If you’re new to iPhone, iPad, or Mac, AirDrop might be unfamiliar to you. It’s a built-in Apple service that lets you wirelessly share files with nearby Apple devices. The sharing process is encrypted, ensuring your private files can only be decrypted on the recipient device.
In this tutorial, we’ll show you how to share photos, videos, PDFs, web links, and other files between iPhone, iPad, and Mac using AirDrop.
What you need to do
On both the sender’s and receiver’s devices:
- Turn on Bluetooth
- Turn on Wi-Fi
- Ensure both devices are within Bluetooth range, that is, 30 feet (nine meters) of each other
- Keep both devices unlocked
- Turn off Personal Hotspot if AirDrop fails
On the receiver’s device:
Set AirDrop visibility to Contacts Only or Everyone for 10 Minutes.
- On iOS: Settings > General > AirDrop
- On Mac: System Settings > General > AirDrop & Handoff > AirDrop
Note that AirDrop receiving settings are also available in iOS and macOS Control Center. Furthermore, it’s also there in Mac’s AirDrop window in Finder.
If you’re sending files to someone else, ensure they have your email address or mobile number saved in their contacts if their AirDrop setting is set to Contacts Only. Otherwise, they’ll need to switch it to Everyone for 10 Minutes. The same applies if you’re receiving a file.
Send files with AirDrop
The process involves using the share option and selecting AirDrop. Then, the receiver has to accept your incoming AirDrop transfer request.
From iPhone or iPad
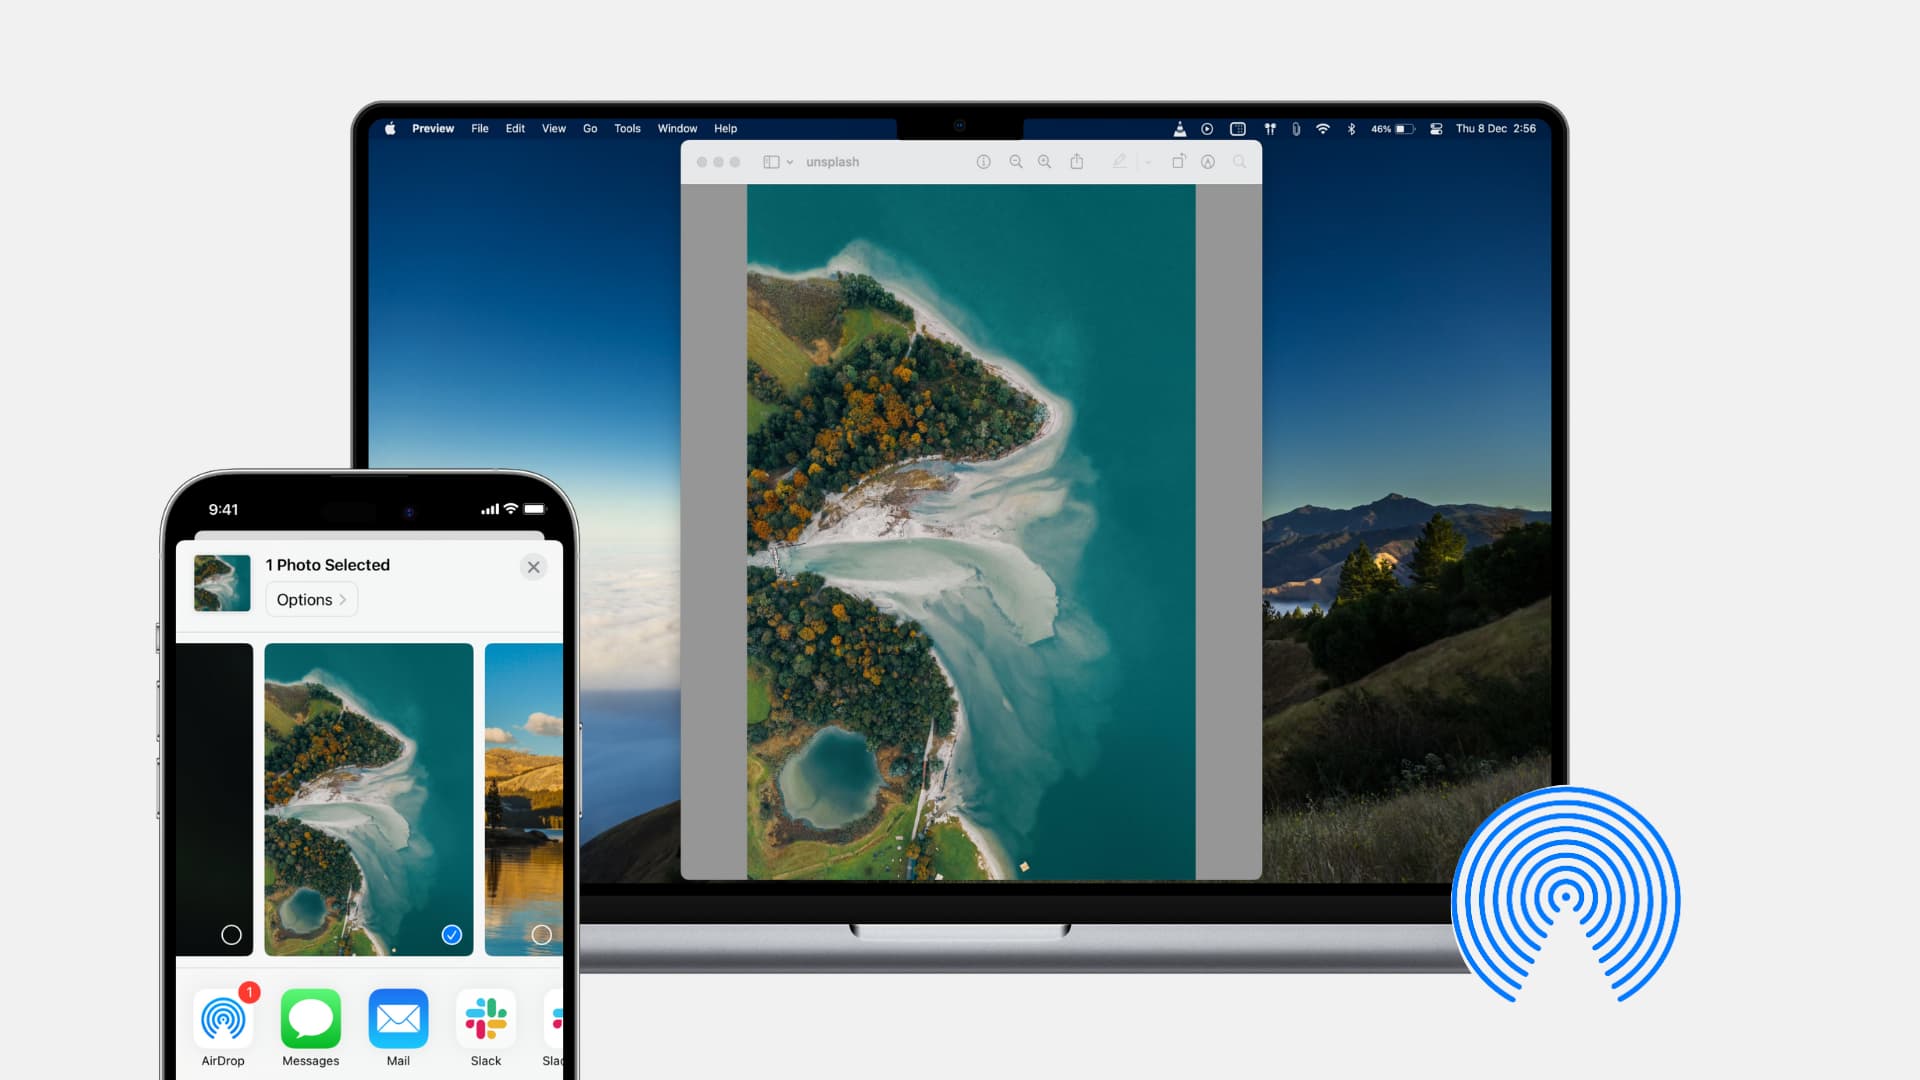
This works in nearly all apps and interfaces where you see the share option. But we’re using the Photos app for these steps.
- Open the app, select the items, and tap the share icon.
- Select AirDrop from the iOS Share Sheet.
- You’ll see a list of available nearby devices. Tap the receiver’s name or their device name.
- Wait for the receiver to accept your incoming request.

From Mac
You can use AirDrop to send files from your Mac to other Apple devices nearly everywhere you see the share button. Here’s an example involving files in Finder.
- Select one or more photos, videos, PDFs, documents, or other files on your Mac.
- Control-click or right-click and select Share. You can also hit the share icon directly if it’s visible.
- Select AirDrop from the share pane.
- Click the receiver’s name or their device name.
- Wait for the receiver to accept your AirDrop request.

You can also use the AirDrop window on your Mac — simply open the AirDrop pane in Finder and then drop an item onto the device you want to send the file to.

Receive files with AirDrop
After the steps above, the receiver must accept the incoming AirDrop transfer request to provide their consent. However, this confirmation isn’t required if you’re sending files to your other Apple devices with the same Apple ID.
When you accept an item on iOS, it will appear in an app specific to the item type. For instance, a photo will appear in the Photos app, an app link will appear in the App Store, and a web link will open in Safari (or the default browser). On Mac, the item will go into your Downloads folder until you change it.
On iPhone or iPad
- You’ll get an alert that shows the sender’s name, a thumbnail preview of the file, and buttons to decline or accept. Hit Accept to start the transfer.
- Once the transfer completes, the app that received the files (like Photos) should open automatically. You’ll find all the recently transferred items there.

Note that if the sender is trying to send you files and documents that iOS doesn’t know where to save directly, it will save them to the Files app, or you’ll see a pop-up asking you to choose a compatible app.
On Mac
- When someone sends a file to your Mac via AirDrop, you’ll see an incoming transfer request in the top right corner of the screen. Hit Accept. With photos and videos, you’ll have to hit Accept and then choose if you want to save it to the Photos app or the Finder Downloads folder.
- Once the transfer is complete, the Finder folder or app will open automatically, showing the new files.

Use AirDrop by bringing two iPhones nearby
You can bring two iPhones very close to each other and send or receive files instantly. For this to work:
- Each person’s (the sender and receiver) contact details (respective Apple Account’s mobile number or email address) must be saved to the other person’s iPhone. If it isn’t saved, you can use the instant NameDrop feature to exchange your contact details.
- Make sure Wi-Fi and Bluetooth are enabled on both devices.
- Go to Settings > General > AirDrop and make sure Bringing Devices Together is switched on.
- Both iPhones must be signed in to Apple Accounts.
Once you’ve taken care of the above obligations, follow these steps to share media and other stuff via AirDrop with nearby friends and family members.
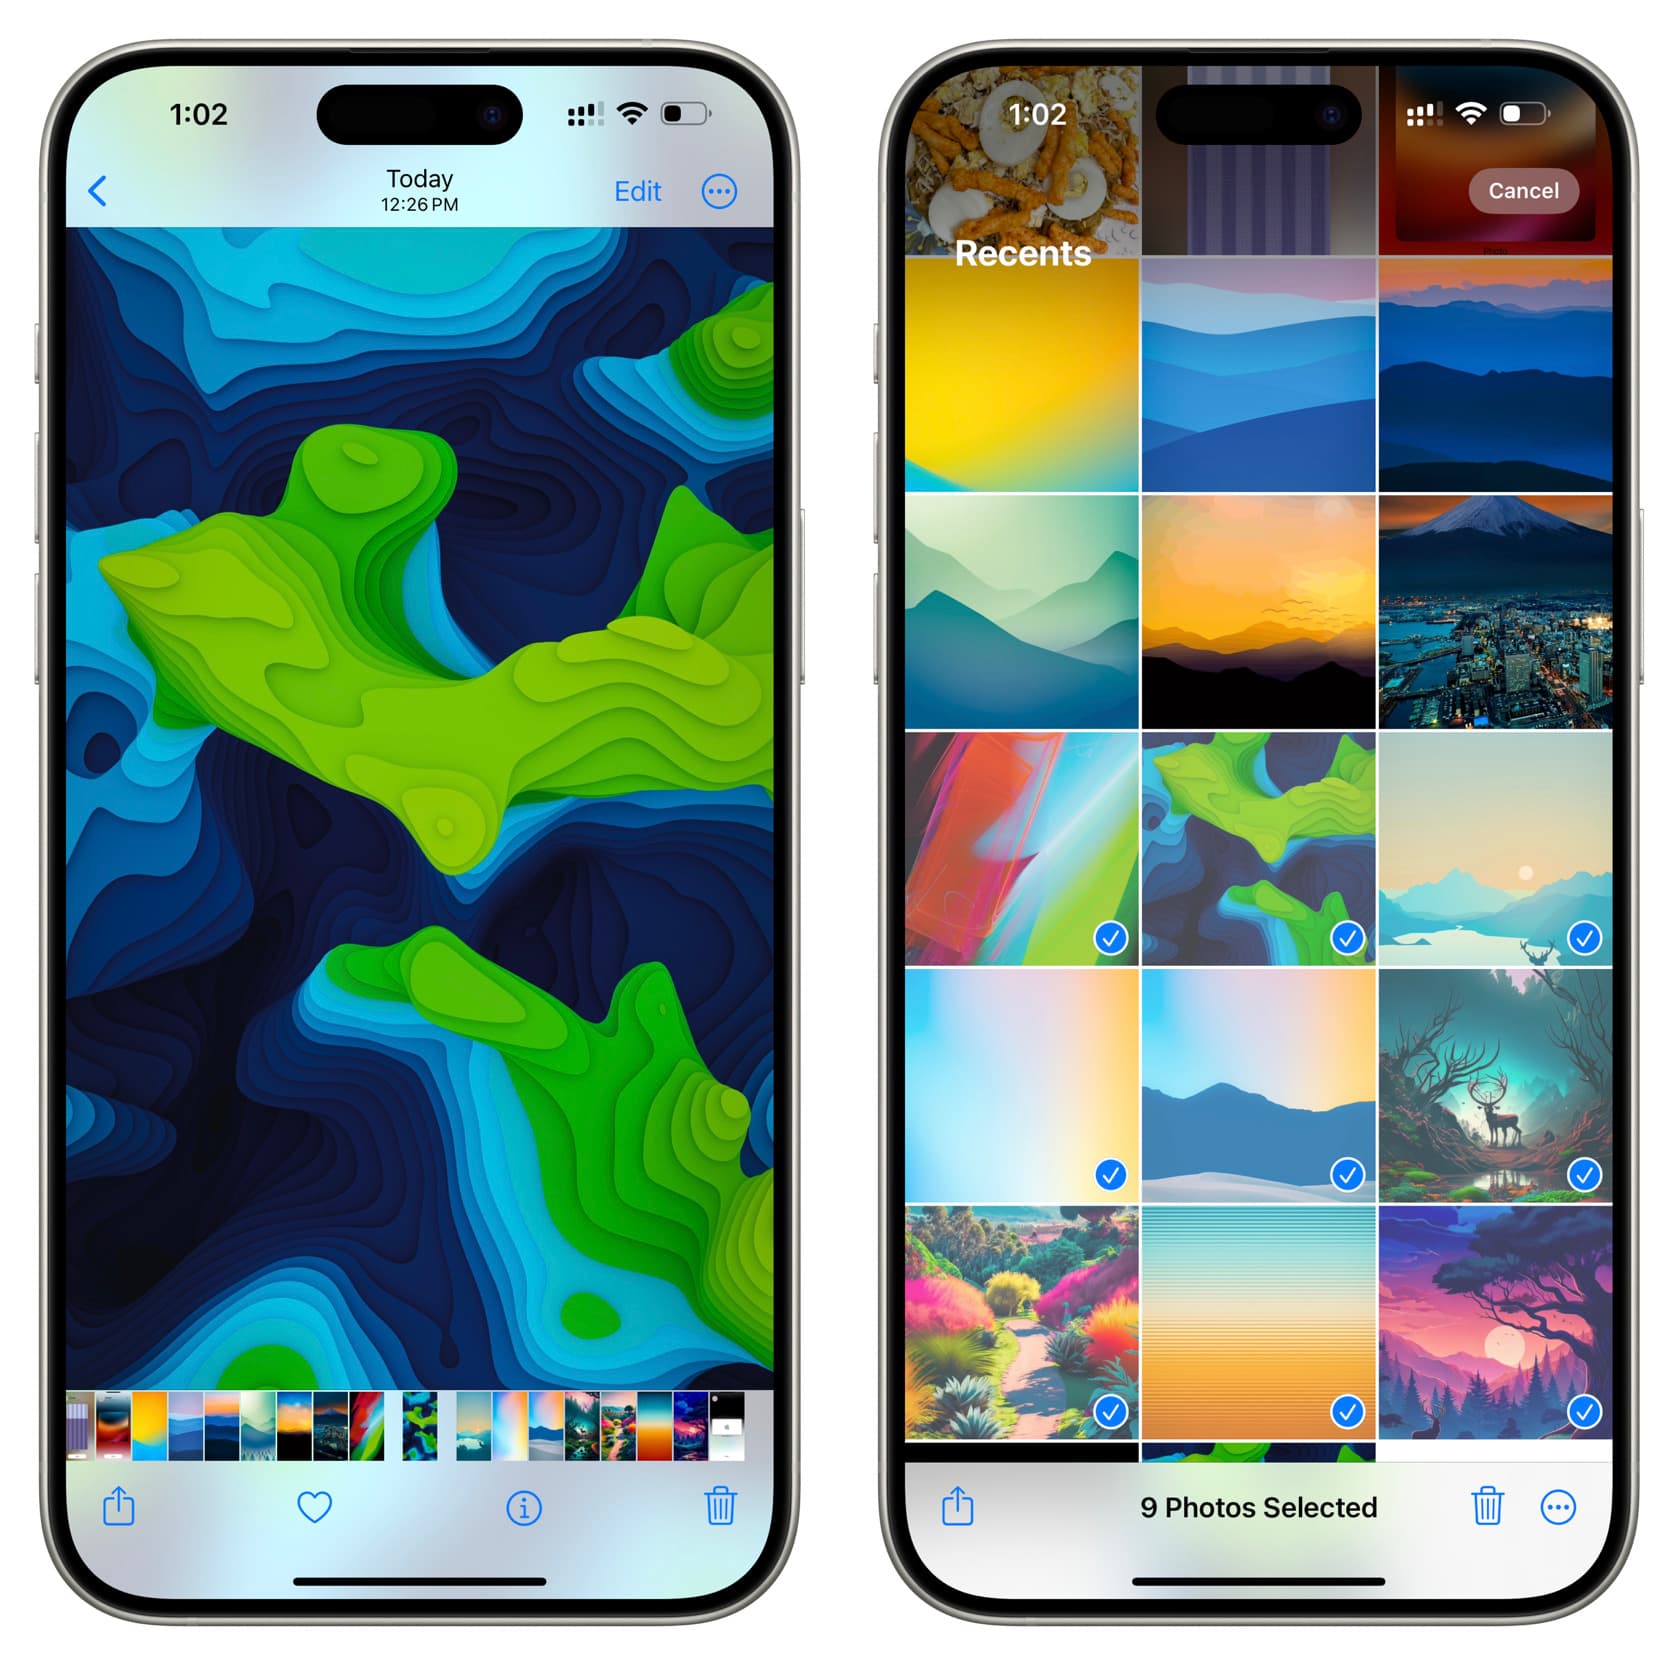
1) Open the Photos app on the sender’s iPhone.
2) To share a photo or video, tap it so that it’s the only item on the screen. To share multiple photos and videos, tap Select and mark them.
3) Now unlock the receiver’s iPhone and make its top portion touch the top part of the sender’s iPhone.
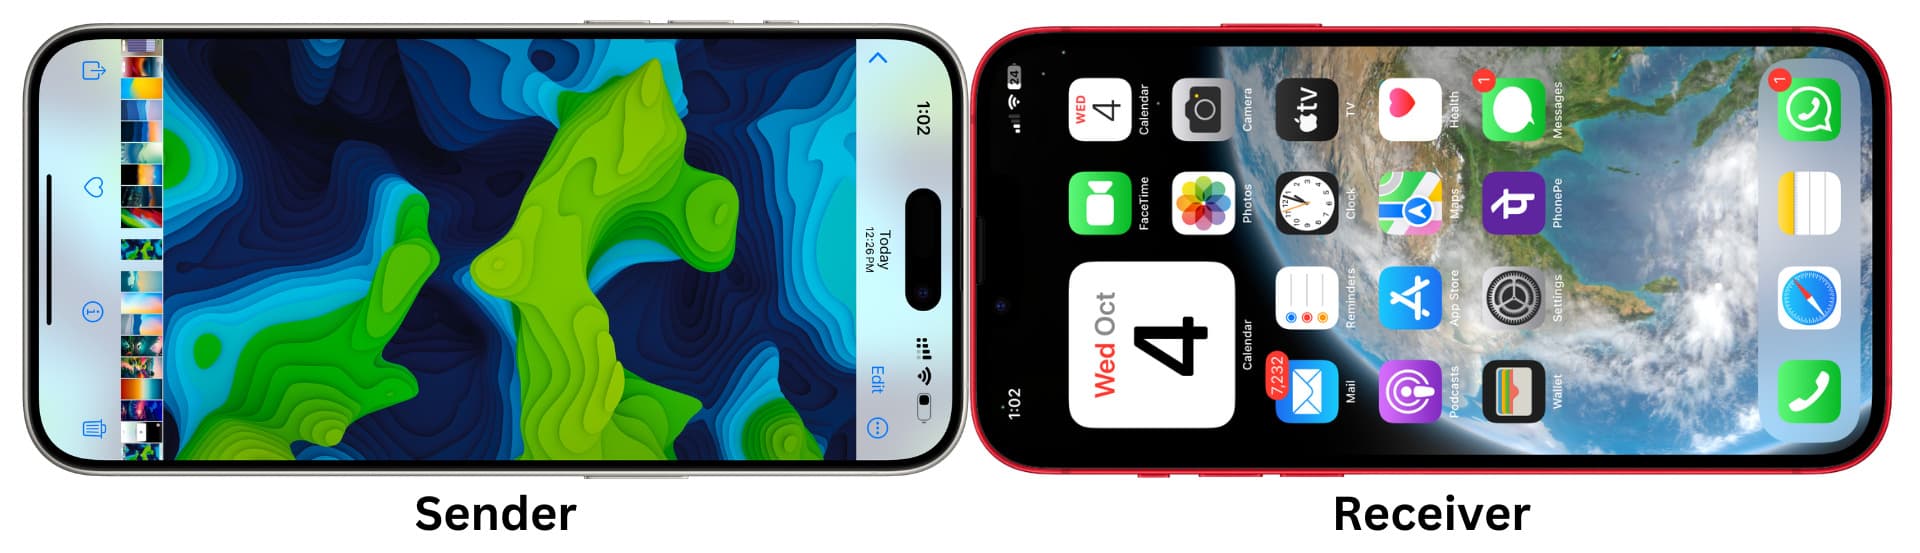
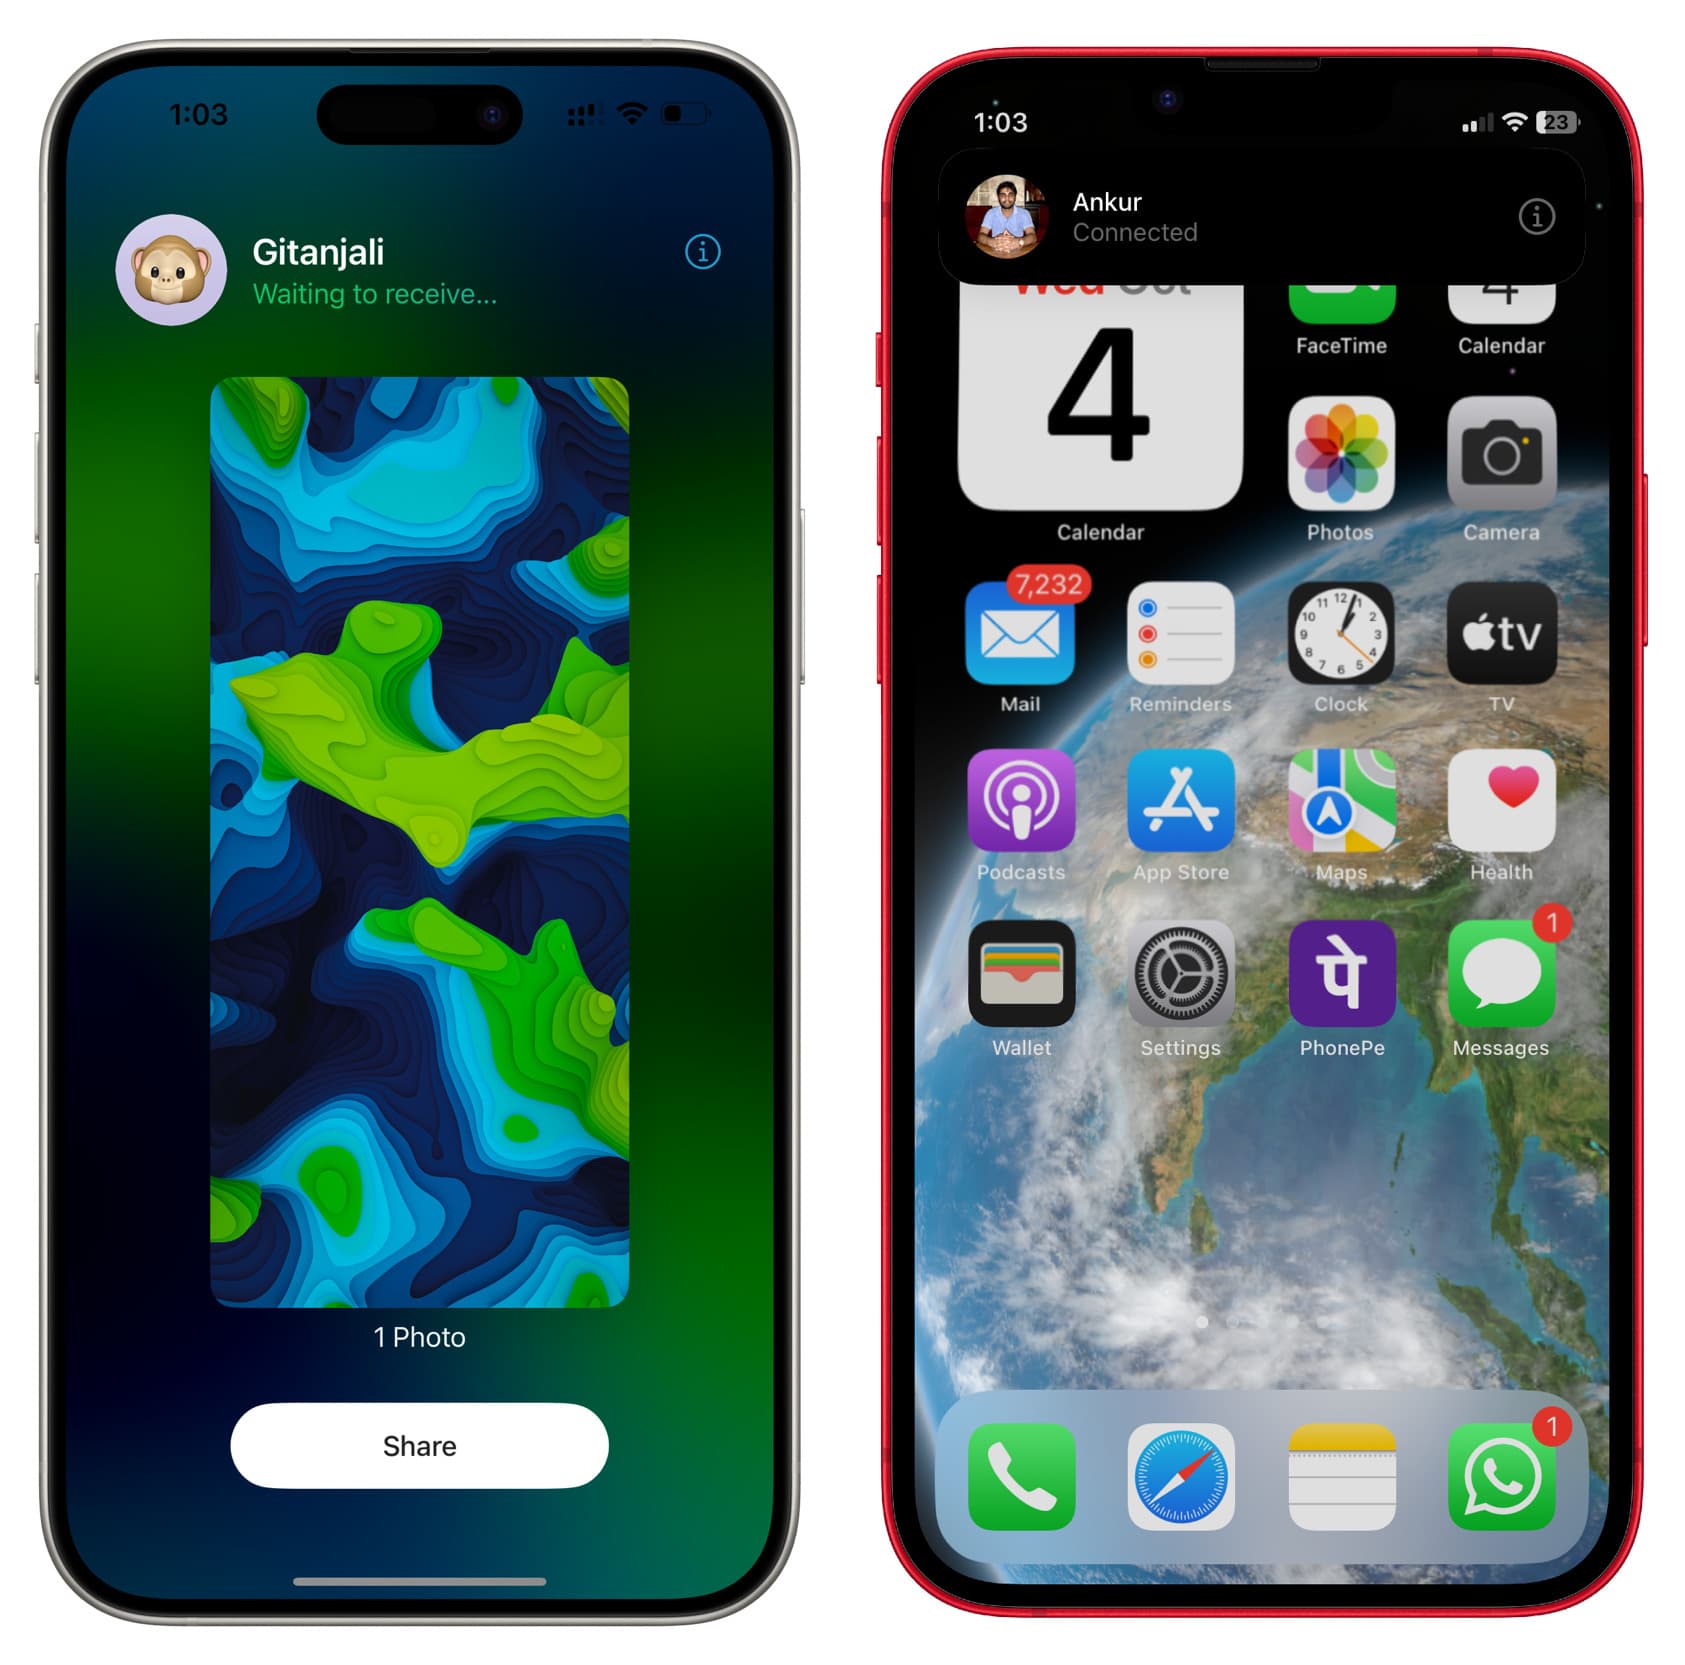
4) Haptic feedback, sound, and ripple animation will appear on both iPhones. Pull both devices apart only after you see the share screen on the sender’s iPhone and a “Connected” banner on the receiver’s iPhone. Finally, tap Share on the sender’s iPhone, and the transfer will take place.
Note:
- If both persons open an image or select multiple images and hold their iPhones close, they both will see the Share option.
- You don’t necessarily have to make the top parts of both phones touch—simply bringing them very close, even on their vertical sides, should work. But since the NFC chip is on the top portion of the iPhone, we suggest bringing the top parts of both phones into close proximity.
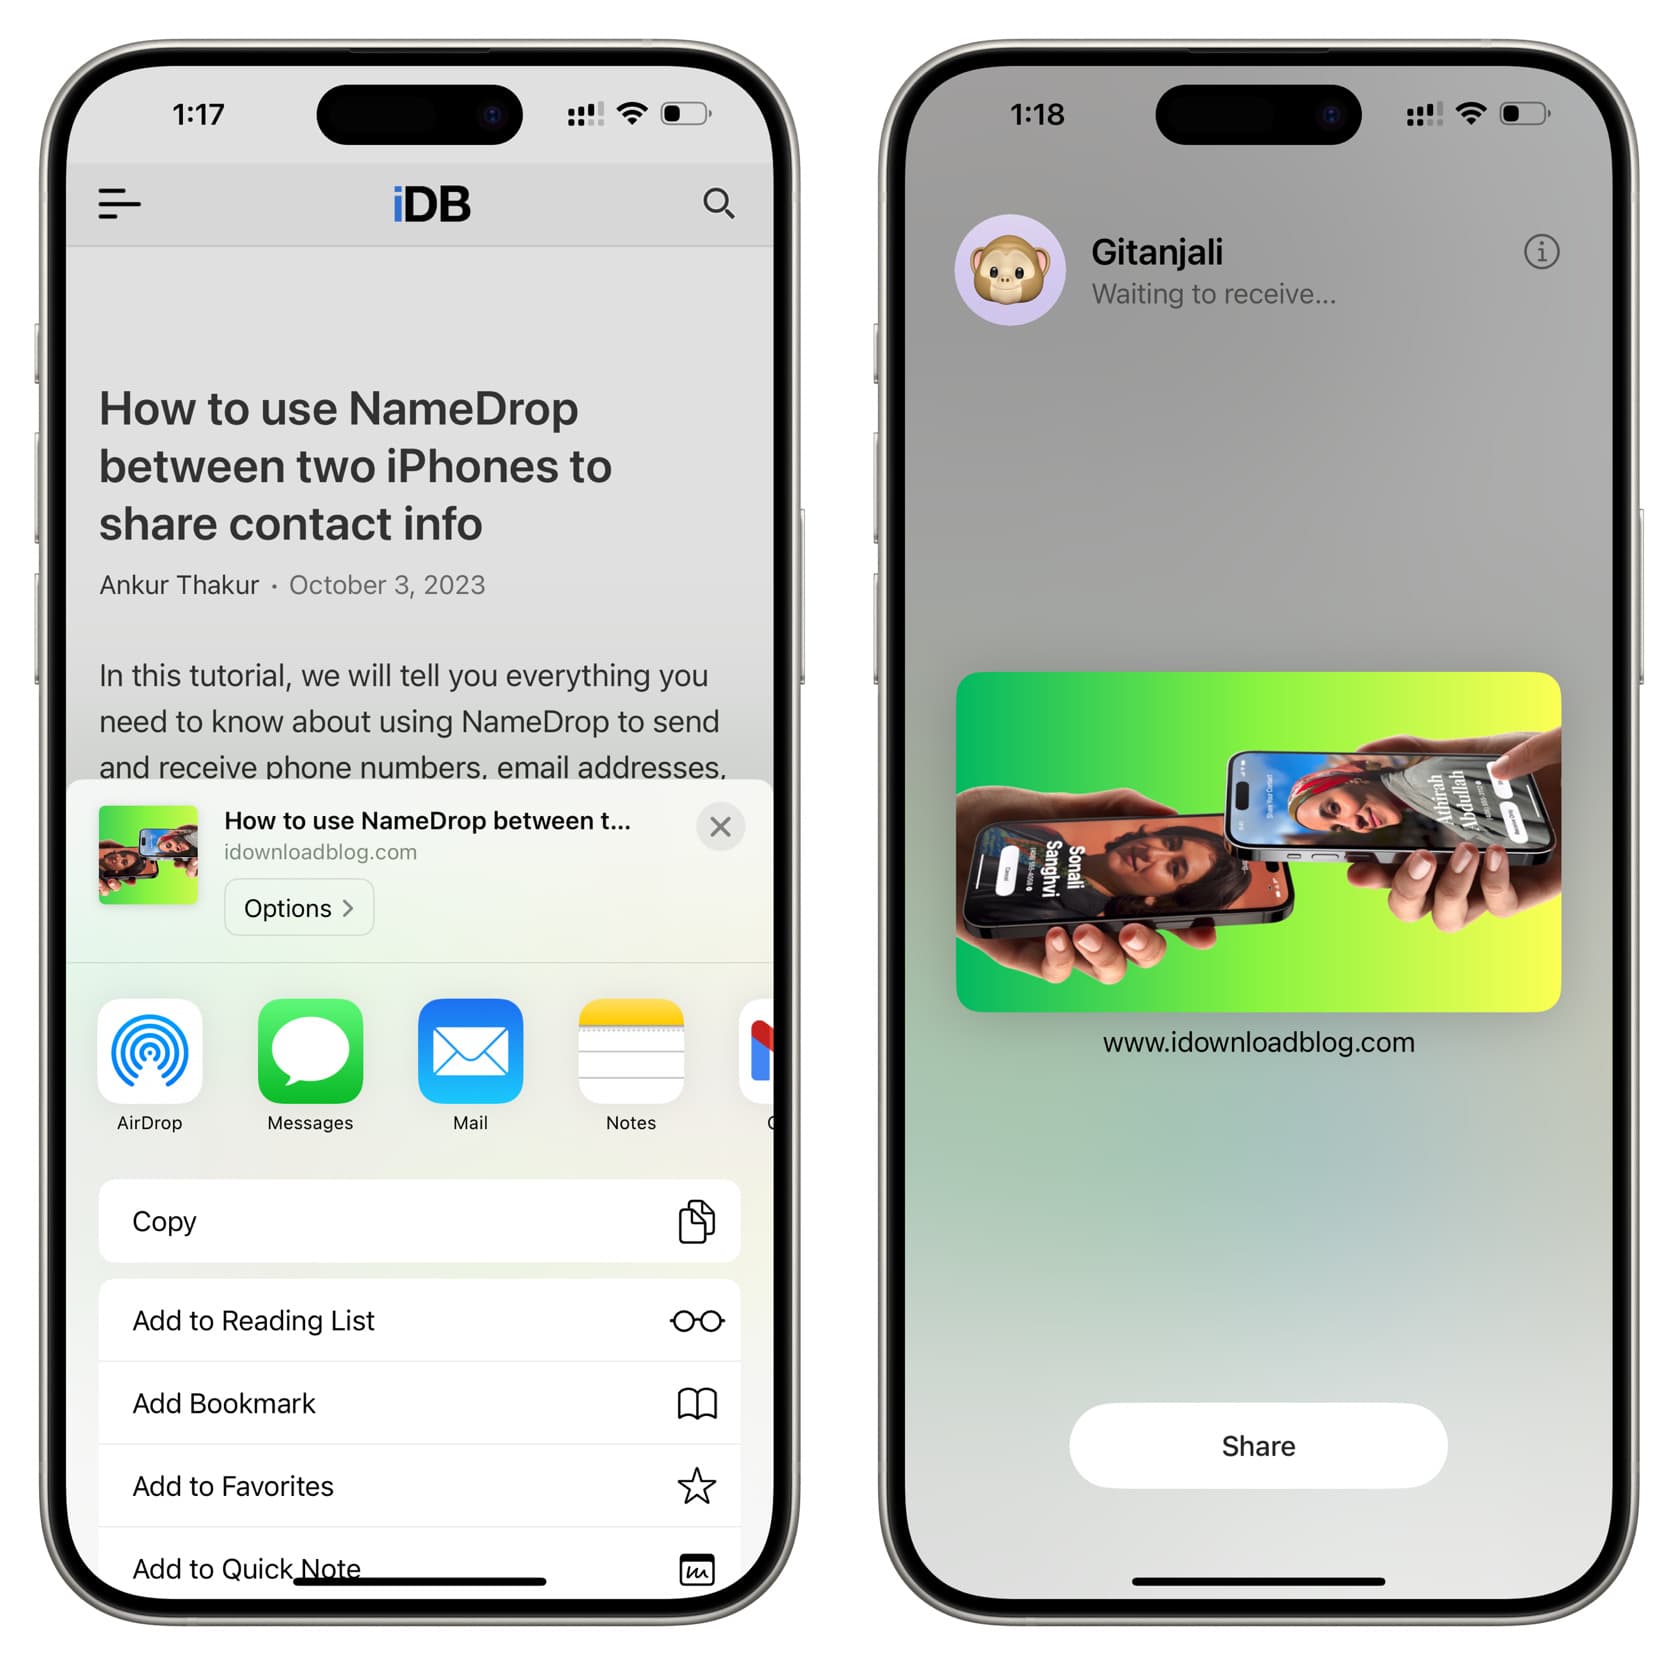
You can also use nearby AirDrop to share items outside of the Photos app. The steps below should work in most Apple and third-party apps. Here, we’ll demonstrate using Safari to share a website link by holding two iPhones close together.
1) Open the app on the sender’s iPhone and tap the share option to see the iOS Share Sheet. Depending on the app, the share button may look like an arrow, three dots, or something else.
Note: If an item (like a website in Safari) is already open on the full screen, you may not even need to tap the share button and can go straight to steps 2 and 3.
2) Bring the receiver iPhone very close and take its top part near the top portion of the sender’s iPhone.
3) Tap Share on the sender’s iPhone.
Use the AirDrop screen
You may not be able to transfer the media or link from the iOS Share Sheet. In that case, tap the AirDrop button to see all nearby devices. Now, instead of selecting a device or user from this screen, just hold the receiver iPhone near the top portion of the sender iPhone, and it will transfer the content.

Use AirDrop over cellular data
Normal AirDrop works only when both devices are in close proximity.
However, if the Use Cellular Data option is enabled in iOS Settings > General > AirDrop, you can initiate an AirDrop session when two iPhones are within 30 feet (nine meters). Once the AirDrop starts, you can move both phones far apart, out of the Wi-Fi range, and the transfer will continue over cellular data. The files will be uploaded to the iCloud server via the 5G or 4G connection and then downloaded to the receiver’s iPhone.
Cellular AirDrop transfer is usually slower than normal AirDrop, as it involves uploading and downloading files over the Internet.
Use wired AirDrop
You can connect two Apple devices together using a USB cable and then transfer files via AirDrop like you normally do. Since the devices are connected with a wire, the transfer happens over this cable connection instead of Wi-Fi. We’ve explained everything in our dedicated tutorial.

More on AirDrop: