In this simple step-by-step tutorial, we’ll show you how to quickly adjust your AirDrop receiving settings from Control Center on iPhone, iPad, and Mac.
Control Center gives you instant access to common shortcuts for things you frequently do, such as disconnecting from Wi-Fi or toggling Bluetooth on or off.
Most of the controls are visible right away, but some are hidden in plain sight, like your AirDrop visibility options.
About AirDrop visibility
AirDrop transfers files using an ad-hoc peer-to-peer Wi-Fi connection between devices and uses Bluetooth to discover nearby devices, so both Wi-Fi and Bluetooth must be turned on for AirDrop to work.
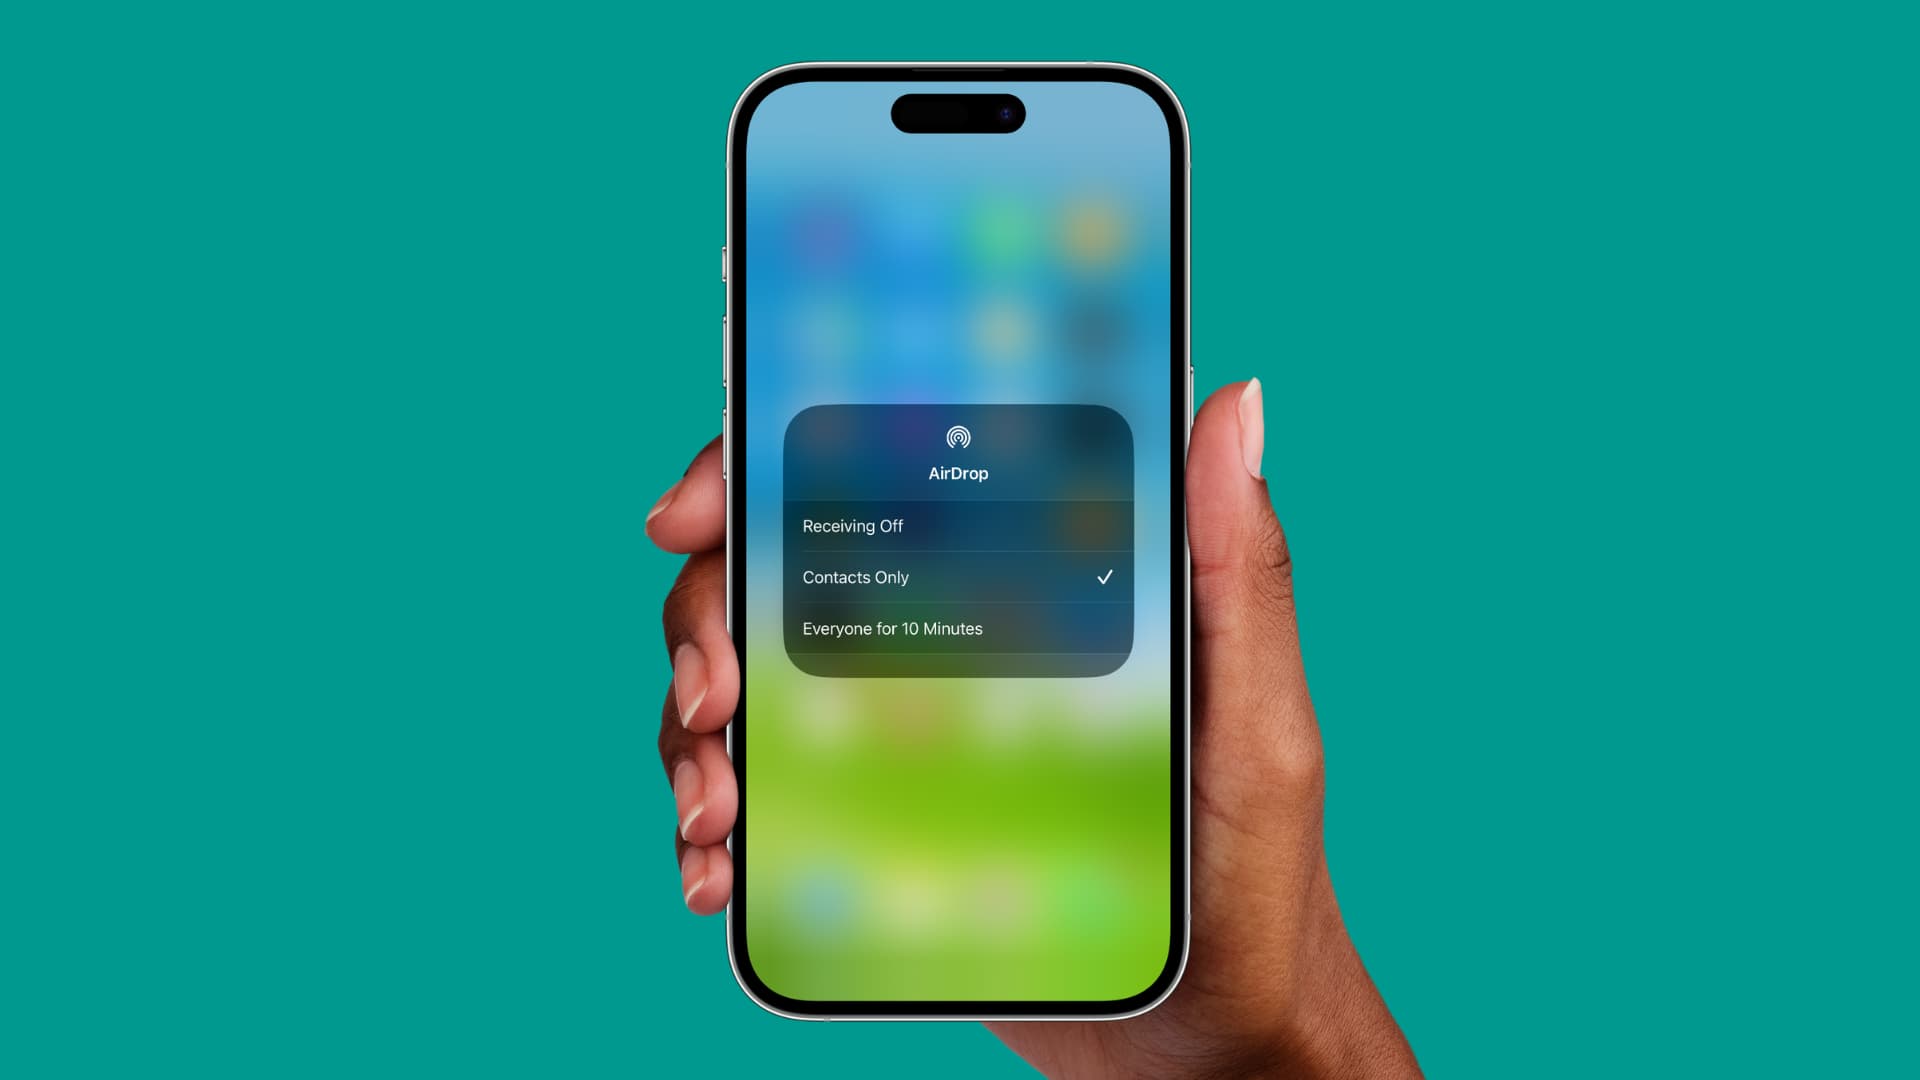
If you want to receive files from another Apple device, you’ll have to enable the AirDrop visibility on the receiver device. Your options are to set the AirDrop visibility to just people in your contacts or everyone for the next 10 minutes. Note that there is no 10-minute limit on Mac.
You can always customize AirDrop visibility in Settings > General > AirDrop. But there’s a faster way to quickly change your AirDrop receiving options, and it involves the Control Center.
Change AirDrop visibility from Control Center
Here are the steps for iOS and macOS.
iPhone and iPad
- Open Control Center by swiping down from the top right corner of the screen.
- Touch and hold the network settings tile in the upper-left corner to expand it.
- Tap AirDrop and select one of the following:

- Receiving Off: You won’t receive AirDrop requests from your devices or others.
- Contacts Only: Only people in your Contacts app can see your device.
- Everyone for 10 Minutes: Any nearby iOS device can discover your device and send you stuff. Of course, you’ll have to tap Allow to receive the item. Note that in older versions of iOS, this option is just Everyone — without the 10-minute limit.
Mac
- Click the Control Center icon from the top right side of the menu bar.
- Select AirDrop.
- Choose from Contacts Only or Everyone. To turn off AirDrop, toggle the switch at the top.

Stay safe!
Even though you can accept or decline each request as it arrives, you’re recommended against leaving AirDrop open to everyone unless you don’t mind getting unsolicited AirDrop requests.
Because people can be nasty and not everyone AirDrops uplifting memes to random strangers, you should really have AirDrop turned on only for people in your Contacts and not for everyone.
More on AirDrop: