In this guide, we’ll go over 25 tips and tricks to use your Apple Pencil like a pro. These will help you make the most of it when working on your iPad.
These tips have been curated using my Apple Pencil 2nd generation on my 6th generation iPad Pro running iPadOS 17. Most of them will also work if you have an Apple Pencil 1st generation or the new Apple Pencil with a USB-C port.
1. Open the Control Center
You won’t be able to swipe down from the top right corner of the screen with your Apple Pencil to get to Control Center. Therefore, to do that, simply tap the Wi-Fi and battery icon with your Apple Pencil, and it will open the iPad’s Control Center.
2. Open Notification Center
Tap the time or date in the top left corner of your iPad’s screen with your Apple Pencil to bring down the Notification Center.
3. Go to the Home Screen
Unlike Control Center and notifications pane, you cannot go to your iPad’s Home Screen using your Apple Pencil. This is because nothing happens if you tap or touch & hold the bottom Home bar with your pencil.
Therefore, if you want to go Home using your Apple Pencil, you will have to enable AssistiveTouch and set one of its actions to take you Home.
To do that, go to iPad Settings > Accessibility > Touch > AssistiveTouch and turn it on. Now, set Single-Tap, Double-Tap, or Long Press to the Home action.
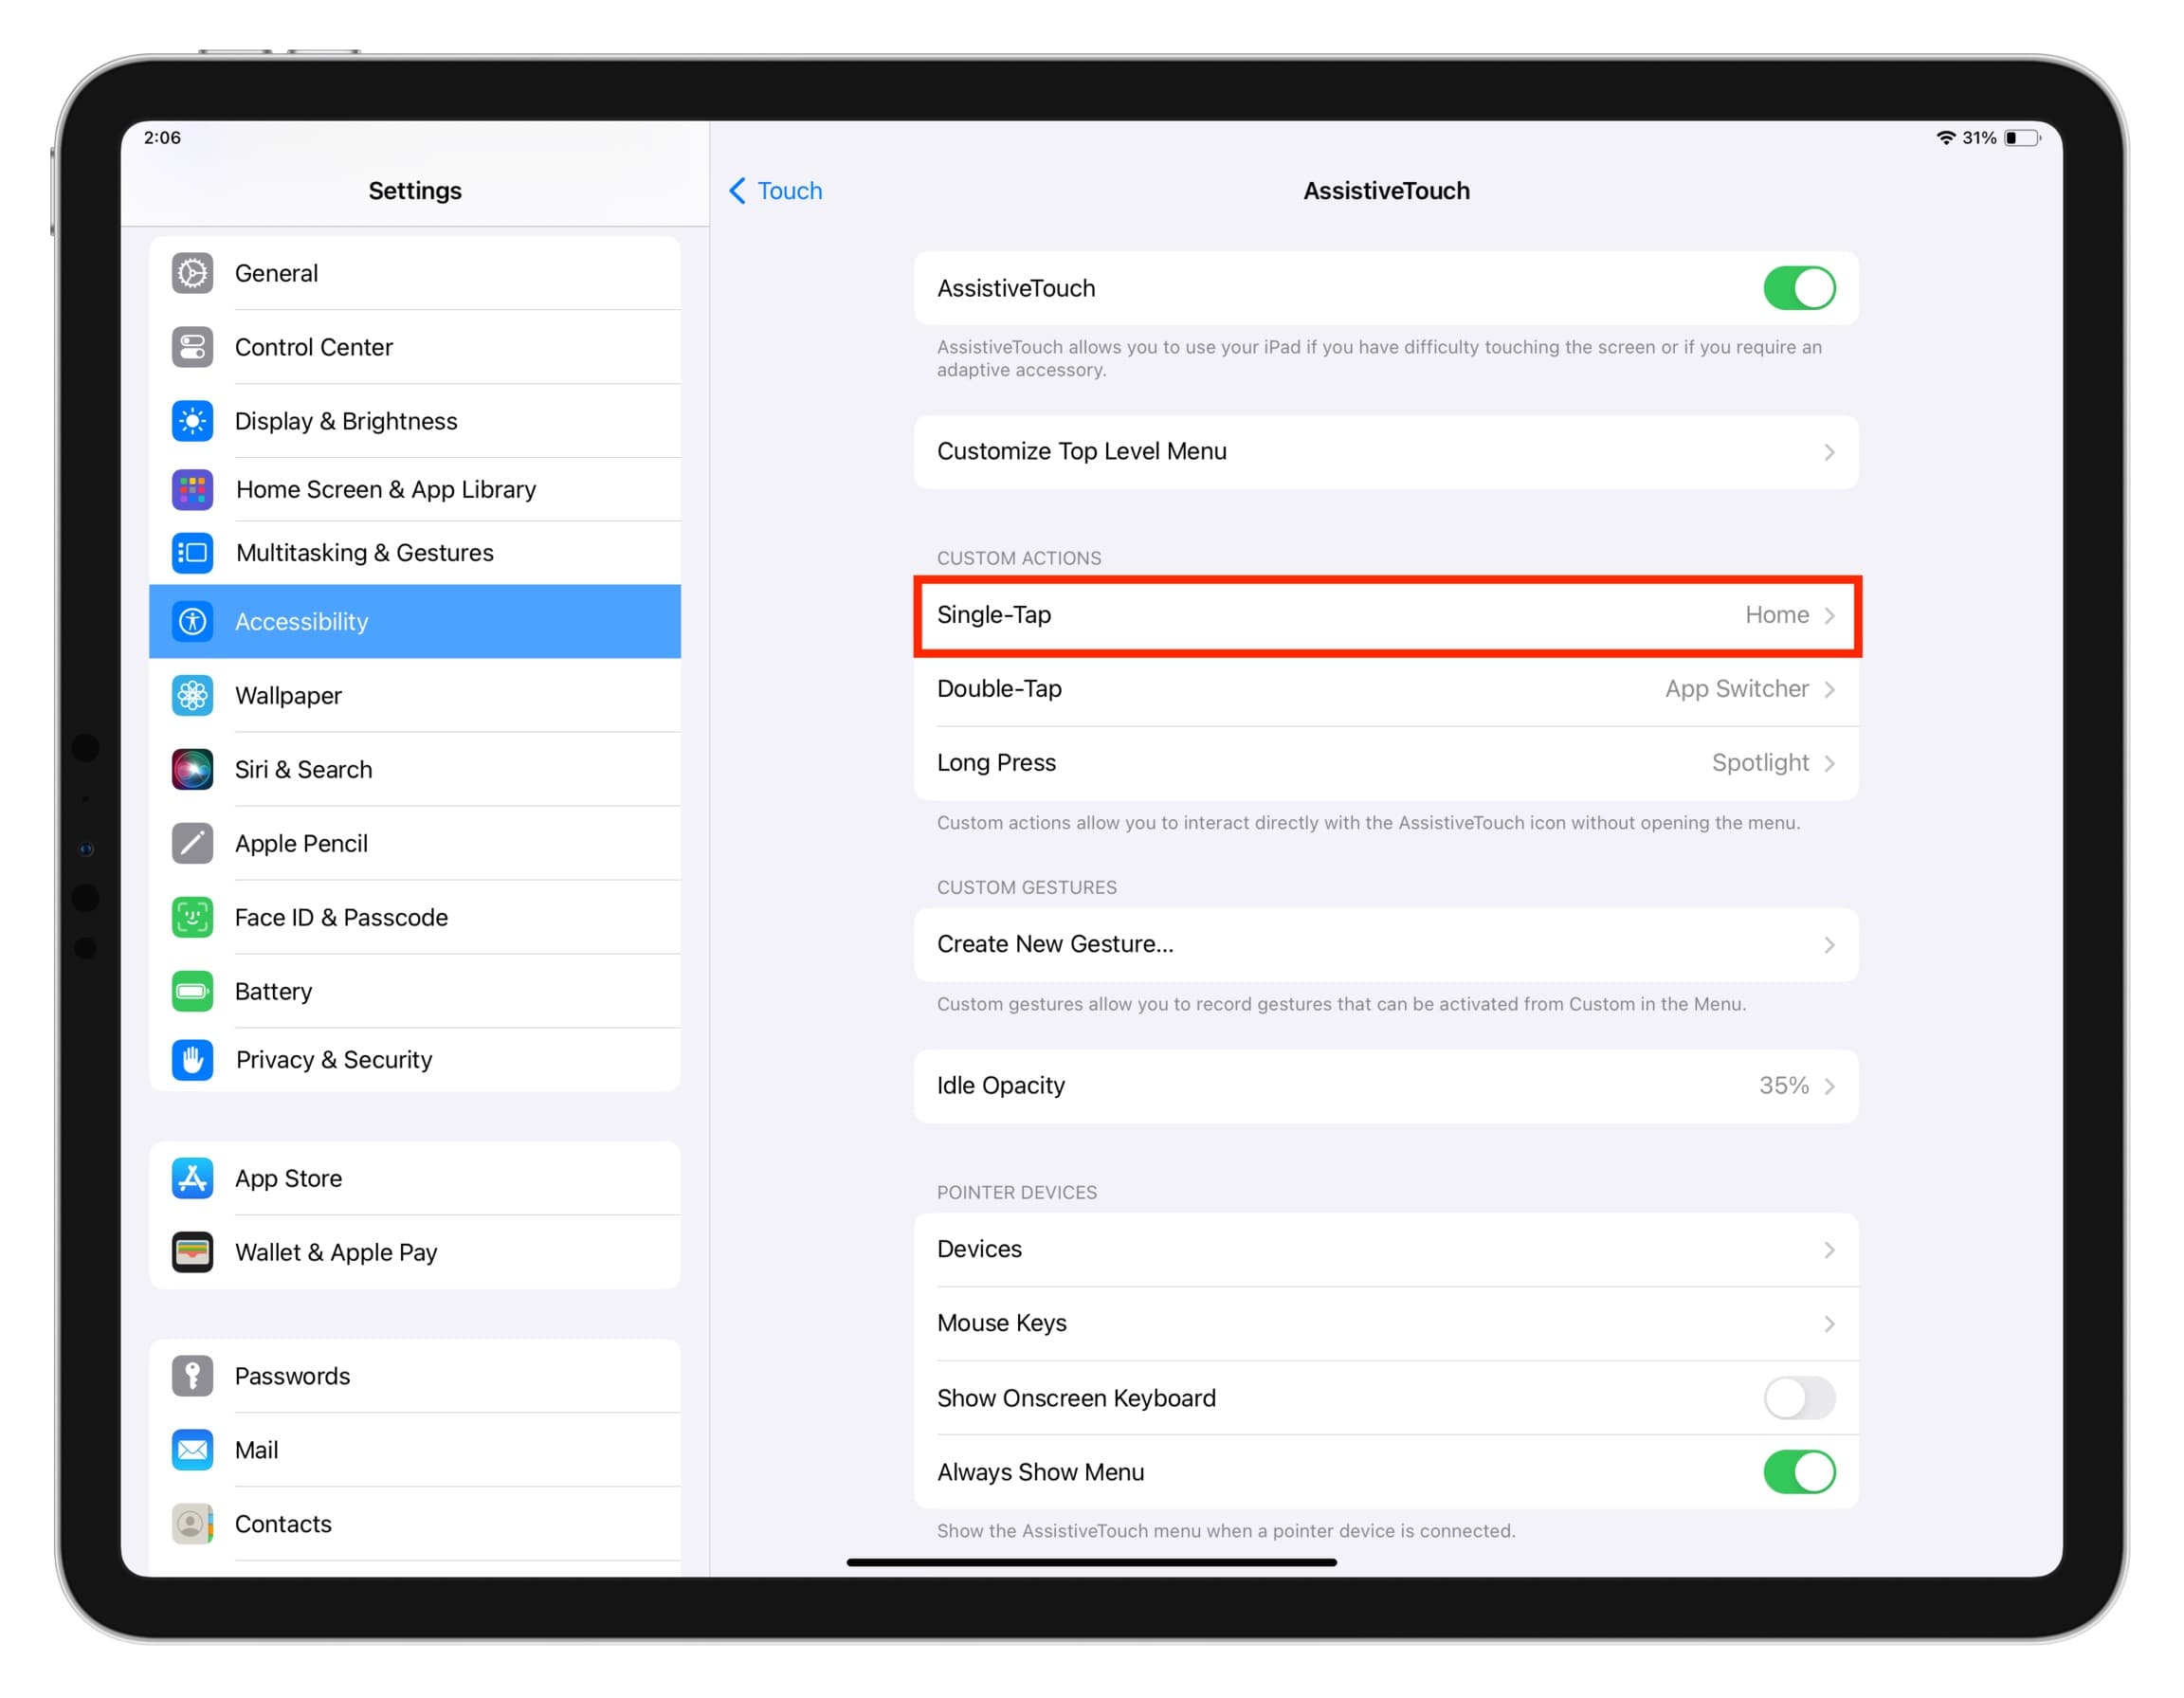
After this, whenever you want to go to the Home Screen, you can interact with the floating AssistiveTouch button using your Apple Pencil.
You can also use the above trick to open App Switcher using Apple Pencil or do one of many other things.
4. Create Quick Note even when the iPad is locked
Tap your locked iPad screen with your Apple Pencil, and it will open a Quick Note so you can instantly draw or jot something.
5. Bring up a sketch pad window from anywhere
Swipe outwards from the bottom right corner of your unlocked iPad using your Apple Pencil or a finger to open a small Notes app window. You can now handwrite or draw on it.
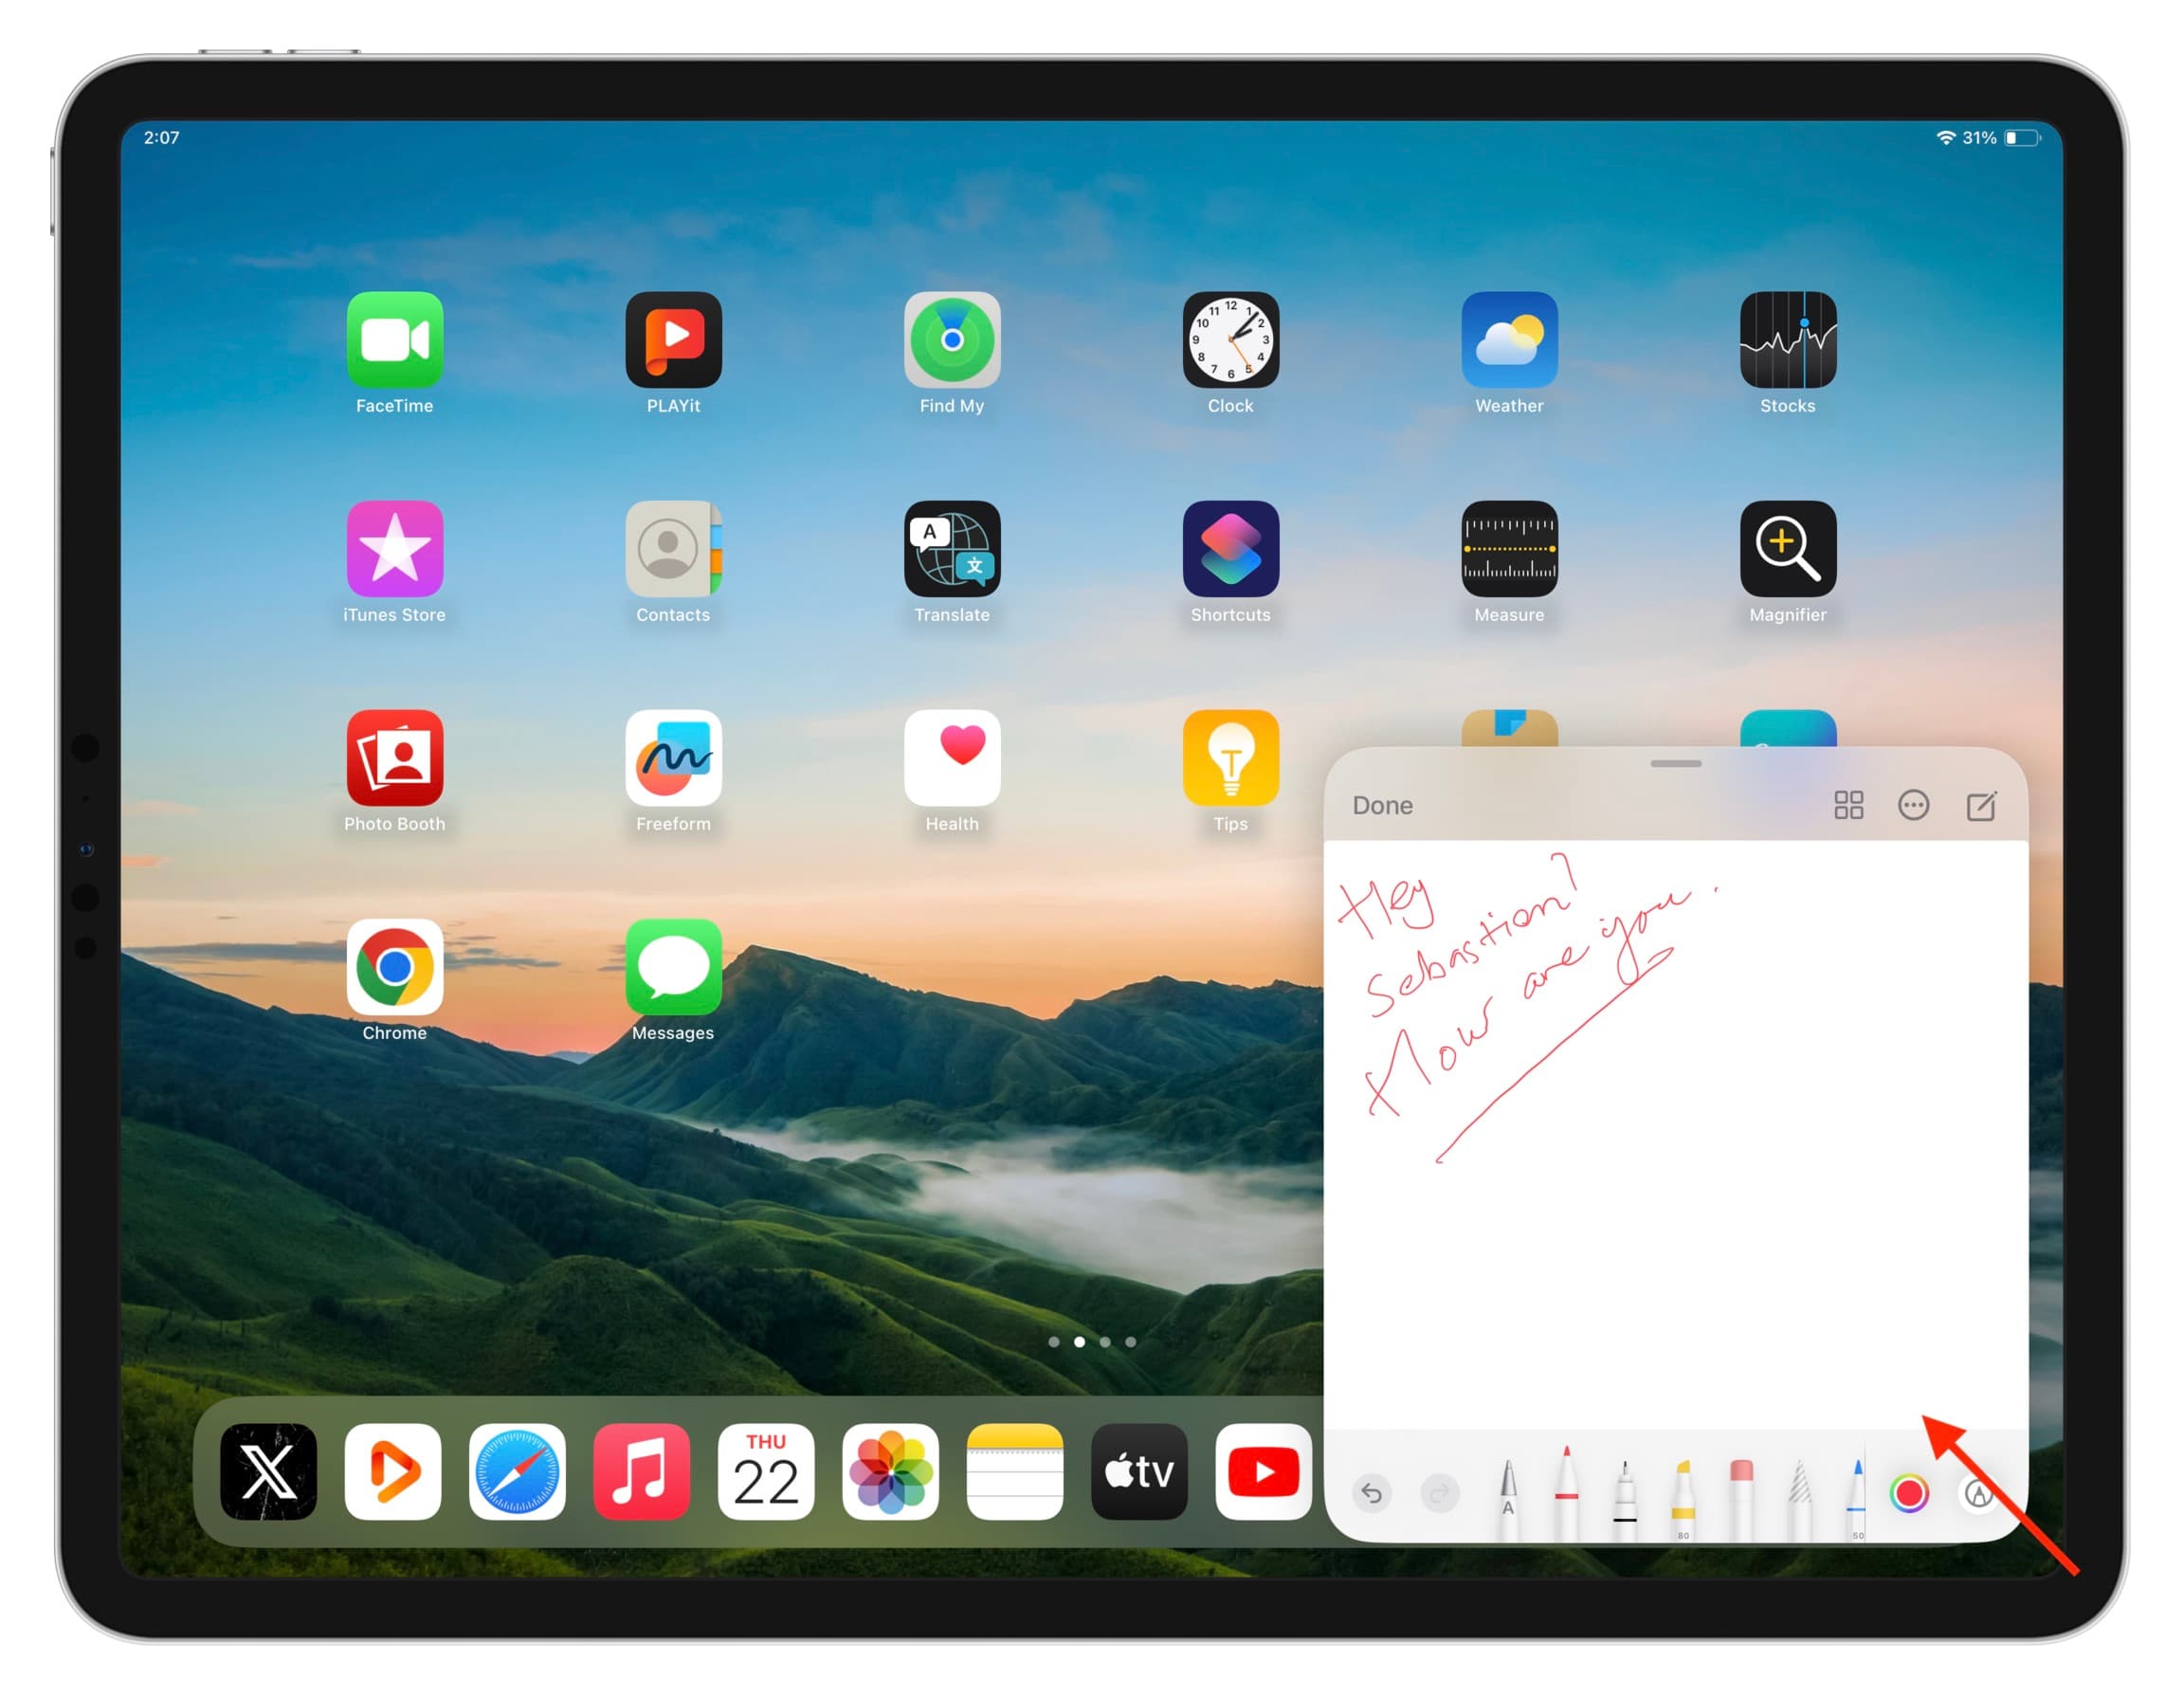
The notes you create in tips 4 and 5 will appear under the Quick Notes folder of your Apple Notes app.
6. Grab a screenshot using your Apple Pencil (or finger)
Swipe outwards from the bottom left corner of the iPad screen using your Apple Pencil or finger to take a screenshot. You can also annotate it instantly.
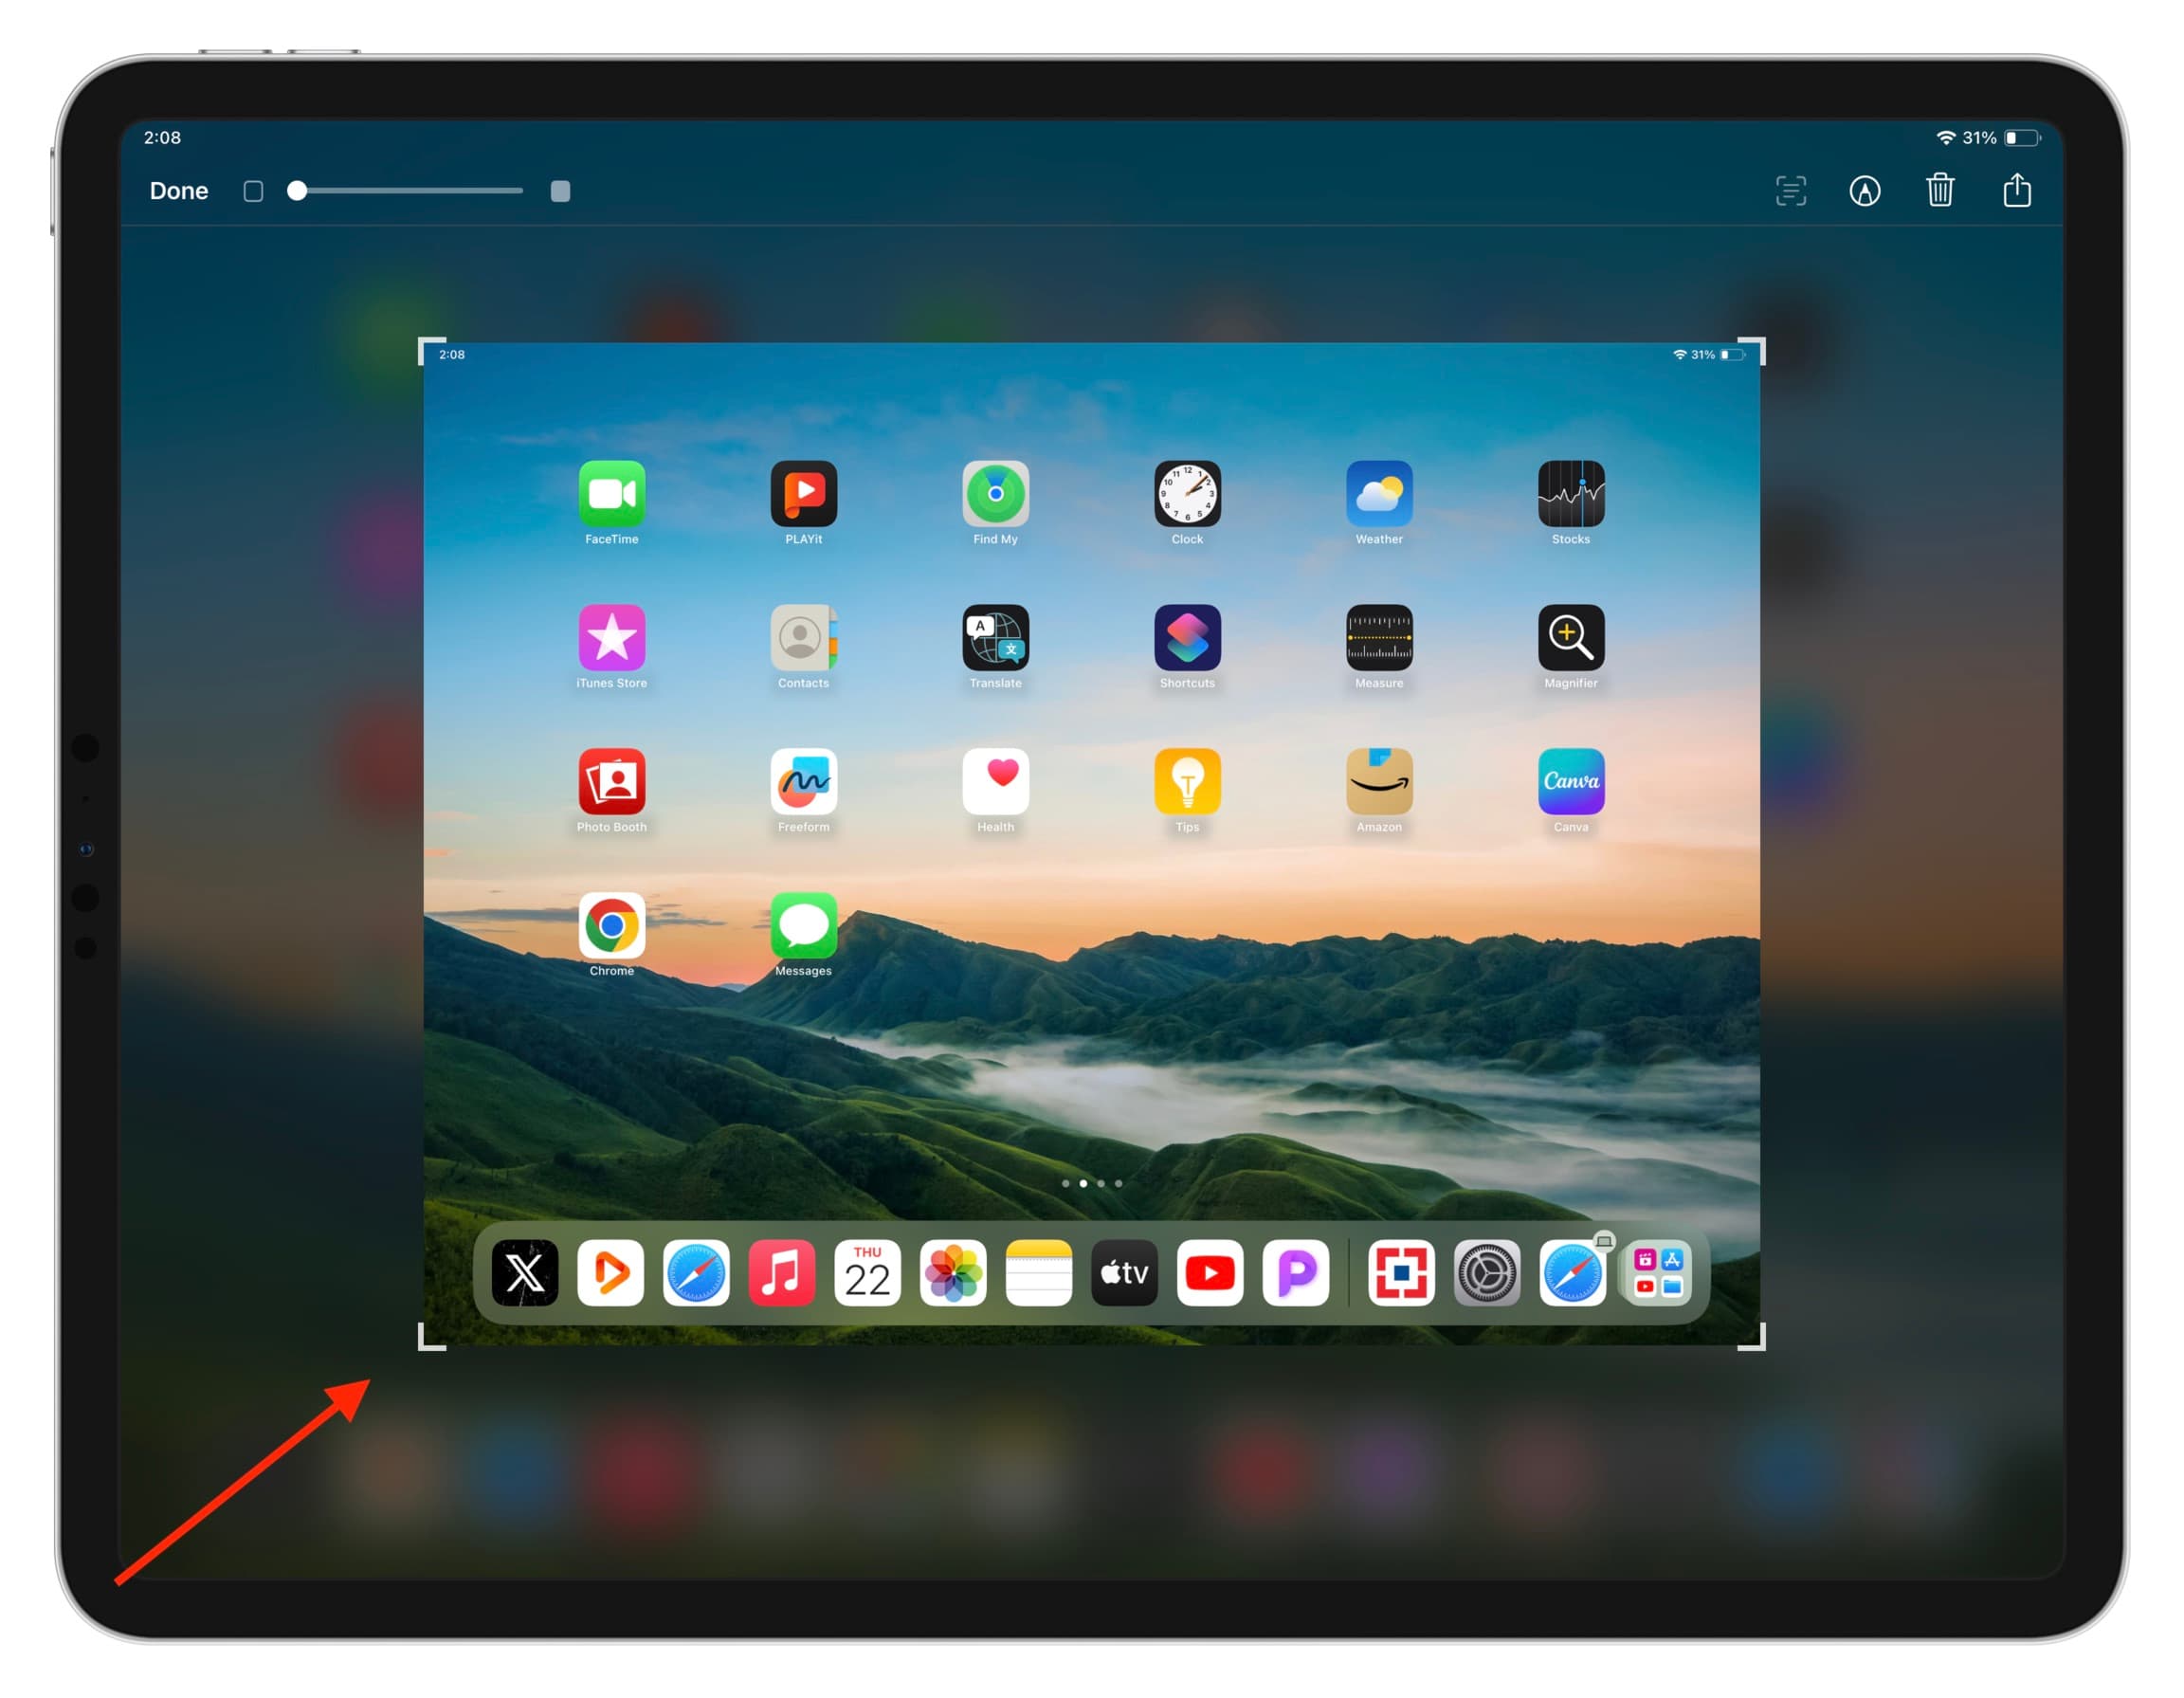
Tip: Imagine you want to take a screenshot of the perfect moment in a video. Now, swipe outward from the bottom left corner and hold. The video will keep playing. Lift your pencil or finger at the right video frame to capture its screenshot.
7. Turn off left and right corner swipes to prevent unnecessary actions
If you frequently trigger Quick Notes and screenshots by accident, go to iPad Settings > Apple Pencil > Left/Right Corner Swipe and choose the Off option.
8. No need to manually enter Markup
When you have a PDF open in the Apple Files app, you can start signing it or drawing on it with Apple Pencil right away without the need to tap the Markup button first. It won’t work if you try doing this with your finger.
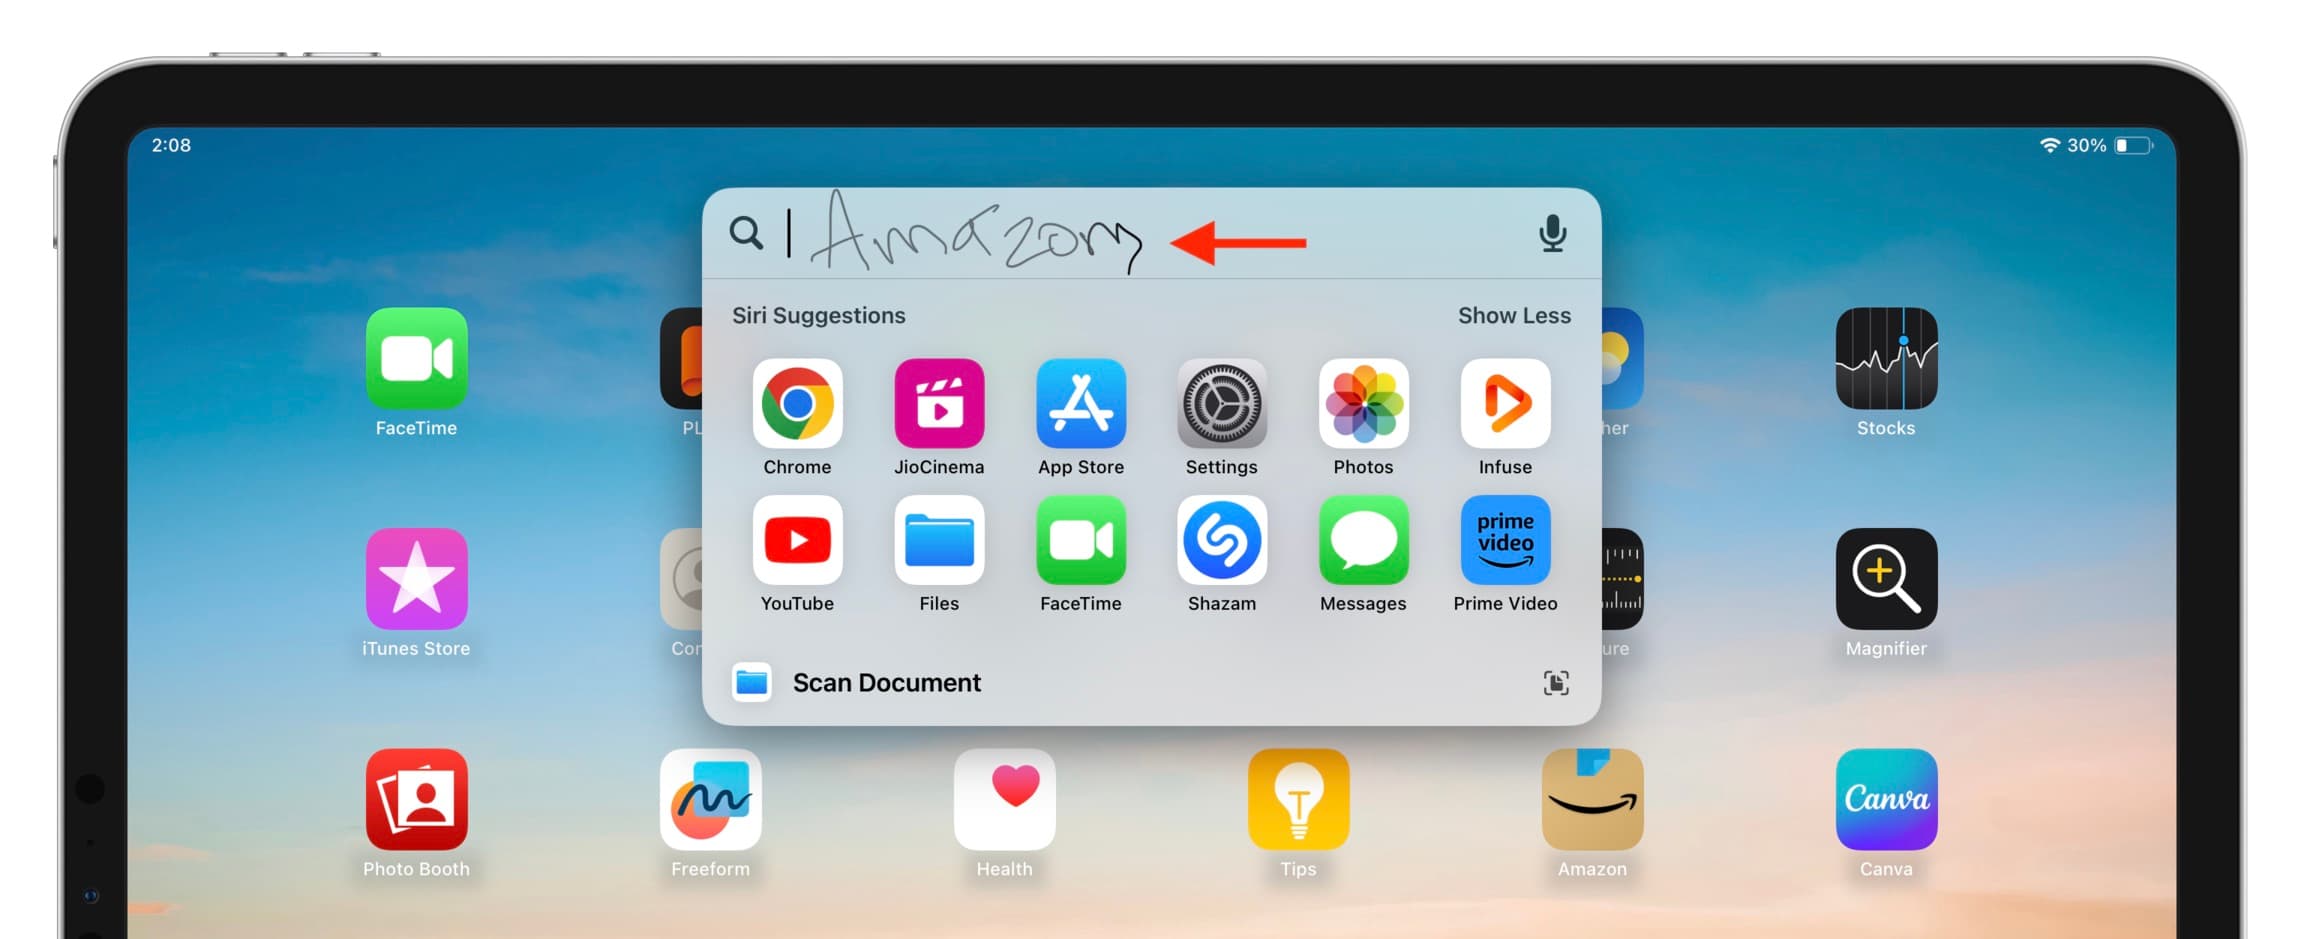
9. Use Scribble in text fields
Do you get annoyed when you’re holding the Apple Pencil in your hand and then you have to type something like a search term using the on-screen keyboard?
Instead of giving your pencil a break, you can directly scribble in the search field or the text box, and your handwriting will be converted to typed text. You can also make a zig-zag line over the word to erase it.
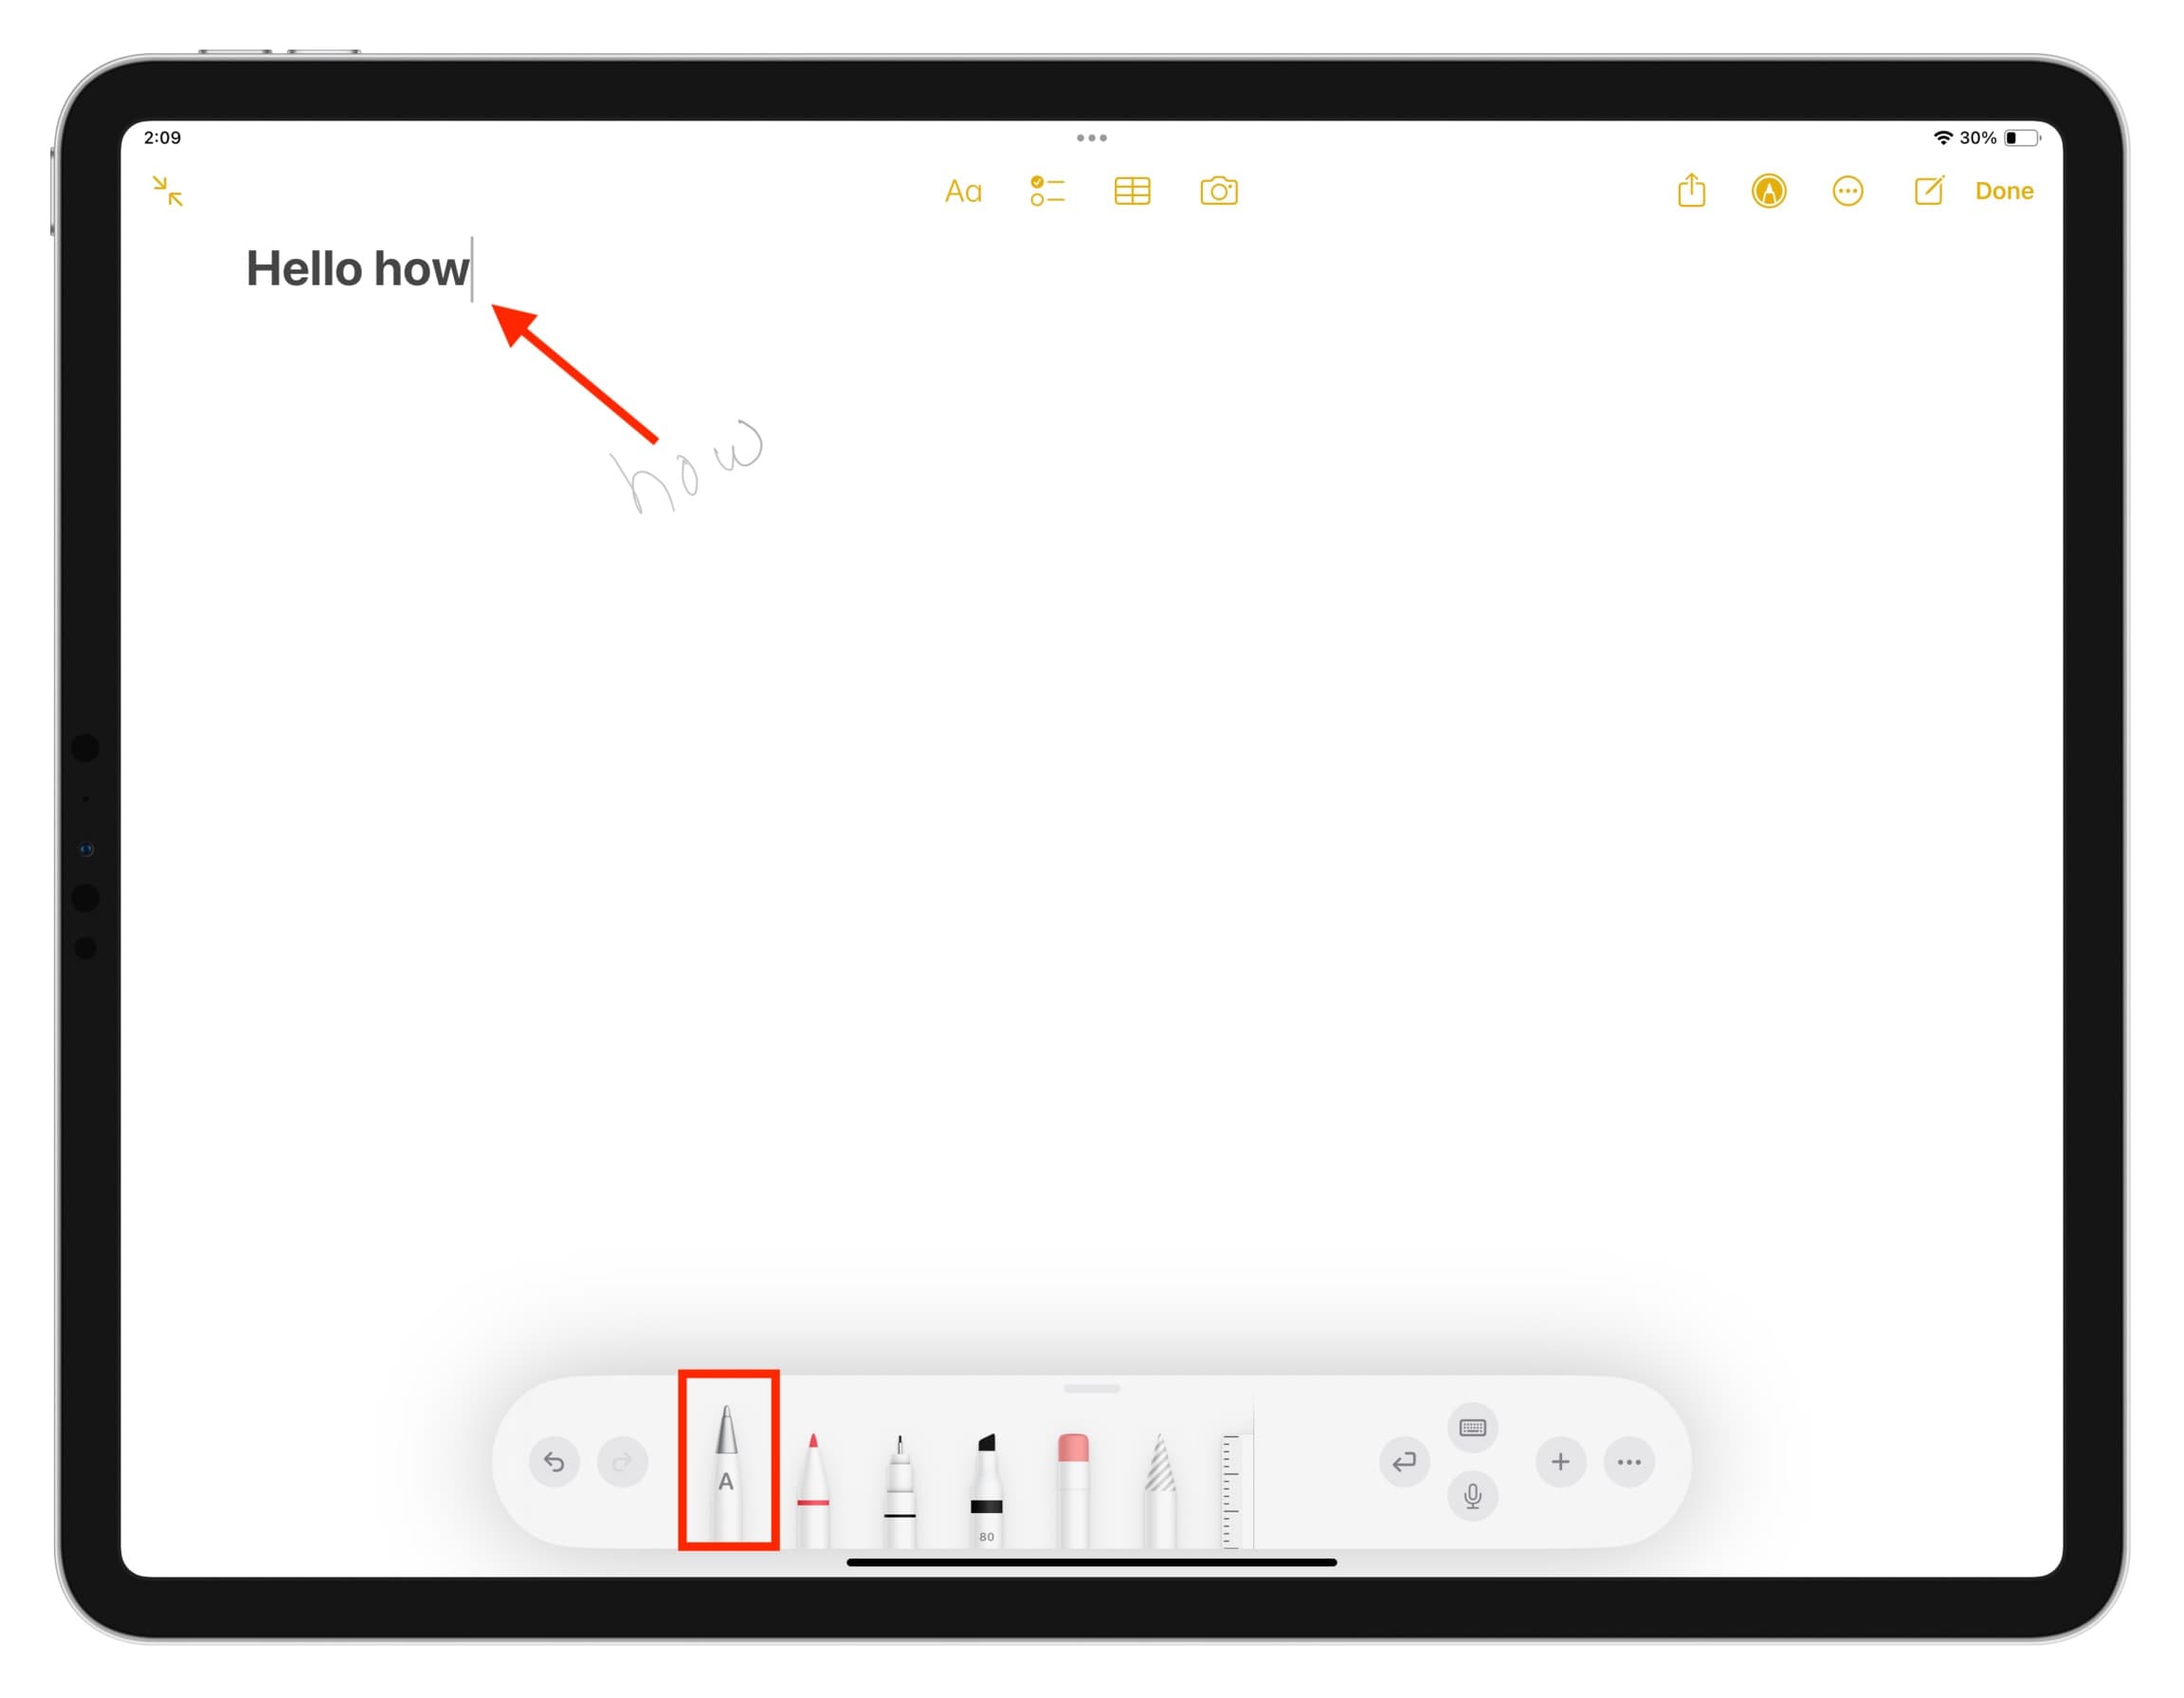
10. Write with Apple Pencil and have it convert into typed text
- Open the Notes app on your iPad and create a note.
- Tap the A pencil tool. If you don’t see it, tap the Markup button first.
- Now, write on the screen using your Apple Pencil, and it will convert to actual typed text.
11. Copy what you’ve already written with Apple Pencil as normal typed text
If you’ve already handwritten something using your Apple Pencil in the Notes app, you can touch and hold it using your finger and then copy it as text.
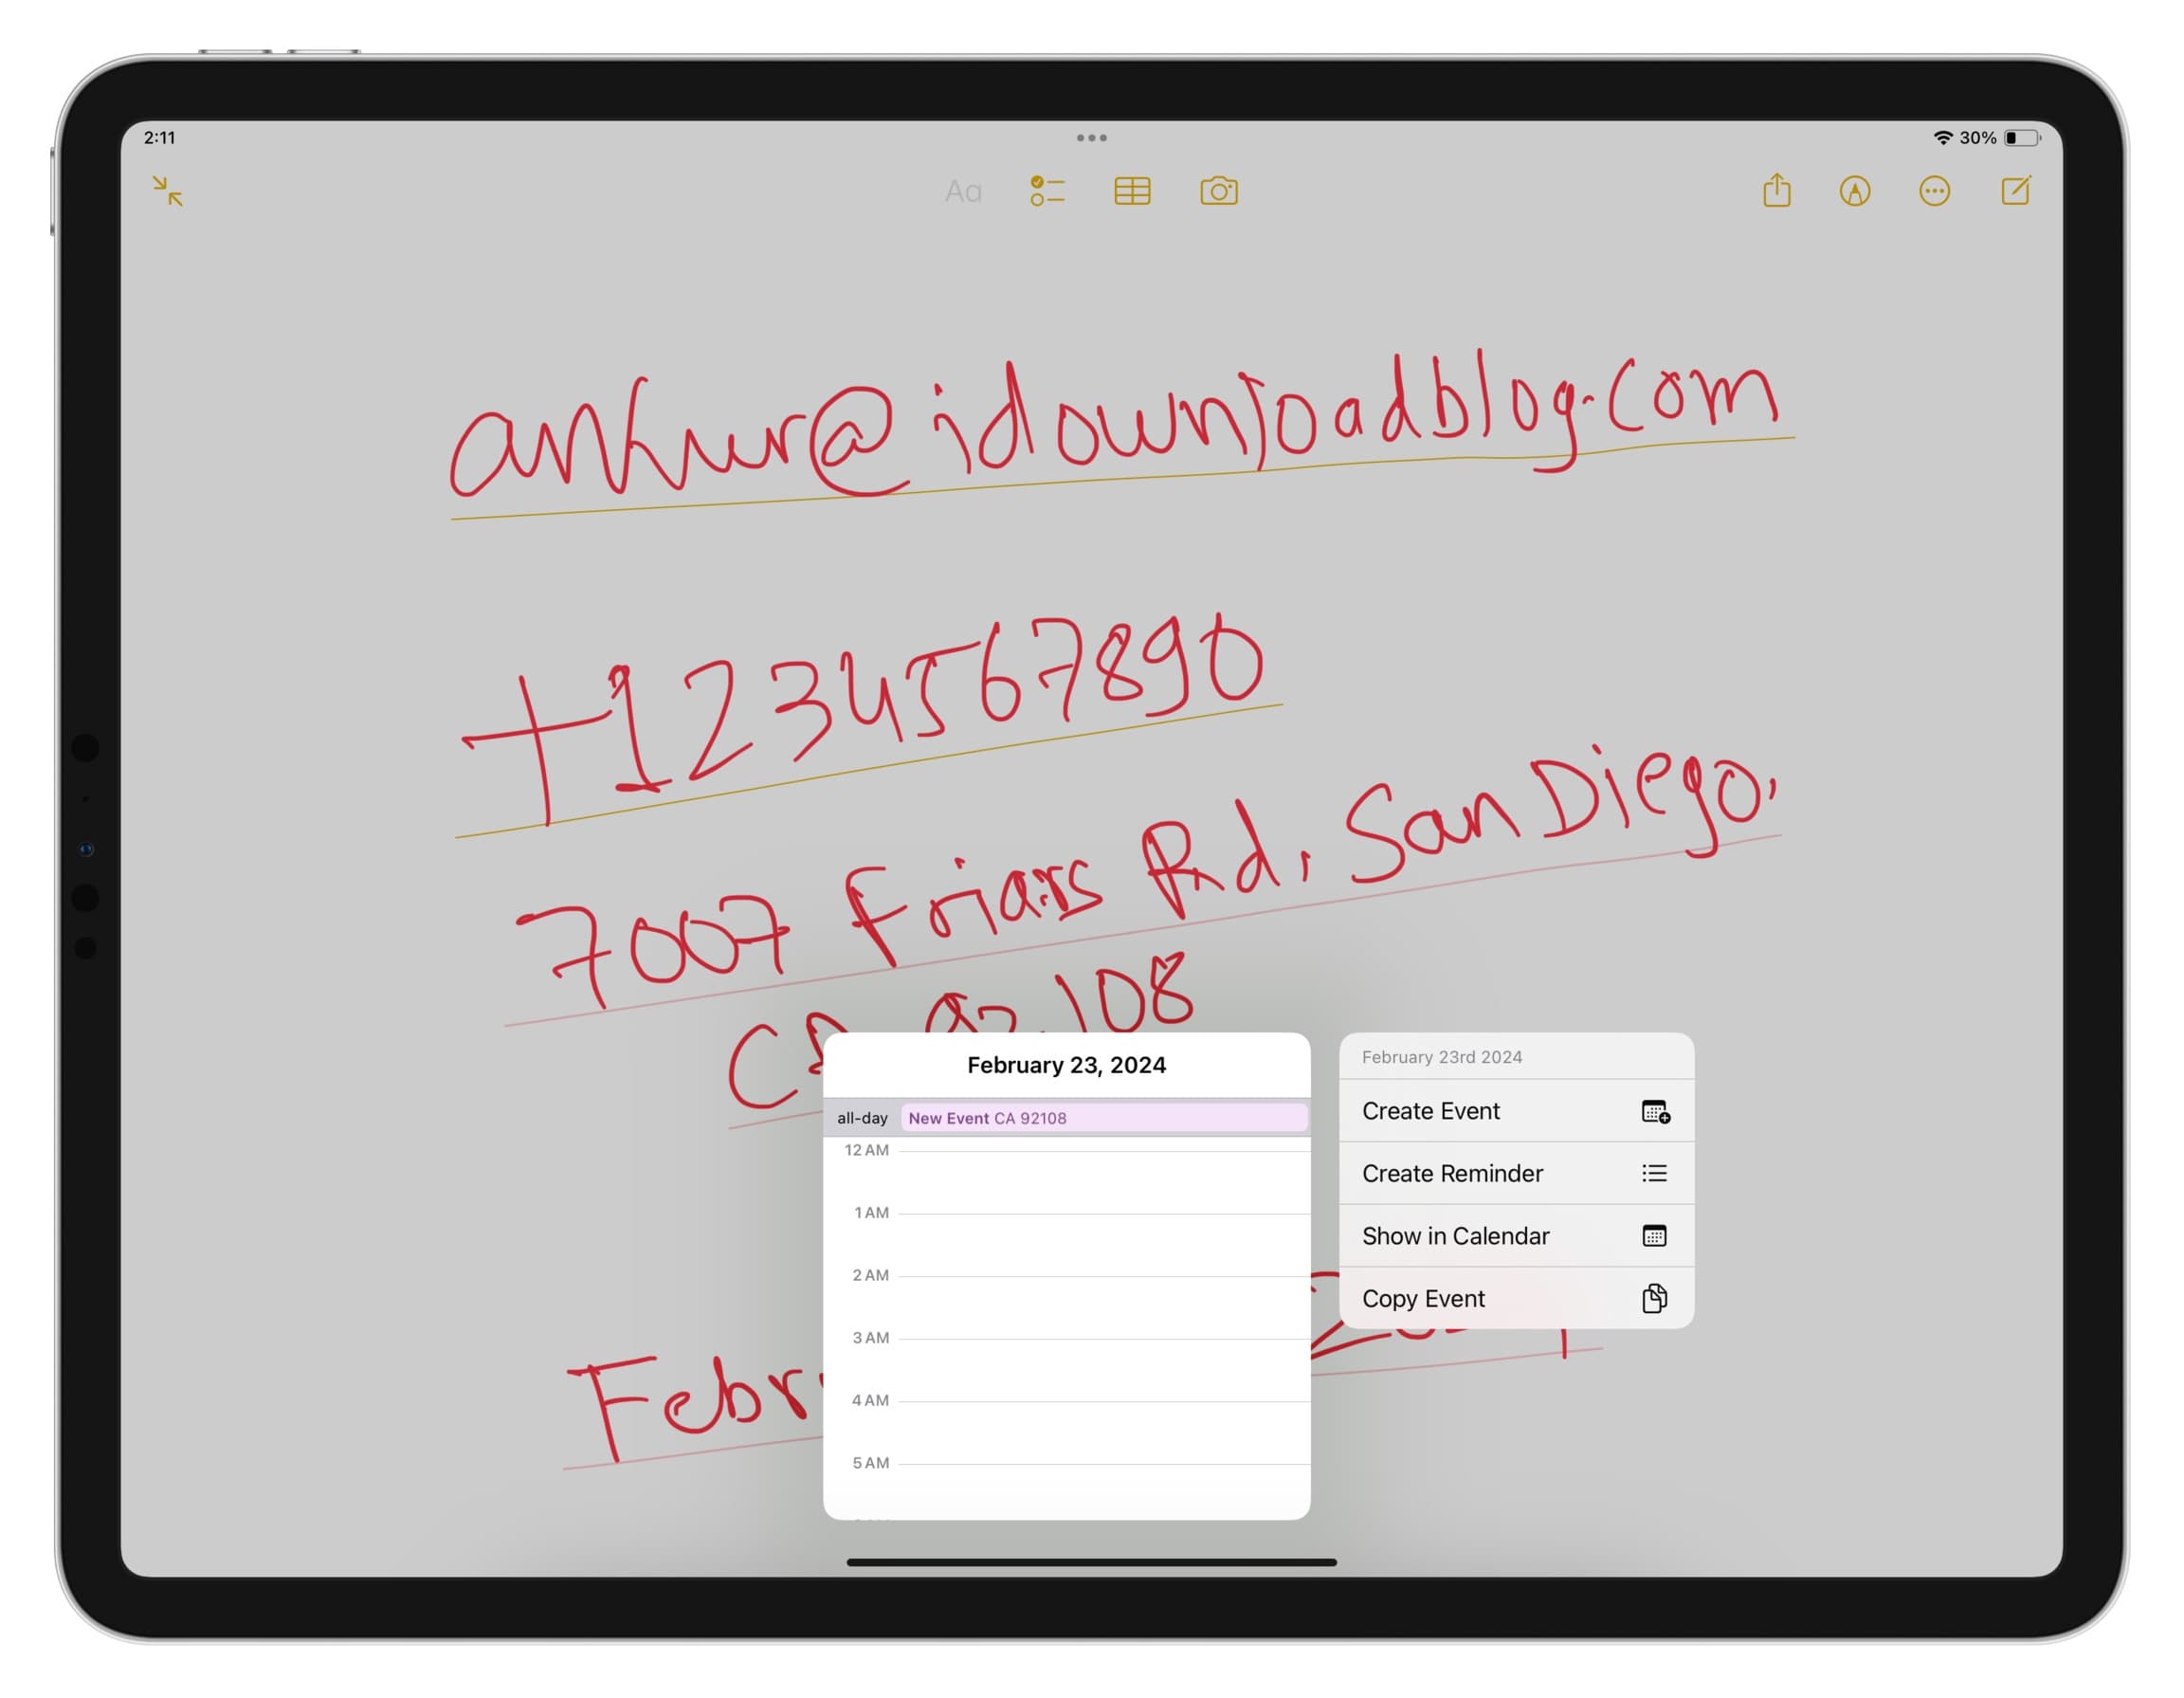
12. Take relevant action on written text
If you’ve handwritten a date, mobile number, email address, or physical address in the Notes app, you will see a thin line under it, even though you did not underline it. You can touch and hold such text with your finger and take appropriate action. For instance, if you’ve handwritten a:
- Date: You can create a calendar event or reminder, show it in the Calendar app, or copy the event.
- Address: You can get directions to this place, open in Maps, add to contacts, copy it, or share it with others.
- Mobile number: You can call the number, send a message, FaceTime, add to contacts, or copy it.
- Email address: You can send a new email, shoot an iMessage, FaceTime, save to the address book, or copy the address.
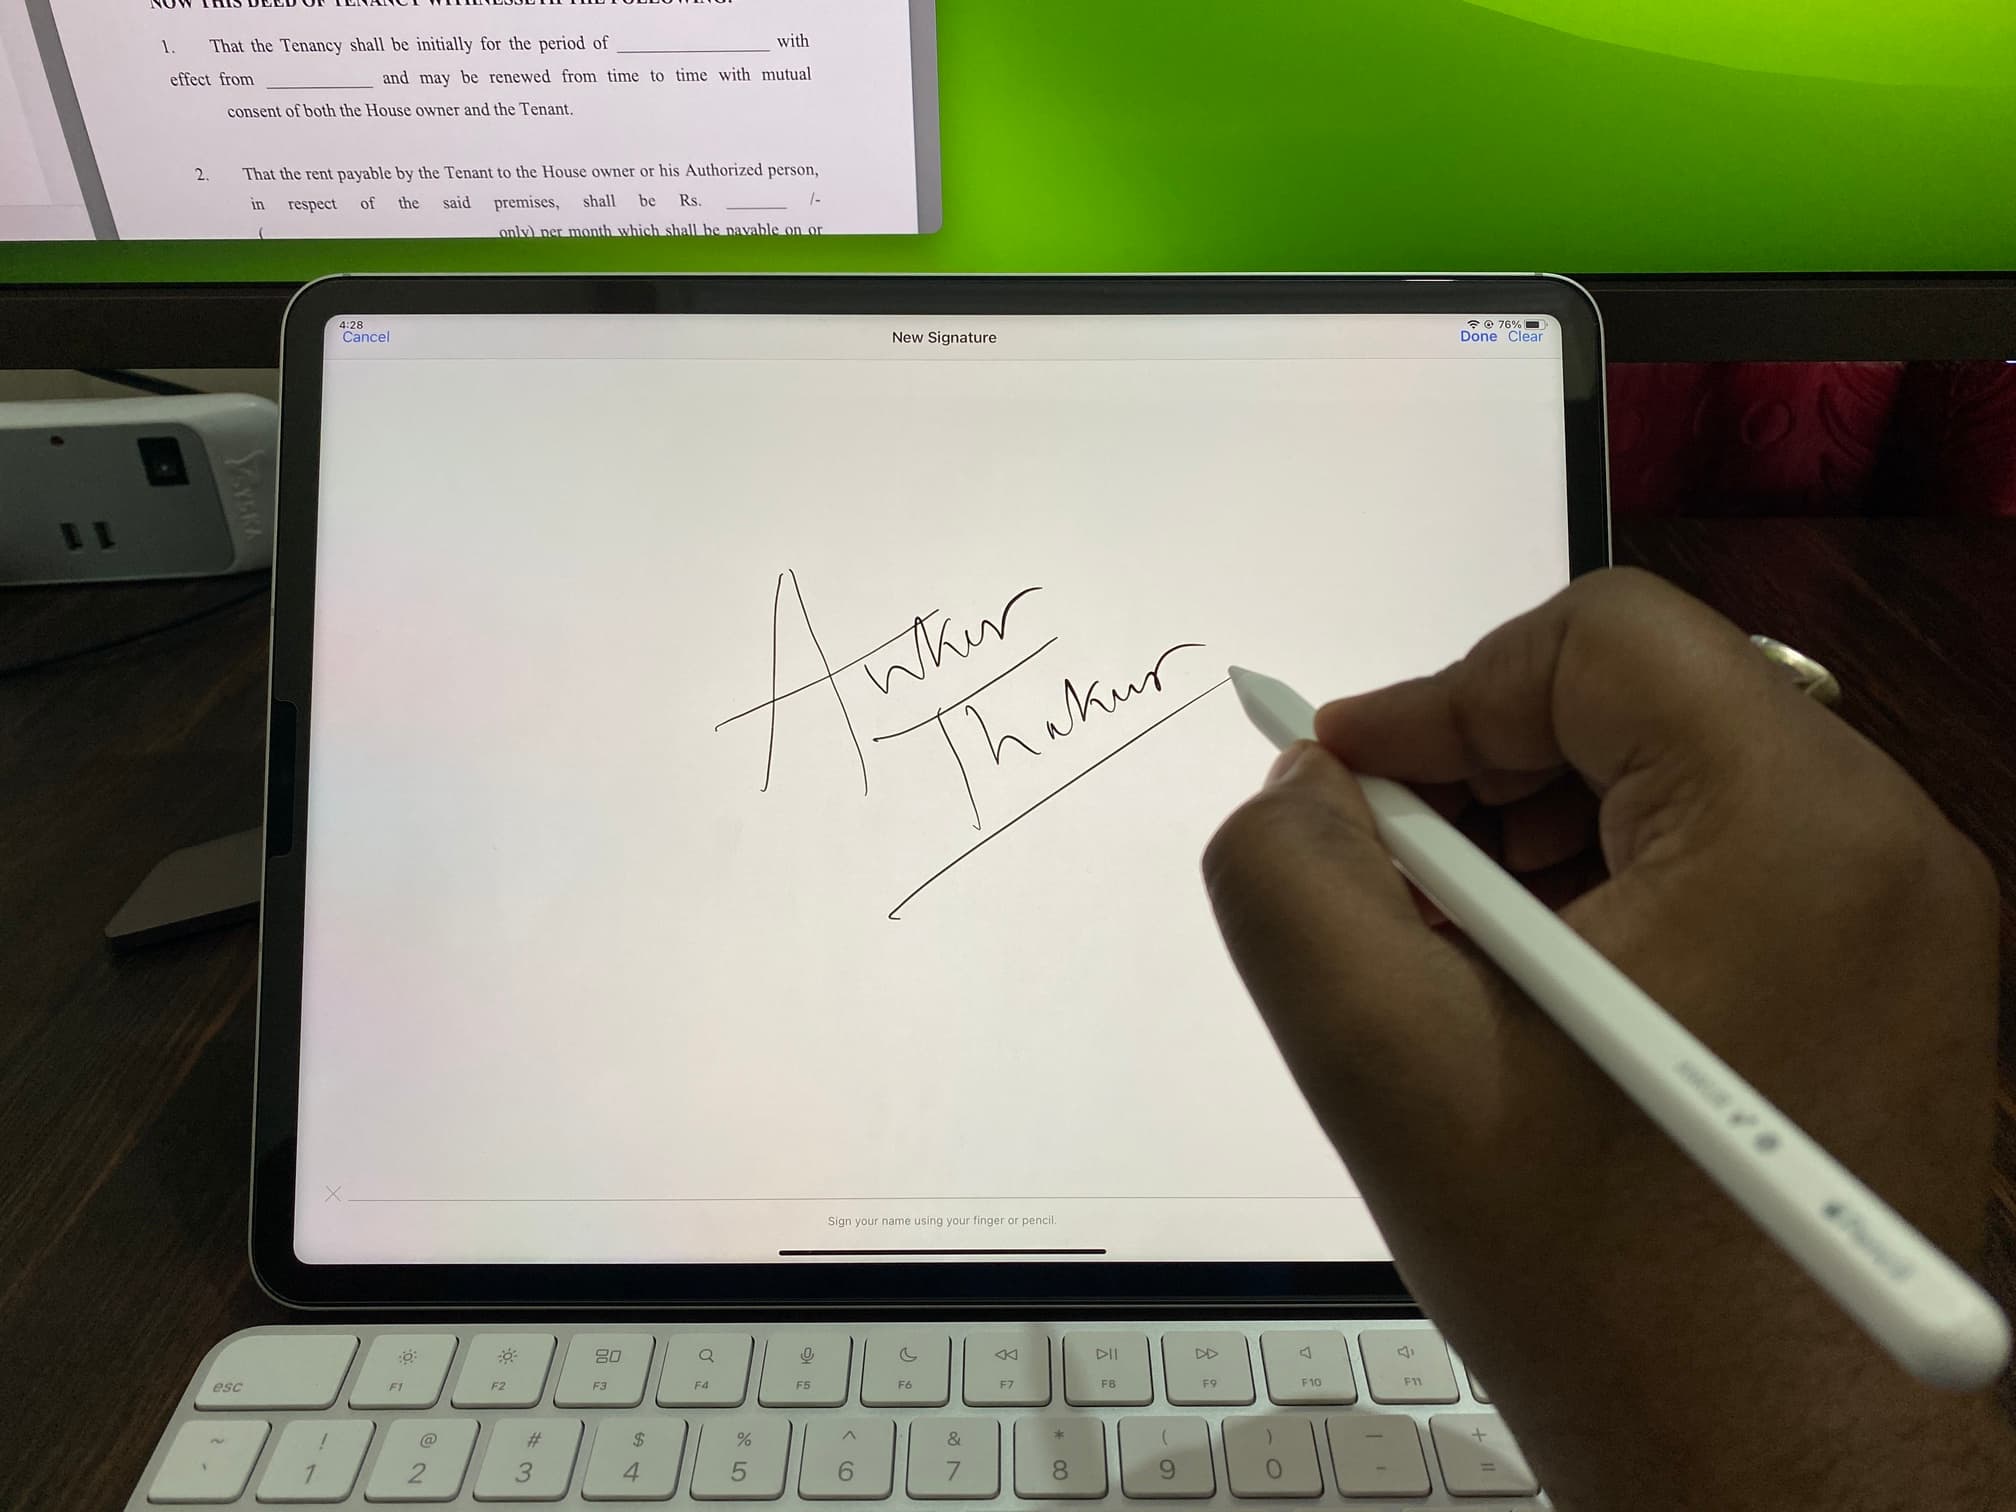
13. Sign PDFs and documents
Open a document in the Files app and sign using your Apple Pencil. You can also use your iPad and pencil to sign documents on your Mac. If you’re using a third-party app, look for the relevant signature option and then use your pencil.
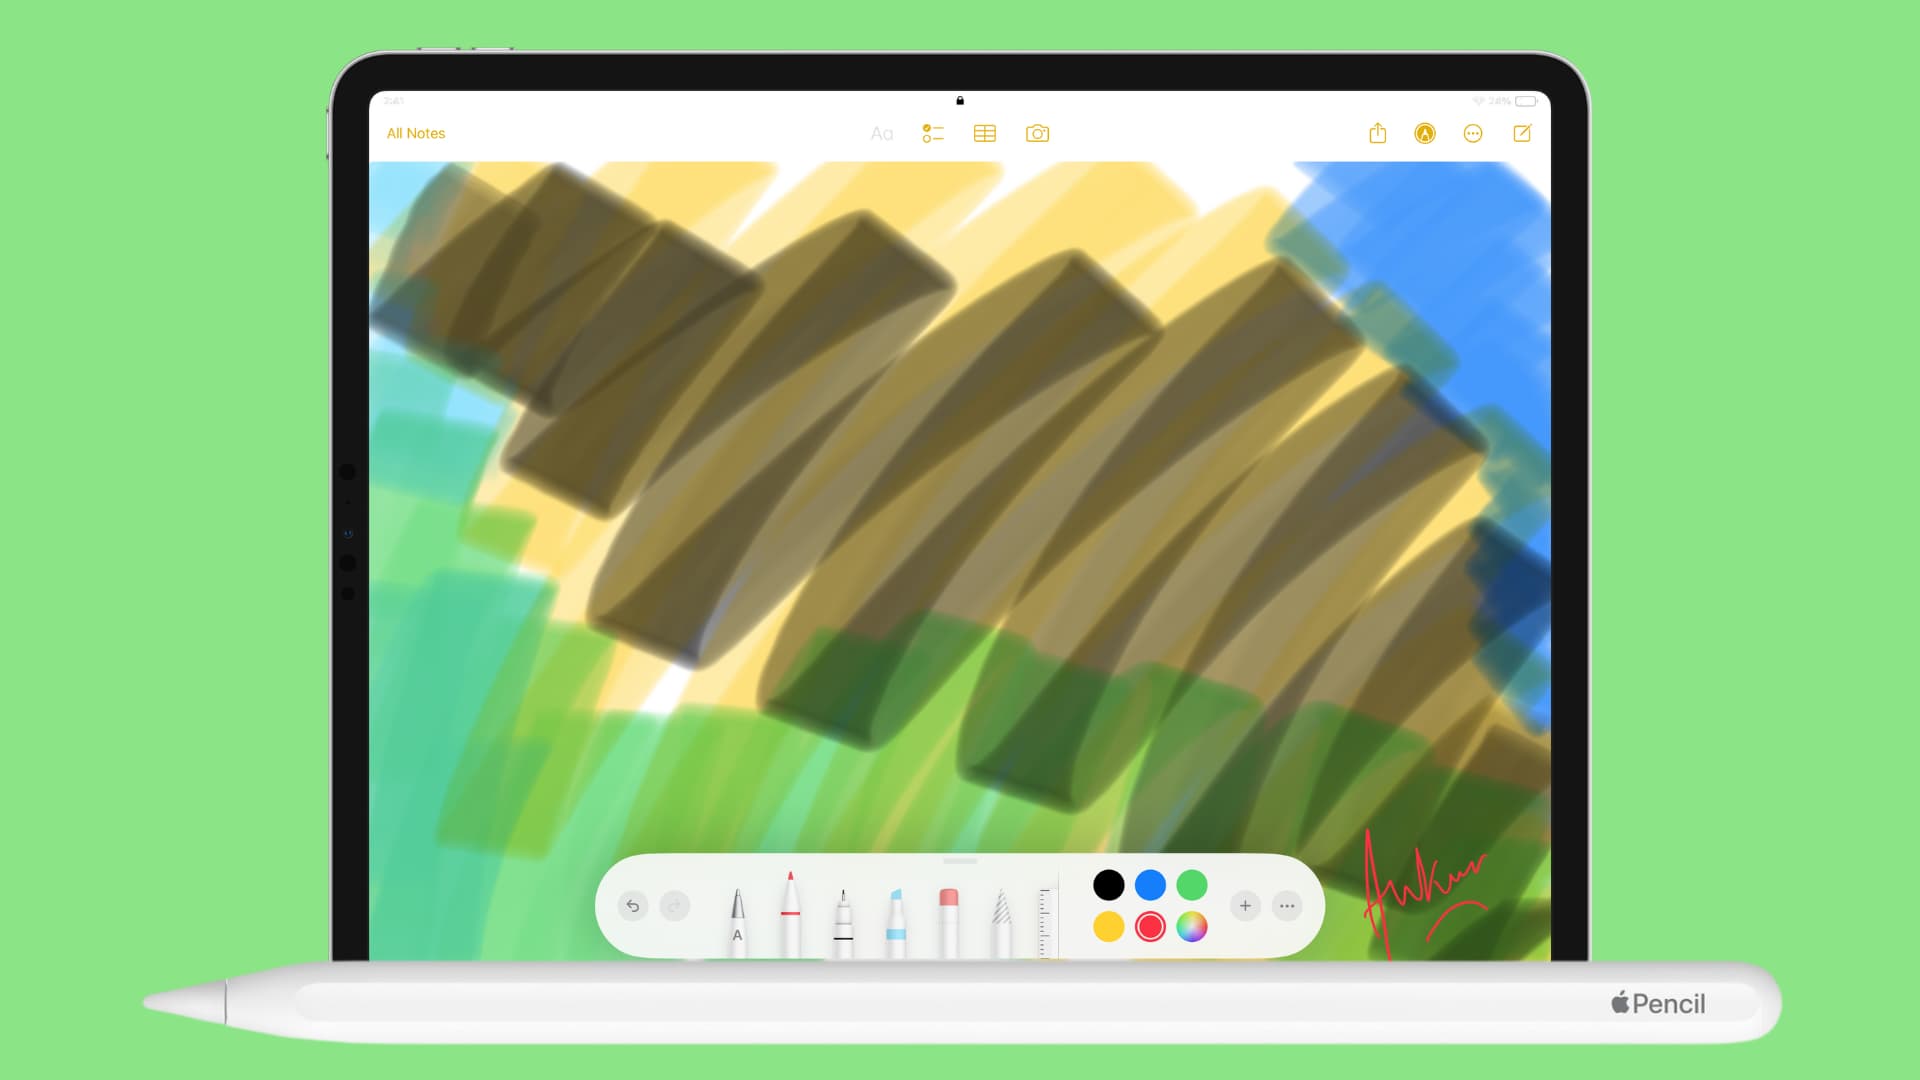
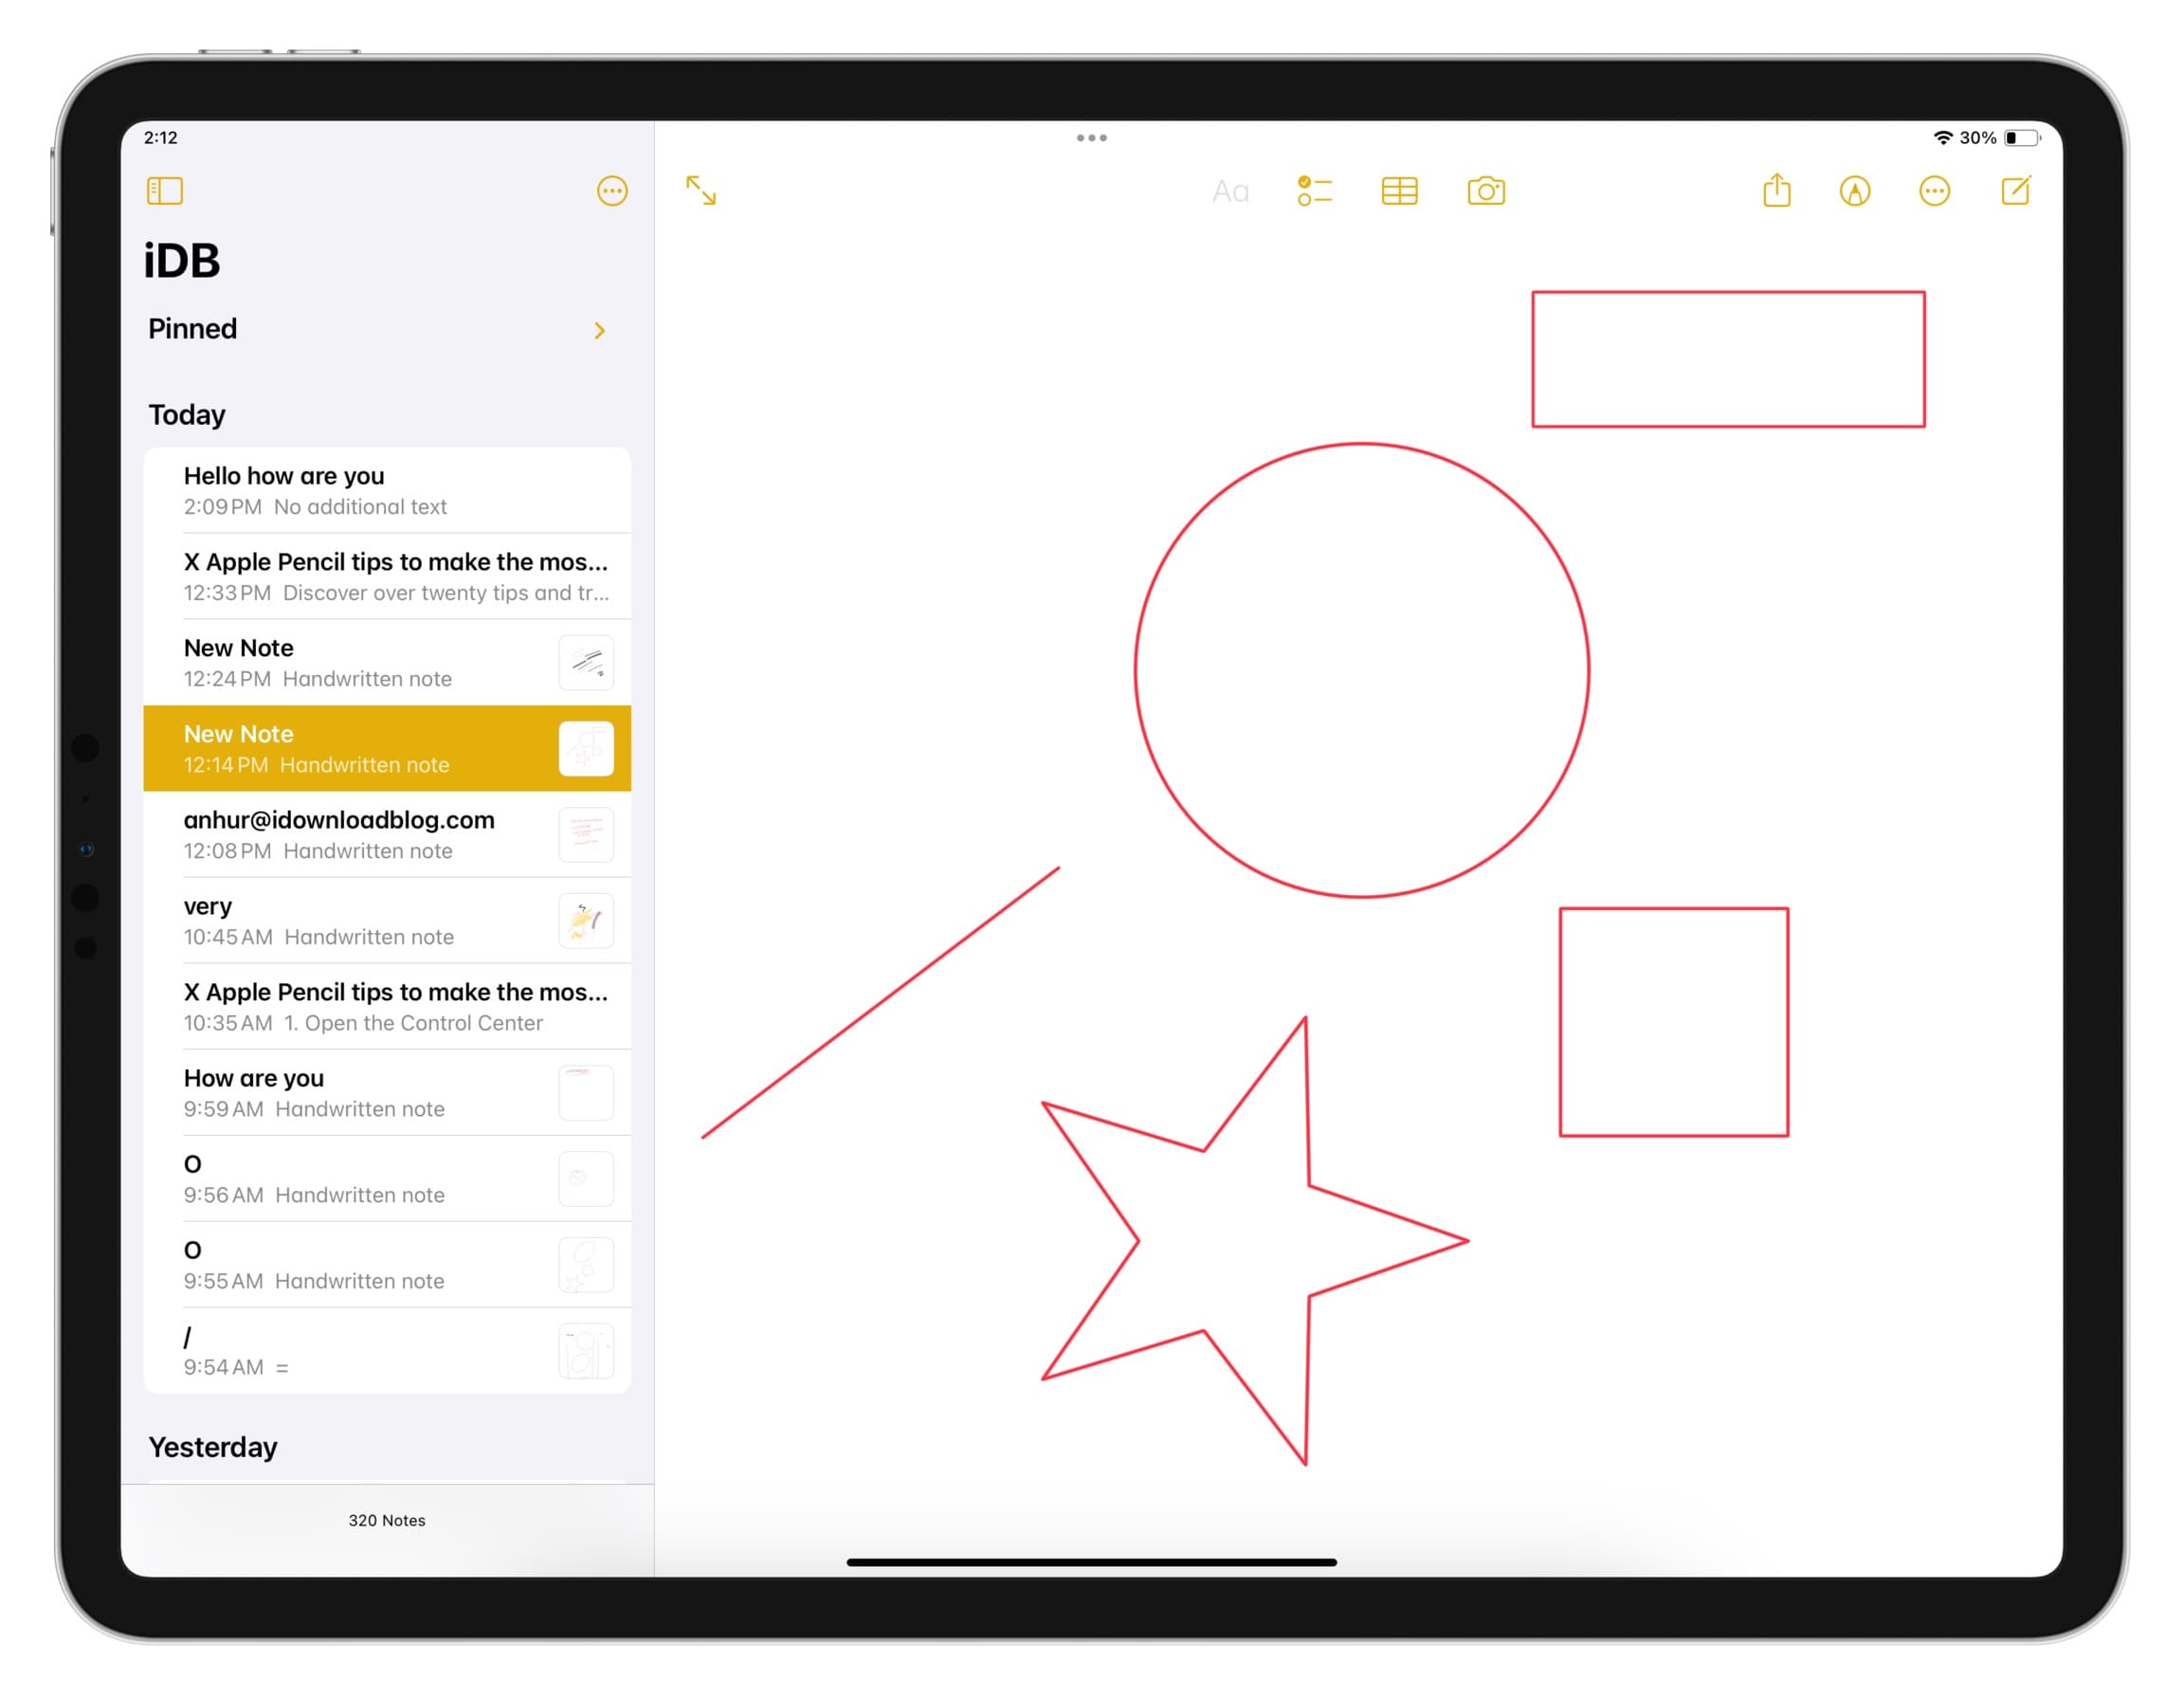
14. Draw perfect shapes
Open the Notes app and draw a circle, oval, square, rectangle, star, or straight line, and continue to hold the Apple Pencil’s tip on the screen for a bit longer until you see a perfect shape. Now, lift your pencil, and your drawing is no longer crooked but in perfect shape!
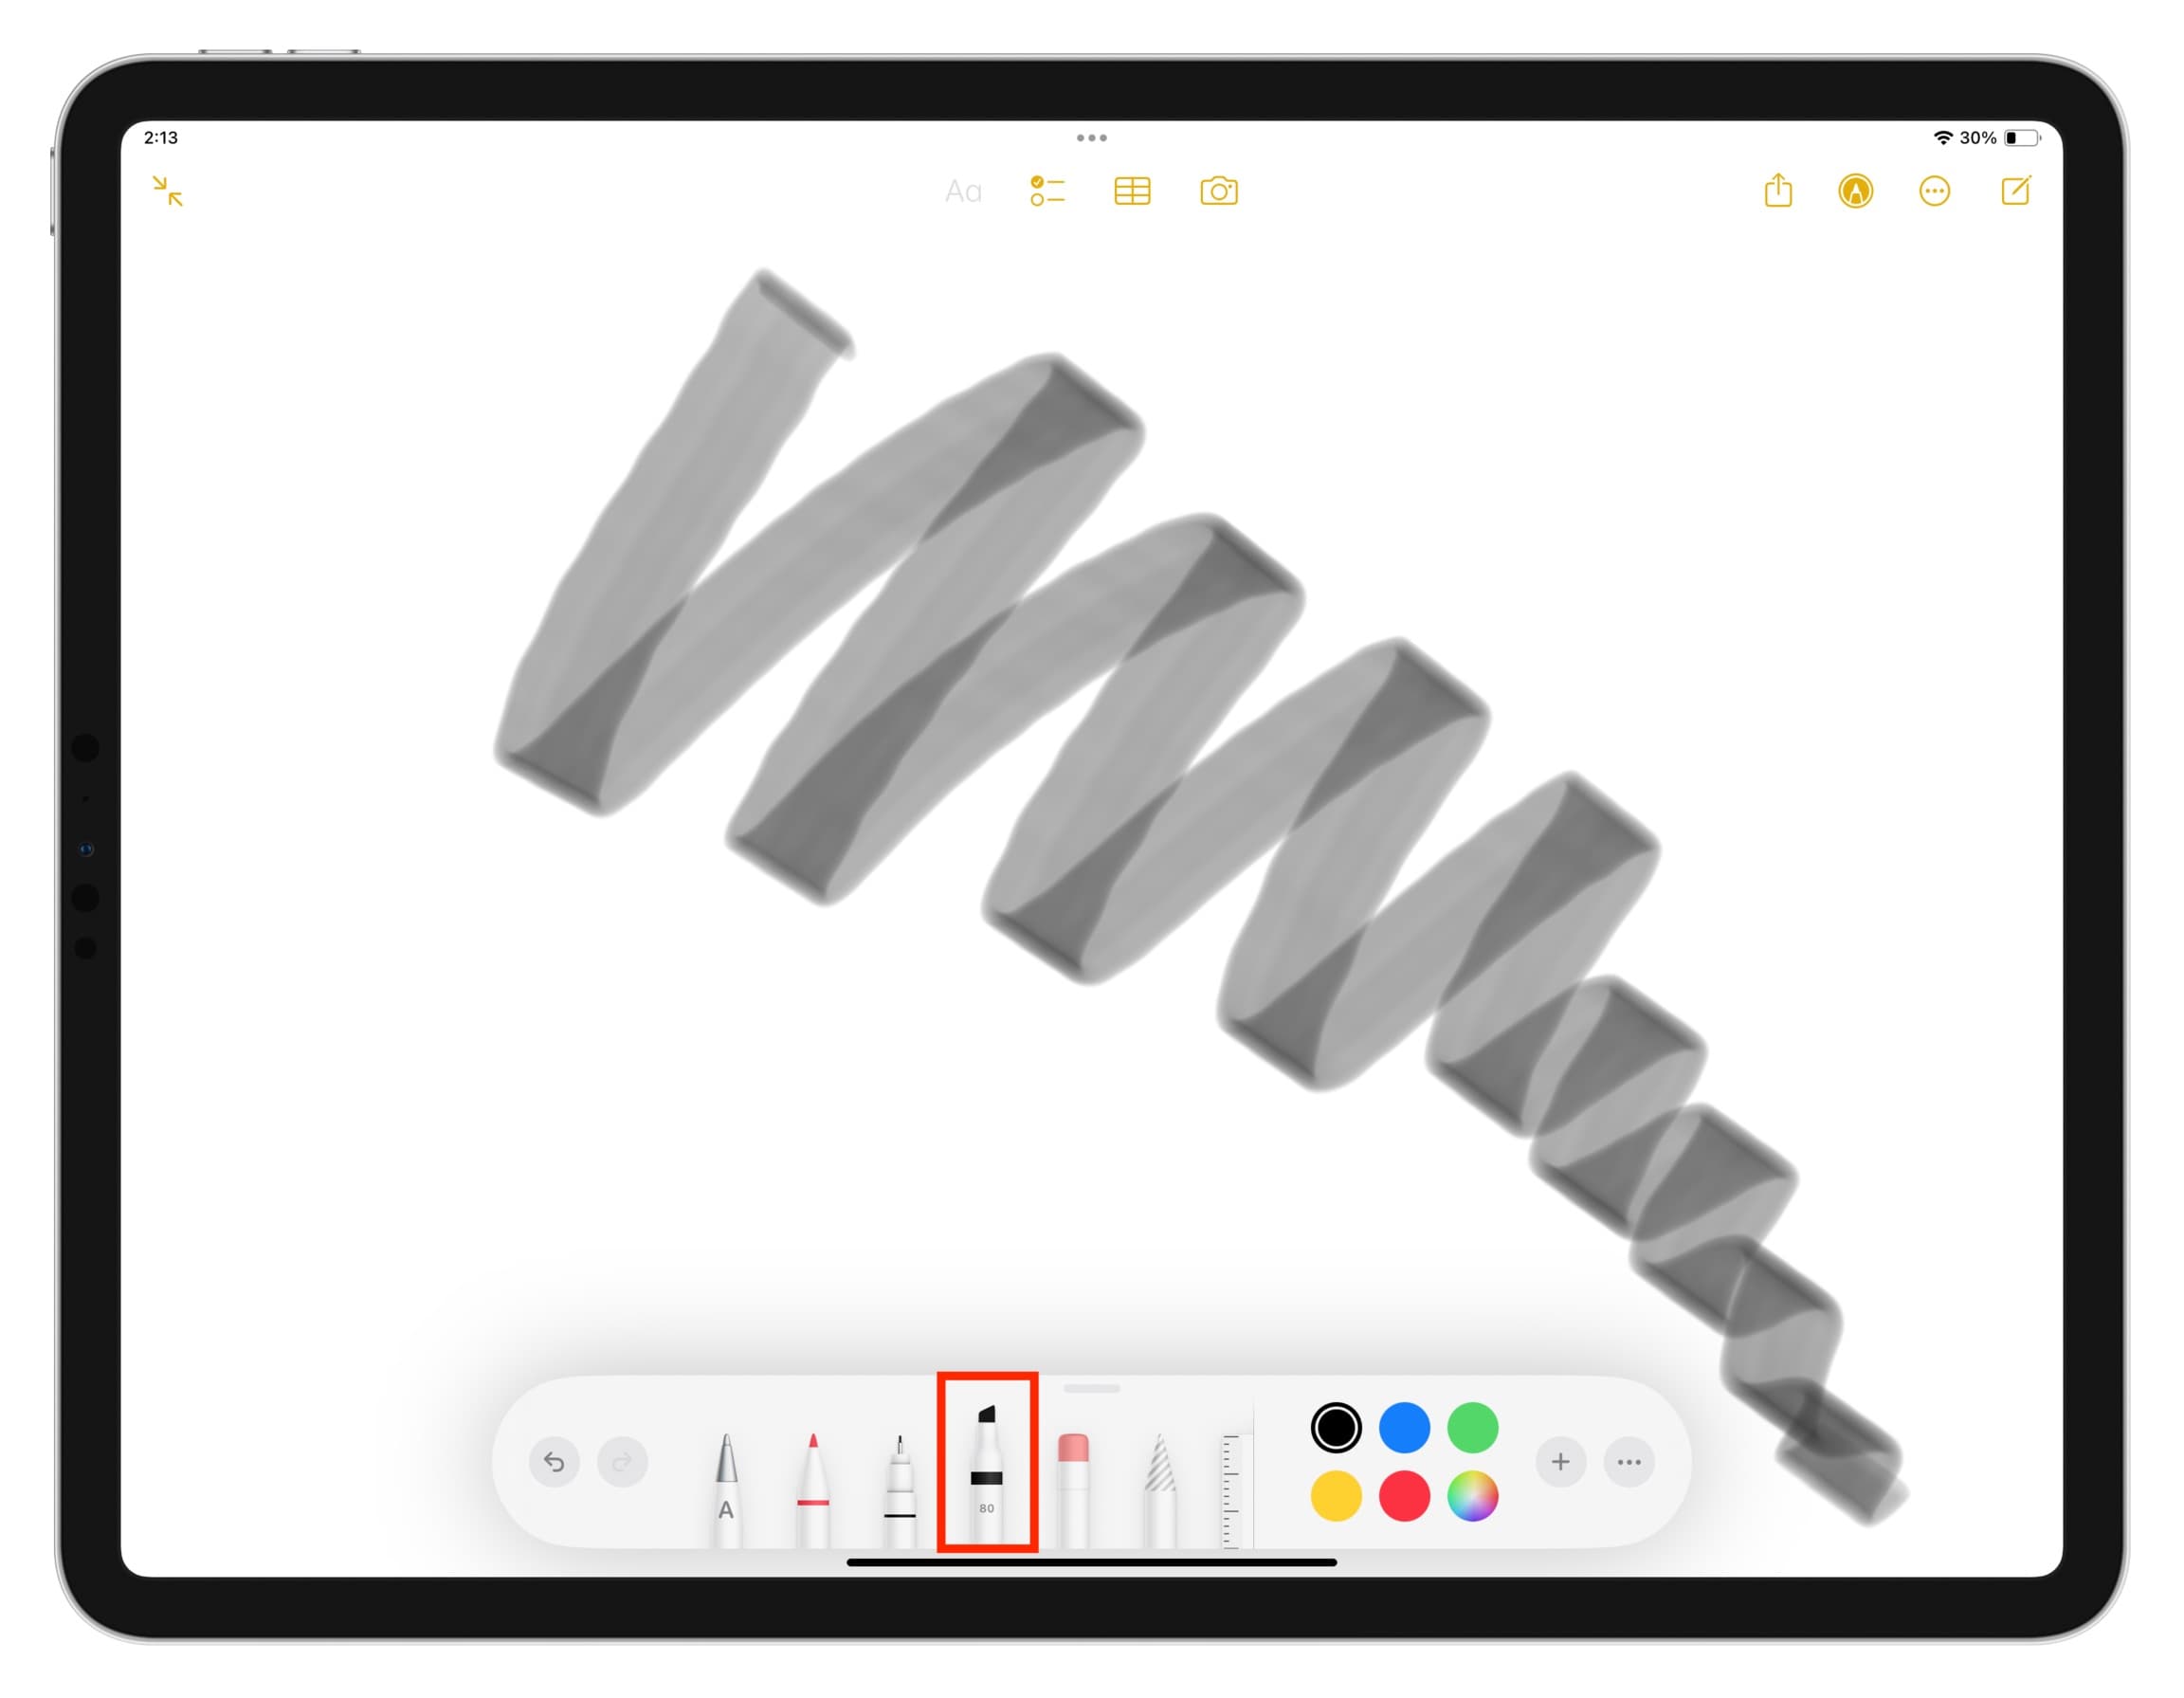
15. Tilt your Apple Pencil tip
All Apple Pencil models have tilt sensitivity. You can use it for shading or creating other effects while sketching or coloring.
Pro tip: Shake your iPad or swipe left with three fingers to undo. Swipe right with three fingers to redo.
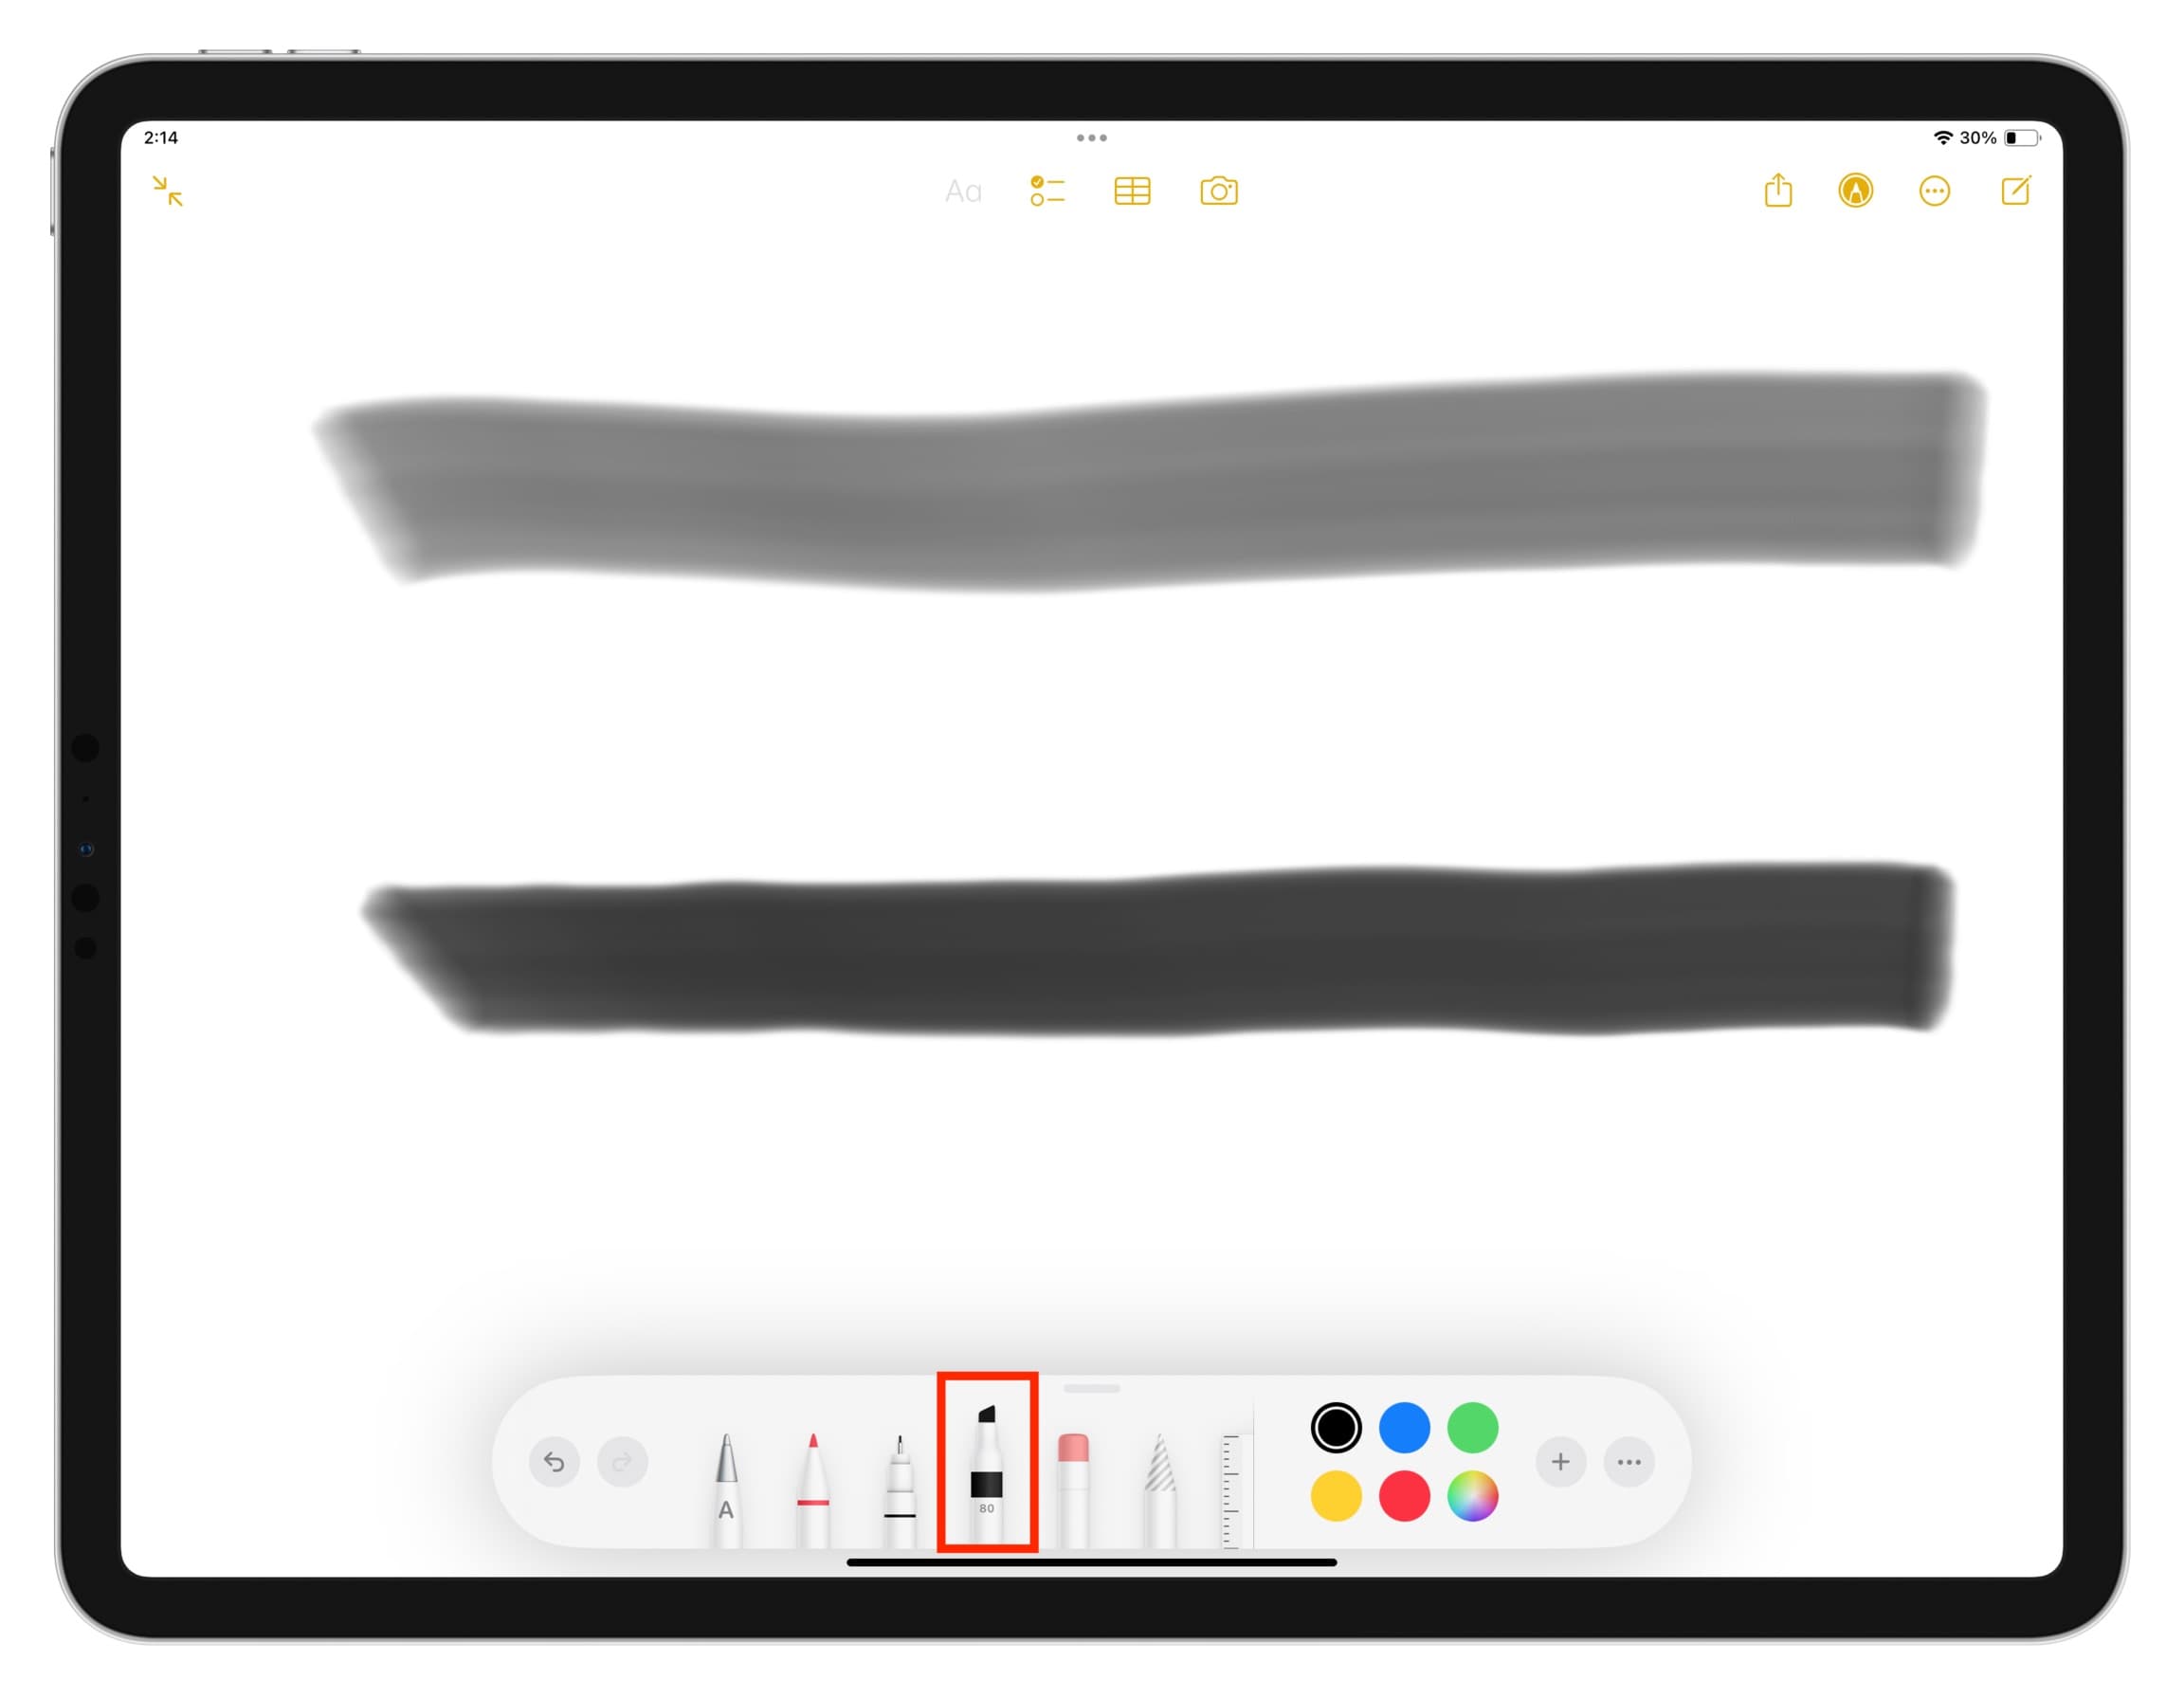
16. Use pressure sensitivity
Apple Pencil 1st and 2nd generations (excluding the new one with USB-C) also have pressure sensitivity that ensures your drawing responds to the pressure you put and accordingly creates light or dark strokes.
You can use this in supported apps. But if you want to try it now, go to Apple Notes and select the highlight tool. Now, make a straight line with almost no pressure and then do the same while exerting pressure. Both lines will have different degrees of opacity.
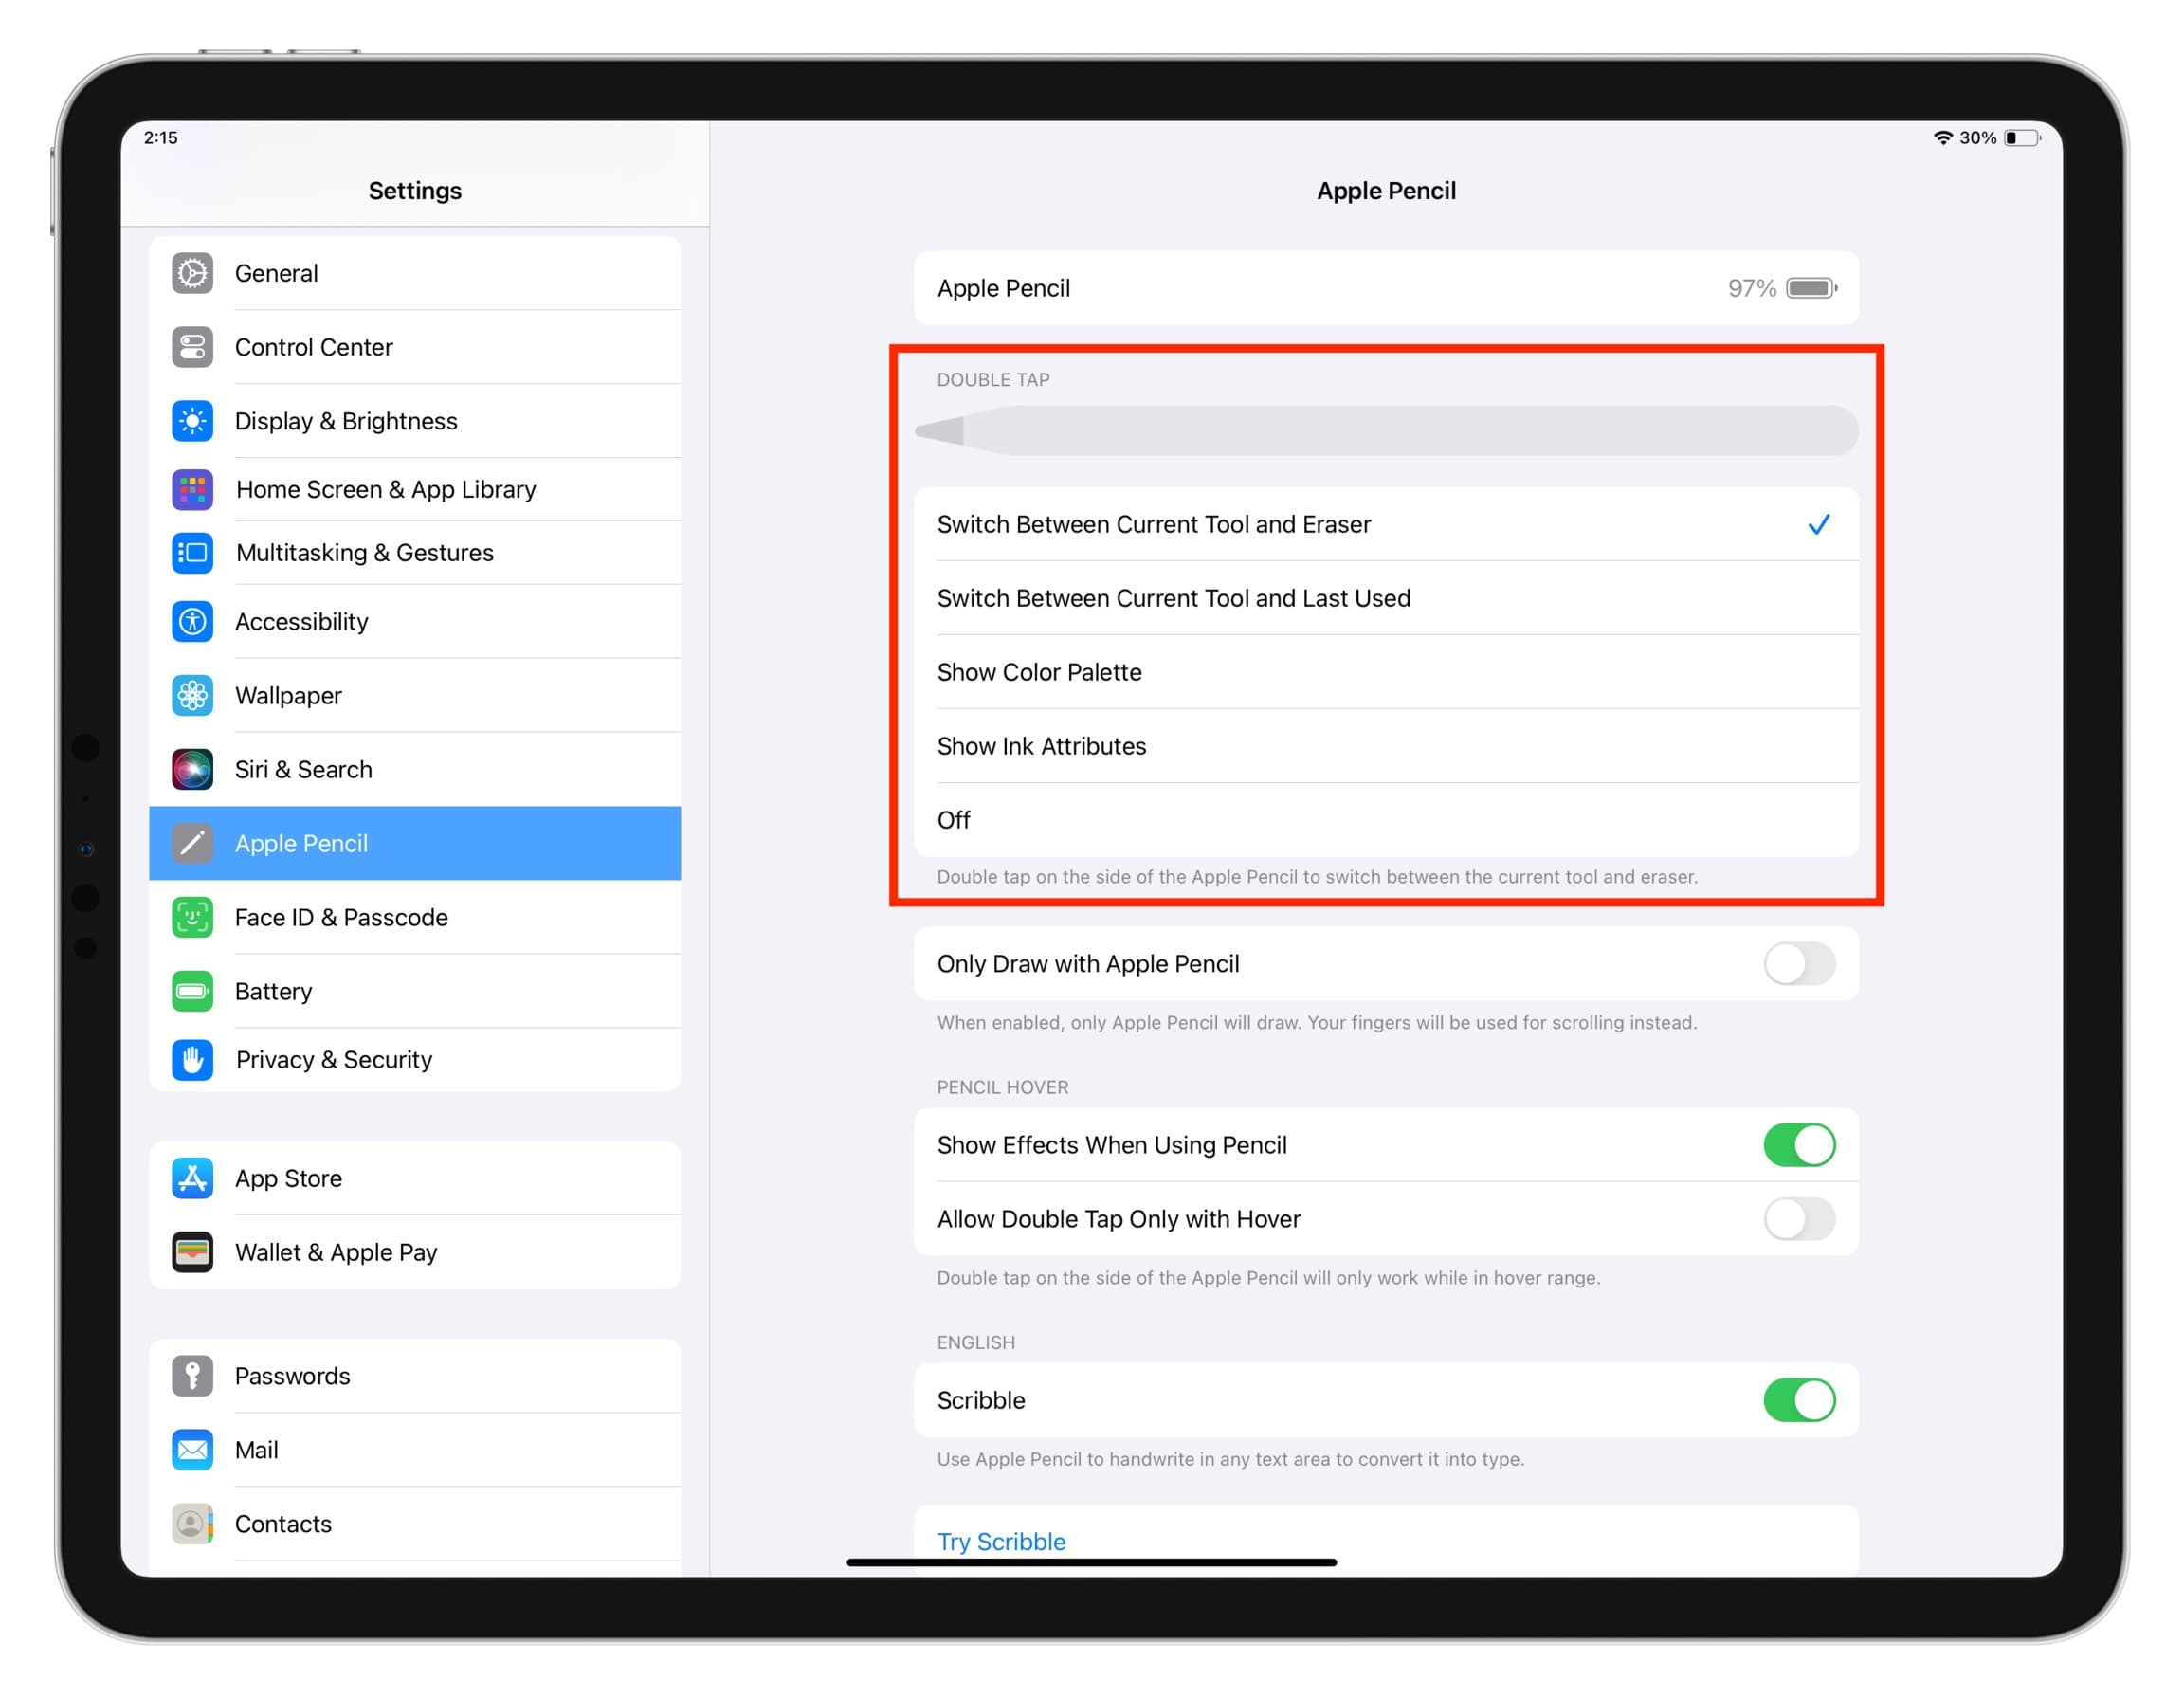
17. Double-tap to switch between the tools
When using your Apple Pencil to draw, you can double-tap just above the tip area to switch between the current tool and the eraser.
You can customize this action to your liking or turn it off from iPad Settings > Apple Pencil > DOUBLE TAP. You can set it to switch between current and last used tools, show color palette, or show ink attributes.
18. Draw on a piece of actual paper with your Apple Pencil and have it appear on your iPad
When I was a kid, my drawing teacher would give us tracing papers. We would draw on it with our graphite pencils to create beautiful flowers and scenery.
You can do something similar with your iPad. Here’s how:
- Open Apple Notes and create a new note. You can also use other apps that let you draw.
- Put the tracing paper or a normal thin paper with your drawing’s outline over the iPad screen.
- Now, run your Apple Pencil over the actual paper, and the drawing will be created inside the Notes app.
Pro tip: It’s tough to write in good handwriting on the slippery iPad glass screen. To address this, you can purchase a screen protector like Paperlike or put a piece of thin paper over the iPad screen and write on the coarse surface with your Apple Pencil. But remember that doing this may cause the tip to wear off sooner.
19. Draw in emails
You can use your Apple Pencil to create and attach a drawing to your email in the Apple Mail app.
20. Use two fingers to scroll when drawing with Apple Pencil
When you’re sketching with your Apple Pencil, scrolling with your pencil or one finger may add an unneeded line. So, scroll up or down with two fingers to avoid that.
21. Turn hover off or on
You can put your Apple Pencil 2nd generation over items on the screen to preview tools and controls before you use them. It’s a wonderful feature to have on the iPad Pro 11-inch (4th generation) and iPad Pro 12.9-inch (6th generation).
However, if you don’t use it, you can turn off Show Effects When Using Pencil under the Pencil Hover section in iPad Settings > Apple Pencil.
22. Check an app’ specific Apple Pencil settings
Drawing, designing, notepad, and other such apps can have dedicated settings for Apple Pencil. Make sure you explore and tweak them accordingly.
23. Check your pencil’s battery status
You can add the batteries widget on the iPad Home Screen to keep track of your Apple Pencil’s battery.
24. Find your misplaced Apple Pencil
Have you lost your Apple Pencil somewhere nearby and can’t find it? Here’s how to recover it.
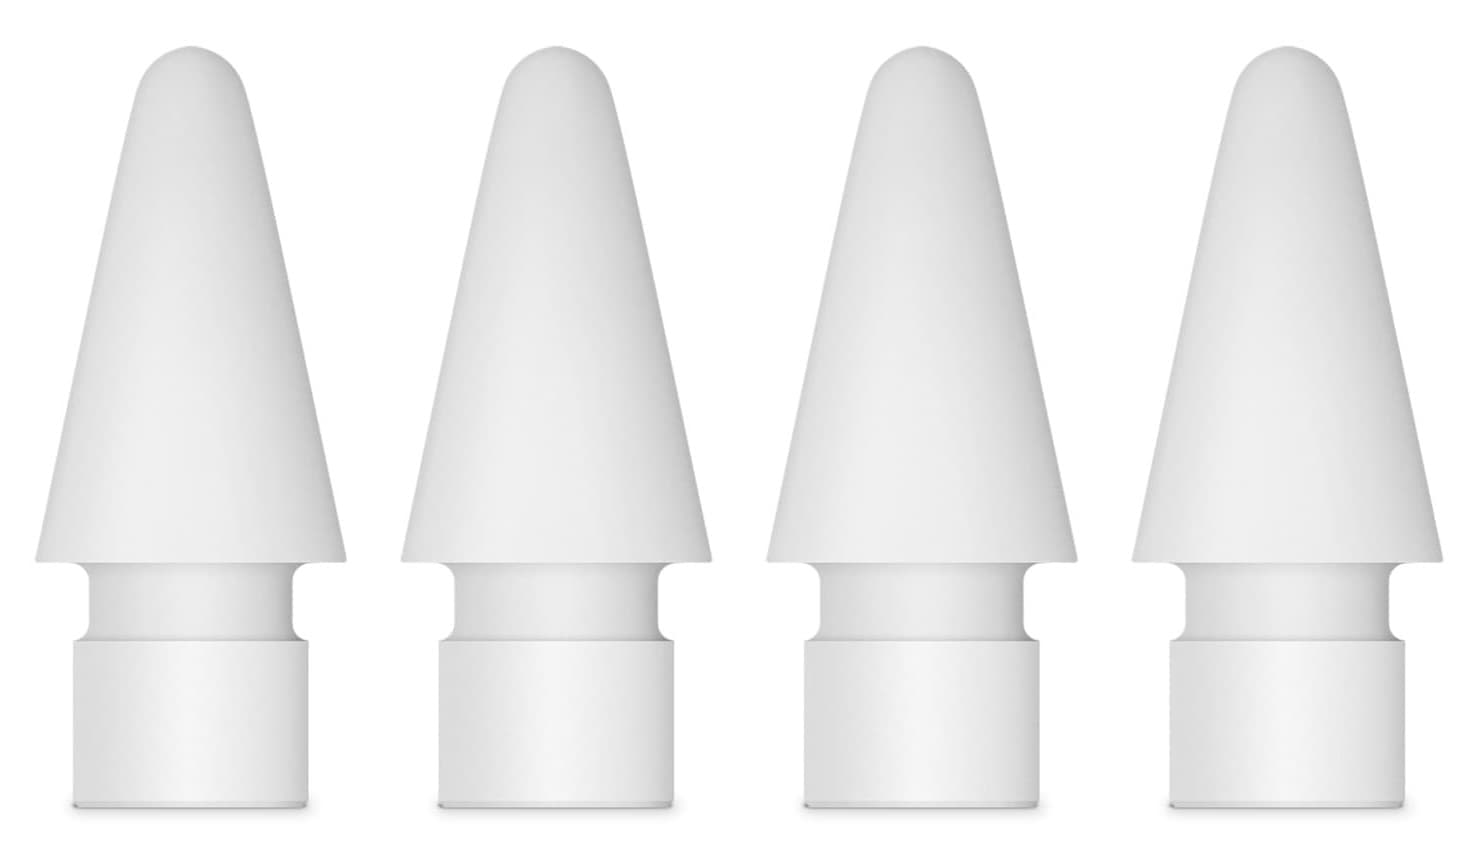
25. Replace the tip of your Apple Pencil
Lastly, we come to the end of our tips list, which is about the Apple Pencil’s physical tip. If it is worn out and not working properly, you can purchase a set of 4 tips from Apple for $19 and replace it.