The Apple Maps app received nice enhancements with iOS 14 and iPadOS 14. So of course, Apple introduced some of these new features for Maps on macOS Big Sur. In addition, the app has a slightly different appearance and navigation.
Whether you just picked up your first Mac or upgraded to the new OS, we’ll guide you through using the updated Maps app on Mac.
Updated Maps on Mac
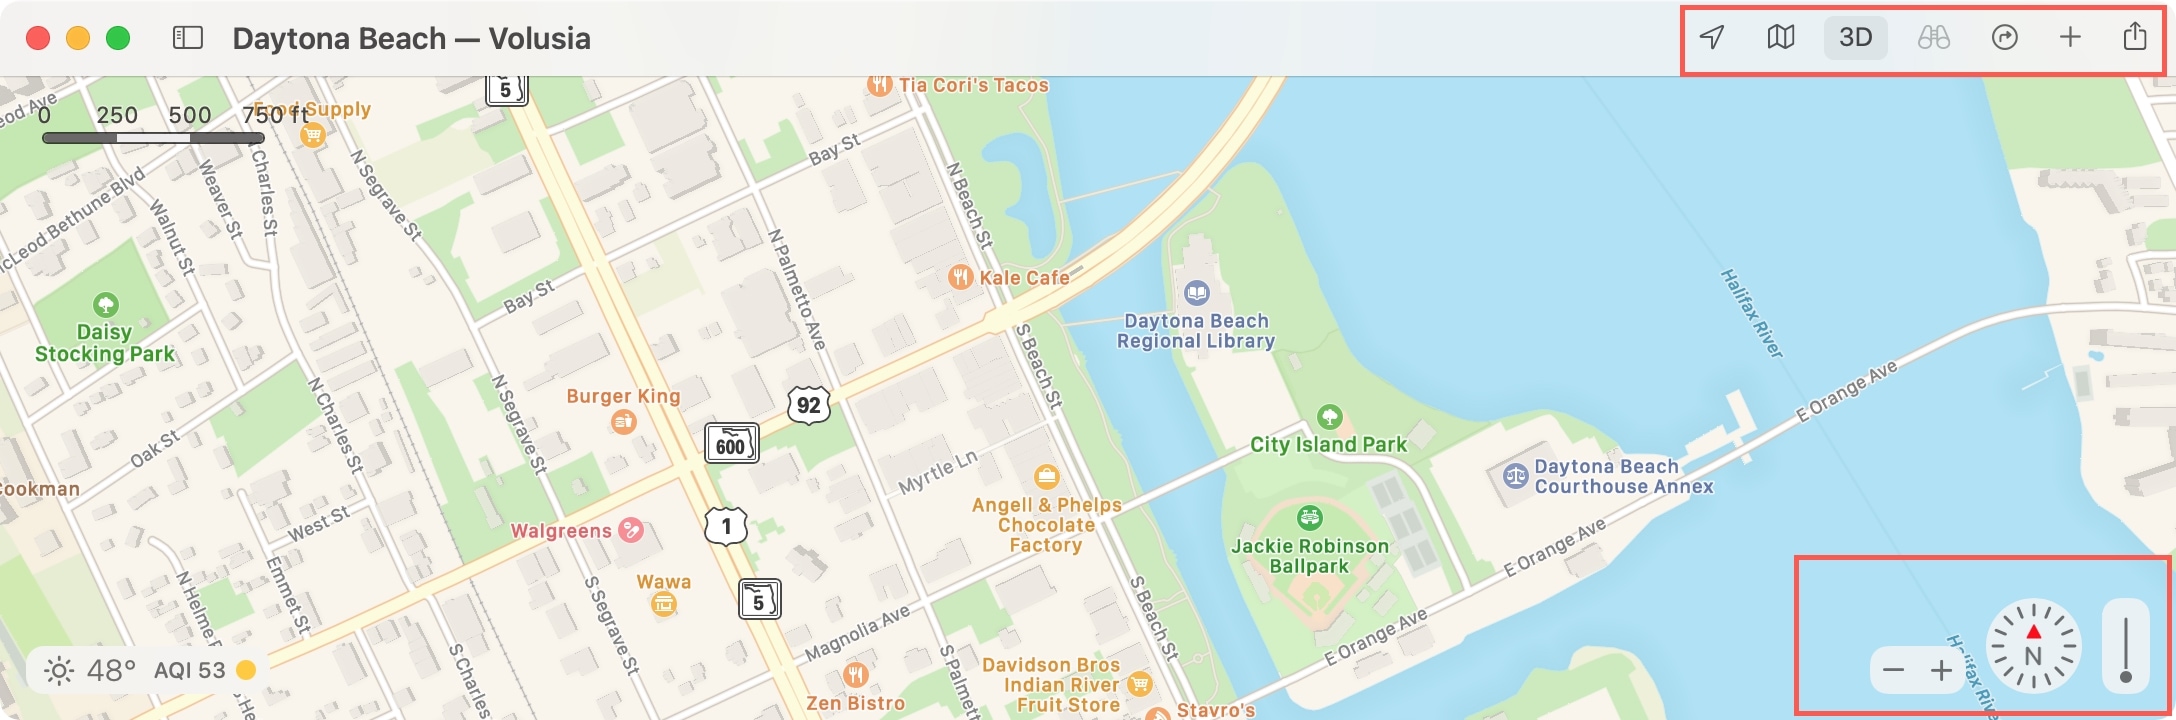
Apple moved a few options around from the last version for viewing your map. The toolbar at the top has handy buttons for your current location, map view (default, transit, satellite), 3D, Look Around, directions, adding a tab, and sharing a map.
The zoom, compass, and 3D slider are all on the bottom right making it easy to adjust the view of your map without jumping to various spots in the app.
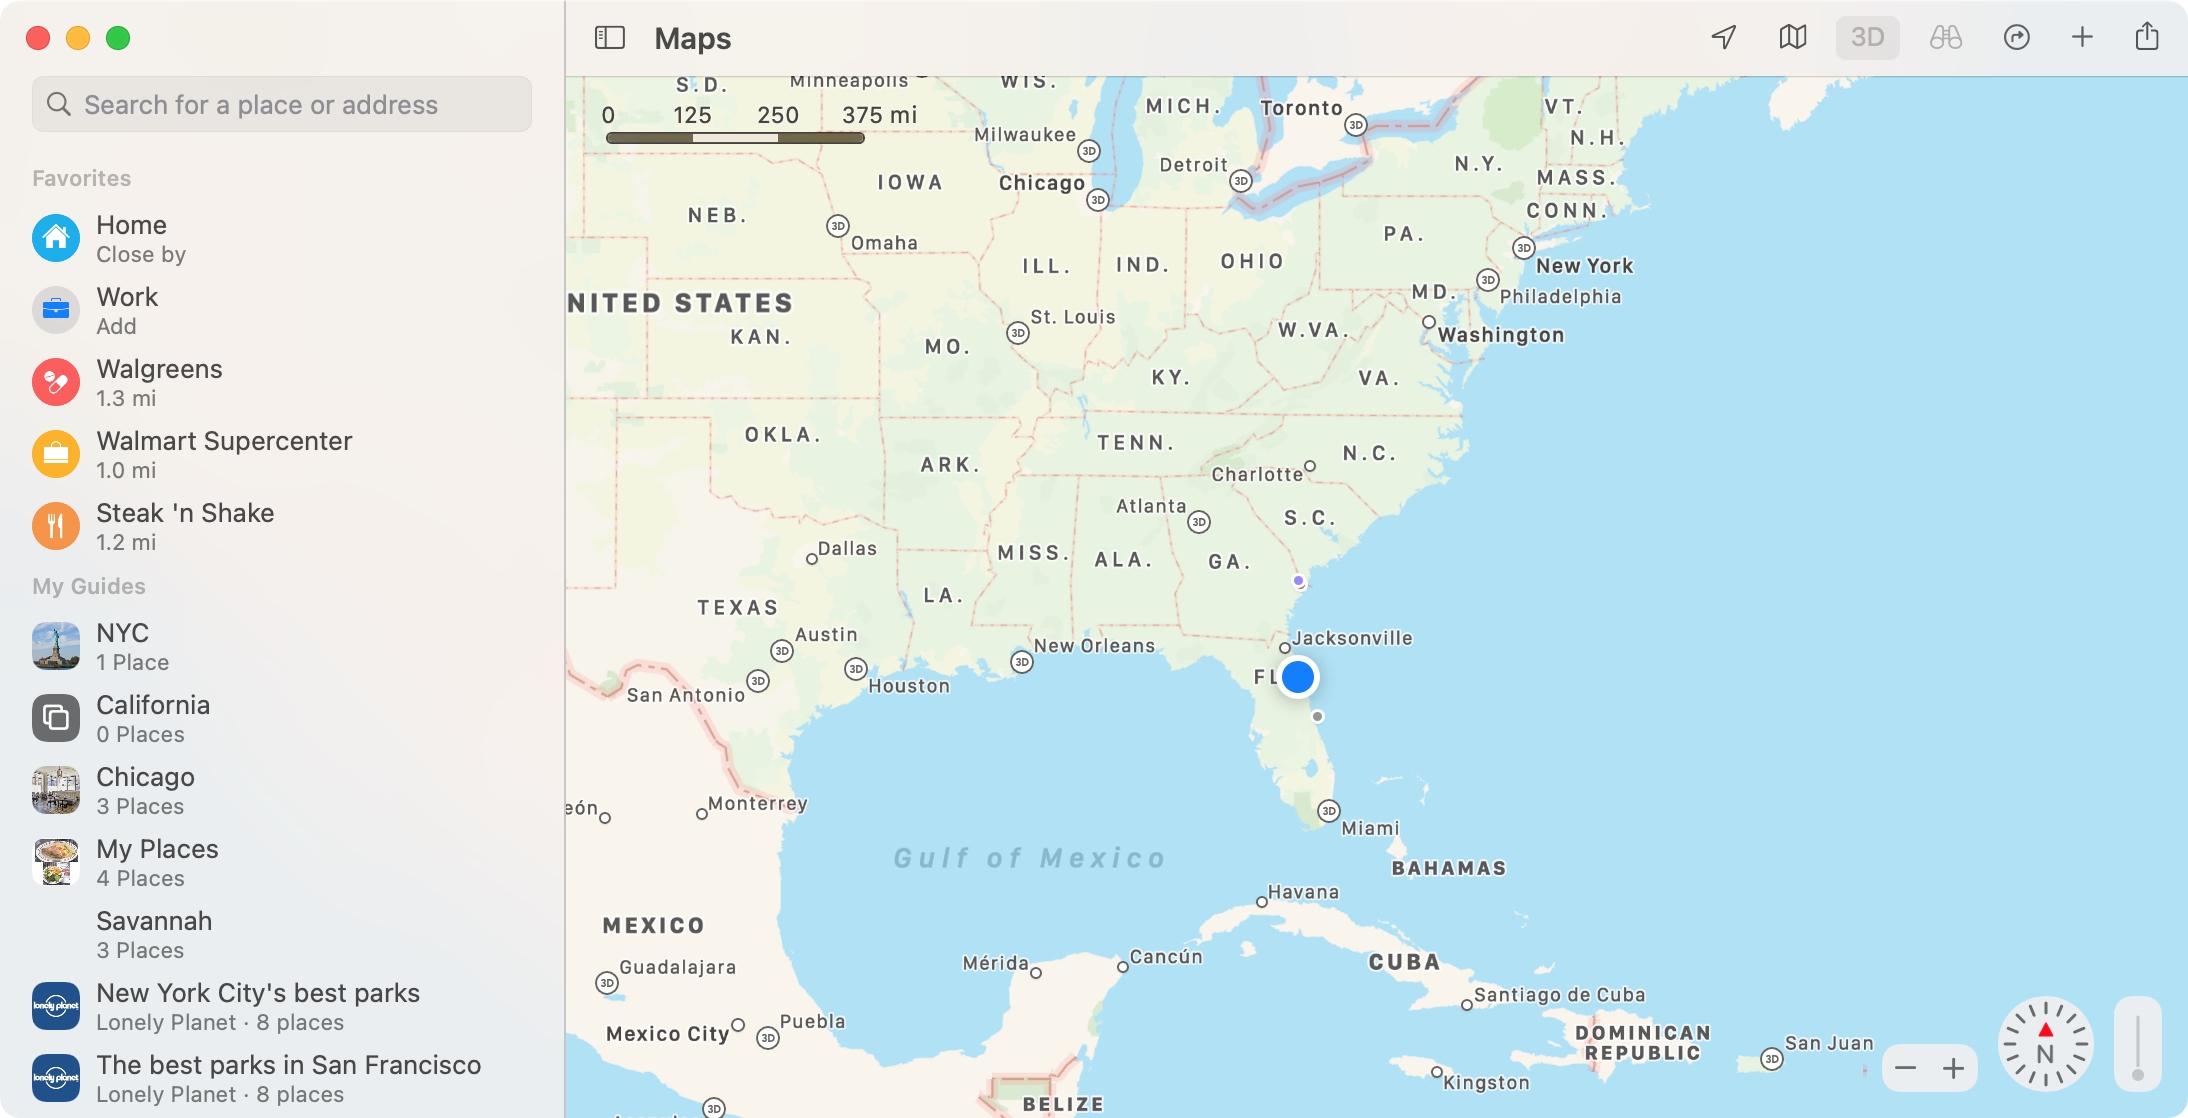
Additionally, the Search box no longer appears at the top. This gives you a full view of your map instead. You can access the search feature in the sidebar along with Favorites, Recents, and My Guides (below). Plus, you can still use the tab bar for switching between multiple locations.
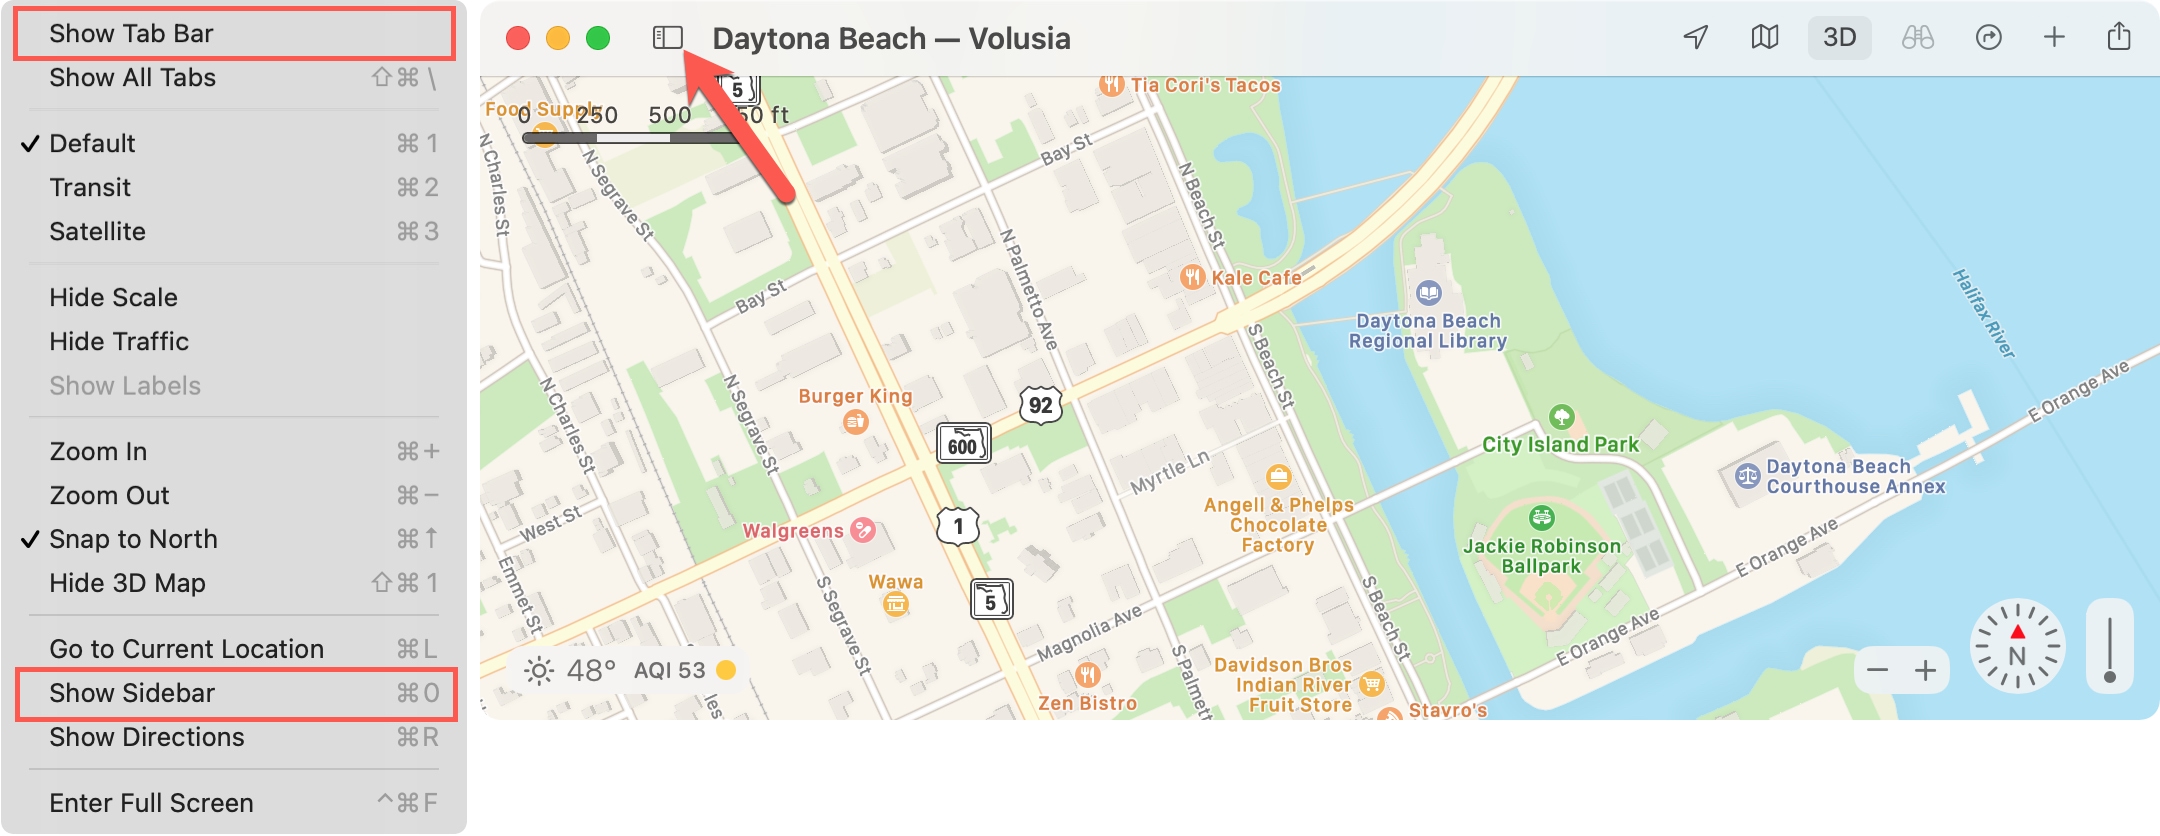
Select View from the menu bar to Show Sidebar and/or Show Tab Bar. You can also quickly open and close the sidebar with the Toggle Sidebar button on the top left of the Maps window.
Related: Keyboard shortcuts for Maps on Mac
Search
The Search tool in Maps is still as helpful as ever. You can quickly find businesses near a location and you can easily narrow down the options.
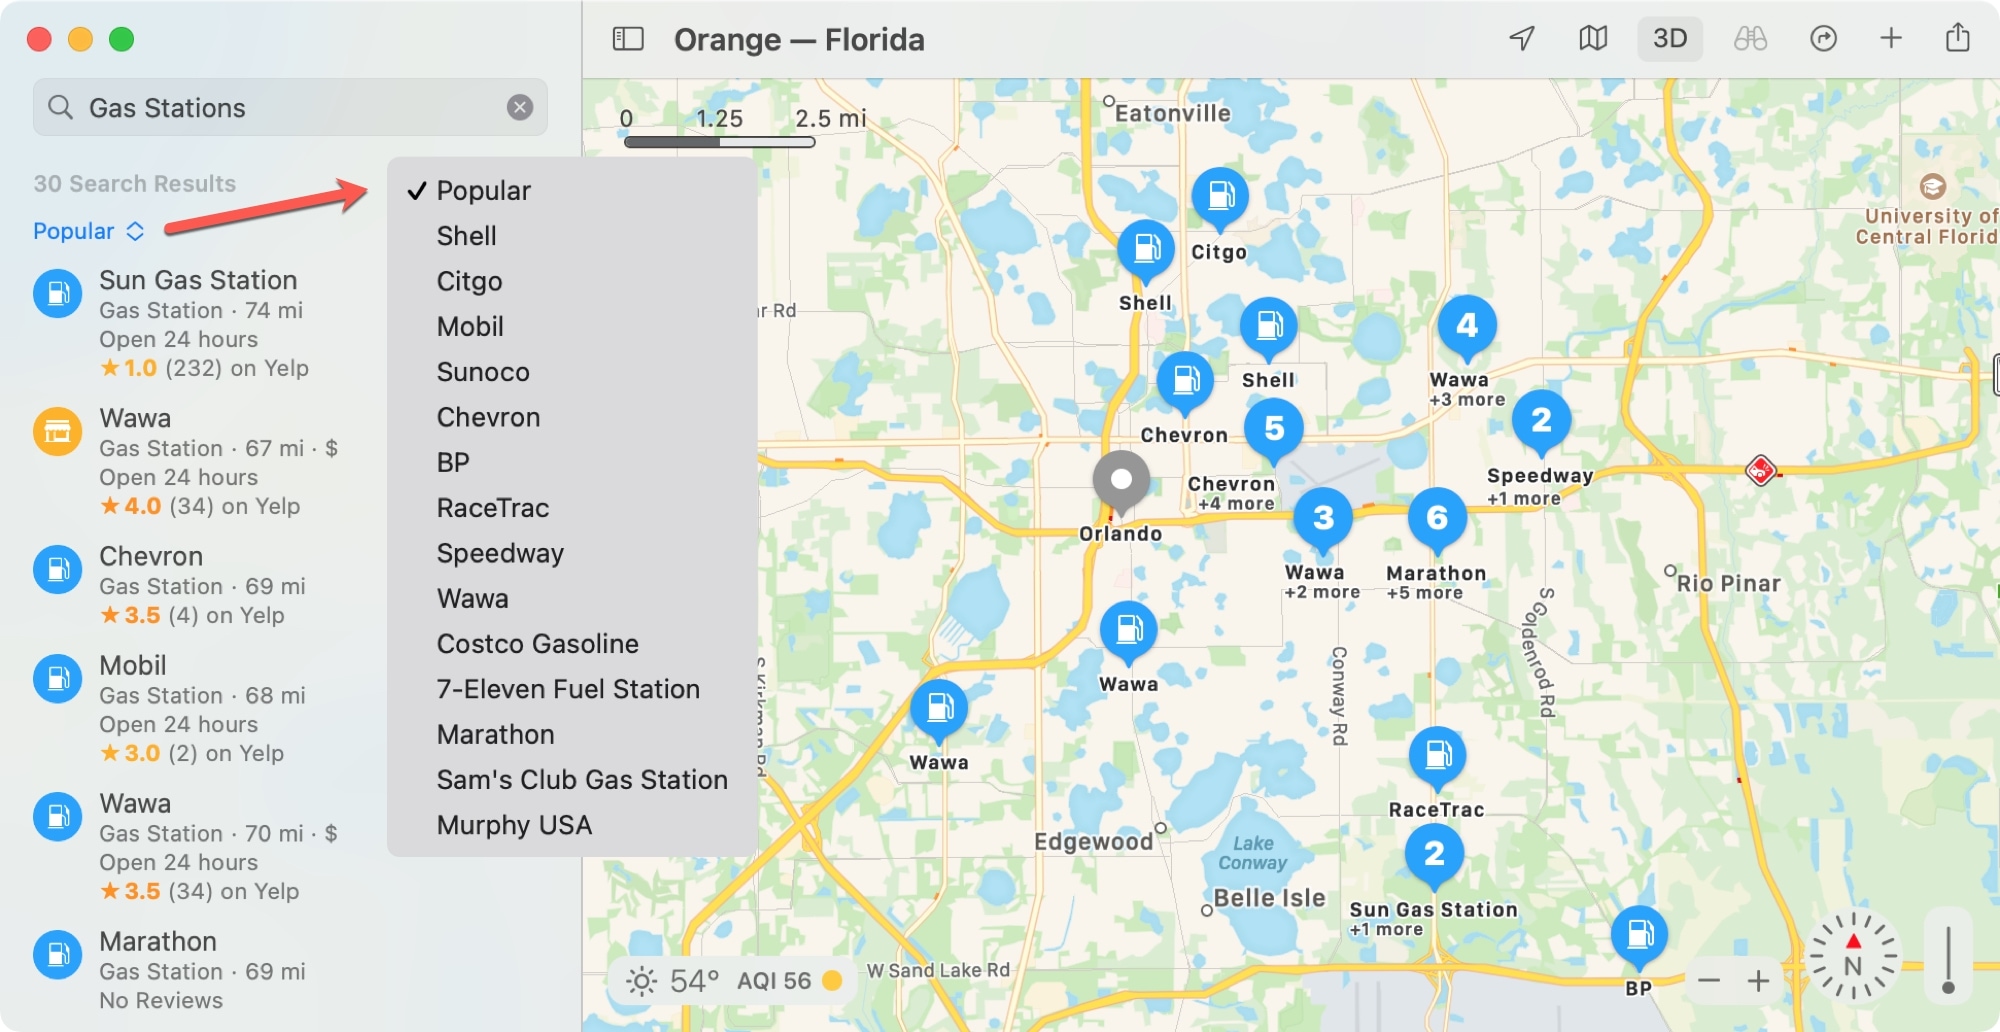
Click an option under Find Nearby like Fast Food, Restaurants, Gas Stations, or click More for other types of places. When you see the results, click the sort drop-down at the top of the list which defaults to Popular. Then, pick a business name, cuisine, or other option to view only those locations.
Favorites and Recents
The improved sidebar in Maps on Mac is your go-to spot for saved locations called Favorites or those you looked up last named Recents. Click to expand Favorites or Recents and select a location to plot it on the map and get directions.
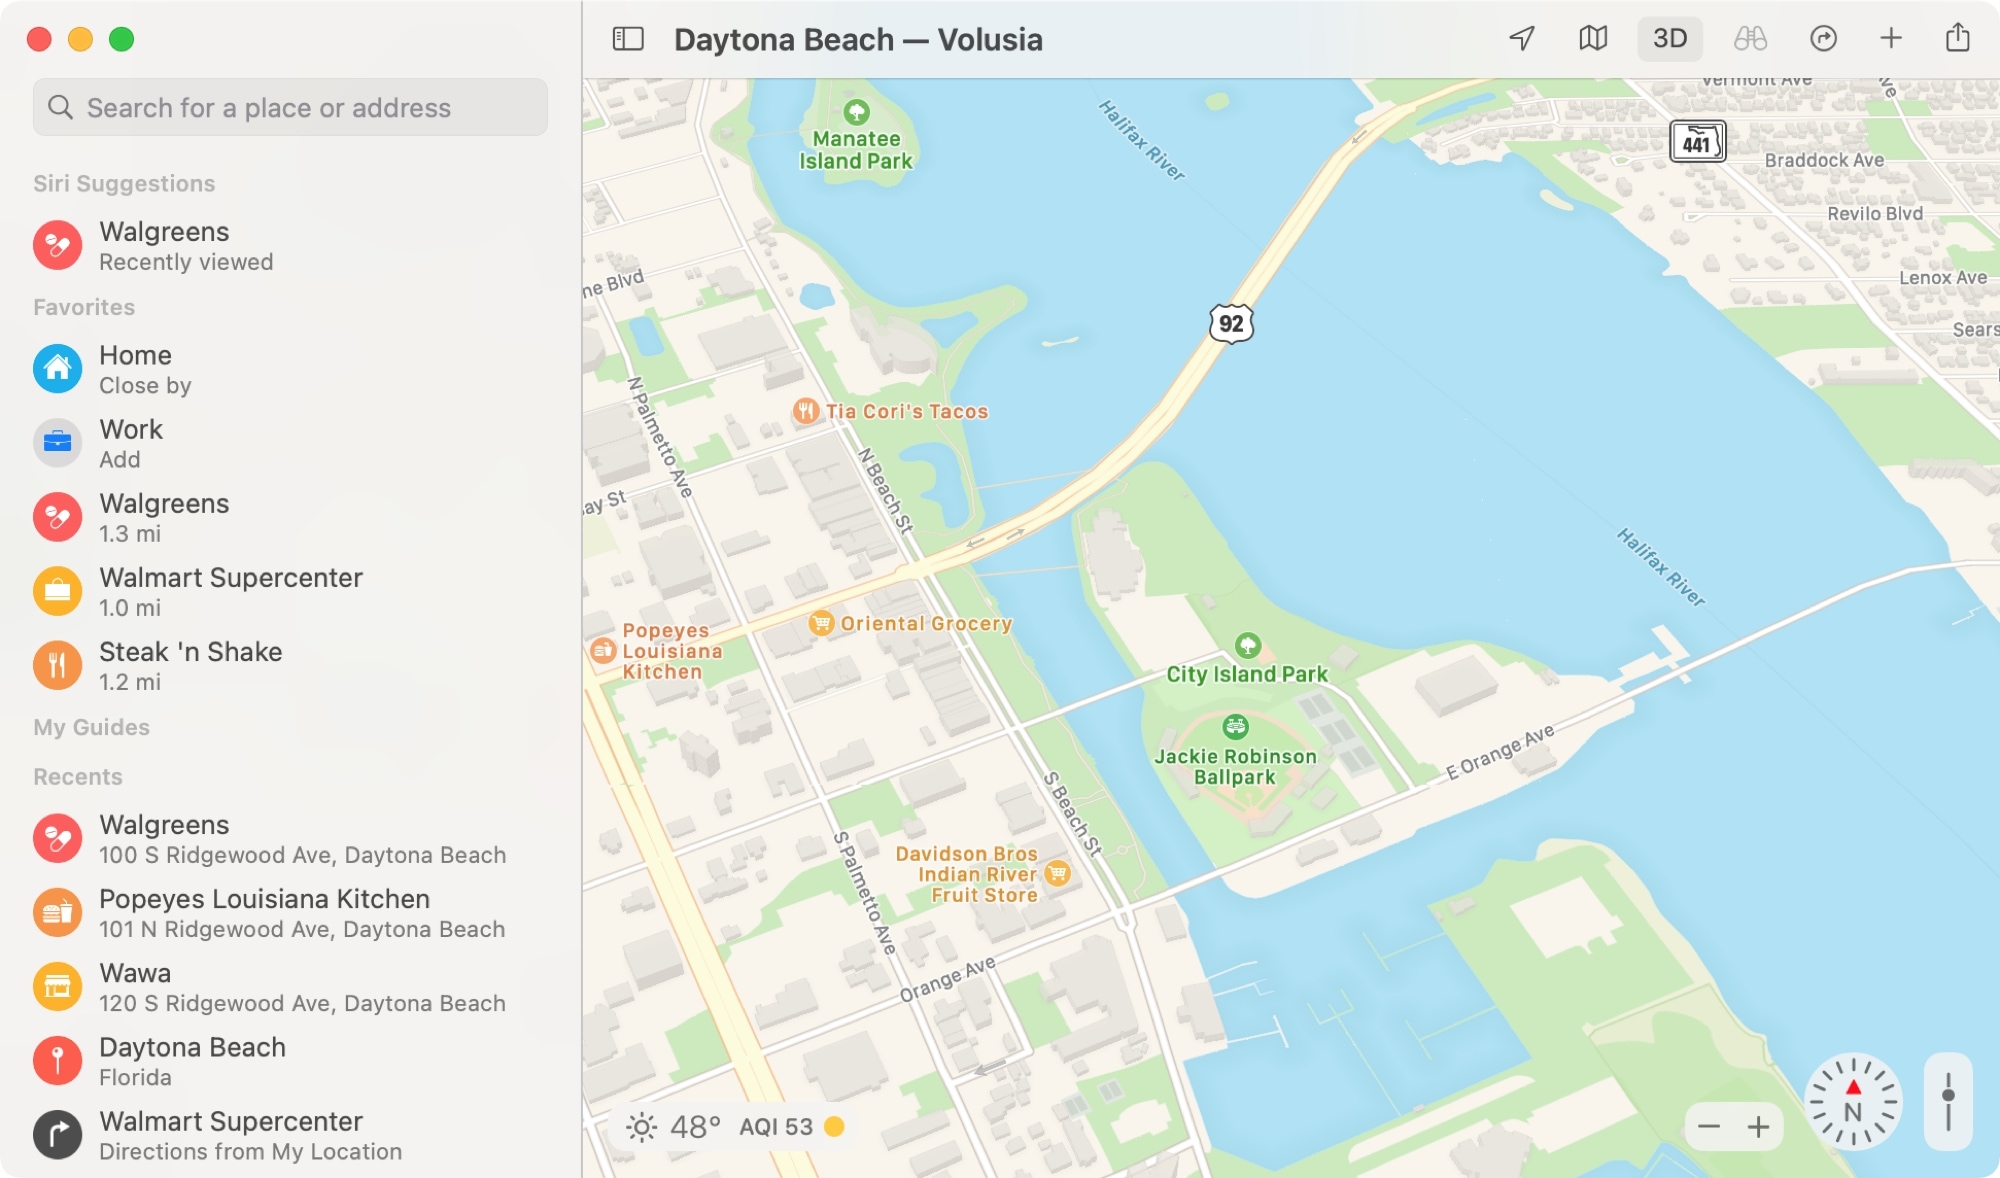
You may also see Siri Suggestions display for locations that might interest you.
My Guides
The newest feature for planning your next road trip or getaway is My Guides. As we explained for the city guides feature on iPhone and iPad, these are curated collections pointing out noteworthy spots in that city. So if you added any guides on your iOS device, you’ll see those in the Maps app on Mac too.
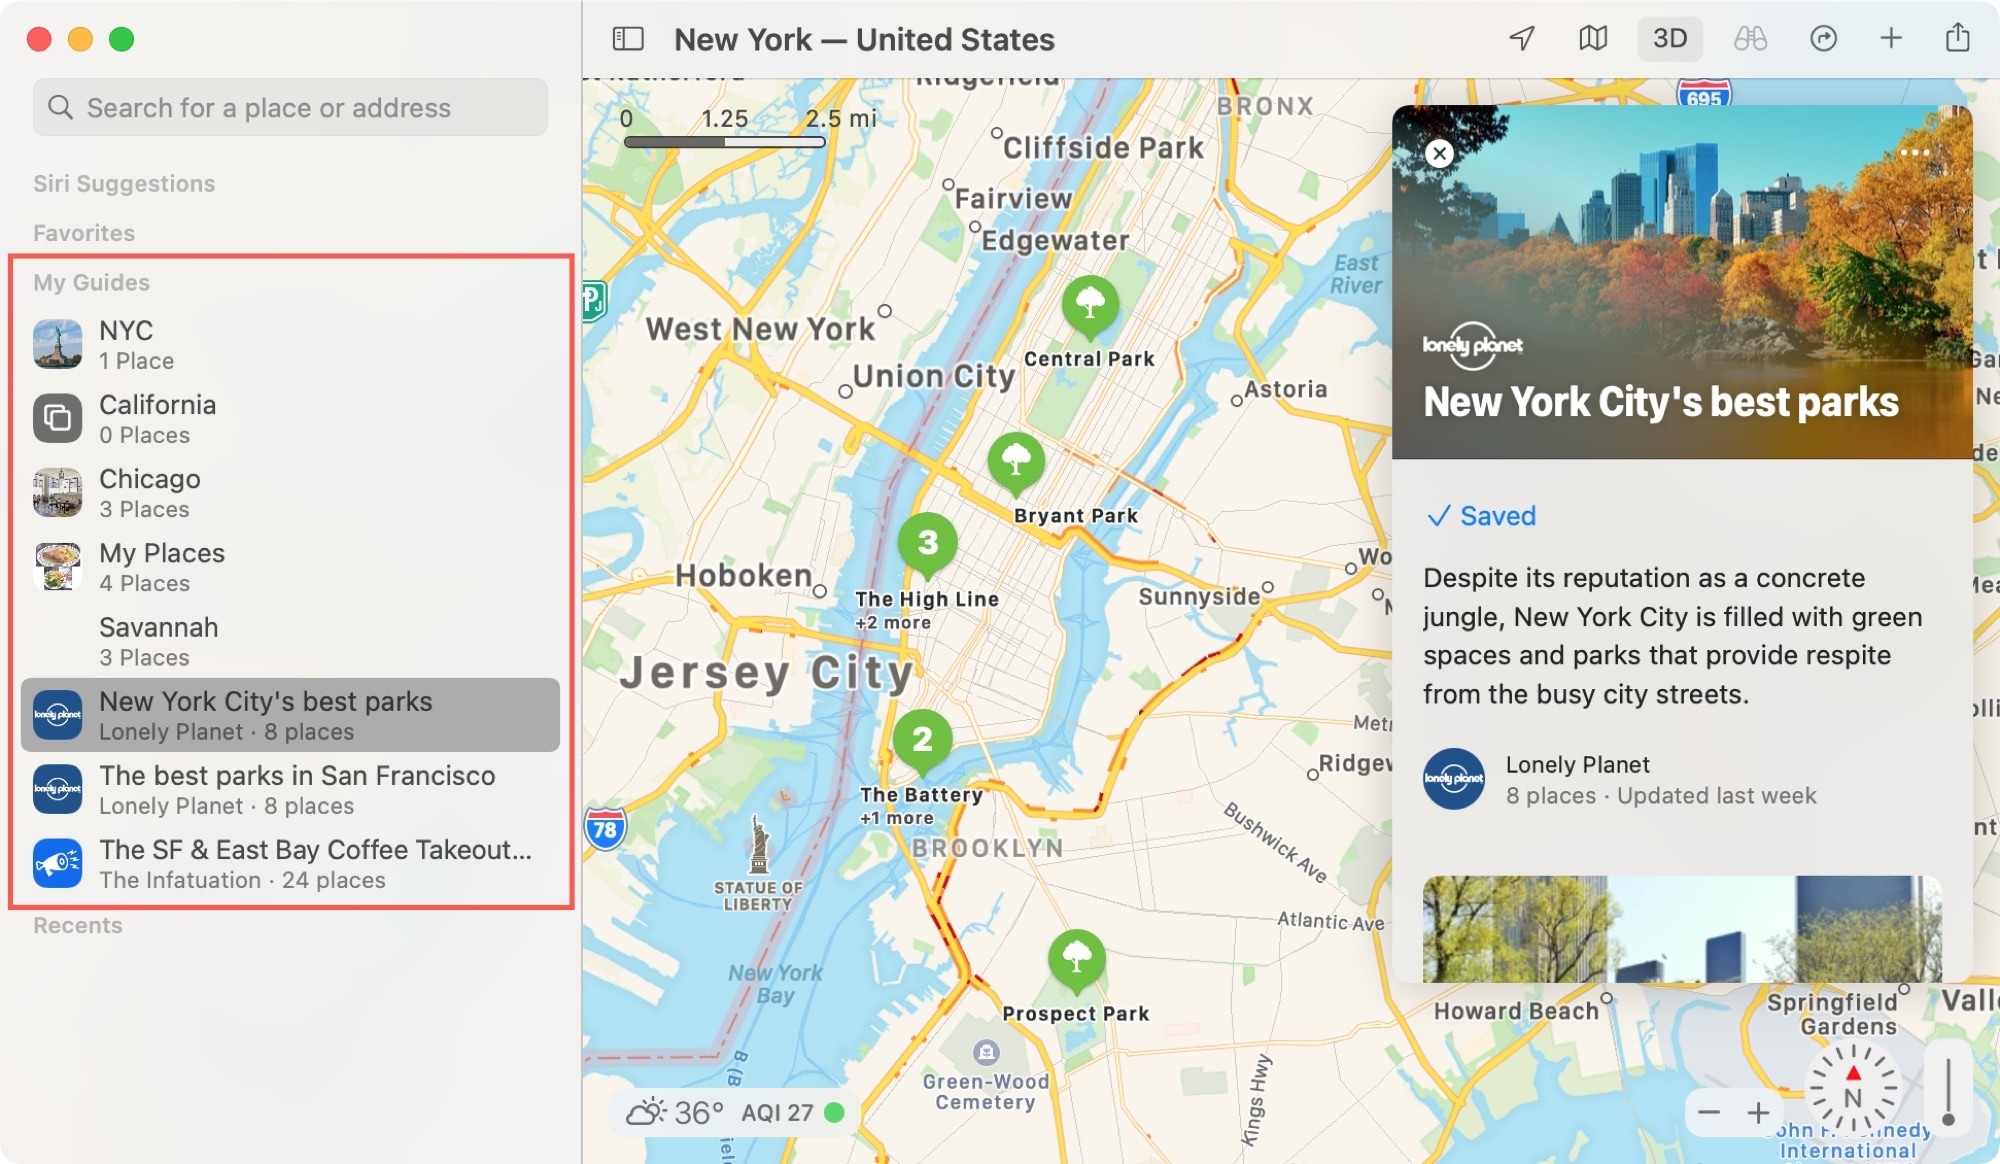
You can also add a guide you find, create your own, edit one, and assign a cool photo. Then, save, share, or send a guide to another device.
Check out our full article on using the curated city guides in Maps on Mac for details on using this convenient and useful feature.
Getting directions
To get directions click either View > Show Directions or the Show Directions button in the toolbar. You’ll see that when you request directions, they appear in a small pop-up window on the right.
Enter your From and To locations to get started. You can choose your method of travel, which includes the newest cycling directions feature (available in select areas). You can also avoid tolls and highways by clicking Options and reverse the locations, all in this pop-up window.
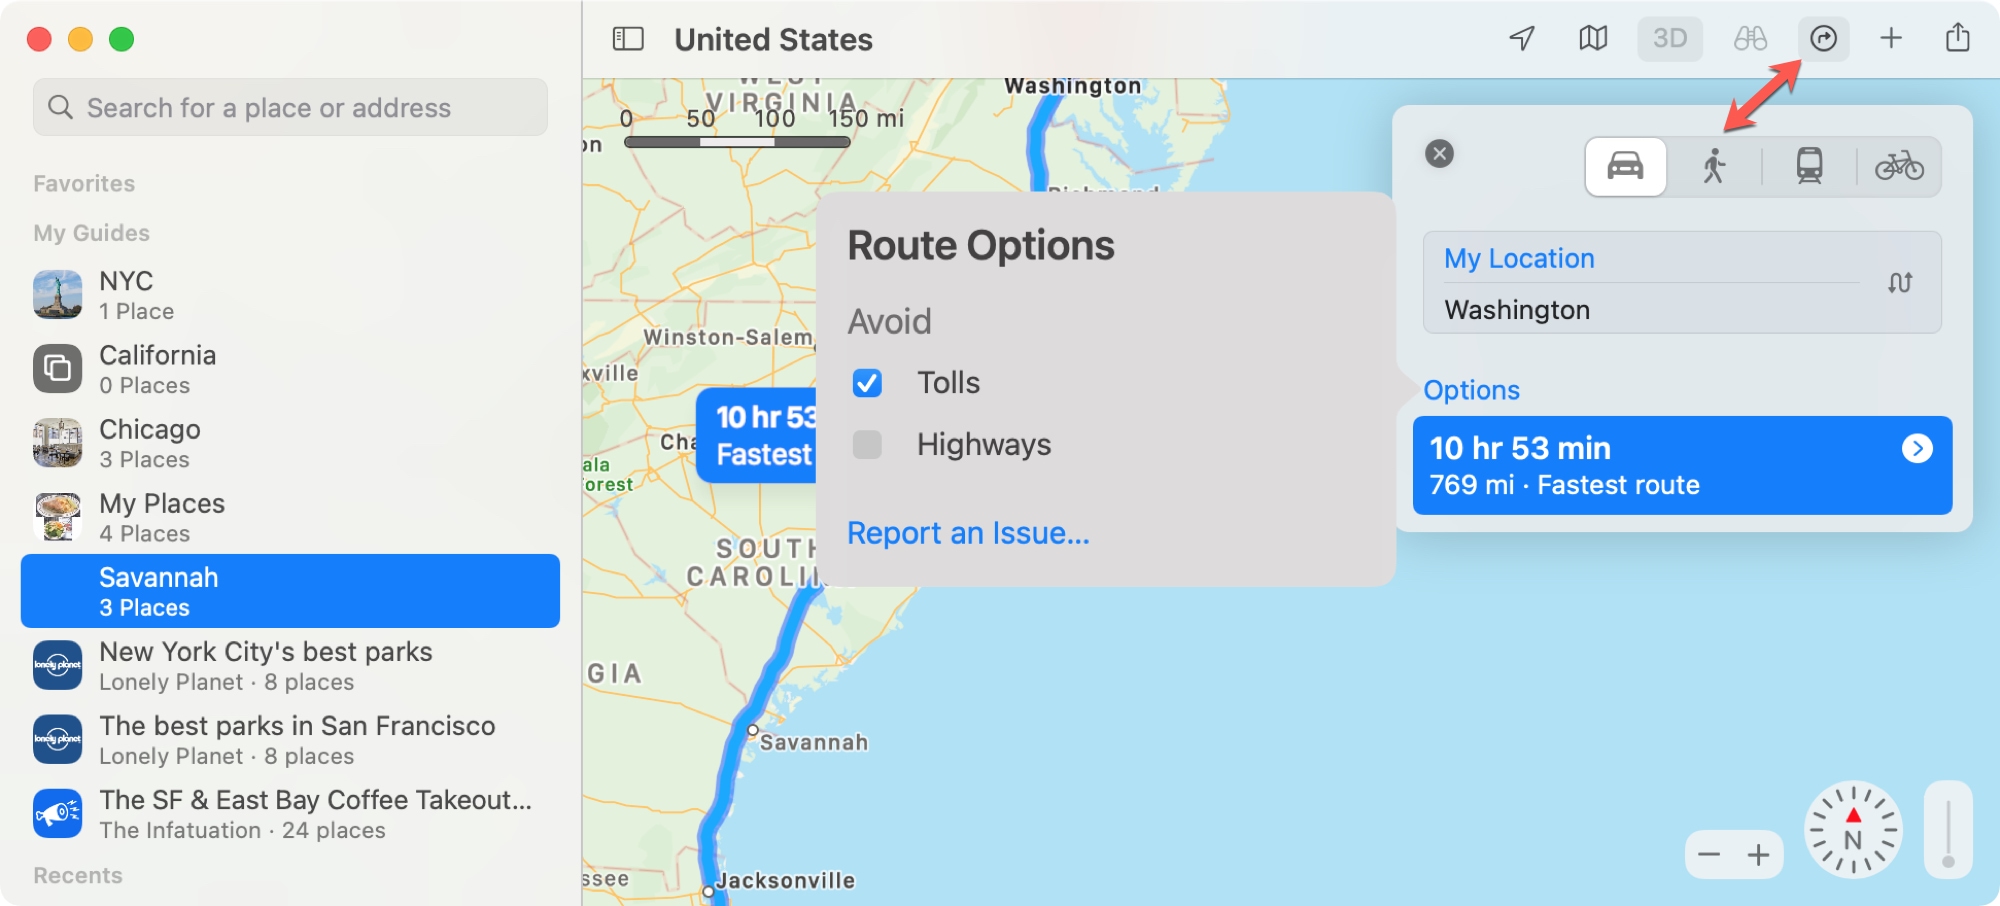
If there is more than one set of directions to a location, click the one you want to use to display it on the map and expand it in the pop-up to see the turn-by-turn directions.
Viewing location details
You can still view details like address, phone number, hours, reviews, and more for businesses and other places in Maps. Just click a location and pop-up window appears giving you all available information.
There are buttons at the top to call, visit the website, add to a guide, and share it. Click the three dots on the top right to add it to your Favorites, send to another device, copy the coordinates, and create a new contact.

This window can hold tons of details and provide helpful actions depending on the type of location. So if you’re interested in that spot, take a moment to look through it.
Related: How to see locations that accept Apple Pay in Apple Maps
Accessing Maps Preferences
For adjusting settings that apply each time you use Maps on Mac, you can head to Maps > Preferences from the menu bar. There, you have two tabs you can configure.
General settings
The General tab is where you can select your distance units, show labels, display weather conditions and air quality, and more.
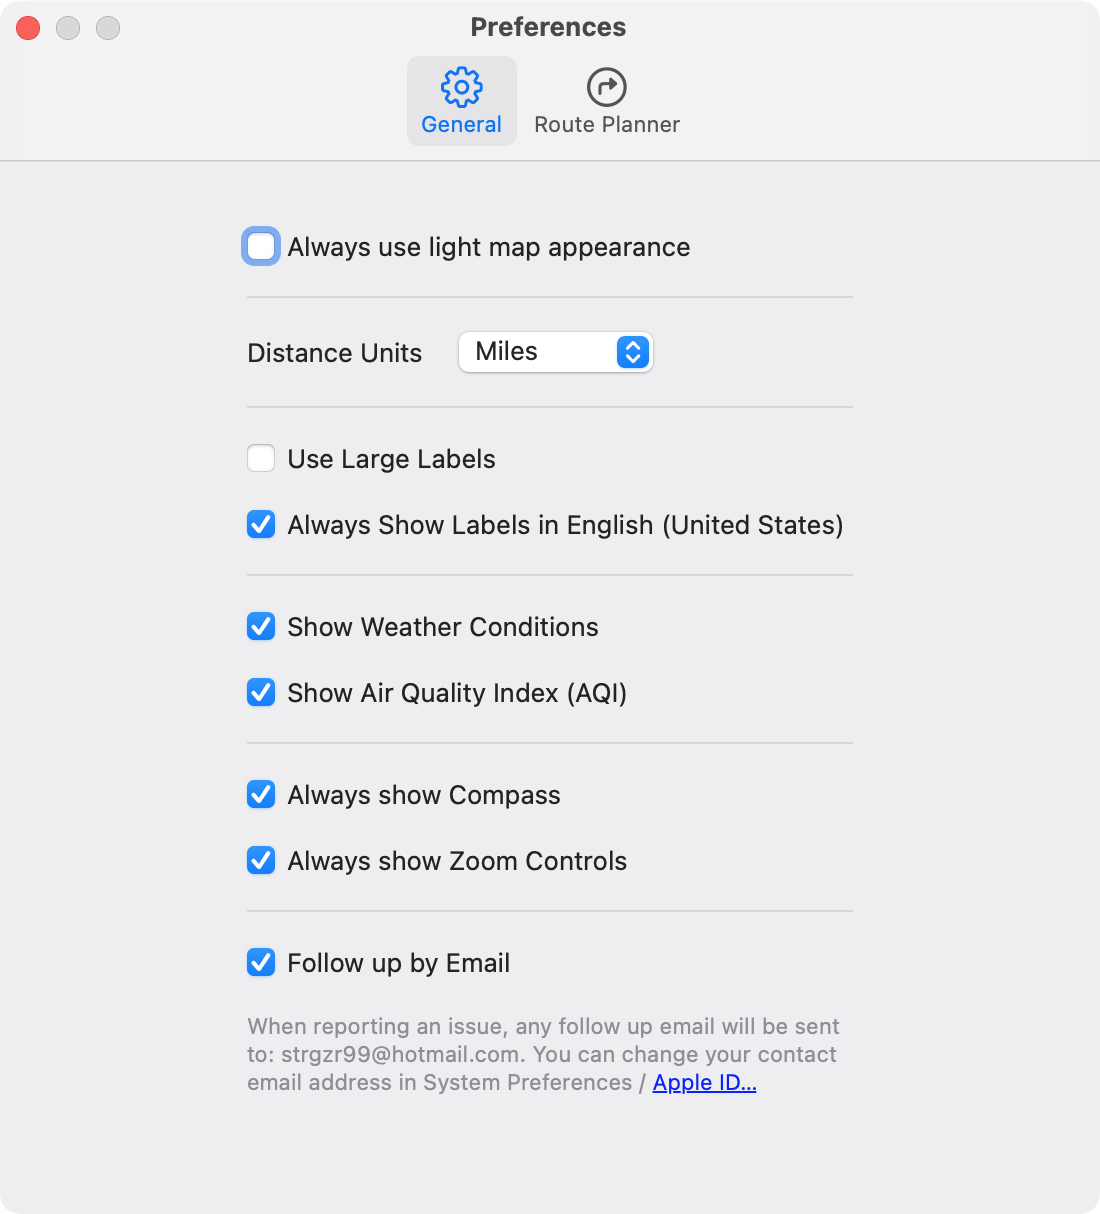
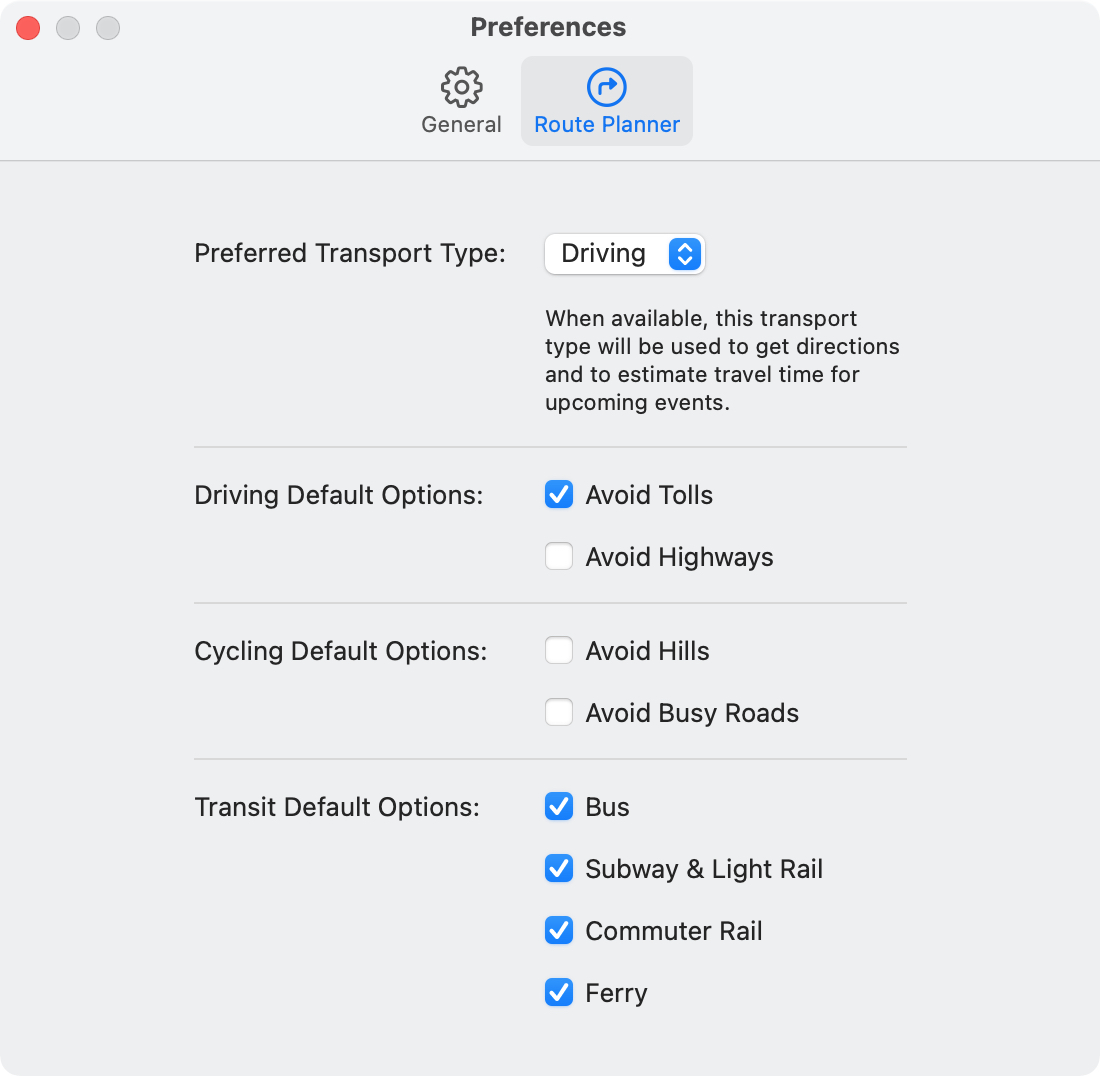
Route Planner settings
The Route Planner tab is where you pick your preferred method of travel and default options for driving, cycling, and transit.
Wrapping it up
Don’t take the Maps app on your Mac for granted. It’s a terrific way to find nearby places, new spots to visit, and information about local businesses. Along with seeing directions, the updated Maps on Mac has a lot to offer and the improvements with macOS Big Sur make it better than ever.
What’s your favorite feature in the Maps app? Is it a new feature or one that has been enhanced?