Learn how to style a table in the Numbers app on your Mac, iPhone, or iPad to change the table’s appearance and make it visually appealing.

Numbers is a terrific app for working with, well, numbers. For creating tables of data that you can manipulate and track, adding formulas for automatic calculations, and more, it works great. And if you handle spreadsheets in Numbers often, there may be a time when you want to print or share a sheet.
Rather than basic black and white, you can spruce up your tables in Numbers with a bit of style. This is ideal for displaying your data with a nicer appearance for those viewing it.
Add style to a table in Numbers on Mac
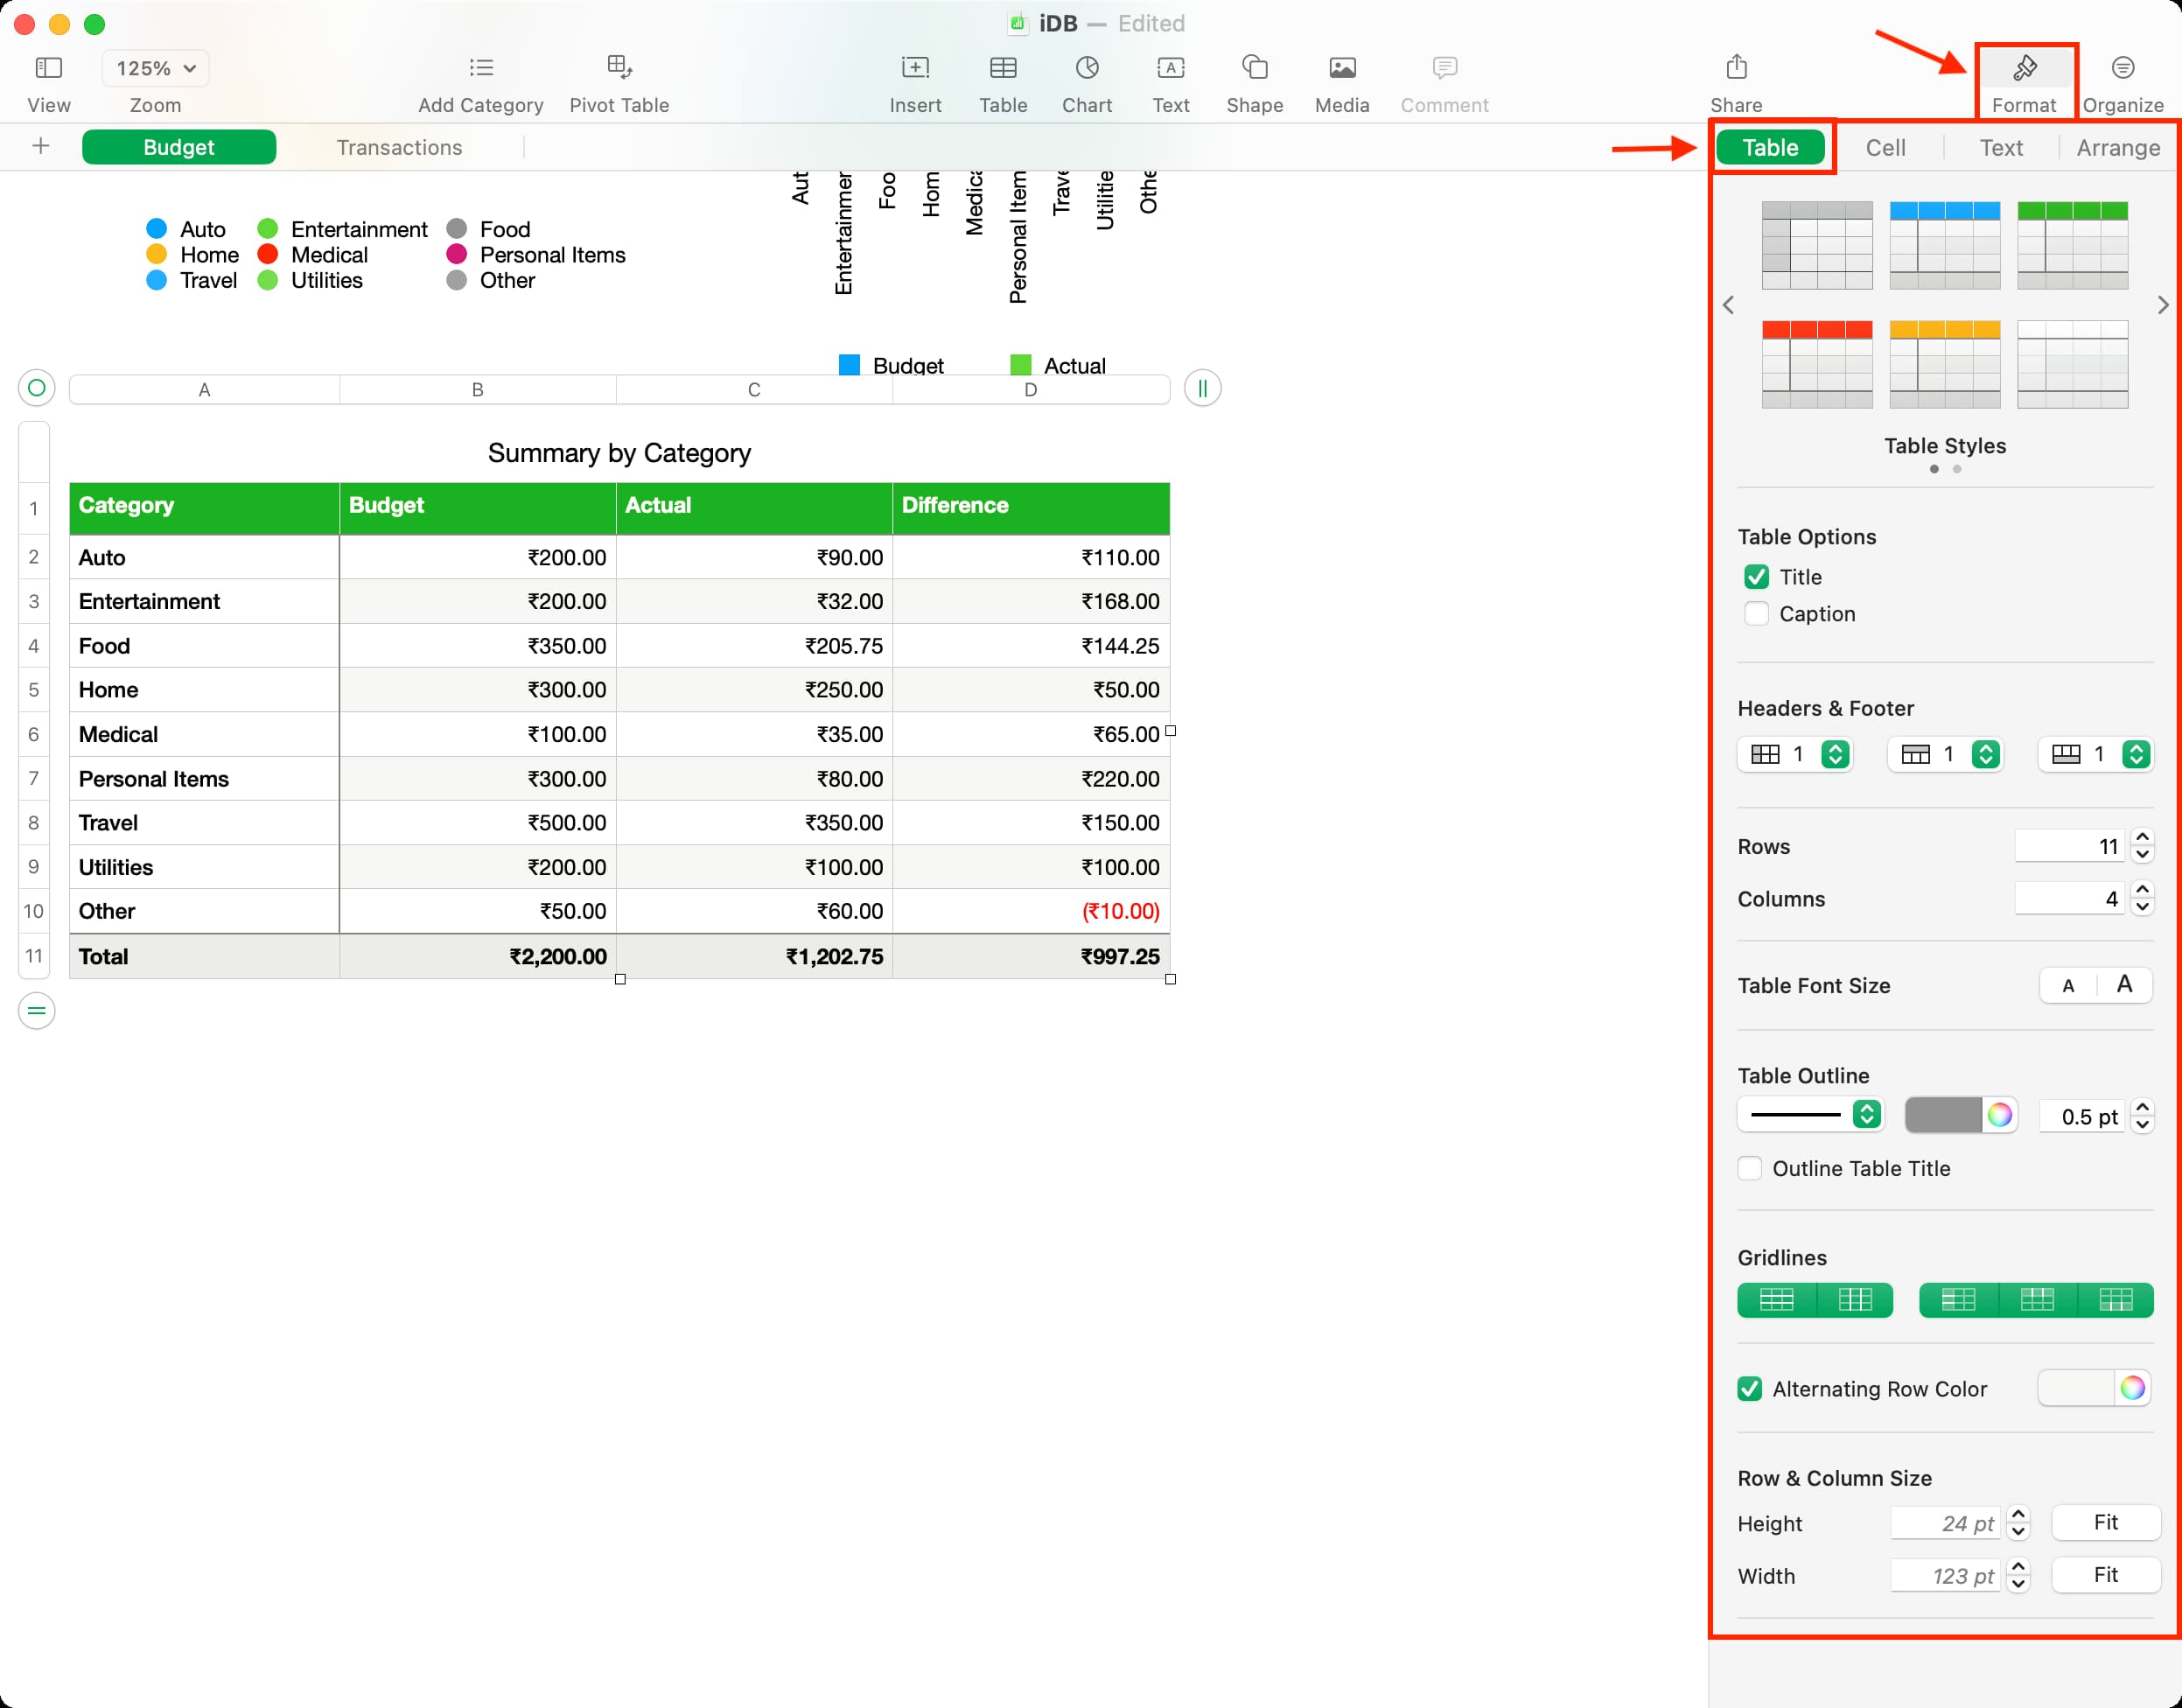
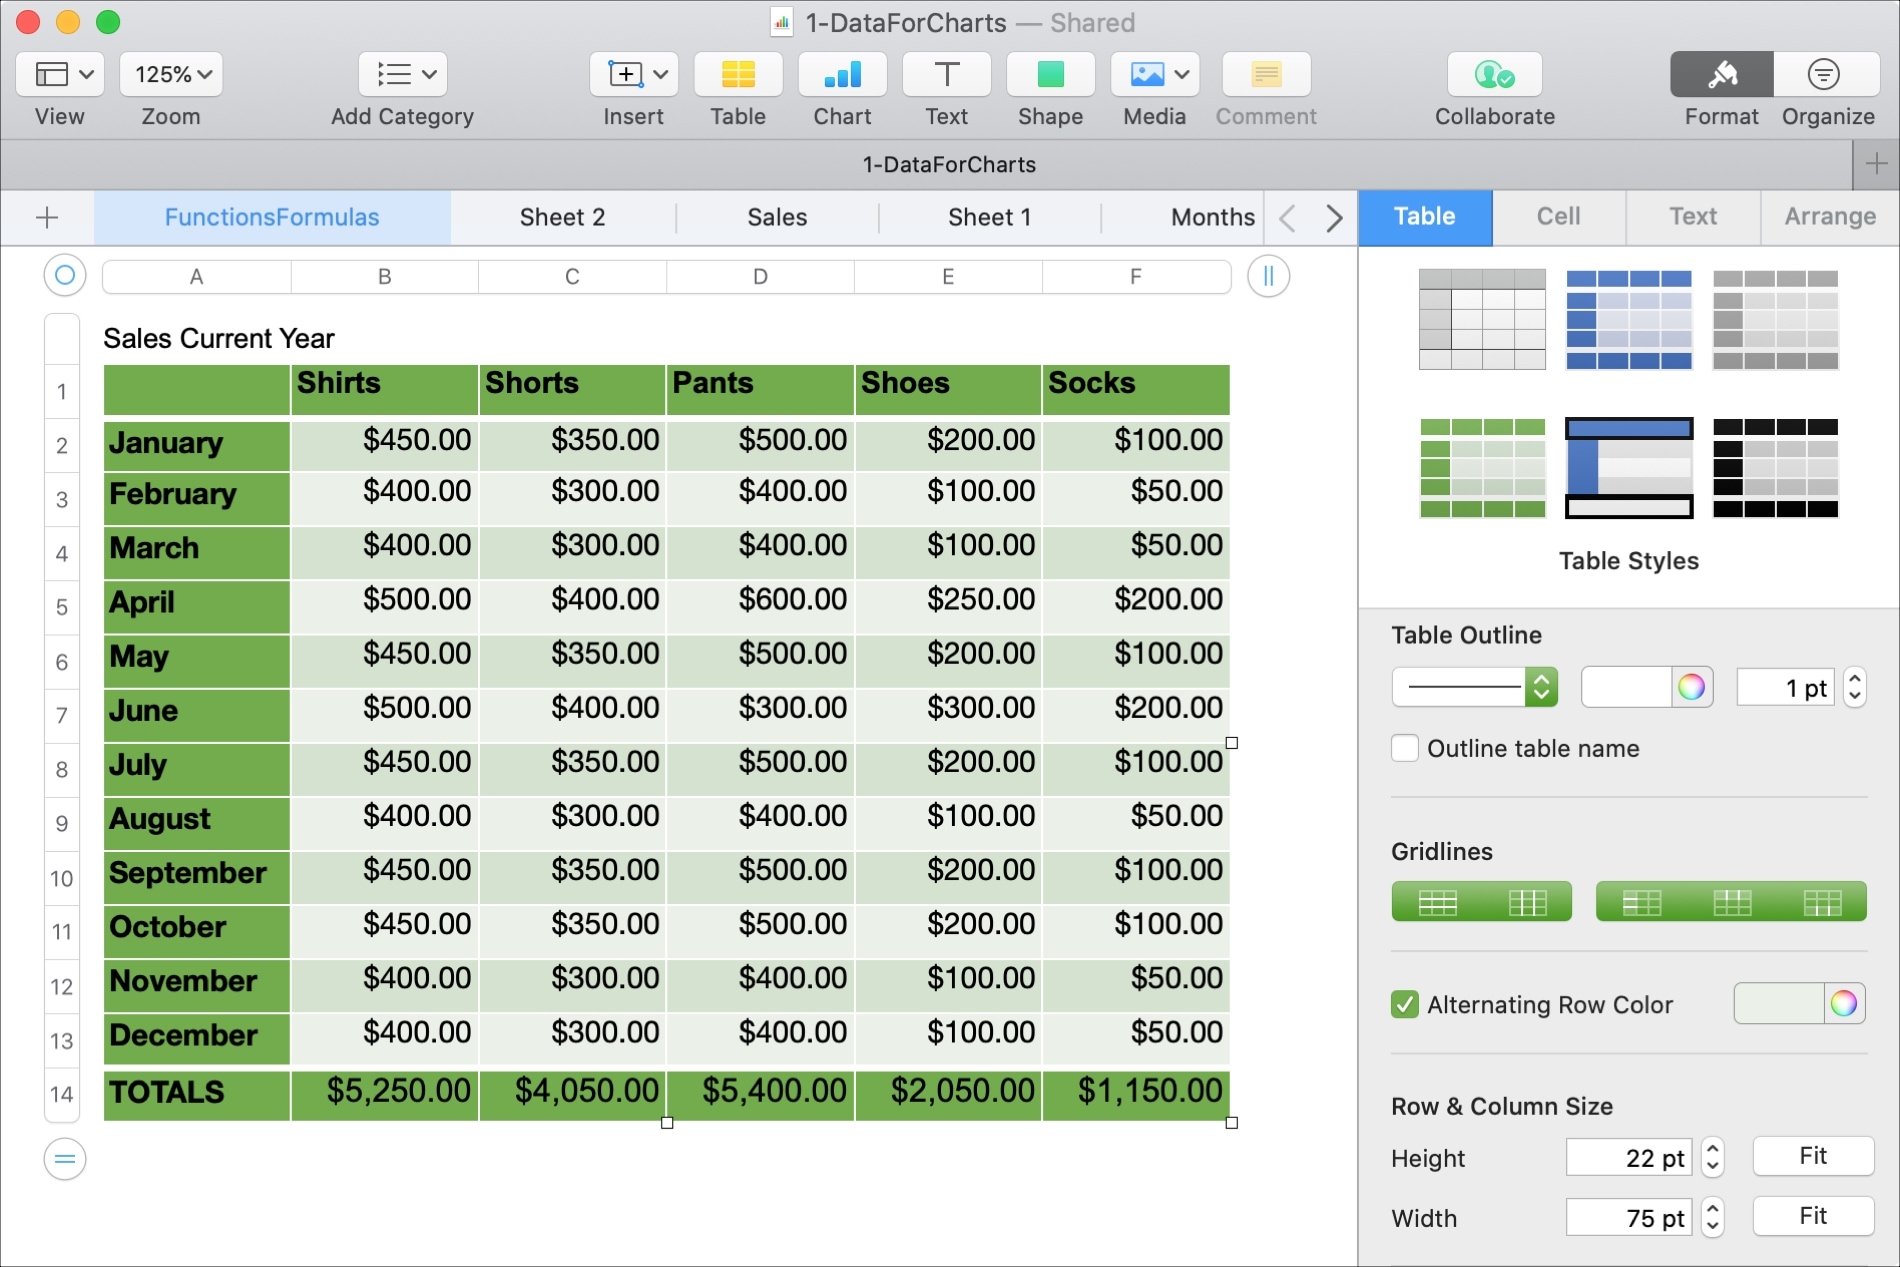
1) Open your workbook in the Numbers app, select a sheet containing the table, and then pick your table by clicking the circle in the upper left-hand corner of that table.
2) Click the Format button to open the sidebar.
3) Choose Table at the top.
Start with a style
You have six preset Style options right at the top of the sidebar that you can use for your table. This is a great place to start with designing your table.
You can click each one and see your table change immediately. The default design is on the one in the upper left corner of the Style section.
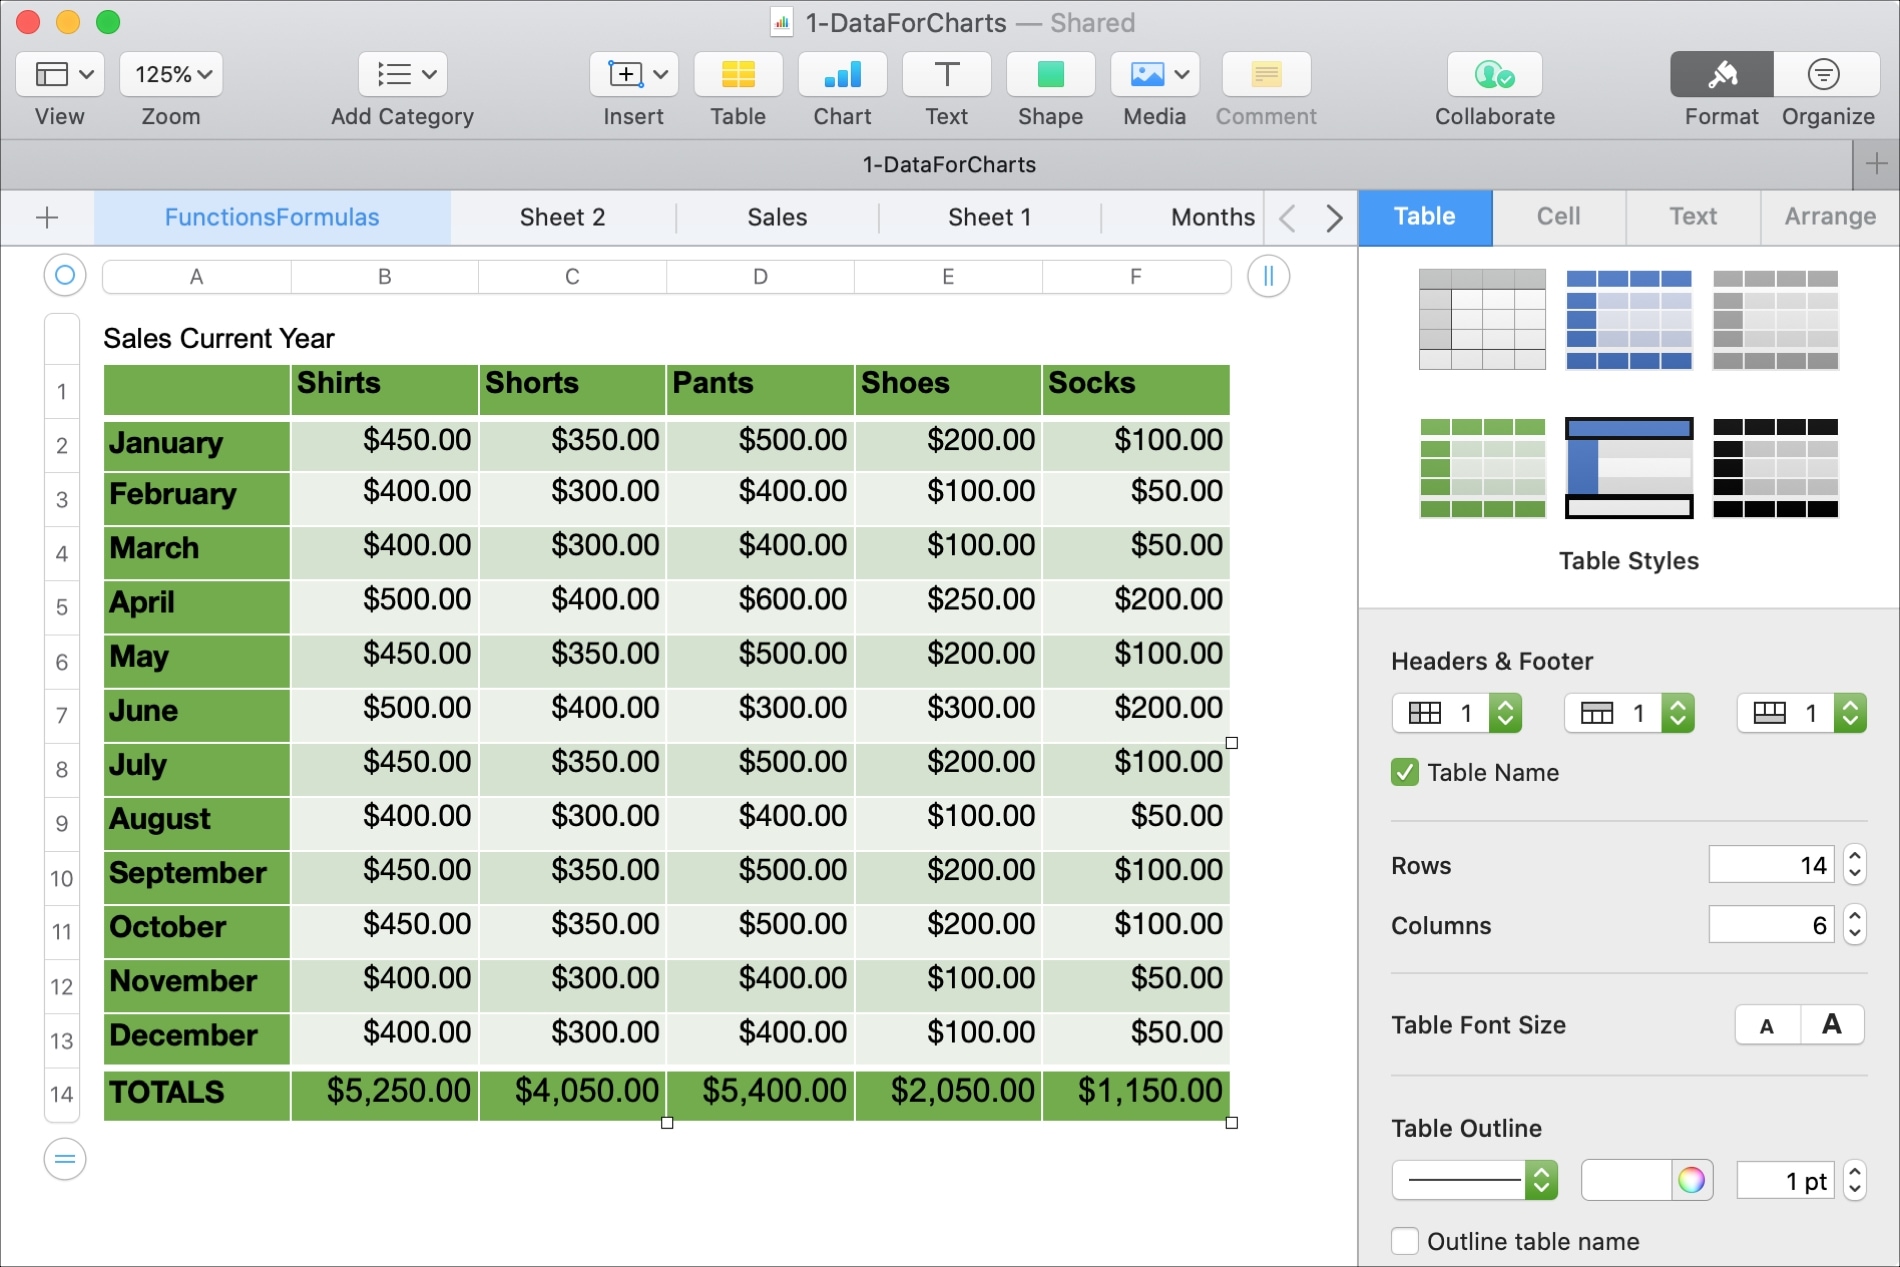
Table name
You’ll also see a setting for Table Options (Title and Caption). Check those boxes if you want to display the name of your table at the top of it and a caption underneath it.
Below the Style, you’ll see Header & Footer with three drop-down boxes. These let you adjust how many columns and rows will have those colors you choose in the Style section.
So, if you want the first row and column in that color, choose the number 1 in those drop-down boxes. And if you want the last row in the table the same way, like in the screenshot below for our Totals, choose the number 1 for that drop-down box.
If you have more than one row or column that you want to be highlighted, just pick that number in the corresponding drop-down box.
Rows and columns
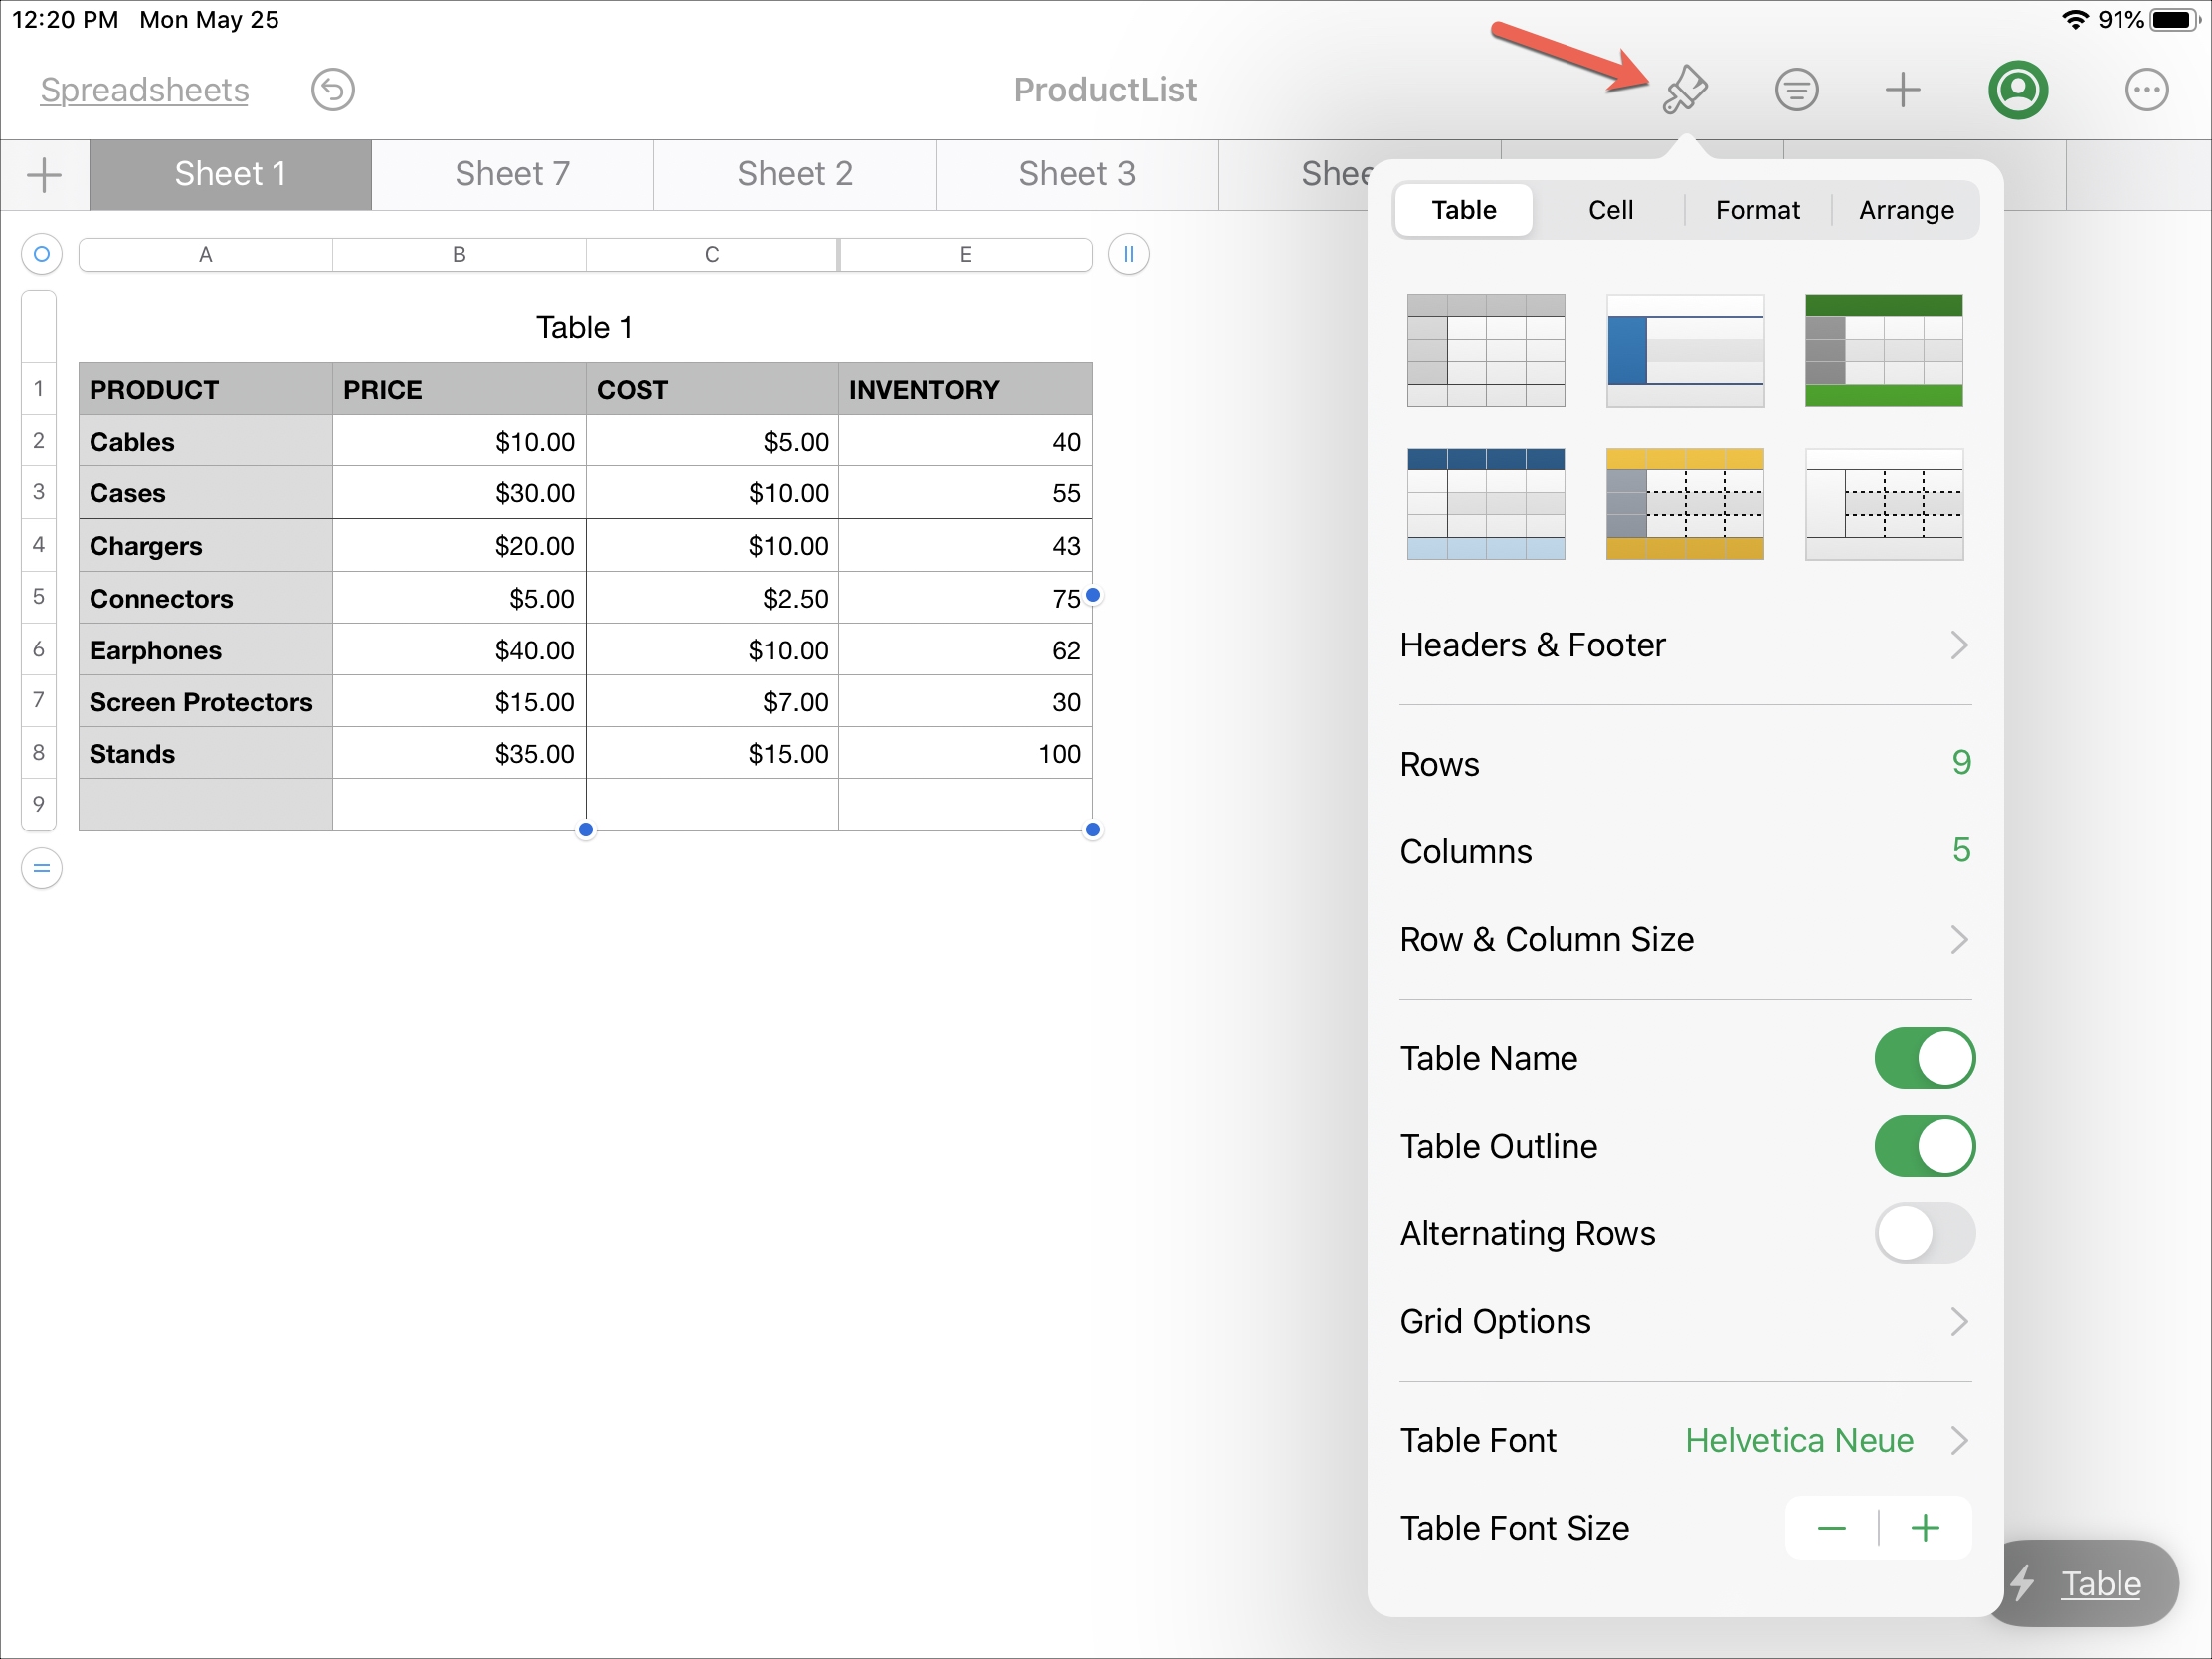
If you want to add more Rows & Columns to your sheet, you can do so in this area of the Format sidebar. Note that you cannot remove either if you have data populated in them. But you can easily add a row or column this way in addition to doing it in the table itself.
To add a row or column in the table, click the row or column header to display the menu and then pick an option.
Table font size
You can adjust the font size for any individual cell, row, or column that you want. But if you prefer to adjust the size of the entire table, either larger or smaller, you can do it here by clicking the Increase (large A) or Decrease (small A) buttons next to Table Font Size.
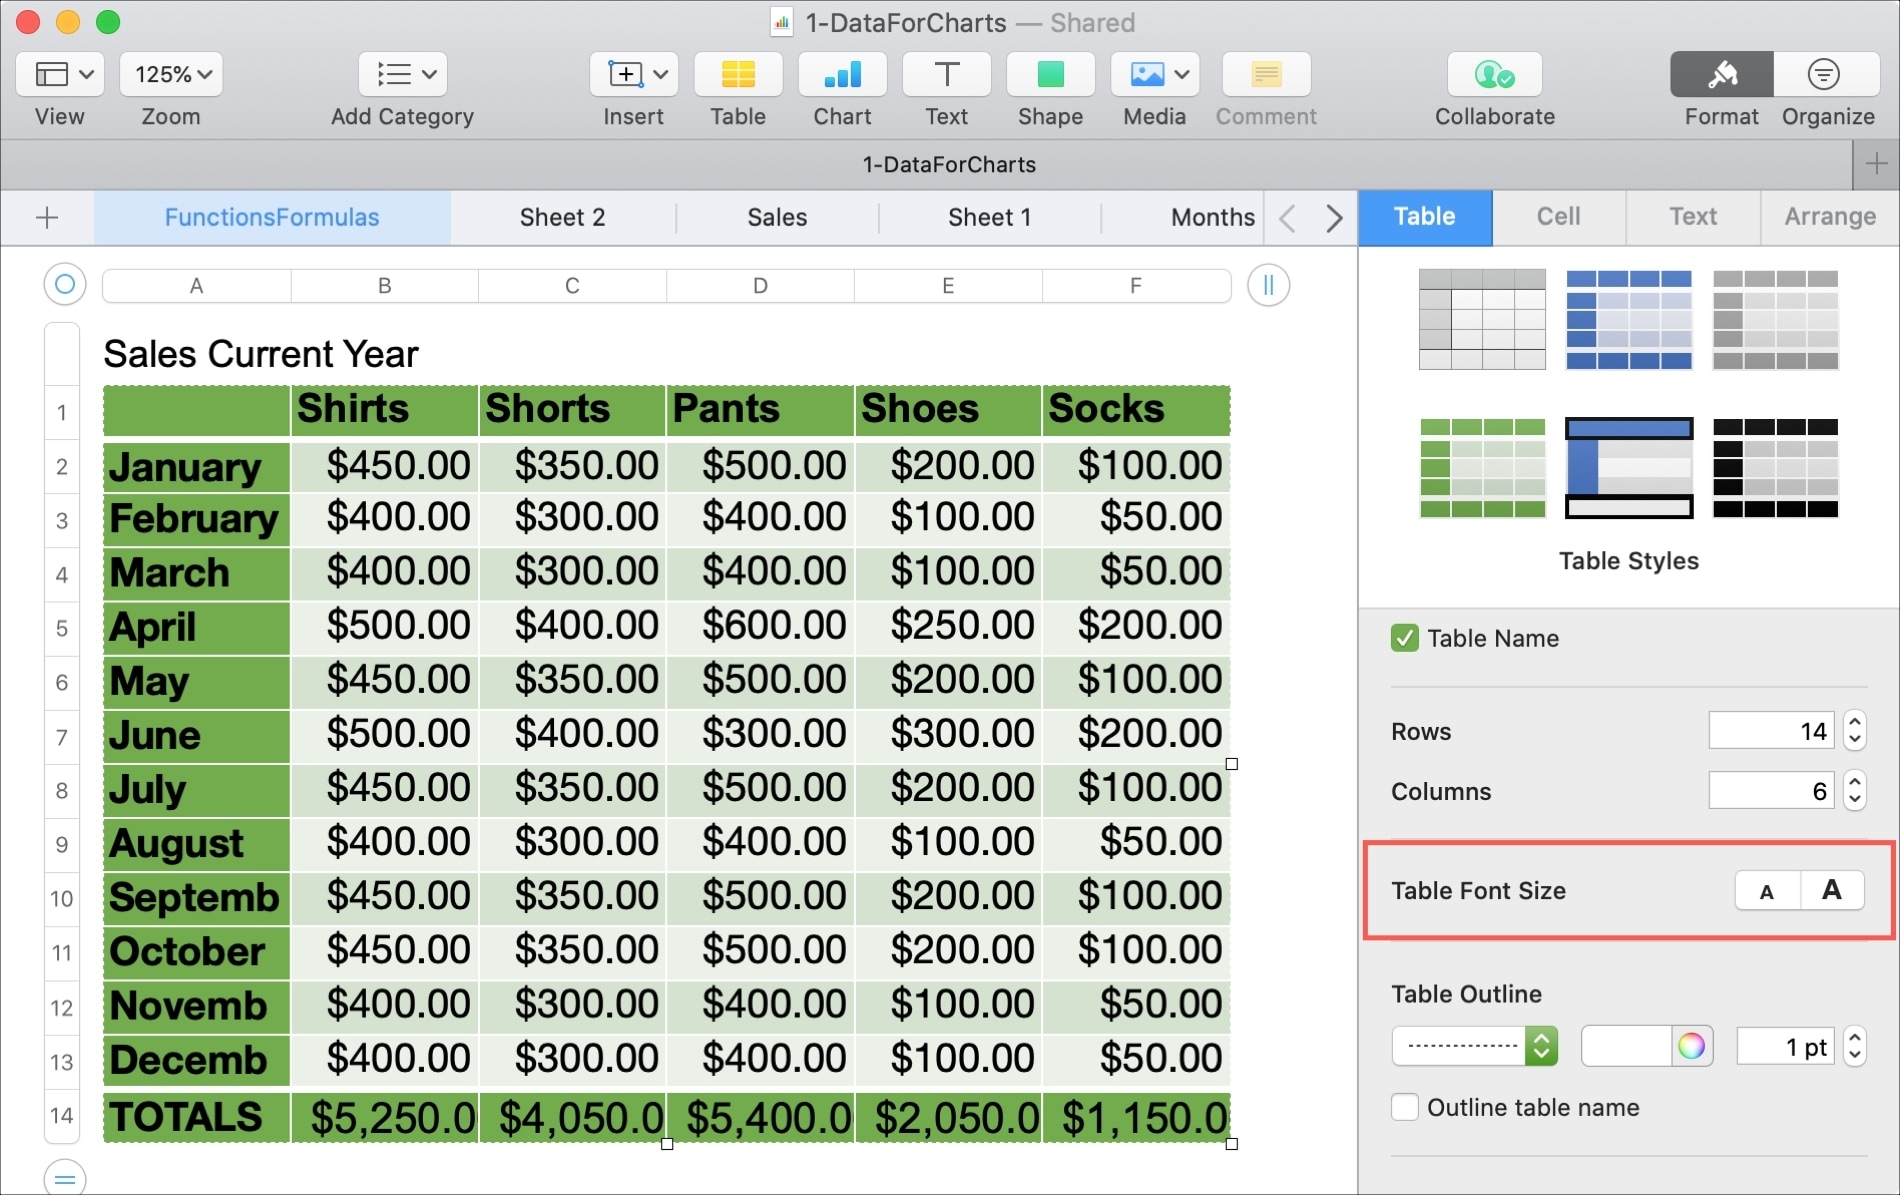
This will change the font size for the whole table by one point. For example, say you have your row headers in 12-point font and your data in 11-point font. If you hit the button to increase the table font size, your headers will then be in 13-point font and your data in 12-point font.
Table outline
Next, you can change the style, color, and size of the Table Outline. This is basically the border around the entire table. These changes are very subtle but might be just what you’re looking to do. And you can check the box to outline your table name as well.
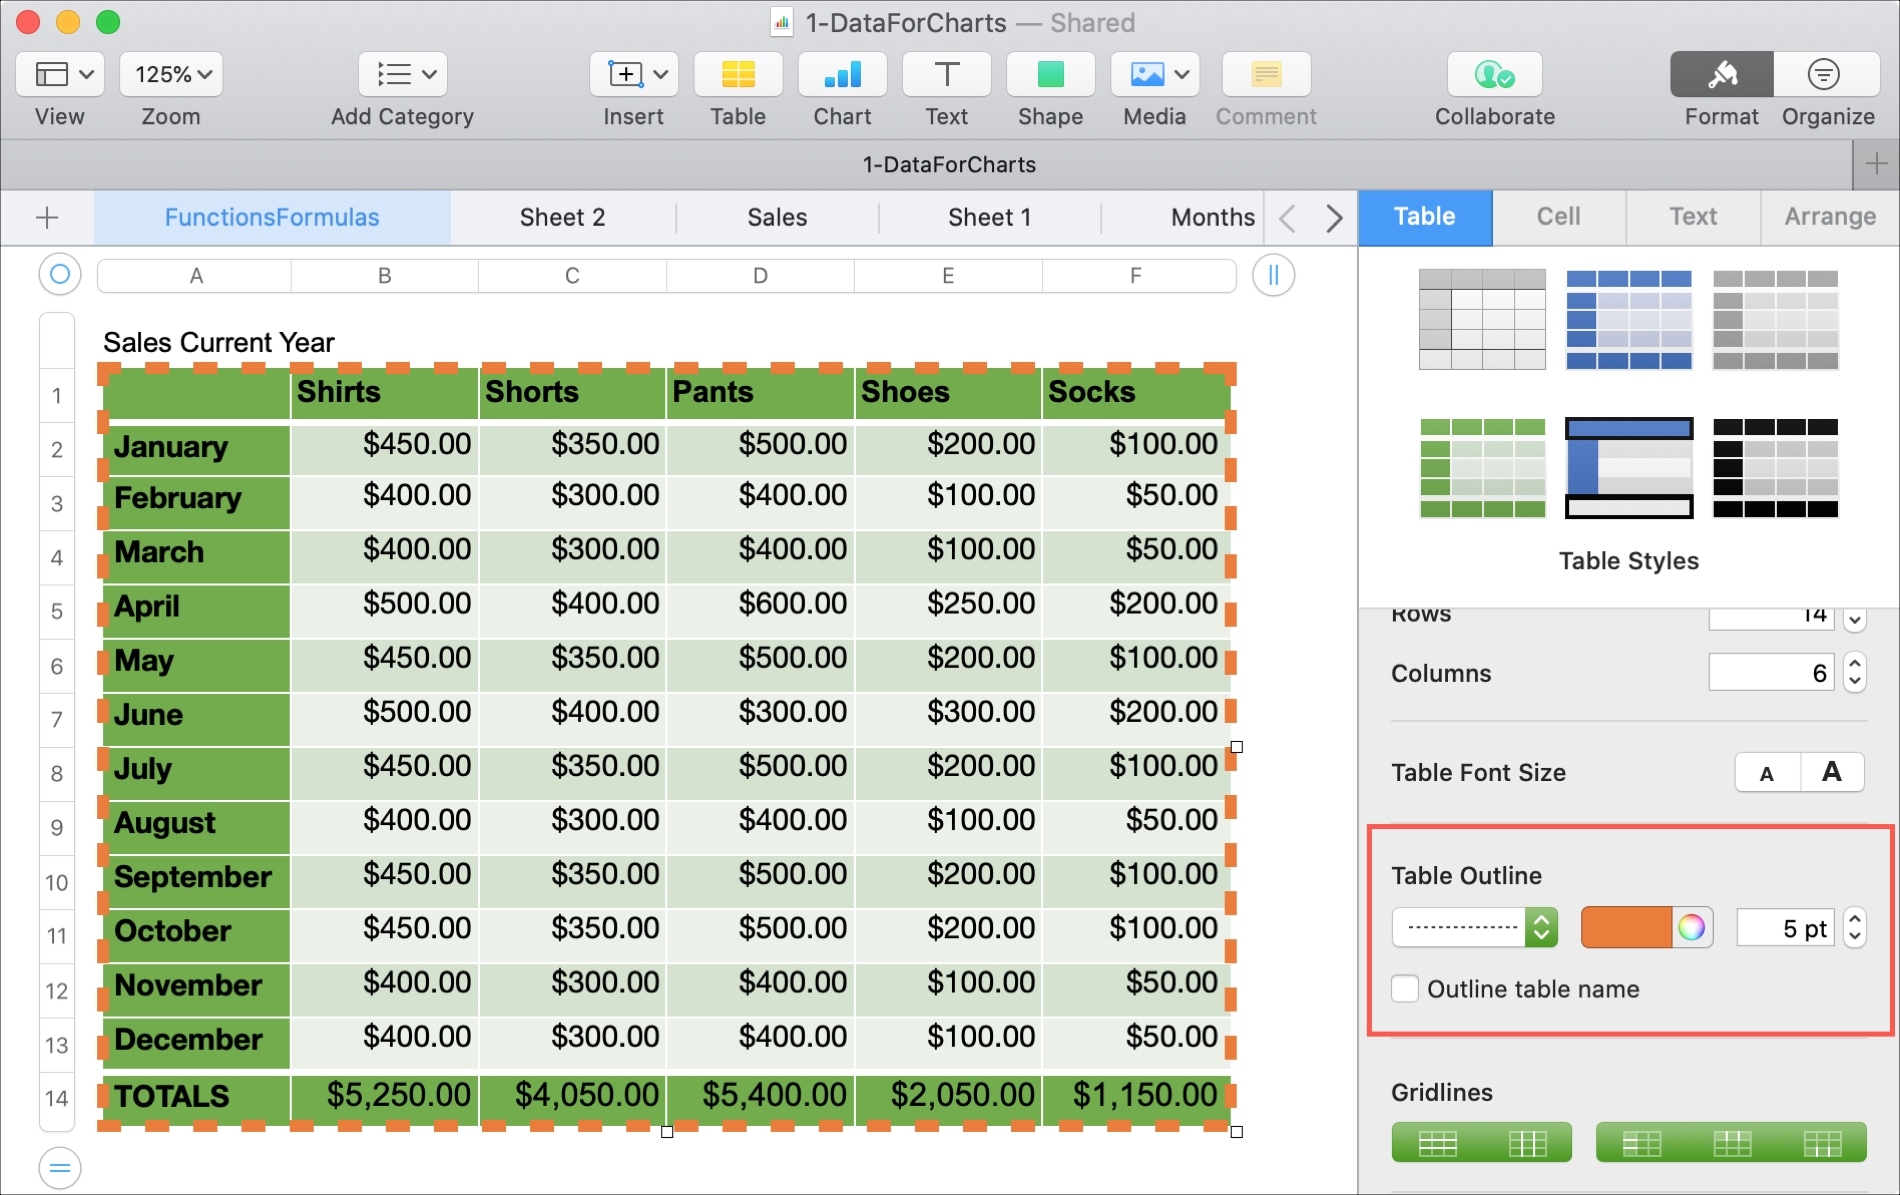
Gridlines and alternating row color
By changing the style of the Gridlines in your table, you can make certain rows or columns stand out from the rest. There are five different styles to choose from, so you can click to select those you want to use.
In addition, you can add an Alternating Row Color. This feature in spreadsheets makes the data easier to read as you go down or across.
Row and column size
Finally, you have the Row & Column Size section. This is a simple way to enlarge the space in your rows or columns. If you prefer to have the rows and columns fit your data perfectly without extra space, you can click the Fit button next to height, width or both.
Add style to a table in Numbers on iPhone and iPad
If you’re working with your spreadsheet in Numbers on iPhone or iPad instead of Mac, you can add some style to your table there as well.
1) Open your Numbers workbook to the sheet with the table and select your table by tapping the circle in the upper left-hand corner.
2) Tap the Style button (brush icon) at the top.
3) Choose Table at the top.
You’ll then see your styling options with one additional feature, which is to change the Font Style for the entire table.
When you finish making your style changes on your iPhone or iPad, just exit the formatting window: On iPhone, tap the X in the corner of it, and on iPad, tap the Style button again.
With some small style changes to your tables in Numbers, you can make your data look sharper, be easier to read, or just have a more attractive appearance.
Are you going to spruce up a table or two in Numbers on Mac or iOS? If so, let us know how it turns out or if you have some tips to share.
More tips for Numbers: