Learn how to add a check box, star rating, slider, stepper, or pop-up menu in the Numbers app on your Mac, iPad, and iPhone for better data visualization and interaction.

Numbers is more than a simple spreadsheet application. You can do things like create a form for data entry, insert interactive charts, and more.
Another great feature is the ability to add controls like check boxes, star ratings, pop-up menus, sliders, and steppers. These items give you easy ways to do data entry, fill out forms, and analyze your data. You can add each of these controls to your spreadsheet and adjust their settings to fit your needs.
Add a control to Numbers on Mac
Each of the controls we’ll cover is inserted in the same way. So open your sheet in the Numbers app and do the following.
1) Select a cell to add a control.
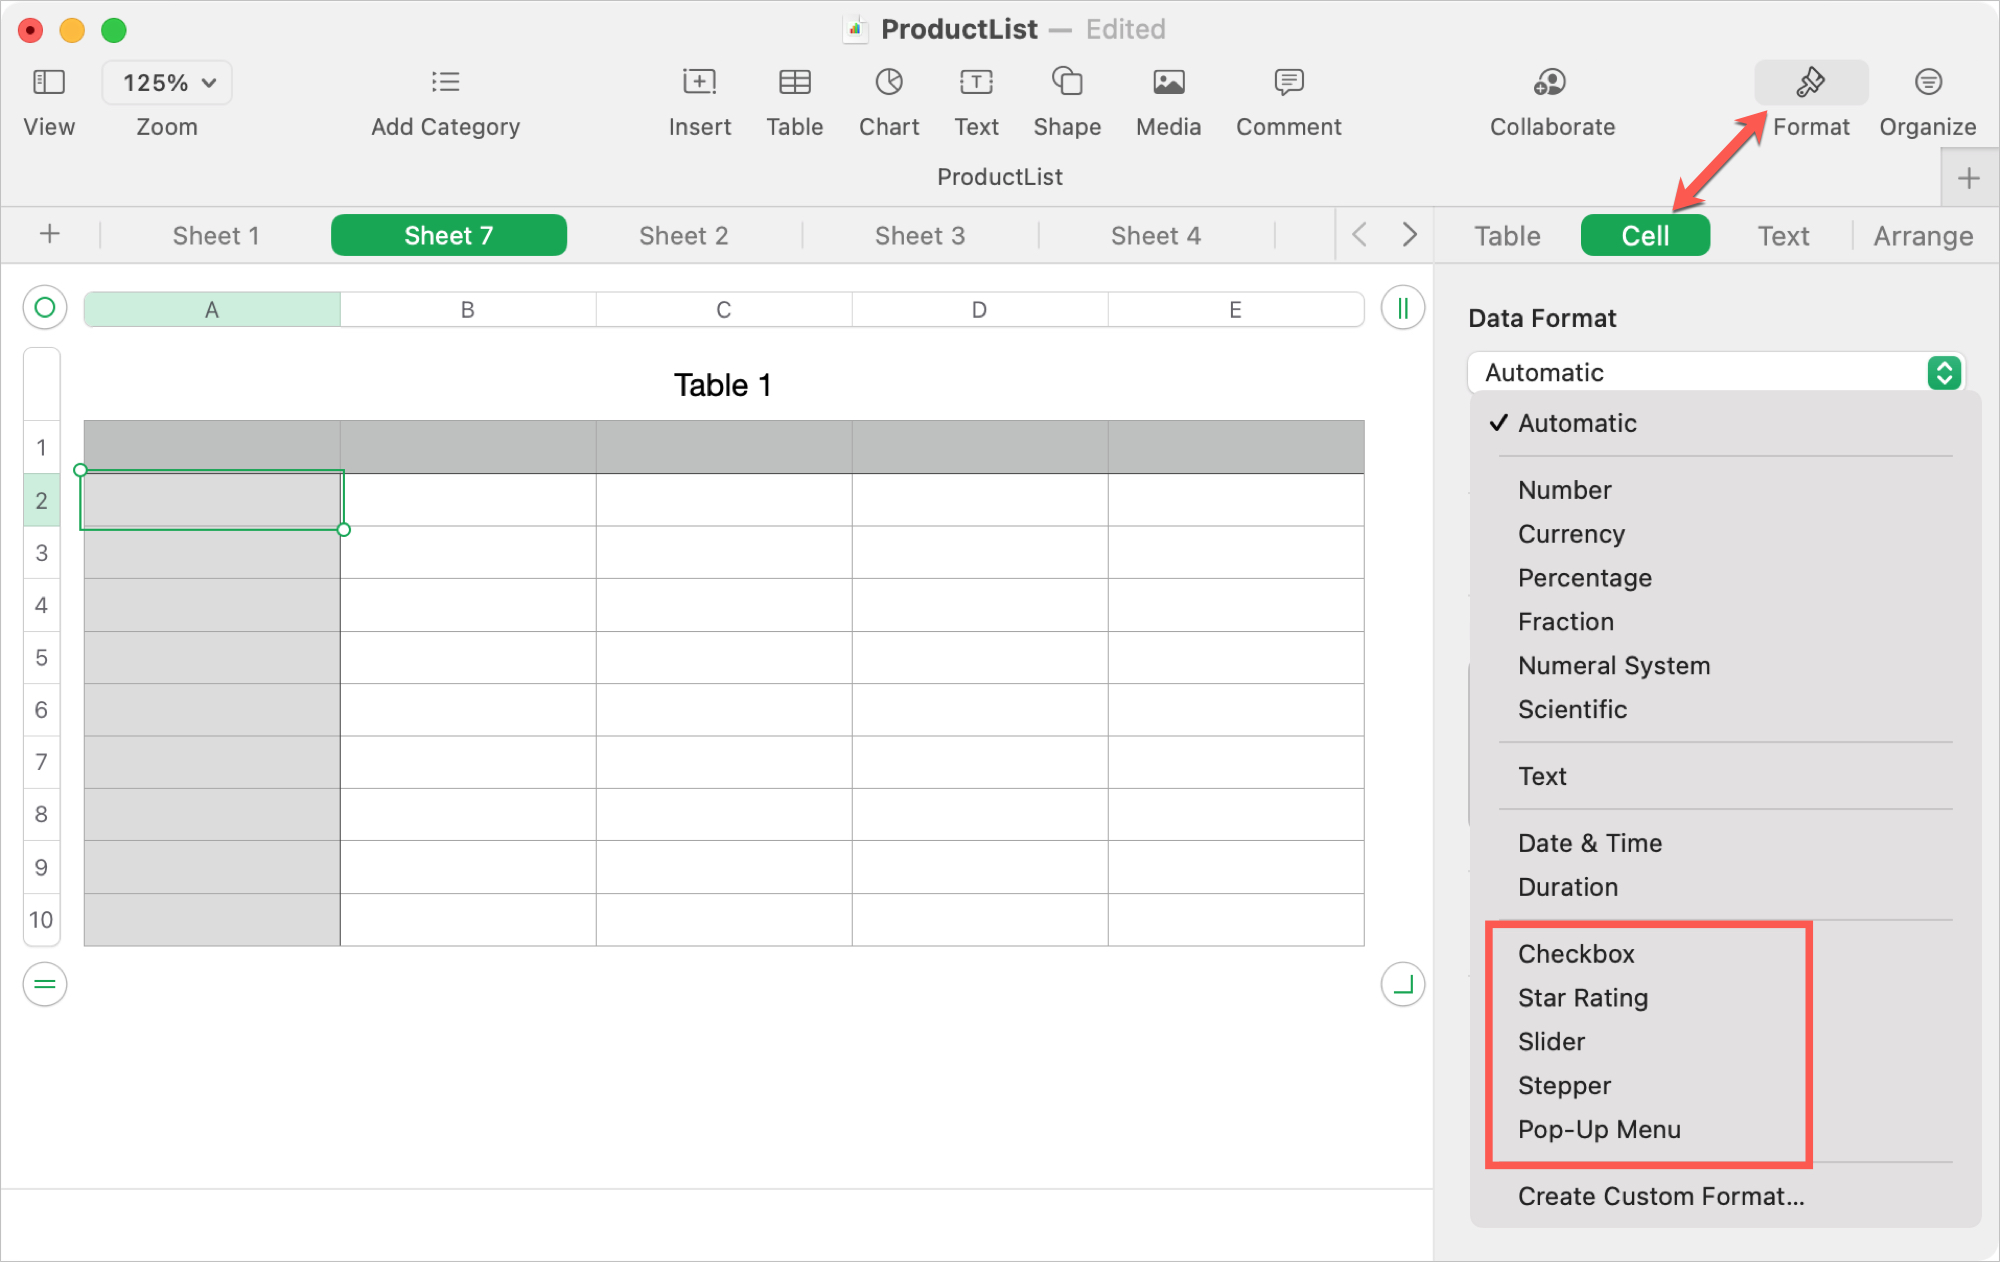
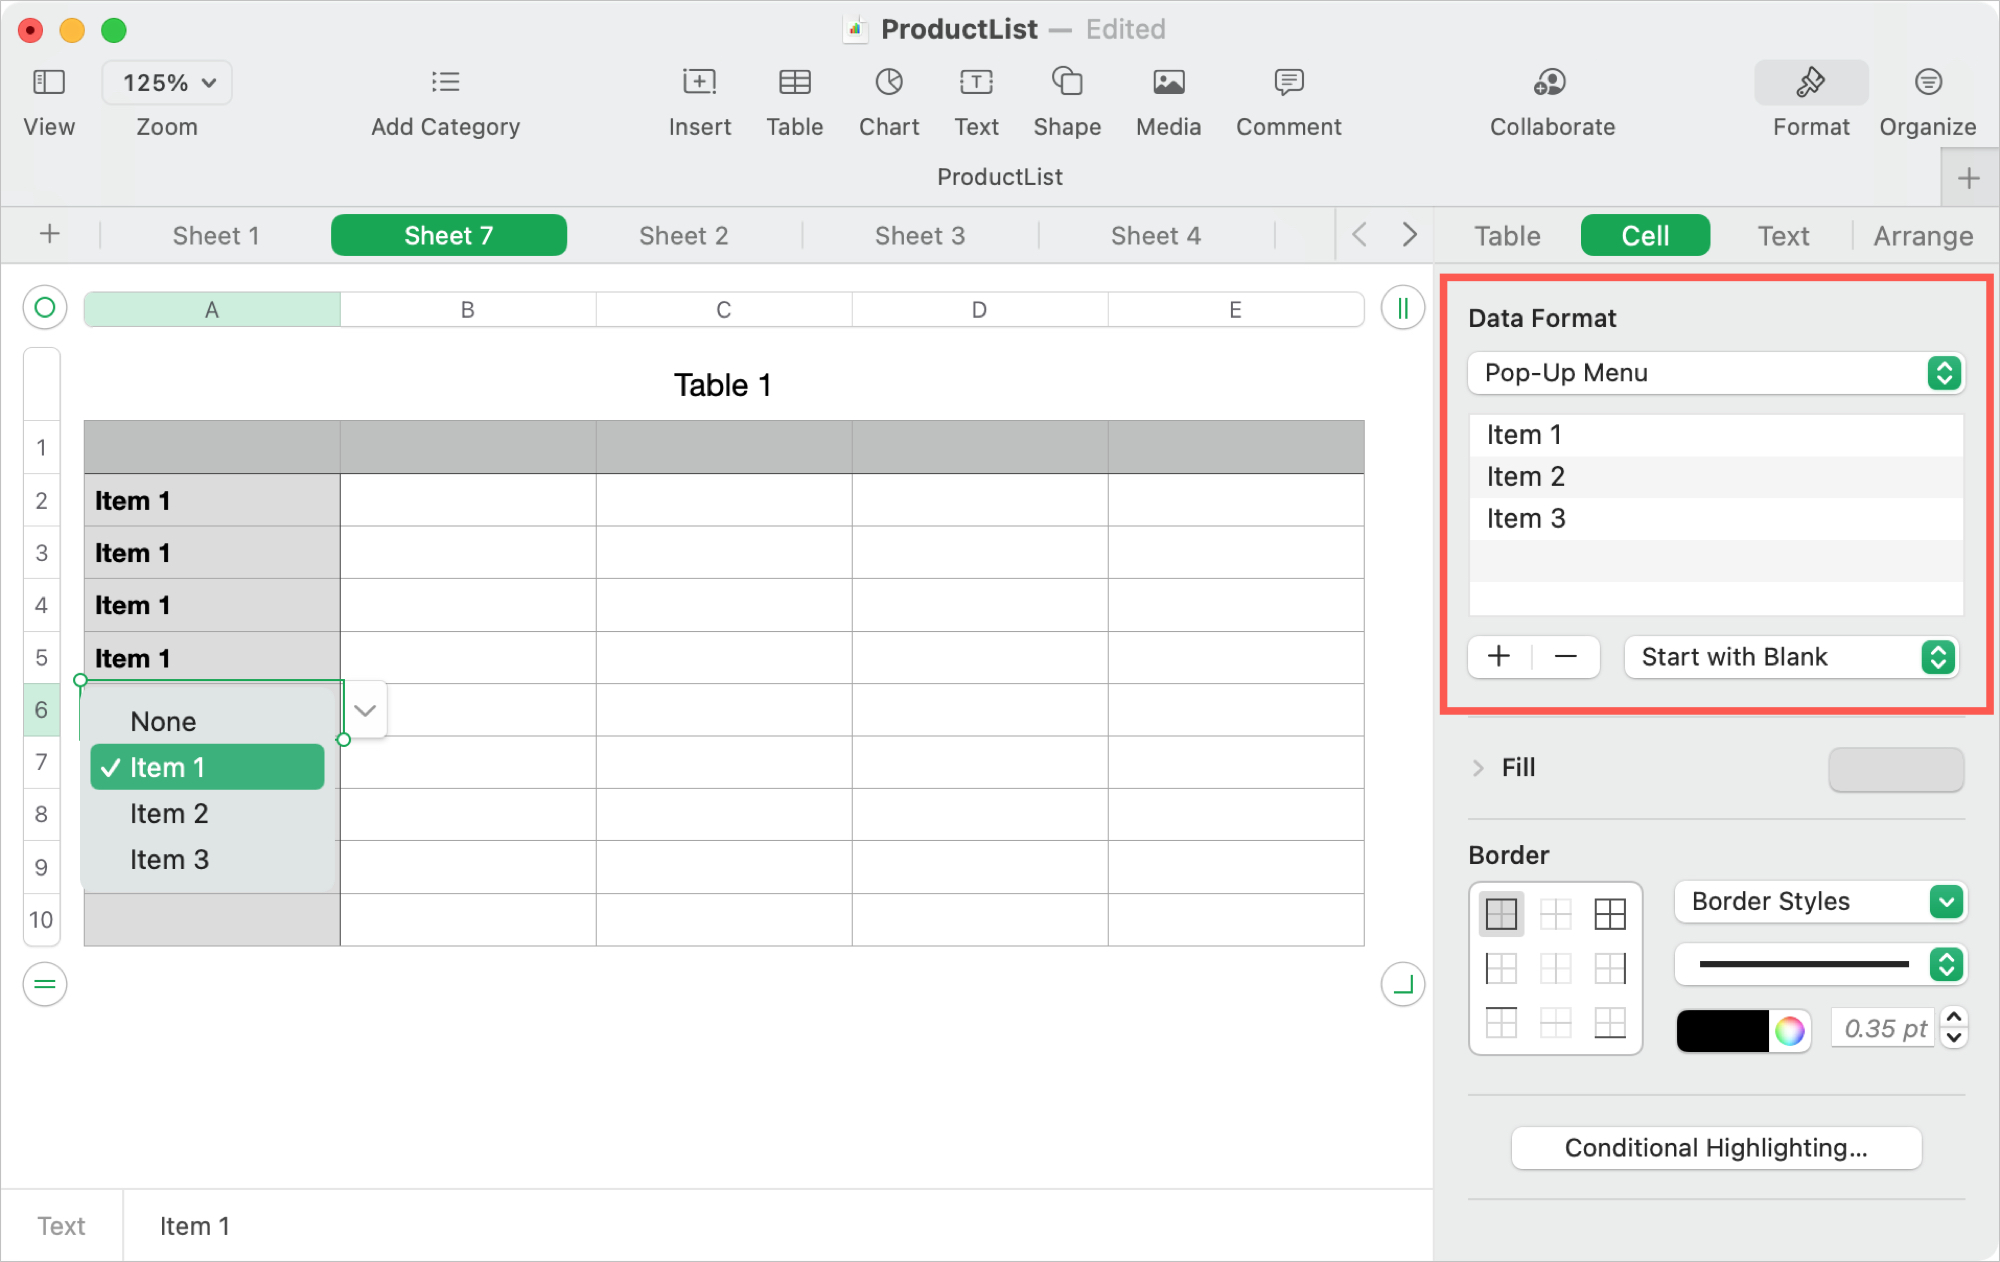
2) Click the Format button on the top right.
3) Pick the Cell tab at the top of the sidebar.
4) Click the Data Format drop-down box and choose the control from the bottom of the list.
Add a check box
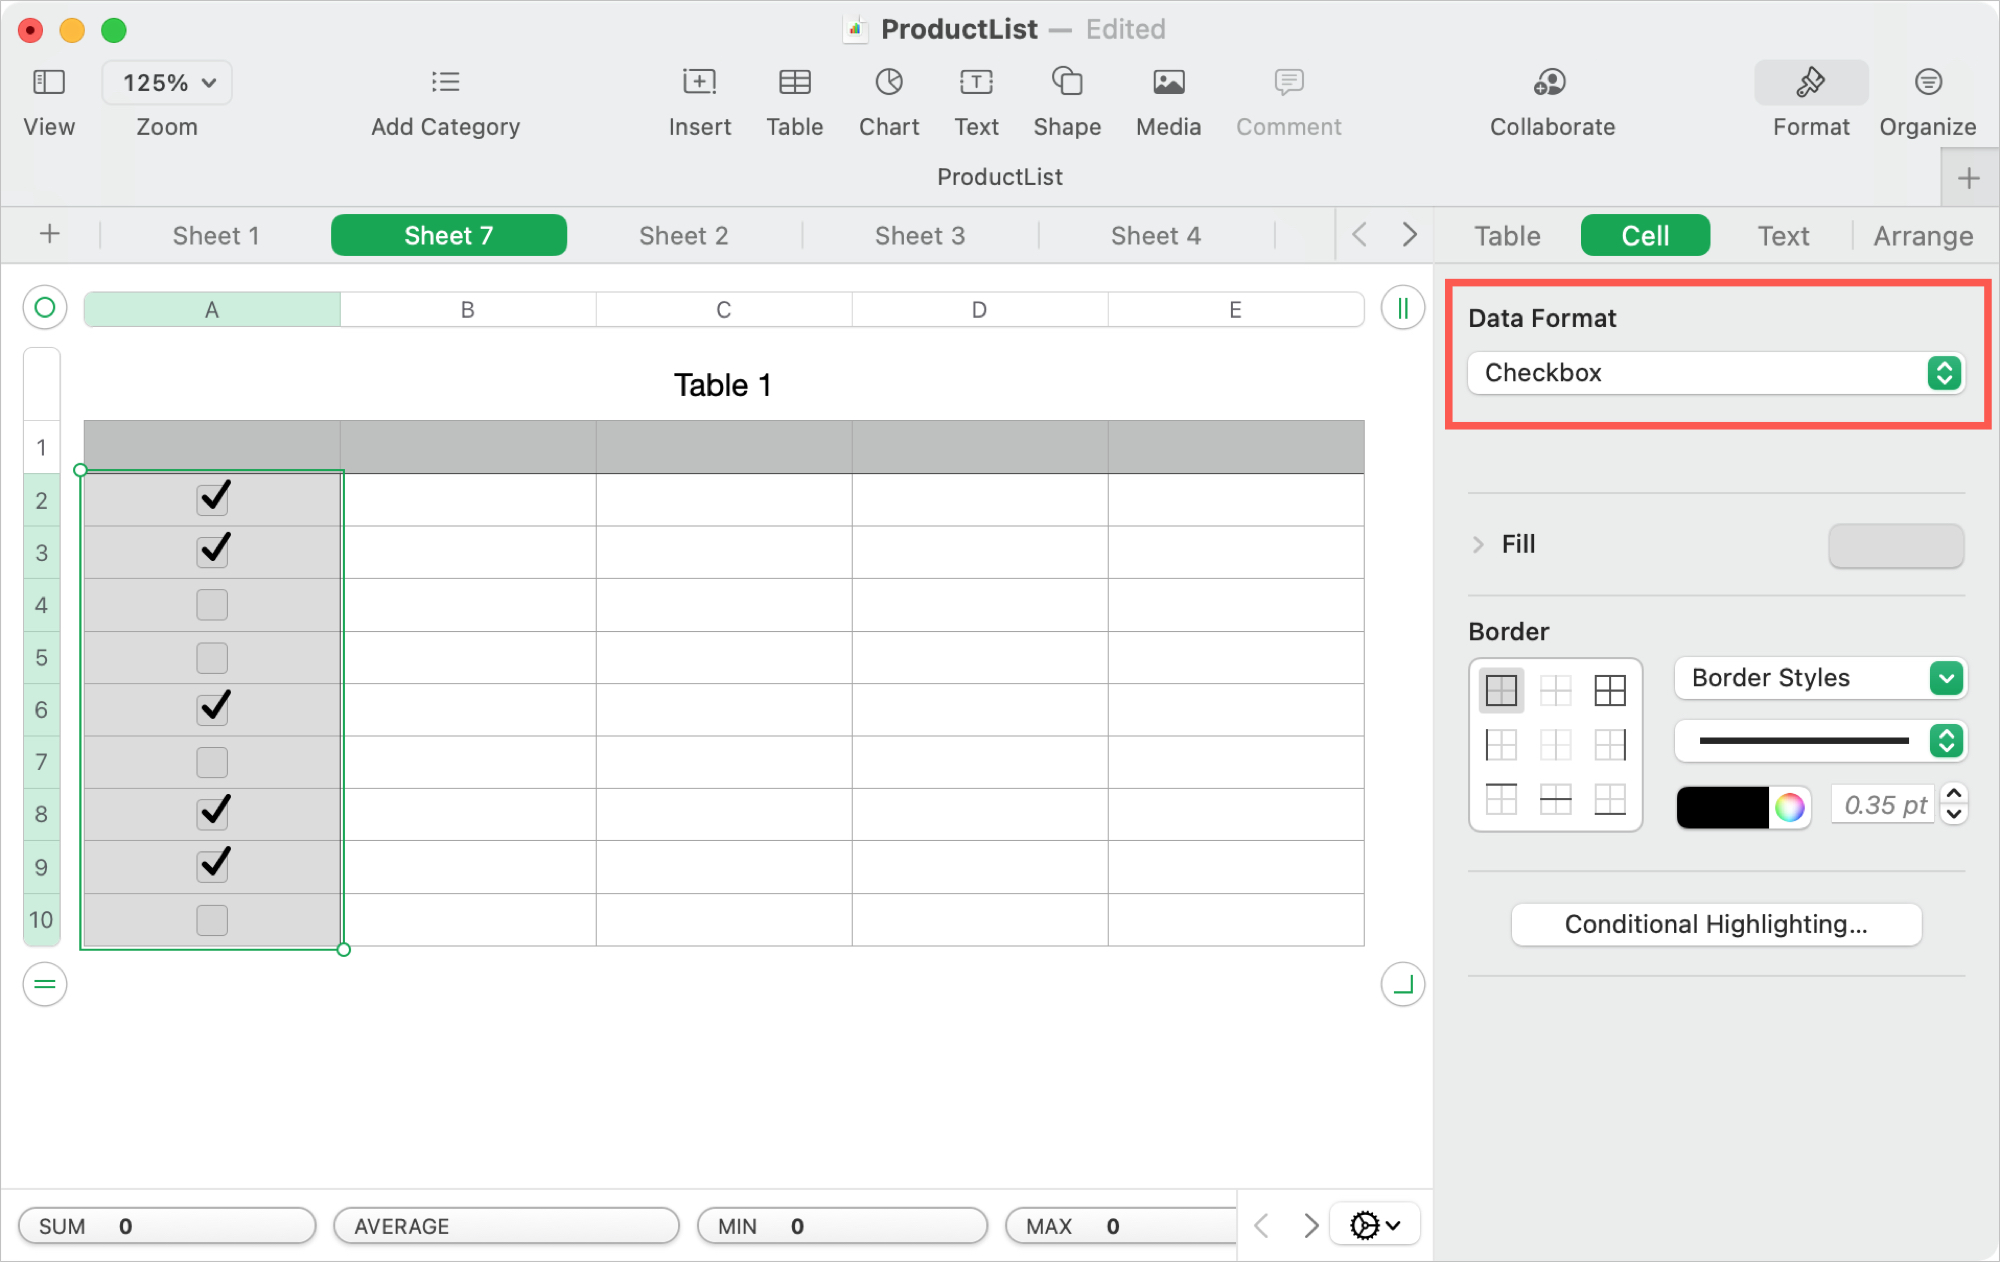
A check box is the simplest control to work with and use. It’s ideal if you’re creating your own checklist in Numbers. But you can also use it when creating a form for others to complete.
Select Checkbox in the Data Format list, and that’s all there is to it. Click the check box to mark and unmark it.
Add a star rating
We see star ratings everywhere, in Apple Music for songs and on the App Store for apps and games. You can rank an item on a scale using stars. Numbers makes this control easy to use as well. A star rating defaults to a five-star scale.
Select Star Rating in the Data Format list, and you’re done. To use the rating, click one of the five dots starting on the left to set the rating. So, if you want to rate something with four stars, click the fourth dot from the left.

Add a slider or stepper
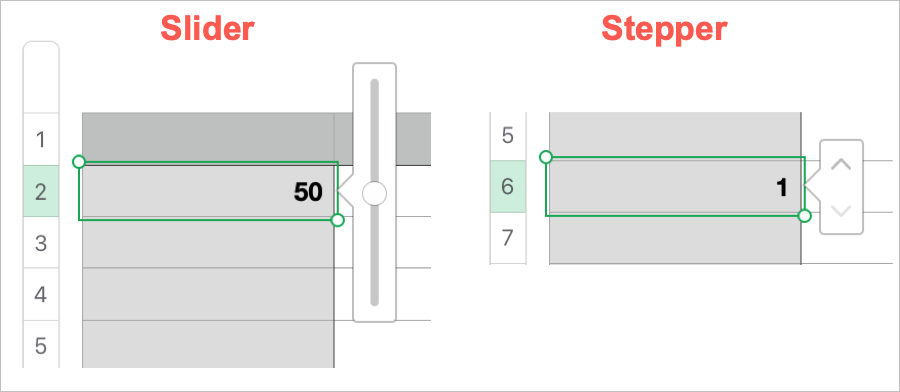
Sliders and steppers are similar. They allow you to pick a value from a range you set. And you can use them in conjunction with charts or other data to see the changes as you adjust the values. With a slider, you move a button up and down to choose from a range of values. With a stepper, you use the arrows to move up and down a set number of increments at a time.
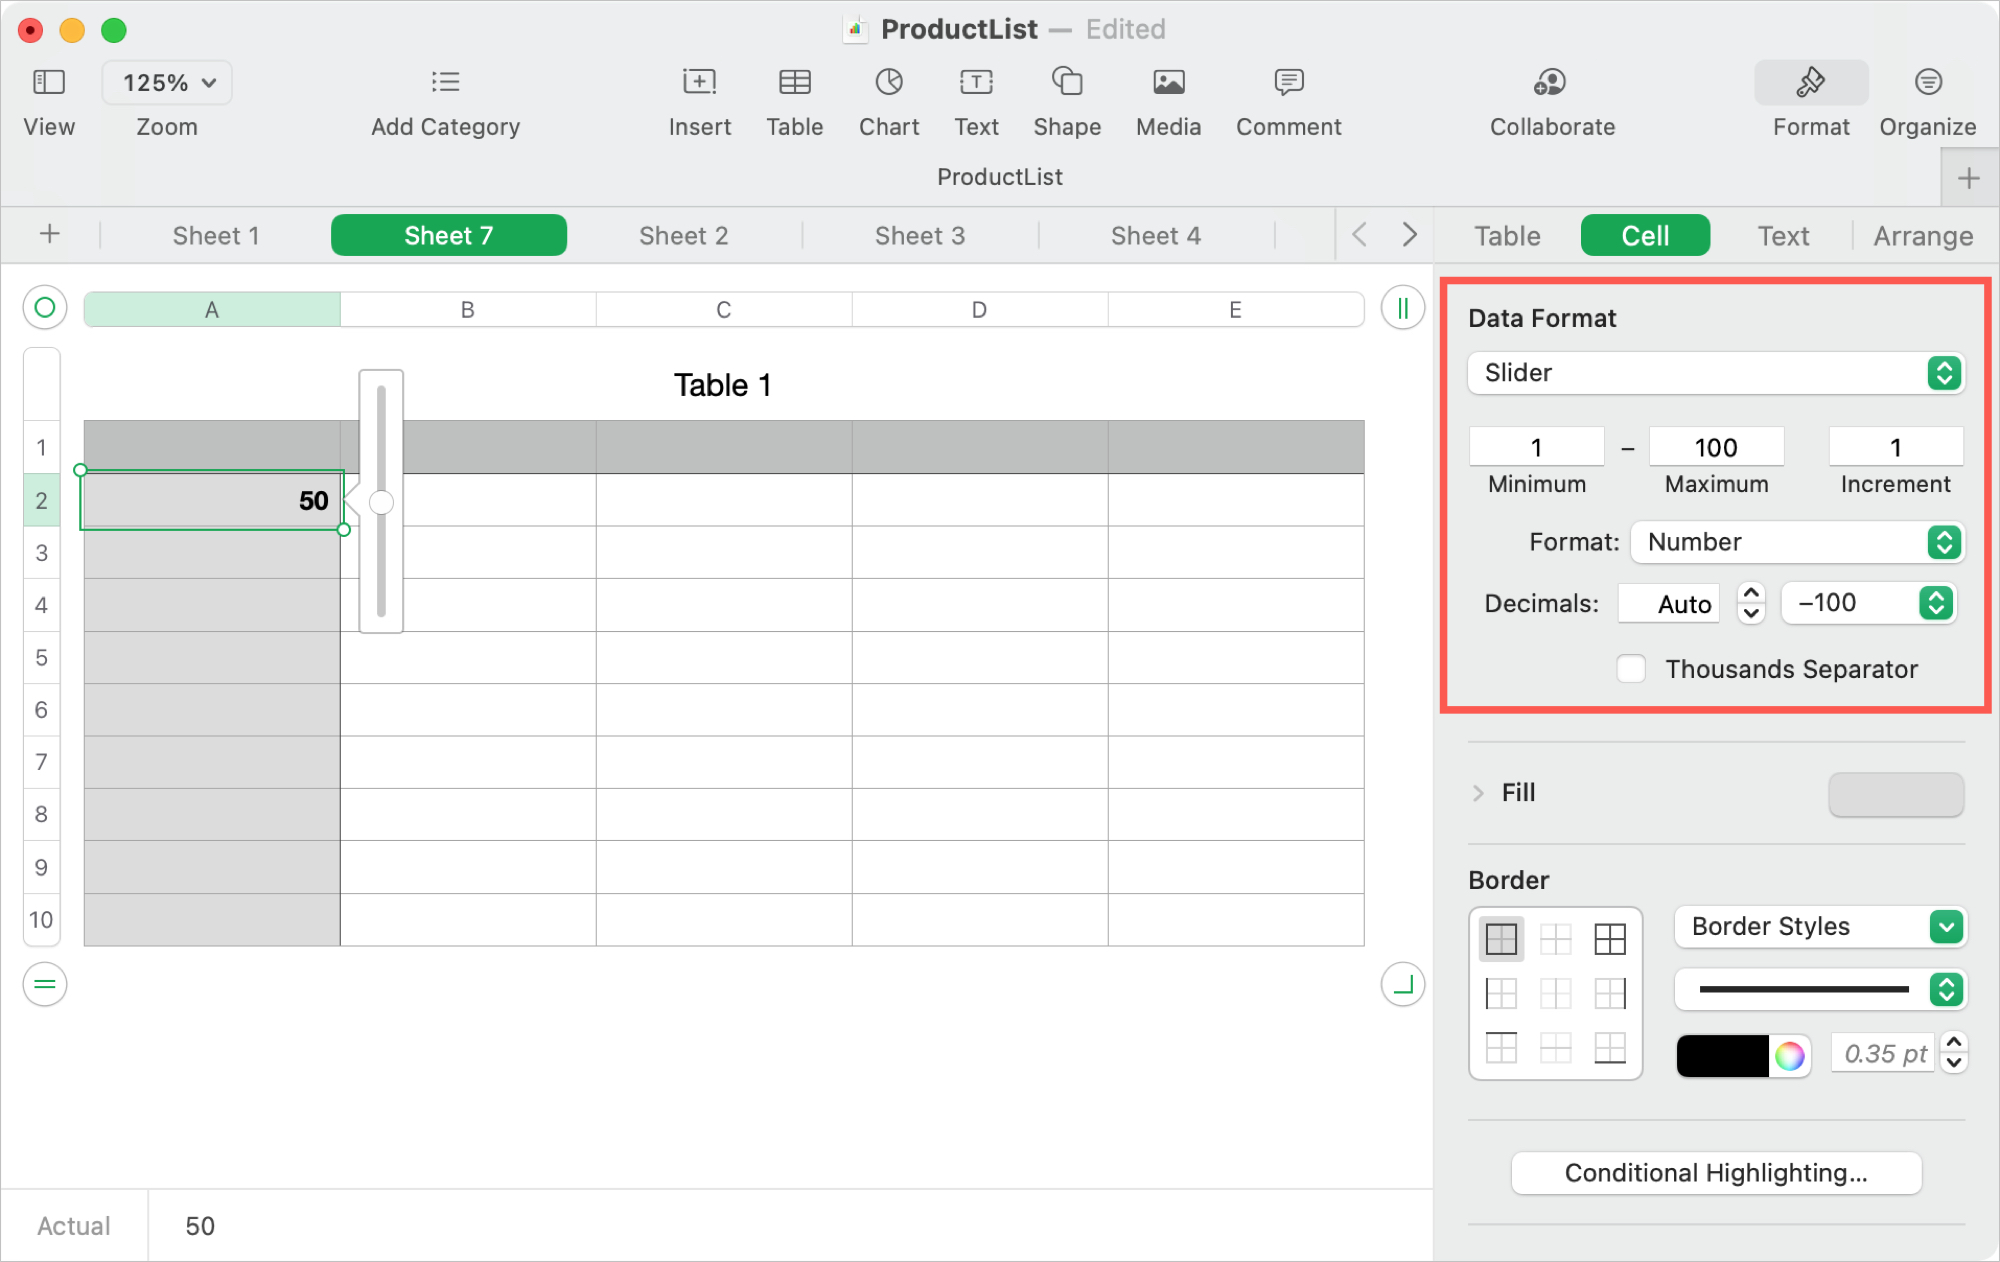
Select Slider or Stepper in the Data Format list and adjust the settings.
Enter the Minimum and Maximum values and the number of Increments. Set the Format for a number, currency, percentage, or fraction. Select a Decimals setting and display for negative numbers. And finally, check the box if you want a Thousands Separator.
A pop-up menu gives you a handy way to select items from a list. For example, you can choose a color or size for a product, currency for a donation, or name from a list of employees.
Select Pop-Up Menu in the Data Format list and add the list items in the text boxes that appear. Use the plus and minus buttons to add and remove items and the drop-down box to show the first item in your list or a blank for None.
Add a control to Numbers on iPhone and iPad
You can add each of the same controls to your sheet in Numbers on iPhone and iPad.
1) Select a cell to add a control.
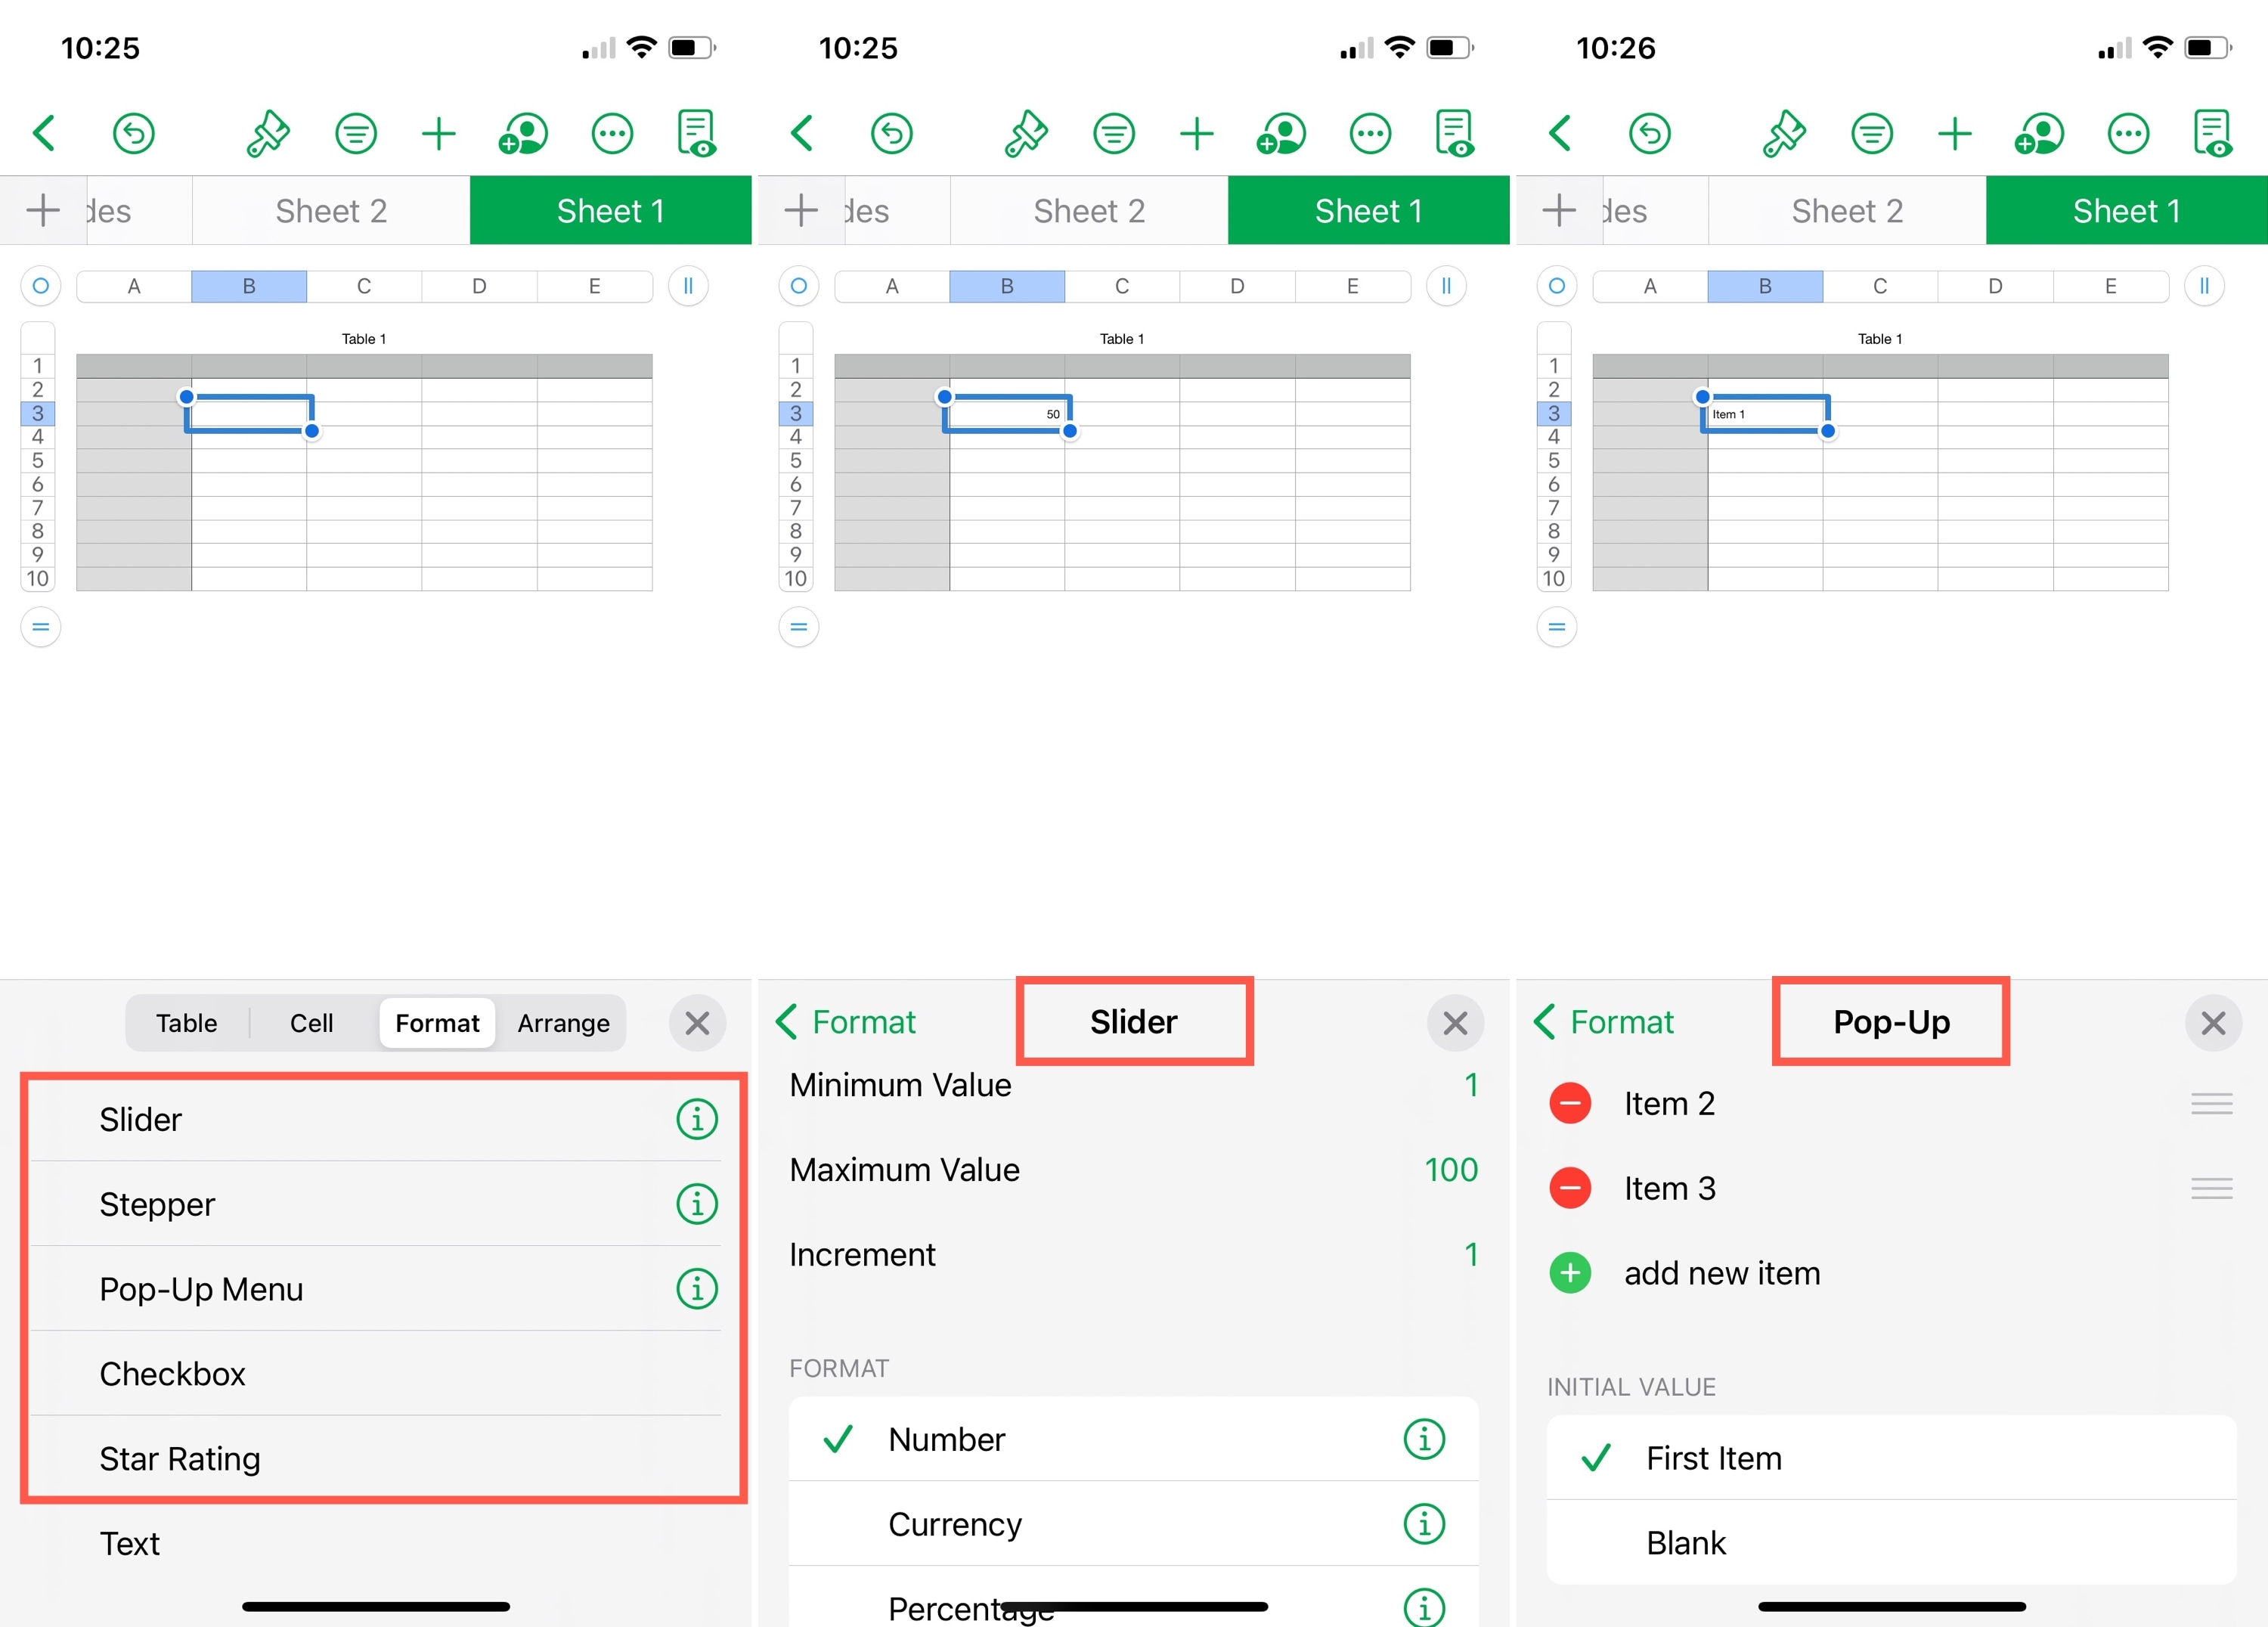
2) Tap the Format (paintbrush) icon at the top.
3) Pick the Format tab in the pop-up.
4) Choose the control you want to use. For a slider, stepper, or pop-up menu, tap the info icon ⓘ to adjust the settings as described above for Mac.
Whether you want to speed up data entry or experiment with your charts, these controls can help you do it. Are you going to add a check box, slider, or pop-up menu to your Numbers sheet?
On a related note: