Learn about this simple and efficient method for organizing your files and folders in Finder on Mac using colored tags.
Having an effective way to organize your files and folders is important on any computer. And if you’ve just purchased your first Mac and want to start organizing from the start, that’s a great idea. One convenient method to use for this on Mac is tags, which are basically labels.
Tags on Mac work just like they do in email or note-taking applications. You can use colors and words to create tags and then use those tags to categorize items and find what you need quickly.
For those new to Mac who would like some extra help, we’ll go through everything you need to know about creating, using, searching, and removing tags on your Mac.
Create tags for Finder
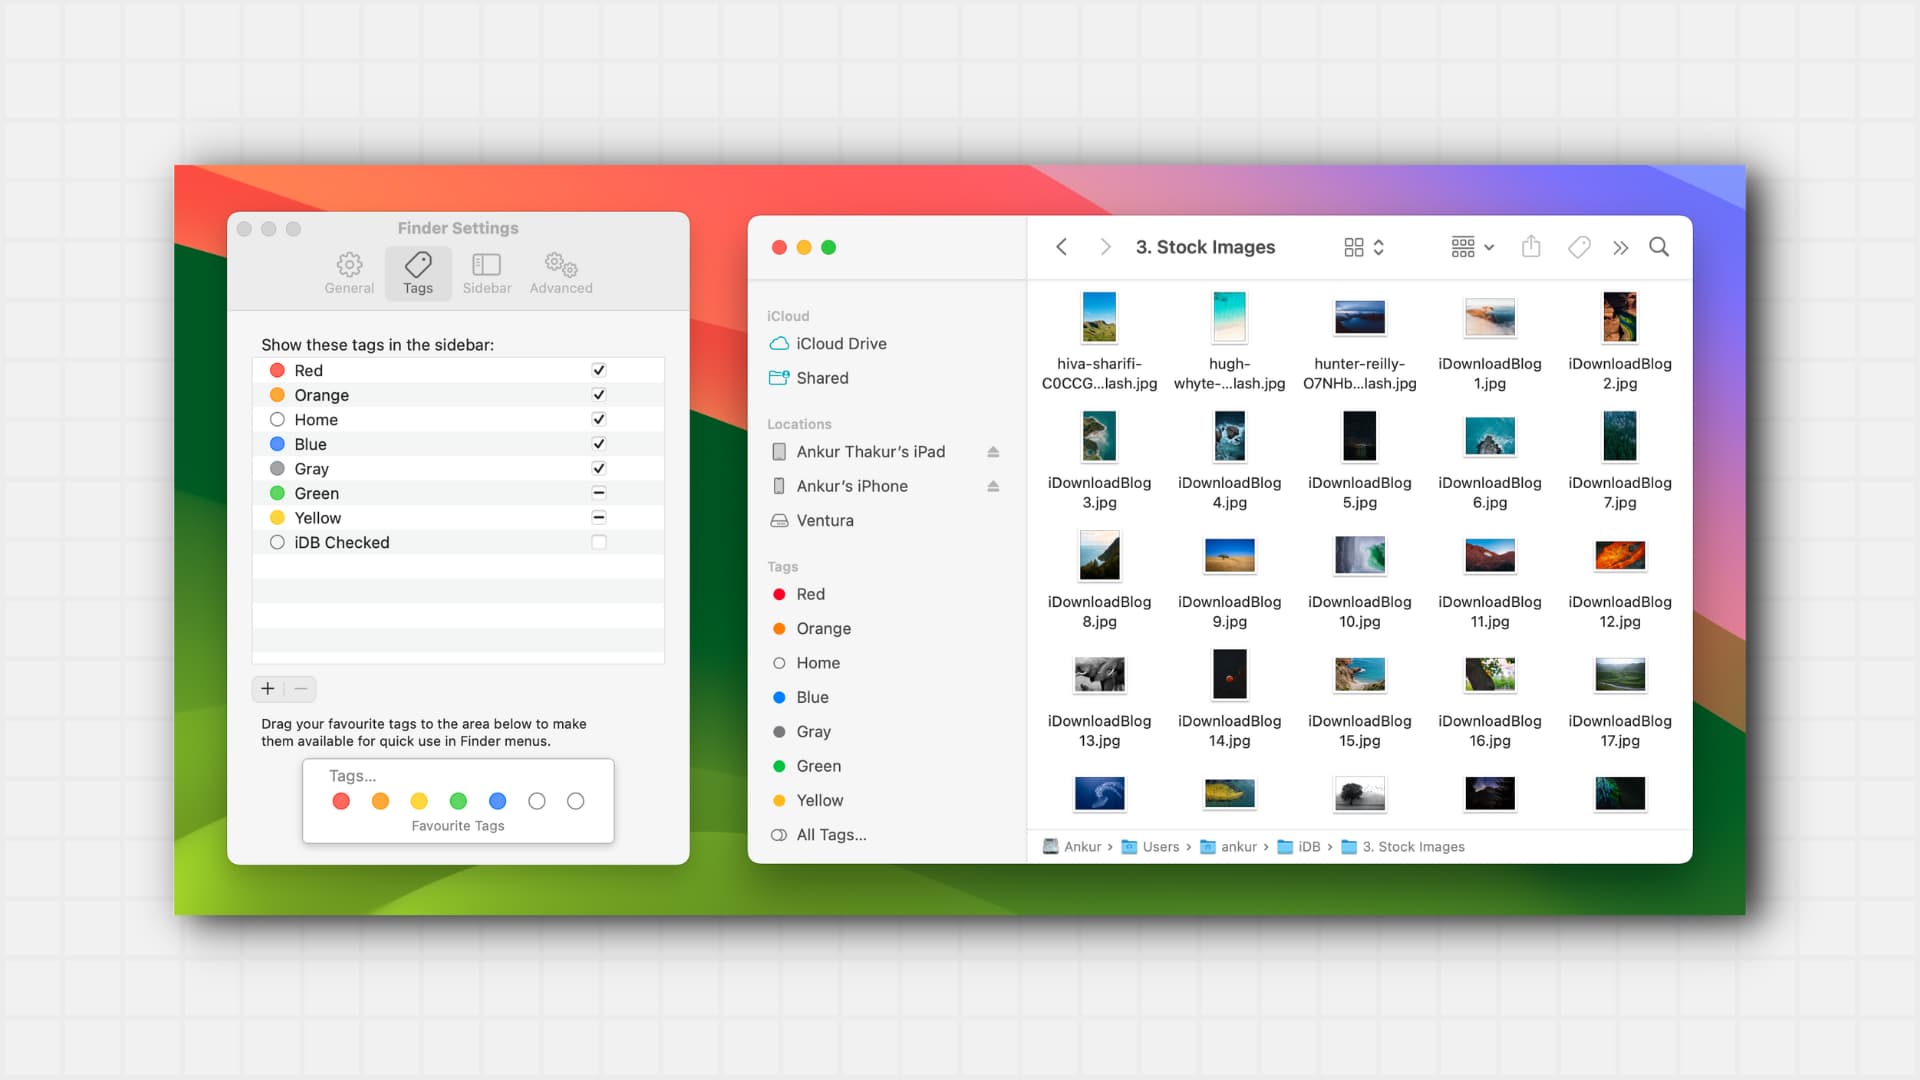
If you have certain tags in mind that you’d like to create, this is a terrific place to start. And you can view all of the currently available tags, create your own, and make changes to tags in the Finder Settings.
Click Finder > Settings or Preferences from the menu bar. Then, click the Tags tab. You’ll then see tags colored and labeled blue, green, red, yellow, and so on.
To create a tag, click the plus sign button. The new tag will appear at the top of your list as “Untitled,” so just give it the name you want and hit the return key.
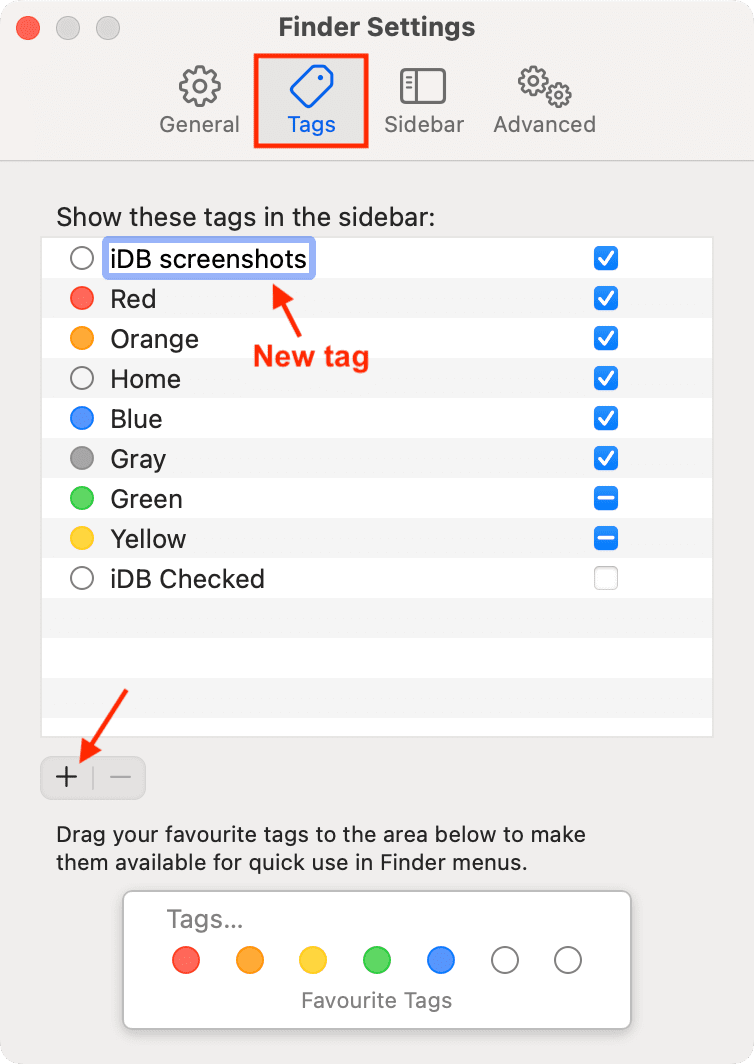
To give the new tag a color, either right-click or hold Control and click the tag and pick a color.
Edit and delete tags
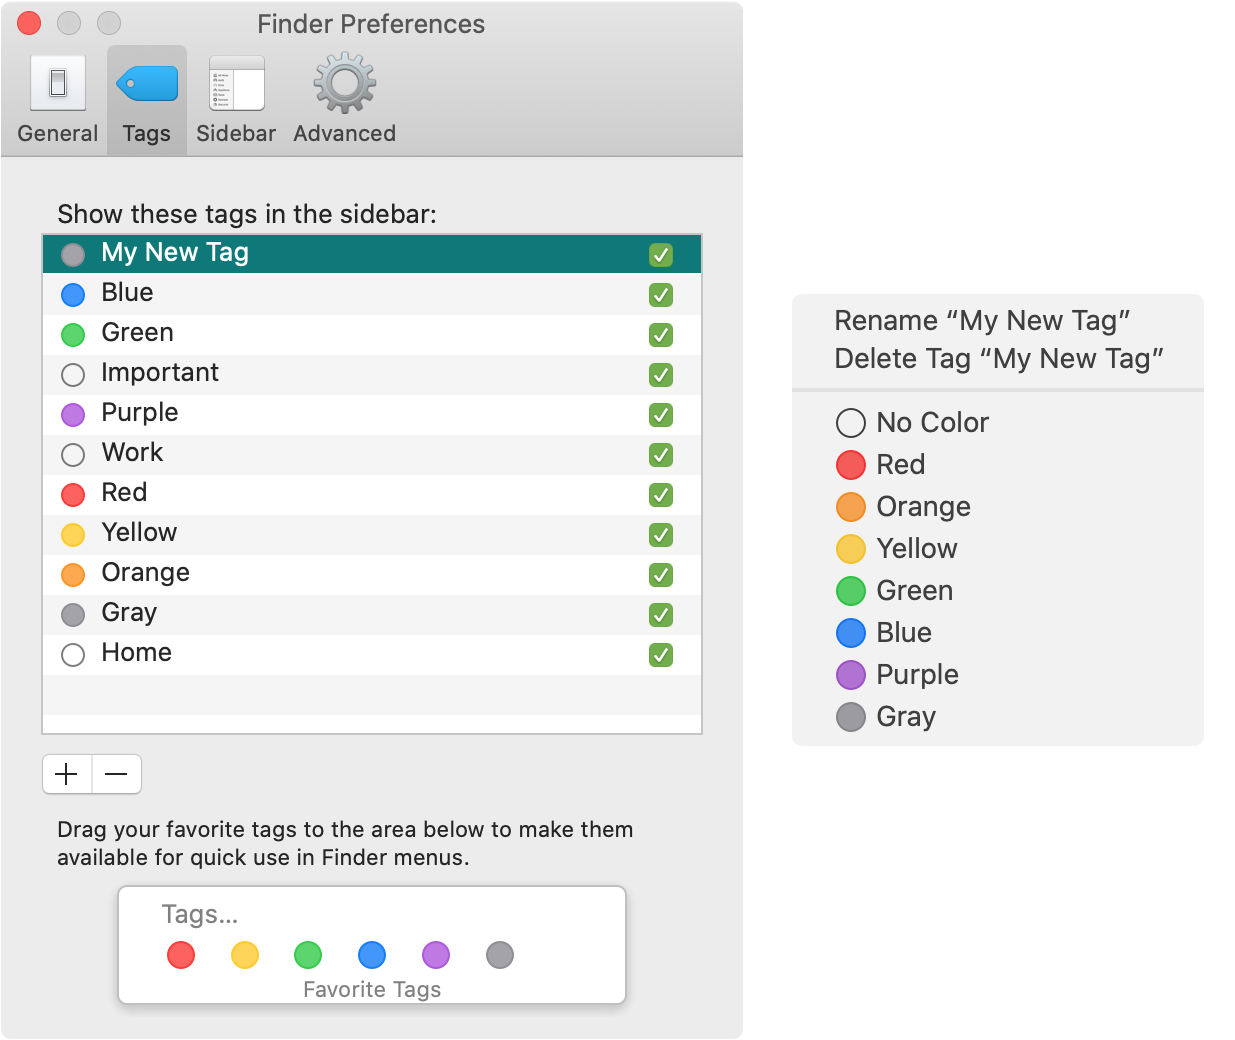
While you’re in the Tags tab of Finder Settings, you can edit those that already exist by changing their name or color. Or, you can delete tags if you like.
Either right-click or hold Control and click and select Rename to give it a new name or Delete to remove it. (You can also select the tag and click the minus sign button to delete it.) And if you like, you can choose a new color in that small window.
Display tags
The tags that you see checked in the Finder Preferences window are the ones that will display in your Finder sidebar and as options when saving a file. So you can check and uncheck the ones you want to use.
Note: If you uncheck certain tags, you’ll still be able to use them, which you’ll see below in the Assigning Tags section.
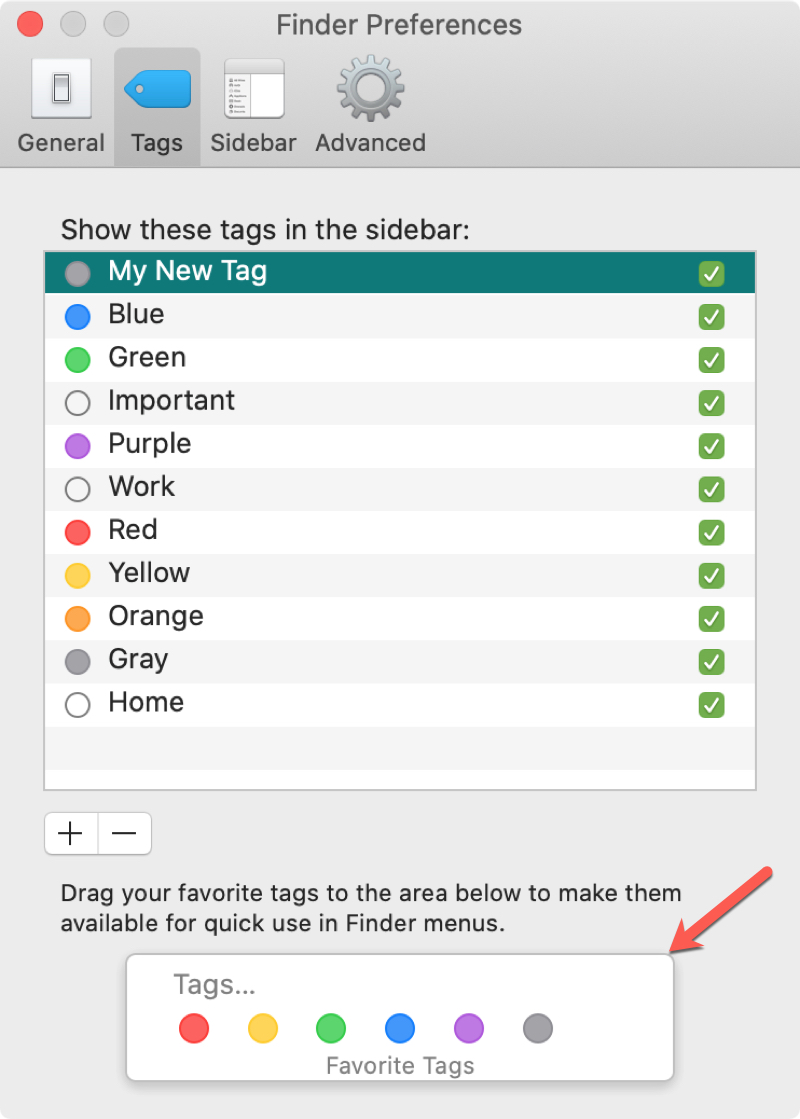
Another option in that window is at the bottom for your Favorite Tags. These are used for quickly tagging files and folders in the Finder menus. So if you have a couple that you plan to use most often, just drag them from the list into the Favorite Tags box.
Assign tags to files and folders
Tagging your files and folders is super easy, and you can do it when you save an item as well as after the fact.
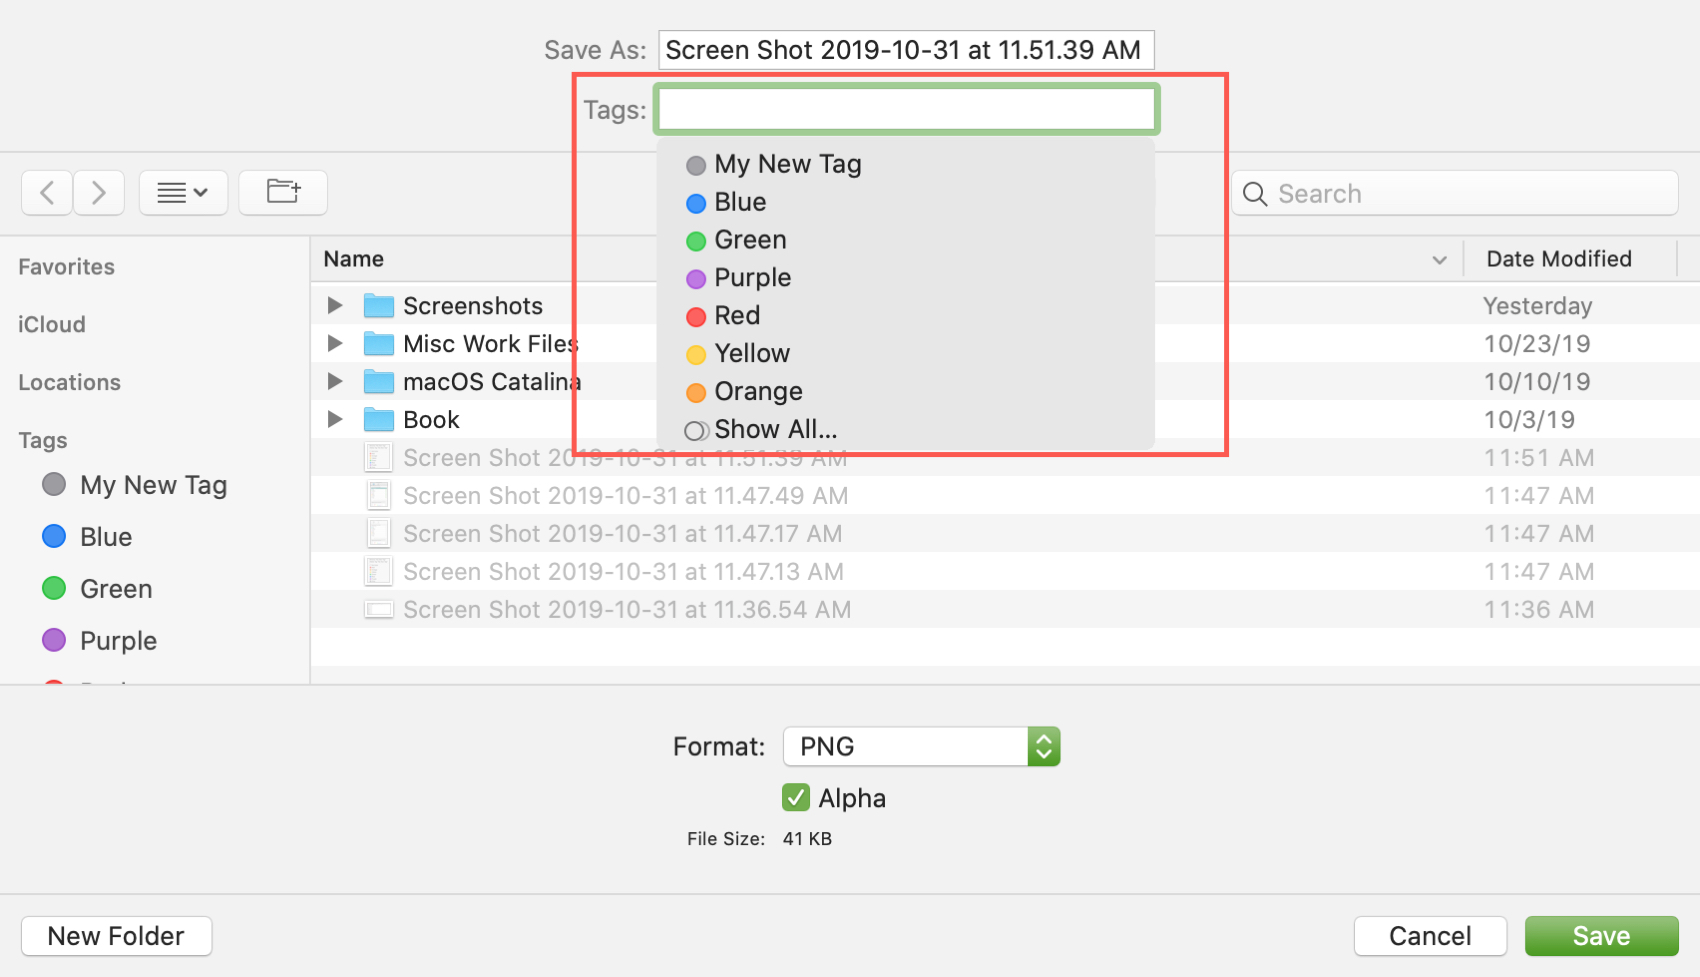
Saving new files
To add a tag when you save a file, just click the Tags box in the save dialog window and pick your tag. If you want to use one that you don’t see because you unchecked it in the Finder Preferences, just pick Show All, and it will display as an option.
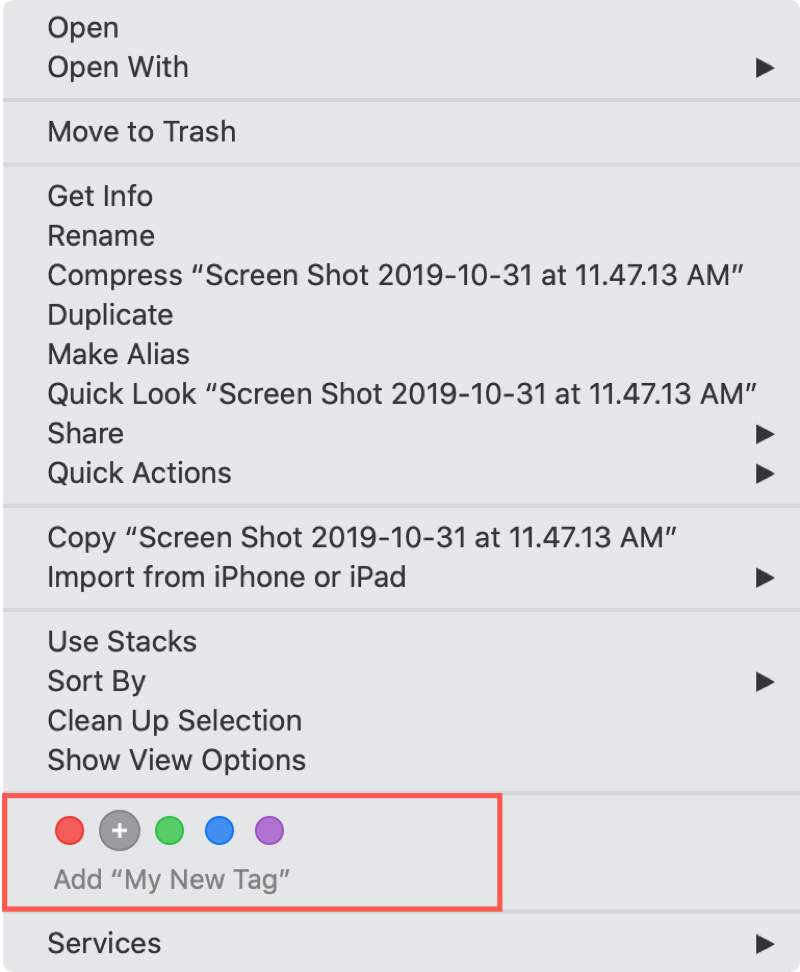
Existing files and folders
To add a tag to an existing file or folder, either right-click or hold Control and click to bring up the context menu. You’ll see a section toward the bottom for Tags. And remember, these are those Favorite Tags you designated in the Finder Preferences. So just pick one, and you’re set.
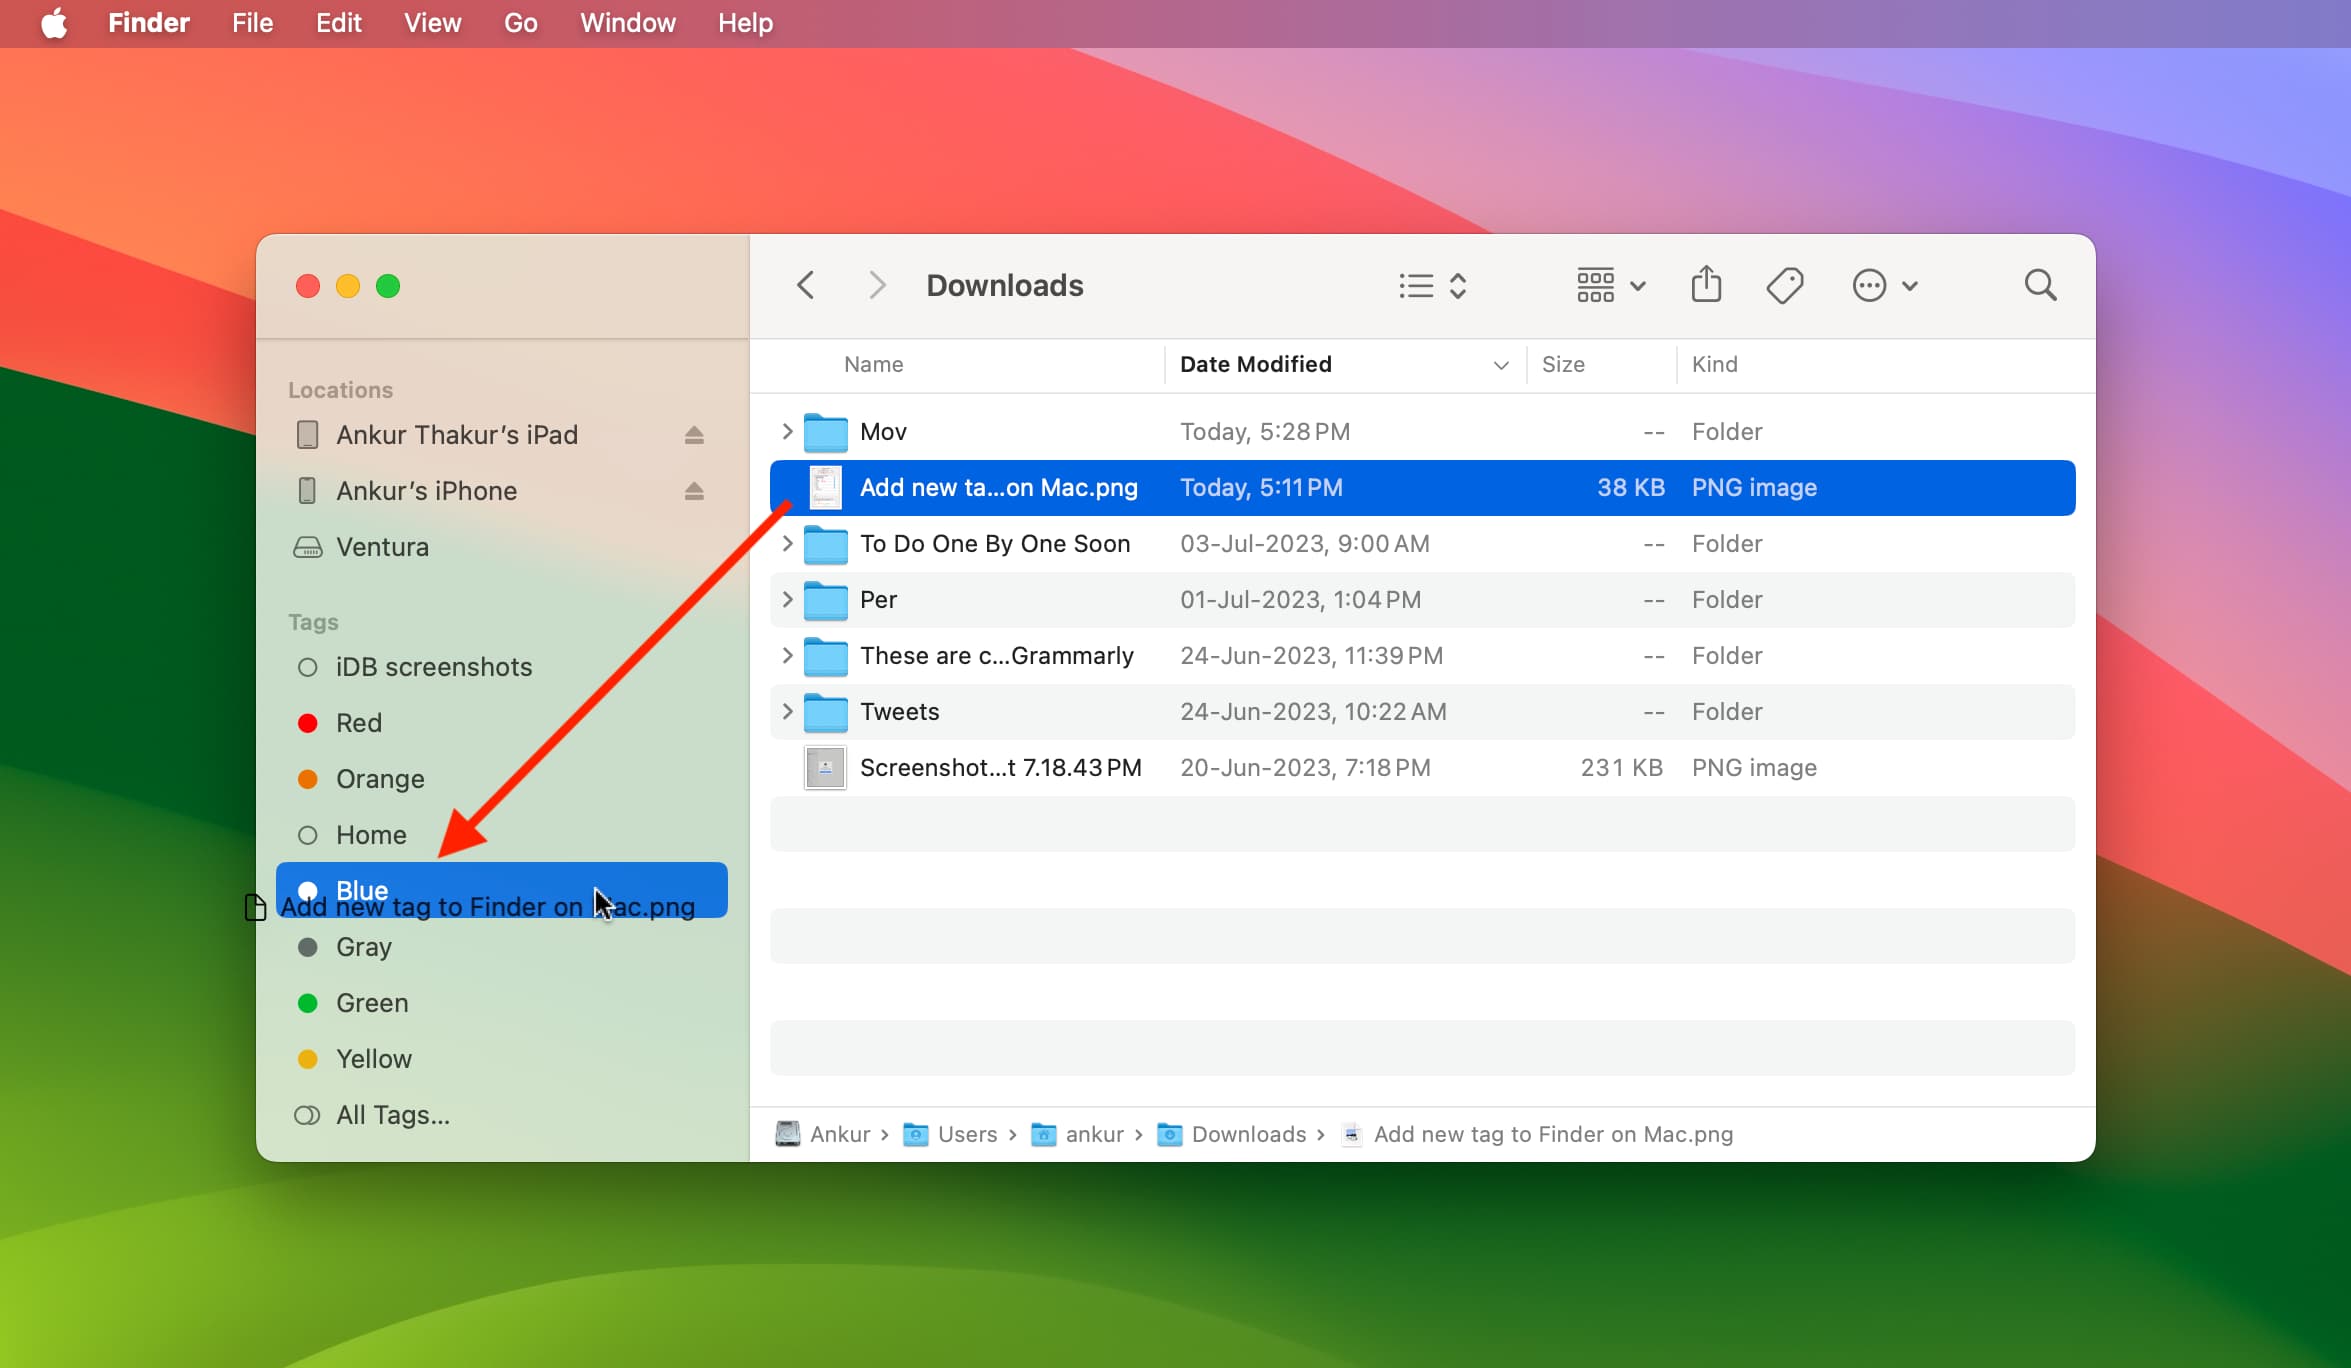
Another way to tag an existing item is in the Finder window. You can simply drag the file or folder to the tag you want in the Finder sidebar under Tags. If you want to use one that you unchecked, click All Tags, and it will display as an option.
One more way to assign a tag is to select the item and then click the Tags button in the Finder toolbar.
Remove added tags
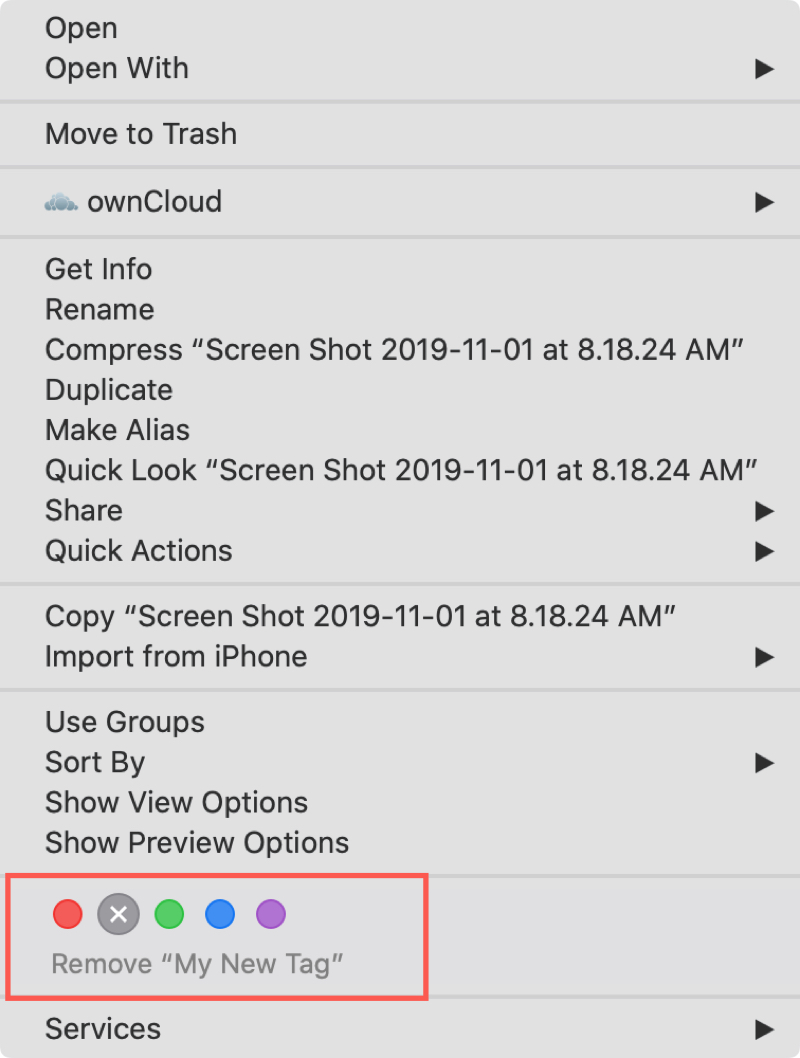
If you assign a tag to a file or folder and decide to remove it, you can do this quickly.
Either right-click or hold Control and click to bring up the context menu. You’ll see the tag you selected toward the bottom with a checkmark in it. Just click the tag to remove it.
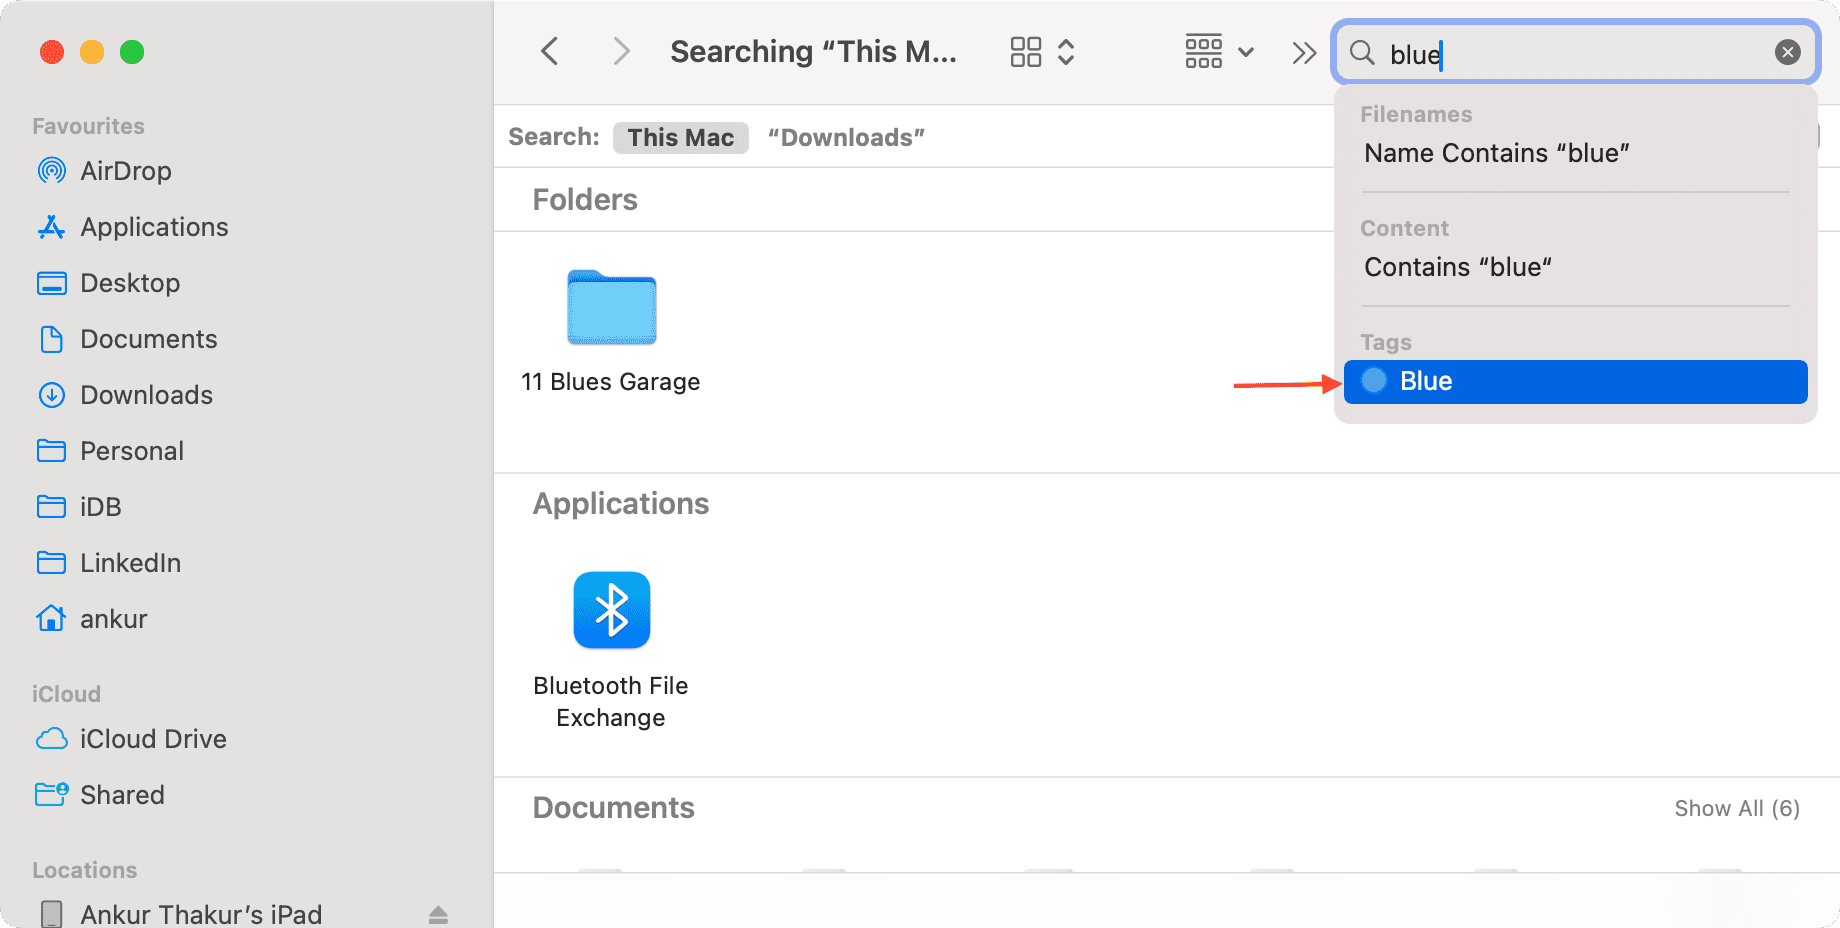
See all files with a specific tag
When you want to find an item using a tag, you actually have a few different ways to do it.
- Click the tag in the Finder Sidebar to display all items with that tag.
- Click the Item Grouping button in the Finder Toolbar or View > Group By > Tags from the menu bar.
- Type the tag color in the Finder search field and then pick the tag from the results under Tags.
When it comes to organizing files and folders on your Mac, take a look at the options you have with tags. You can label similar items, search easily, and create tags for things you want.
Check out next: