If you own a Mac, you most likely use the Finder window on a daily basis; probably more than you even realize. But one thing you may not have known throughout the eons of using the Finder interface as Apple has created it to be used, is that you can actually customize the Finder toolbar to your liking.
By doing so, you can supercharge your Finder window’s functionality with additional easy-to-reach features, and we’ll show you how to customize your Mac Finder toolbar in this simple tutorial.
Why to customize the Mac Finder toolbar
The Finder window of your Mac has useful functionality built into it already, such as:
- Navigating back and forth between folders
- Switching between grid, list, preview, and Cover Flow view modes
- Sorting files by various criteria
- Quick actions to perform inside the current folder
- Sharing files
- Assigning tags to files
- Searching for files
On the other hand, customizing your Finder toolbar can be useful if you have no need for one of the aforementioned features, or if you are interested in adding more features. Among the new feature buttons and tools you can add to the Finder toolbar are:
- Quickly grabbing the path of a file
- Eject a disk button
- Burn a disk button
- New folder button
- Delete button
- Connect to a server
- Get information about a file
- Get a quick look at a file’s details
- And more…
Although some of the features can be accessed in different ways, the workflow could be made faster with customizing your Finder toolbar depending on the way you do things.
So if you were interested in seeing how this is done, follow along as we discuss the steps below…
How to customize your Finder window’s toolbar
To start customizing your Finder window’s toolbar, follow these quick steps:
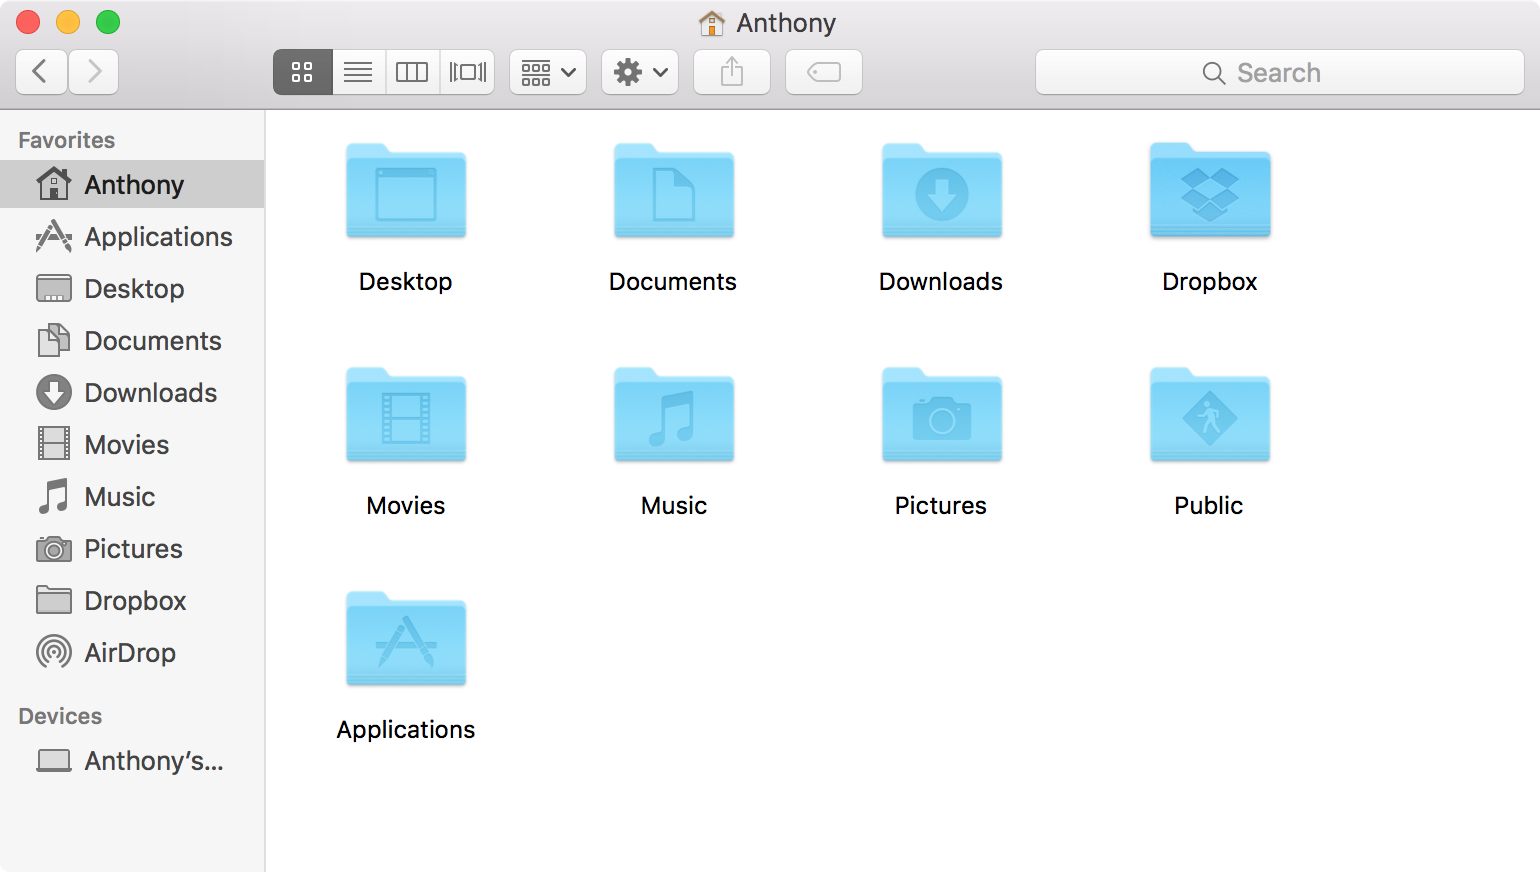
1) Open a finder window by clicking on the Finder icon in your Mac’s Dock.
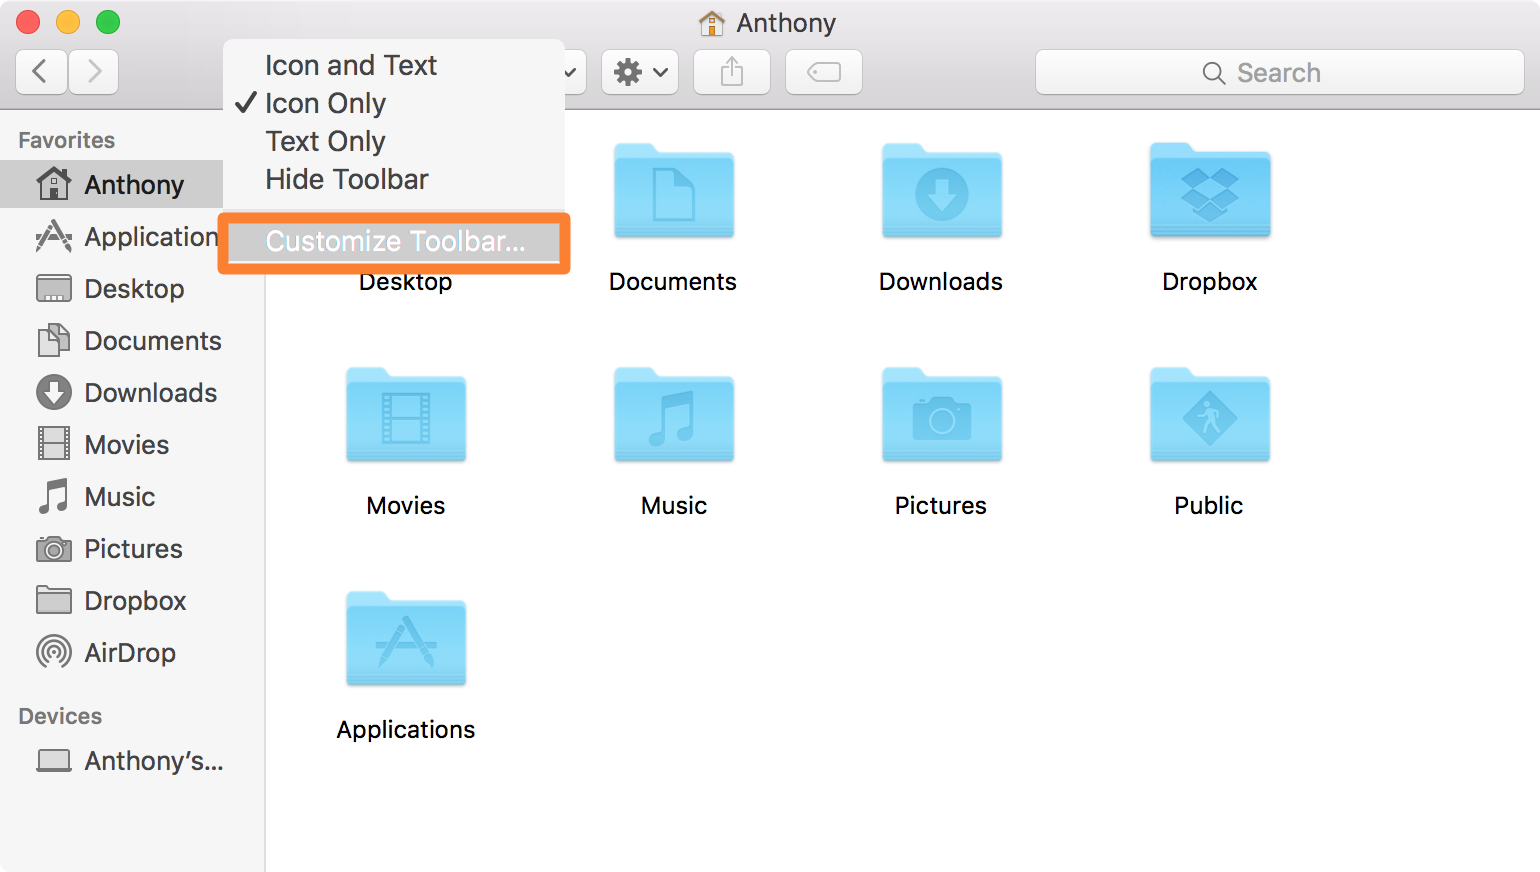
2) Right-click somewhere in the toolbar, and in the pop-up menu, you’ll click on Customize Toolbar.
3) A new interface appears with a variety of different buttons and functionality features that you can drag and drop into the toolbar.
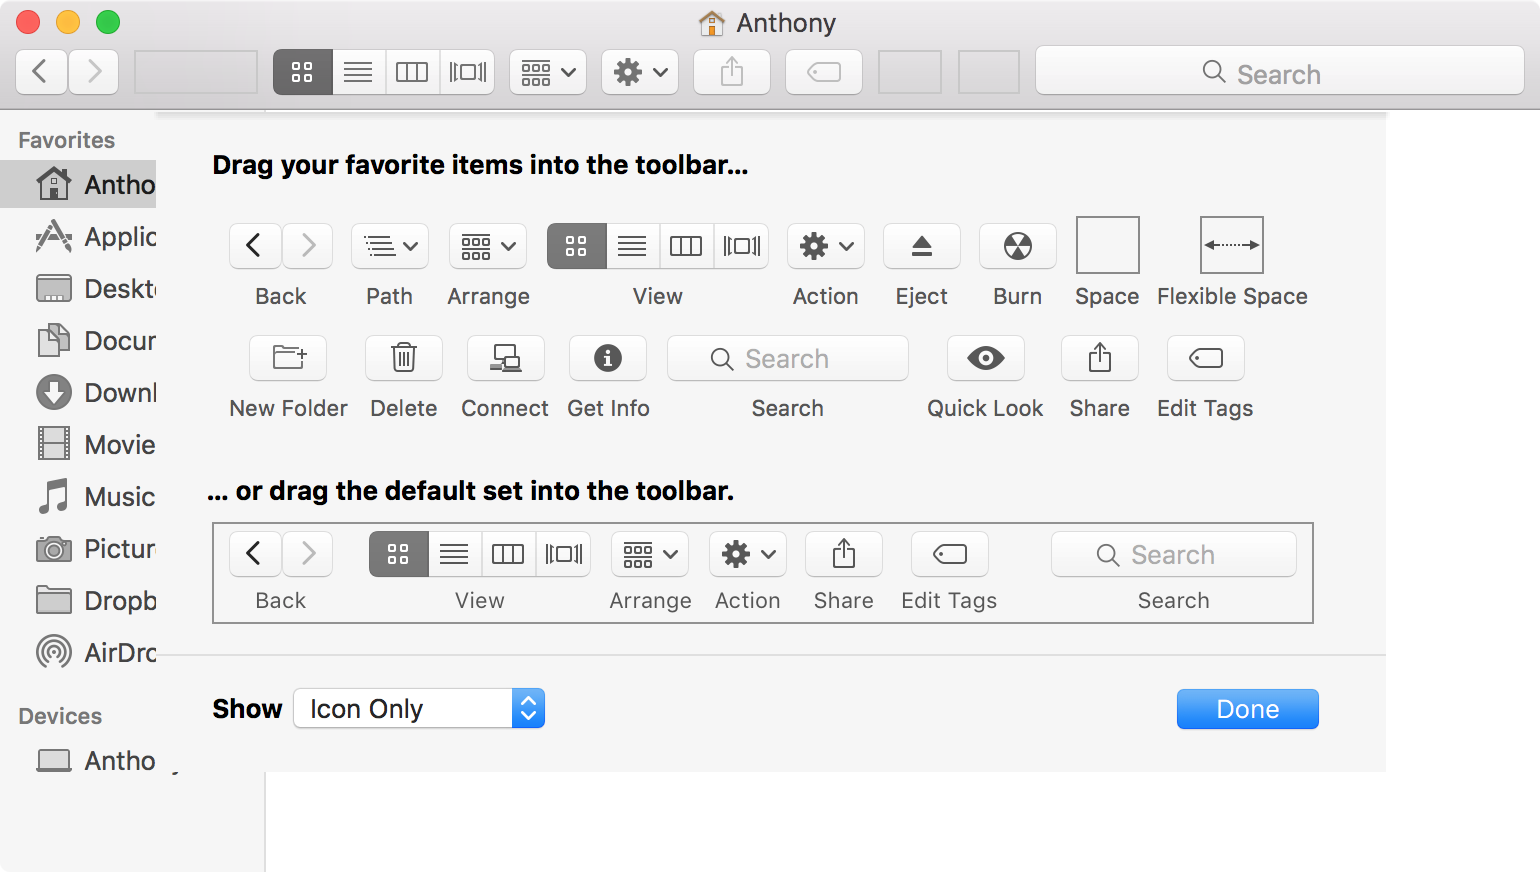
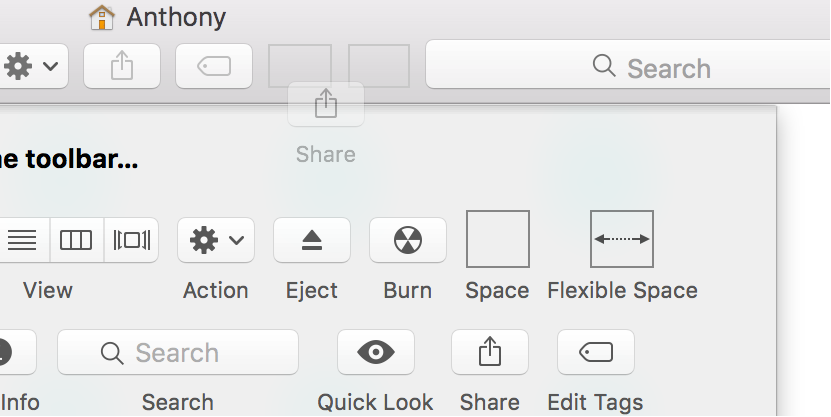
4) Select something to add or remove from the Finder toolbar, and then click and drag it in or out of it; Example: Share button.
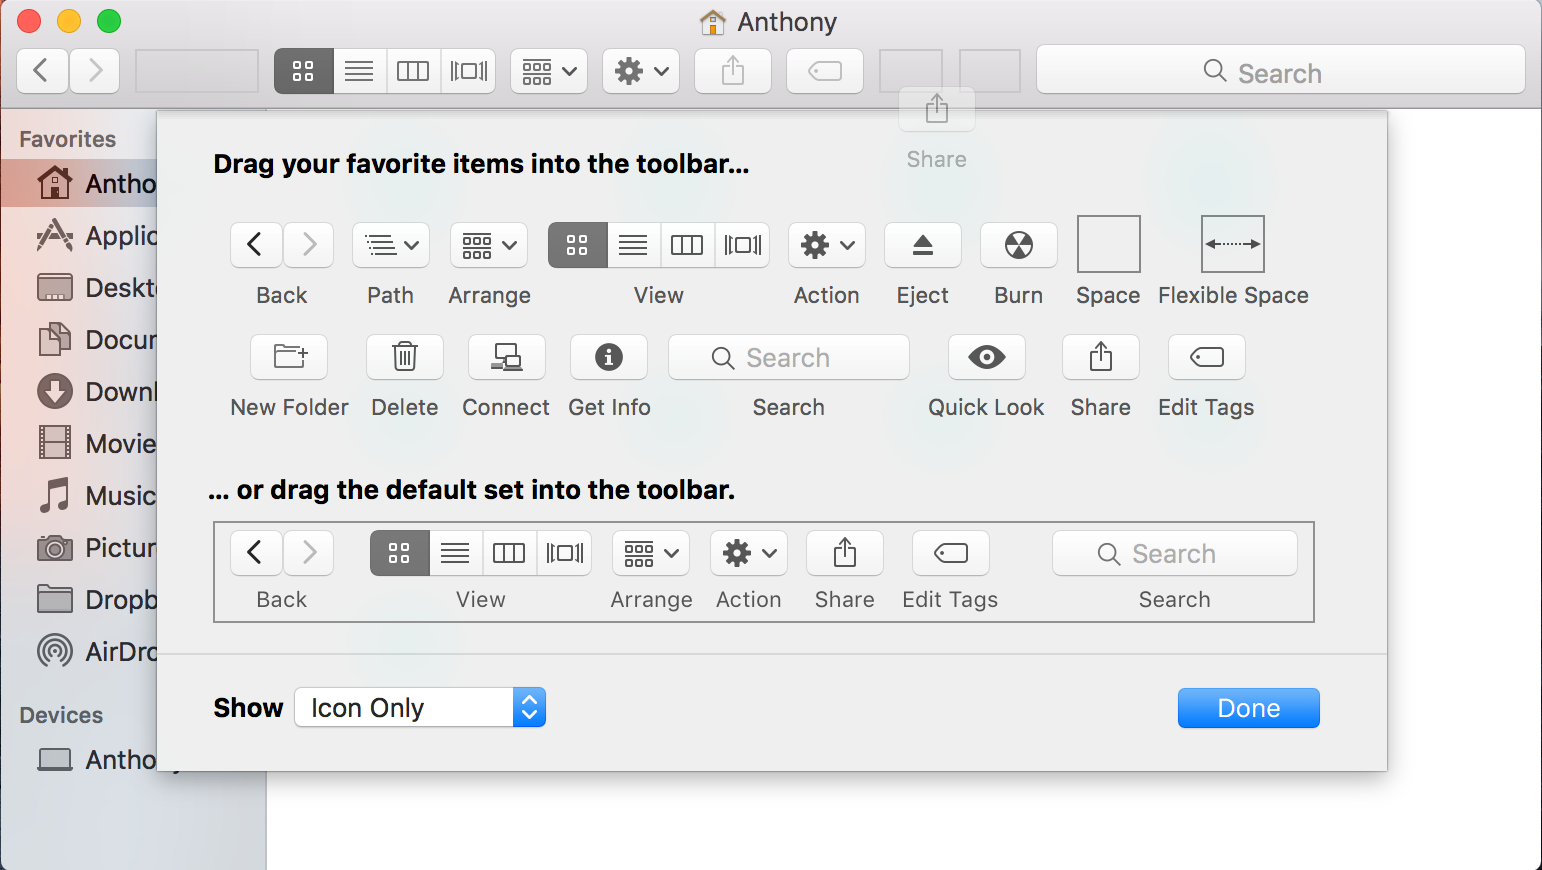
5) Click on the blue Done button to save any changes you make.
And now you’ve just customized your Finder toolbar. That was easy!
Wrapping up
Customizing the Finder toolbar is something every Mac user should know how to do, and it can help improve workflow productivity depending on how you use your Mac.
If you’re afraid you’ll mess something up, or you want to ever go back to the factory settings for the Finder toolbar, you can always drag the default set back into the toolbar, as shown at the bottom of the toolbar-editing interface.
Also Read: 10 keyboard shortcuts for Finder on your Mac
If you found this tutorial useful, and now have a more functional Mac Finder toolbar than before, drop us a comment below!