
Time Machine is very useful, because not only does it allow you to back up all of your user data, but it also allows you to selectively view and restore portions of that data, even down to individual files.
In this tutorial, the forth in our series about Time Machine, I’m going to show you to how to view and restore an individual file using a Time Machine backup.
How to restore individual files from Time Machine
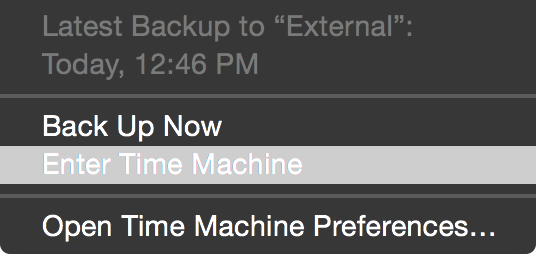
Step 1: Enter Time Machine via the menu bar shortcut. If you don’t see this menu bar option. Click System Preferences → Time Machine, and select Show Time Machine in menu bar.
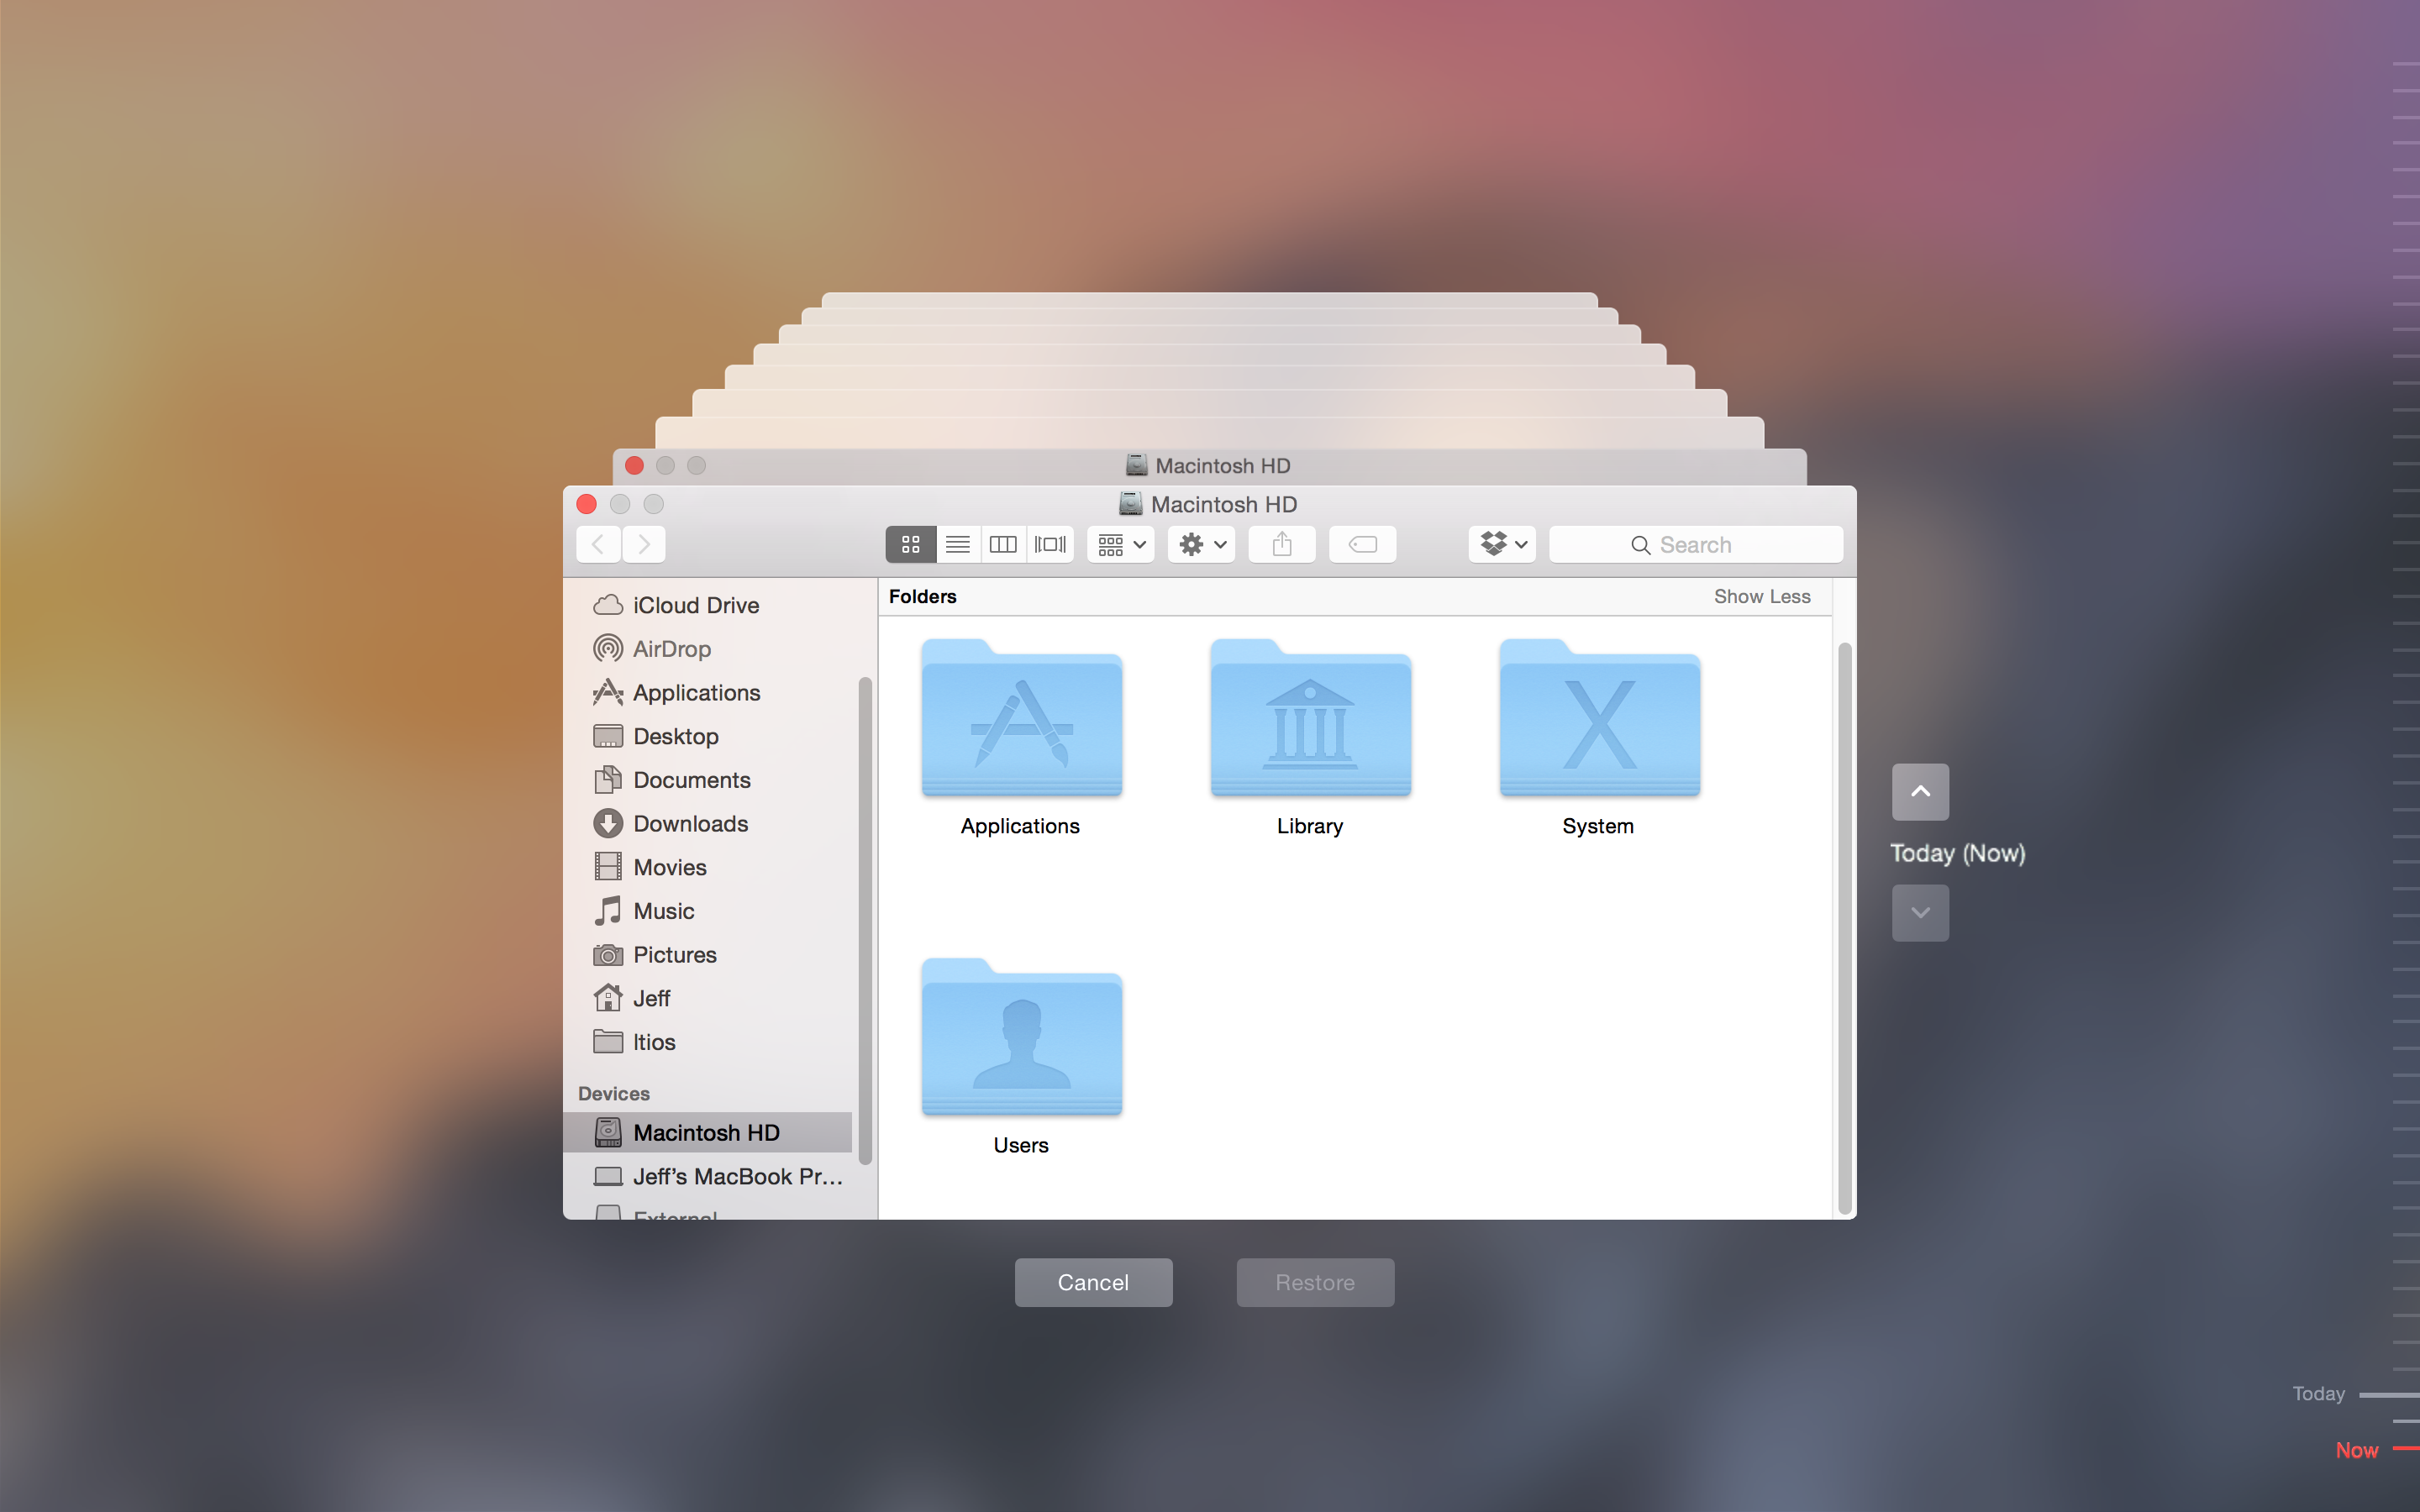
Step 2: Once you’re in Time Machine, open the folder that contained the file that you wish to restore.
Step 3: Use the dial on the right to navigate back through time until the item that you wish to restore appears in the folder. You can now decide to simply view the file (double click it, or use click and then press the space bar to preview), or you can restore it by proceeding with this tutorial.
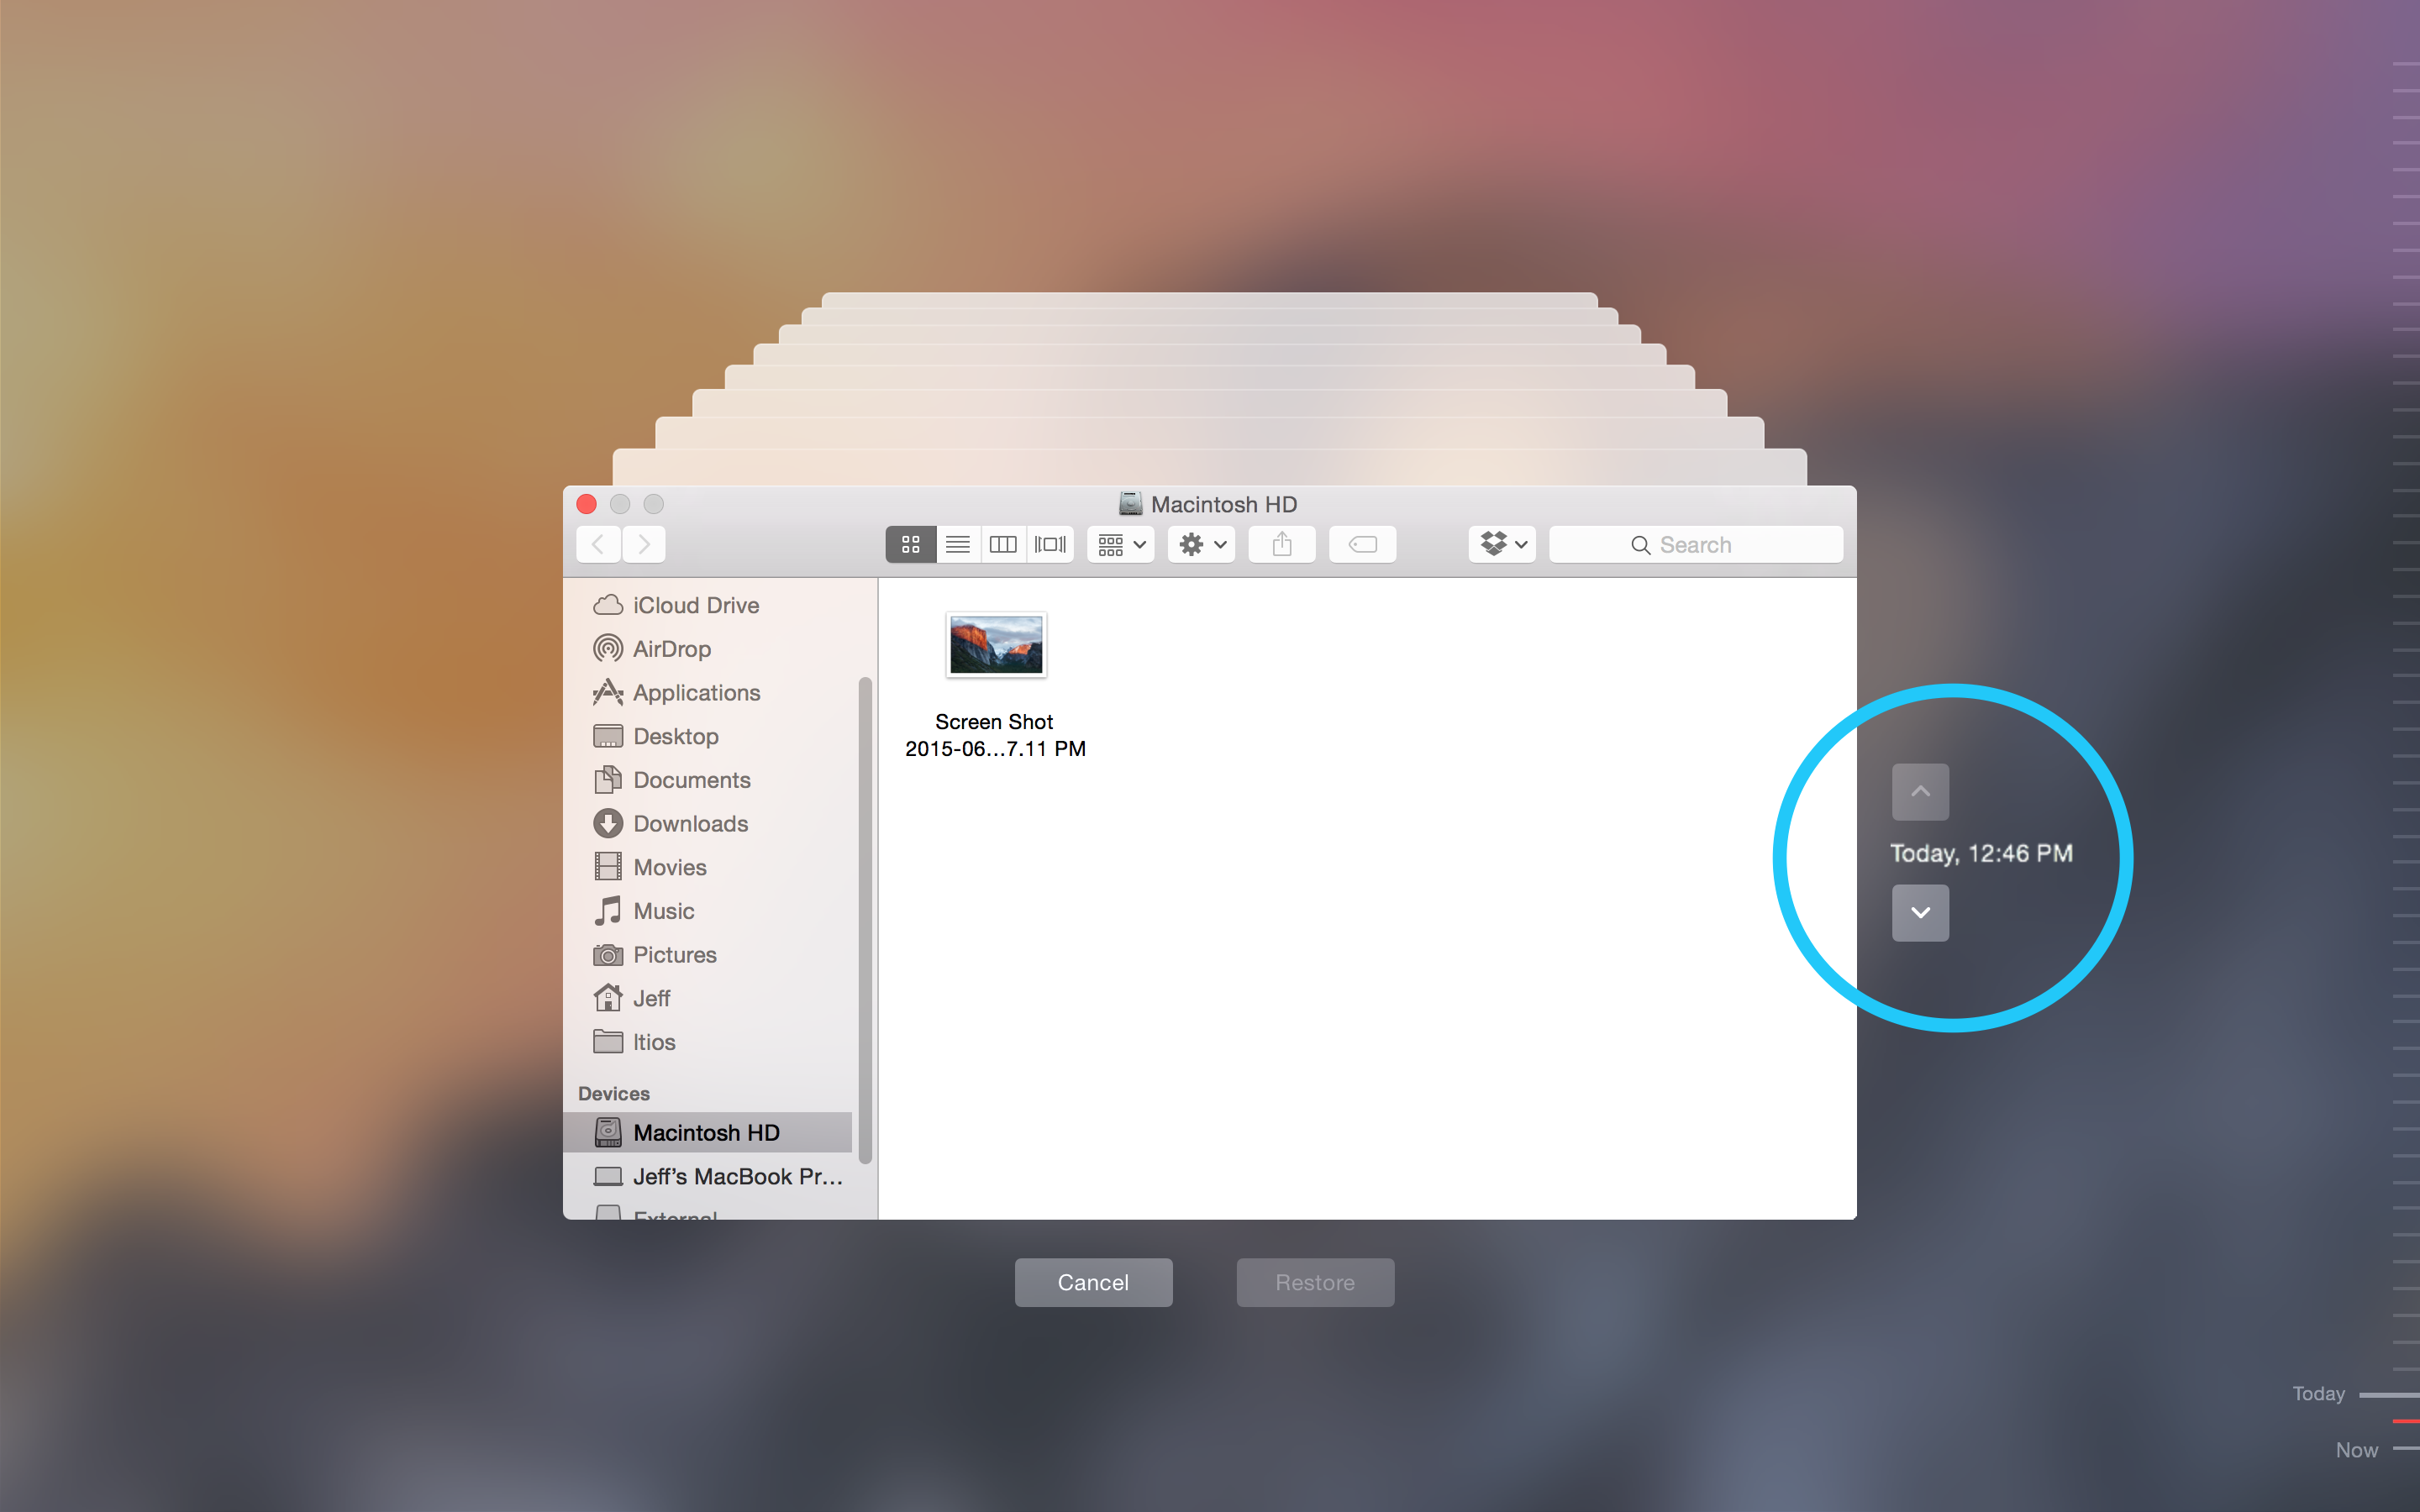
Step 4: While the file is highlighted, Click the restore button at the bottom of the interface to restore that individual file from backup.
Congratulations, your file should now be back on your Mac as it originally was before it was lost.
And that’s it. That’s how you can easily view and restore files from a Time Machine backup. This can be a life-saver when you accidentally get rid of a single file, and later it turns out that you really needed that file.
To learn more about Time Machine, make sure to also check out these other tutorials:
- How to set up Time Machine on OS X
- How to encrypt Time Machine backups
- How to exclude files from being backed up in Time Machine
- How to create a partition on your Time Machine external hard drive
- How to set up a new Mac from a Time Machine backup
- How to move Music or Photos to a new Mac using Time Machine