Learn how to manually update Spotify on Mac to ensure you have the latest available version of the app with the newest features and bug fixes.
Spotify for Mac users might be a little stumped when trying to manually check for updates in the app. You’re not alone. Unlike most Mac apps, the Spotify app doesn’t have a dedicated “Check for Updates” option in any of its menus.
So while Spotify doesn’t follow the traditional update format that most Mac apps use, it typically stays up to date automatically. Nevertheless, you can still check for updates manually, which can help when you’re on shoddy Wi-Fi and automatic updates don’t have a chance to finish.
Check and manually update Spotify on Mac
1) Open the Spotify app on your Mac.
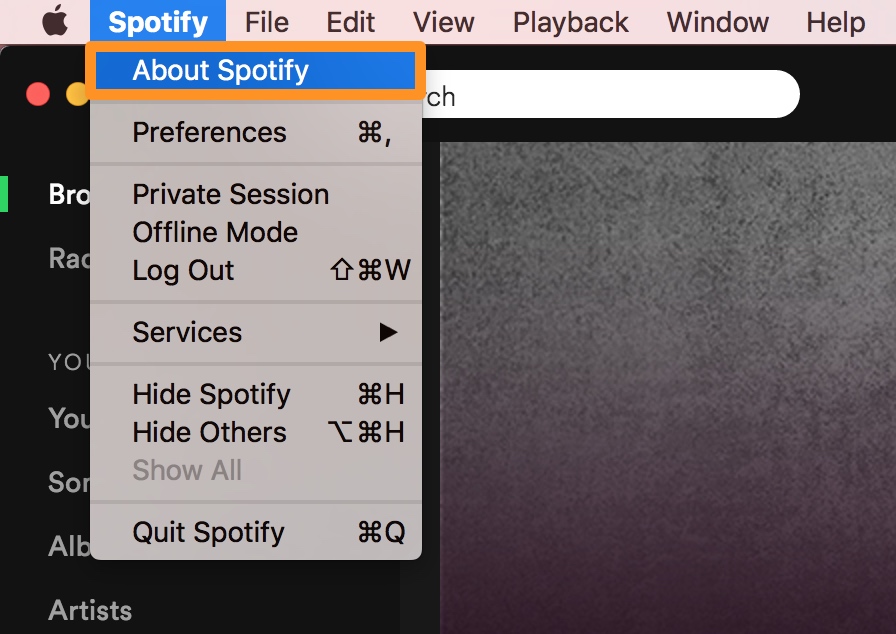
2) Click Spotify in the top menu bar and choose About Spotify from the drop-down menu.
3) When the About window opens, you may see a line saying there’s a newer version available. If you do, click the “Click here to download” link.
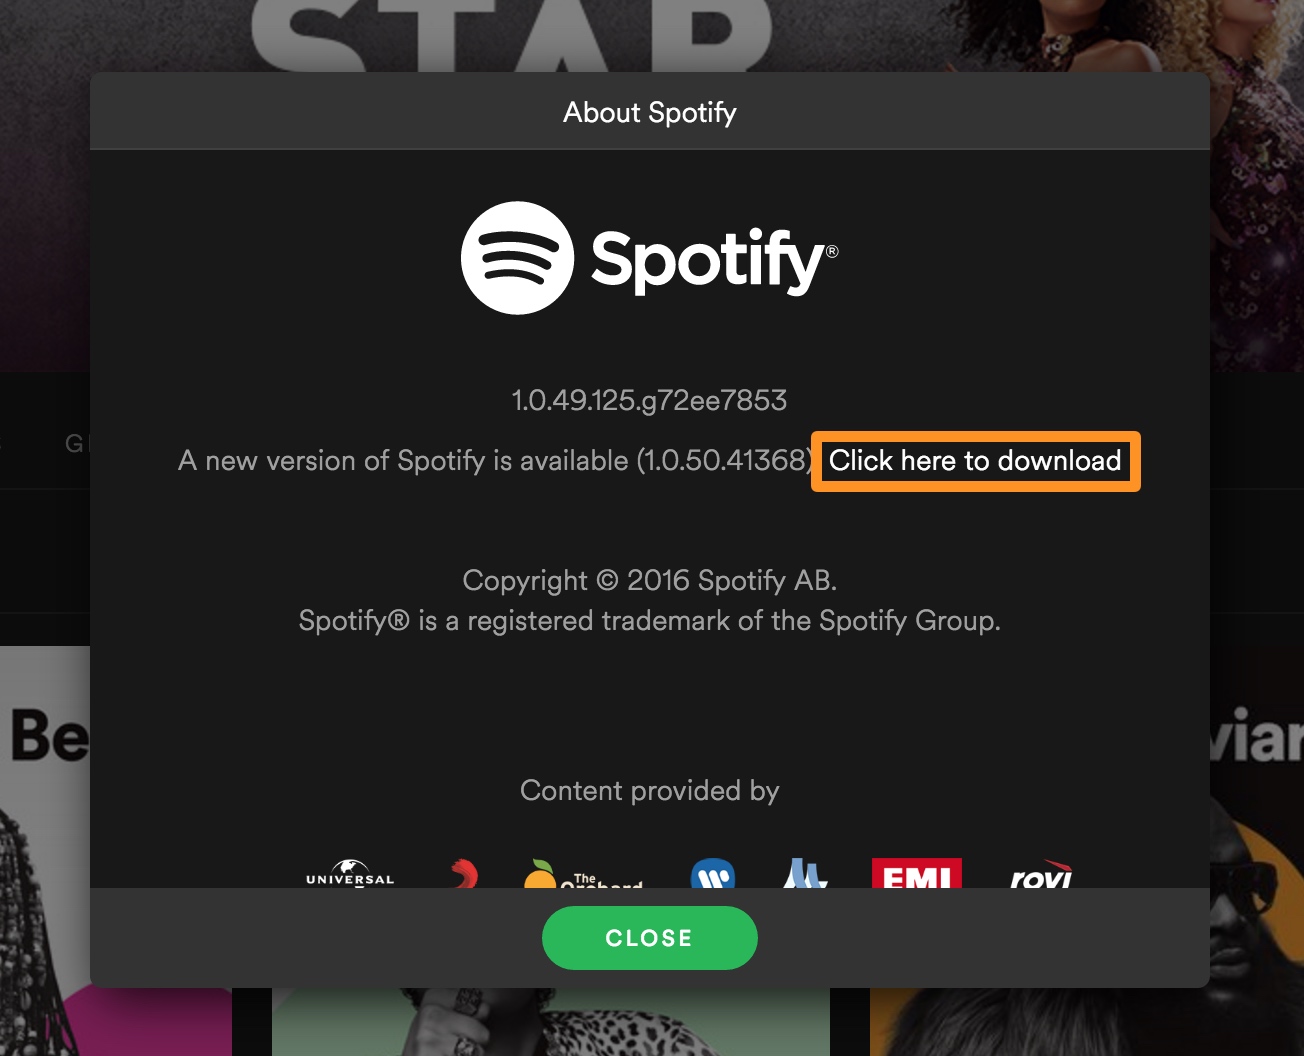
4) Your Spotify app will begin downloading the update.

5) Once finished, Spotify will ask you to restart the app to install the latest version. Click “Please restart to install.”

6) Simply quit the app, re-open it, and your update should be installed!
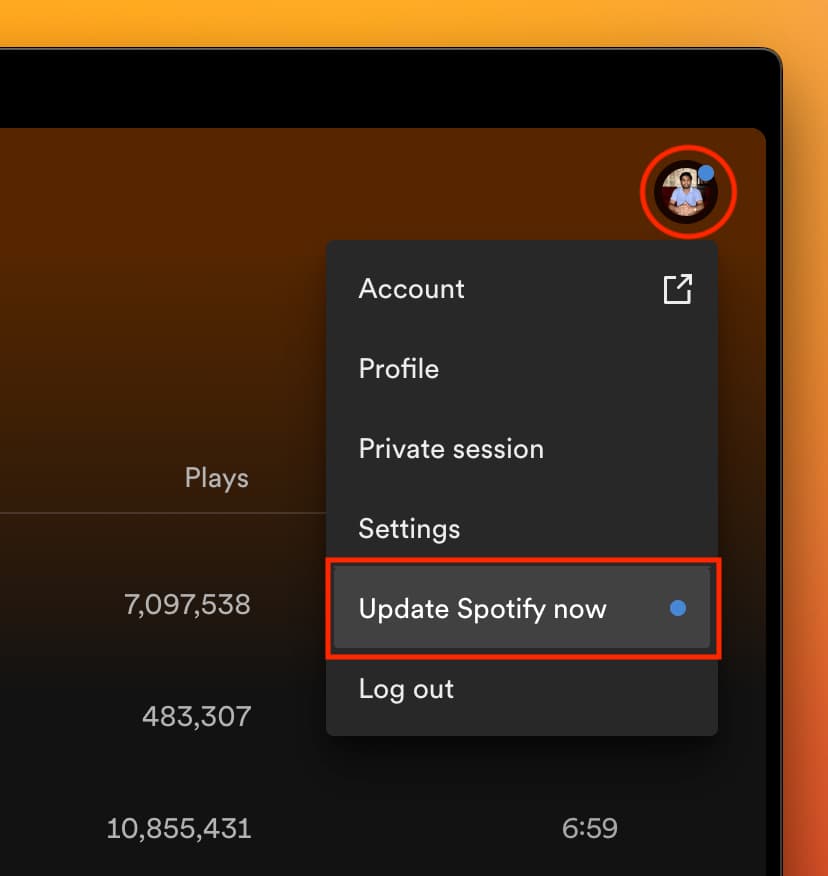
Alternatively, when you receive an update, a small blue dot will appear on your profile picture. Click it and choose “Update Spotify now.”
No update available?
If you don’t see the download link in the “About Spotify” menu, that means your app is already up to date. This means you don’t have to install any updates, because either Spotify has installed all the latest updates automatically, or you have already manually installed the newest release at an earlier time.
Finally, as you already know, deleting and reinstalling the app from Spotify’s official website is also a sure-shot way to ensure you get the most recent build of the app.
It’d be nice to have a simple “Check for Updates” option in the Spotify menu, as most Mac apps do, but for now, this is the way to go about it.
More on Spotify: