In this tutorial, we will show you how to quickly crop a screenshot or screen recording on your iPhone, iPad, or Mac before you save or share it.
Unlike your Mac where you have the option to select an area or app window, screenshots or screen recordings on your iOS device capture everything that’s on the entire screen.
Related: How to blur, pixelate, and hide sensitive parts of a photo on iPhone
Crop screenshots
If you’ve already taken a screenshot, open the image in the Photos app or Mac’s Preview and use the regular crop option for iOS or macOS.
If you have not taken one, follow these steps instead.
On iPhone or iPad
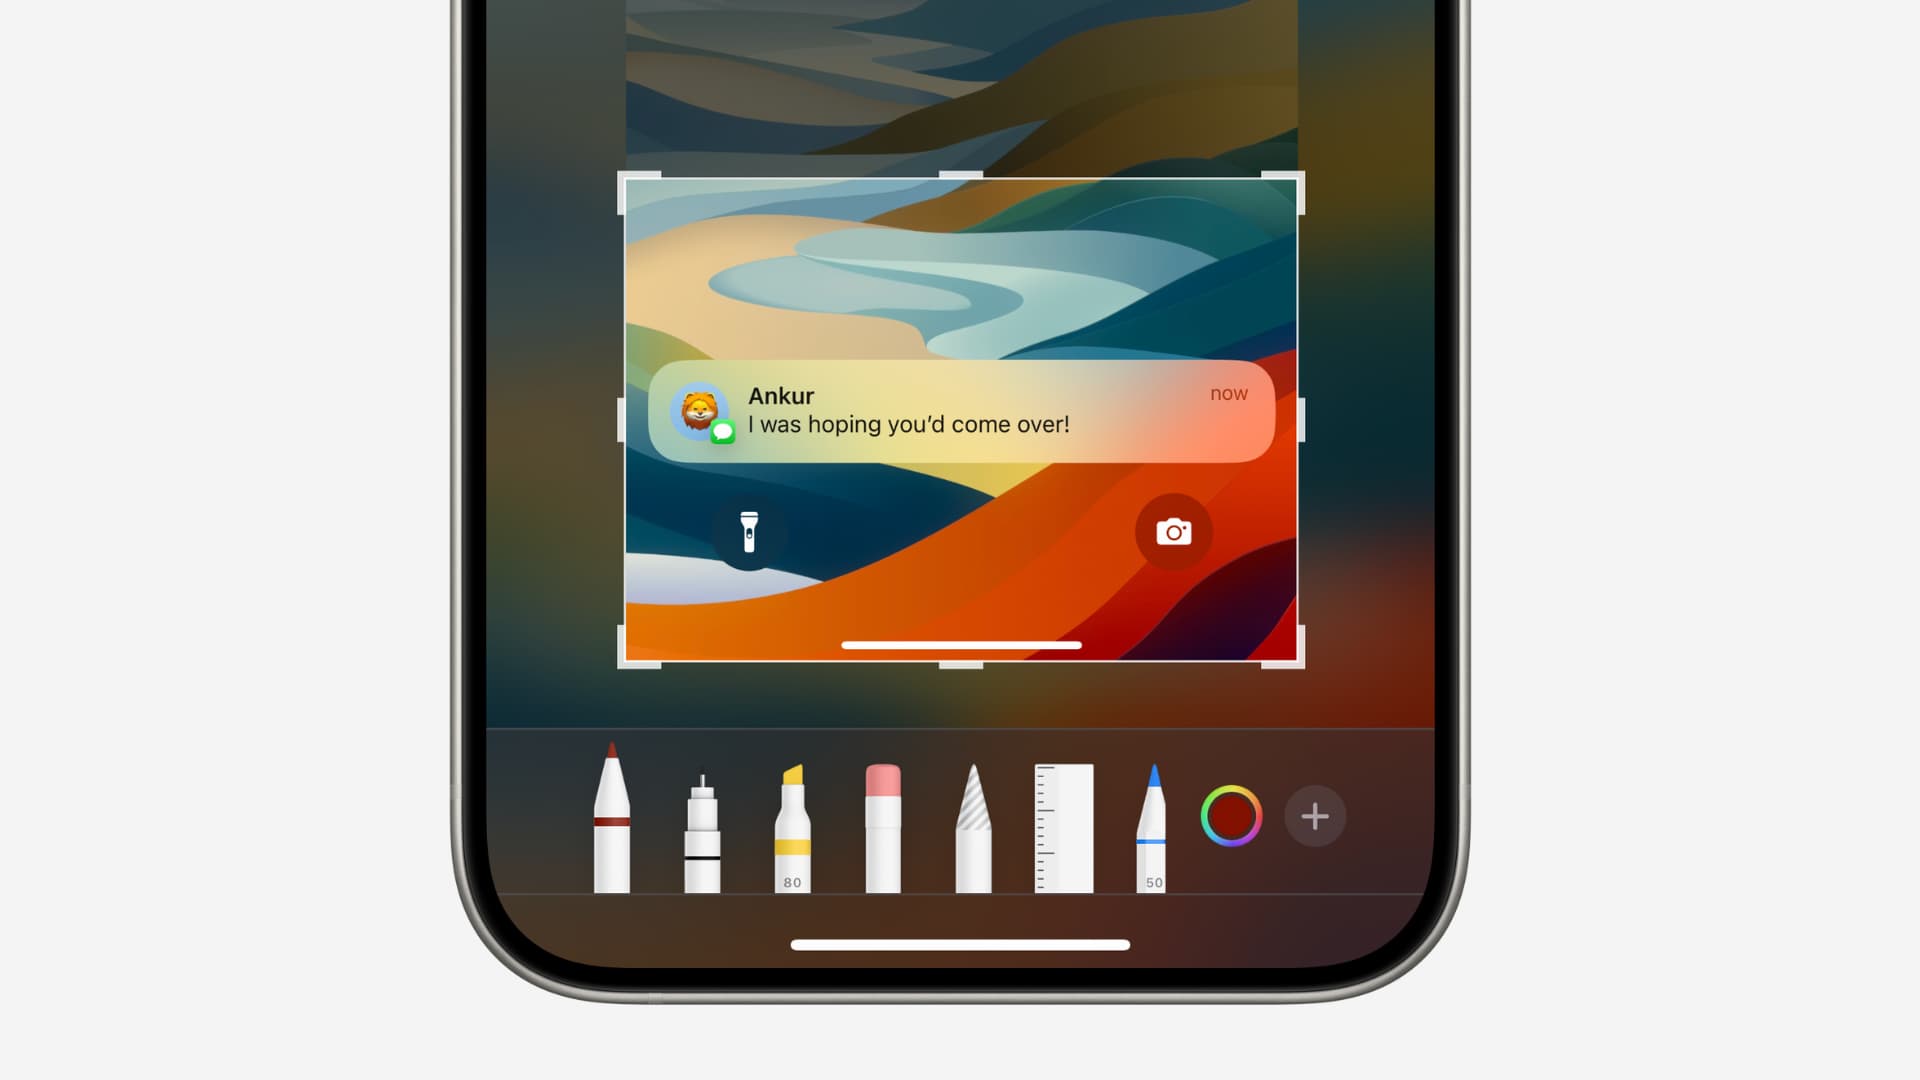
1) Take a screenshot by holding the power button and one of the volume buttons.
2) Tap the screenshot thumbnail from the bottom-left corner of the screen.
3) Drag the four corners and the middle side tabs to crop your screenshot as desired.

4) Tap Done > Save to Photos.
5) Now, go to the iPhone or iPad Photos app to find this cropped screenshot.

On Mac
1) Press Command + Shift + 3 to capture the full screen or Command + Shift + 4 to capture a portion of it.
2) Click the thumbnail icon from the bottom-right corner of the screen.

Note: If you do not see the thumbnail, press Command + Shift + 5 to open the screenshot toolbar. Now, hit Options and check Show Floating Thumbnail.
3) Click the markup button from the top.

4) Select the crop tool.

5) Now, drag the corners in a free-flowing manner to crop it as desired. If you can’t drag it, position the pointer properly over the corner and wait until it turns into a two-sided arrow icon.
You can also place the pointer over the selection area and it will turn into a hand icon. Now, drag this selection area elsewhere on the screenshot.
6) Click Done to save the cropped screenshot.

Crop screen recordings
iPhone or iPad
Record the screen using the screen recording button in the Control Center. After that, open the Photos app and go to Albums > Screen Recordings to find the video. If you just made a screen recording, you can also touch and hold the Dynamic Island and tap View to open the file directly. Now, hit Edit and use the regular crop option to trim out the unneeded parts of your screen recording.

On Mac
1) Make a screen recording on your Mac using Command + Shift + 5 or with the QuickTime Player.
2) Now, right-click over the screen recording file and choose Open With > Other > Photos > Open. You can also open the Photos app and then drag the screen recording over it.
3) With screen recording open in the Photos app, click the Edit button from the top right corner.

4) Select Crop from the top.
5) Drag one of the corners to remove the unneeded parts. You will also find some other handy tools on the right sidebar that let you quickly select a dimension/shape for the cropping area.
If you want to undo a change, press Command + Z or hit the Reset button to start over.
6) With the video cropped, click Done.

7) Once the video is cropped to your liking, use File > Export > Export 1 Video. You can also drag the video from the Photos app to the desktop.

Check out next: