As both a weekend photographer and someone who regularly photographs items for the posts that I make for iDB, I’ve spent quite a lot of time and effort furnishing my camera bag with the necessities so that I’m prepared for anything, whether I find myself in the comfort of my own home or walking leisurely through the park.
If you’re a photographer just starting out and wondering what kinds of things you should keep in your camera bag, then you’re in the right place. As someone who handles photography equipment regularly, I’m in a unique position to recommend things that lessons over the years have taught me never to go without.
What’s in my camera bag?
Before I just start rattling off about all the different things that I keep in my camera bag, I’ll start by organizing those items into two categories: gear and accessories. Gear is equipment especially tailored to my camera, such as the camera body and lenses, while accessories are items that I like to include to complement my photography experience in the field.
Lastly, I plan to focus more on what I believe every photographer needs more-so than the personal items I pack. That’s because I have a few items in my bag that I pack for reasons that most photographers won’t have. I’ll talk about that stuff at the very end of this piece for those interested.
Without any further ado, let’s jump right into it.
Camera Gear
Before you can take photos, you need a camera and some lenses. You don’t need a hyper-expensive camera body and the best lenses on the market to take good photographs, but it’s something that you might consider if you ever find yourself picking up professional work or wanting to improve your image quality.
I used to be a Nikon shooter – I used a Nikon D7000 DSLR for several years before upgrading to a Nikon Z6ii mirrorless body, and then later to a Nikon Z8 mirrorless body a few months after that. But after a while, the bulkiness of that equipment led me to explore other avenues, and that’s when I moved to the Sony ecosystem, which boasts great specs while maintaining a much more compact form factor.
That’s why today I use a Sony Alpha 1 camera that I scored on eBay with just under 300 clicks (shutter actuations) on the camera body for around 50% of the retail price. It was a deal I couldn’t walk away from, and so started my transition from Nikon to Sony.
The Sony Alpha 1 is a few years old. It launched in March of 2021 with an impressive rap sheet, and even to this day, there aren’t many mirrorless cameras that can stack up with it. It boasts a powerful 50-megapixel sensor and supports 8K video recording, and as a benefit that I take advantage of all the time, it offers both digital and mechanical shutter options.
Most photographers don’t need a camera as powerful as the Sony Alpha 1, but if you can find a deal on one, I say jump on it. Even my Nikon Z6ii was an excellent camera, although there are rumors that the Nikon Z6iii could be on its way out. If you’re on a budget, a second-hand Sony A7 IV would also be a great choice.
As for lenses, what can I say? I’m a lens guy. I appreciate having an assortment of lenses because there are instances where I might need a close-up one day and then may need a longer lens to get closer to the action another day.
When first getting into cameras, it was always drilled into my head to invest in what’s called the holy trinity of lenses; that typically looks something like a 14-24mm wide angle, a 24-70mm standard zoom lens, and a 70-200mm telephoto zoom lens. These focal lengths get you everywhere you need to be in most scenarios; but some well-chosen prime lenses can get you those beautiful portrait shots everyone loves.
Personally, I keep only the following Sony G Master lenses in my bag:
- 14mm f/1.8 ultra-wide prime
- 50mm f/1.2 prime
- 24-70mm f/2.8 standard zoom
- 70-200mm f/2.8 telephoto zoom
It’s an ambition of mine to eventually cough up the dime for a super-telephoto lens that extends beyond 200mm for long-distance wildlife photographs, but those get pricey quickly depending on specs, and if I’m being honest, I won’t use it as often as the lenses listed above.
If you saw those price tags… yes, good glass is expensive and you get what you pay for. I’ve spent much of my hobby buying, trading, and upgrading, but you don’t need to start off with professional lenses to take good photographs. If you’re starting off, you should start small like I did.
A good wide-angle lens will do well in busy environments for capturing much of the action in a single frame. These are useful for street photography, concerts, astrophotography, parties, and other situations where there’s a lot to capture, but perhaps not a lot of room to do it. I think anything in the 14-24mm range is good for this, which is why I have a dedicated 14mm prime lens. The f/1.8 aperture also works well in low light.
I also highly recommend a nifty fifty. You don’t need a 50mm lens with a wide f/1.2 aperture – an f/1.4 or f/1.8 aperture is enough; I just happened upon a deal I couldn’t refuse and that’s why I ended up with an f/1.2. 50mm is close to the focal length perceived by the human eye, so the images you capture with these lenses are comparable to what your eyes would have seen in that moment. That’s what I think makes them attractive. I use this lens all the time for portraits and for product photography, such as in review posts.
Zoom lenses can be a can of worms because as soon as you introduce moving parts, you find compromises. Most zoom lenses have a variable aperture, which many times ranges from f/3.x to f/6.x. These zoom lenses work great outdoors in the Sunlight, but when you take them indoors where there isn’t as much light, you’ll find that the exposure takes too long, and images come out underexposed. That’s why I use constant f/2.8 zoom lenses. They cost a bit more, but they let in the maximum amount of light, so I don’t compromise on convenience or image quality.
I use a 24-70mm f/2.8 standard zoom lens because it’s ideal for pretty much everything; taking pictures of landscapes, people, cars, buildings, and anything you might find while traveling. This lens features a wide-angle mode, hits that 50mm sweet spot, and can also extend out to 70mm for more reach if I’m far away. The constant f/2.8 aperture makes this a good indoor/outdoor lens.
I also have a 70-200mm f/2.8 telephoto zoom lens because I can use it for almost everything else, such as photographing weddings, certain kinds of wildlife, up-close sports, distant cars, and a host of other things. It doesn’t quite give you the distant reach that you might want for bird photography, but it covers a colorful assortment of other things, so it’s a must-have in my opinion.
If you can’t afford these lenses, I would suggest that you invest in a good 50mm lens and a decent telephoto zoom (somewhere in the 70-200 range). Cheaper telephoto zoom lenses sporting variable apertures exist, and they’ll work fine, but they aren’t as effective indoors or in low light situations, so keep that in mind. When you pay for f/2.8, you get indoor/outdoor performance and faster, sharper image capture.
Even if you’re using a Canon or a Nikon camera body, you can find many of the same lens focal lengths that I use for my Sony camera. I know this because I used to own a Nikon, and I have researched this topic extensively to understand that even brands that I don’t own and use have competing products.
I don’t want to get into the ‘which camera is better’ debate, because that’s a dirty subject, but I will say that I appreciate the compactness of my Sony equipment and loved the image quality of my Nikon. You can’t go wrong with whatever you choose if you pick your equipment correctly for how you intend to use it.
Accessories
Accessories are important, but there’s one thing you need to know before you start buying everything: good cameras and accessories don’t make a good photographer. Just look at me… I’ve got a decent setup and even I’m not Pablo Picasso when it comes to taking pictures. Being a good photographer takes practice, technique, and perhaps even a little bit of talent. I mention talent because even though I’ve practiced and honed my technique over several years, I still find there are other people who pick up cameras and quickly outpace me.
After you’ve established yourself with camera gear and have a general understanding of what you need for your intended use case and how to use it, you may find yourself accumulating camera accessories. You shouldn’t rush into this because simply buying all the best stuff won’t make you a better photographer. Instead, you should buy what you need as you need it so that your collection grows with you as you learn.
In my camera bag, I have a wide array of accessories. The following section will be more list-like than my camera gear section because I feel that camera accessories are subjective. On the other hand, most photographers carry similar accessories, regardless of camera make and model, so this is where I’m open to making more blanket recommendations.
A good tripod

Every photographer should have a tripod. I don’t care if you get a cheap plastic tripod from a big box store or a sturdy carbon fiber tripod that costs one or several grand. Get what fits your body and stabilizes your camera effectively. Don’t settle for a tripod that doesn’t keep your gear steady enough for a still photograph and don’t over-buy a tripod that you don’t need.
Since tripods vary greatly in build quality and features, I’m comfortable recommending a Peak Design travel tripod. They’re in the mid-range of price and quality and many novice and professional photographers feel comfortable using them. You can get one in aluminum for around the same price as a lens or you can get one in lighter and stronger carbon fiber material for more.
I’ve personally reviewed one right here on iDB, and I love how it folds so compactly that it compares to the size of a bottle of water. I own both an aluminum and a carbon fiber version of this tripod and both are excellent, however the carbon fiber version is noticeably lighter. They include a plate for your camera and a carrying case to shield it from the elements. I find that they’re particularly robust and modular.
If $300-600 sounds expensive to you for a tripod, consider the fact that you will be putting your camera and lens on it. Do you trust that gear to not fall over on the ground with a flimsy plastic tripod or a metal one that seems sturdy until the screws start loosening? You should probably invest in a tripod that’s worth around 10-20% of your camera body and your most expensive camera lens, and I think that Peak Design is a safe bet.
A sturdy sling
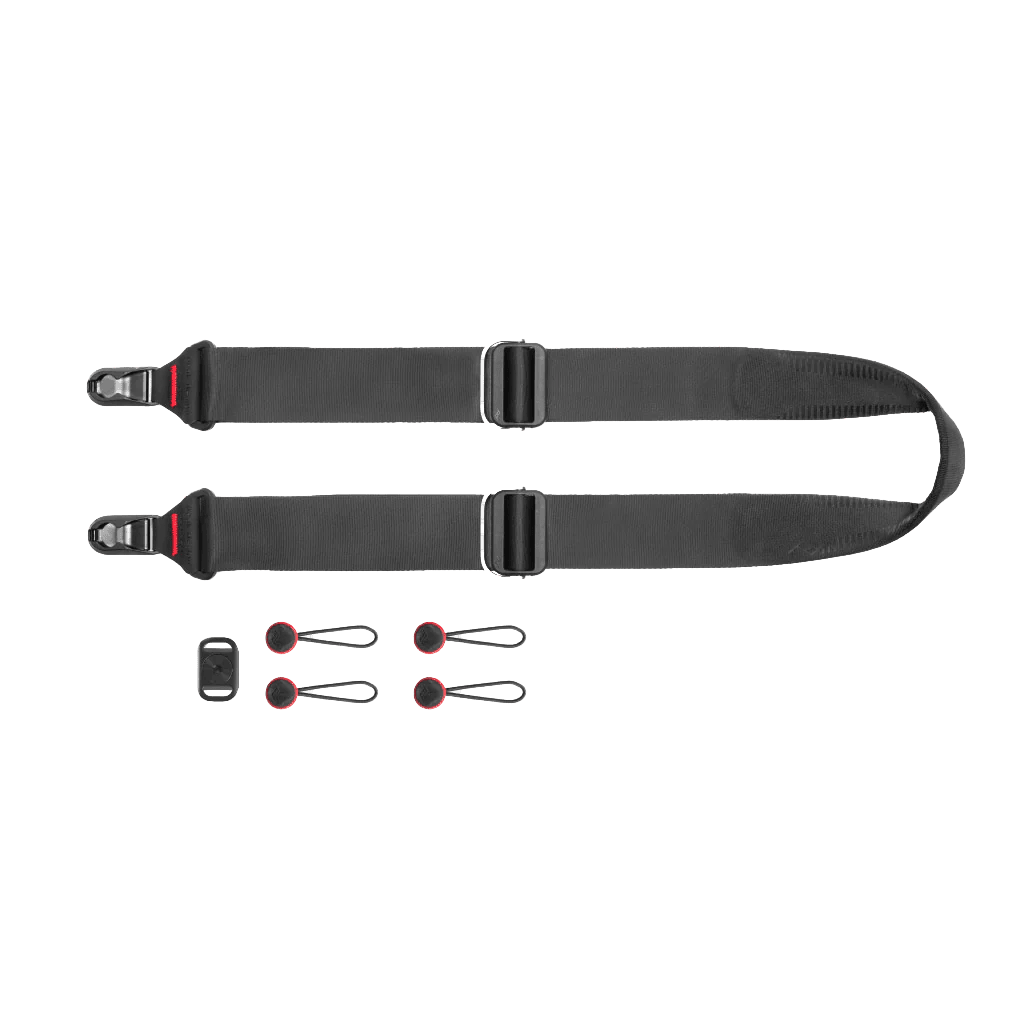
Camera gear can get heavy, and for some reason, it feels like it gets heavier the longer you lug it around while walking. I think this has more to do with personal perception than the laws of physics due to getting tired from all the effort, but investing in good camera support can lessen the perceived load.
For this reason, I suggest a good camera sling that both feels good around your neck or shoulder and keeps your camera gear secure. I personally carry a Peak Design Slide because it feels great on my neck and shoulders and because I know the anchors that attach to my camera or lens are sturdy and won’t break on me.
You should strive for whatever looks and feels good to you, whether that’s a piece of paracord or leather, but in my case, the Peak Design Slide folds flat to be stowed away when not in use, and it’s adjustable on either side. Another thing I really love about this thing are the silicone grips at the center that help keep my gear firmly planted on my shoulder when I’m walking. No more slipping and sliding…
Extra batteries
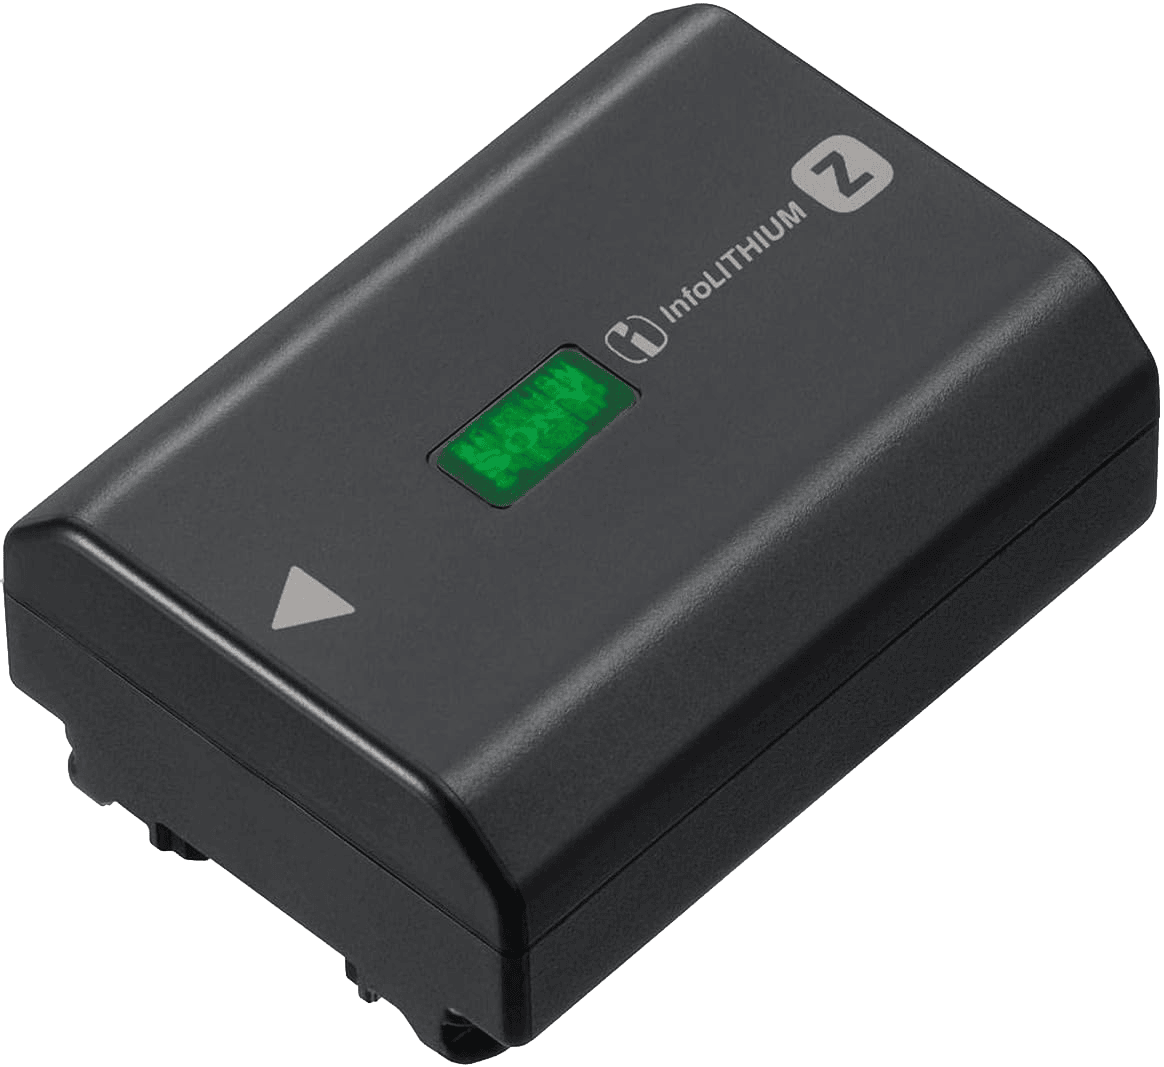
Your next major investment should be spare batteries. I recommend at least two spare batteries in addition to the one that’s already in your camera. Why? Because you need a backup in case the one already in your camera dies, and you should have a backup for your backup in case you forget to charge it from your last trip. Ask me how I know? The school of hard knocks is screaming through my gritted teeth right now…
Three batteries in total is a good number to live and die by, but you can get by with two if you need to. You never want to be without power when your camera says the battery is low, as this will keep you from getting the shot. I personally have four batteries because my shoots quickly discharge my batteries and I spend a great deal of time in the field, but I usually don’t use more than three at any given time.
Also, don’t cheap out on batteries; buy OEM. I’ve been through the ringer and aftermarket batteries don’t last as long and discharge more quickly than OEM batteries do. I learned this with my Nikon and I also found it to be true while operating my Sony. It seems to be a valid issue across the board, and many reviews agree, so don’t make the mistake of buying cheaper batteries that won’t last you your entire photo or video shoot.
Internal storage
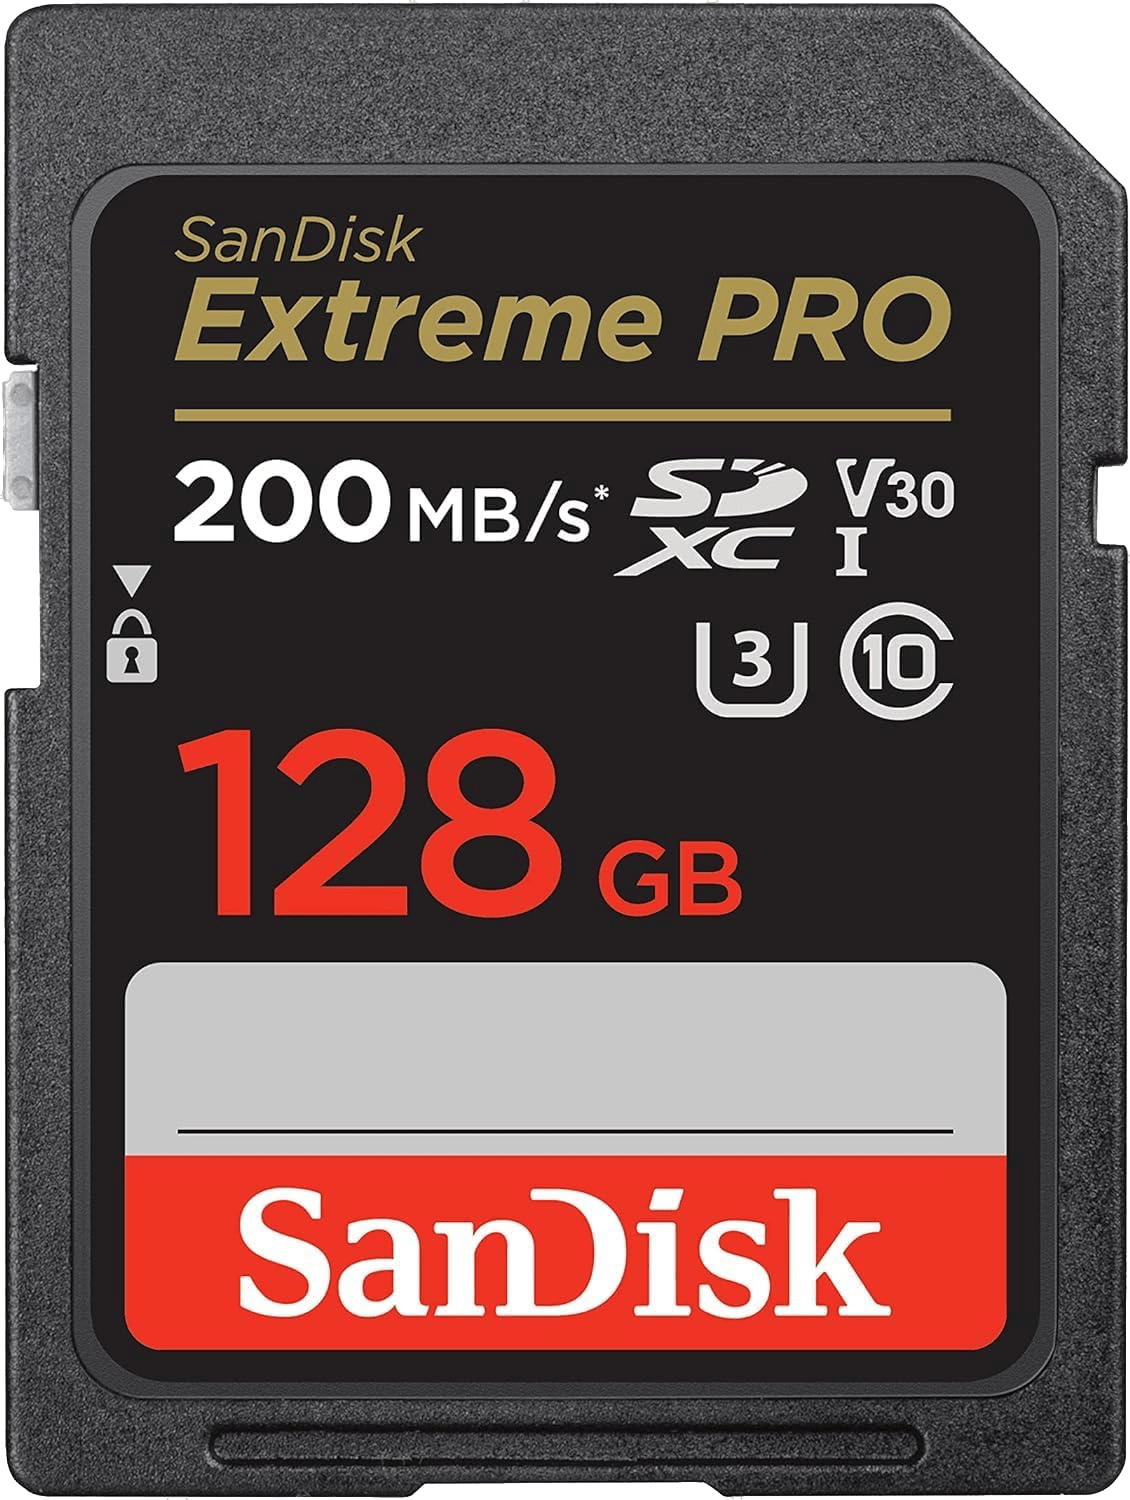
When you take pictures or record video, it’s stored on a memory card in your camera. I highly recommend that you invest in memory cards, even if you think they’re too expensive. Try to find the fastest memory you can afford and don’t settle for smaller memory cards if you can help it. Larger capacity cards go on sale all the time, and I trust brands like Delkin, Lexar, OWC, Sabrent, SanDisk, and Sony Tough to get the job done.
Modern cameras utilize 24-50-megapixel sensors on average, and these sensors produce large files, especially when capturing RAW photographs. On my Sony A1, a single RAW file at 50 megapixels can run over 100MB, so I would want at least a 128GB memory card for this use case, but I would probably recommend a 512GB or 1TB card over that if you can afford it because if you turn on burst shot mode, you’ll need it. Amazon pushes great sale deals on these all the time.
I primarily use a set of Sony Tough 640GB CFExpress Type A cards in my Sony A1, but not all cameras take CFExpress Type A cards. CFExpress Type B is more common, so if your camera takes CFExpress Type B, you will use those instead. I also have a pair of 128GB OWC Atlas Ultra SDXC cards in my bag that I can put in my camera in a moment’s notice if my CFExpress Type A cards fill up. I consider them my emergency backup cards.
I also recommend that you buy at least two memory cards if you have a single-memory card camera body or at least four memory cards if you have a dual-memory card camera body. That’s because you may want redundancy in your file storage just in case one memory card fails you or you fill one of them up.
If your camera supports multi-memory storage, such as mixing and matching SDXC cards and CFExpress cards, whether they’re type A or type B, I recommend starting off with less expensive SDXC cards. CFExpress cards are nice and make file transfers to the computer a breeze because of their speeds, but they’re more expensive. Most photographers can get by taking rapid high-resolution images and even 4K video with a fast SDXC card.
Keep in mind that modern MacBook Pros have an integrated SD card slot too, so if you buy CFExpress cards, you’re going to need special adapters unless you hook your camera directly to your computer. This equates to extra cost if you opt for the faster CFExpress standard.
External storage
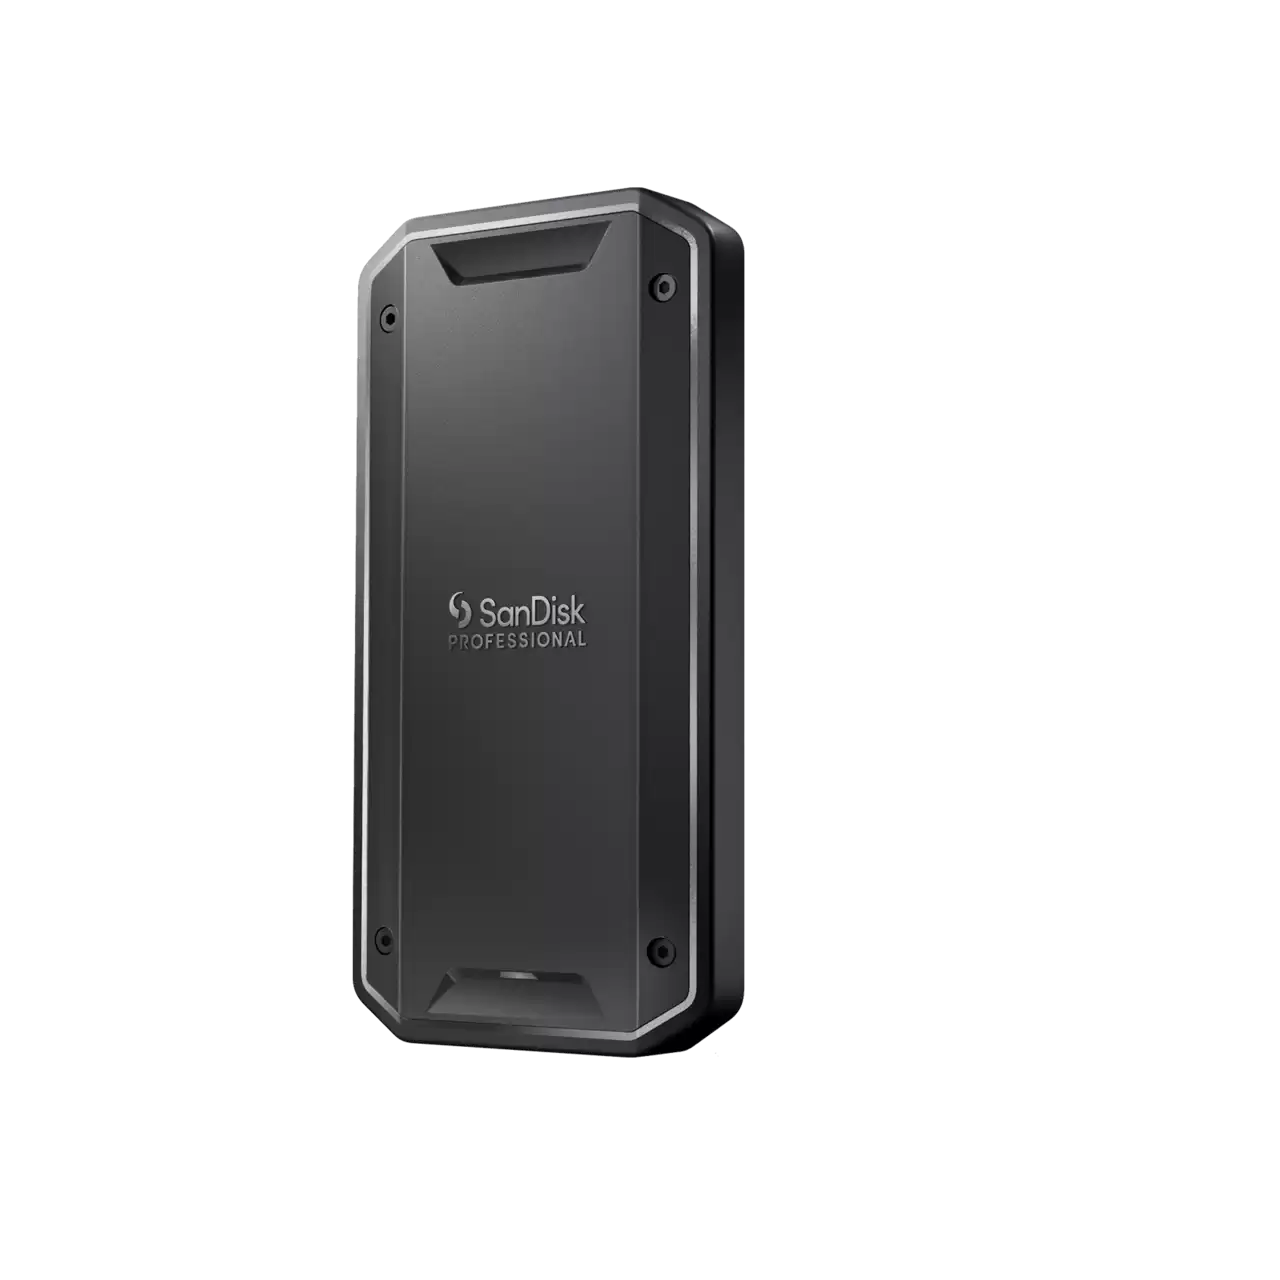
In addition to storage for your camera, you will find that the internal storage in your laptop is best suited for software as opposed to RAW camera images and video files. I highly suggest investing in an external solid state drive (SSD) so that you can offload what’s on your memory cards onto those and edit them directly from the SSD.
My favorite SSD for photography by far is SanDisk’s Professional G40 series. I have two 2TB versions of these that I acquired on a Lightning Deal at Amazon once. The reason I love these so much is that they support lightning-fast data transfer speeds of 3,000 MB/s over Thunderbolt 3, which pairs swimmingly with my MacBook Pro that supports Thunderbolt.
I also appreciate that these SSDs are IP68 water and dust resistant because that means I can bring them along with me for the journey and not need to worry about them getting damaged in my already water-resistant camera bag.
You can use any SSD you want for external storage, or you could even save money by opting for an external hard disk drive instead, but you won’t get the same speed capabilities from cheaper options, which is something to keep in mind. For most people, a basic USB-C SSD will handle everything you need, and Samsung’s T9 SSD is a good choice for this.
Don’t worry too much about the bells and whistles or the brand when picking a SSD. Just get one that provides enough storage space and that works with your computer without having to invest in any fancy adapters. Just be sure that you are buying something that will work for you without breaking the bank.
A charger
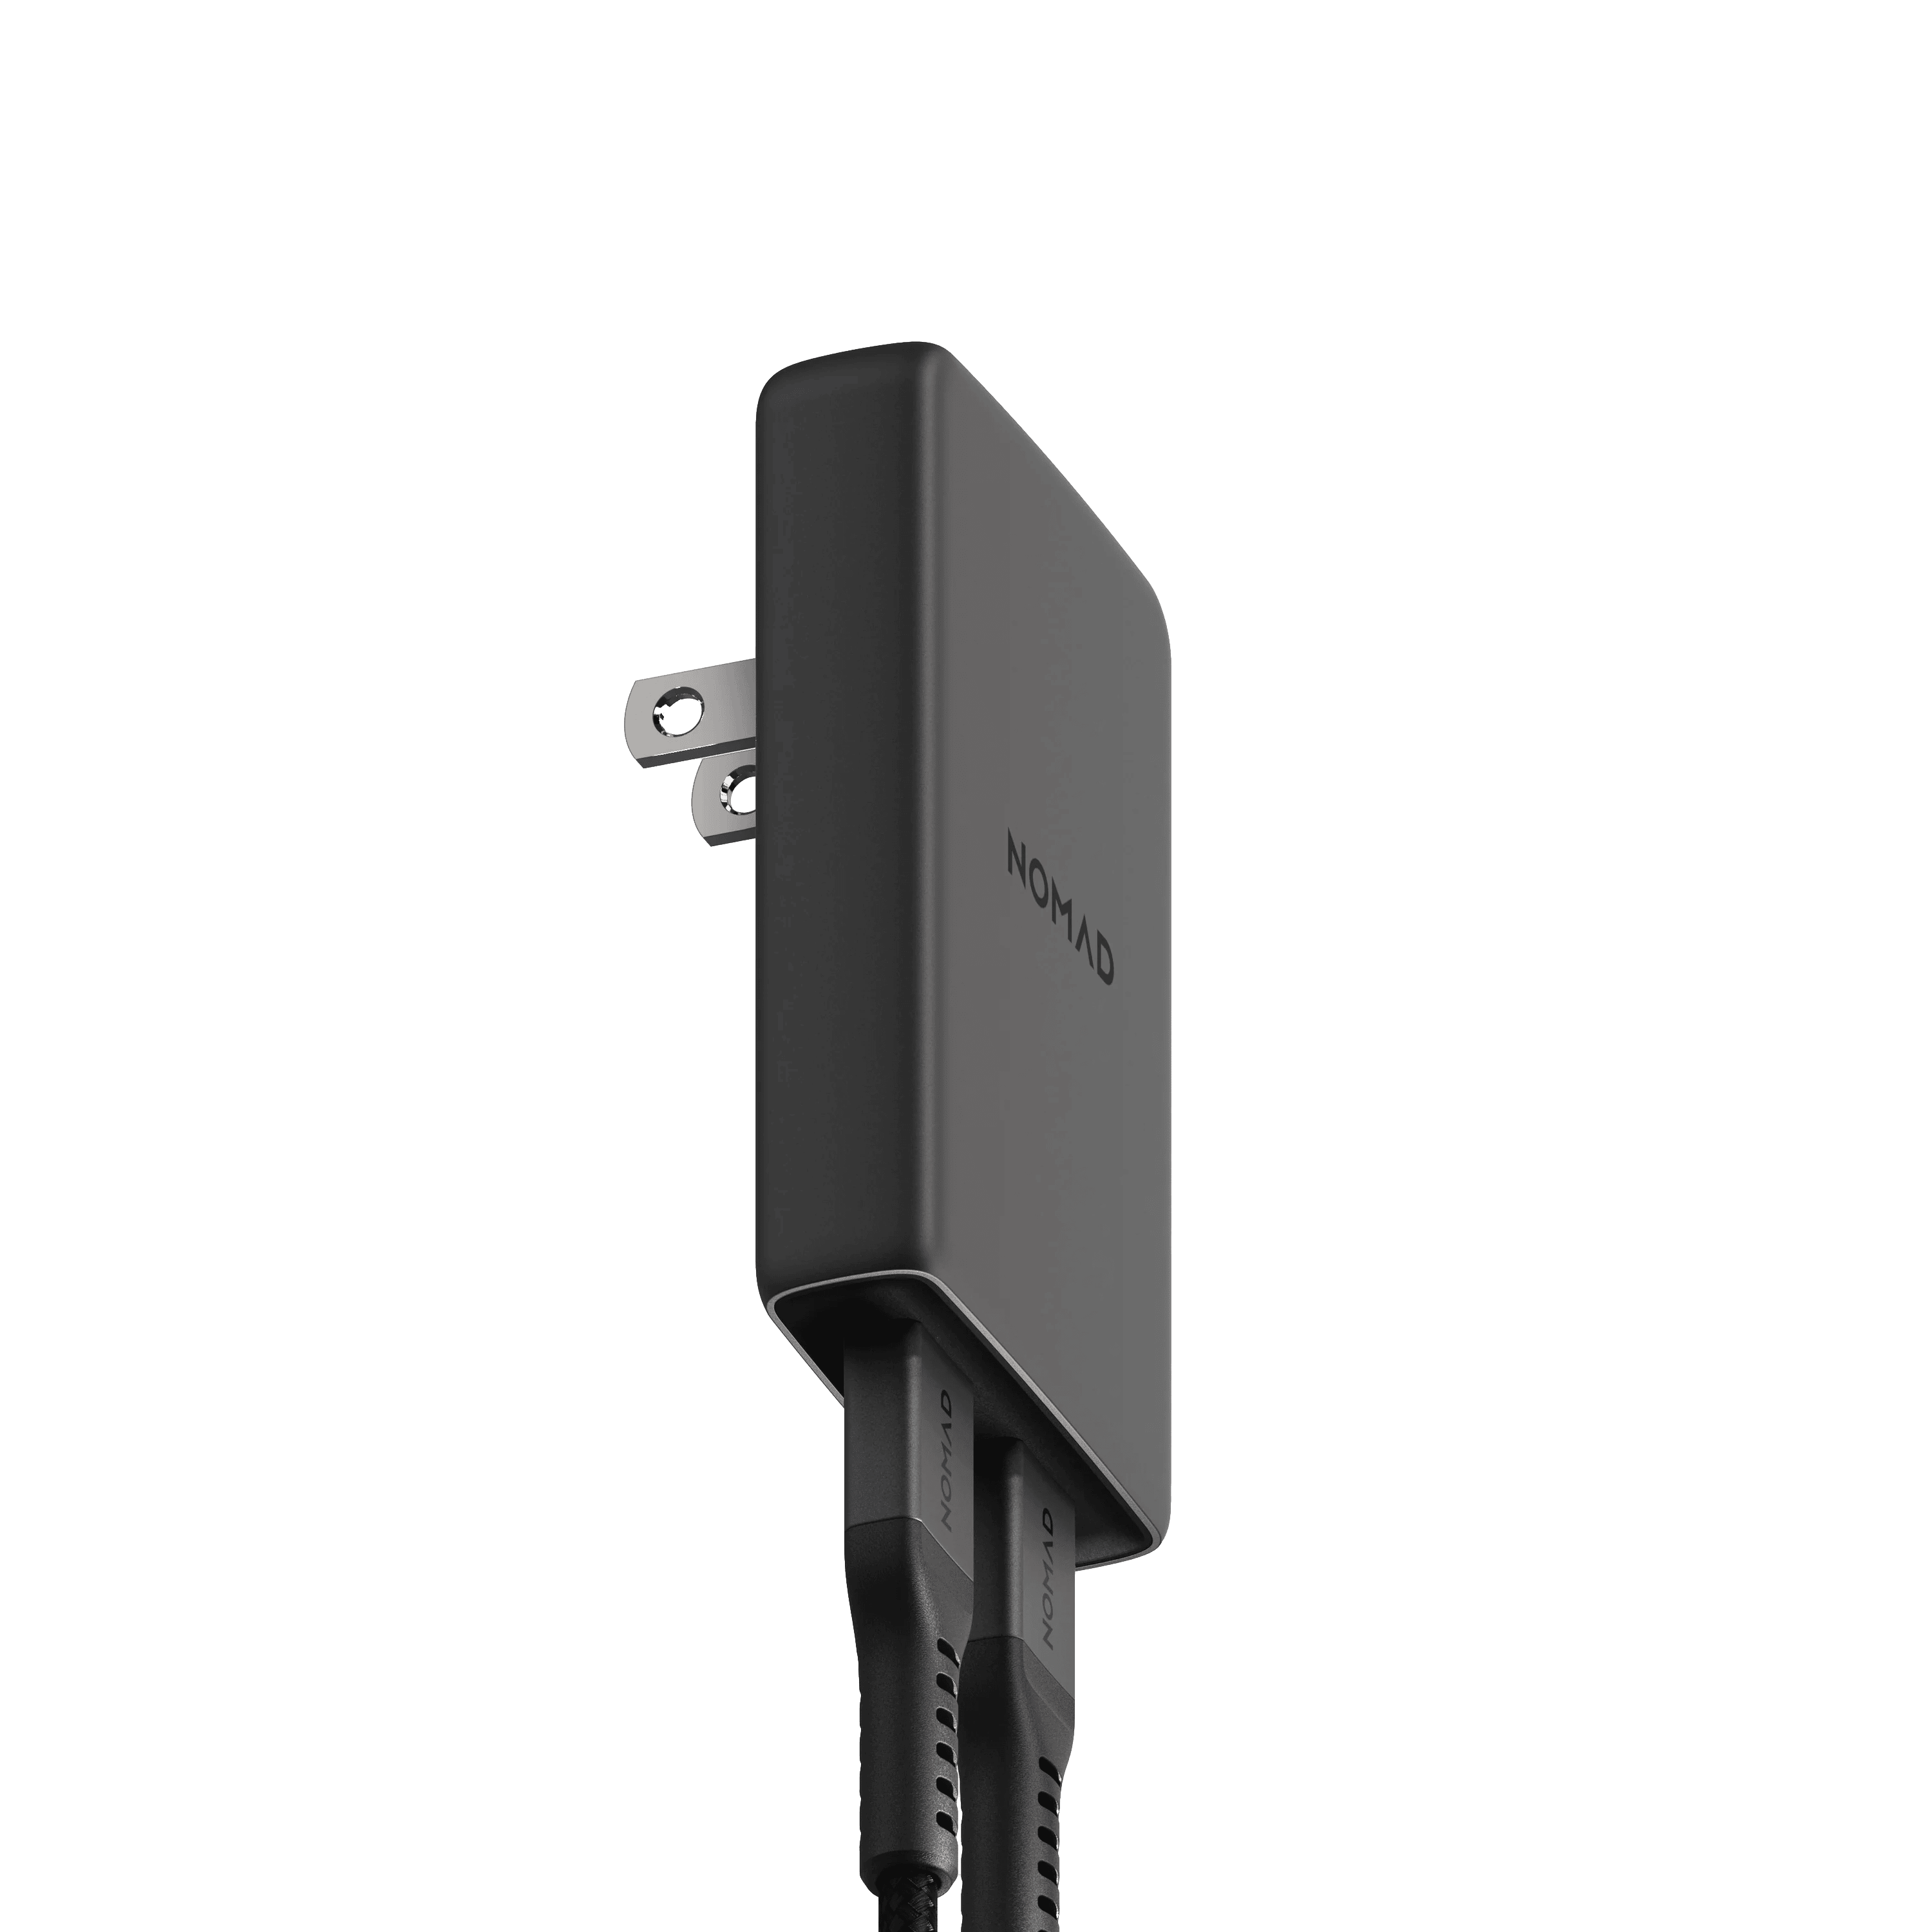
We already talked about camera batteries and why they’re important, but it can be easy to blow through a battery if you’re shutter-happy. Most modern cameras are USB-C-compatible, so I highly recommend a decent power adapter and cable. In my case, all recent cameras I’ve owned have been USB-C compliant, so I like to carry around a USB-C PD-capable charger.
When I’m using a smaller sling bag with minimal gear, I gravitate toward Nomad’s slim 65W power adapter because it’s small enough to fit in a battery pocket and has two ports so that I can charge my camera and my 12.9-inch iPad Pro or iPhone 15 Pro Max at the same time if I need to.
When I have a full-sized backpack-style bag for a longer trip, I’ll pack Nomad’s 130W power adapter because it’s hefty enough to fast-charge my MacBook Pro while also delivering power to my camera and my iPhone 15 Pro Max at the same time.
This also means that I carry two – yes two – USB-C cables in my bag. One for charging my camera and the other for charging my laptop or tablet. One of those USB-C cables is a Thunderbolt 4 cable because my CFExpress Type A card reader is Thunderbolt-compatible, which unlocks faster transfer speeds on both my Macbook Pro and iPad Pro when necessary. USB-C and Thunderbolt 3 & 4 cables are interchangeable.
I have absolutely no problem recommending Nomad’s nylon-braided USB-C cables, as they’re durable and come in different length options. They’re what I personally use in my bag because I know I can trust them to hold up to the elements and to hard use.
Another thing I like to carry with me if I’m using a larger backpack-style bag is a Nitecore dual-battery charger. This useful utility lets me charge two of my Sony camera batteries at the same time, separately from my camera. Together, this means I can charge 3 batteries at the same time, which can get me all charged up for a photo shoot in no time.
Portable lighting
Photography is all about the capture of light, so naturally, photographs don’t come out that well when there isn’t enough of it. That’s why you should always carry around some kind of light source with you.
When it’s a bright and Sunny day outside, you might think you don’t need any lighting, but the opposite can be true. Those harsh Sunny days tend to create bright spots on your subjects in addition to shadows under features such as noses, hats, and the likes. You can brighten any subject with an inexpensive folding reflector that you can ask your subject to hold below the frame, and it will bounce some of that light back up to remove the unsightly shadows in their facial features.
When your subject isn’t a person, or you’re photographing something in lower light, that’s where powered lighting comes into play. I don’t typically recommend ordinary camera flashes because they can introduce harsh light that makes an image look strange to my eyes, but I really do like to use LumeCube’s Panel Pro 2.0 because it uses RGB LEDs to produce multi-color light at various brightness levels, including cool and warm whites. Best of all, you can attach it to your camera’s hot shoe with the included mount if you like.
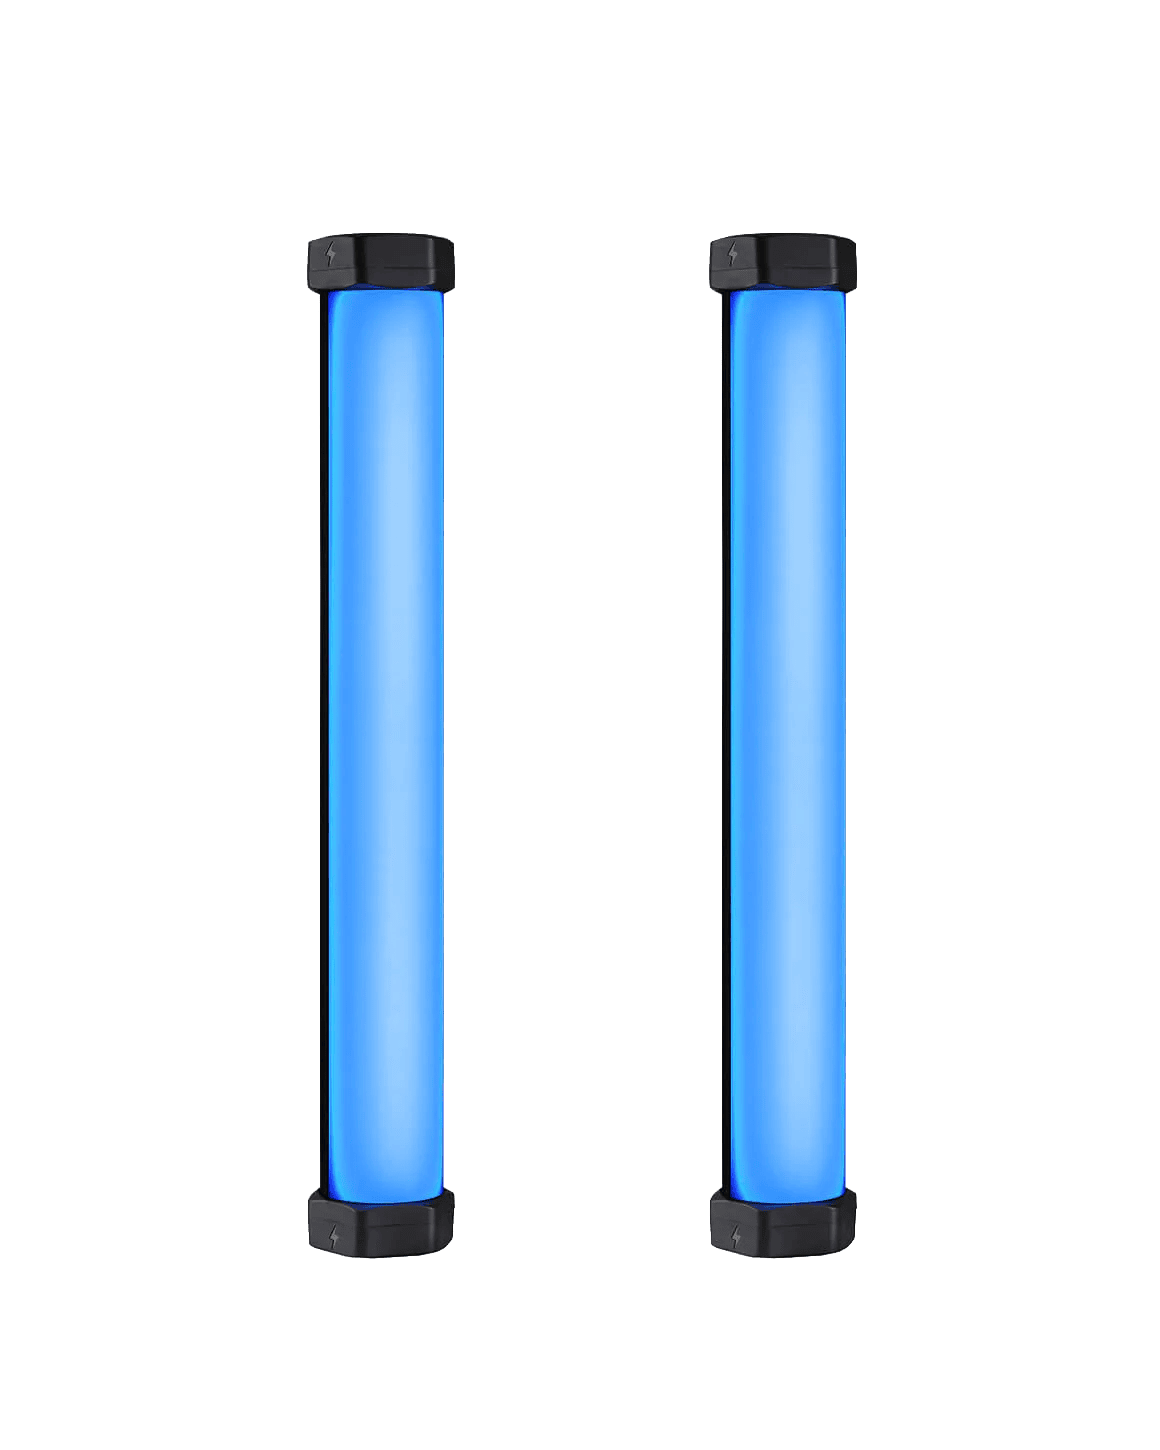
In places where this isn’t enough light, it’s a good idea to invest in bigger portable lights. While these don’t fit inside of my camera bag per-se, I do frequently use LumeCube’s RGB Tube Light XL for indoor shots. I own two of these because they frequently go on sale, and they put out so much light that you can literally command the darkness. They feature the same variable brightness and RGB capabilities as the Panel Pro 2.0, so you can make your scene look however you want. They also come with mini tripods so you can stand them up.
If you’re on a budget, you can always experiment with flashlights and diffusers, however you’re going to have a lot more control over your scene with a lighting system afforded by the options I’ve recommended.
Cleaning supplies
It’s inevitable that you’re going to find yourself with a speck of dust (or multiple specks of dust) either on the camera lens, or worse, on your camera’s sensor. This is even more of a risk with mirrorless cameras that lack a mechanical shutter because there’s literally nothing there to protect the sensor from flying debris.
While the Nikon Z9 and the Sony A1 each provide a feature to lock a sensor guard over the sensor when the camera is turned off, not all cameras can do this. So it’s a really good idea to carry some basic cleaning supplies that can help you clean not only the sensor, but also your lens glass if necessary.
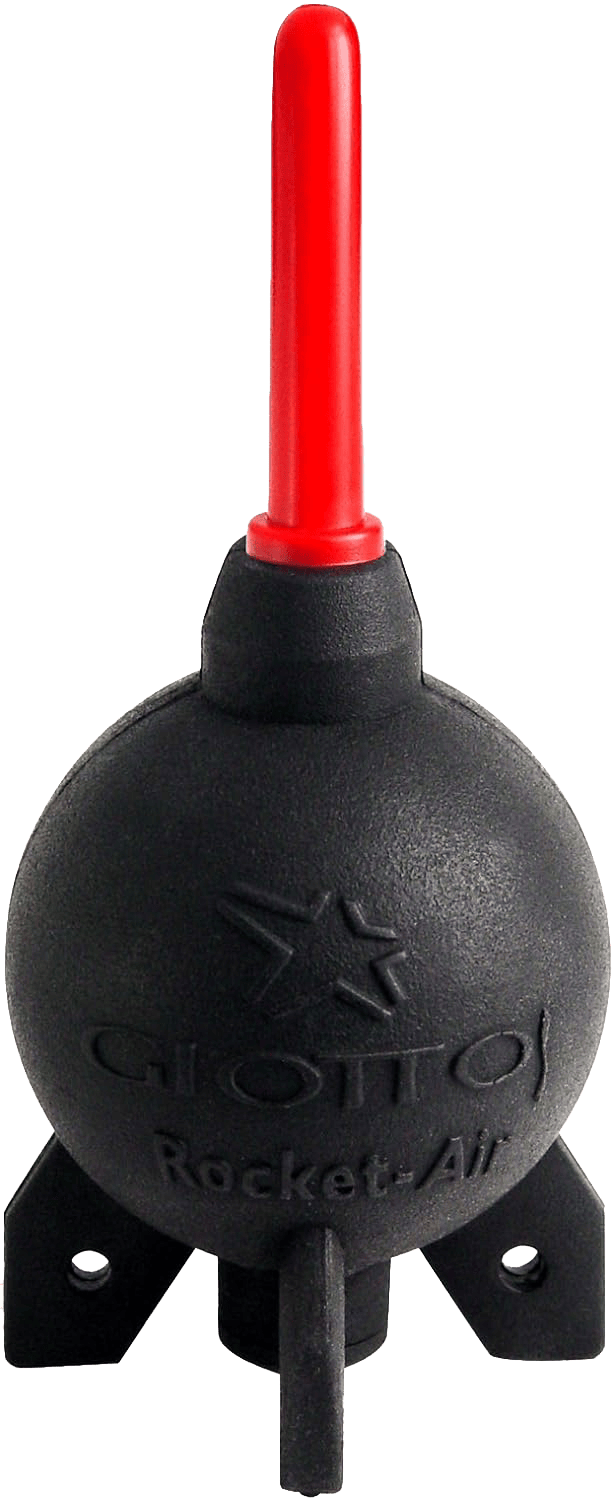
One of my most-used cleaning accessories is a Giottos small Rocket Air Blaster. It’s as simple as it looks – a rubber bulb that fills with air so that you can squeeze it to expel air from the red tube. There are off-brand knockoffs of this product, but I don’t recommend them because the bulb doesn’t fill back up with air as quickly and they don’t provide as strong of an air puff as the Giottos does. So this is one area where I will specifically recommend the Giottos brand.
For lens cleaning where the Giottos Rocket Air Blaster wouldn’t work, such as removing oil or ocean spray smudges from the lens glass, I would strongly recommend carrying a small amount of isopropyl alcohol and a few Q-tips or swabs. These are perfect for cleaning lenses and leave a streak-free shine. I don’t recommend those cheap micro-fiber cloths that often come with cleaning kits because they’re prone to sucking up finger oils and then you’ll just smear that crud all around on your lens glass and you’ll need isopropyl alcohol to clean it off anyway.
If you’re worried about the camera sensor, you will want to order a specialized camera sensor cleaning kit for your camera. These come in different shapes and sizes and generally come with a cleaning fluid and a swab/squeegee that you carefully drag across your sensor while the camera is turned off to lift any debris. This should be a last-ditched cleaning effort only if the Giottos Rocket Air Blaster doesn’t work since it comes with a risk of damaging your camera sensor if done incorrectly.
I will say that it’s particularly rare for the Giottos Rocket Air Blaster not to handle pretty much all cleaning necessities since I don’t touch my lens glass and since I avoid changing lenses out in the field when conditions seems hazardous, but there may be instances where you will need the additional cleaning supplies and you’ll thank yourself later for buying them ahead of time.
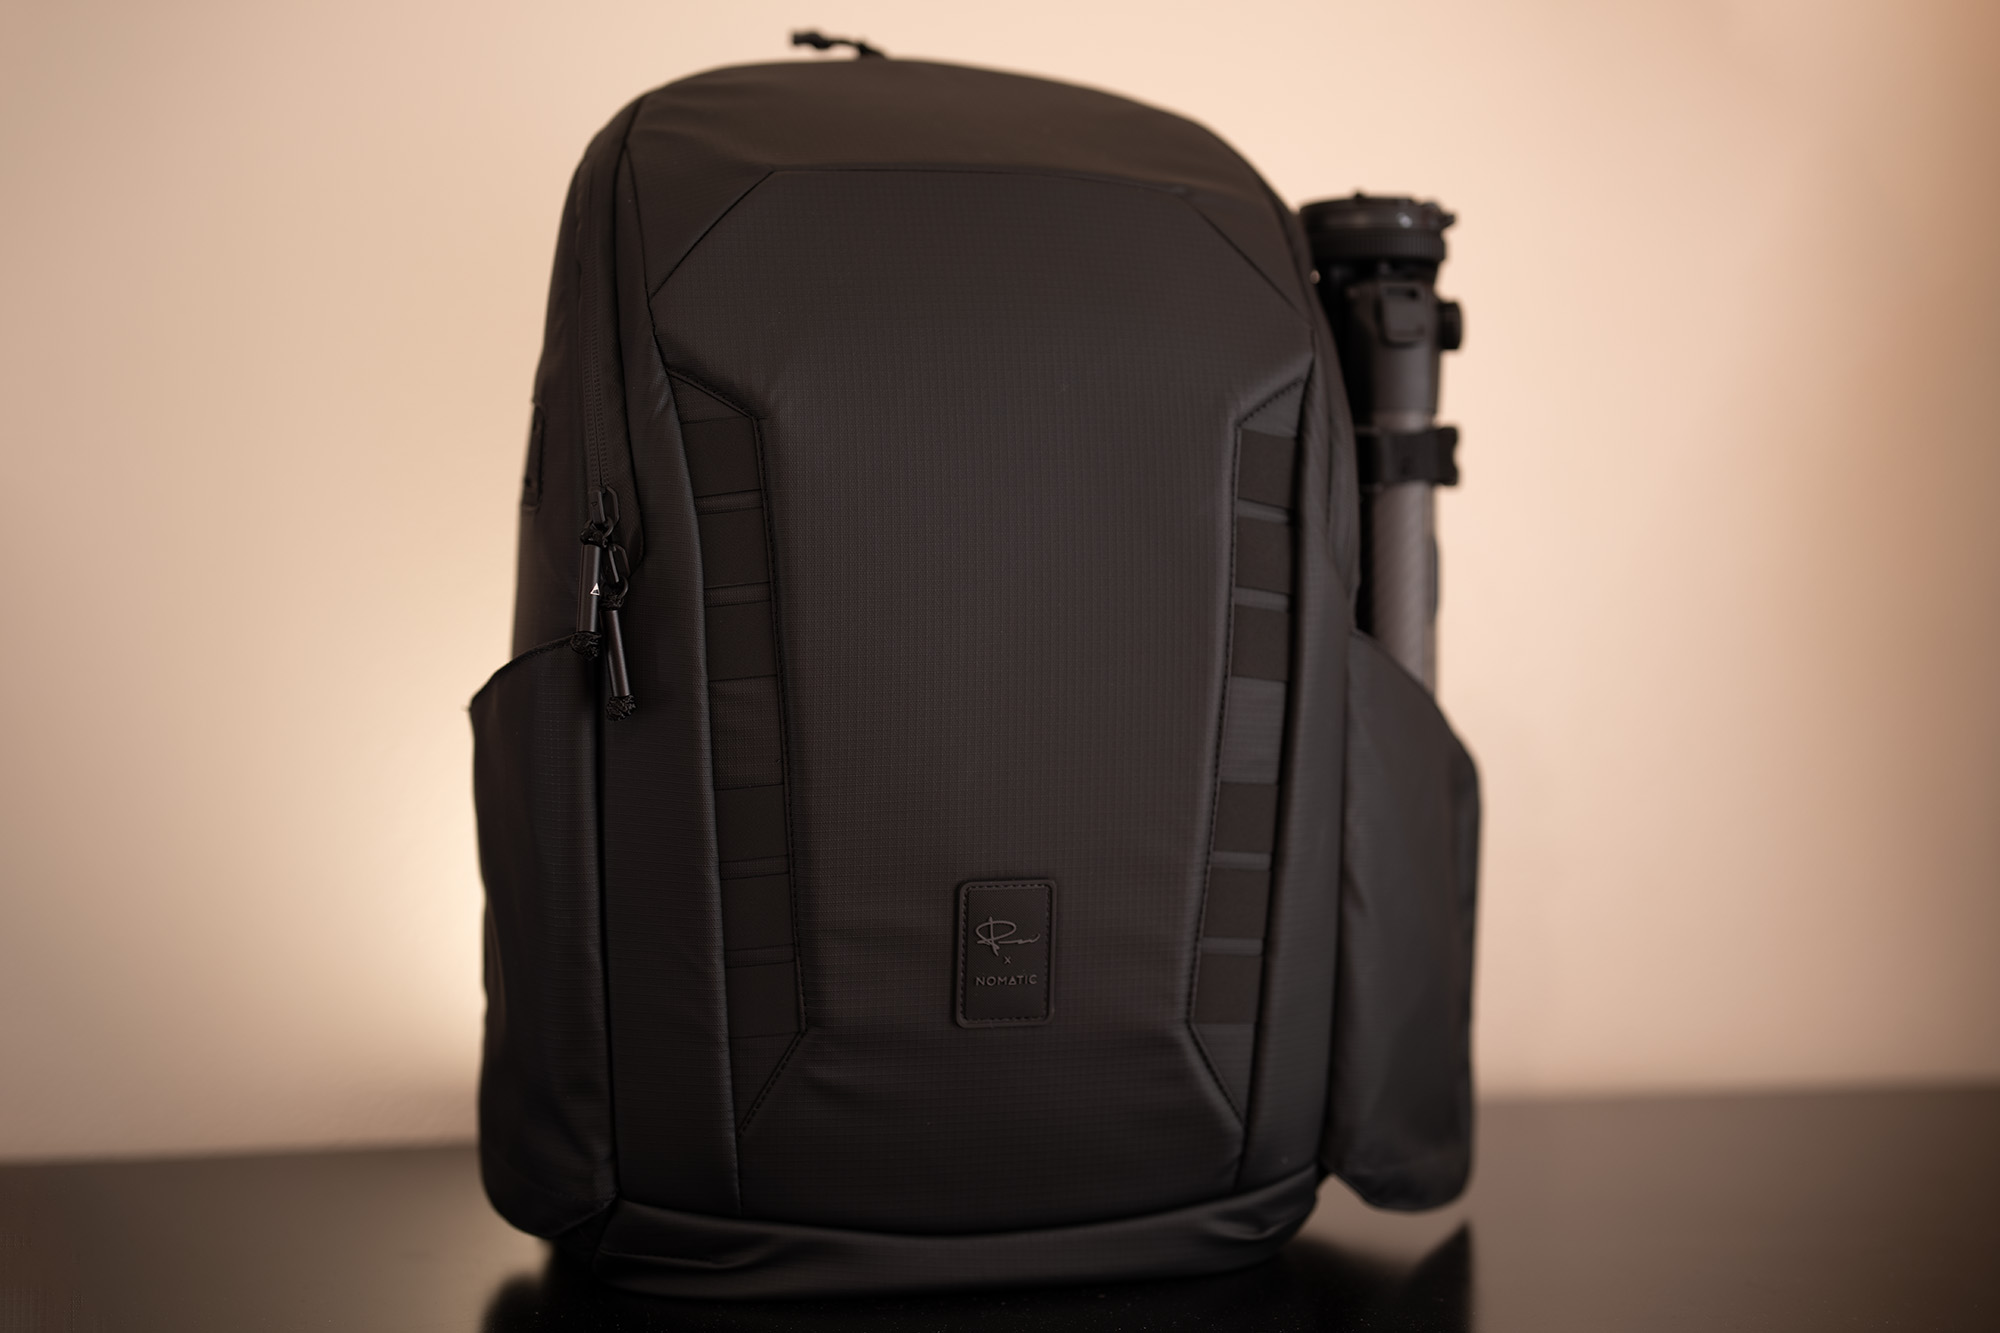
A good carrying bag

Now we get to what is perhaps the most subjective part of the accessories list so far, and that’s the container you’ll use to transport all your gear. For some people, that’s a pelican box; for others, it’s a padded backpack. Some people hate both of those and prefer to travel light with nothing but a sling bag.
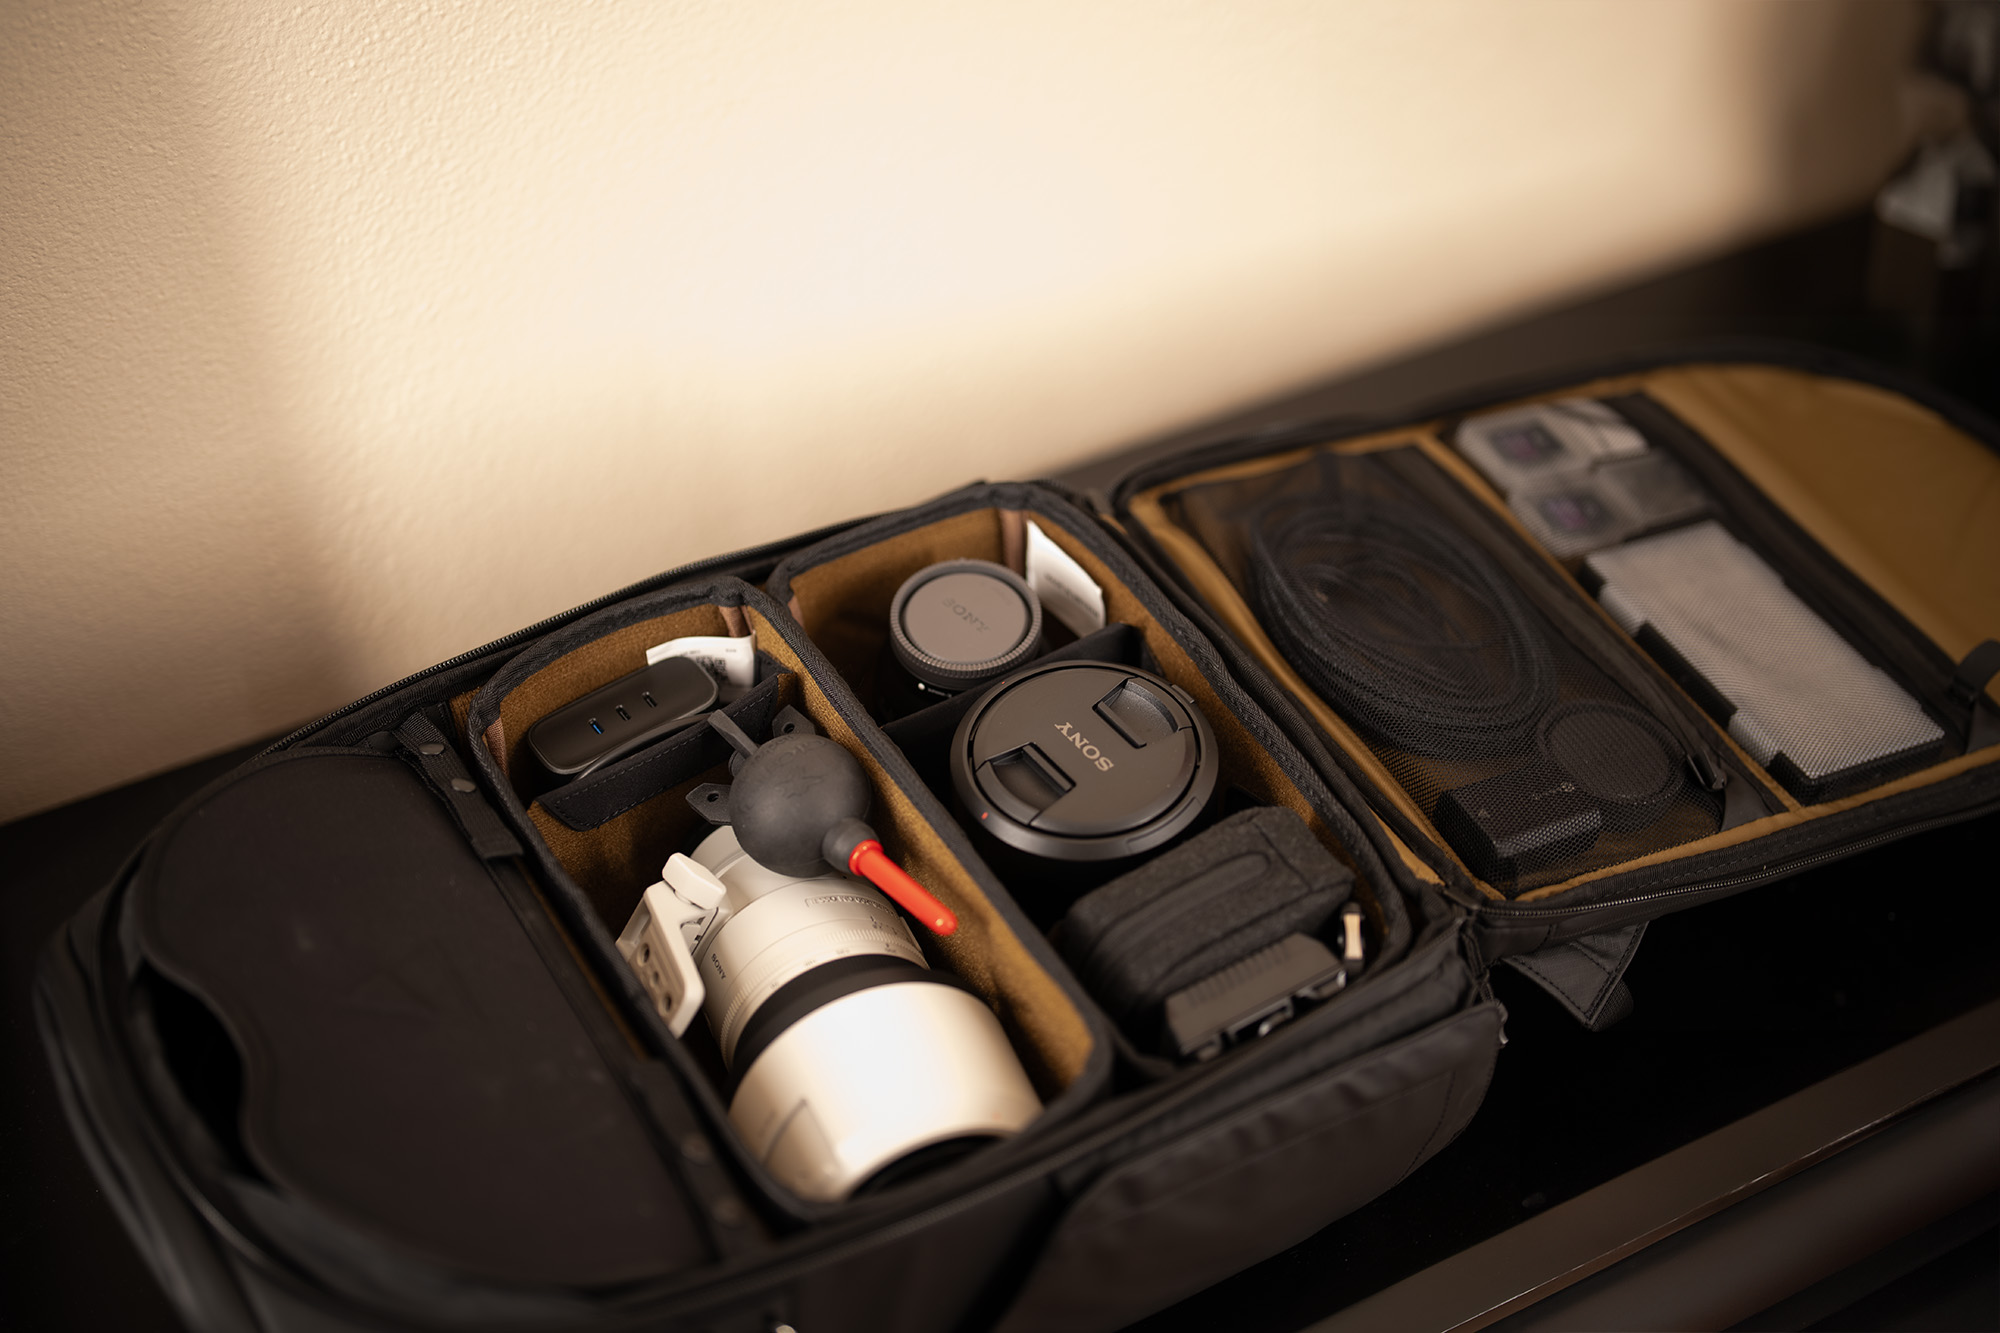
Personally, I lean toward the 25L McKinnon Travel Pack from Nomatic because it’s not only spacious, but it’s heavily padded and internally modular. With its unique adjustable ladder system and internal cube organizer system, you can pack this bag for essentially any loadout you can imagine. Every piece of my camera gear, in addition to my 14-inch MacBook Pro and my Peak Design tripod, can fit in this one bag.
With the organization system in this bag, you can set your cube loadout based on whatever lenses you want to bring and use the ladder system to separate other items for your excursion, be it clothes, more camera gear, or larger lenses. I also appreciate how this bag stands upright on its own and offers weather resistance with no external covers required.
It’s also extremely comfortable with all its strap padding, making it possible to comfortably wear for hours on a trip.
Depending on the circumstances, especially if I’m packing for a travel trip more than I am for photography alone, I will flip-flop over to the Peak Design 20L Everyday backpack. That’s because this backpack’s unique origami-style organizer system works well for photography gear, while its top-end expandable storage works great for packing extra clothes and accessories for my trip.
I’ve previously reviewed the Peak Design Everyday backpack and I think it has a slightly better tripod pocket than the McKinnon bag, but it doesn’t stand upright. It also harbors more custom metal hardware than plastic hardware as found on the Nomatic bag, and it seems more compact for everyday use. It too offers good weather resistance.
I also recommend that almost every photographer invest in a good sling bag because there will be times when you only want to take your camera and one or two lenses with you as opposed to your entire loadout. My personal recommendation is the 8L McKinnon Sling from Nomatic because it’s big enough to store my Sony A1 with the long 70-200mm telephoto lens attached to it. Alternatively, I can attach my 24-70mm standard zoom lens and include one other prime lens with it. There are also compartments for batteries, cables, filters, and other goodies.
Truth be told, you don’t need an expensive camera backpack to take good photographs. You just need something that you can trust to keep your gear safe. If you’re carrying inexpensive gear, then you can invest in a cheaper bag, but if you’re using an expensive camera, wouldn’t you want the best protection possible for it?
A laptop or tablet

If you’re serious about being a mobile photographer, then it’s a good idea to pack away some kind of laptop or tablet that offers photo editing capabilities. This means you’ll need to invest in photo editing software too.
I personally like to don a 14-inch MacBook Pro with an M3 chip because it’s plenty powerful enough to run my favorite photo-editing software, whether that’s Adobe Photoshop, Adobe Lightroom, Photomator, Pixelmator Pro, Topaz Photo AI, or something else. I use all these programs interchangeably, depending on what I think gets the task done faster and easier.
If I’m feeling truly nomadic, I’ll sometimes substitute my 14-inch MacBook Pro for the 12.9-inch iPad Pro with an M1 chip. It lets me shave a little weight from my bag on shoots that I don’t expect are going to require a ton of photo edits. I can also run Adobe Photoshop, Adobe Lightroom, and Photomator on my iPad Pro, which makes it a comparably powerful device for photo editing. The Topaz Photo AI developers tell me that an iPad version of their software is still a few years out, but it’s coming (and I’m stoked about that).
If you’re choosing a laptop or tablet for your work, it’s not necessary to buy a fully loaded machine. A base model MacBook Air or even a non-Pro iPad will suffice. You can even get away with using a Windows computer if you prefer. I just find that the Mac platform is best for creative work, so that’s what I’ve always used and I’ve never really turned back since making the switch.
Personal stuff
Now that I’ve covered what I think are some of the essentials for any photographer to keep in their bag that I like to keep in mind, I’ll share some of the personal items that I like to stow for reasons that are unique to me. I don’t expect that everyone will agree with these items, but I lug them around because I have a personal use for them and perhaps someone else who wants a similar setup will gain inspiration from it.
Here are some of those personal items:
- mophie 3-in-1 travel charger with MagSafe – for keeping iPhone, Apple Watch, and AirPods Pro charged on the go
- Apple AirTag – for being able to track my camera bag at all times
- Sony Wireless Camera Remote – for being able to remotely control my camera when I can’t be near it
- Extra cables – USB-C/Thunderbolt 4 and HDMI to ensure I have all the connectivity I could ever need
- Peak Design Capture Clip – so that I can conveniently mount my camera anywhere on my person
- Moment Lens Filters – to change the dynamic of my photo shoot however I see fit
- Extra Peak Design anchors – because you just never know when your primary anchor could fray
- GoPro Hero 12 Black Creator Edition – to record action footage whenever I need to
- DJI Mini 4 Pro – to get up high when the situation requires it
- mophie powerstation pro AC battery – so that I can keep everything charged when power runs low
That’s about it for extra gear. Obviously, I don’t carry all of these items at all times, but I do swap them in and out occasionally to suit my needs for whatever work I’m doing. I would generally advise anyone who’s trying to build a camera bag to do the same, as there’s almost never a need to bring everything you own with you at any given time.
Think about what you’ll be doing and bring the gear you need to complete your task. This not only lightens your load, but it prevents you from losing everything in one fell swoop should the unthinkable happen…
Summary
Most photographers will agree that a personal collection never ends. You’ll want more gear, more lenses, and more powerful cameras as times goes on, and the brands that make the stuff are always innovating and bringing out newer generations of gear.
That aside, sticking to the basics can help you save time and money, as the holy trinity of lenses tends to lend itself toward most forms of photography. If those are financially out of reach, a standard zoom lens and a prime or two with a decent aperture should fare well if you can get your lighting right.
It’s important to remember that you will ‘marry’ your lenses, but probably only ‘date’ your camera body. The idea of thinking here is that you may upgrade your camera body several times throughout your photography career (or hobby) to keep up with evolving specs, but you’ll always use the same glass with those bodies.
In terms of accessories, you should always keep spare power and storage space on your person since these are expendable resources that will always need to be replenished. It’s also important to have cleaning gear so that you can remove dust and smudges that will inevitably appear as your use your gear out in the field.
You can further support your photography with a comfortable sling, a sturdy tripod, supplementary lighting, and a container that not only stores, but protects your gear from unexpected falls, weather, and other hazards.
Wrapping up
At the end of the day, everyone’s ideal photography loadout looks different. People use their gear in different ways and have different requirements than the next person. My goal in this piece was to share some details about the equipment I use on a regular basis and discuss why I recommend them in the hopes that it may inspire beginner photographers on what they could use. That doesn’t mean your kit will look exactly like mine.
As photography is a fun hobby of mine, I am genuinely interested to hear about what my fellow photographers are keeping in their bags. I find it particularly fun to learn about people’s shortcuts, tips, and tricks, so I’d love to read about them in the comments section down below.