In this step-by-step tutorial, we show you how to change the extension of an image, video, audio, document, or other file on your iPhone, iPad, or Mac, why you might want to do that, and potential issues to avoid.
Changing the file extension can be useful for several reasons. For instance, fixing the incorrect extension can help you open the file in specific creator apps, like Photoshop.
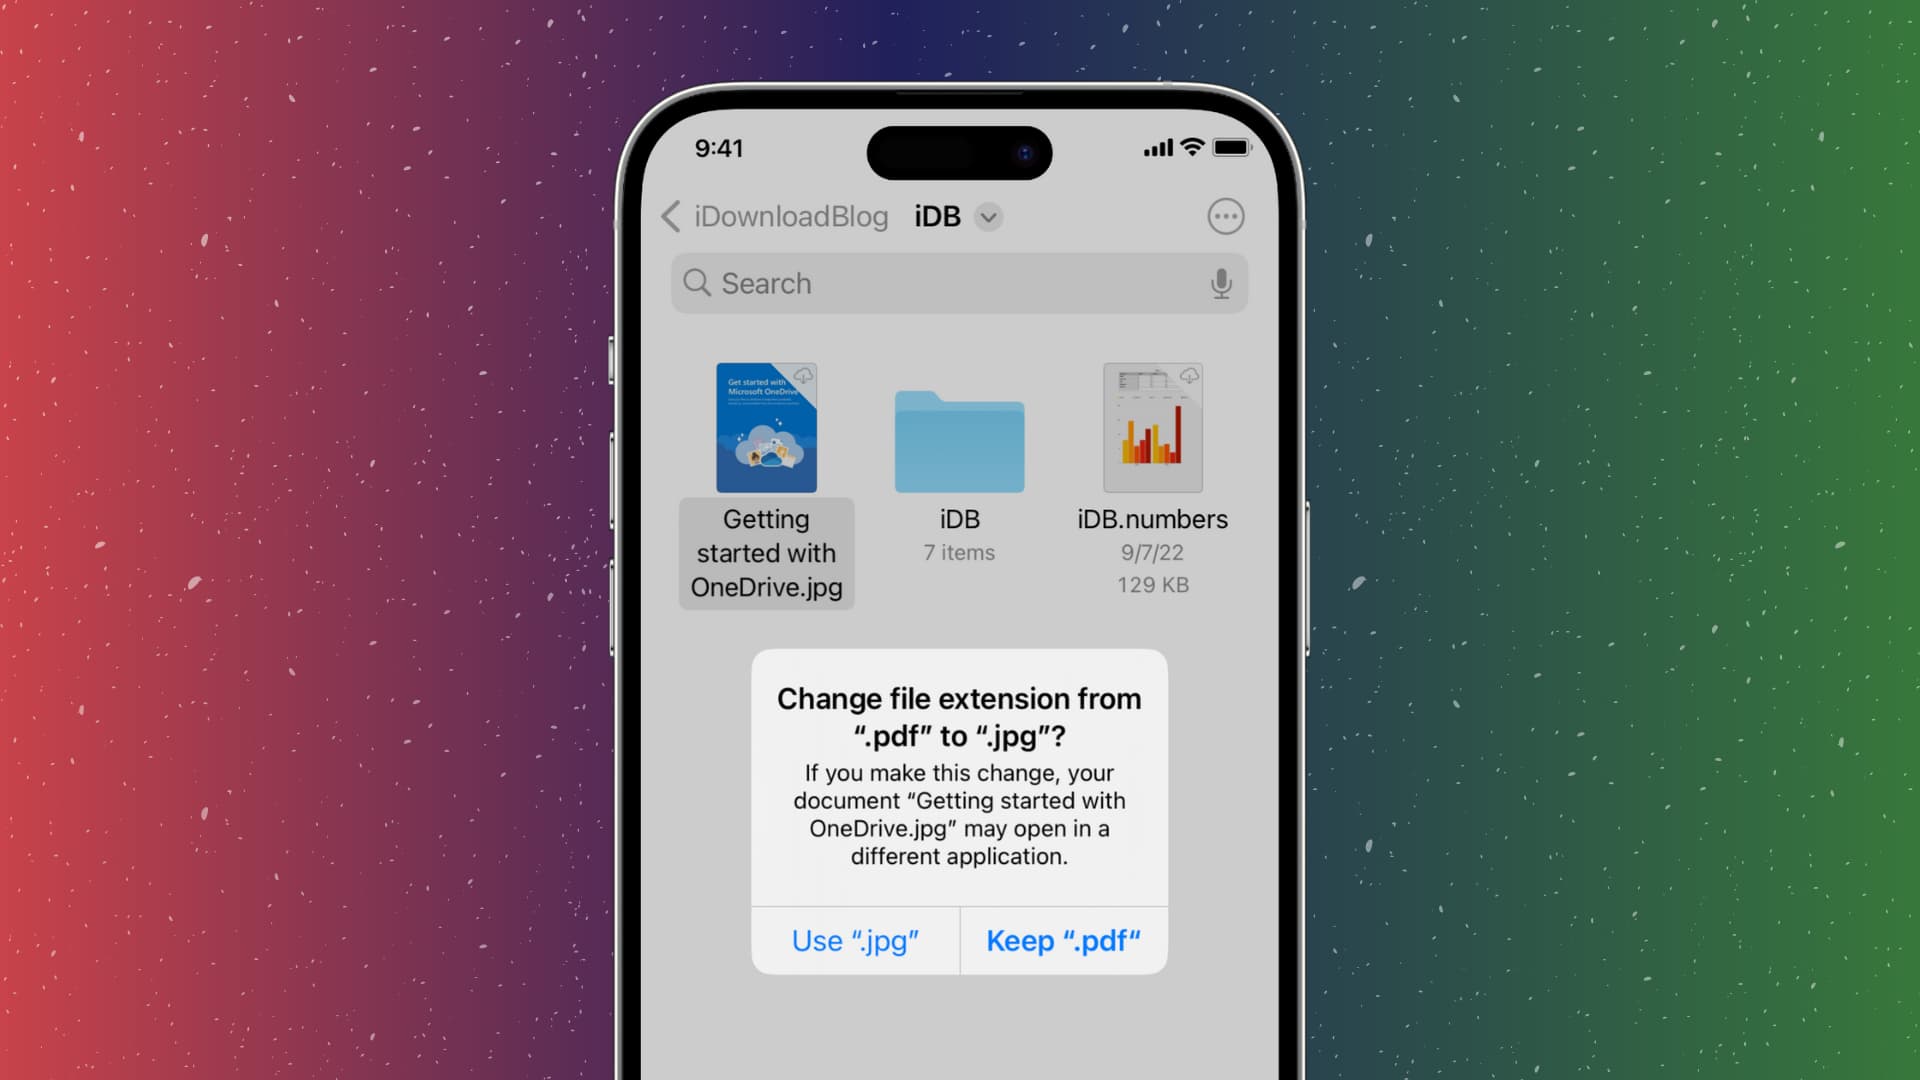
You can also use it to hide the file type for security purposes. For instance, changing the PDF extension to. JPG will throw an error when you or someone with access to your device attempts to open the file on your Mac. To fix this, simply change the file extension back to PDF.
Change a file extension on iPhone or iPad
It involves three easy steps.
Step 1: See all file extensions
- Open the iOS Files app and go to a folder.
- Tap the three-dots menu button, then choose View Options.
- Turn on the switch for Show All Filename Extensions.

This option will display file extensions for images, documents, videos, and other items in the built-in Files app.
Step 2: Change a file extension
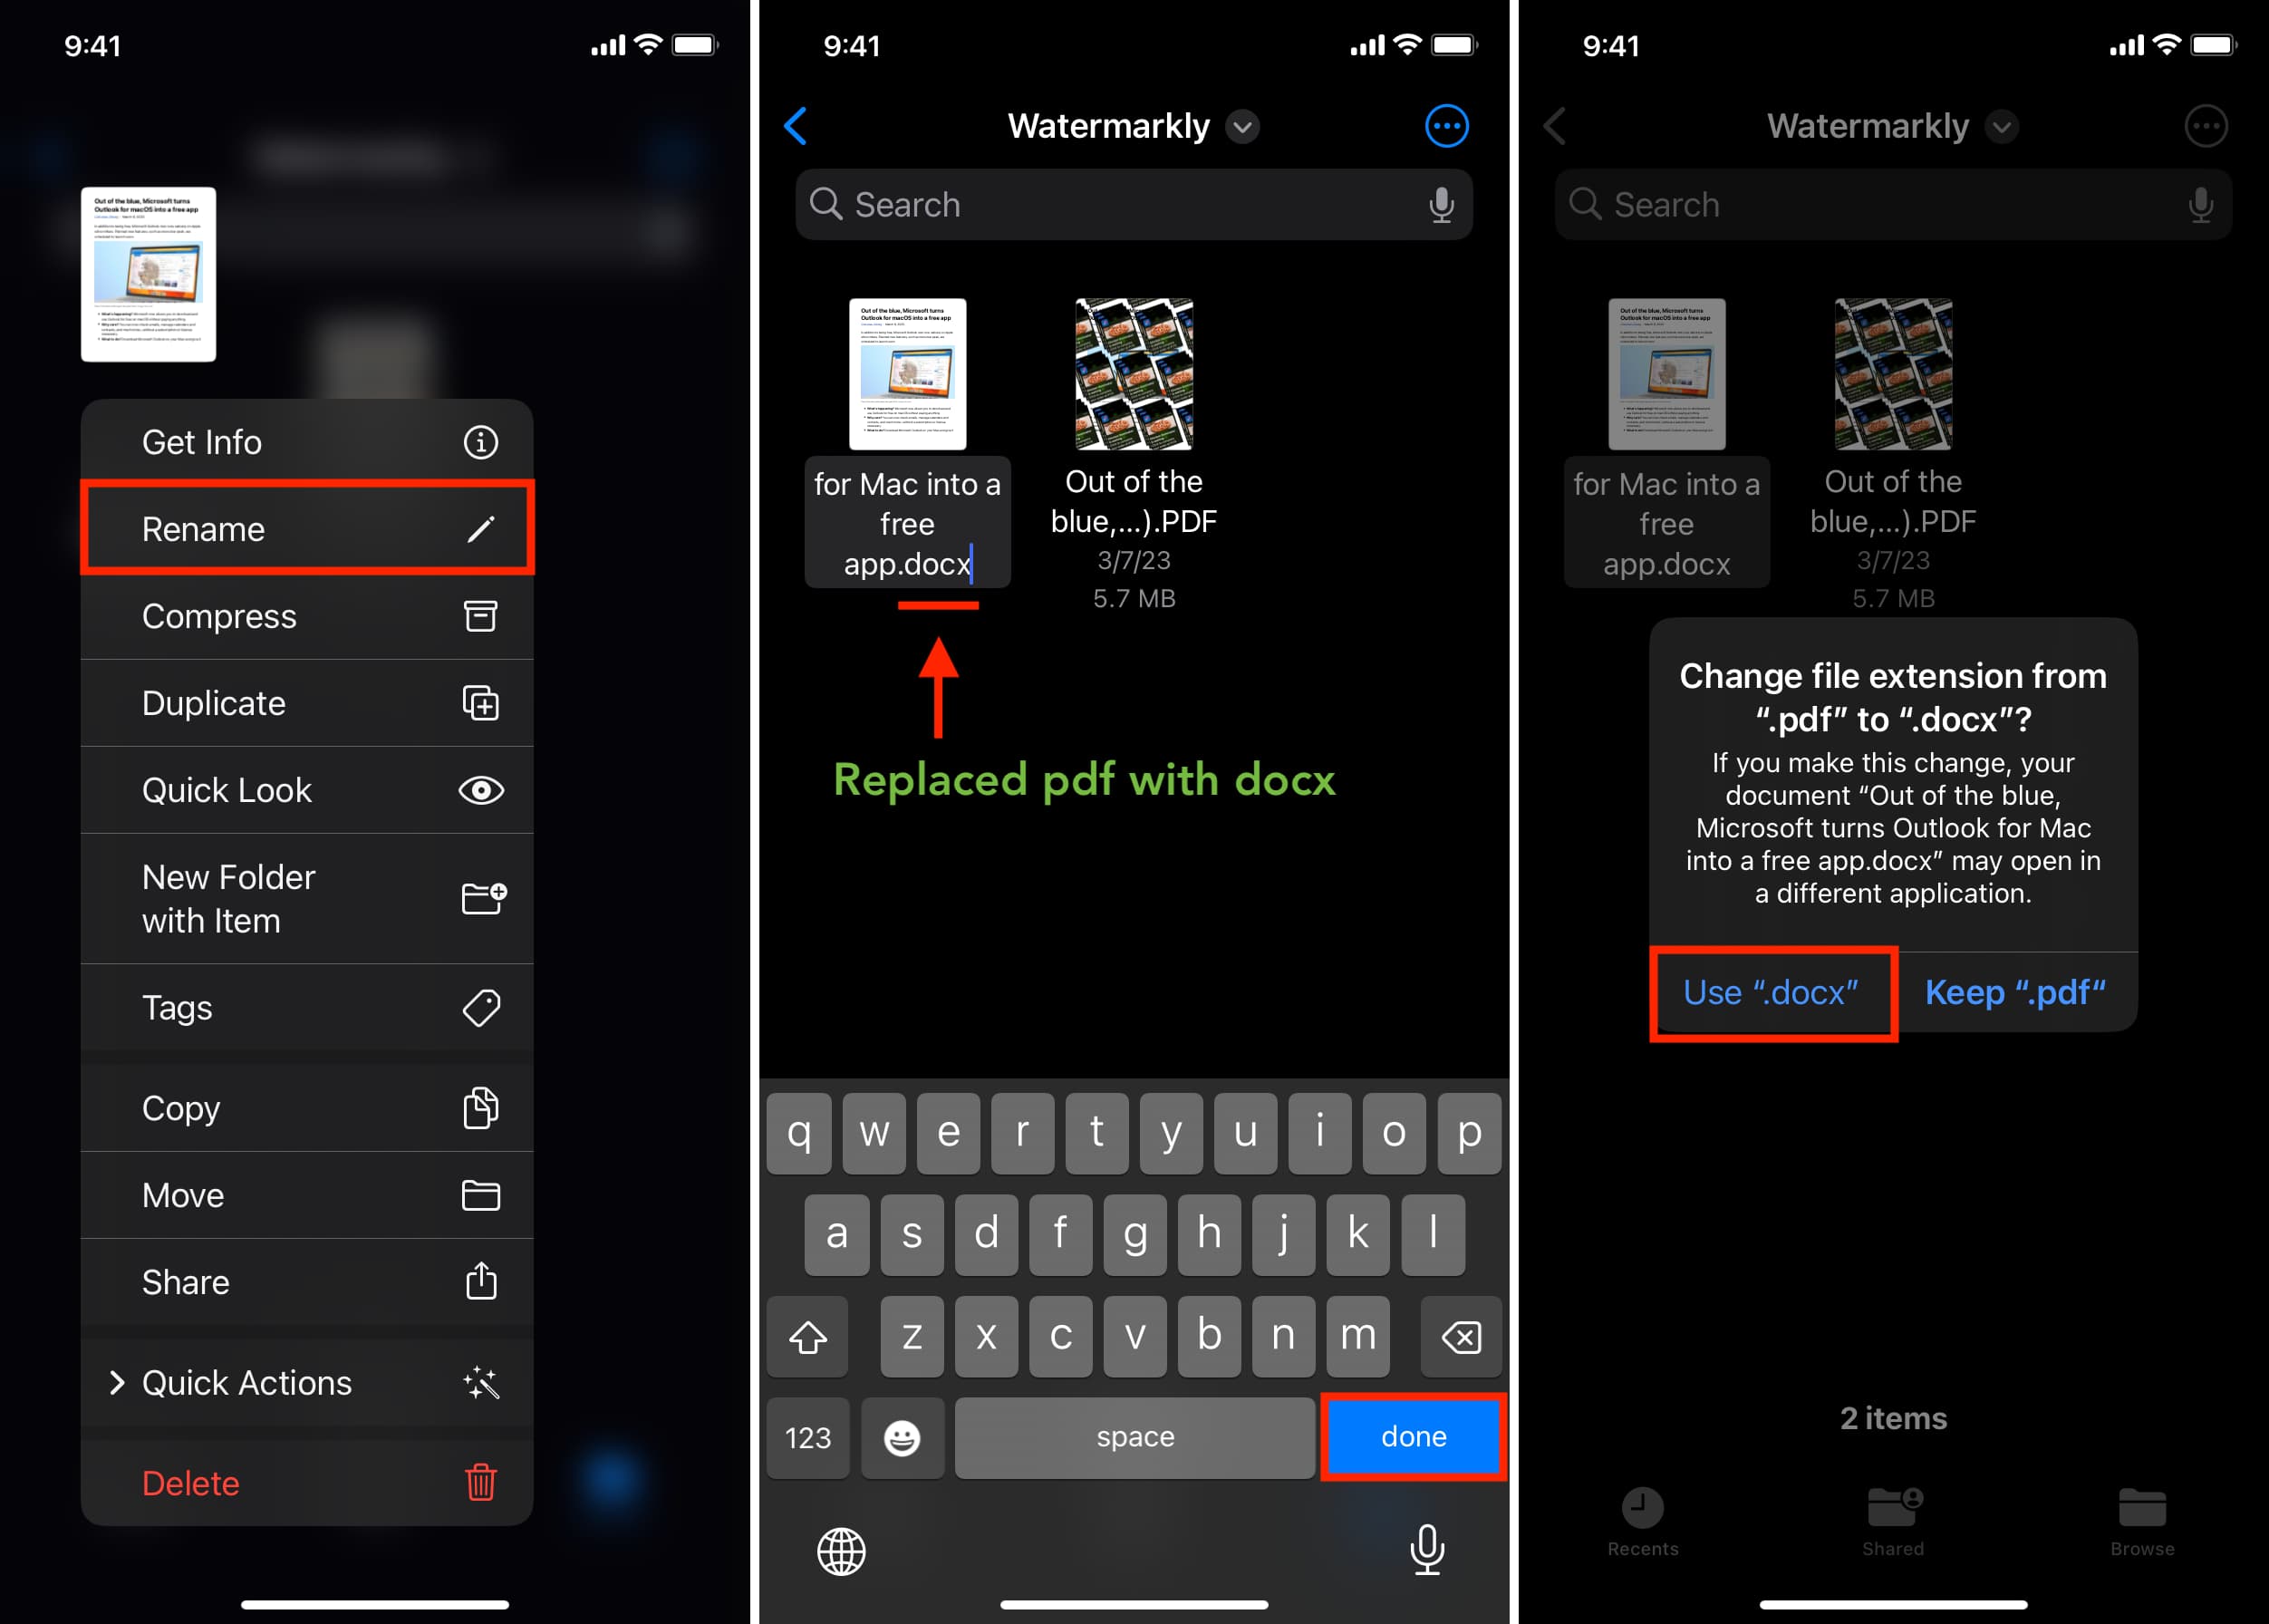
- Touch and hold an item in the Files app, then choose Rename from the menu.
- Replace the current extension with a new one and tap the checkmark or done key on the keyboard.
- Tap Use “.NewExtension”.
Step 3: See the new file extension
The extension appears at the end of the file name. You can also see the extension and file type by touching and holding a file name and choosing the Get Info option.
Change a file extension on Mac
The process for macOS is just as easy as on iOS.
Step 1: Show file extensions in the Finder
- Select the desktop, then click Finder > Settings or Preferences in the menu bar.
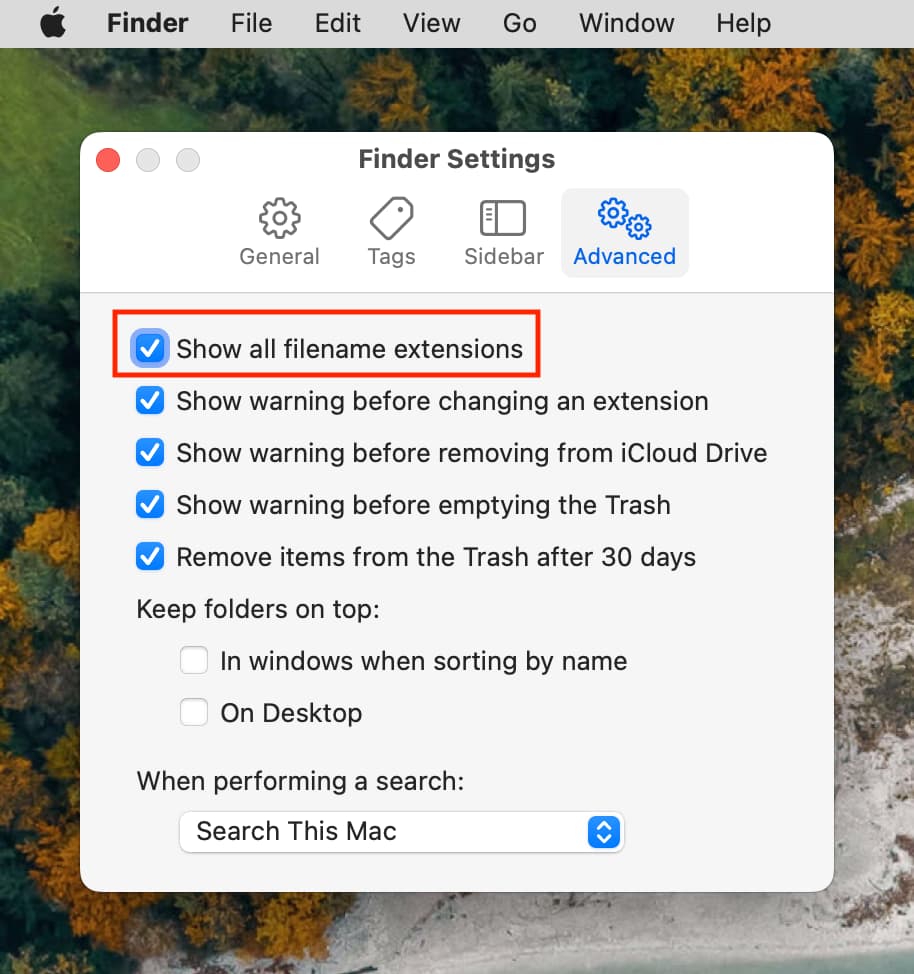
- Click Advanced.
- Check the box for Show all filename extensions.
Step 2: Change a file extension
- Open the folder where your file is located.
- Select the file and press the return / enter key to rename it or right-click the file and choose Rename.
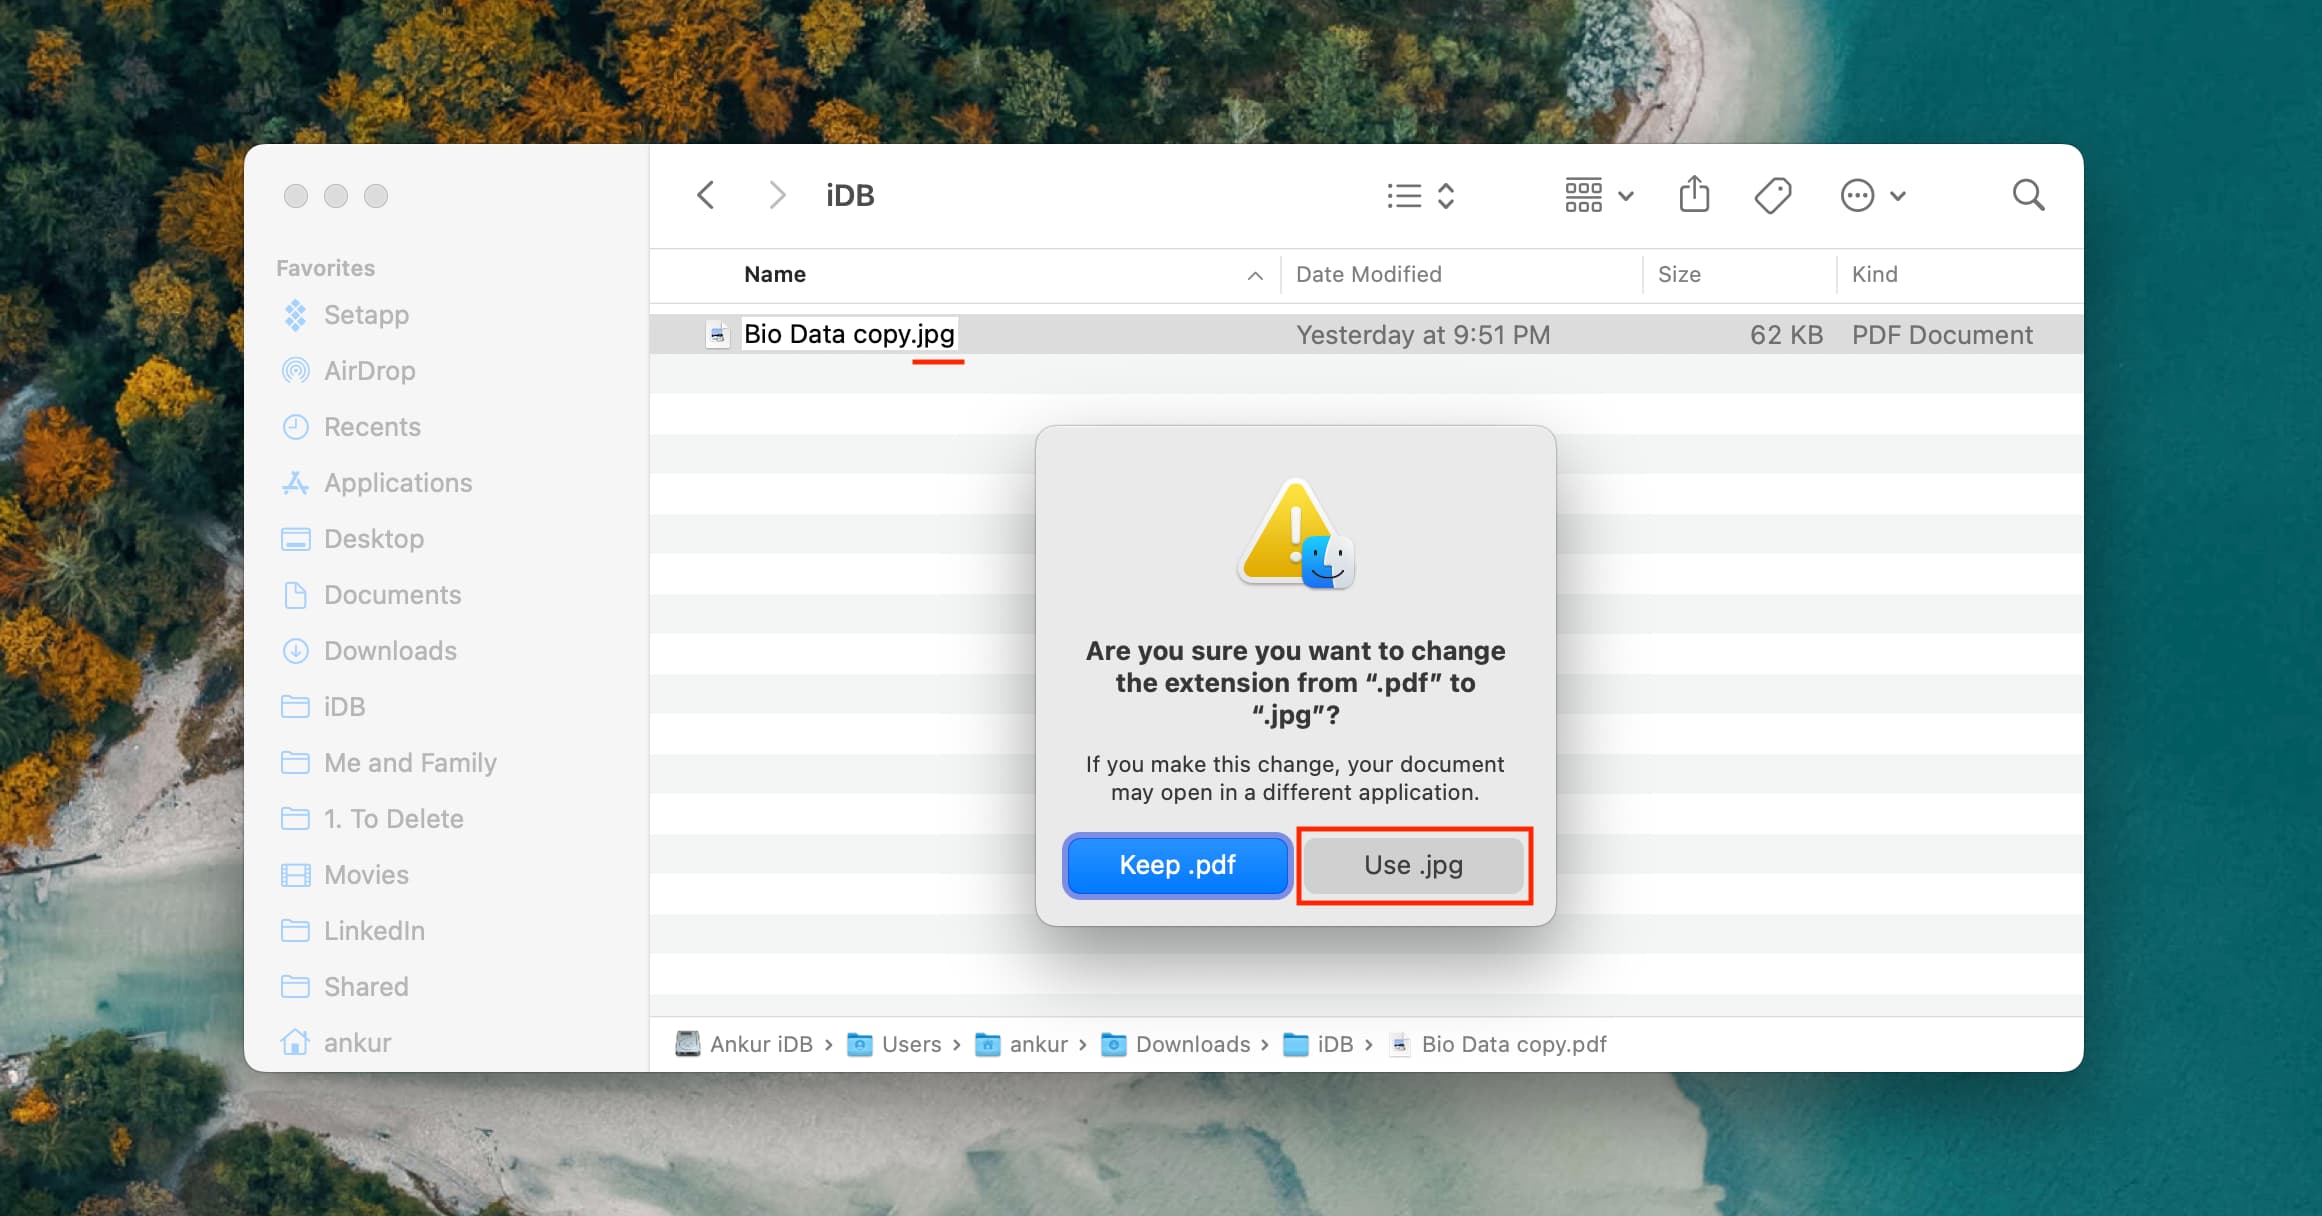
- Replace the current extension with a new one, then hit the return / enter key.
- Click Use .NewExtension.
Step 3: See the new extension name
Select the file and press Command + I or right-click the file and choose Get Info to see the file extension and kind in the inspector window.
Related: How to turn off warnings for file extension changes on Mac
How to fix a file not opening after changing its extension
A file may not open after changing its extension due to the following reasons:
- You’ve set an incorrect extension, like PNG for a PDF document.
- The file hasn’t finished downloading; redownload it to open.
- The OS doesn’t support this file type.
Will changing a file extension magically open any file?
No. Imagine you’d like to play an MKV video on your iPhone, iPad, or Mac even though the MKV format isn’t supported on Apple’s platforms. Simply changing the .mkv extension to .mp4 won’t do the trick. But if the extension is incorrectly set to .mp3, changing it to mp4 will make the video playable again in the built-in Photos, Files, and QuickTime Player apps.