As you probably know, Preview on Mac automatically saves changes you make to an image or PDF file. While most times this is benefit, it can also be a detriment. You can create a duplicate before you start working on the file, but if you forget, then you’ve just changed the original. And this isn’t always what you want.
At the same time, you may make several changes that you decide you don’t want to use after all. But again, you’ve changed and saved the file already.
Here, we’ll show you how to view and recover previous versions of PDFs and images in Preview. This allows you to go back and grab an earlier version to use or copy.
Working with previous versions in Preview on Mac
Revert to the last version
If you know that the last version of the image or PDF is the one you want, you can quickly go back to it.
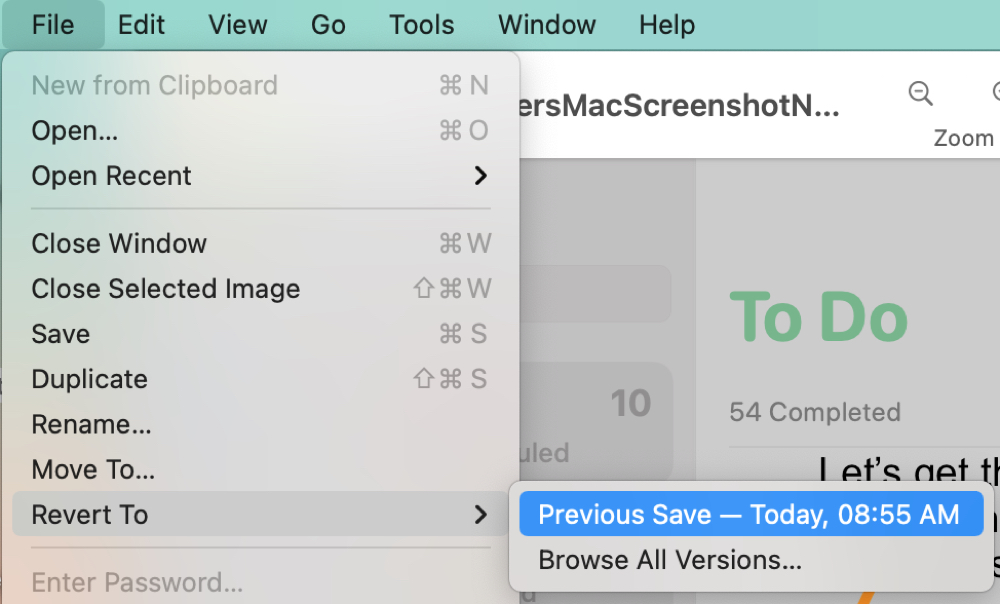
Click File > Revert To and select Previous Save. You’ll see the date or time of that last saved version which should help if it was recent or if you know you’ve only made one set of changes.
After you revert to the last saved version and click File > Revert To, you’ll see you can then go back to the Last Opened version. Again, if you know this is the version you want to restore, then it’s a fast way to get it back.
Browse all versions
If you’ve made many changes to the file and aren’t sure which one you want or you simply want to review all versions, you can do this as well. And you can restore a particular one or copy of it if you like.
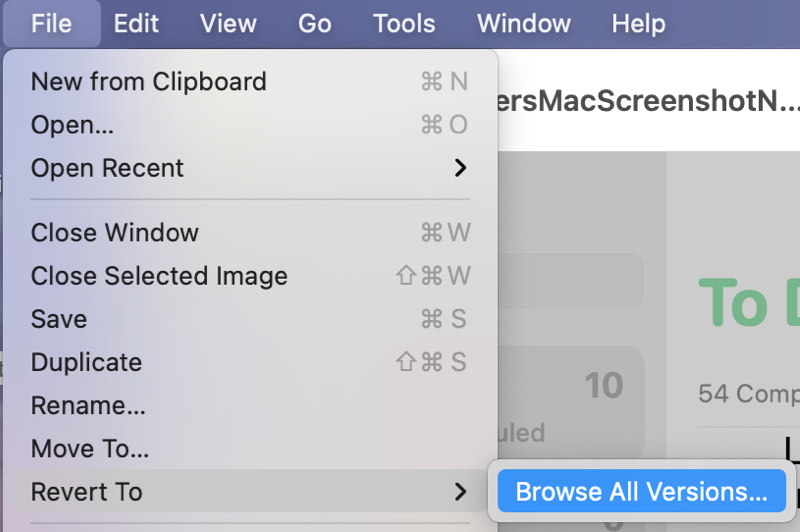
Click File > Revert To and select Browse All Versions. You’ll then have a nice, full-screen view of the current file with the various versions next to it.
You can use the arrows to move through each saved version or click a spot on the timeline on the right to jump right to it. Below each version is the date and time it was saved.
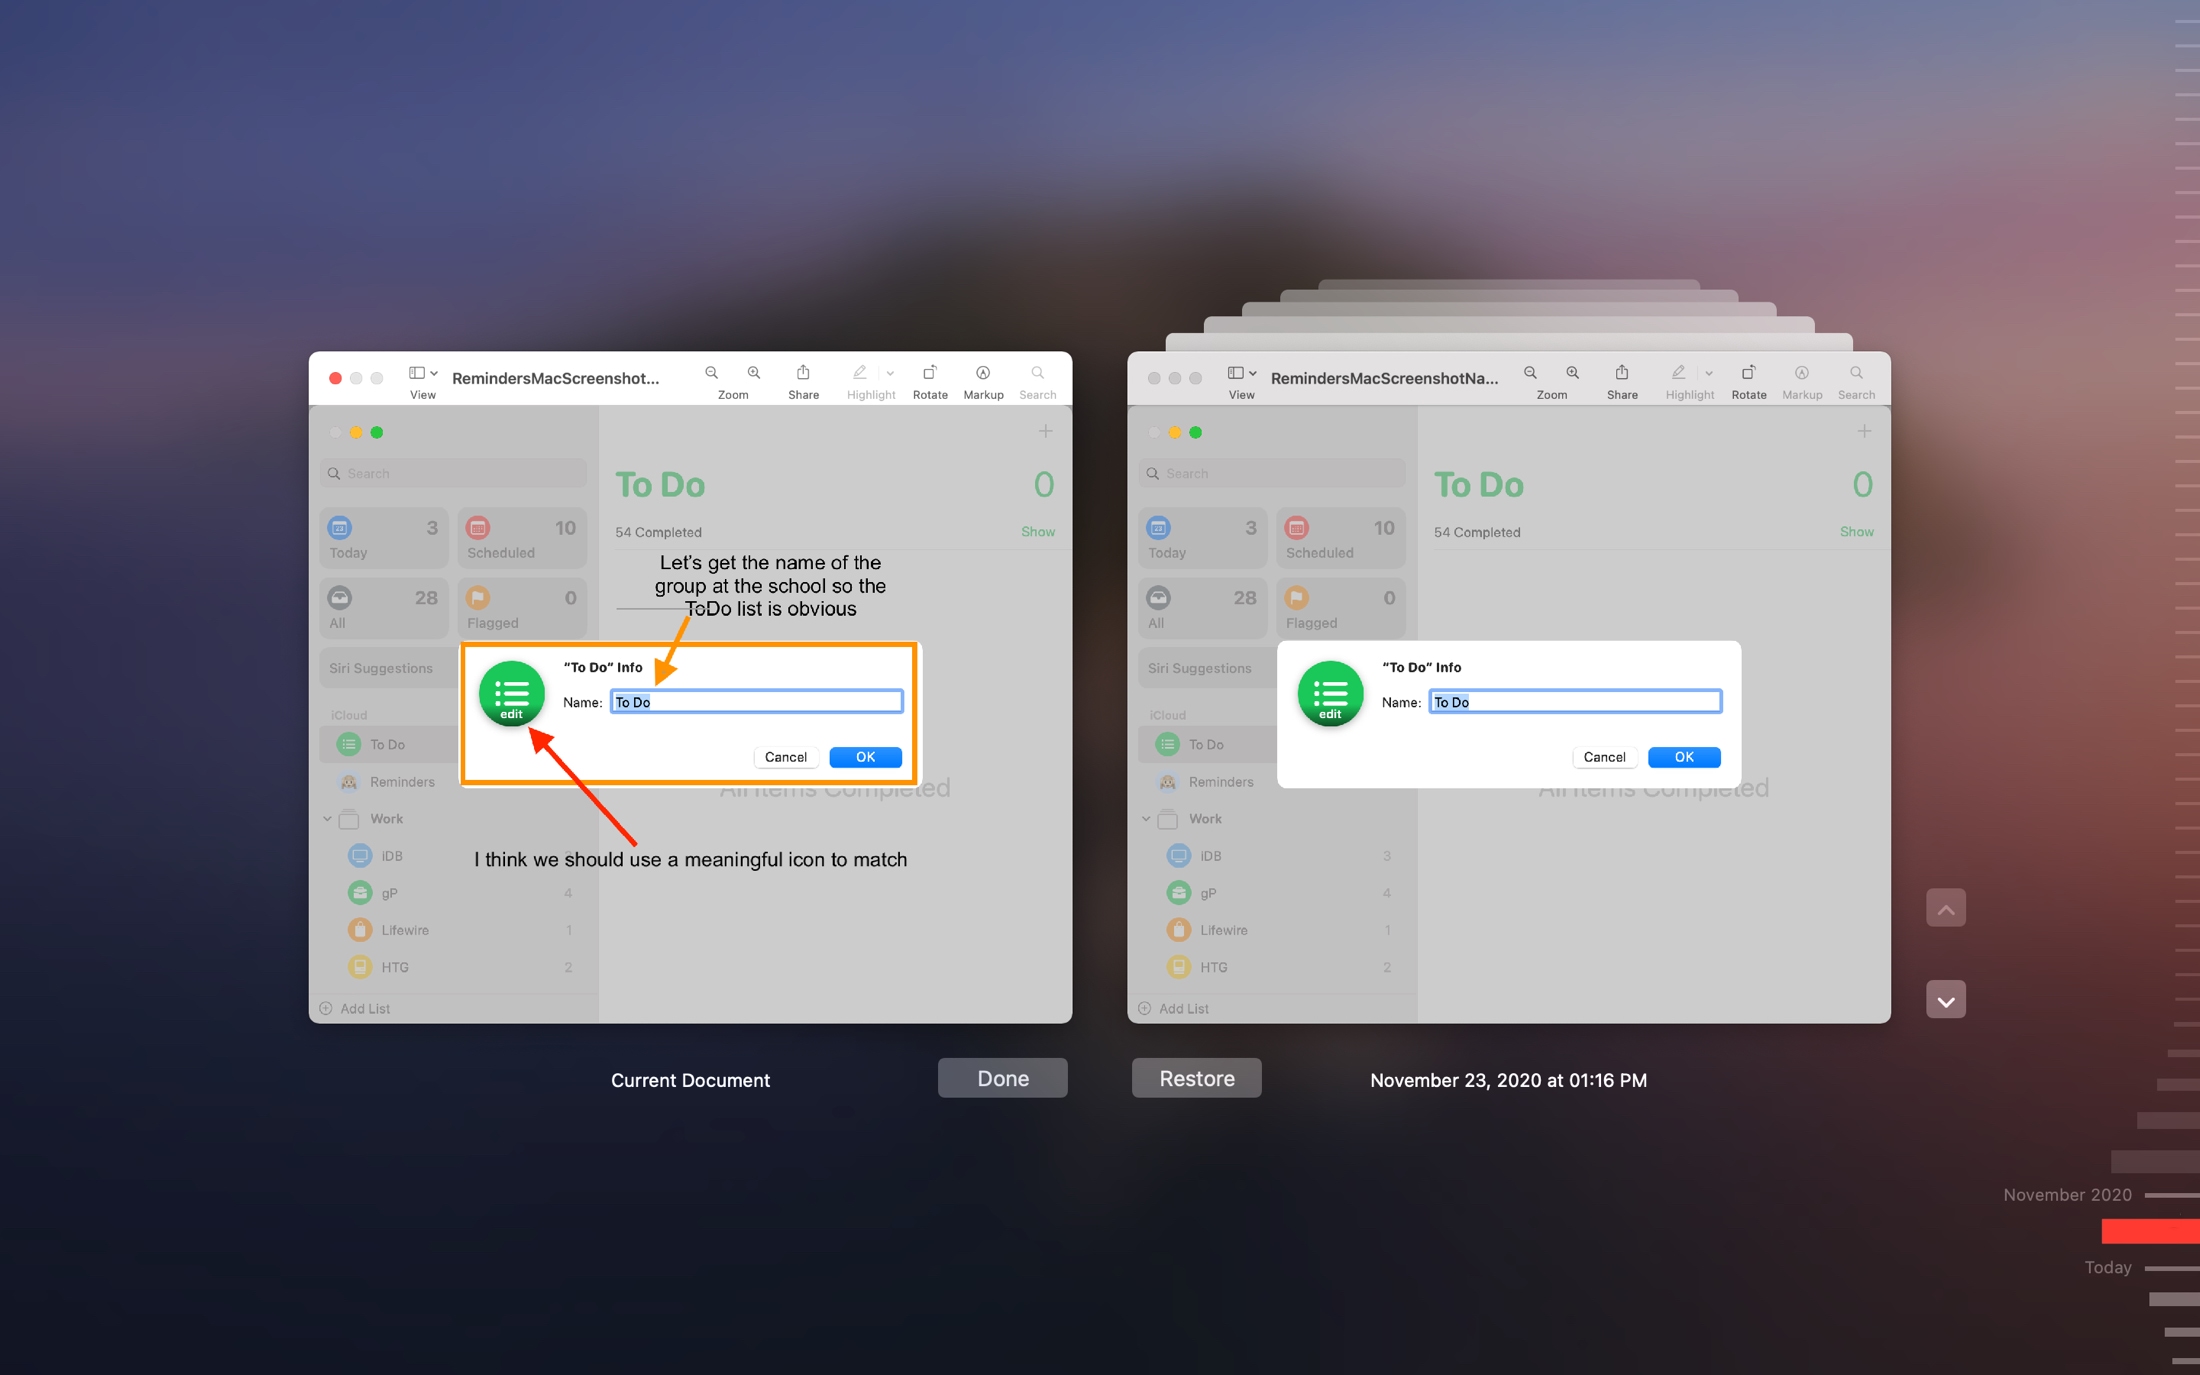
If you find the version you want to use, click the Restore button when you see that version display.
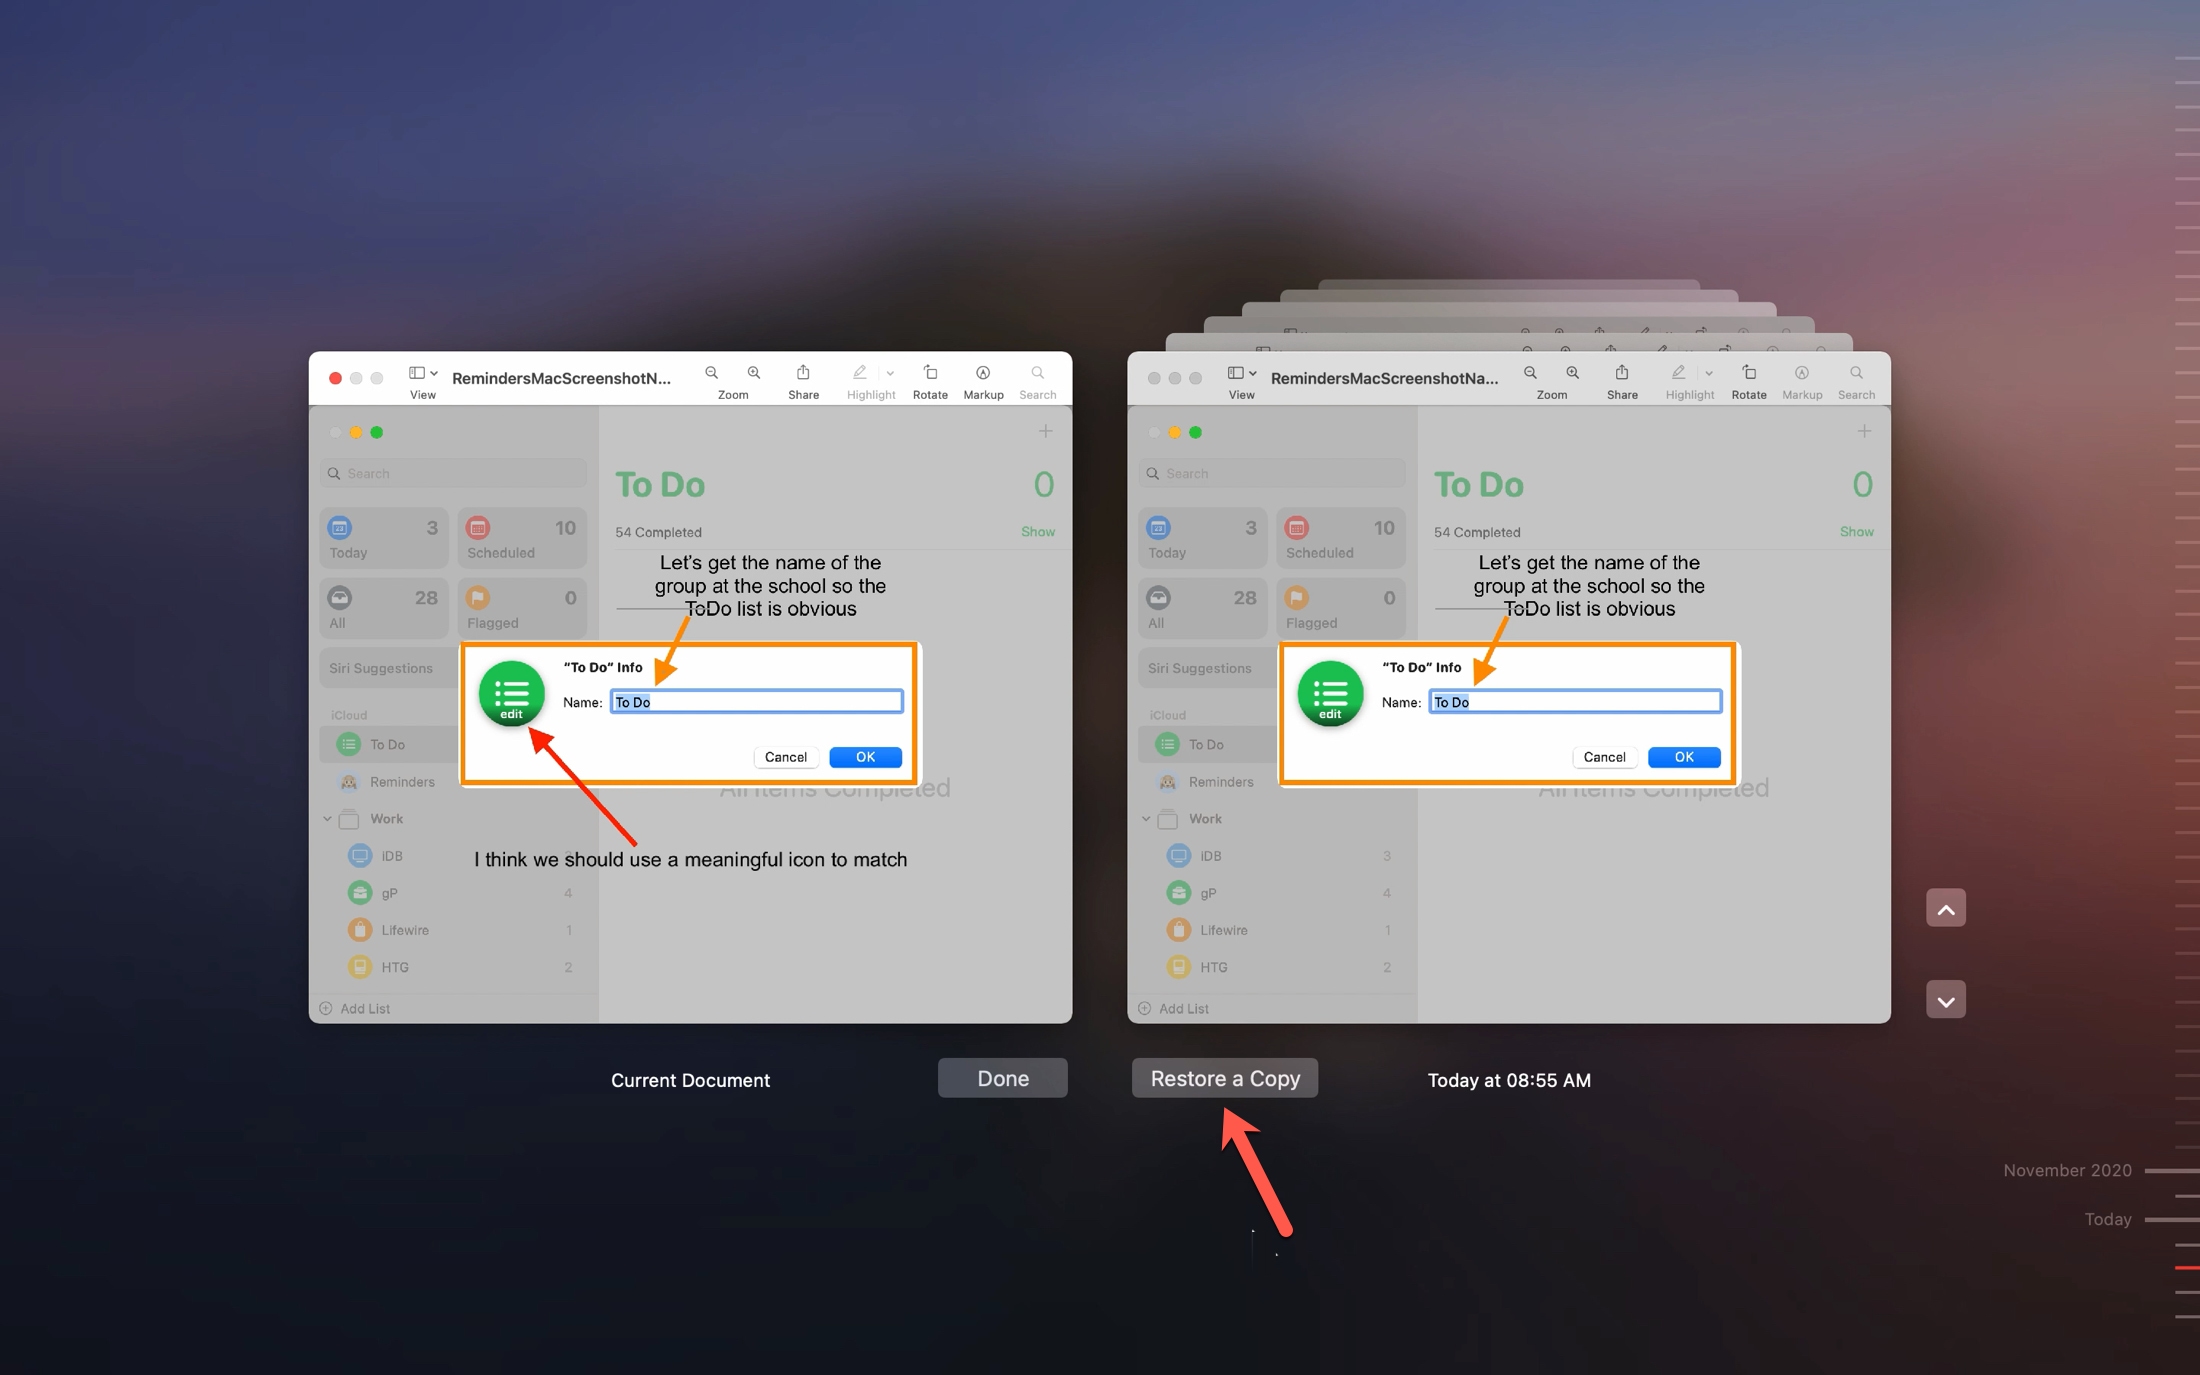
If you want to create a copy of a previous version to use, press and hold the Option key and click Restore a Copy.
To continue with the current version, simply click Done. The screen will close and you’ll be back on the Preview window as you were.
Take precautions
To avoid overwriting your original image or PDF files, here are a couple of tips when using Preview on Mac.
Duplicate the file first
If you plan to make annotations to an image or PDF using Preview, your safest bet is to save a copy of the file first. That way, you can make all the changes you like to that copy without effecting the original.
Click File > Duplicate and a new Preview window opens with a copy of the file. The word “copy” is added to the filename automatically but you can change the name if you prefer.
Ask to save
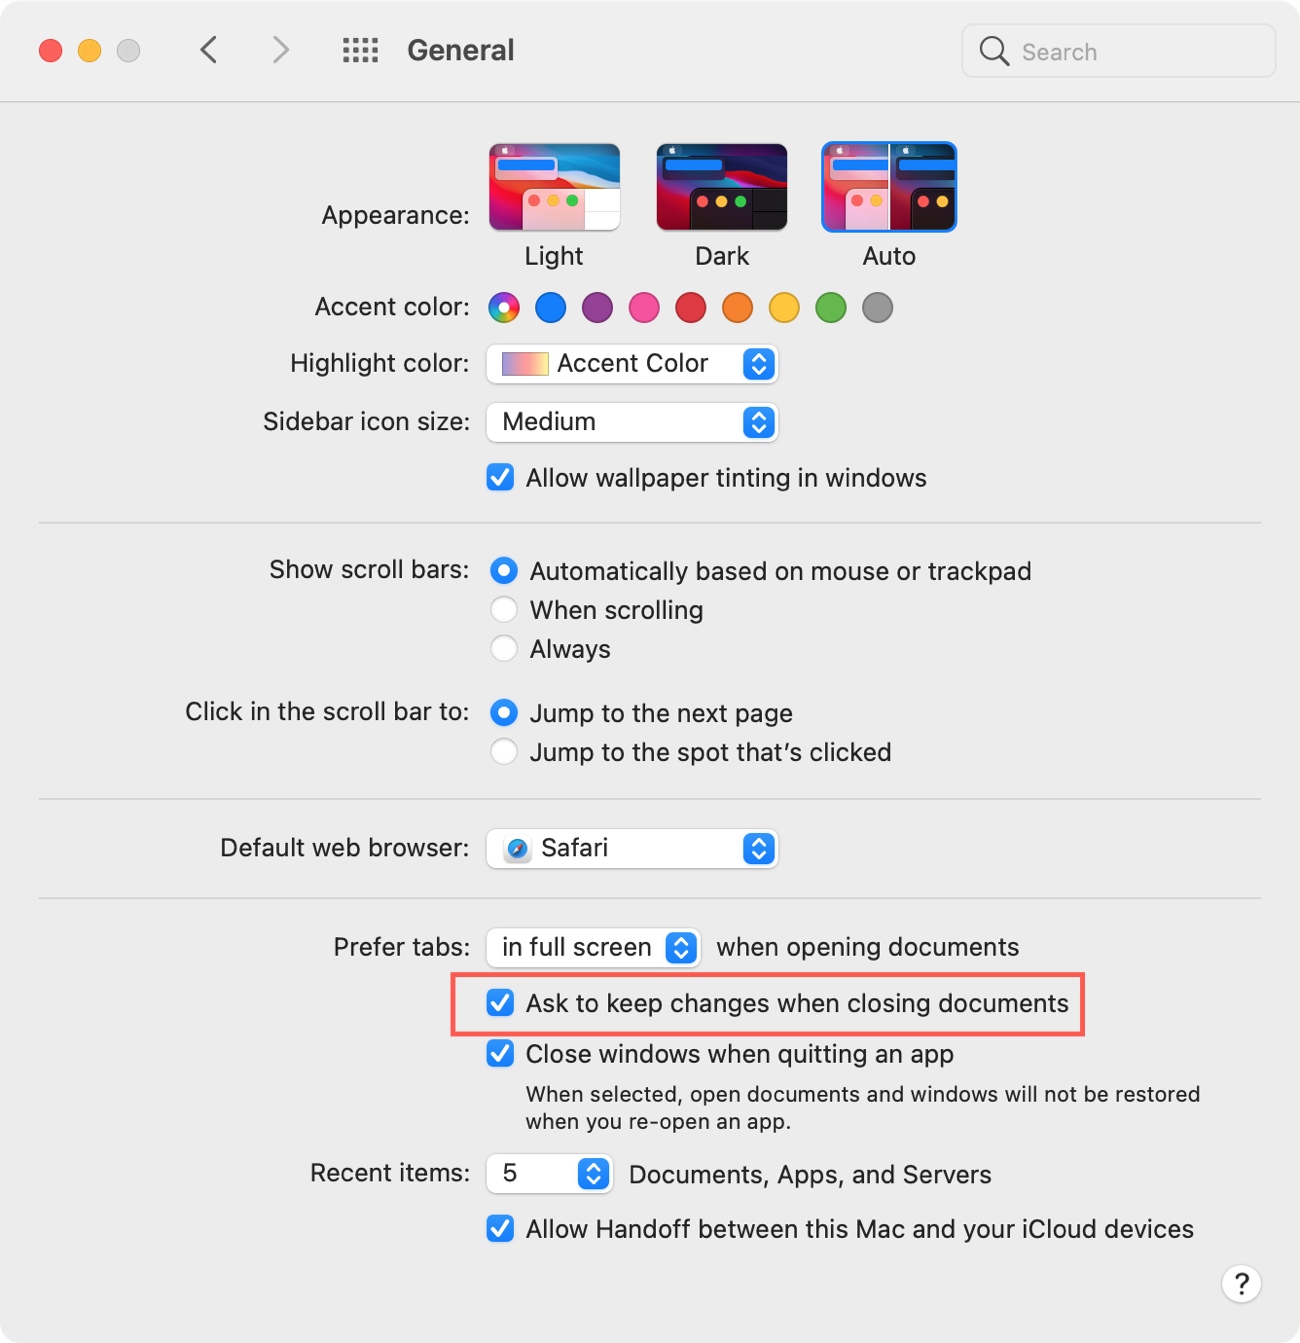
You can make an adjustment in your System Preferences that prompts you to save or discard changes. This way, when you close a file in Preview that you’ve edited, you have an opportunity to save those edits, discard them, or cancel and keep a copy.
Go to System Preferences > General and check the box for Ask to keep changes when closing documents. Just note, this setting is not just for Preview, but works for other Mac apps that use the auto-save feature.
Wrapping it up
Preview on Mac is a convenient built-in app that you can use for marking up or editing images, signing PDFs, and more. So hopefully this how-to will help you if you accidentally change a file or simply need an older version of it.
What tips do you have to share for using previous versions in Preview on Mac? Comment below or hit us up on Twitter with your suggestions!