If you have an Excel spreadsheet or workbook that you want to either share with others, you likely have data that you don’t want them to be able to change. Maybe you want to allow them access to only edit certain cells. On the other hand, you may have data that you want to make sure doesn’t get accidentally changed as you work on the sheet yourself.
Unlike Numbers, you can lock cells in Microsoft Excel in a variety of ways. You can lock specific cells, cell ranges, rows, and columns. There are a few sets of steps in the process, but after you do it once, it will come easily for future workbooks. Here, we’ll walk you through how to lock cells in Microsoft Excel on Mac.
Lock cells in Excel on Mac
Open your workbook in Excel on Mac and follow these steps to lock the cells you need.
Lock all cells in a spreadsheet
You may not realize it but all cells in an Excel spreadsheet are locked by default. This can be confusing because as you know, you can change them. The trick to making sure you cannot edit them is to protect the sheet.
Verify all cells are locked
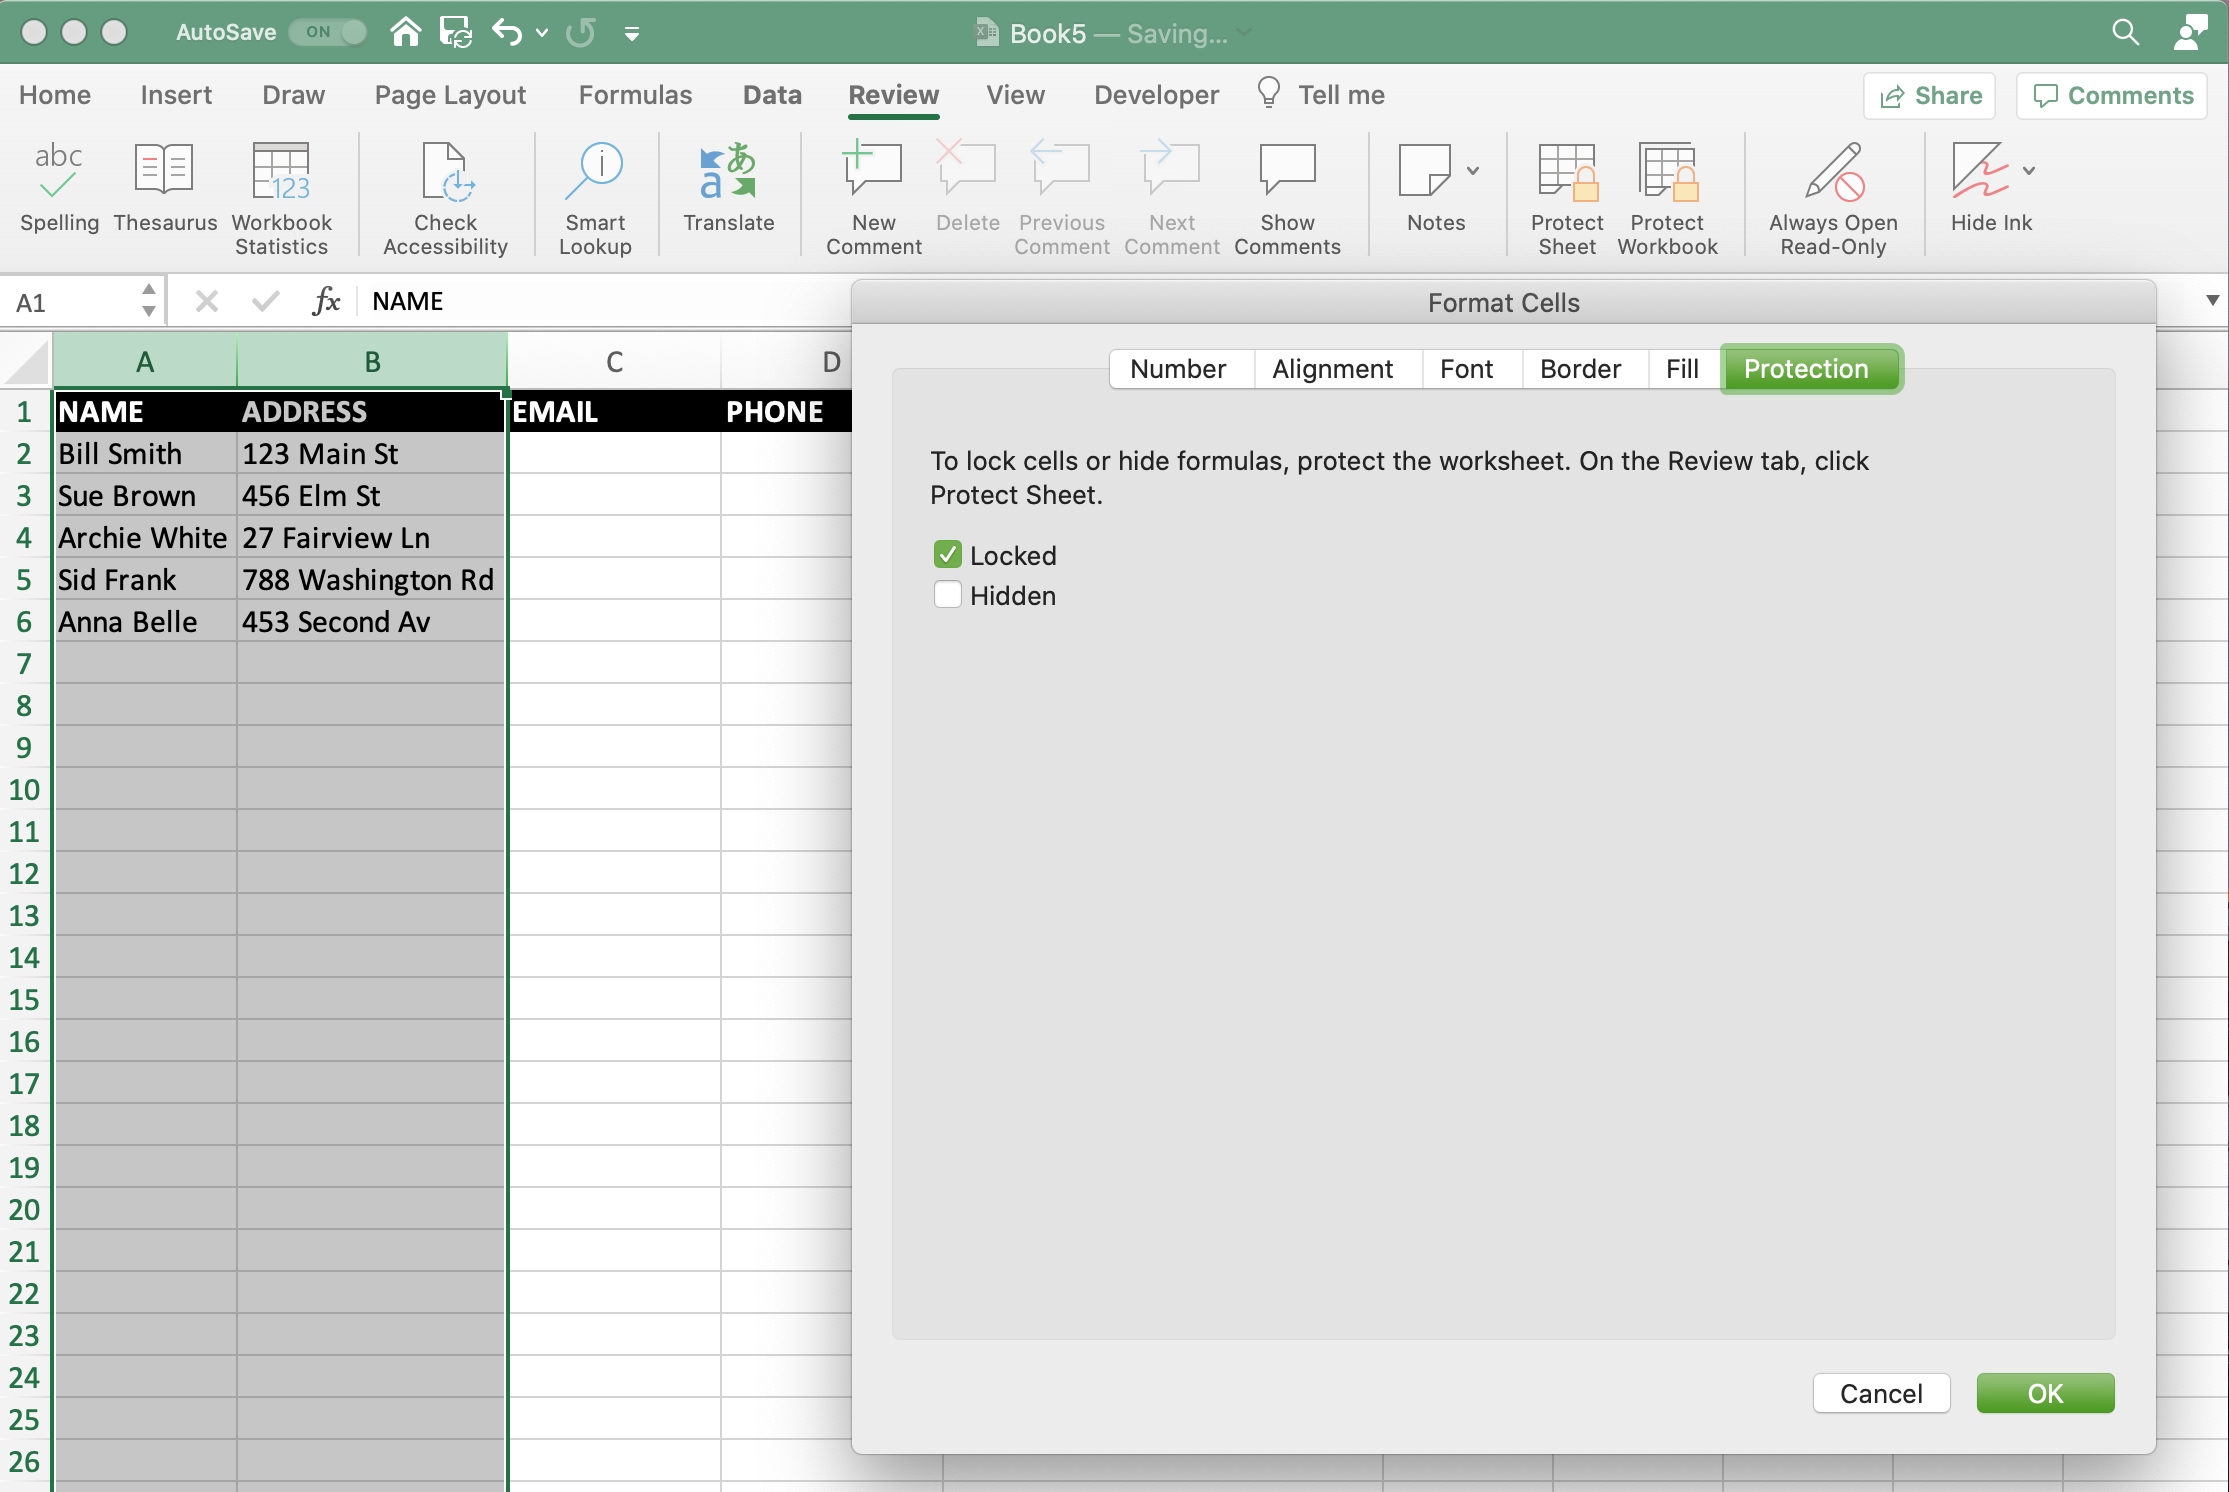
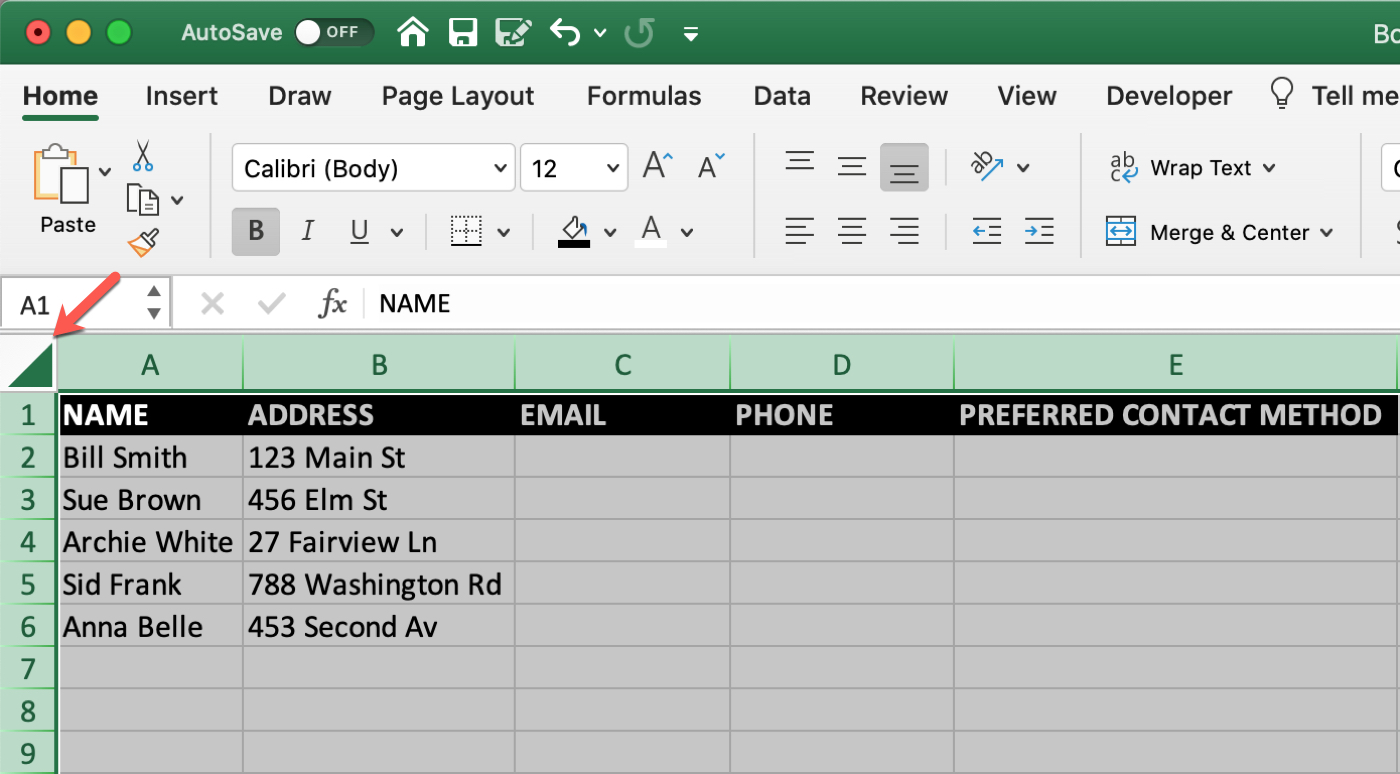
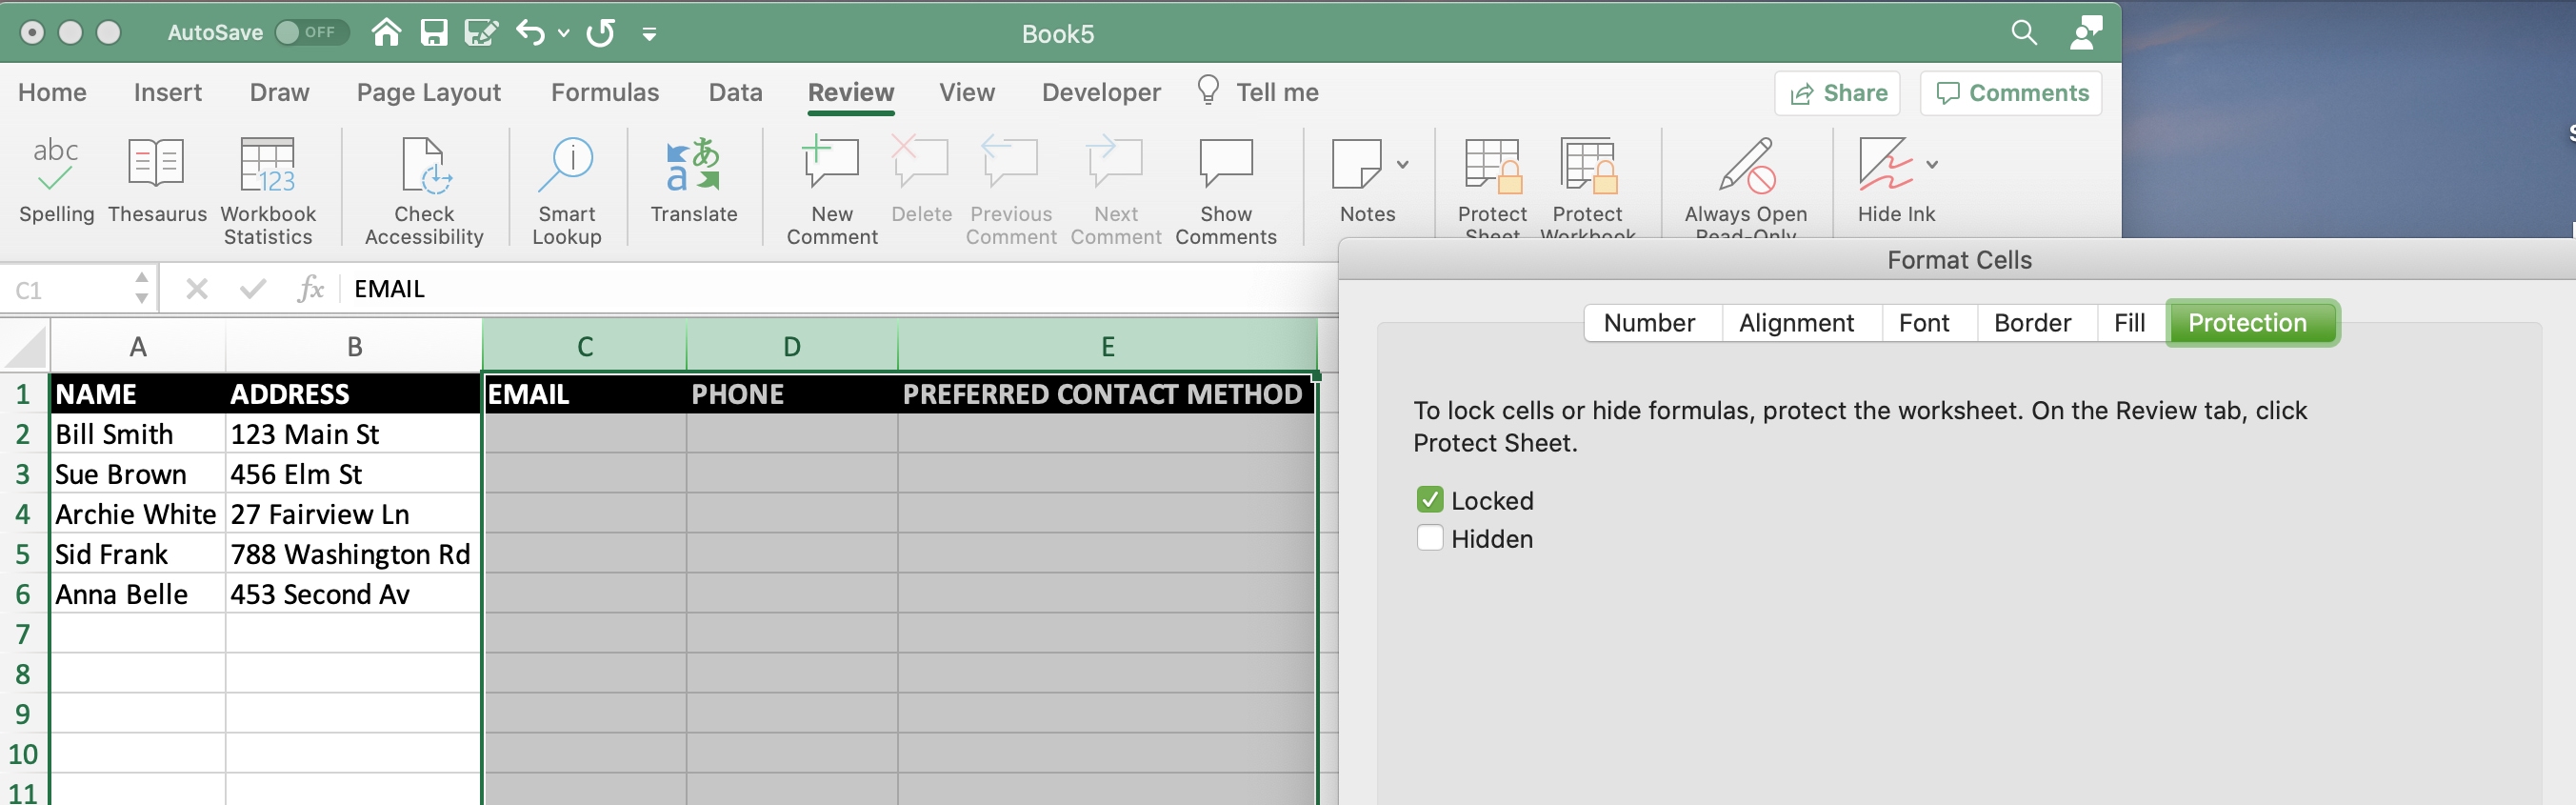
1) With your spreadsheet open, select the entire sheet. You can do this by clicking the square with the triangle on it in the upper left corner of the table. Your entire sheet should be highlighted.
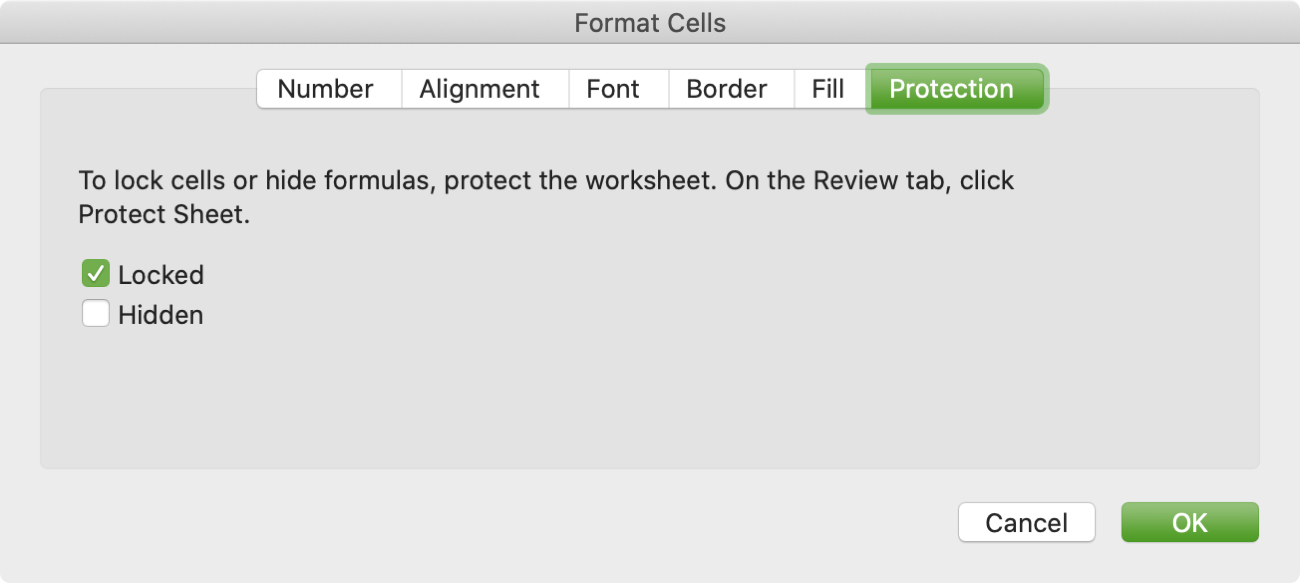
2) Right-click, select Format Cells, and pick the Protection tab. Or click the Format button on the Home tab.
3) Be sure that the box for Locked is checked, which again, should be by default.
This is just an extra step for verification. Continue on to protect your spreadsheet.
Protect the spreadsheet
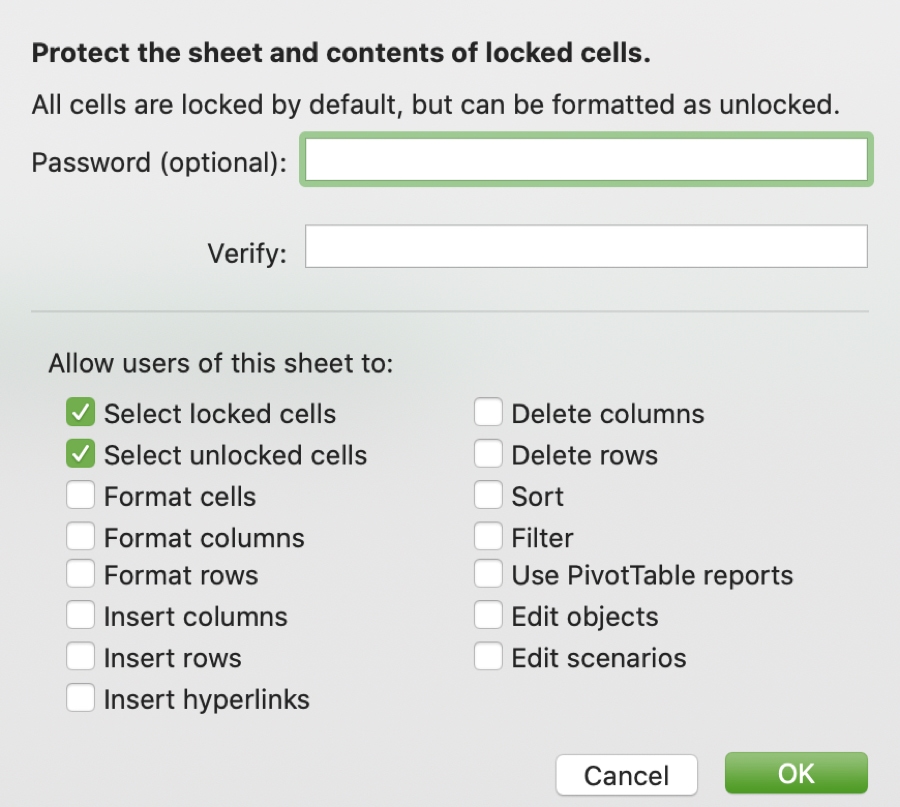
1) Go to the Review tab.
2) Choose Protect Sheet. (Protecting a workbook is different and doesn’t give you the same options.)
3) Notice that you can enter a password to protect the sheet if you like. You don’t have to use a password if you’re locking the cells for yourself. But if you plan to share the sheet, a password is something to consider. You can leave the default items selected or choose more to allow. Click OK.
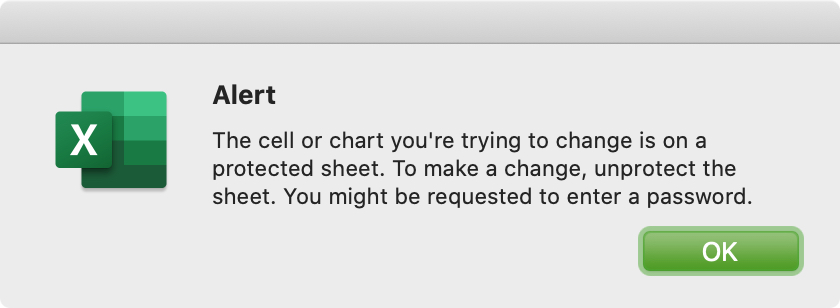
Now try to make a change to your spreadsheet. You should receive an alert letting you know that the sheet is protected. You can do this with other spreadsheets in the same workbook, the same way.
Lock certain cells in a spreadsheet
If you plan to share your spreadsheet and only want participants to be able to edit specific cells, this is easy to do. The way in which you go about locking those cells really depends on how many you plan to lock.
Let’s say you only want to lock certain cells, like a few columns, and allow others to change the rest.
1) Follow the steps above to select the sheet and open the Format (Cells) option.
2) This time uncheck the box for Locked which unlocks all cells in your sheet.
3) Select the cells you want to lock, in our example, it’s a range of columns.
4) Right-click the cells and check the box for Locked.
These steps will have all cells in your sheet unlocked except for those you just locked.
5) Follow the above to protect the sheet and options within it.
Test out your steps to be sure they work by trying to change a locked and unlocked cell. For the locked cells, you should receive that alert.
On the reverse, maybe you want to lock everything in the sheet except for a particular cell or range of cells. You’ll basically do the opposite steps.
1) Follow the steps to select the sheet, format the cells, and make sure all cells are locked.
2) Select the cells you want to unlock, in our example again, it’s three columns.
3) Right-click the cells and uncheck the box for Locked.

These steps will have all cells in your sheet locked except for those you just unlocked.
4) Follow the steps to protect your sheet and the options you want to include.
Again, do a test to make sure the cells you want locked and unlocked are correct.
Unprotect a spreadsheet
Regardless of whether you use a password to protect your sheet, unprotecting it is easy when you want to edit those locked cells again.
1) Go to the Review tab and click Unprotect Sheet.
2) If you didn’t enter a password, the sheet will return to unprotected immediately. If you entered a password, enter it and click OK.

Wrapping it up
Locking specific cells in a Microsoft Excel spreadsheet can be very handy, especially if you’re sharing the sheet with others. It can protect your data while allowing participants to edit only what’s necessary. Plus, you can protect yourself from accidentally editing or deleting data when working on a spreadsheet yourself.
For help locking cells in Numbers, check out our tutorial. And for more help with Excel, head to the Excel section on iDB.
What tips do you want to share for working in Microsoft Excel? Let us know in the comments below or send us a message on Twitter. A tutorial may emerge from your tip!