
Just like unc0ver, the Odyssey jailbreak app is intended to be side loaded into a compatible iPhone or iPad. To help make the process of side-loading the Odyssey jailbreak app easier, the Odyssey Team officially endorsed the brand-new Wander add-on for Apple’s Shortcuts app shortly after the tool came out of public beta.
The Wander add-on doesn’t replace side loading utilities like AltStore and ReProvision or signing services like Jailbreaks.app, but rather synergizes with them to make the process of installing Odyssey and updating to newer versions faster and less cumbersome while providing a more native user experience through Apple’s Shortcuts app in the process. In this tutorial, we’ll show you how to set up the Wander add-on with your Shortcuts app.
Setting up Wander in Apple’s Shortcuts app
If you plan on using the Odyssey jailbreak, then you’d be doing yourself a huge favor by using the Wander add-on. To do this, you’ll want to follow these easy steps:
1) Download and install the Shortcuts app if you haven’t already. It’s free in Apple’s App Store.
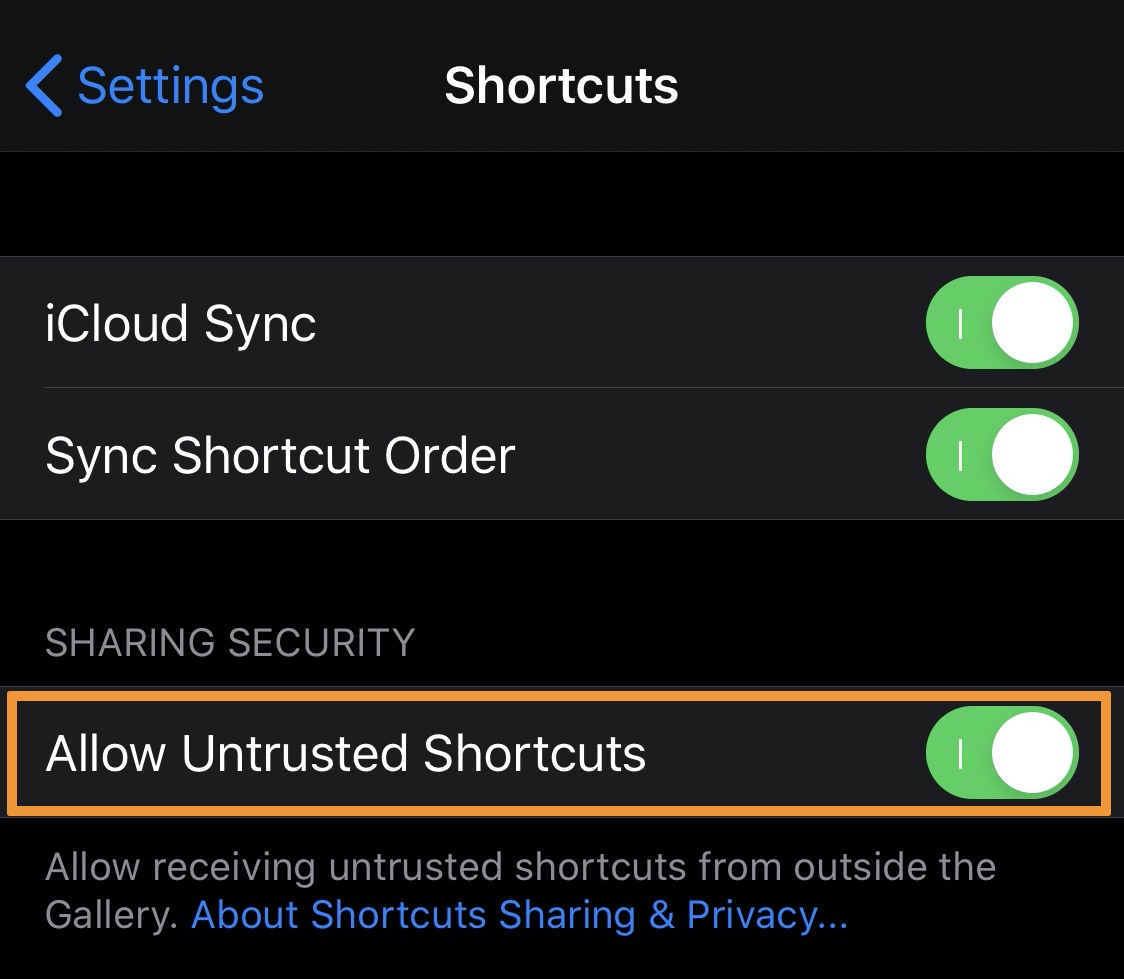
2) Go to Settings → Shortcuts and ensure that the Allow Untrusted Shortcuts option is turned on:
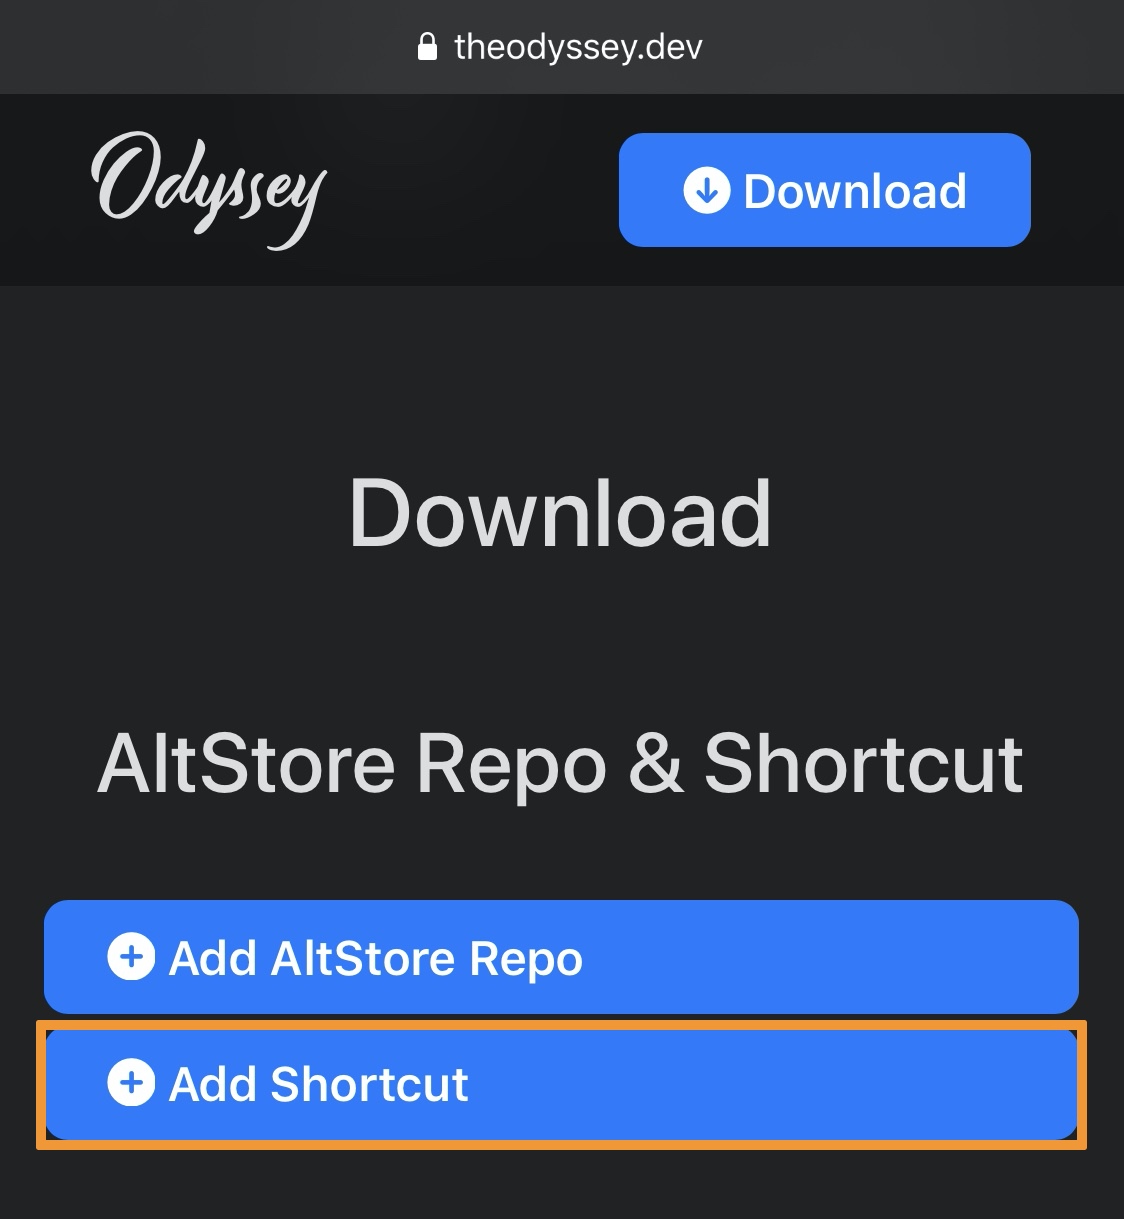
3) Visit theodyssey.dev in your Safari web browser, then tap on the blue Add Shortcut button:
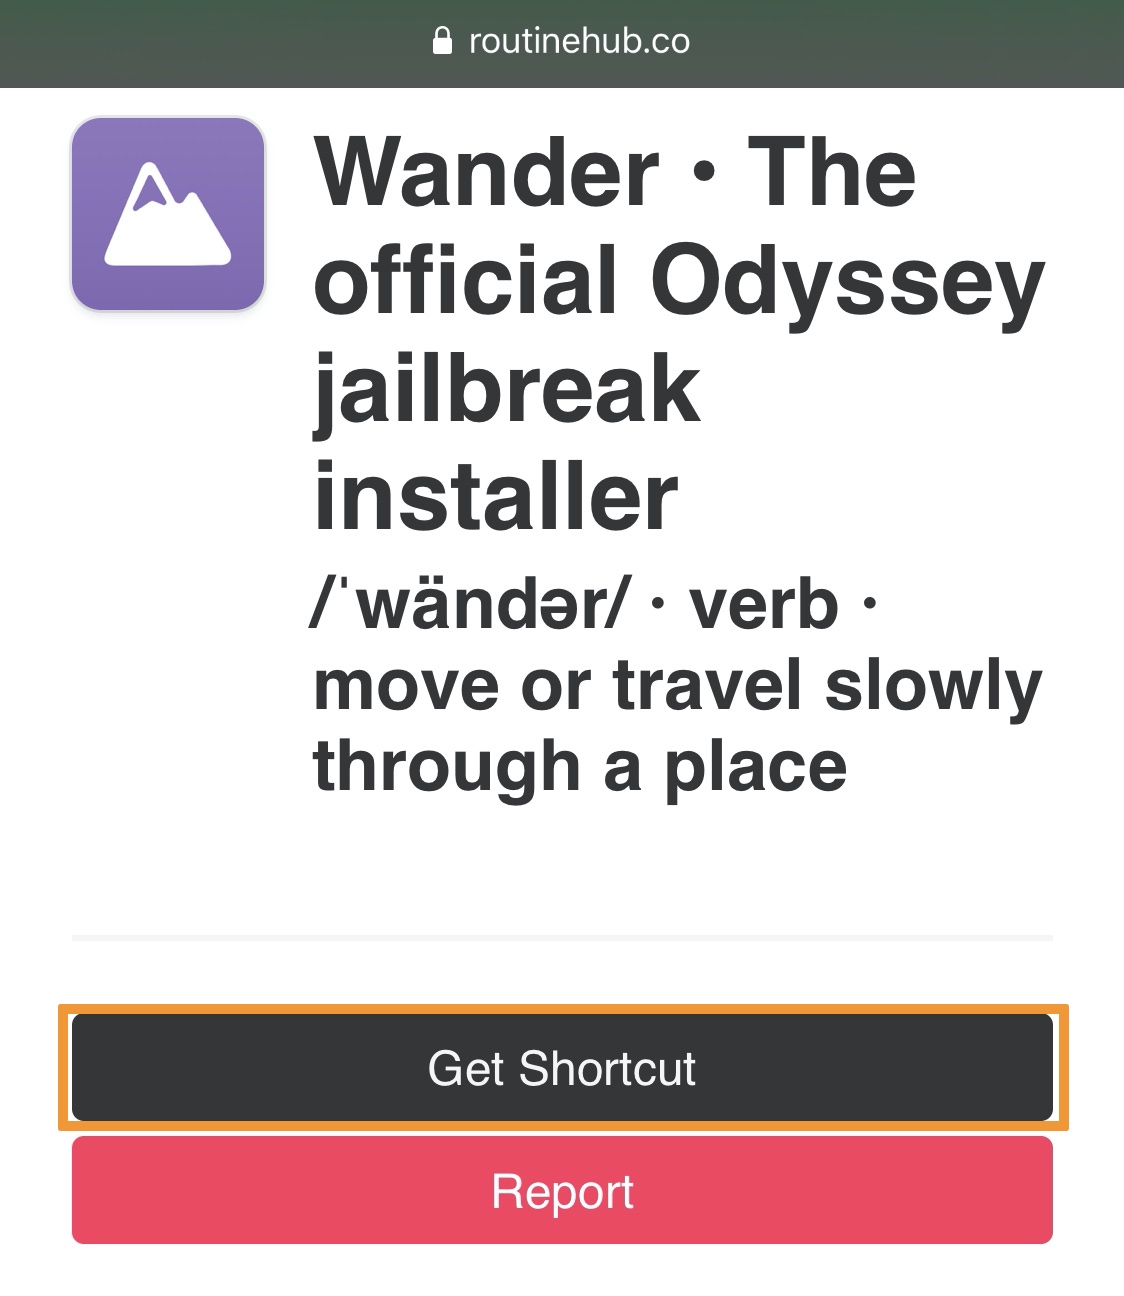
4) You will now be redirected to a routinehub.co web page. Tap on the black Get Shortcut button:
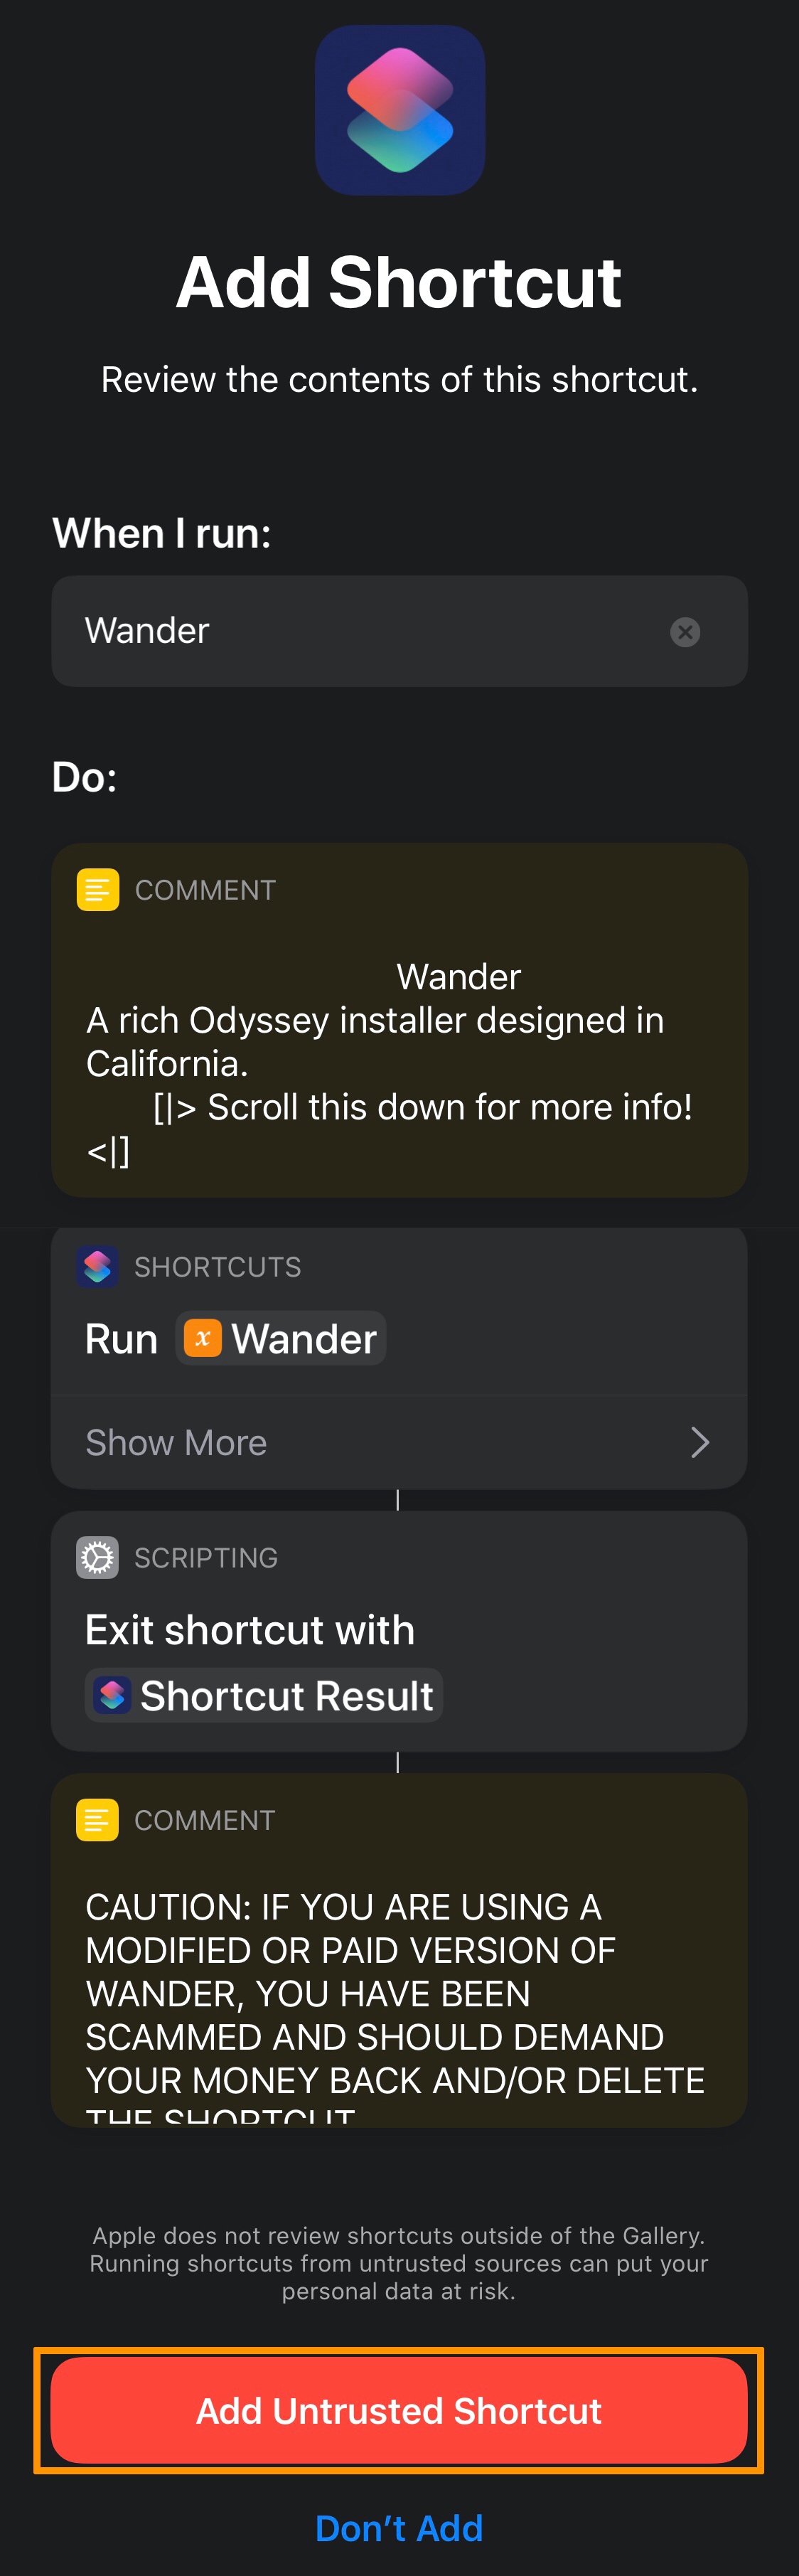
5) In the Add Shortcut interface that pops up, scroll ALL the way down (it’s a long way down) and tap on the red Add Untrusted Shortcut button:
6) Lastly, tap on the blue Done button:
Wander is now set up on your Shortcuts application. You can now use it to install the Odyssey jailbreak app or update to a newer version of the jailbreak app via one of three different installation methods. While the process varies from one method to another, we’ll show you a little bit of what you can do below.
Using Wander via Apple’s Shortcuts app
After you’ve added Wander to your Shortcuts app, you’ll need to configure it for the first use. This process involves granting it the necessary permissions and ensuring that you know how to use it. We’ll go over a few tips below:
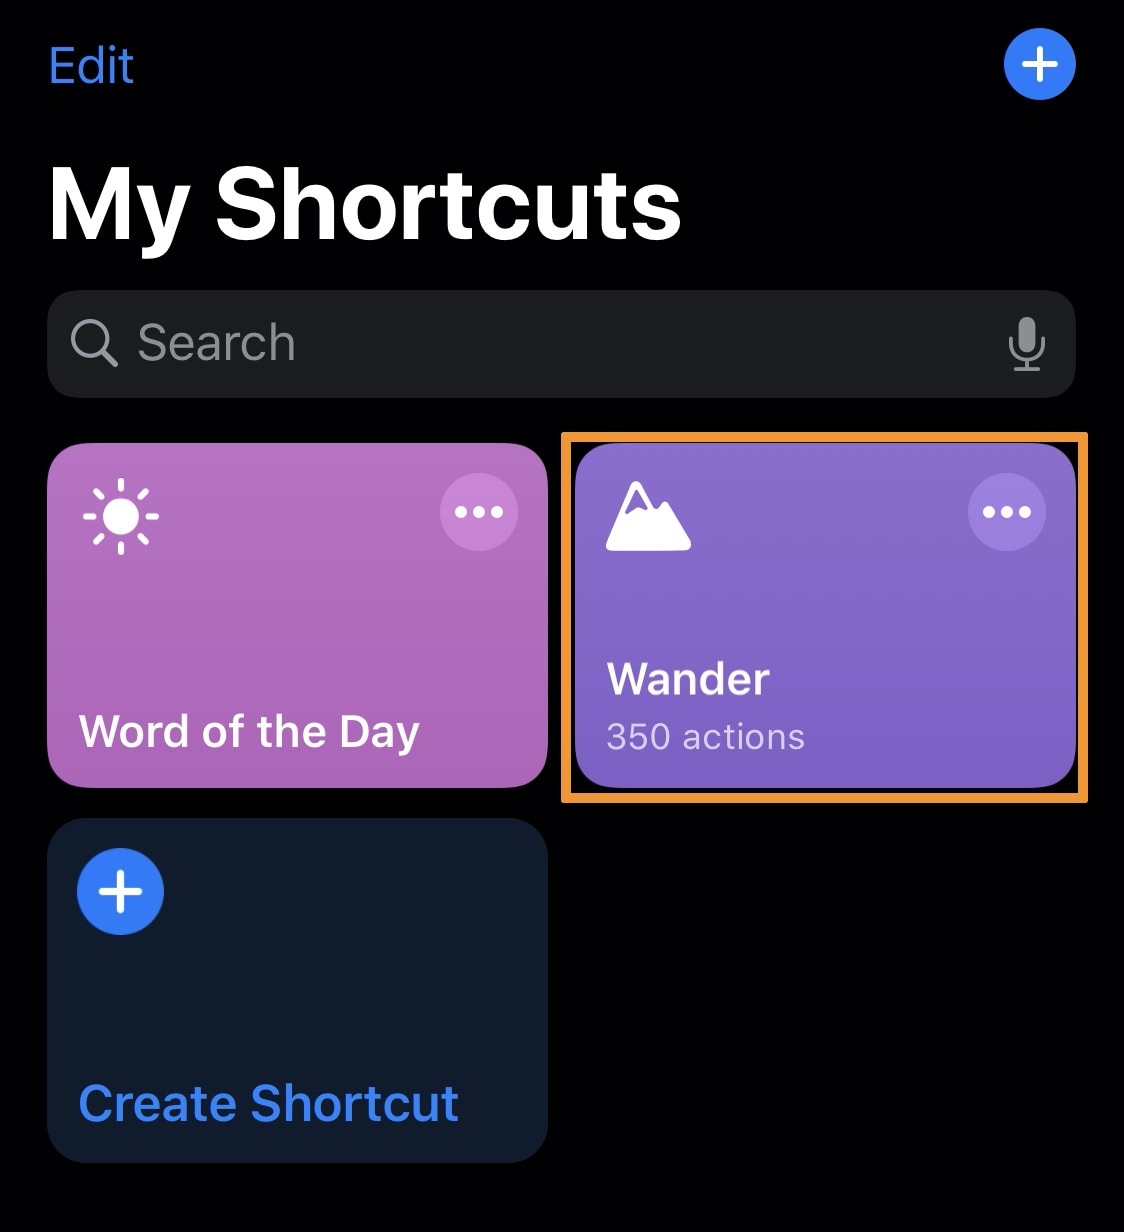
1) To begin, tap on the Wander shortcut:
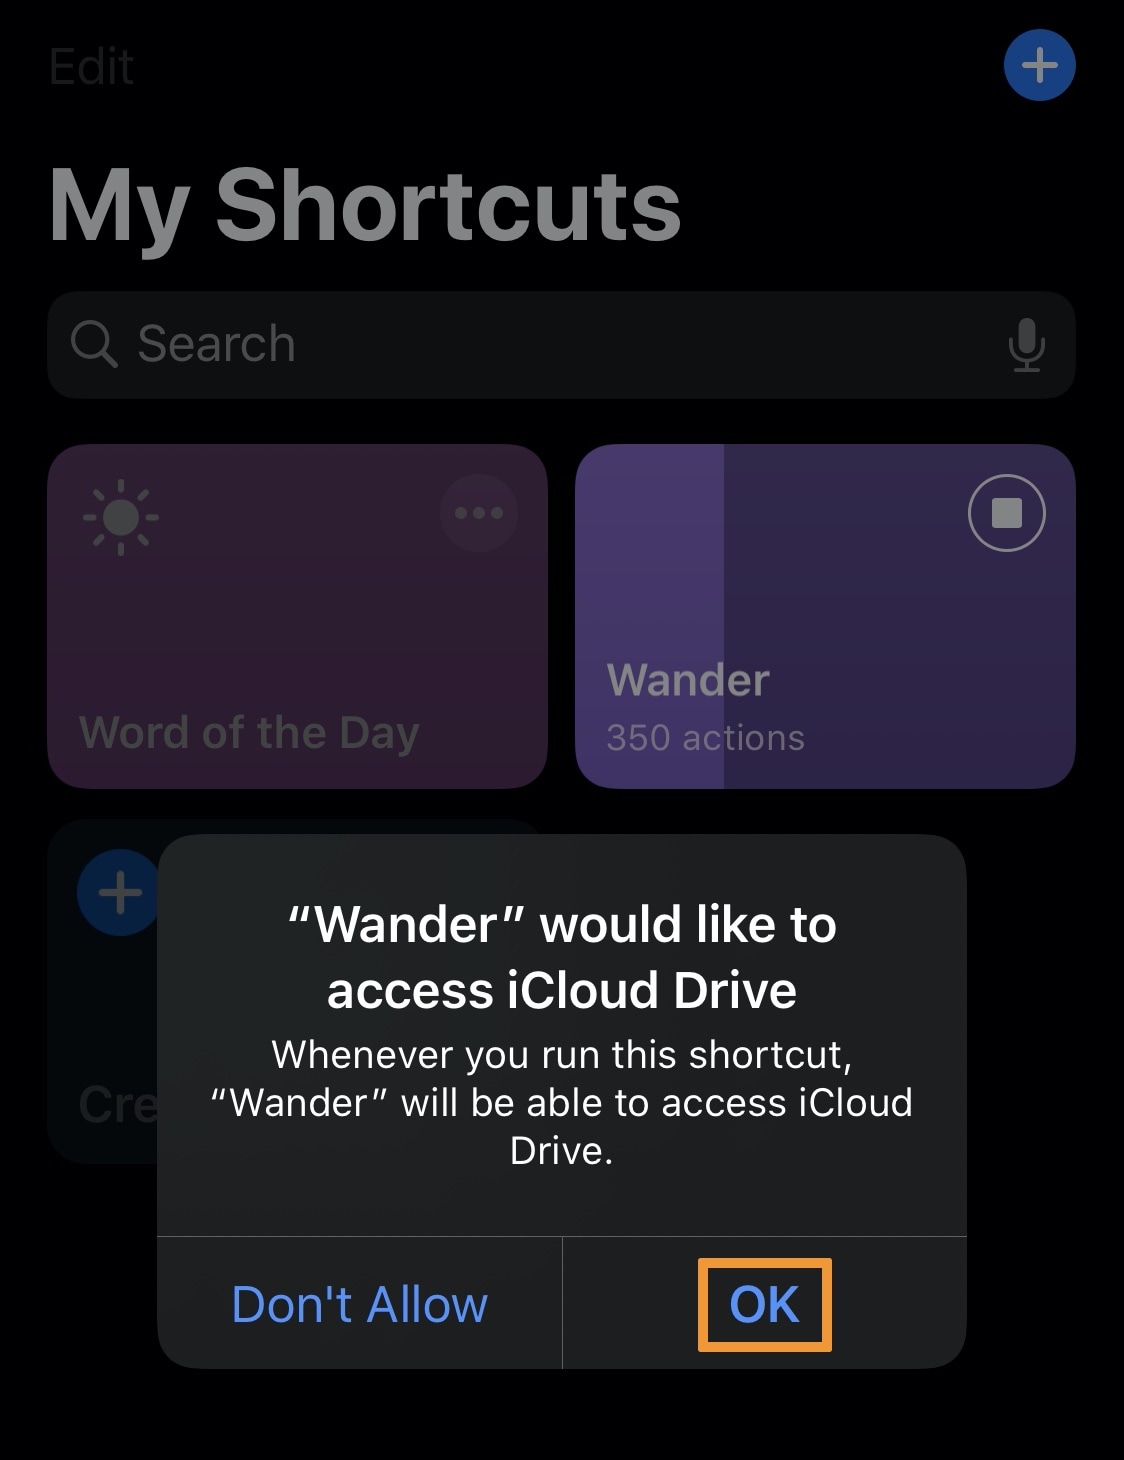
2) Wander will now ask for access to iCloud Drive. Accept by tapping the OK button:
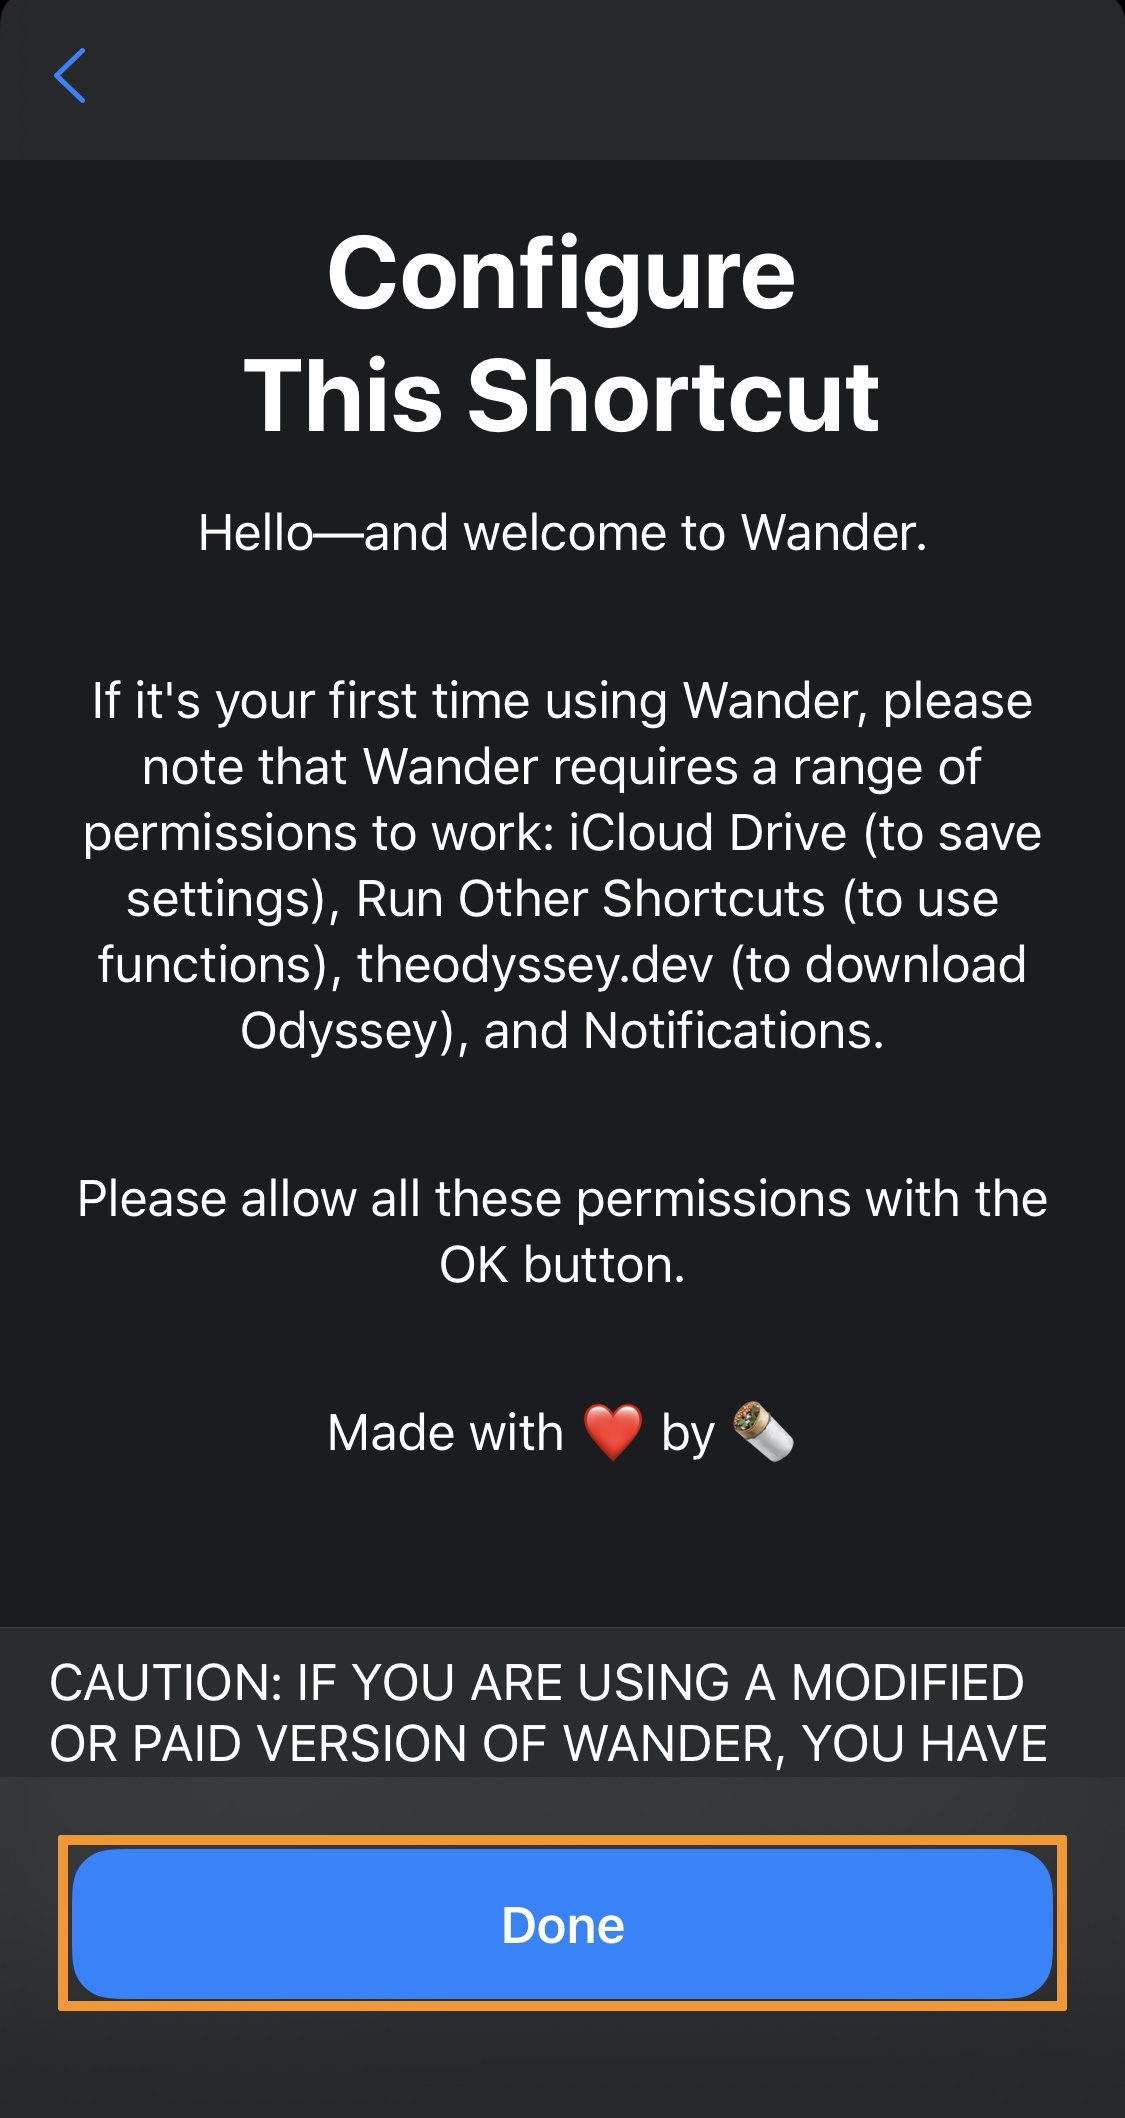
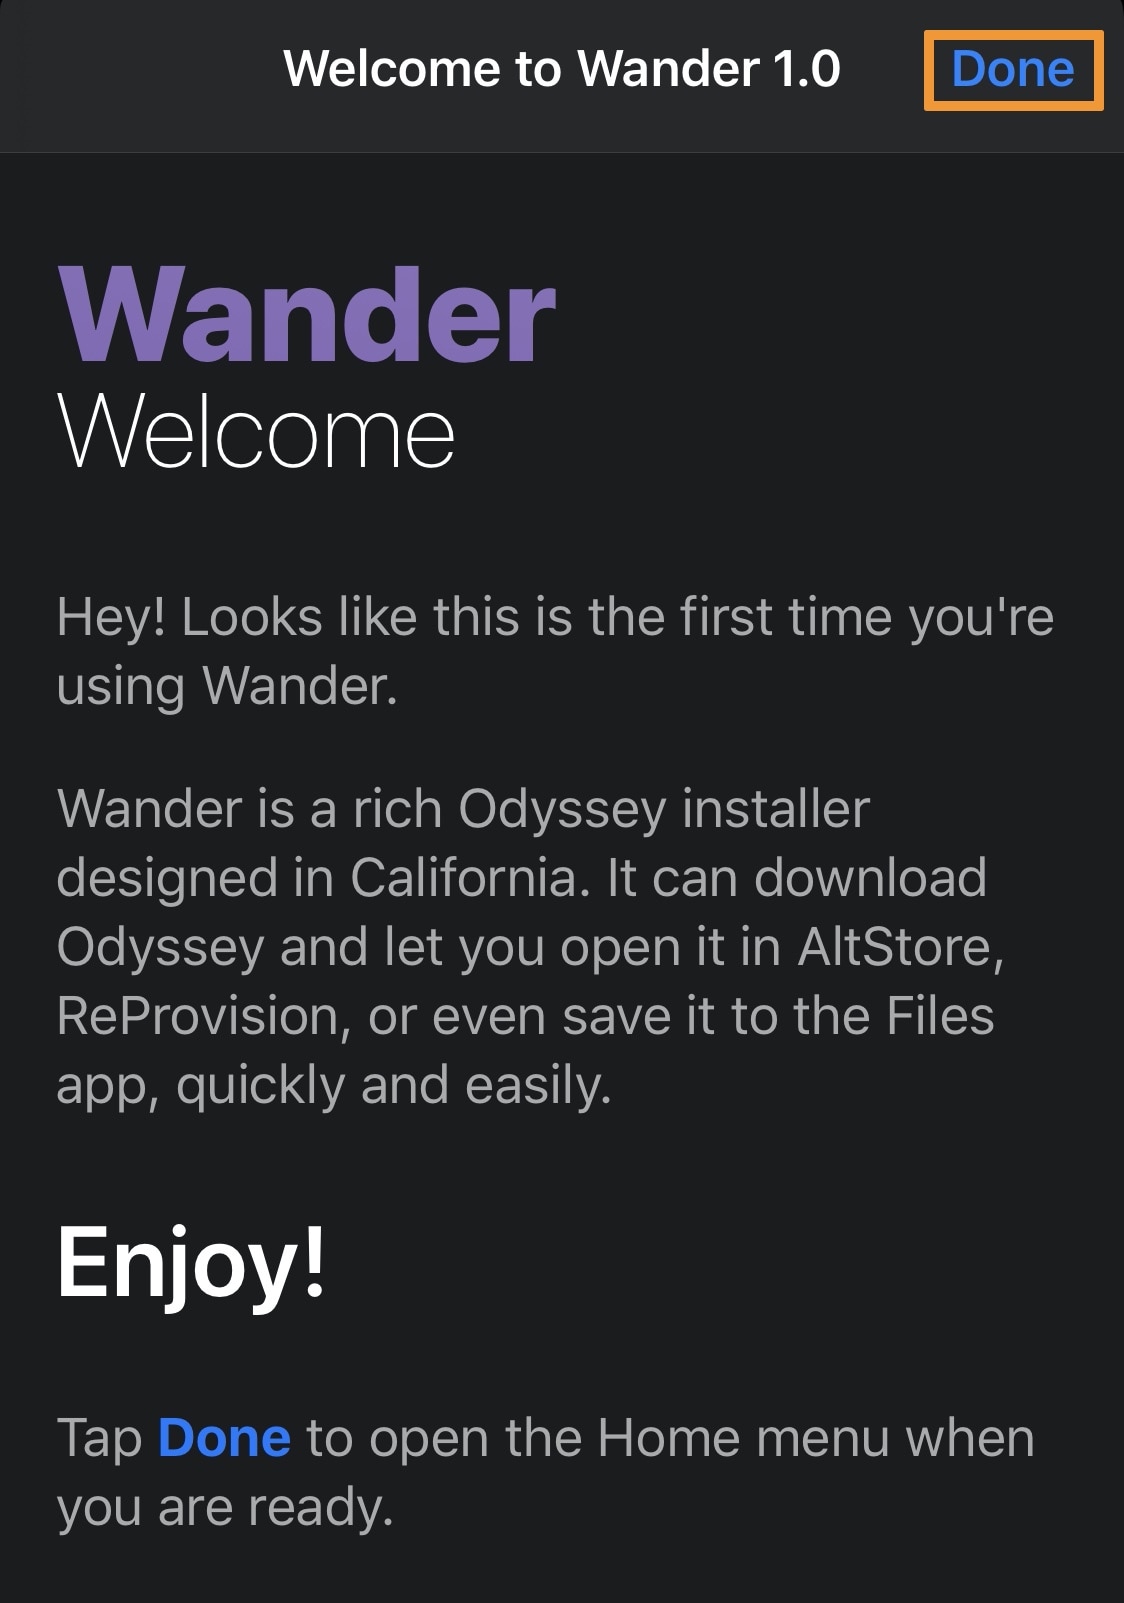
3) In the next interface, tap on the blue Done button at the top right of the interface:
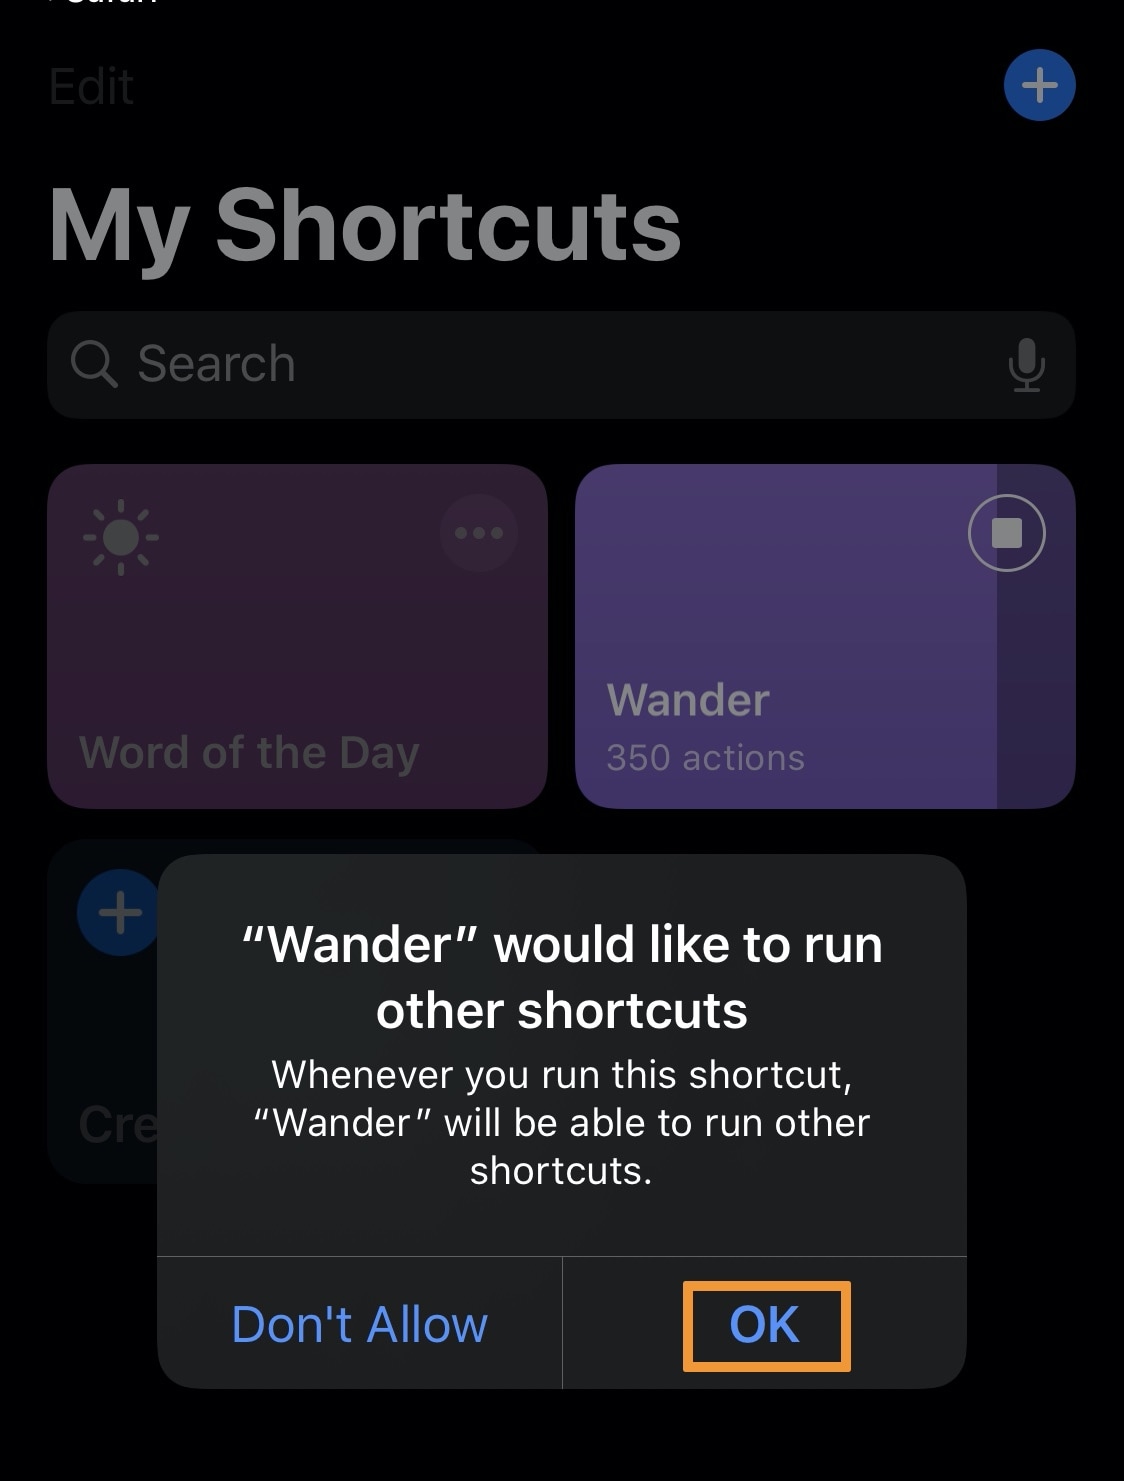
4) Lastly, Wander will now ask for permission to use other shortcuts. Accept by tapping the OK button:
Wander is now fully configured on your device and can be used to install or update the Odyssey jailbreak app at your discretion. Check out the tips below for using Wander:
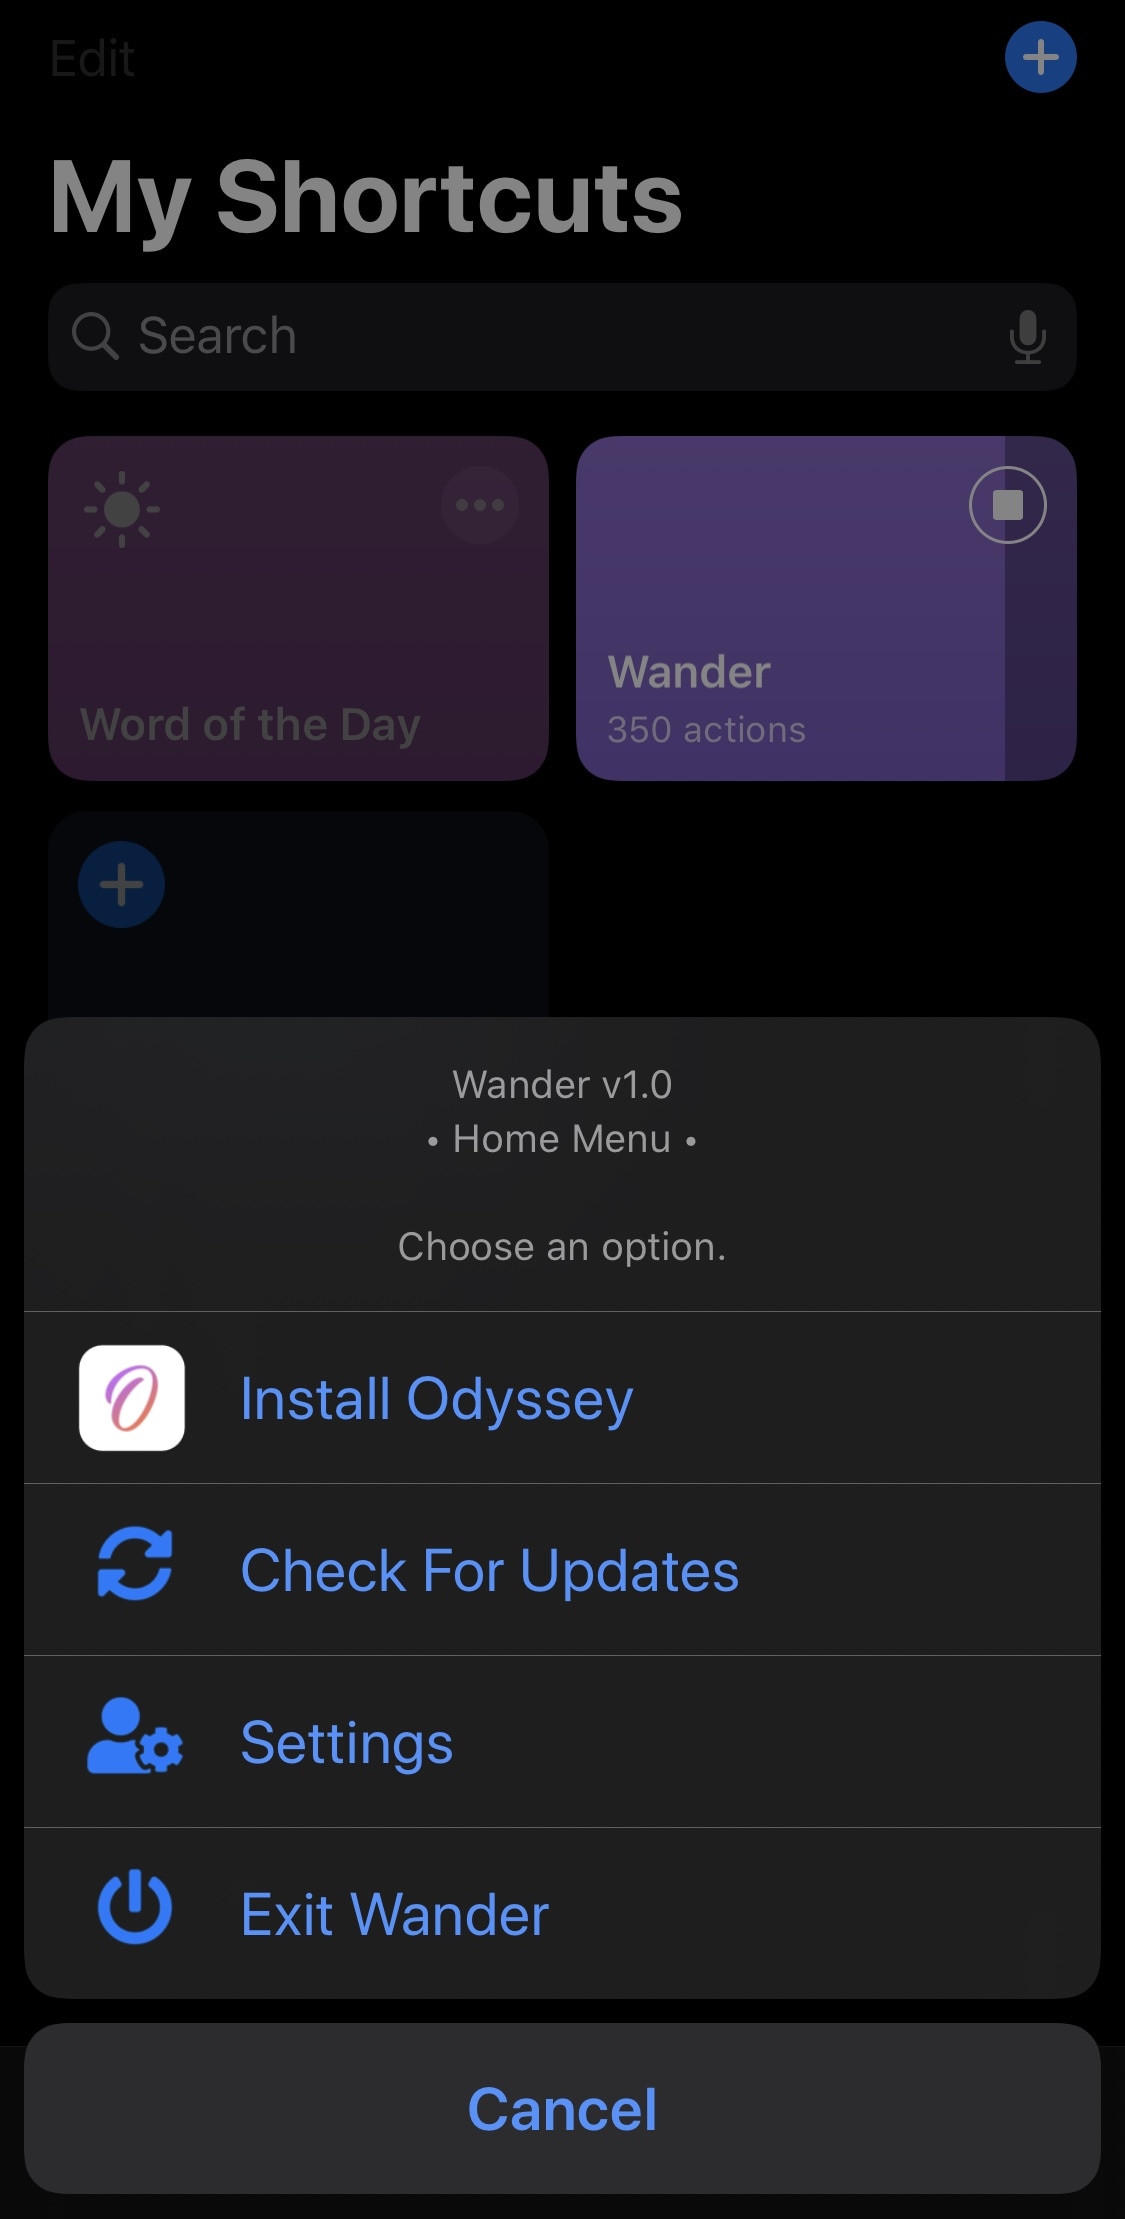
Upon tapping on the Wander shortcut, you’ll be prompted with the option to install or update the Odyssey jailbreak:
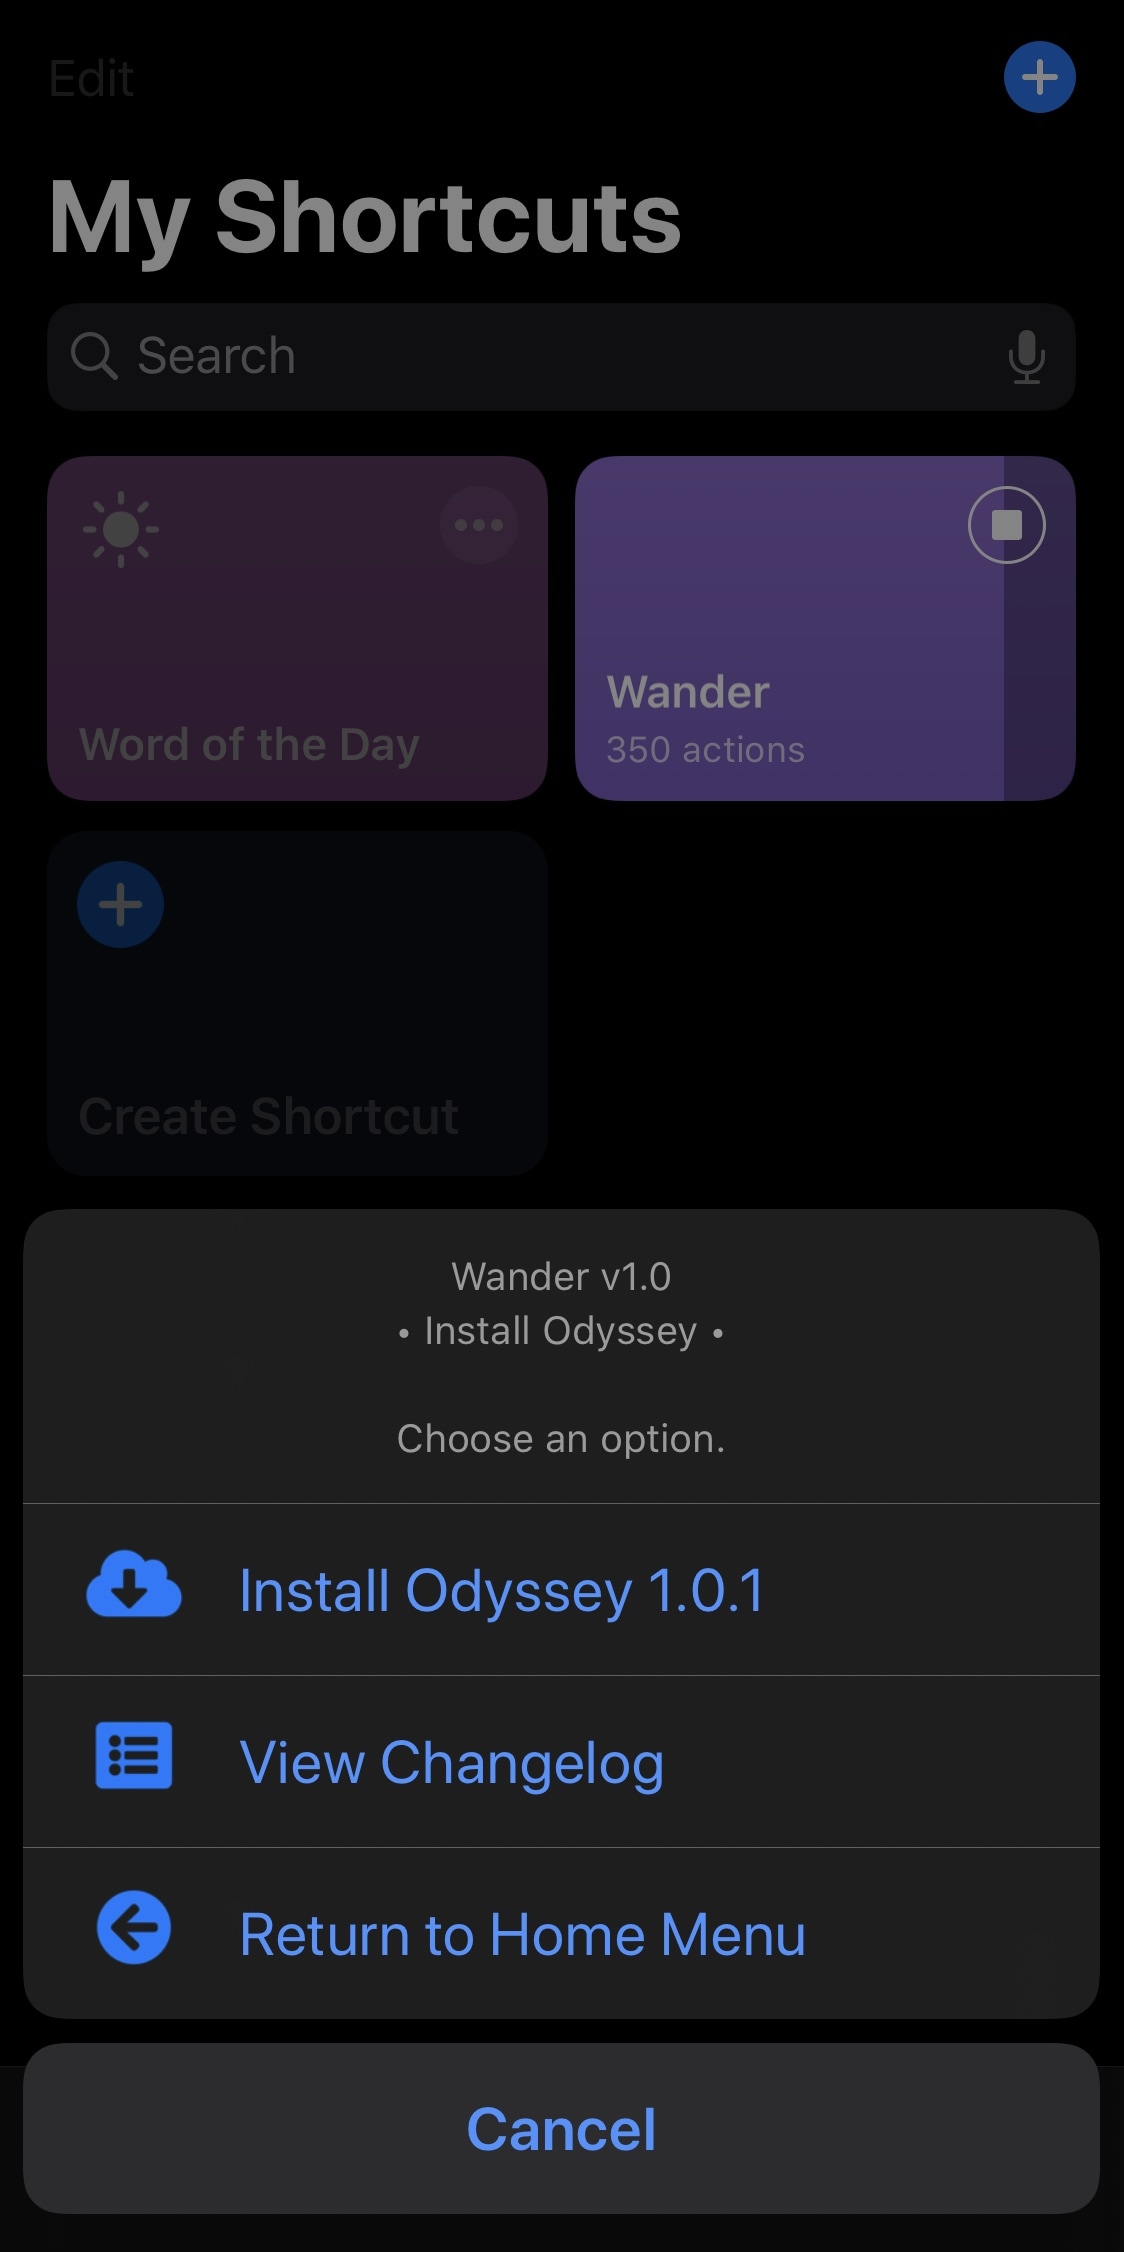
If you tap on the Install option, then you’ll find yourself being asked what version you’d like to install and whether you’d like to view the change log:
Upon tapping Install again, Wander will ask you what you want to use to install Odyssey. You can use AltStore, ReProvision, or Jailbreaks.app:
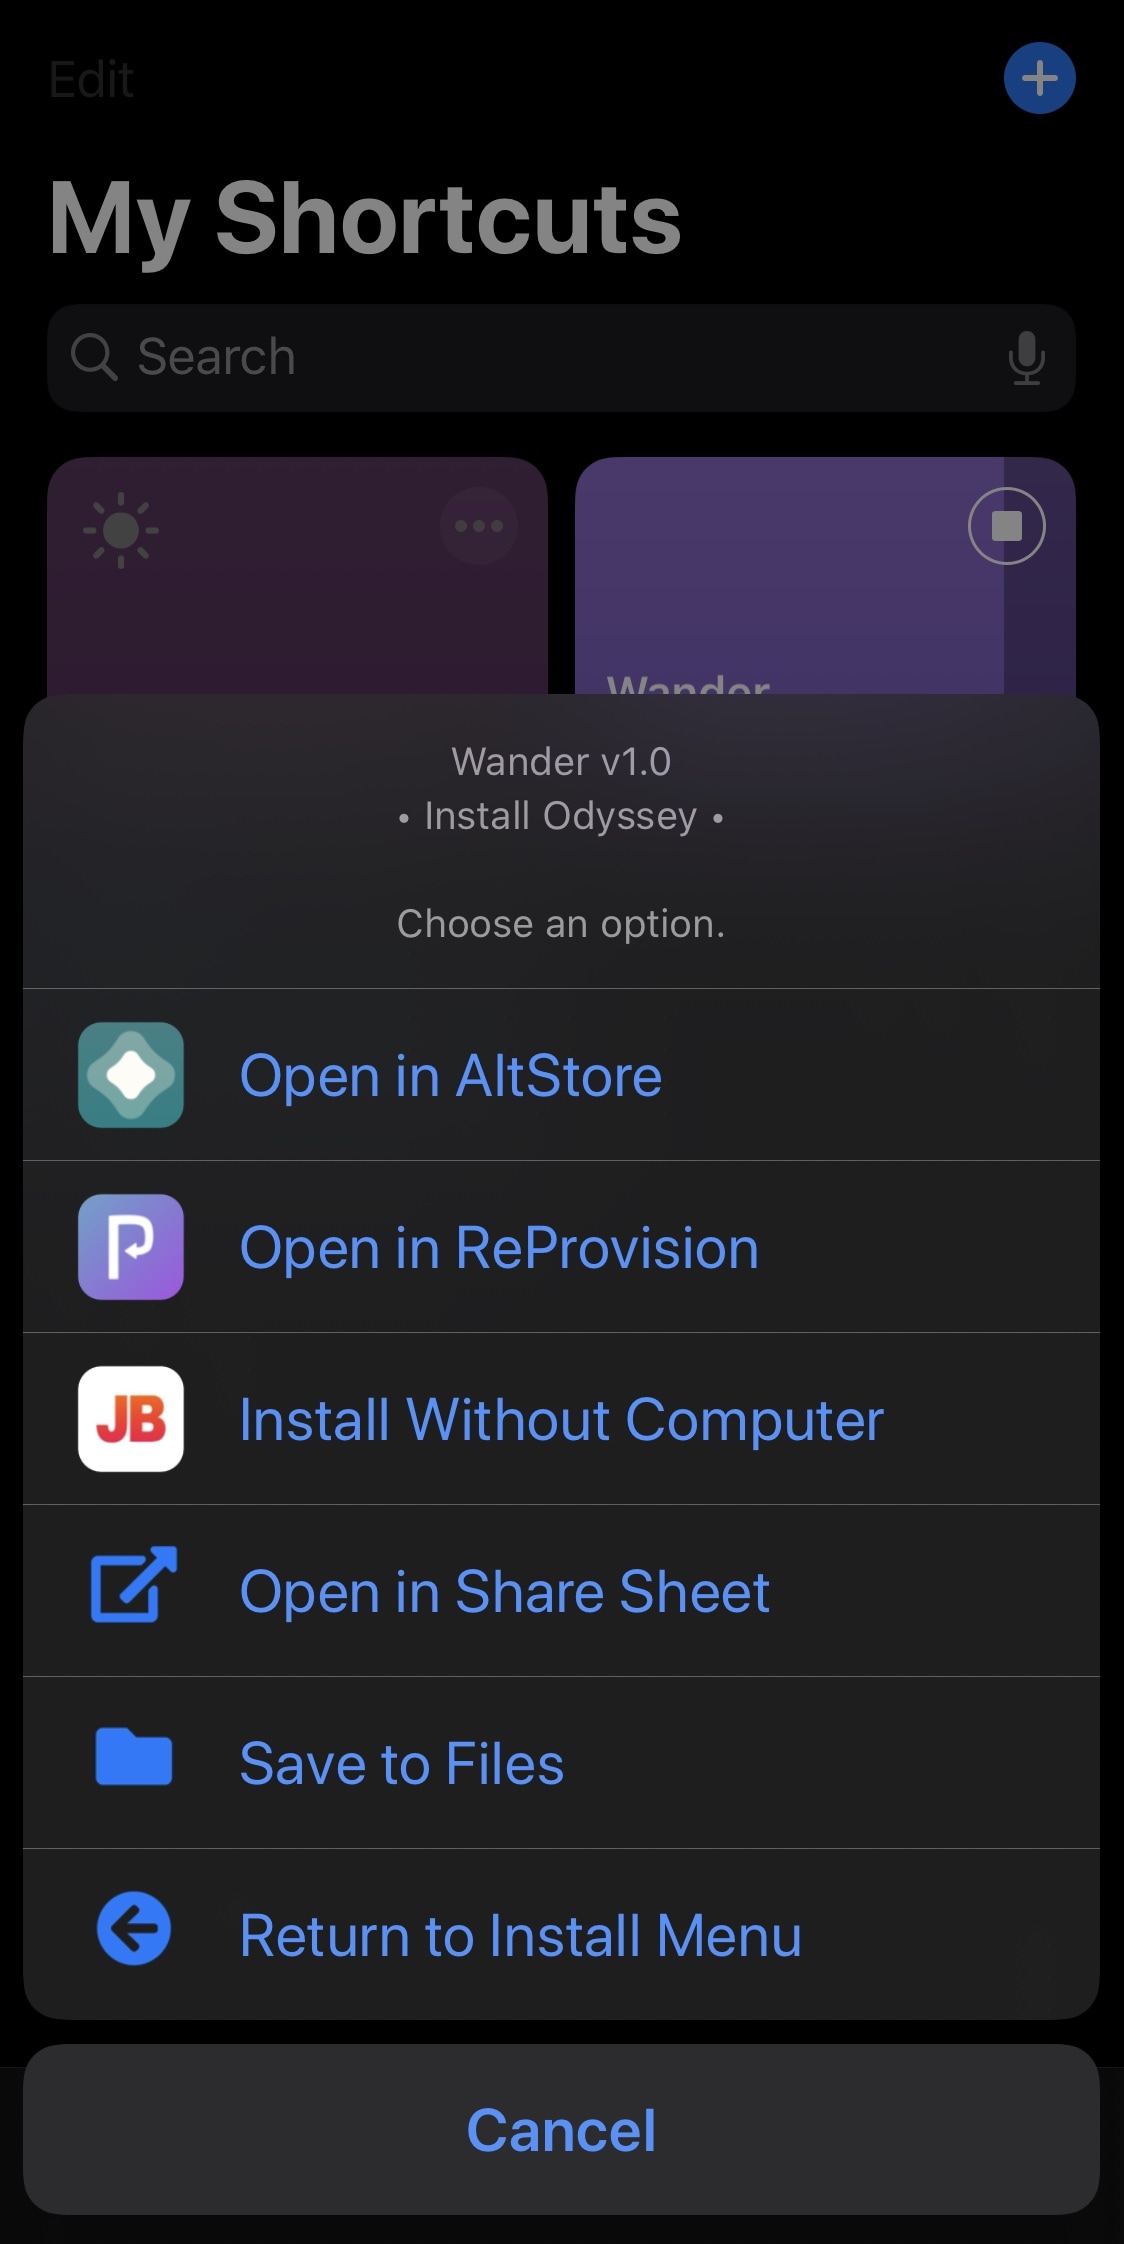
Note: If you will be using AltStore, then you can jump to our tutorial covering the installation of the Odyssey jailbreak with AltStore and skip to step 19 to continue. Please also note that while Jailbreaks.app doesn’t require a computer, it depends on a working signed certificate, which isn’t always available. We recommend using AltStore if you can.
If you tap on the Update option instead of Install, then Wander will look to see if you have any updates available. You may need to allow notification permissions for the Shortcuts app and for the Wander add-on this to work. Otherwise, it looks something like this:
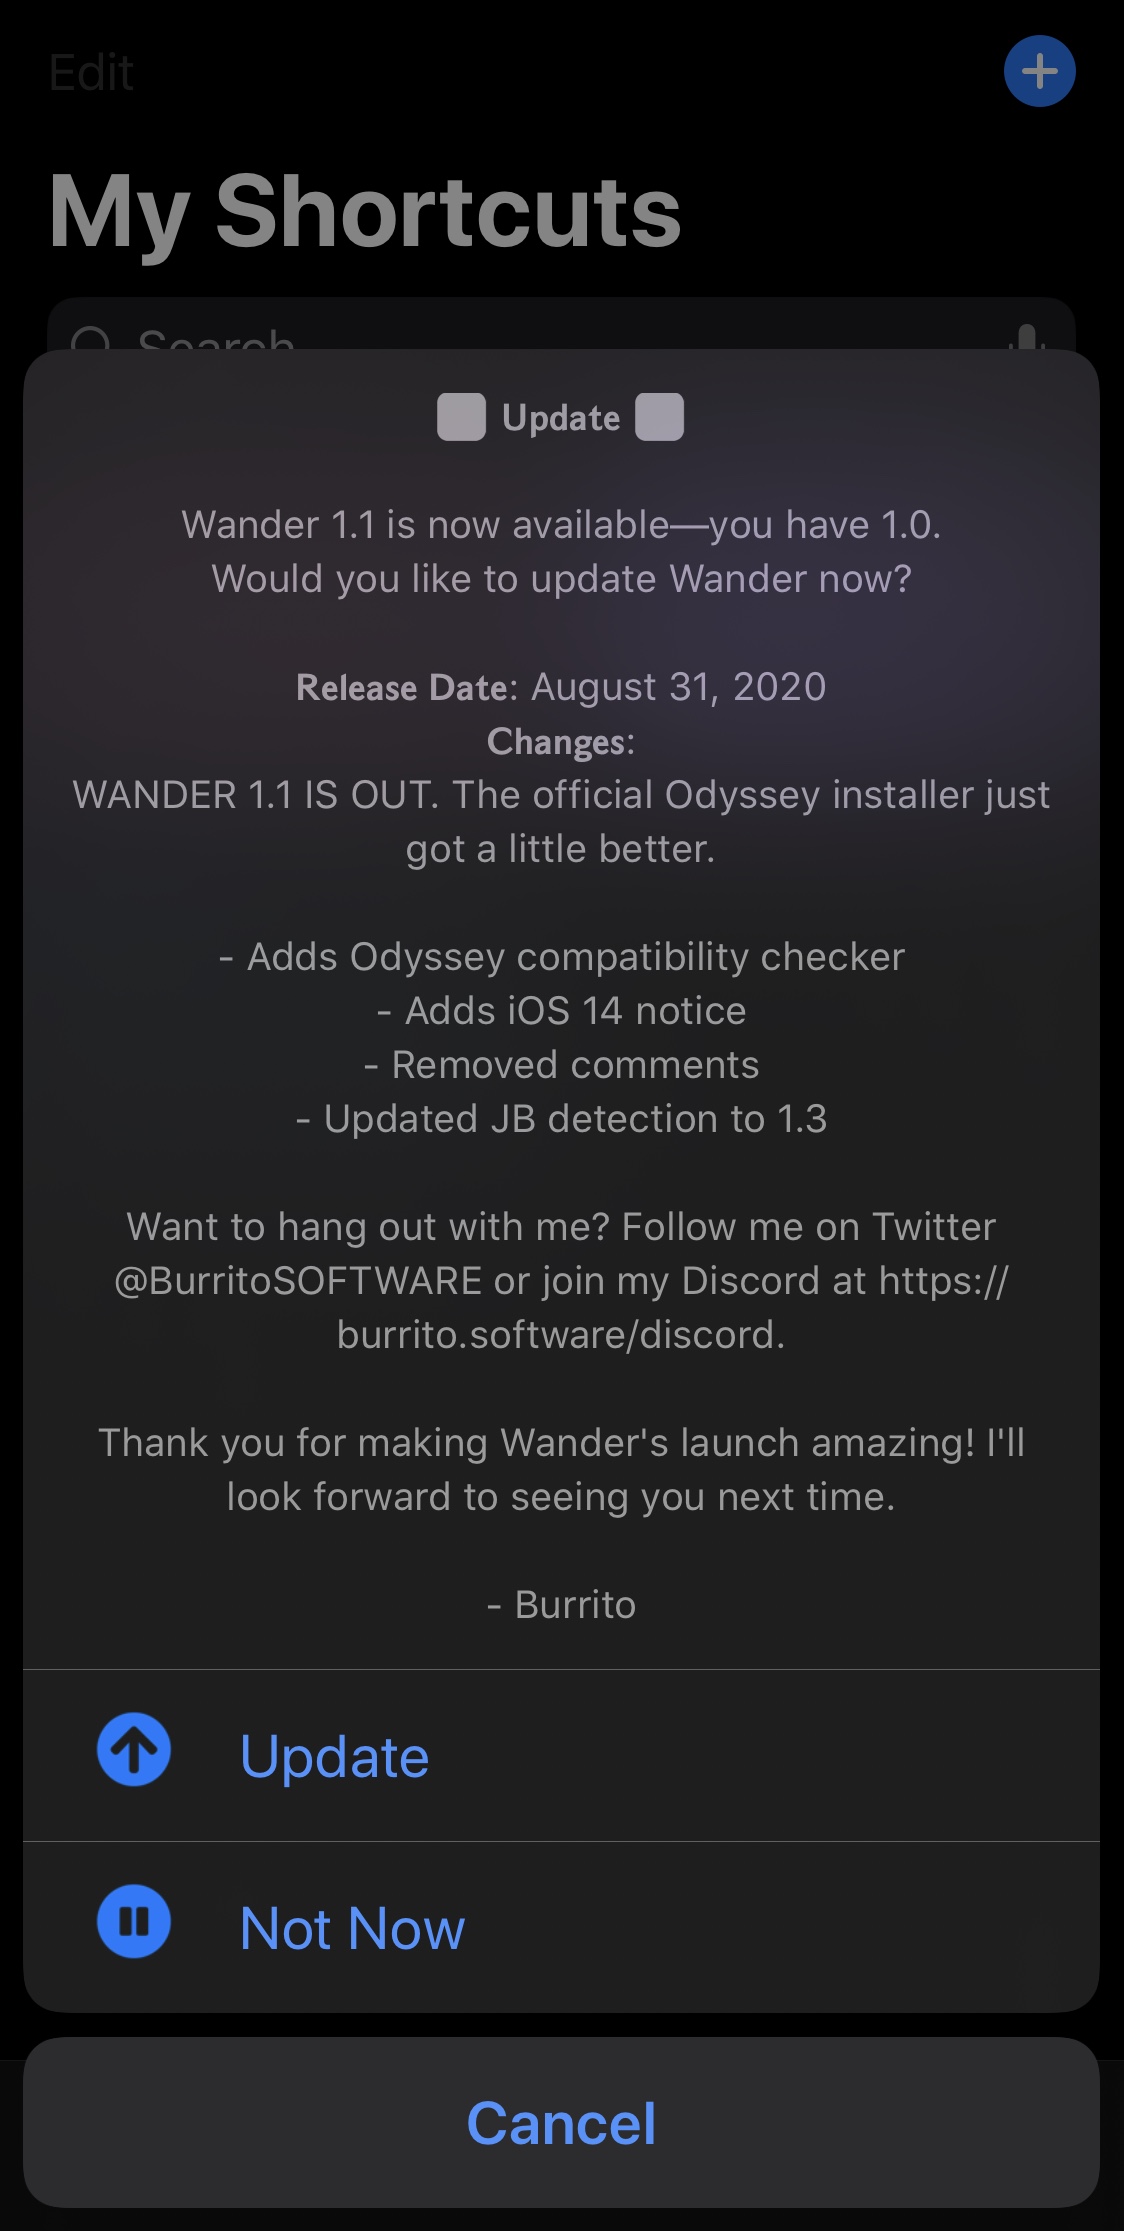
Wander gives you the option to move forward with any available updates, or to skip it for now. If there are no updates available, then Wander will make sure you know about it.
Conclusion
The Wander add-on for Apple’s Shortcuts app is a great way to keep track of and maintain your Odyssey jailbreak app. Whether you’re trying to install it for the first time or install a new update, Wander can make this job both more enjoyable and less tedious to the end user.
Have you configured Wander on your jailbroken Odyssey device yet? Share why or why not in the comments section below. Also feel free to let us know if you’re using a different jailbreak and why.