Learn how to copy bookmarks between Safari, Firefox, and Chrome on your Mac if you want to switch to another browser or have all your bookmarks everywhere.
If you’re preparing your Mac for work or school, then getting your browser ready is part of that process. One piece of it is making sure you have the bookmarks you need, regardless of which browser you’re using. This is especially crucial if you’re someone like me who uses more than one browser, depending on the task.
While bookmarks can certainly be ever-changing, that initial setup with the ones you need is a good start. This tutorial shows you how to import and export bookmarks between Safari, Firefox, and Chrome to get you set up quickly.
Import bookmarks in Safari
You can import bookmarks to Safari directly from Firefox, Chrome, or a saved HTML file.
1) Open Safari and click File > Import From Browser or Import Browsing Data from File or Folder from the menu bar, and choose the browser or import a file.

2) If you choose to import from Firefox or Chrome, you’ll be asked if you want to import extra items like your history and passwords. Make your selections and click Import.
3) If you choose to import a file (Bookmarks HTML File), browse for it and click Import.
Export bookmarks in Safari
Exporting your bookmarks from Safari couldn’t be easier. So open Safari and follow these steps.
1) Click File > Export Browsing Data to File from the menu bar.
2) Decide what you want to export, and click Export.

3) Choose the location to save your export file and click Save.
Import bookmarks in Firefox
If you want to import bookmarks to Firefox from Safari or Chrome, this is simple.
1) Open Firefox on Mac and click File > Import From Another Browser from the menu bar.
2) Select either Safari, Chrome, or a CSV/HTML file.
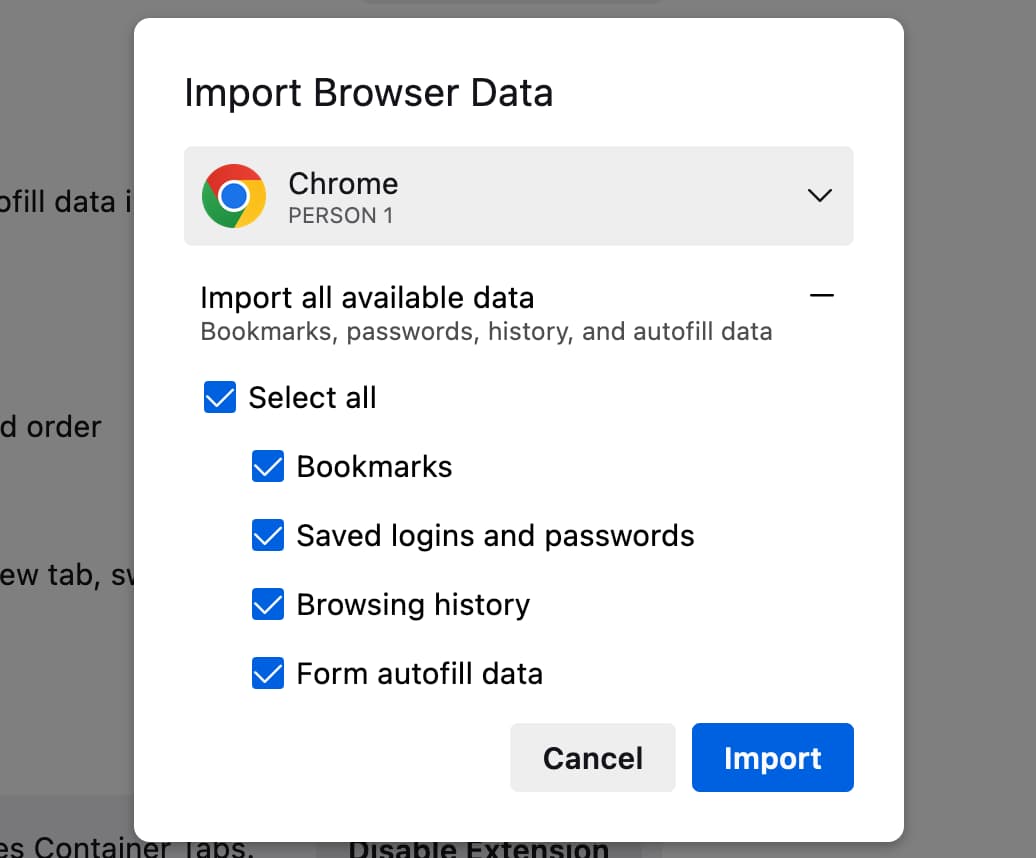
3) Click “Import all available data” and choose the items you want to import. Note that these may vary by browser but can include bookmarks, browsing history, saved logins and passwords, and other data.
4) Click Import.
Export bookmarks in Firefox
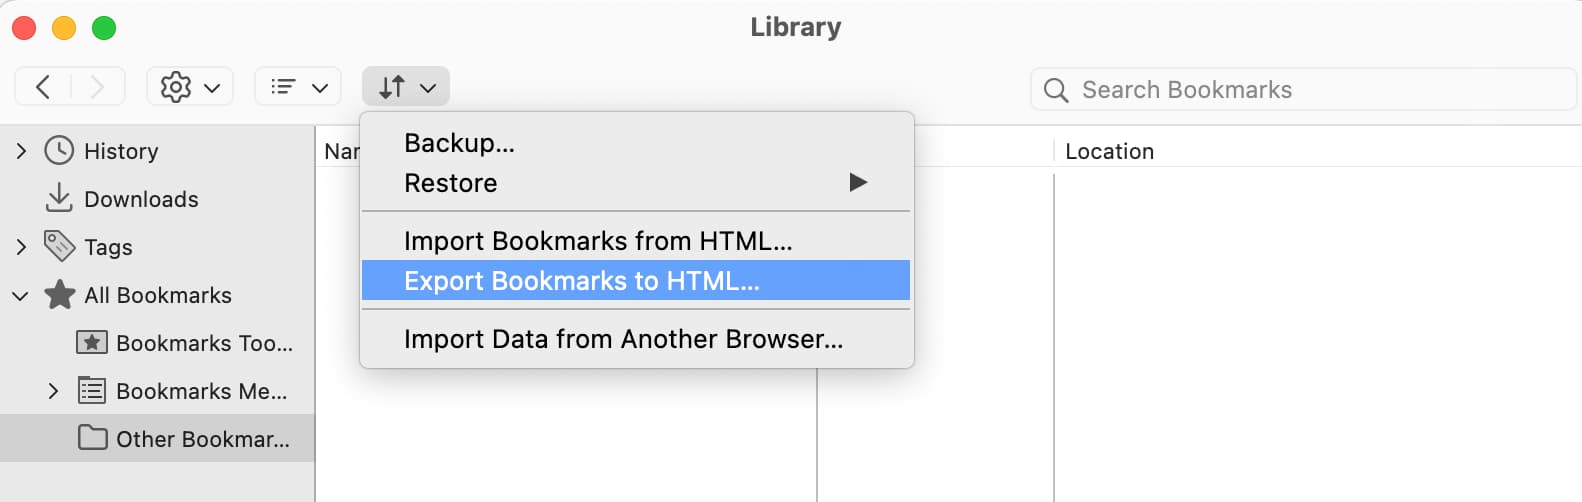
1) Open Firefox and click Bookmarks > Manage Bookmarks from the top menu bar.
2) In the Library window that opens, click the two-arrow button, and select Export Bookmarks to HTML.
3) The default name for the file is bookmarks, but you can change that if you like.
4) Choose a location for the file and click Save.
Import bookmarks in Chrome
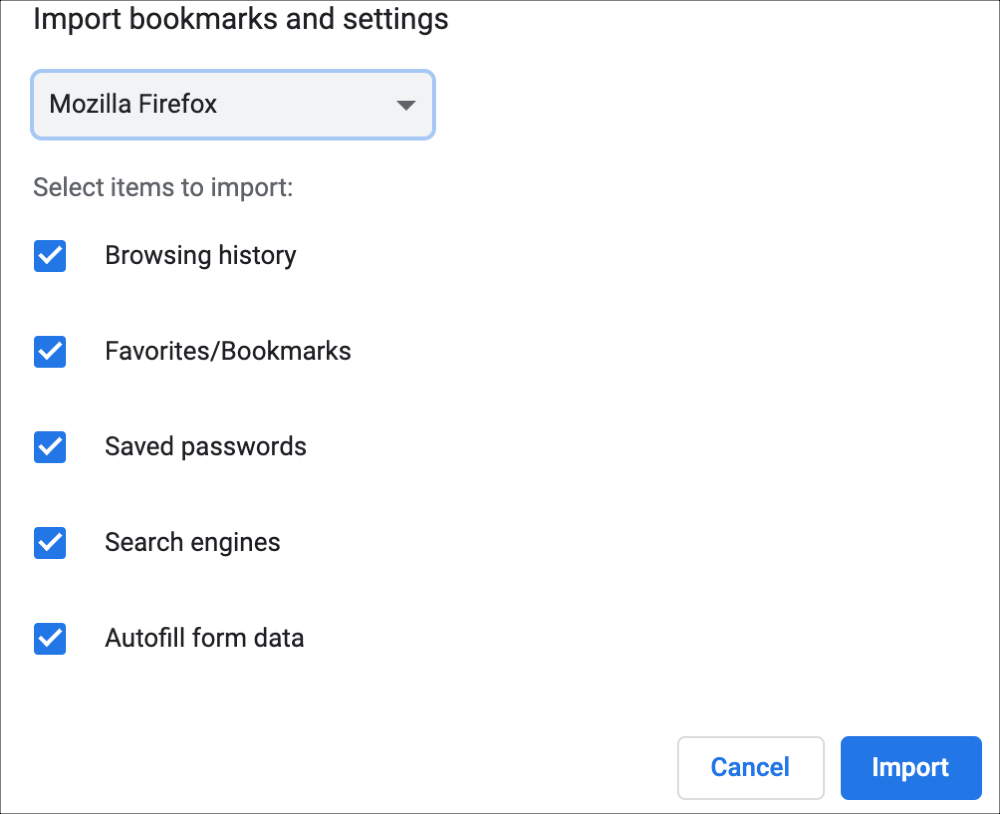
1) Open Google Chrome and click Chrome > Import Bookmarks and Settings from the menu bar.
2) Select a browser like Firefox and then choose additional items to import, like browsing history and saved passwords. Remember, these options differ depending on the browser. Click Import.
When the import is complete, you’ll see a confirmation message. Click Done.
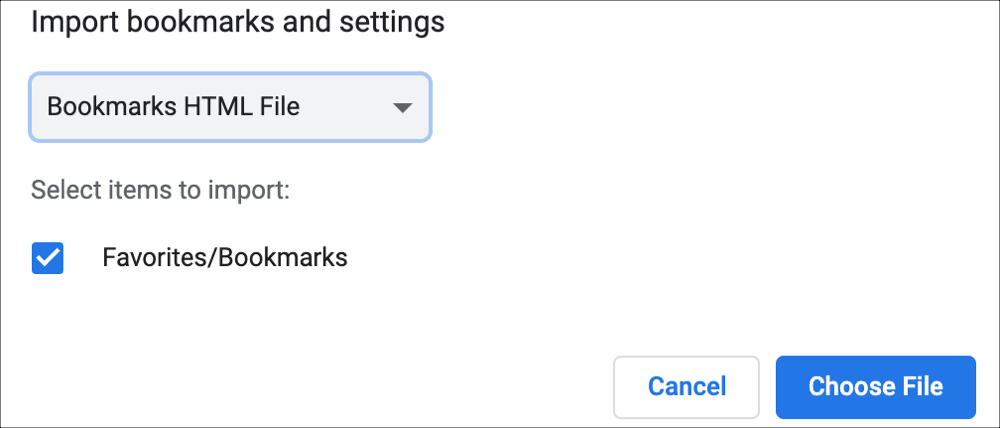
3) If you want to import from Safari, follow the above steps to export the HTML file from Safari and then choose Bookmarks HTML File > Choose File. Now browse for and select the Safari bookmarks file, followed by Open.
Export bookmarks in Chrome
1) Click Bookmarks > Bookmark Manager from the menu bar.
2) Click the Organize (three-dot icon) button on the top right.
3) Click Export Bookmarks (you can also Import Bookmarks from here).
4) The default name for the file is bookmarks [date], but you can change that if you like.
5) Choose a location for the file and click Save.

Export file naming convention tips
Rather than using the default names given to the export file for Firefox and Chrome (“bookmarks”), it’s wise to add the browser name to it. This will make things much easier if you’re exporting and importing with all three browsers.
It’s also a good idea to add the date to the file name. This will help if you decide to export a bookmarks file more than once.
Check out next: How to export Safari bookmarks from your iPhone or iPad to a Mac or PC