Learn how to sort your music collection to your liking, ensuring easy access to your favorite songs, albums, playlists, and more.
With all of the music you have in your library, it can be tough to find what you want. So, taking a few minutes to adjust the options you see and the ways you can sort them is worth your time. You might prefer to browse music by genre, artist, or album. Or maybe you always head to your song list.
However you decide to play your music, make sure that your library is set up to make it easy for you. Here’s how to sort your Music or iTunes library any way you want.
Adjust the view options for your Music library
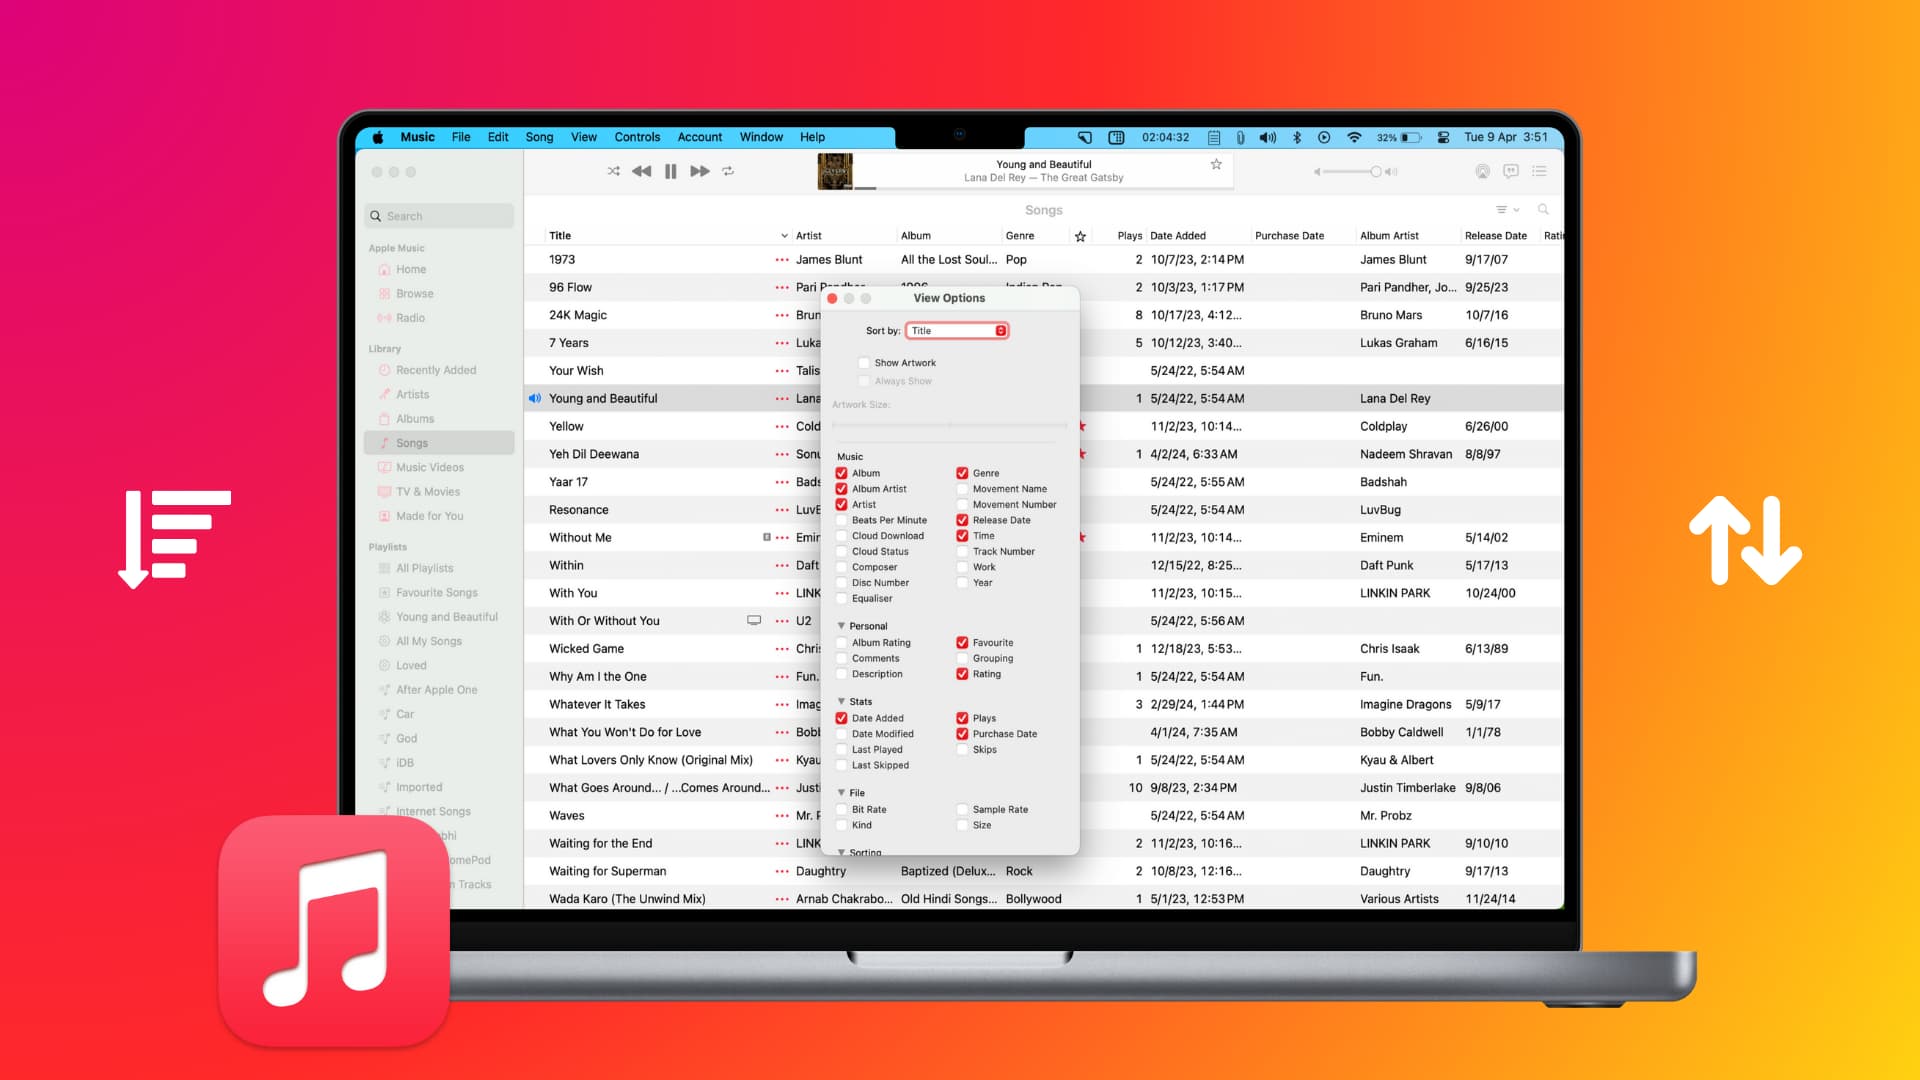
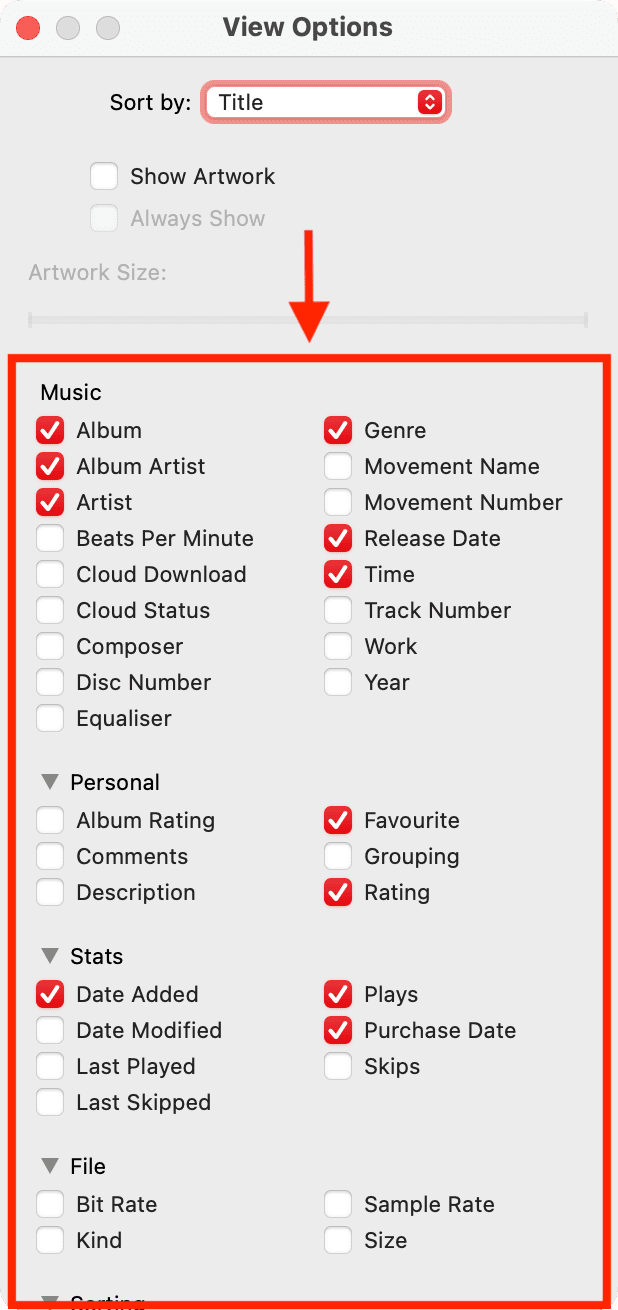
In order to get the sorting options you want, you’ll want to start by adjusting the view options. This lets you choose what you see for your Artists, Albums, Songs, and Genre sections. Keep in mind that some sections offer more viewing options than others.
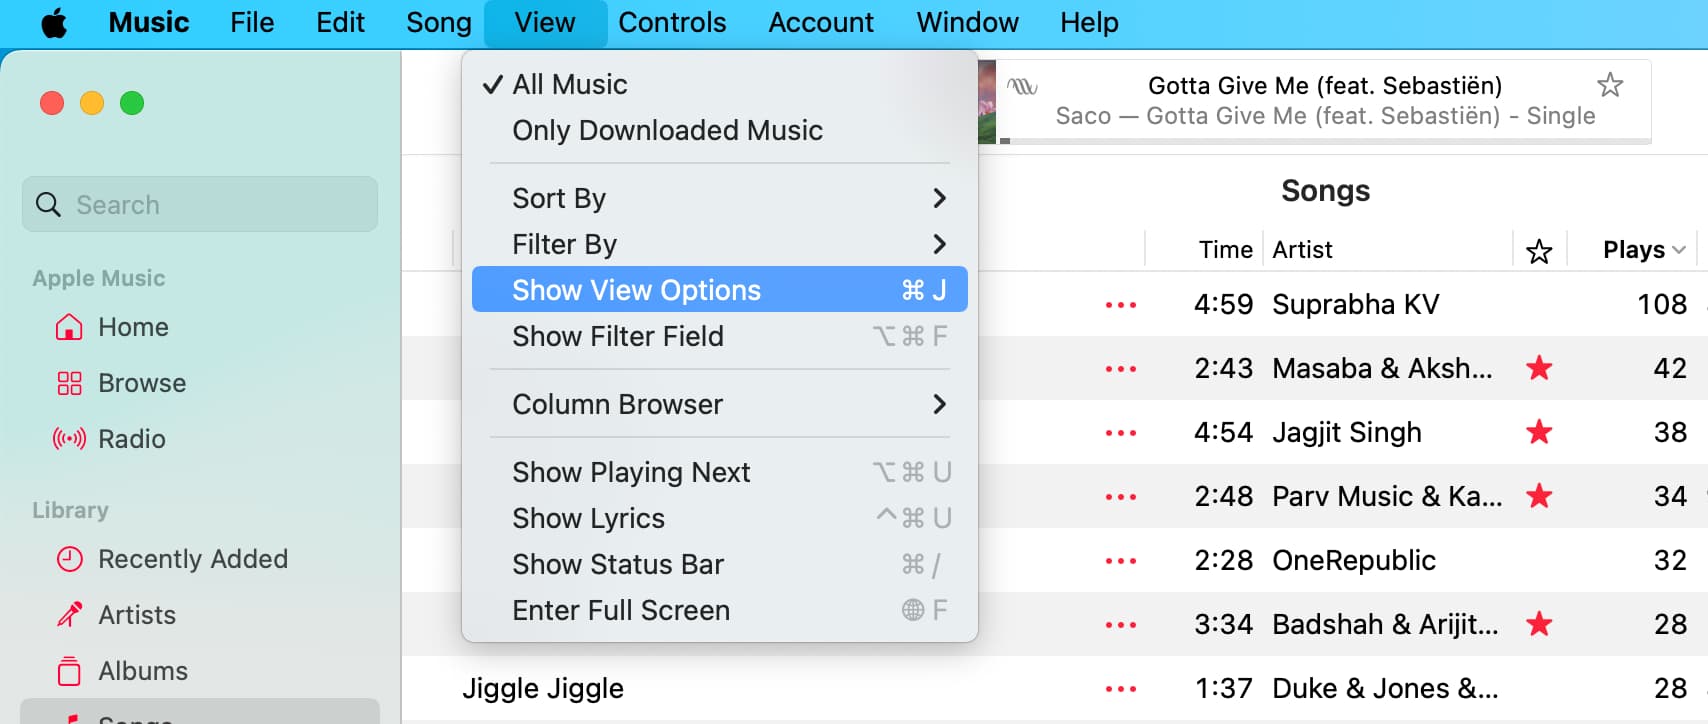
So, open the Music app, go to a section like Songs, and click View > Show View Options from the top menu bar.
Now, you can sort your music based on these parameters:
- Album
- Artist
- Cloud Download: Whether the songs are downloaded locally or not.
- Cloud Status: Is the song purchased from iTunes Store, Matched, uploaded, removed, duplicate, from Apple Music, or are ineligible to be uploaded to your Apple Music cloud.
- Date Added
- Favourite
- Plays: How many times you have played that track.
- Purchase Date
- Time
- Title
After you choose one of the above options, you can choose to sort them in ascending or descending order. For instance, if you select Plays > Ascending, your most listened-to songs will appear at the top of the Songs screen.
Add sections to the Music app’s top bar
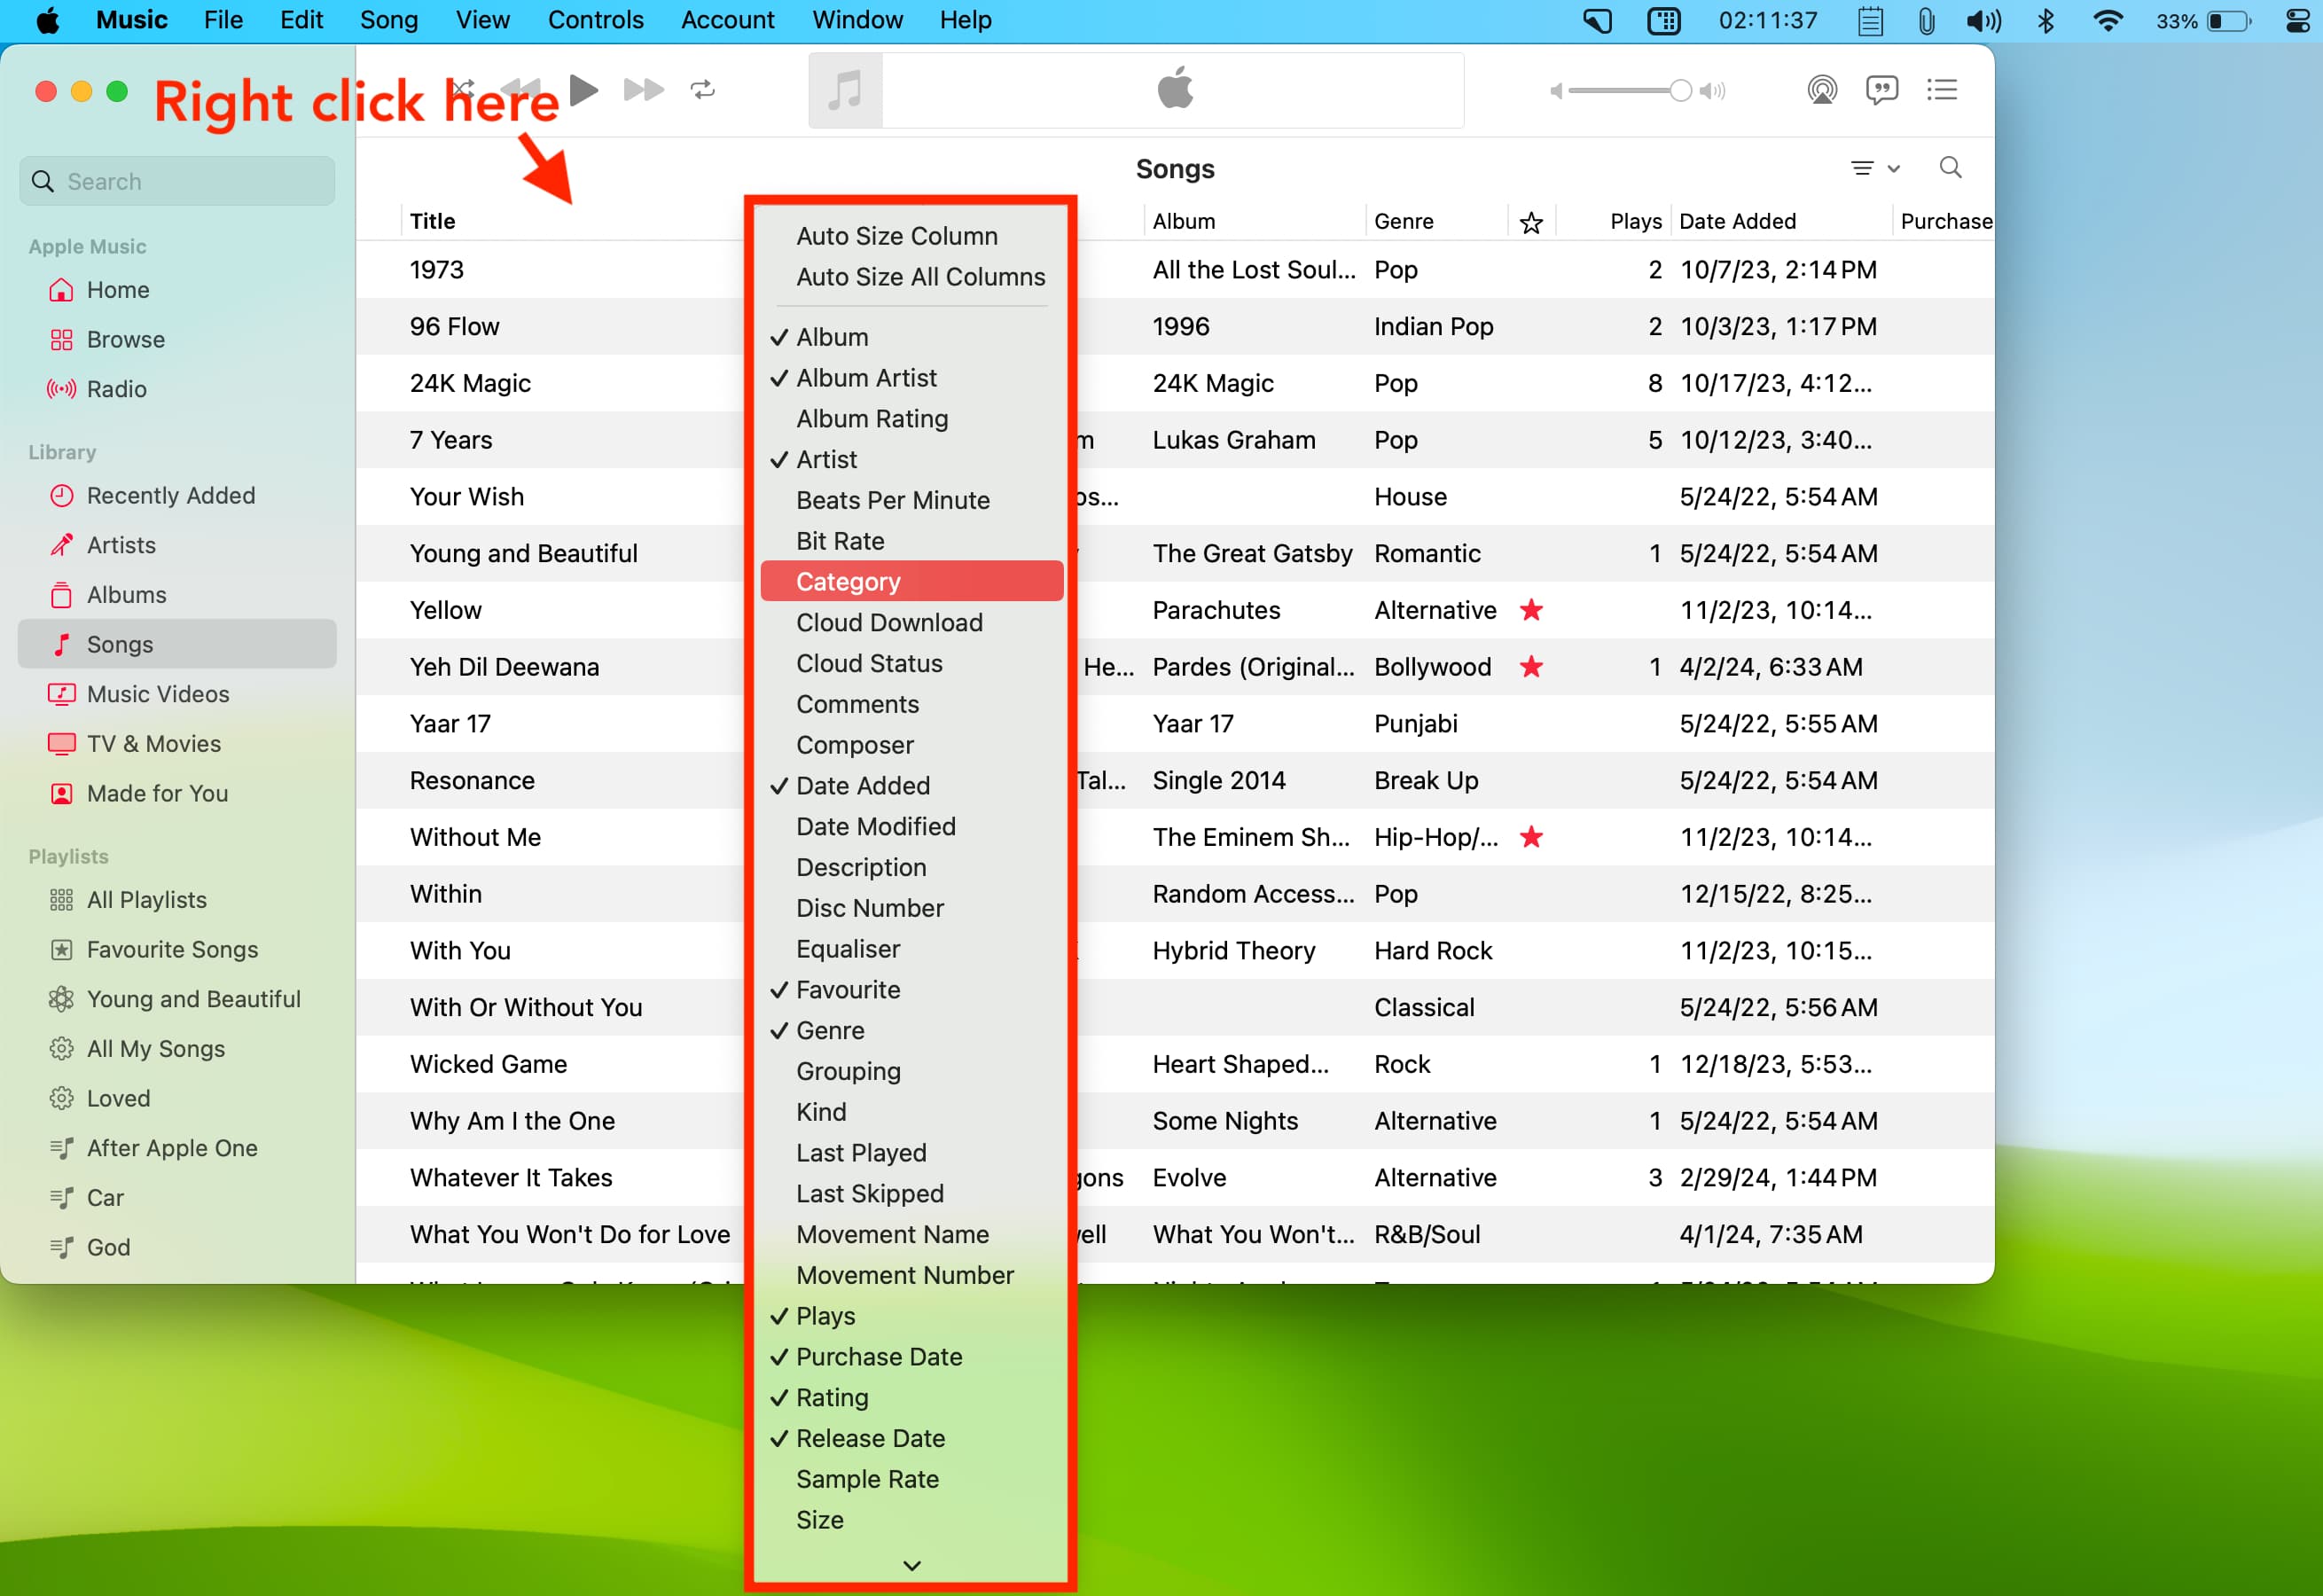
When you look at the top section of the Music app (just under the Now Playing box), you’ll see a thin strip that shows columns for Title (Songs), Artist, Time, Album, and more.
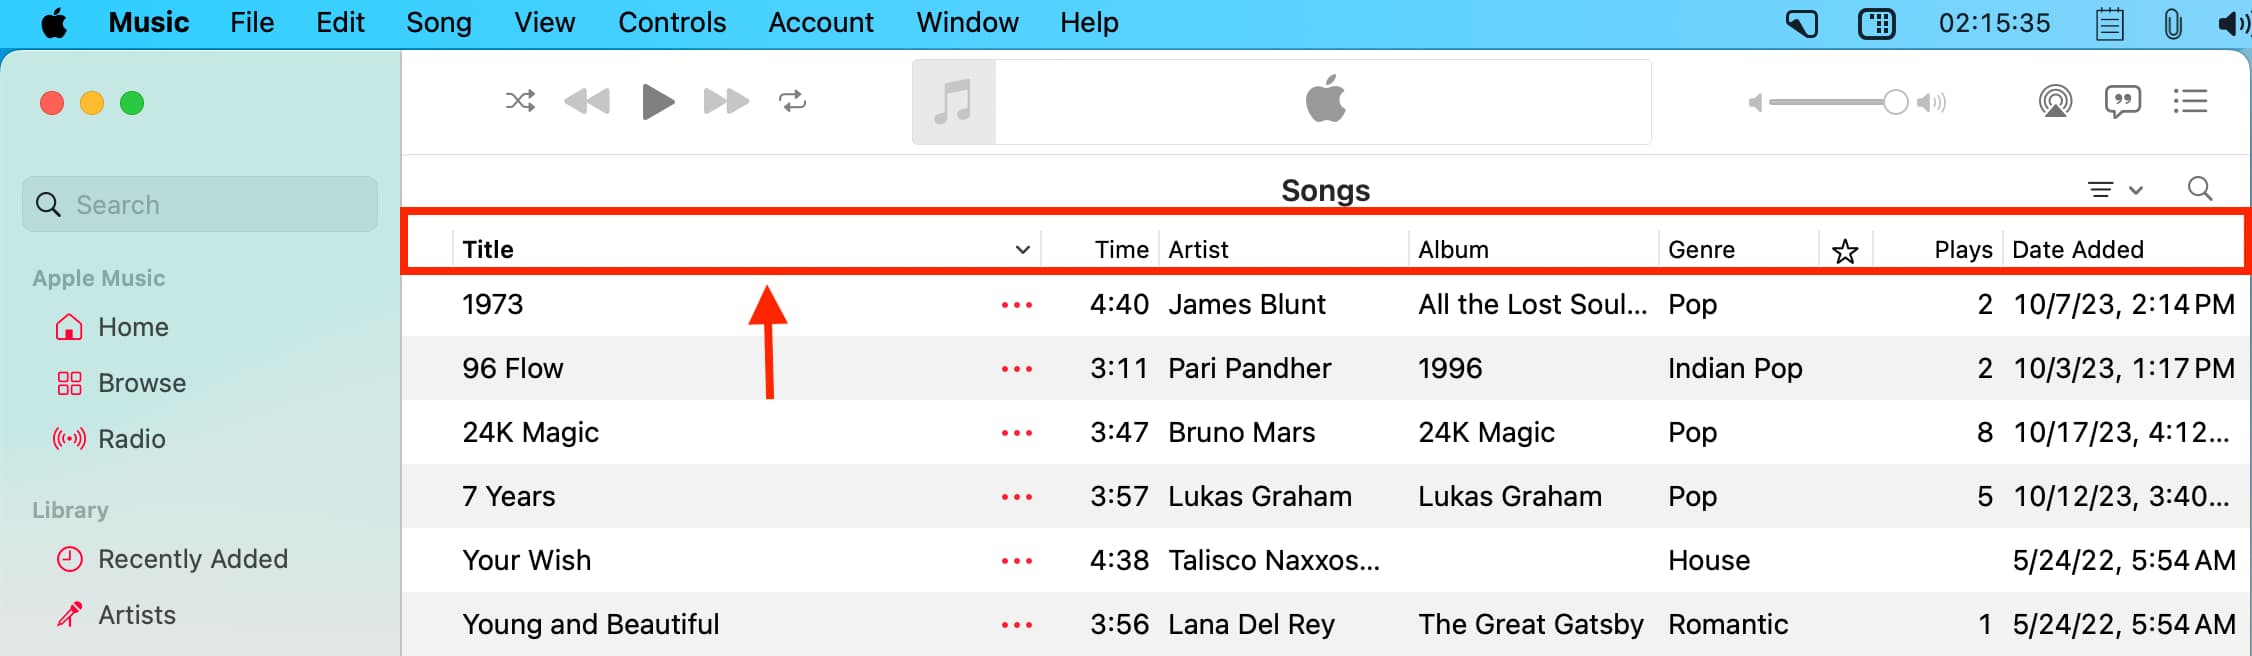
You can click the options here to sort accordingly. For instance, clicking Title will sort the songs based on their names. Tracks starting with A will appear on the top, followed by the rest. If you click Title again, it will reverse and now tracks beginning with a number (i.e., 1973, 24K Magic, 7 Years) or the alphabet Z will be listed at the top.
You can customize this top column strip and add or remove sections. So, click View > Show View Options, and take your time to check or uncheck the boxes for what you really want to see.
Alternatively, you can right-click the thin column strip and check or uncheck the options to add that column.
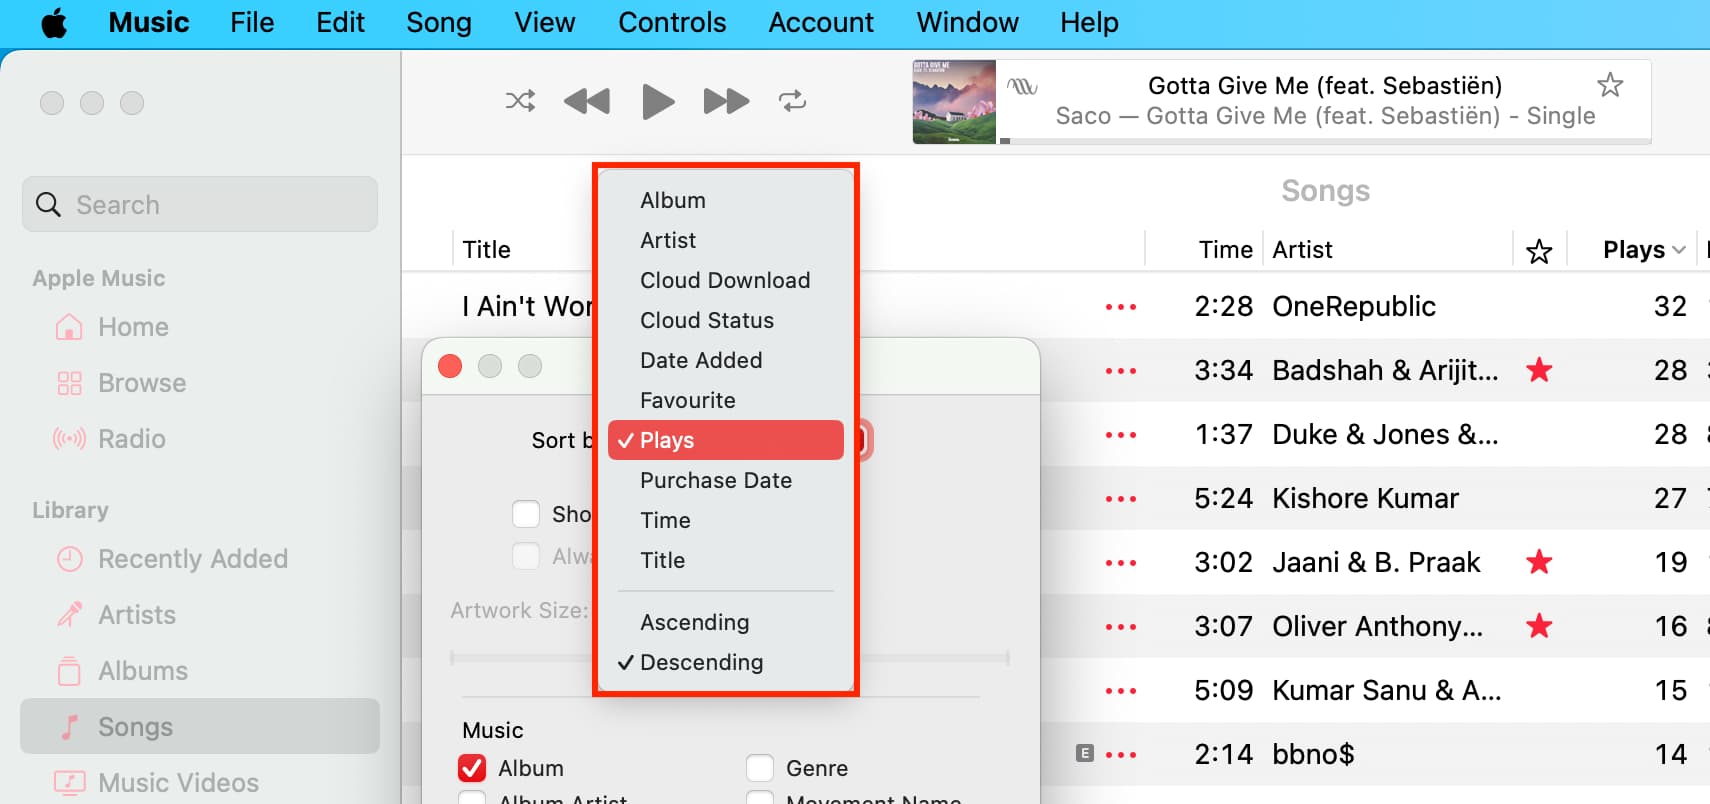
Use the Sort By
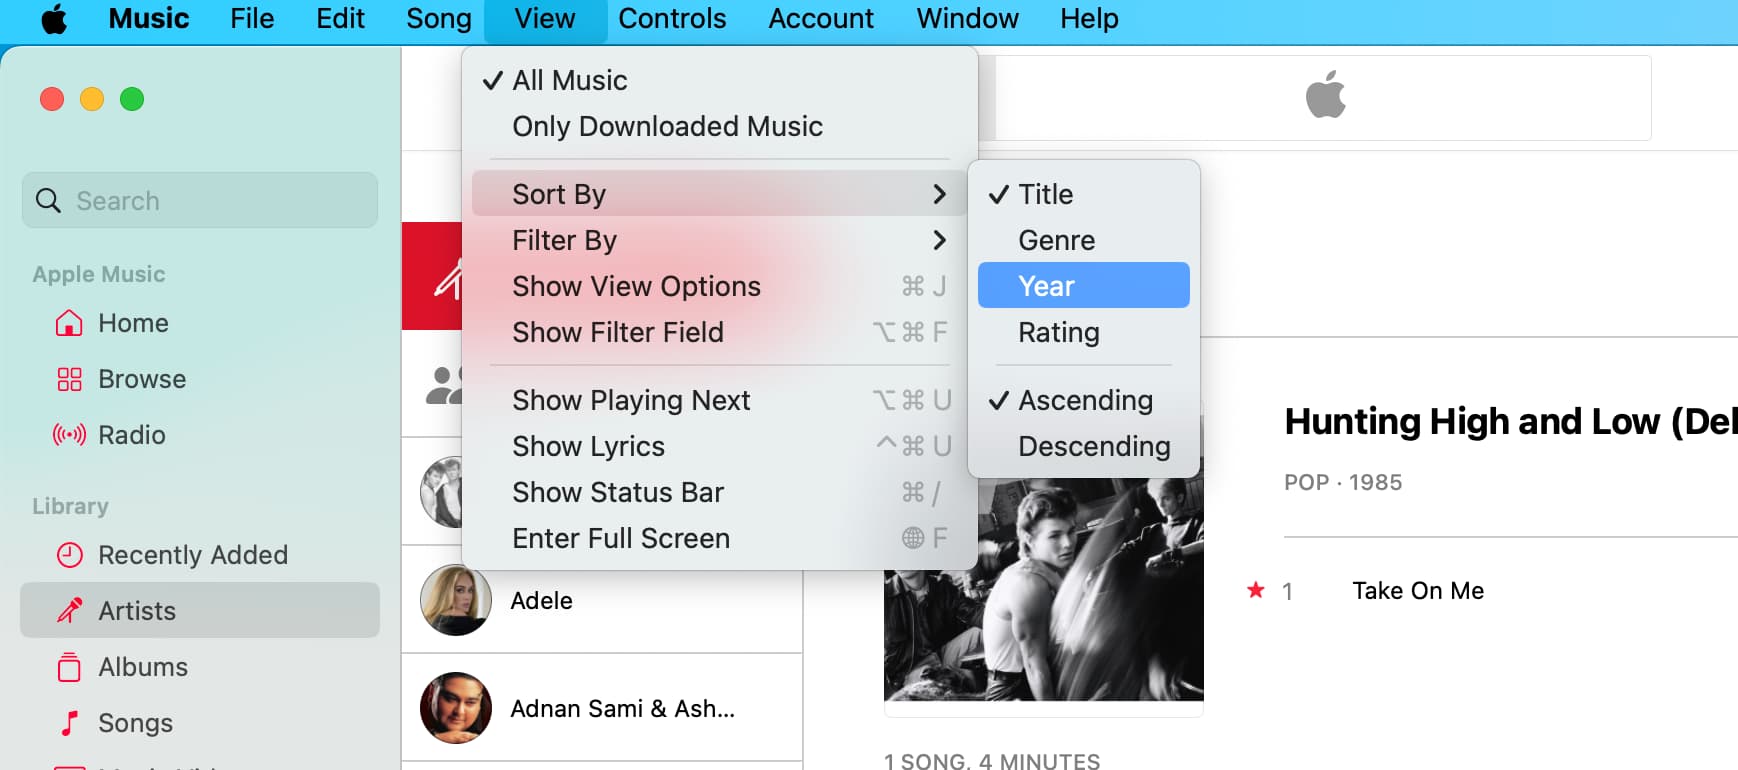
You can also easily change the sort order for each section of your library by clicking View > Sort By from the menu bar. So, any adjustments you make in the Show View Options settings can be changed quickly here, too.
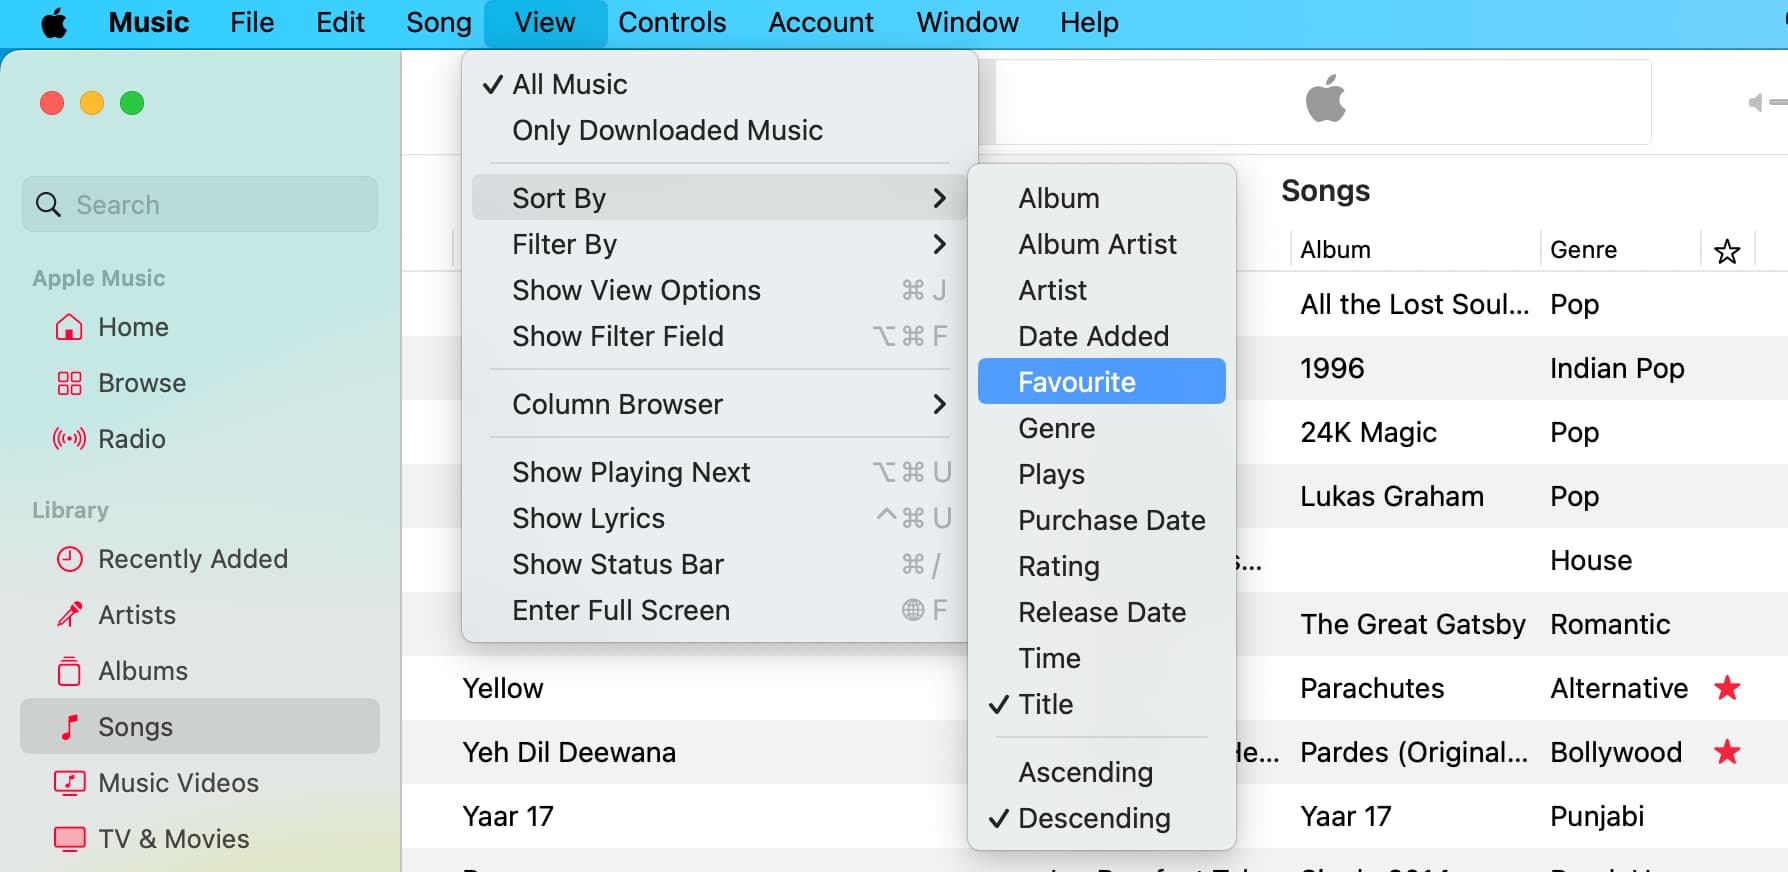
The Sort By option will change based on where you are in the app. For instance, if you are in the Artists section, the Sort By menu will show just a few options.
Changing the viewing options and sort order for your music library can save you a ton of time later. You’ll be able to find the song, artist, or album you’re in the mood for much faster. And, since you can sort your library any way you want, it’s worth a few minutes of your time.
How do you like to sort your library, and which section do you head to the most? I always sort my songs by the number of plays, so my most listened-to tracks are at the top.
Check out next: How to download all your Apple Music songs to your iPhone or iPad at once