In this tutorial, we will show you how to find and delete all duplicate songs in your Apple Music or iTunes library on your Mac or Windows PC. Doing so will clean your media library and help reclaim local disk space.
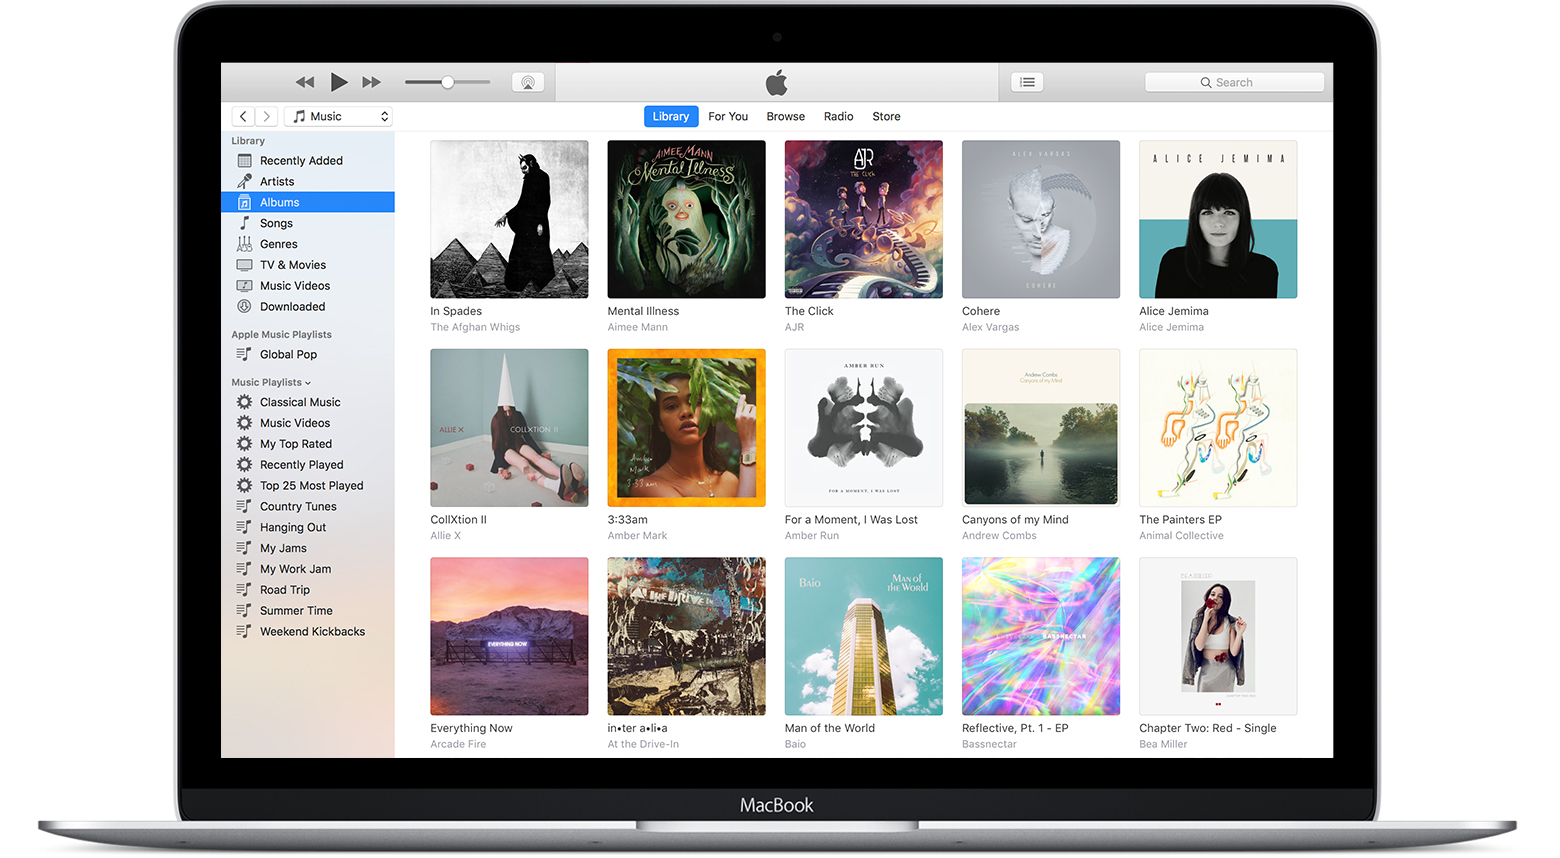
If your music library spans more than a decade like mine, I’m guessing you’ve amassed thousands, if not tens of thousands, of tunes from various sources over all these years.
My library consists of a ton of albums and songs that I ripped from my personal CD collection, as well as those purchased from the iTunes Store back in the day when streaming wasn’t a thing.
When adding items to your Music library from multiple sources, chances are you’ll inevitably end up with duplicate songs that take up valuable storage space. Thankfully, the Apple Music app and iTunes include a feature that can help you easily identify and remove any duplicates from your library.
Find duplicate songs
- Open the Music app or iTunes on your Mac or Windows PC.
- Click the File menu, choose Library, then select Show Duplicate Items.
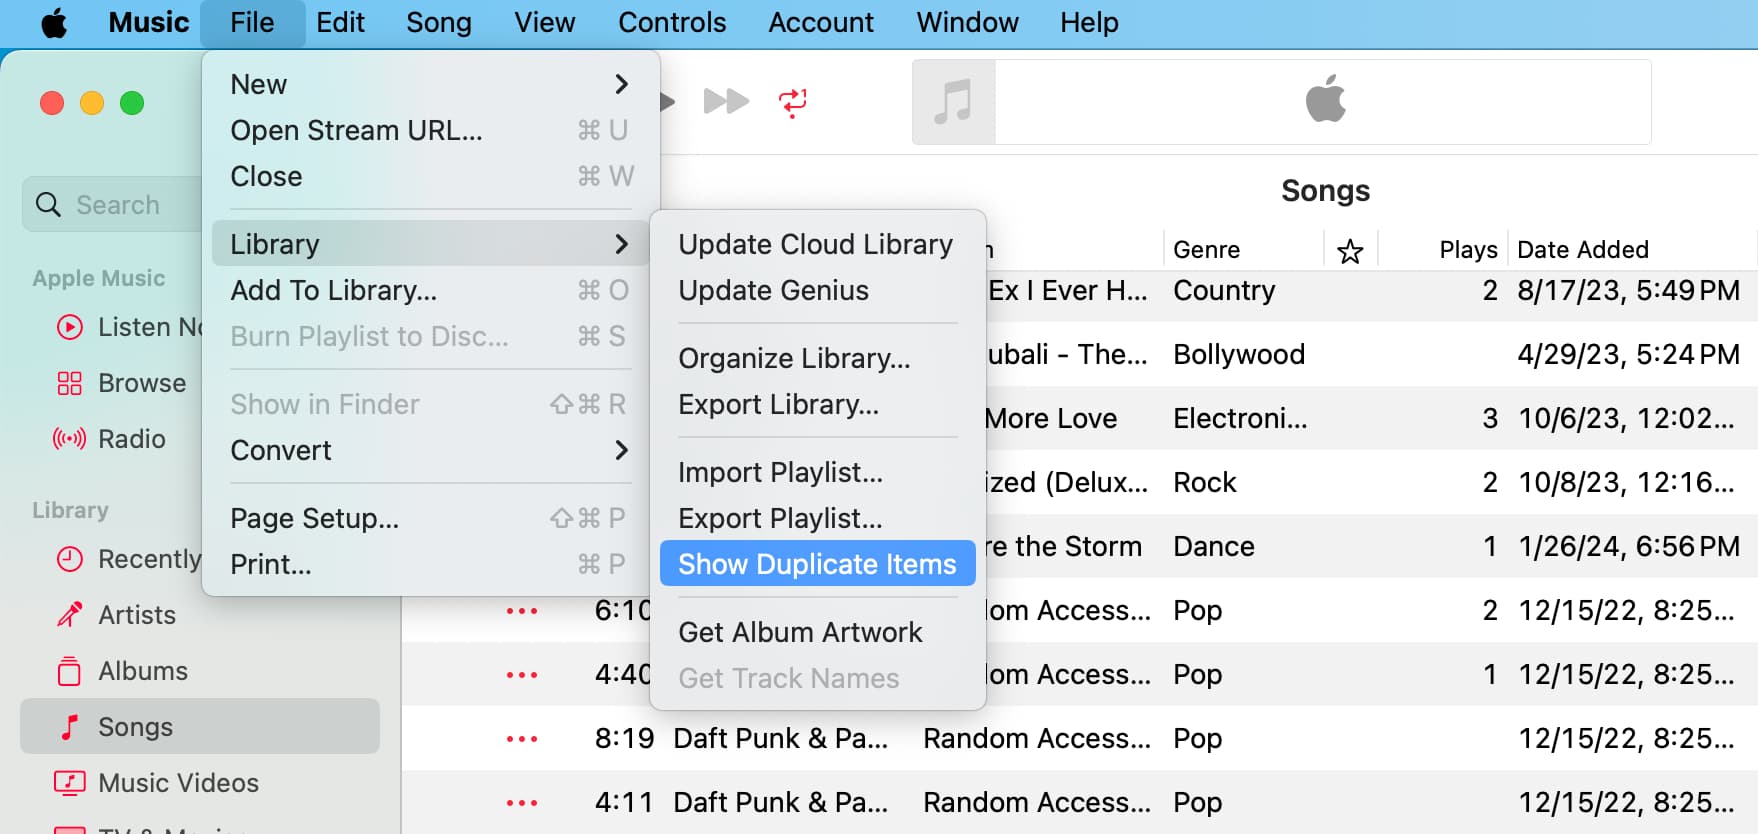
The Music app will filter out all the songs except duplicates. It’s important to know that duplicate items are determined based on the song name and artist rather than on audio analysis. If your tags are all messed up, iTunes may fail to find identical songs, even if they sound exactly the same.
Identifying multiple duplicate variants
Do you have multiple variants of the same song? For example, live and studio versions or versions from different albums? If so, hold the Option key (Mac) or the Shift key (Windows) and choose Show Exact Duplicate Items from the File > Library menu.
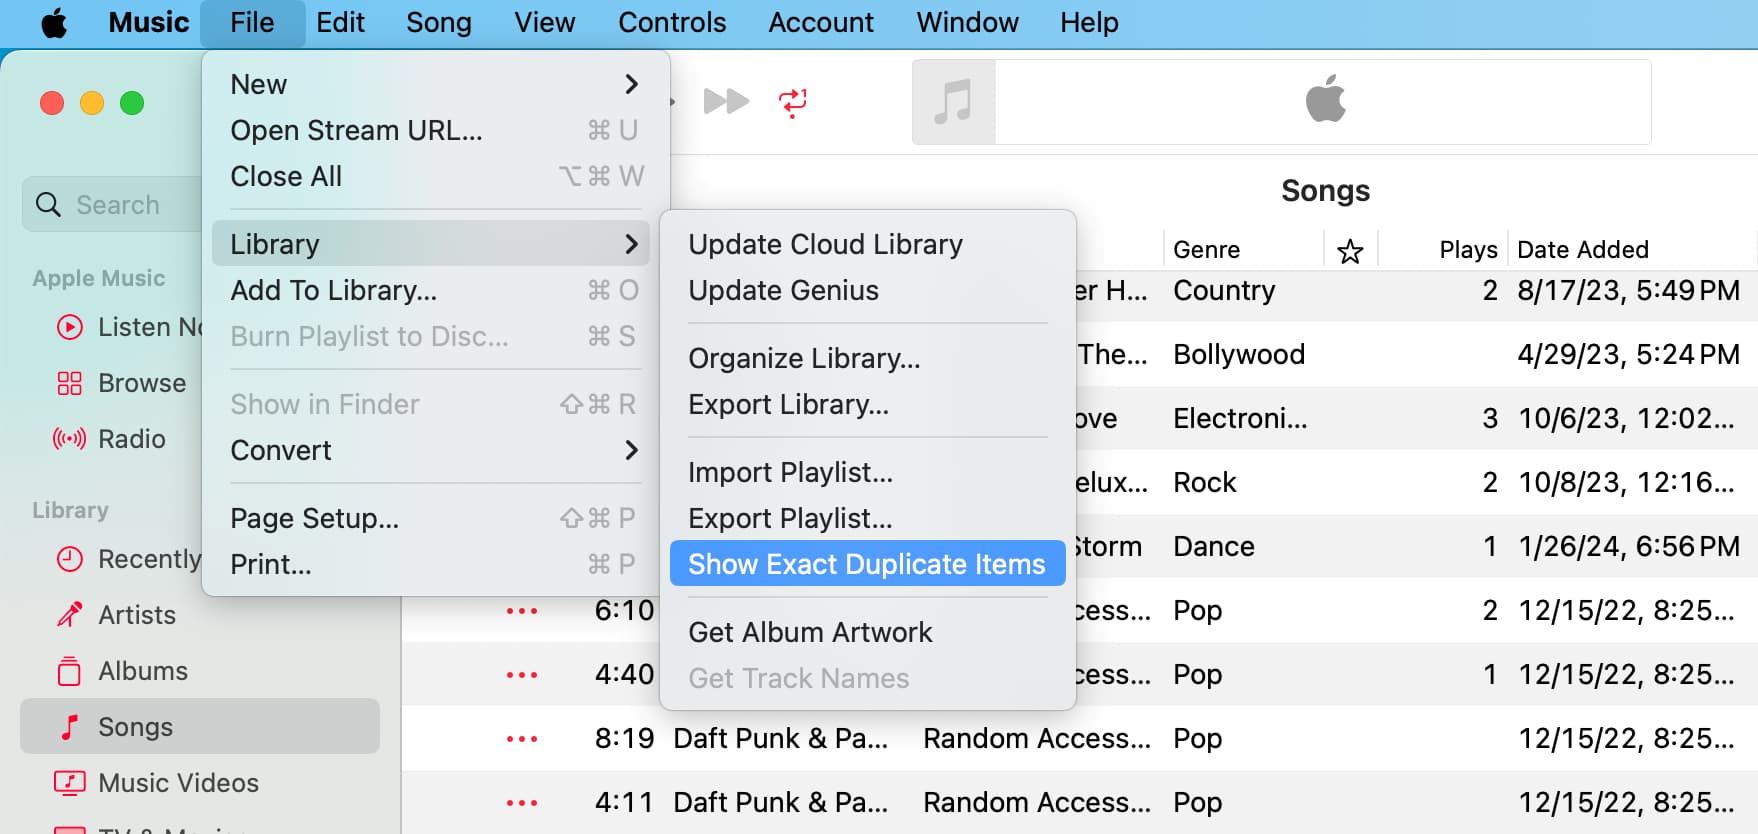
This particular feature only shows duplicates with the same name, artist, and album. With any duplicate items found, conveniently identified, and collated in one place, it might be a good idea to decide what songs you should remove from the Music library.
Delete duplicate songs
To help you determine which item to keep and which to remove, it’s always a good idea to sort your duplicates by name, artist, time, release date, genre, and whatnot. Just click any column at the top to sort the items accordingly. You can reveal many more sorting options by right-clicking one of the columns at the top, such as Name, Artist, and so forth.
Follow these steps to remove duplicates from your library:
- Select one or more duplicates that you’d like to delete.
- From the menu bar, click Song > Delete and confirm. If you’d like to delete duplicate songs that you added to your library from Apple Music, choose the option Delete from Library instead.
- Click Done.
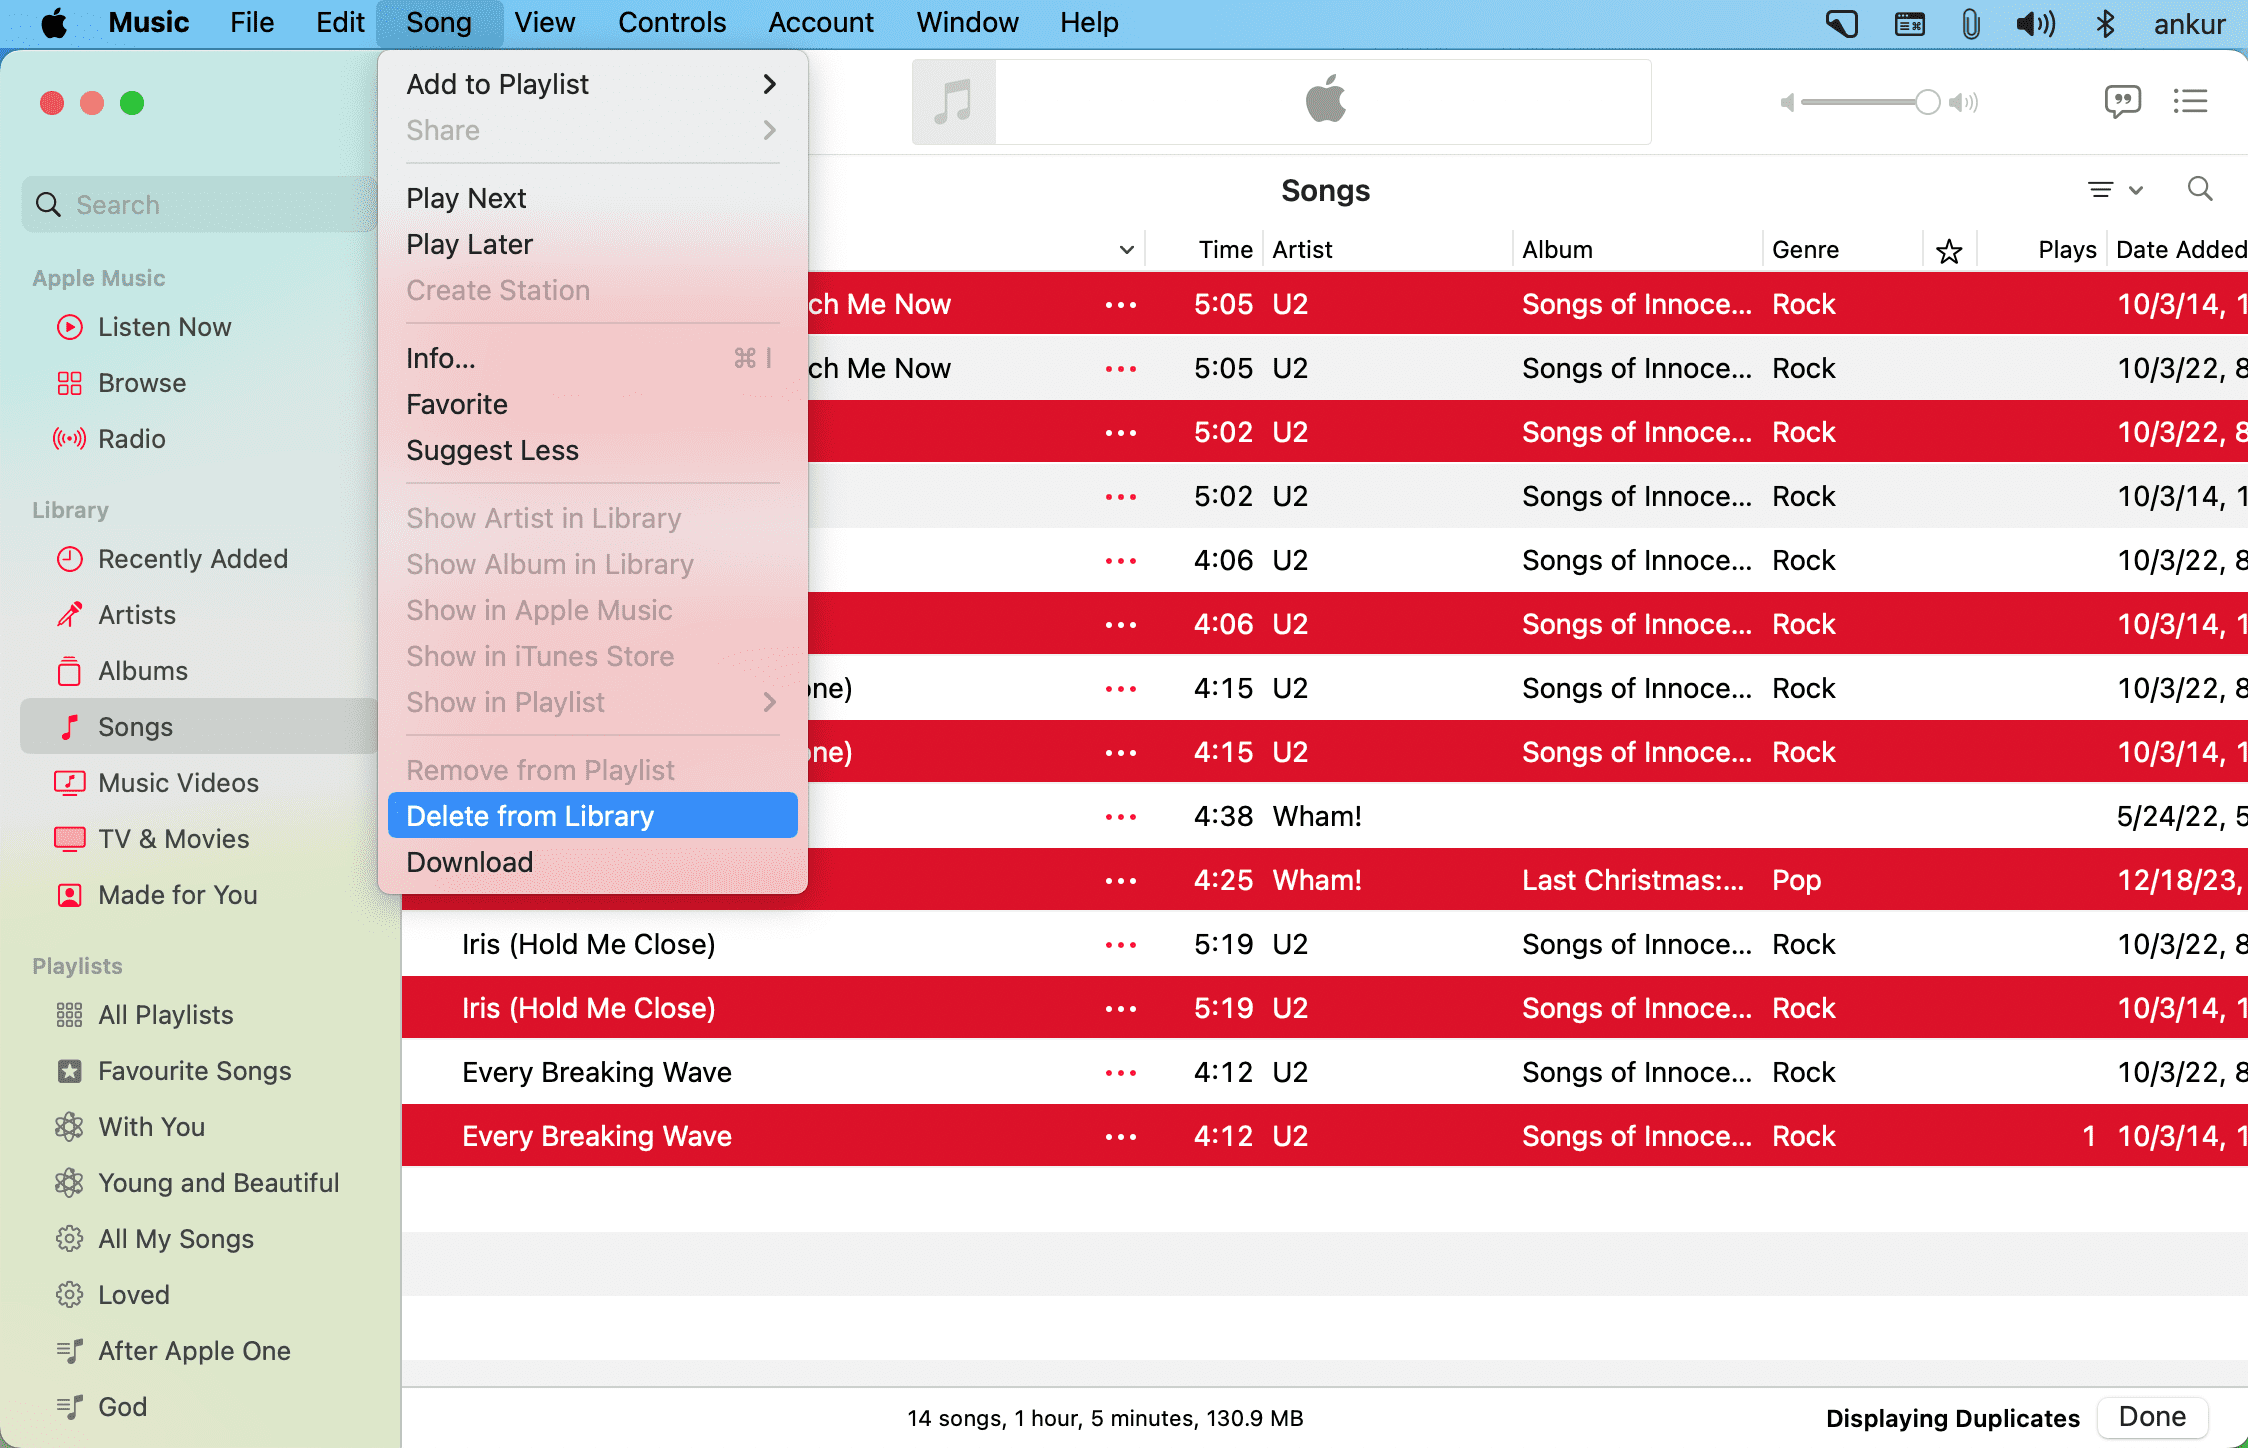
Information in other columns, such as Time, Release Date, or Genre, can also help you determine which item to keep and which to remove. For example, the Plays column shows which version of the song you’ve listened to more. If you have iCloud Music Library (Sync Library) turned on, you might also want to use the iCloud Status or Kind columns to help you decide.
On a related note: Why and how to use referenced library mode for Music (or iTunes) on Mac or PC