Learn how to customize the Finder’s preview pane by choosing specific glanceable details to show when browsing files on your Mac.
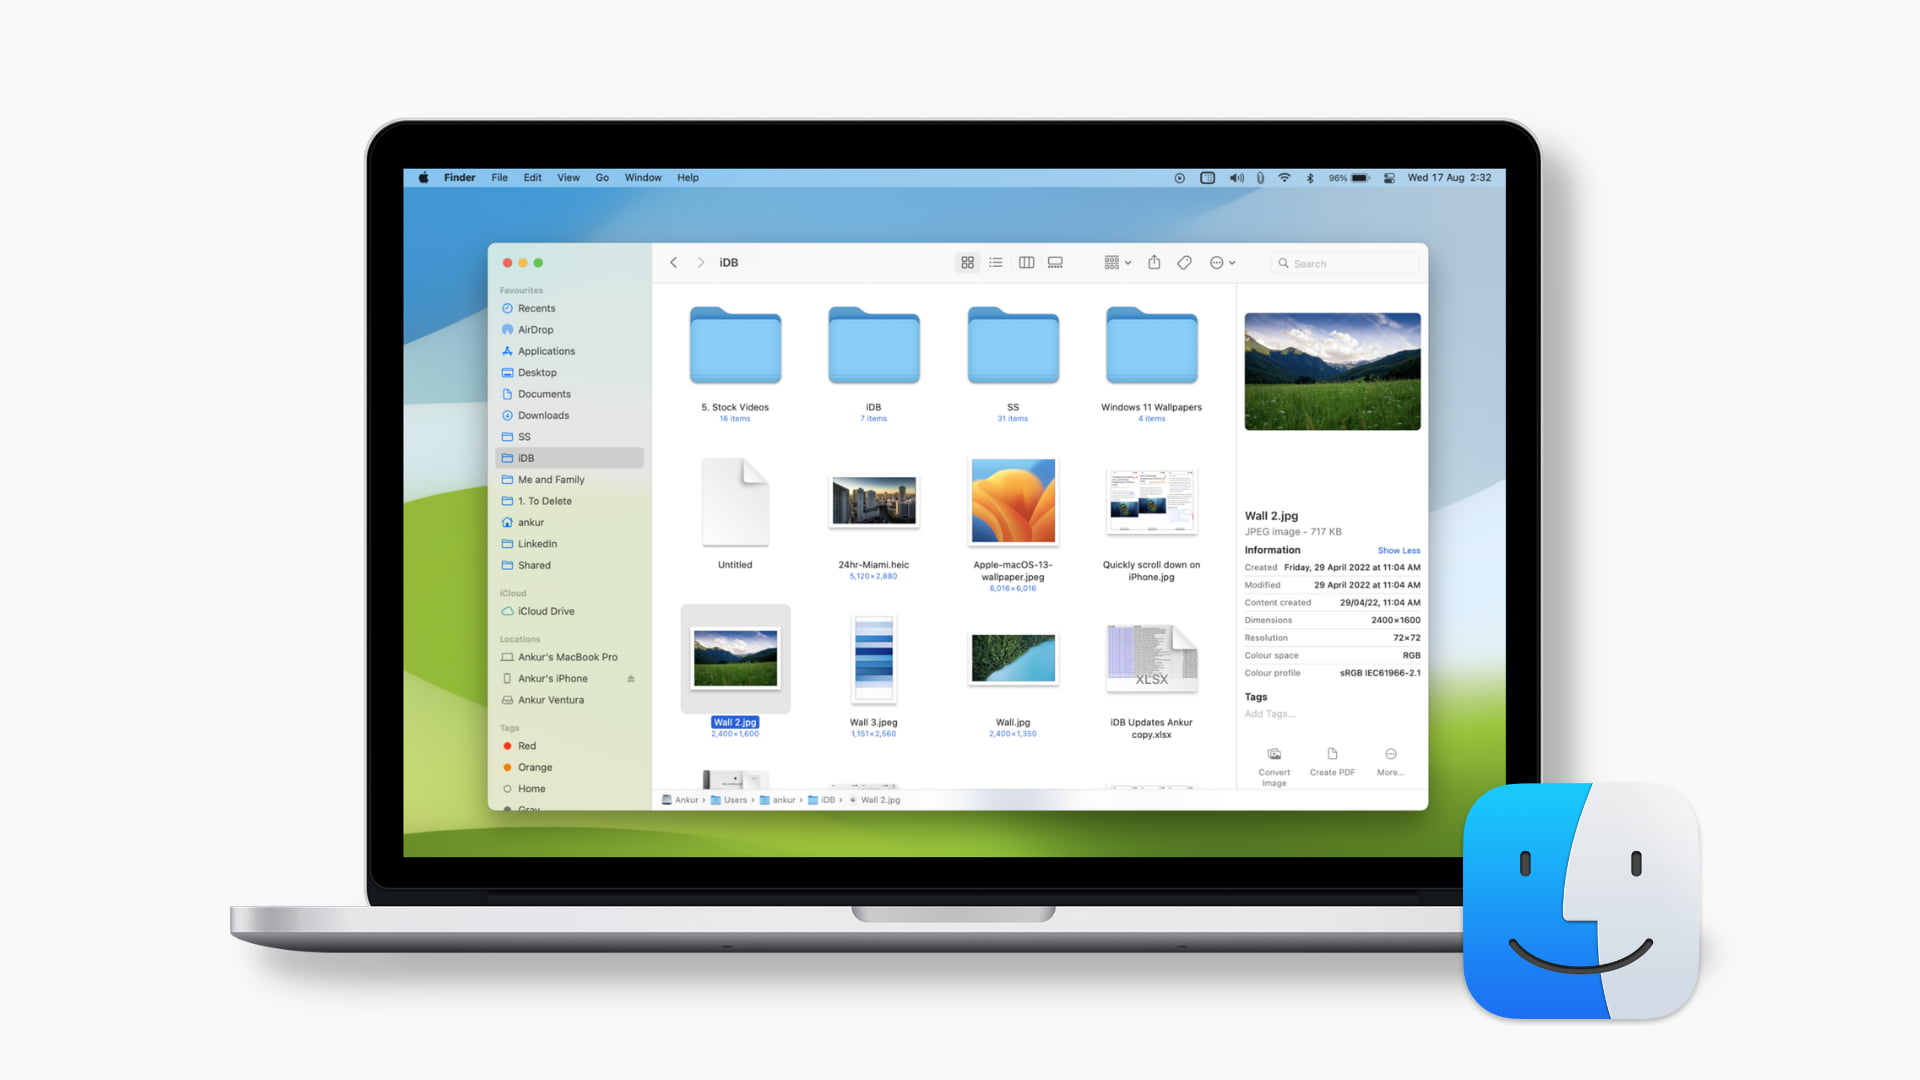
The Finder can display useful details about the selected file in a dedicated preview pane. Here, you can view file creation date, tags, last opened and other details. For image and video file types, you can view metadata such as size, dimensions, and resolution.
The preview pane can also display Quick Actions icons for one-click actions such as Markup and image rotation. Exact options in the preview pane depend on the type of file selected and your own preferences. Follow along with us to learn how to customize the Finder’s preview pane to your liking.
Show the preview pane
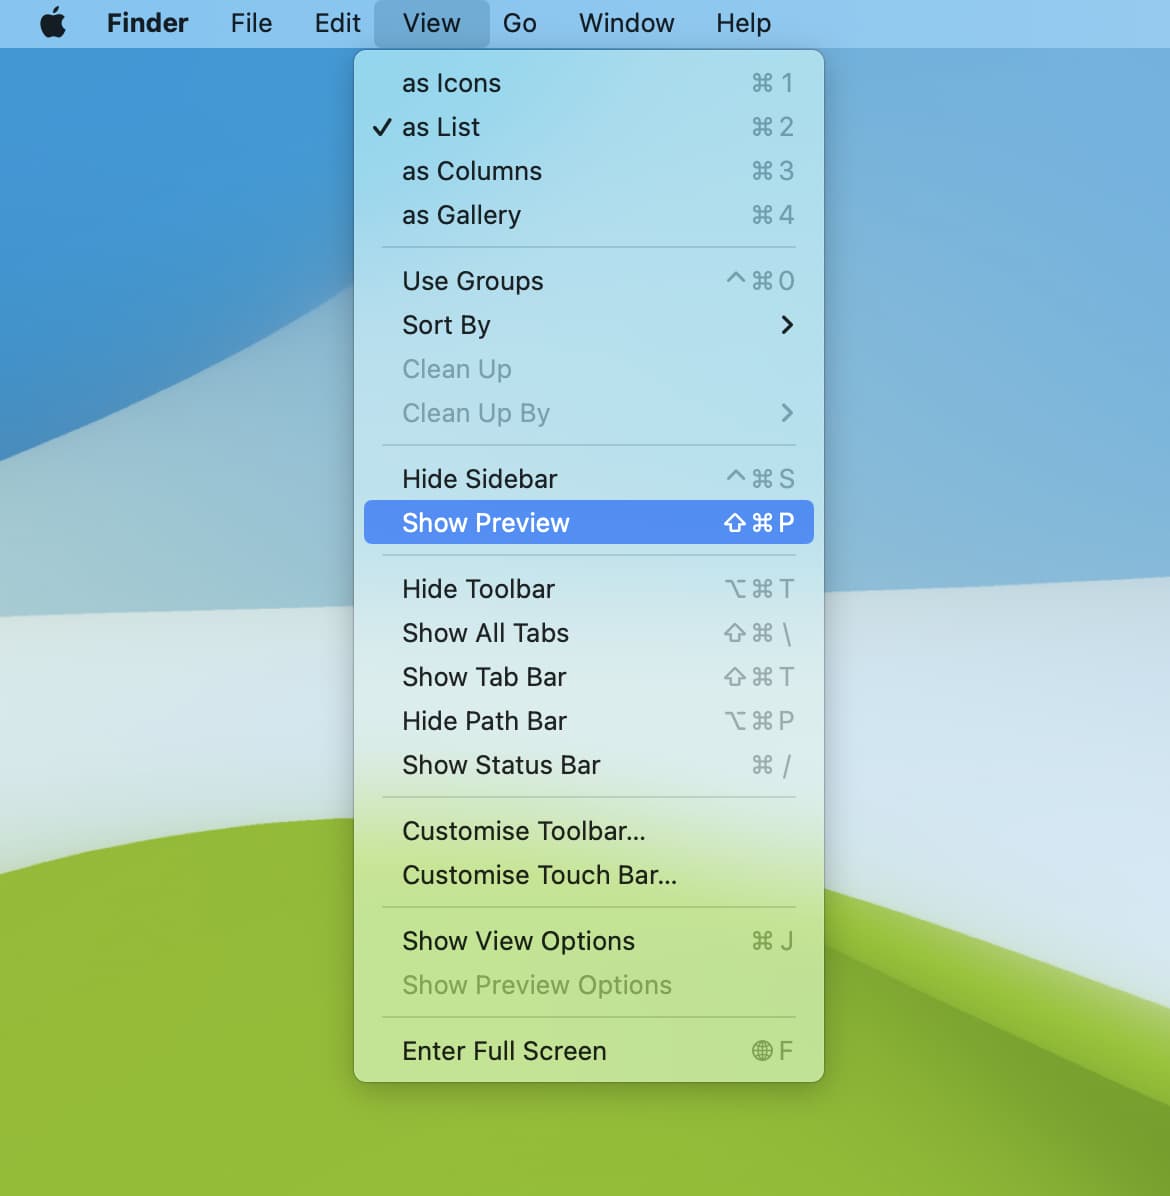
If you don’t see a preview pane as the rightmost column in the Finder window upon selecting a file, click View > Show Preview in the menu. Conversely, hide the preview pane by dragging the vertical divider all the way to the right or click View > Hide Preview in the menu.
Adjust what’s shown in the preview pane
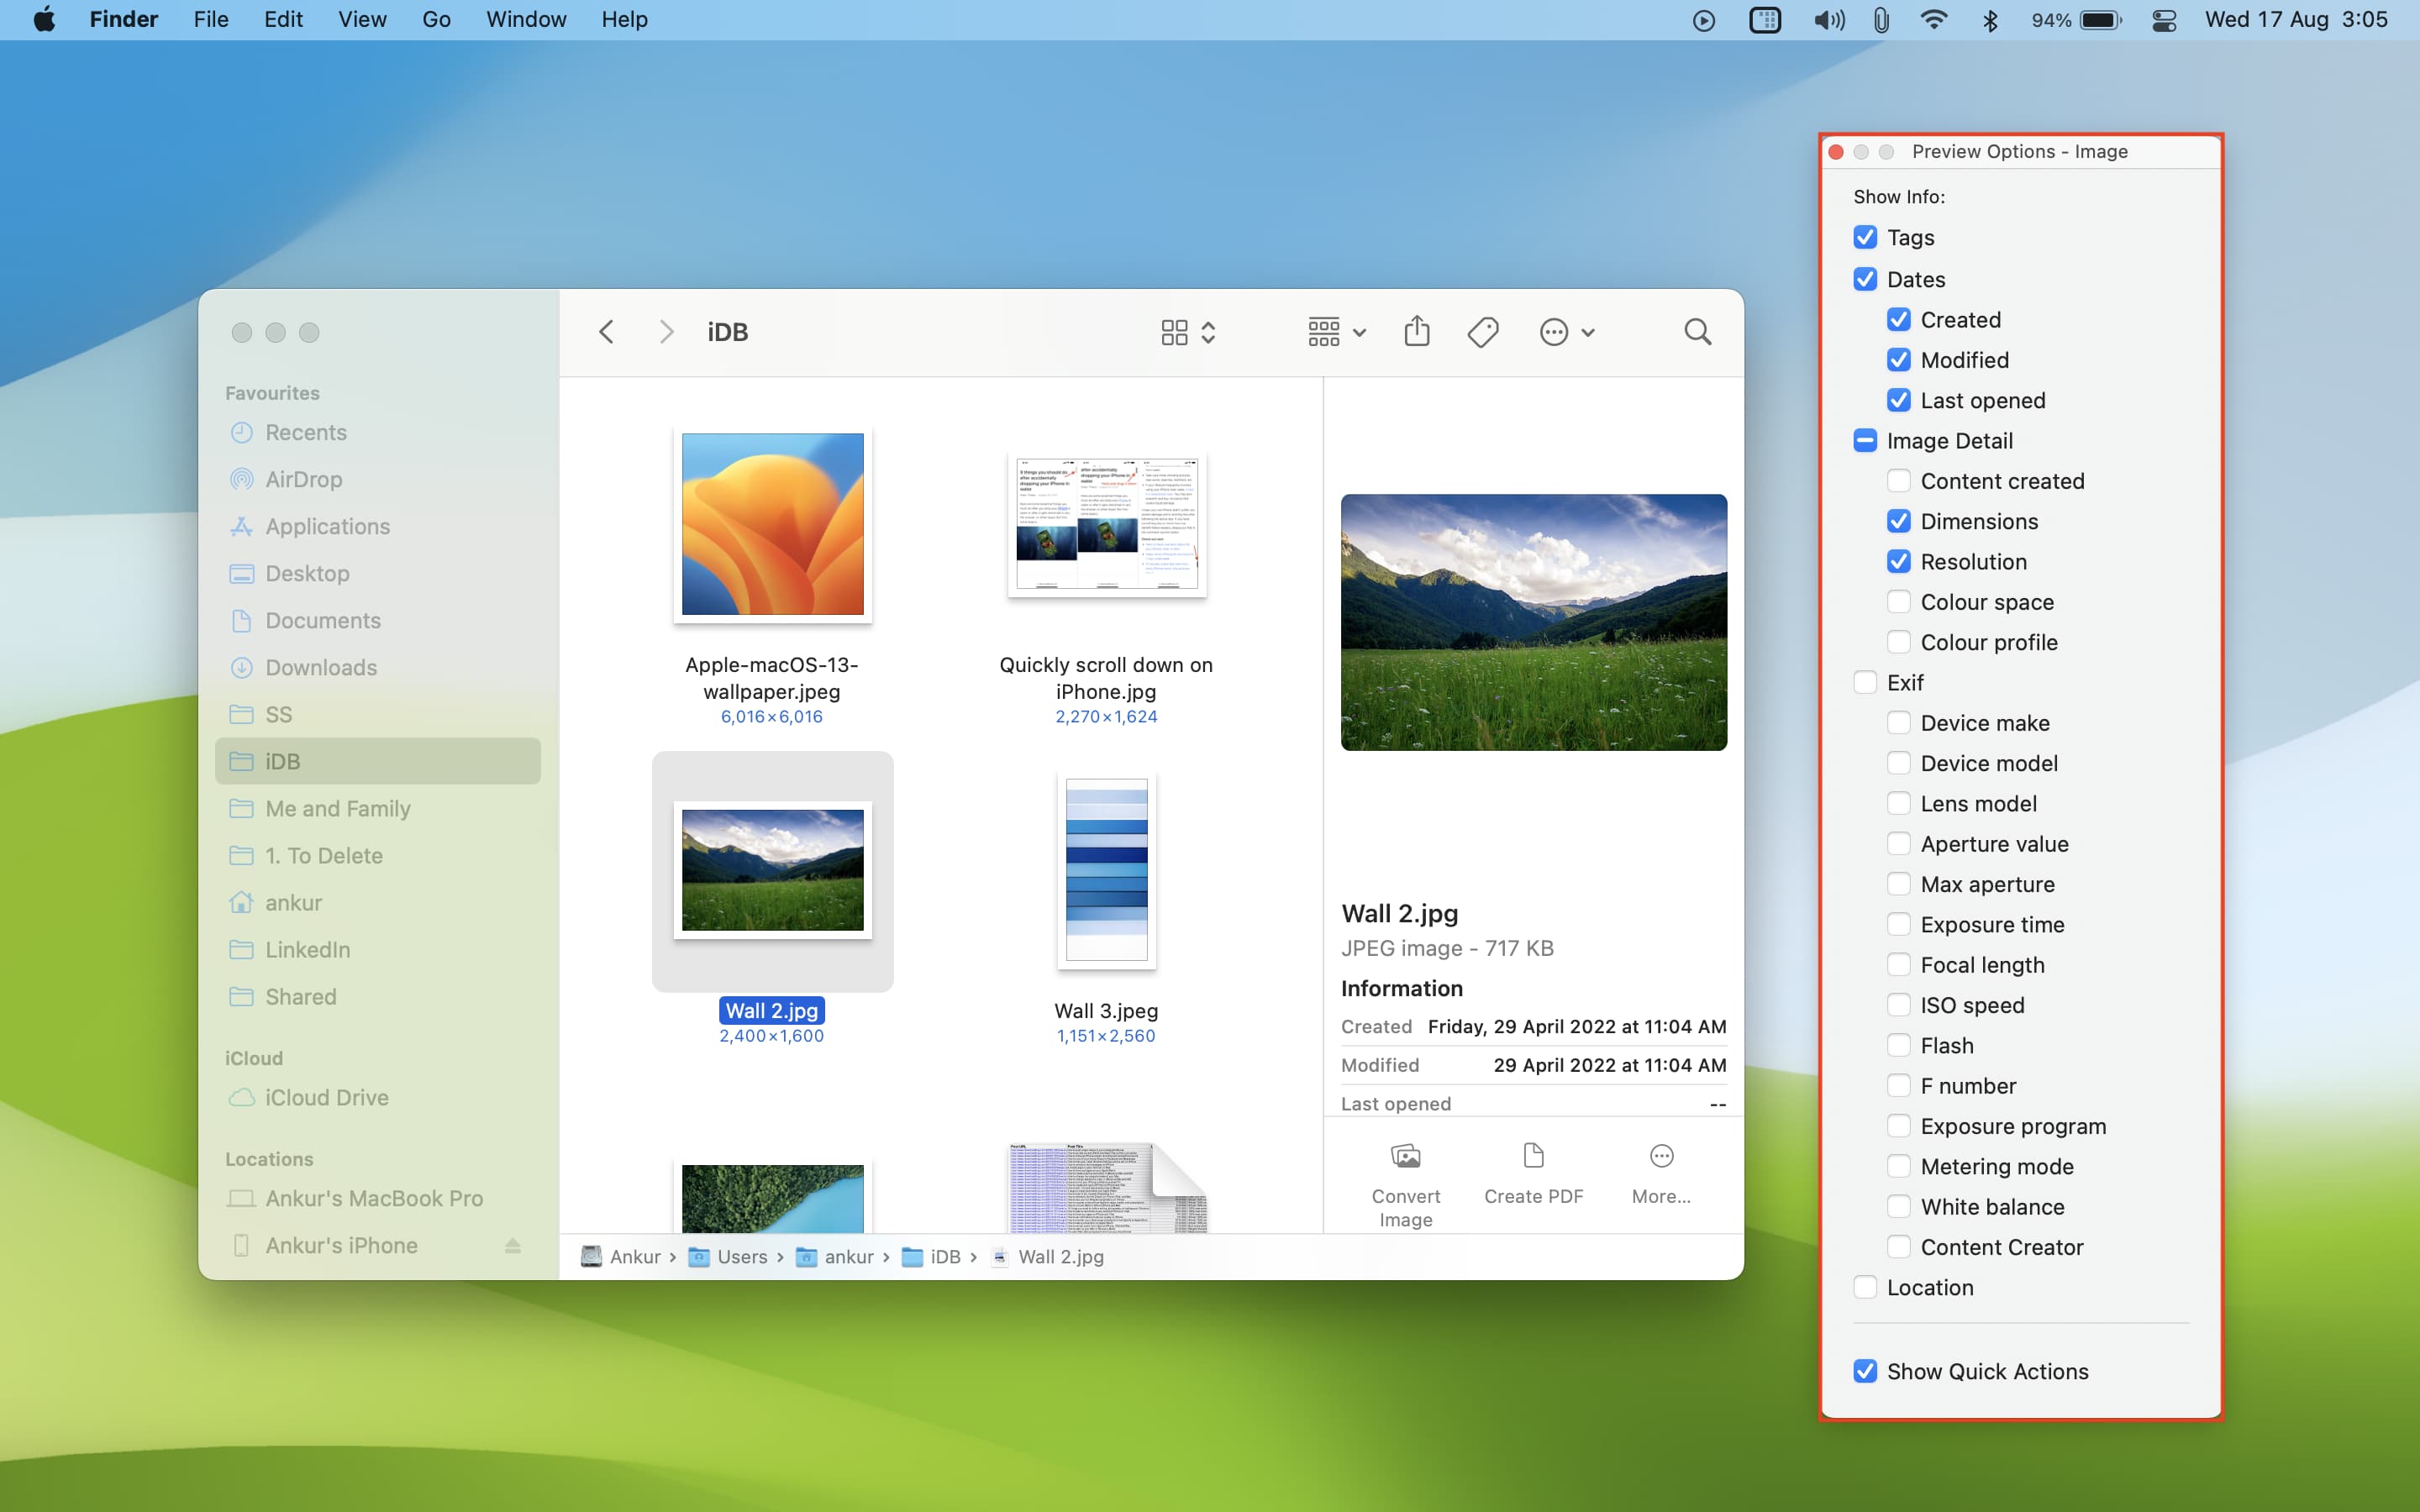
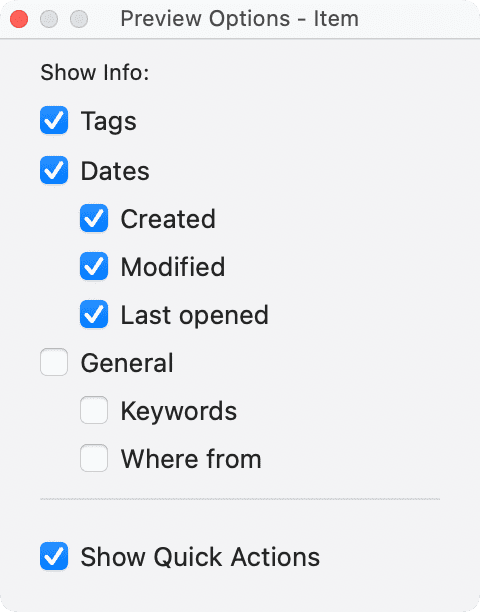
Each file type mentioned below provides its own preview settings, displayed after clicking View > Show Preview Options in the menu.
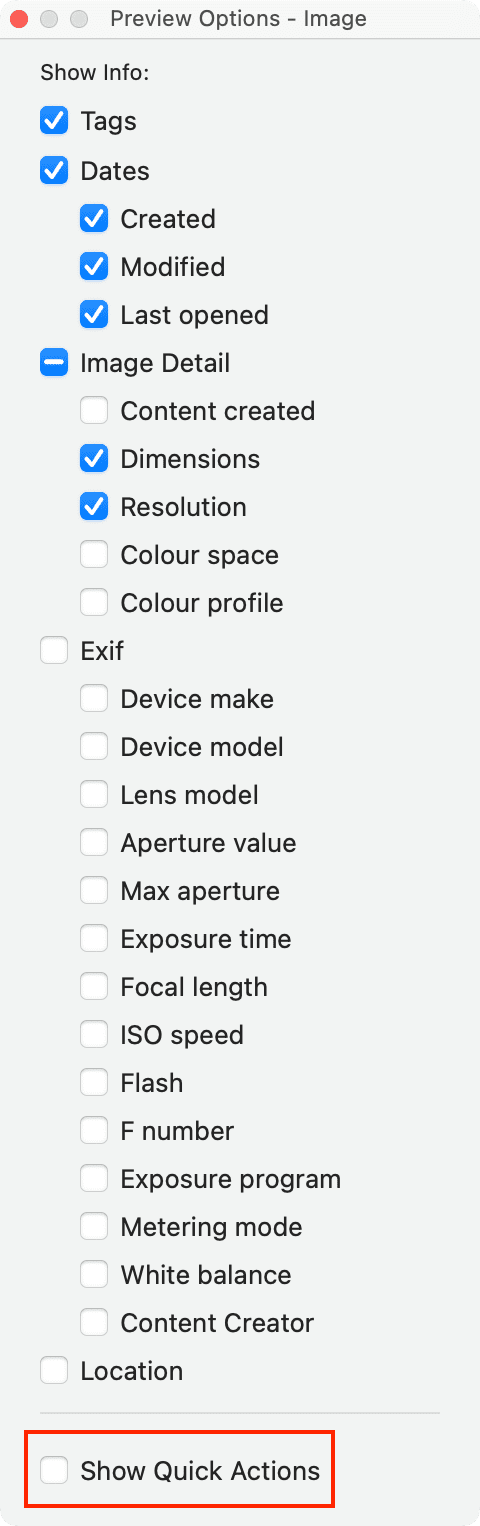
Preview options for images
The preview pane options for images files like JPG or PNG are more extensive than others. If you frequently browse images in the Finder, you can choose to display specific EXIF data, like ISO speed, white balance, device make and model, and so on. When finished, close out the preview options window.
Preview options for documents
Text files and documents created by Microsoft Office apps like Word or Excel and iWork apps like Pages, Numbers, and Keynote offer more or less the same preview options. With the file selected, click View > Show Preview Options in the menu and tick or untick specific pieces of information, like file tags, creation dates, keywords, where the document came from, and more.
Preview options for PDF documents
You have a few additional preview customization options for PDF files in the General section, such as title, author, page, resolution, and description.

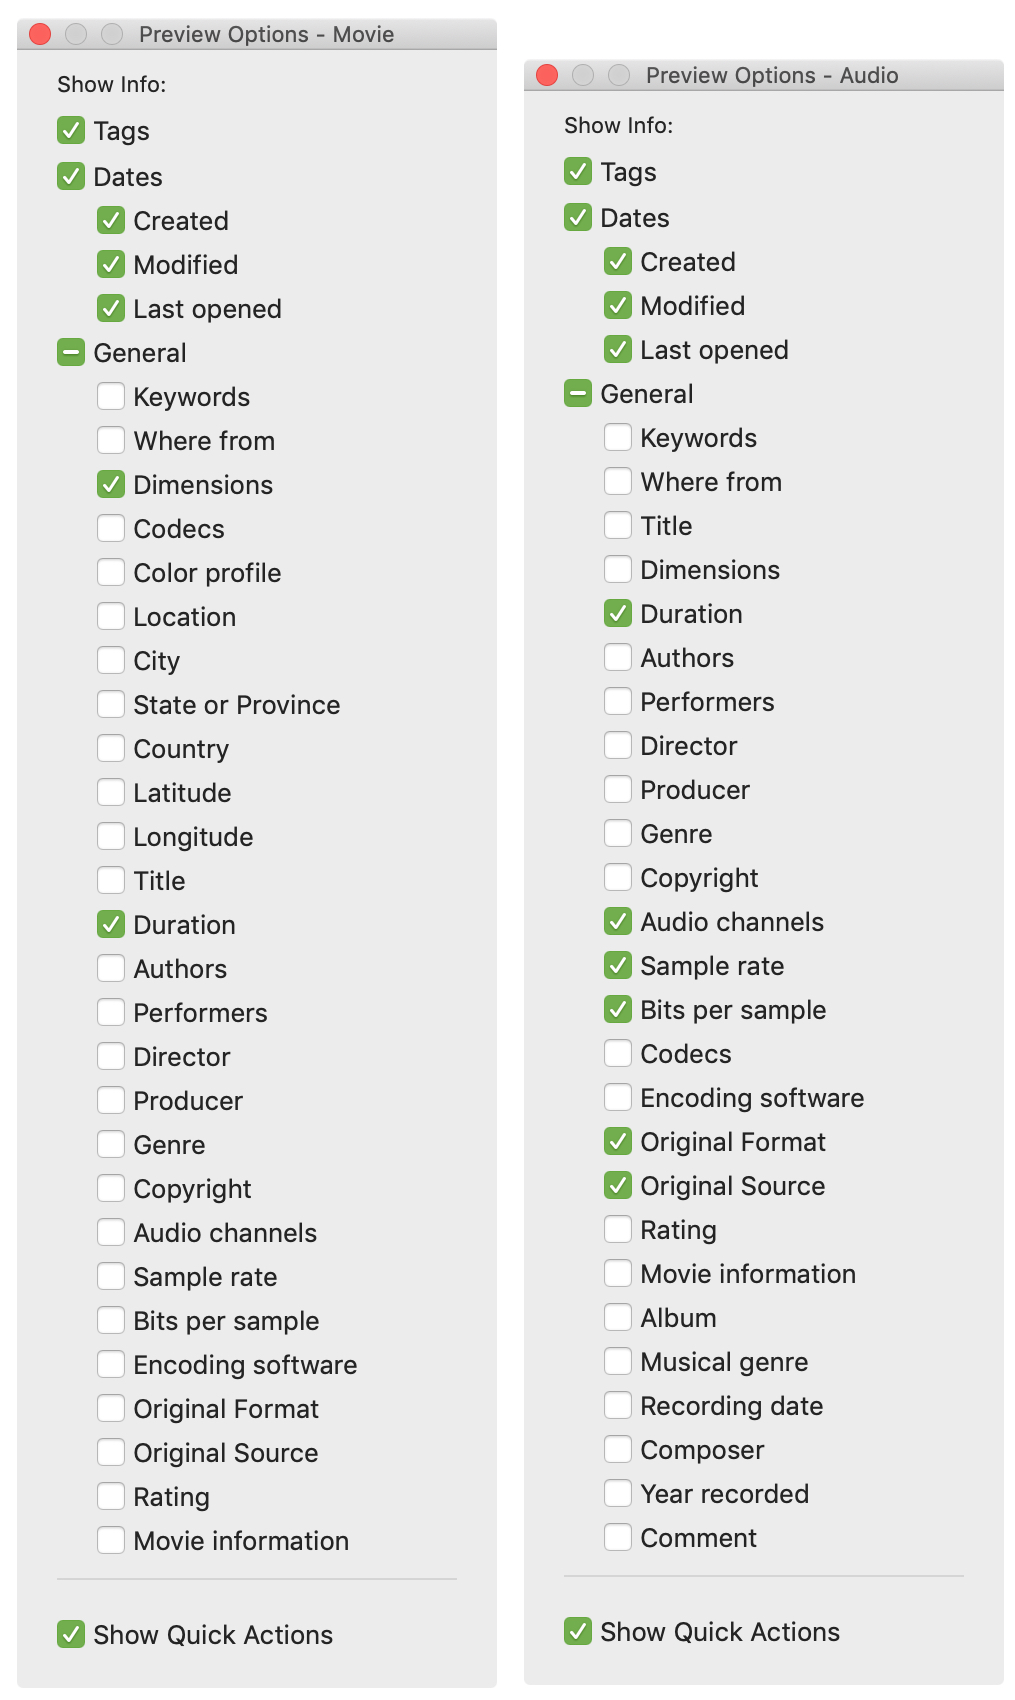
Preview options for video and audio files
Video and audio files provide the richest metadata so you can choose things like display city, state, country, performers, directors, producers, copyright, rating, and genre for video files to display in the preview pane. For audio files, supported details include audio channels, sample rate, bits per sample, codecs, recording date, and musical genre.
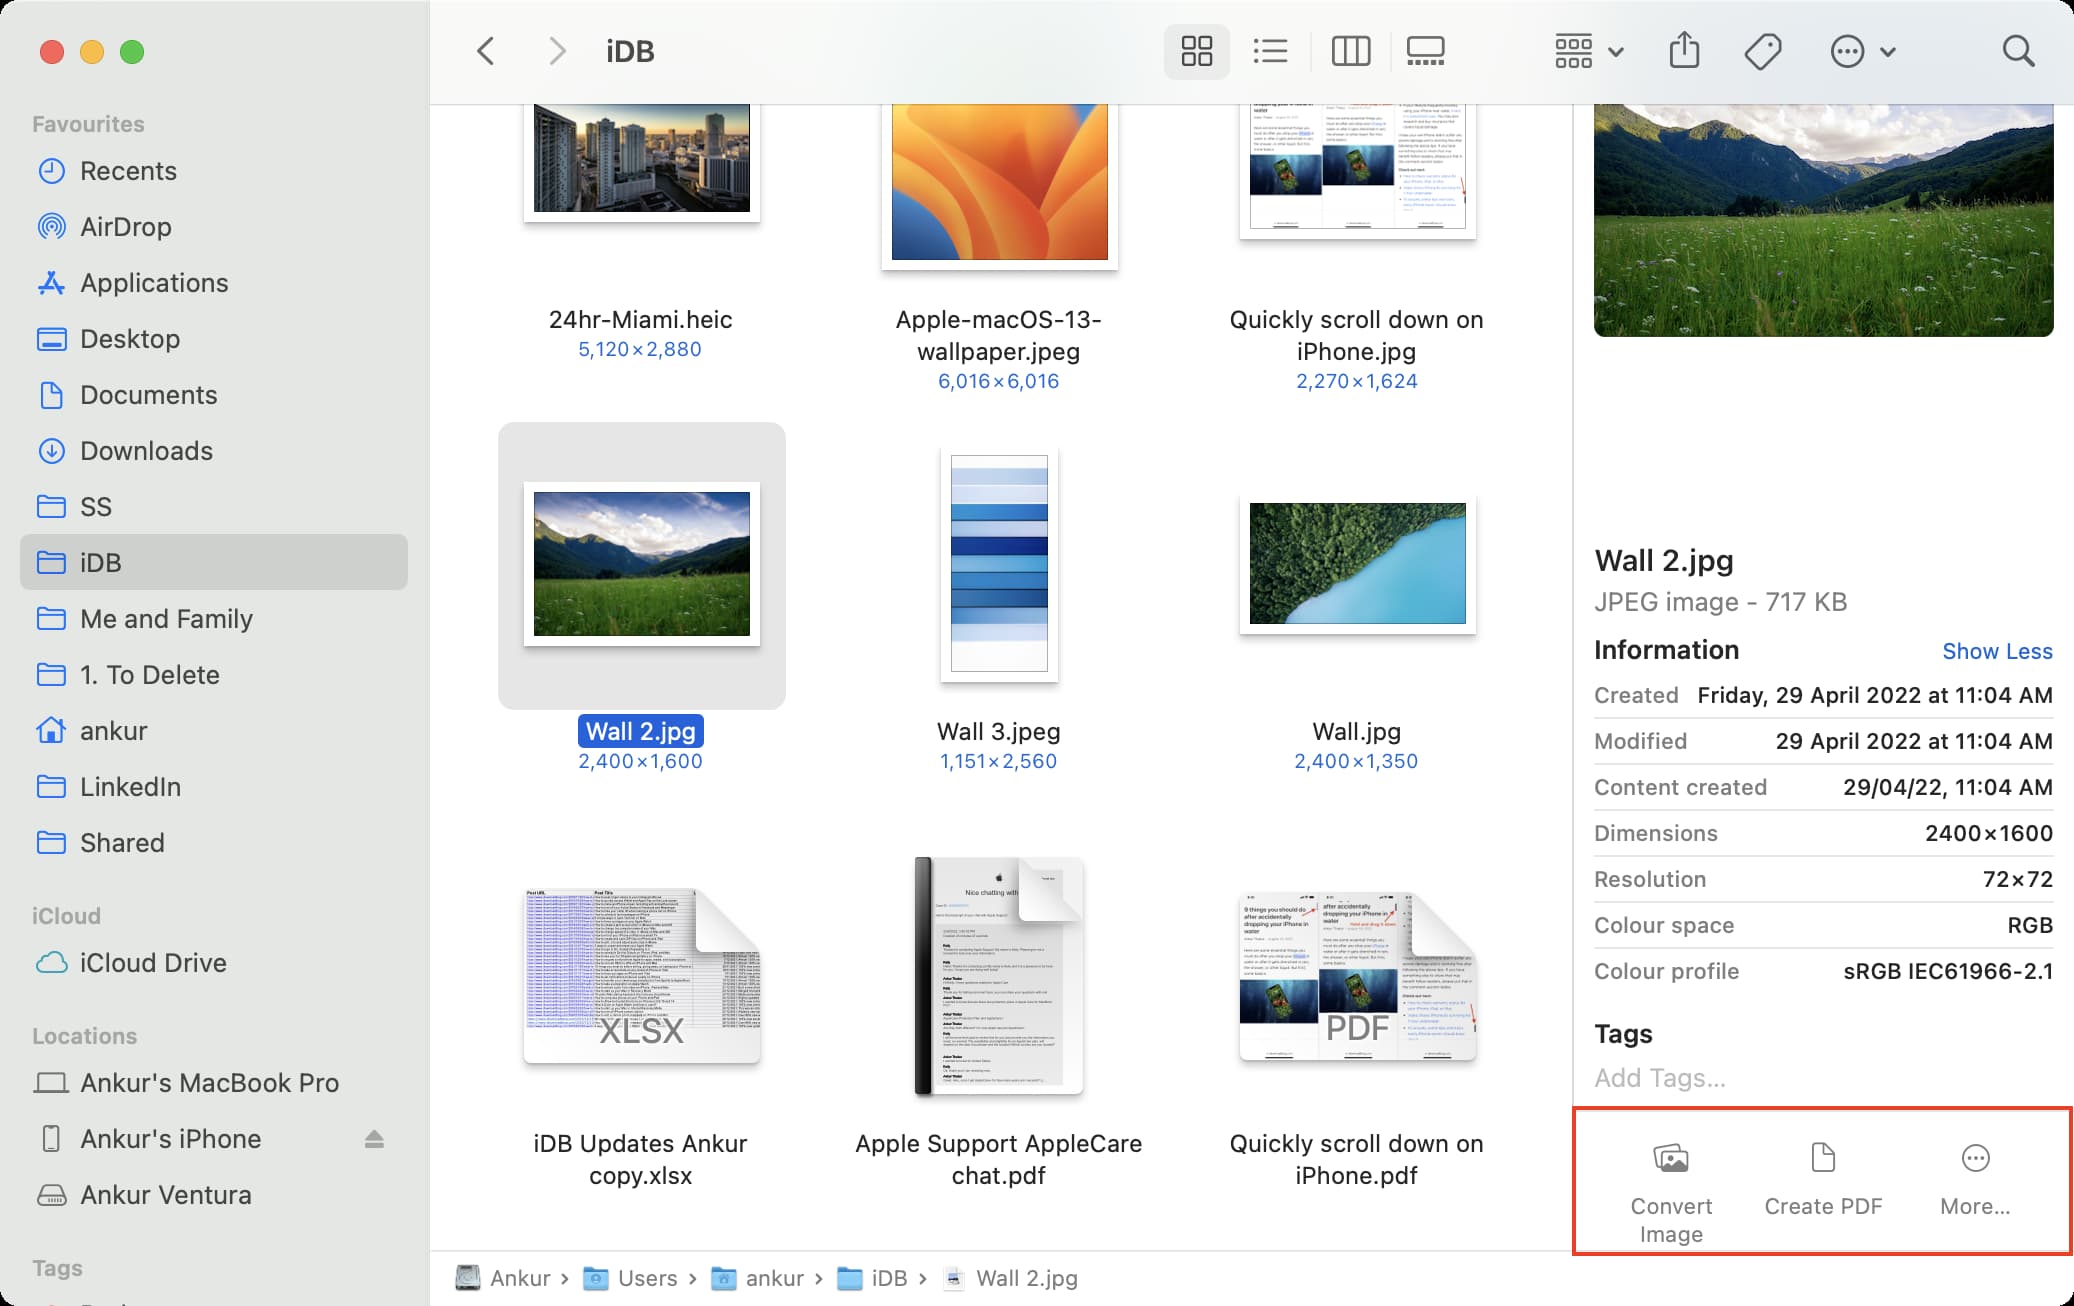
Customize quick actions in the preview pane
Quick Actions icons displayed at the bottom of the Finder’s preview pane depend on the type of file selected. For images, you’ll see quick actions to convert the image, create a PDF, use Markup, and rotate. For video files, you’ll see rotate and trim actions. To adjust these options, click More > Customize.
To hide these icons, select an item in the Finder of a desired file type like an image, then click View > Show Preview Options in the menu and untick the box next to Show Quick Actions at the bottom of the preview options.
The preview pane is a handy way to show various information about files without opening anything. With a little bit of customization, you can have the preview pane only display the information you need. What are your thoughts on the this feature? Do you use the preview pane for all your file browsing needs in the Finder or just specific folders and file types, like images?
Other useful Finder tips: