In this tutorial, we will share how to adjust the HDR (high dynamic range) settings for your iPhone camera. You can choose to turn it on so your iPhone can take better shots in high-contrast situations or turn it off if you prefer that.
High dynamic range (HDR) is a computational photography technique that improves the dynamic range of high-contrast situations by taking multiple photos in rapid succession at different exposures and blending them together. Your iPhone takes three photos quickly when using HDR imaging, and the resulting photo has better detail in the bright and midtone areas.
Overall, HDR and Smart HDR imaging features bring better color accuracy, increased highlight, and more shadow detail to your photos and videos. For more, head to our guide that explains what are HDR, Auto HDR, and Smart HDR shooting modes.
HDR was a hit-and-miss on older iPhone models, but as the iPhone has become more powerful, so has HDR. According to Apple, your phone automatically takes advantage of Smart HDR “when it’s most effective.” But we will walk you through how to disable Smart HDR at will.
Enable or disable automatic Smart HDR
On iPhone 13 and newer
Apple does not allow you to turn off automatic HDR on iPhone 13, iPhone 14, iPhone 15, or later models. It’s always on and helps you take the best pictures in difficult, high-contrast situations.
On iPhone 12 and older
You can turn off automatic Smart HDR on iPhone 12, 11, Xs, XR, SE (2nd generation), and earlier. Once it’s off, you can manually control HDR when taking pictures in the Camera app.
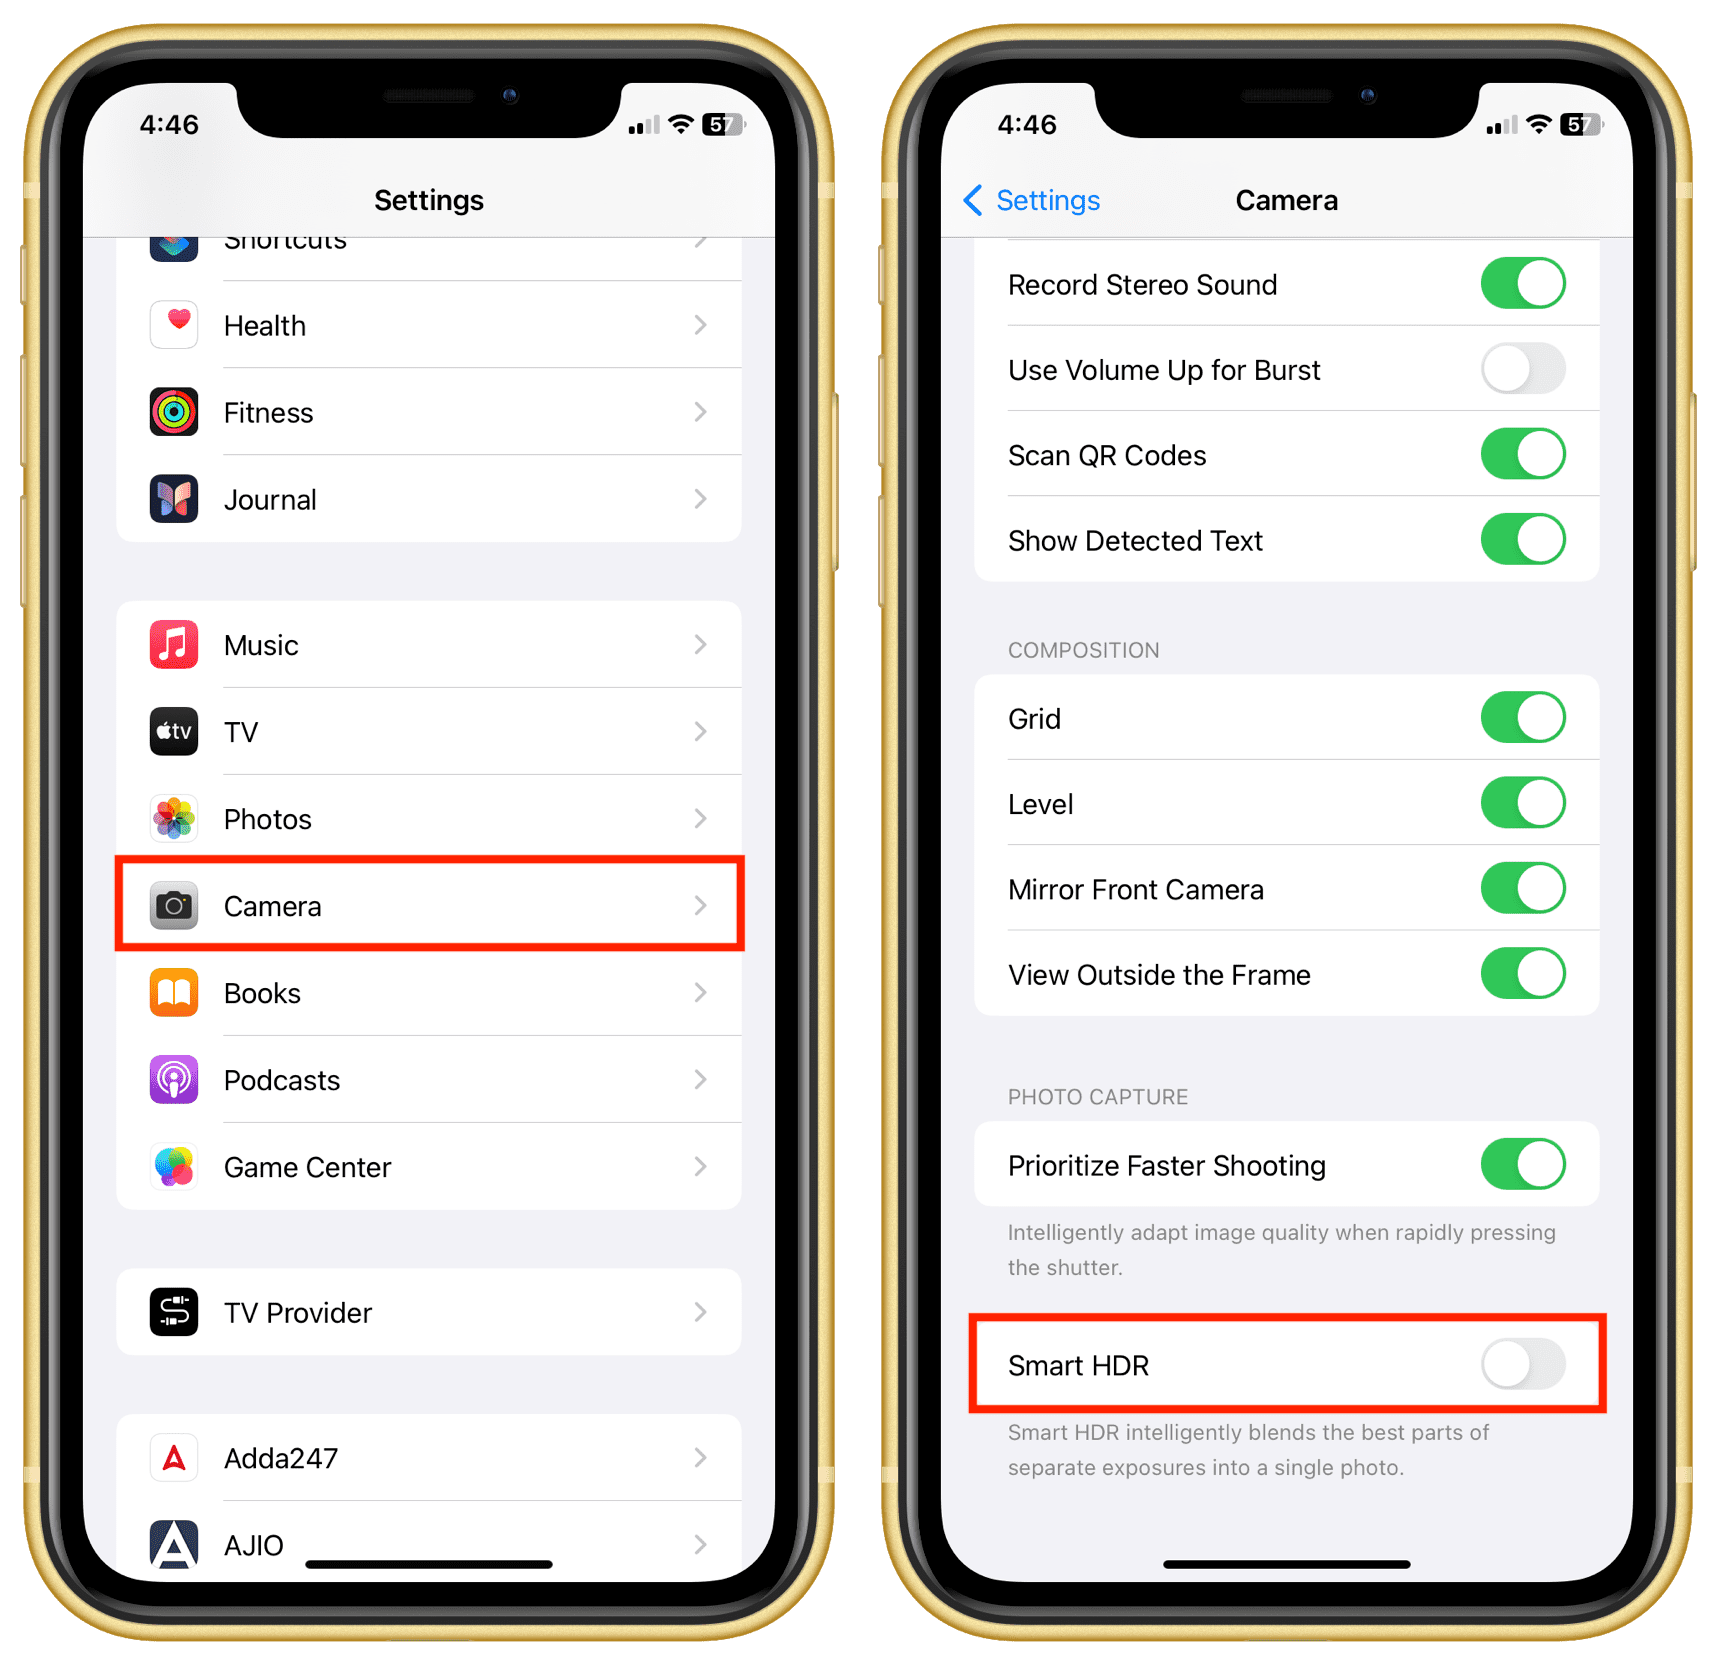
- Open the Settings app on your iPhone.
- Scroll down and tap Camera.
- Go to the bottom of the screen and turn off the switch for Smart HDR. On the iPhone 8, 8 Plus, and iPhone X, it’s called Auto HDR.
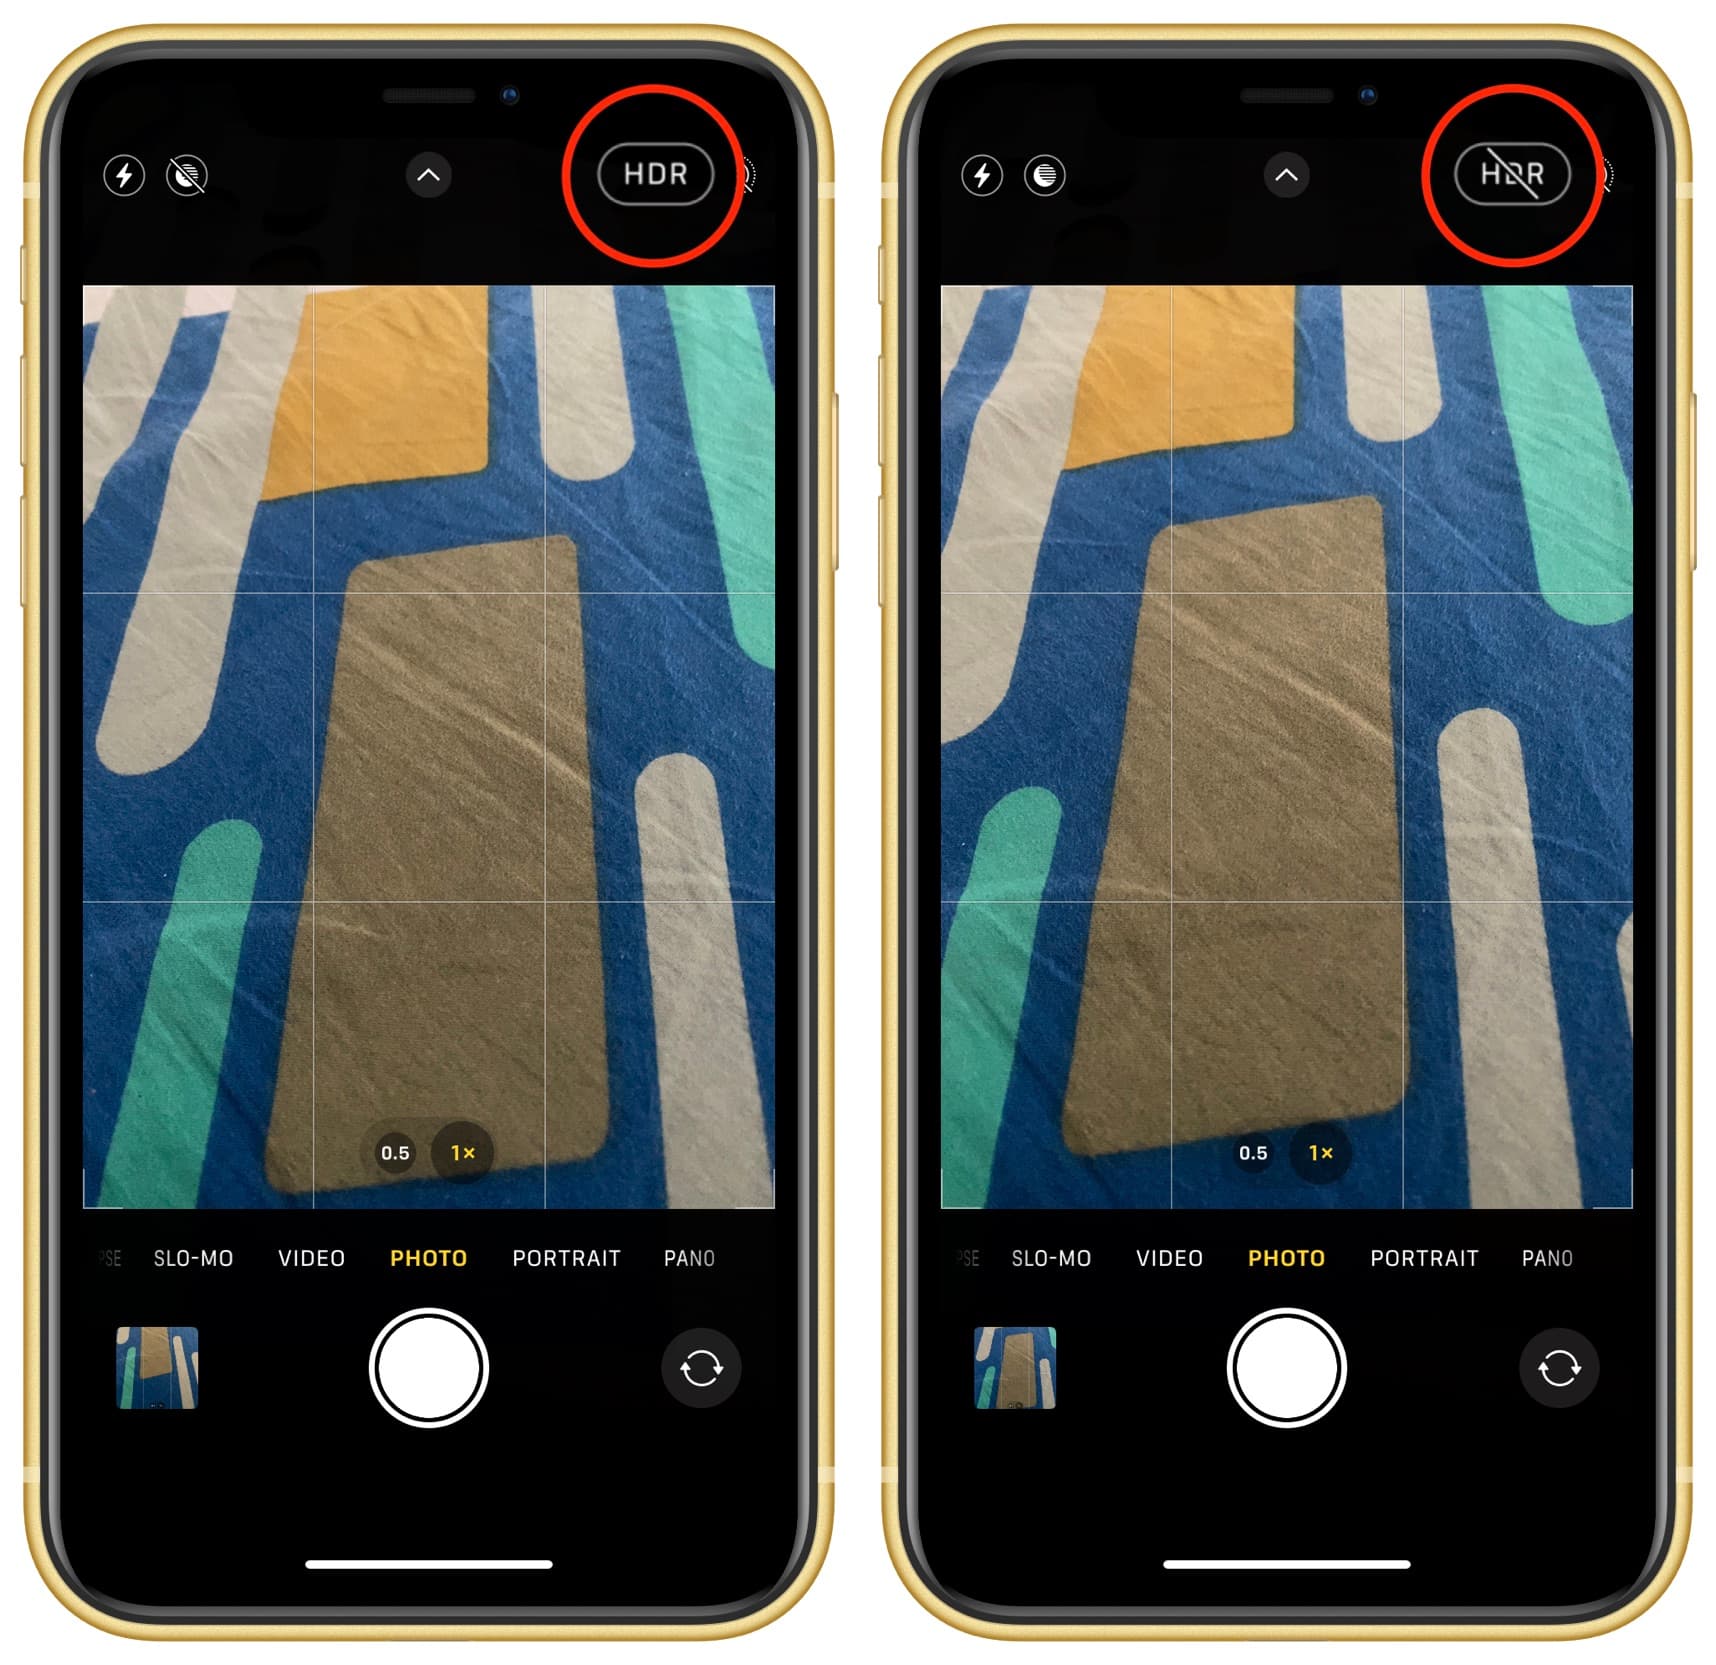
Automatic Smart HDR is now turned off on your iPhone, so you will get an HDR button in the Camera app to control it manually. You can tap the HDR button to turn it off or on based on your needs.
Tip: For best results with HDR, keep your iPhone steady and try to avoid subject motion.
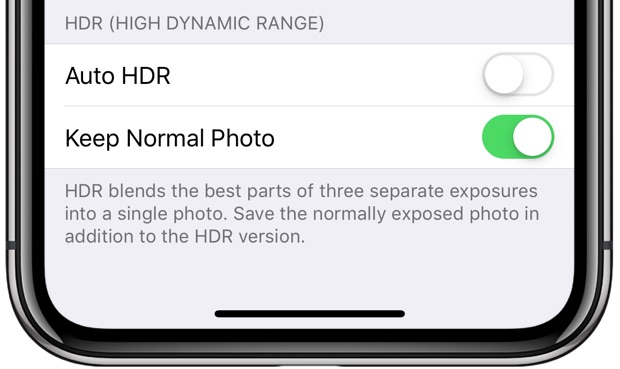
Note: On iPhone X and older models, you have the option to save both the HDR and non-HDR versions of the same image. To do that, go to iPhone Settings > Camera and turn on Keep Normal Photo. But remember that it will occupy double the storage.
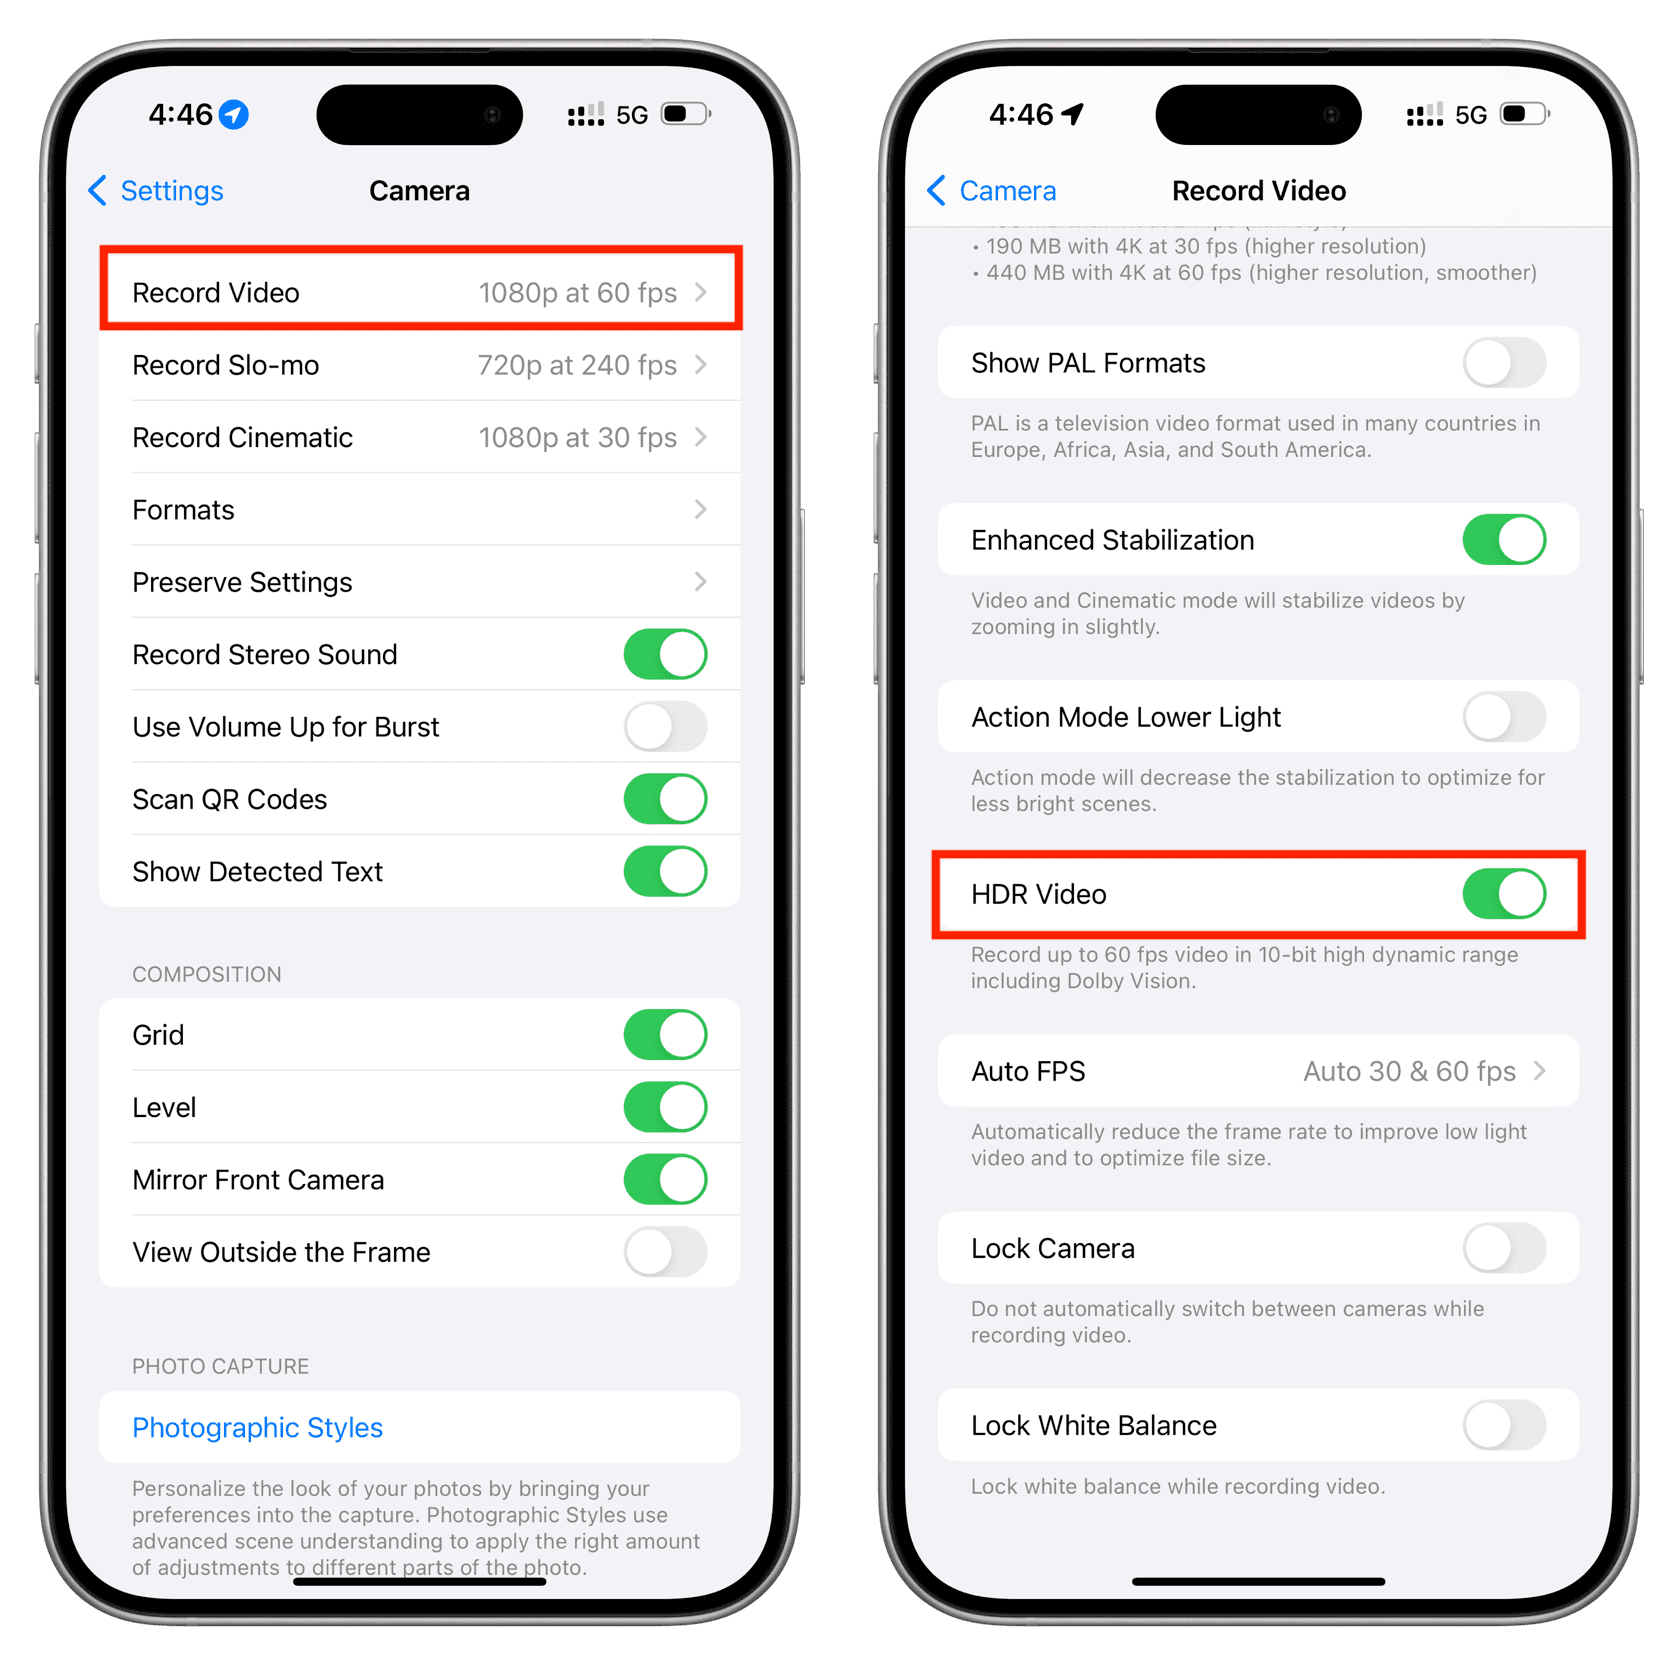
Turn HDR video on or off
iPhone 12 and newer models like the iPhone 13, 14, and 15 automatically record videos in Dolby Vision HDR for true-to-life color and contrast. However, you have the option to turn it off.
- Open the Settings app on your new iPhone.
- Scroll down and tap Camera.
- Select Record Video.
- Activate or deactivate the switch for HDR Video.
Note: HDR Videos are shot in High-Efficiency format, even if your iPhone is set to Most Compatible in Settings > Camera > Formats.
Do more with your iPhone Camera: