Learn how to view the subscriptions you purchased in App Store apps on your iPhone, iPad, or Mac, and cancel ones you no longer need to stop paying for them.
Keeping track of the apps and services you subscribed to isn’t easy; that’s why many people end up paying for things they don’t use anymore without even realizing it.
Keeping track of your active subscriptions is the only way to ensure you’re not wasting money. The first step is to view all your active subscriptions in one place, and we show you how to do it on an iPhone, iPad, and Mac.
iPhone or iPad
1) Open the Settings app and tap your Apple account name at the top.
2) Select the Subscriptions option to view all your active subscriptions, including ongoing free trials, inactive subscriptions, and recently canceled subscriptions.

Mac
- Click the Apple menu and choose System Settings.
- Select Apple Account in the sidebar at the top.
- Select Media & Purchases on the right.
- Click the “Manage” button next to Subscriptions to see all your active subscriptions, free trials, and recently canceled subscriptions.

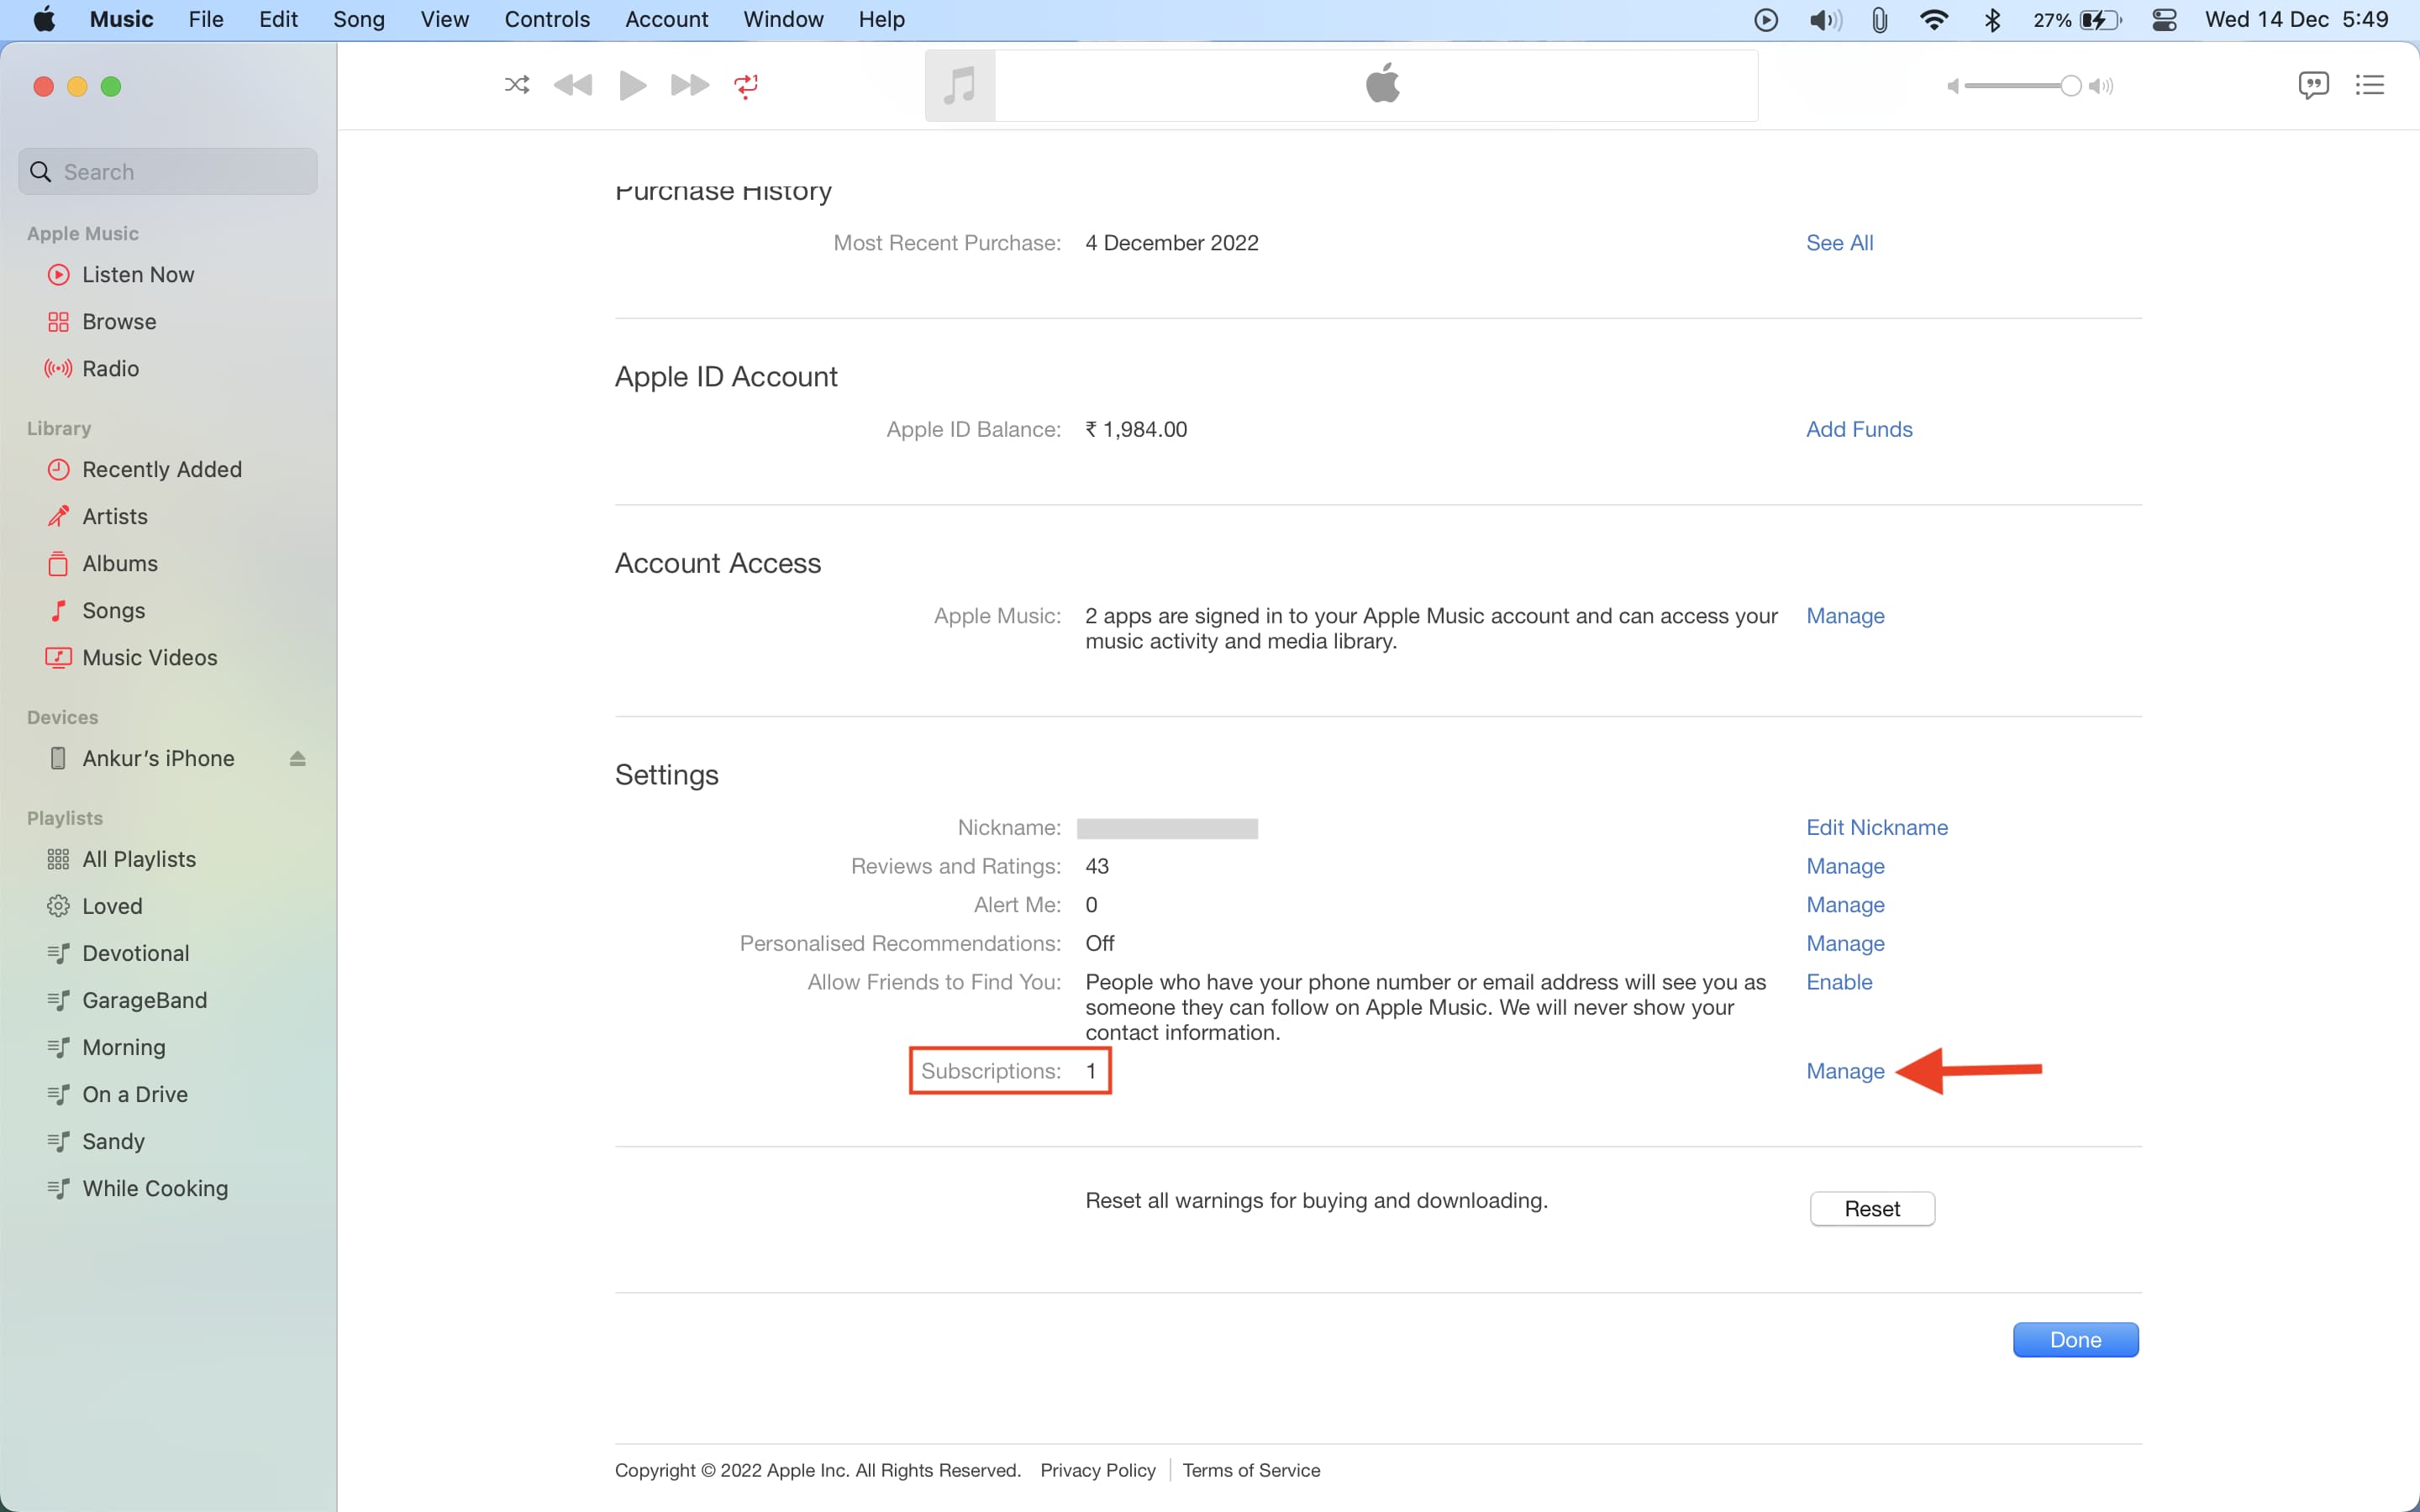
You can also open the Music or TV app on your Mac or iTunes on older Macs or Windows PC, then click the Account > Account Settings menu and click the Manage button next to Subscriptions.
Now that you know how to find out what apps or services you may be subscribed to, it might be a good idea to triage them so you’re not paying for anything you don’t use. Canceling unneeded subscriptions will save you money each month.
Web subscriptions
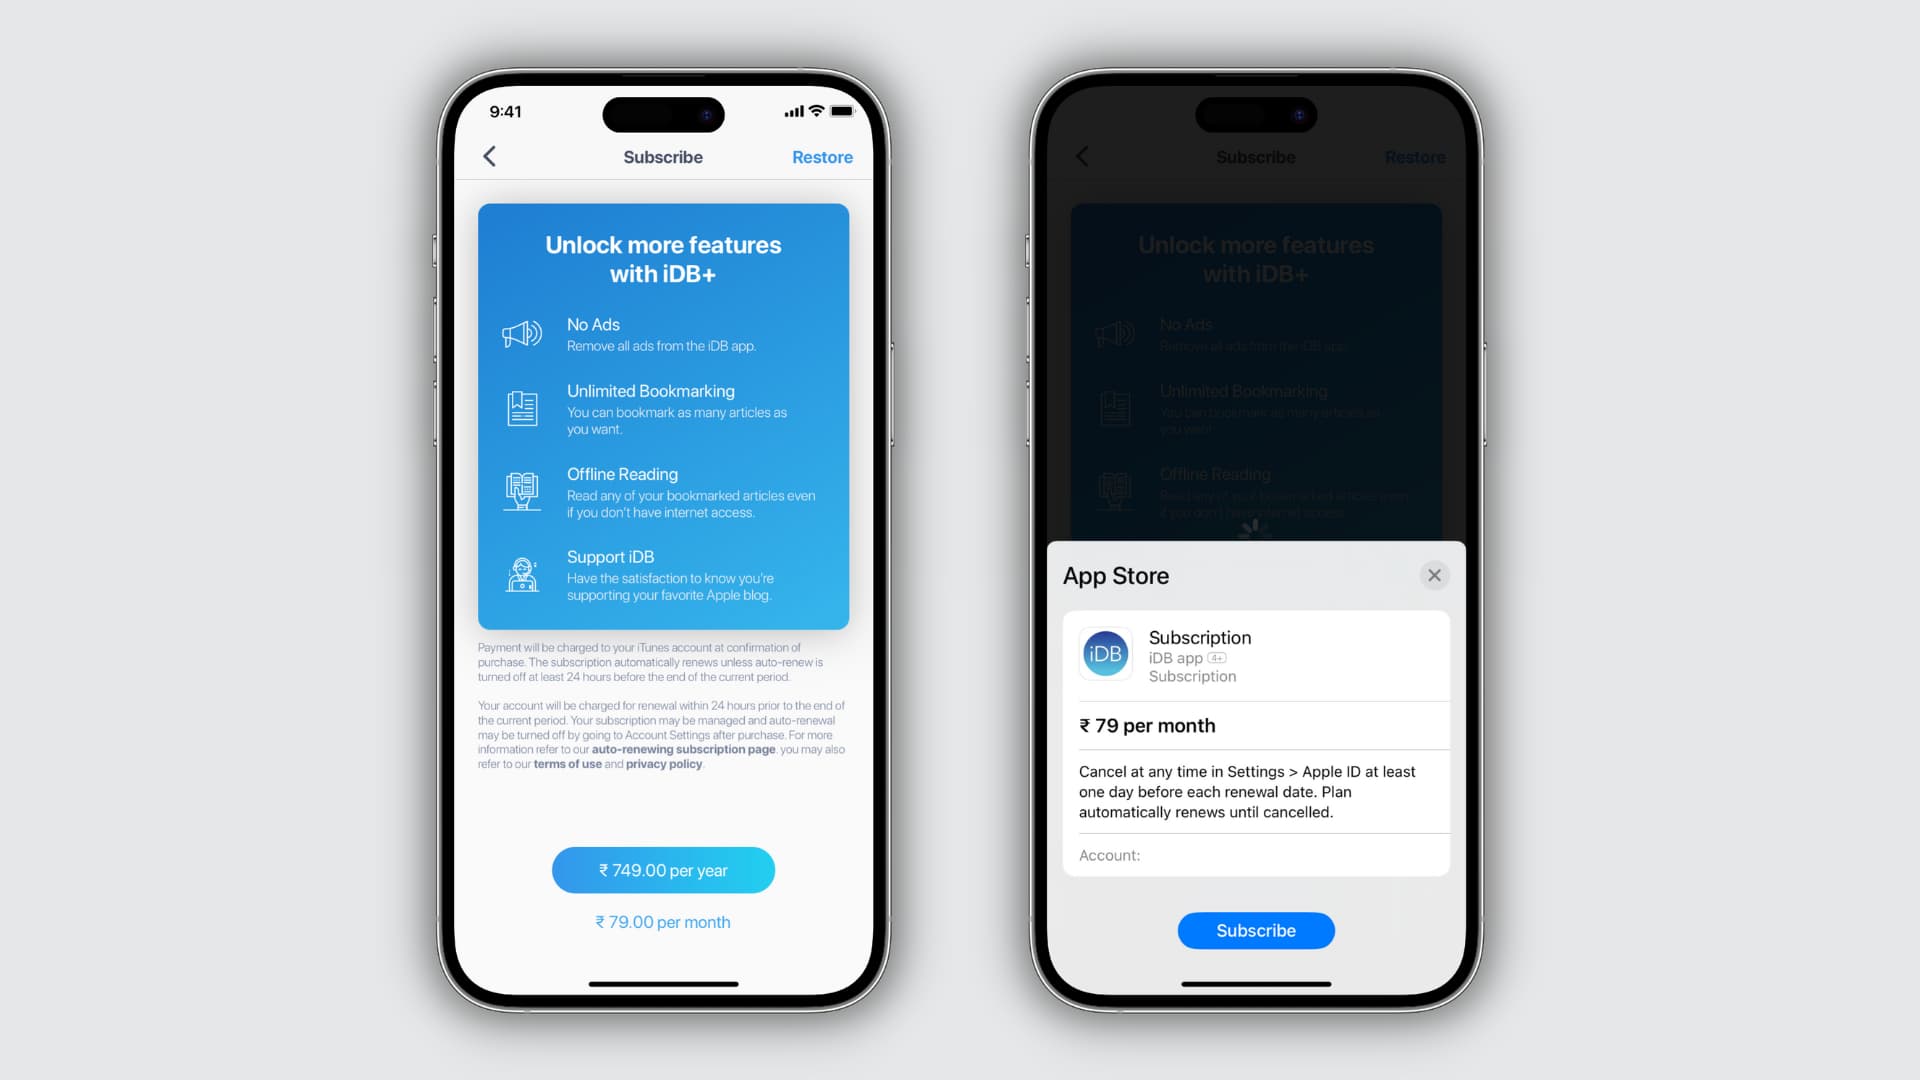
This tutorial is only valid for subscriptions which rely on Apple’s billing system and the in-app purchase mechanism, including Apple’s own subscriptions such as iCloud+, Apple Music, Apple TV+, Apple One, and more.
Subscriptions purchased on the web by following links in apps don’t show up in Apple’s subscriptions interface and cannot be managed there.
That’s why you don’t see your Netflix subscription listed in the Settings app. The same goes for apps that use both Apple’s in-app purchase feature and external subscriptions, like X Premium. If you buy an X Premium subscription using the in-app purchase mechanism, you can manage it in Settings. But if you subscribe to X Premium on the web to save money, the subscription won’t appear in Settings.
To manage an outside subscription, you’ll need to log in to its web interface in a browser like Safari or Chrome and find the option to manage subscriptions.
You’re recommended to check your credit card statement in order to identify your web subscriptions and see how much money you’re burning on those each month. You may also search for ‘subscription’ or the ‘service name’ in your email; if you’ve subscribed, there should be an email confirmation in your inbox.
Do more with subscriptions
Multiple subscriptions quickly add up and silently drain your finances as monthly charges continue on autopilot. To help with that, we’ve put together a list of 14 practical tips to save money on streaming services. And while we’re at it, these 11 tips will help keep your app subscriptions under control.
You can also save money by setting up Family Sharing, which will enable you to share your app and media subscriptions with up to five other family members without additional charges for anyone.
How do you keep your subscriptions under control? Do you keep a running spreadsheet of your active subscriptions or perhaps use a specialized app for that? Let us know in the comments down below!