In this tutorial, we’ll show you how to turn on two-way iCloud sync for the Messages app on your iPhone, iPad, and Mac so your texts are synced and updated across all your devices.
With Apple Messages iCloud sync, signing in on a brand-new device with your Apple Account gives you full access to your entire chat history, complete with iMessage, SMS, RCS, and MMS messages, attachments, and other items. As you message people, delete old conversation threads, and more, everything gets seamlessly and instantly reflected in Messages across all your iPhones, iPads, and Macs.
In addition to keeping your messages synced and updated across all your present and future devices, the Messages in iCloud feature also serves as a safe backup for all your texts. So, should you happen to lose your iPhone or accidentally wipe out everything, a quick sign-in to iCloud is all it takes to get back all the messages.
When I moved from iPhone 6S, my texts were imported to iPhone 11. And now, all my years-old iPhone 6S and iPhone 11 texts are on my iPhone 15 Pro Max. If you care about messages for holding on to the past or for keeping proof, this is an absolutely wonderful feature to have.
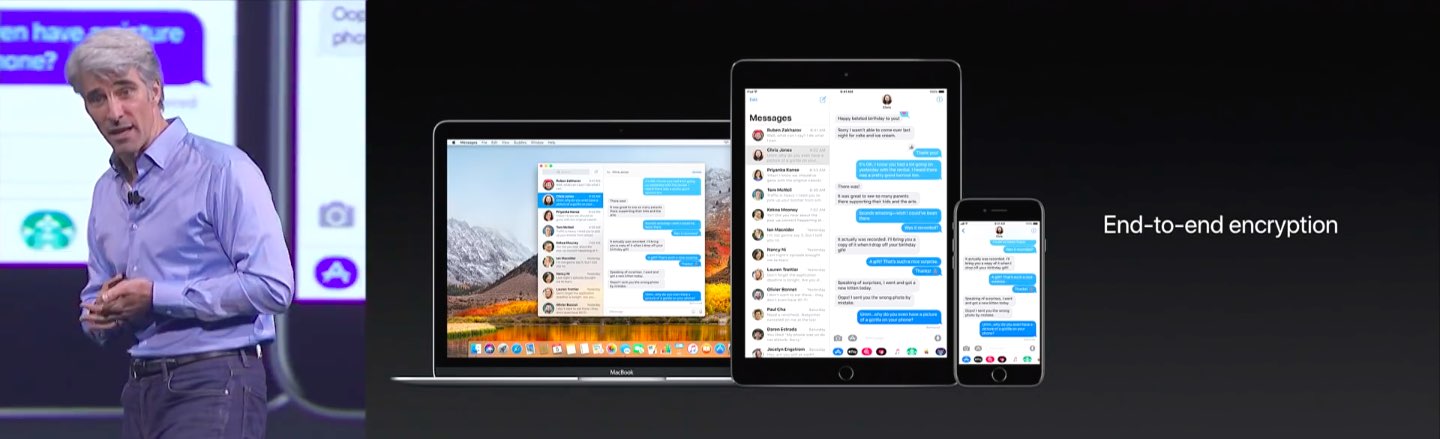
Note: You don’t need to give up your privacy and security when using this cool feature, because Messages in iCloud keeps your exchanges end-to-end encrypted.
Similar to iCloud Photos, Messages in iCloud keeps your Messages content continually synchronized across your iPhones, iPads, and Macs in a manner that helps optimize storage consumption. What’s more, deleting an embarrassing message from your transcript on an iPhone automatically wipes it clean from your other devices, and vice versa!
Apple summed it up best:
Messages in iCloud are updated automatically, so you always have the same view everywhere you use iMessage. When you delete a message, photo, or conversation on one device, it’s removed from all of your devices. And since all of your attachments are stored in iCloud, you can save space on your device.
Important: Messages in iCloud is a free feature, but be advised that your synced texts, threads, attachments, and other content count against your iCloud storage allotment. If you’re on a free 5 GB plan, you might want to upgrade to a paid tier or free up sufficient iCloud space.
Turn on Messages in iCloud
You must enable the feature separately on each device you’d like to use it on.
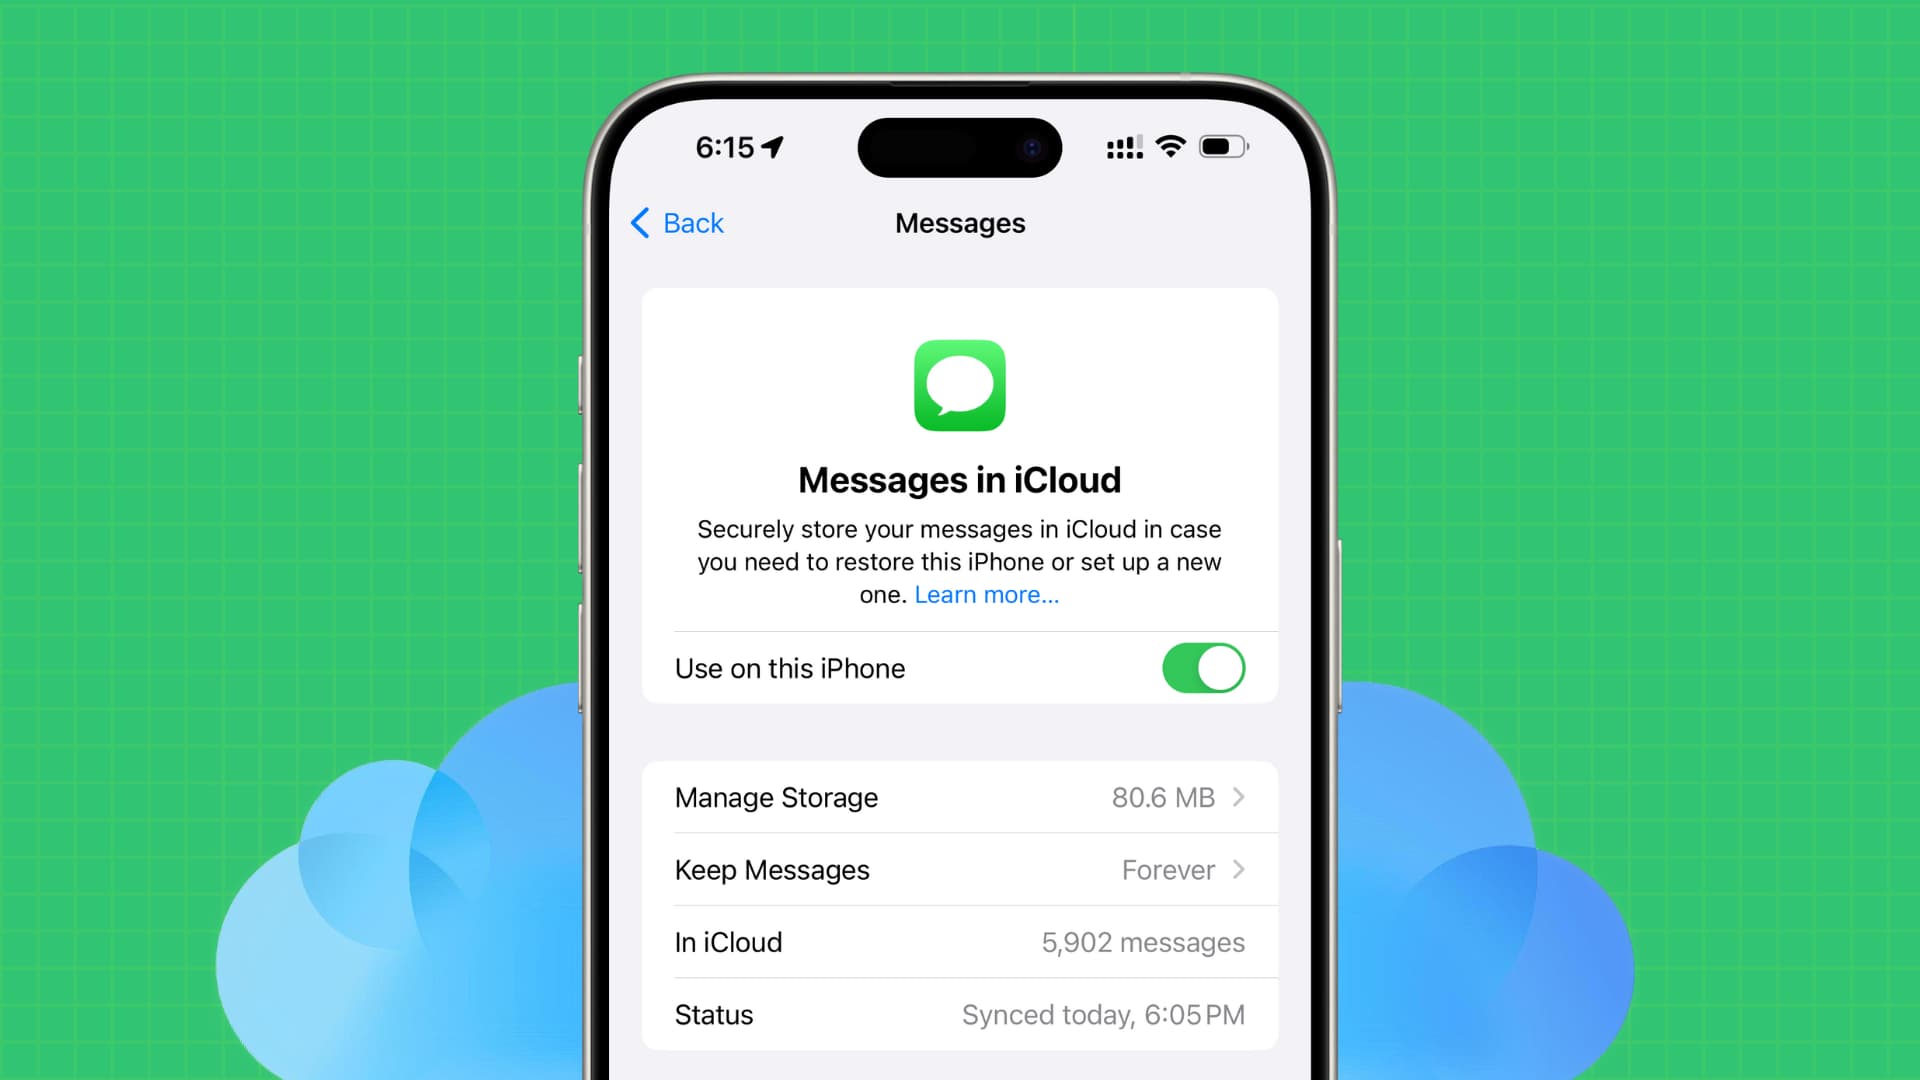
On iPhone or iPad
- Open the iOS Settings app and tap your name at the top.
- Tap iCloud.
- Tap Messages.
- Turn on the switch for Use on this iPhone or iPad.

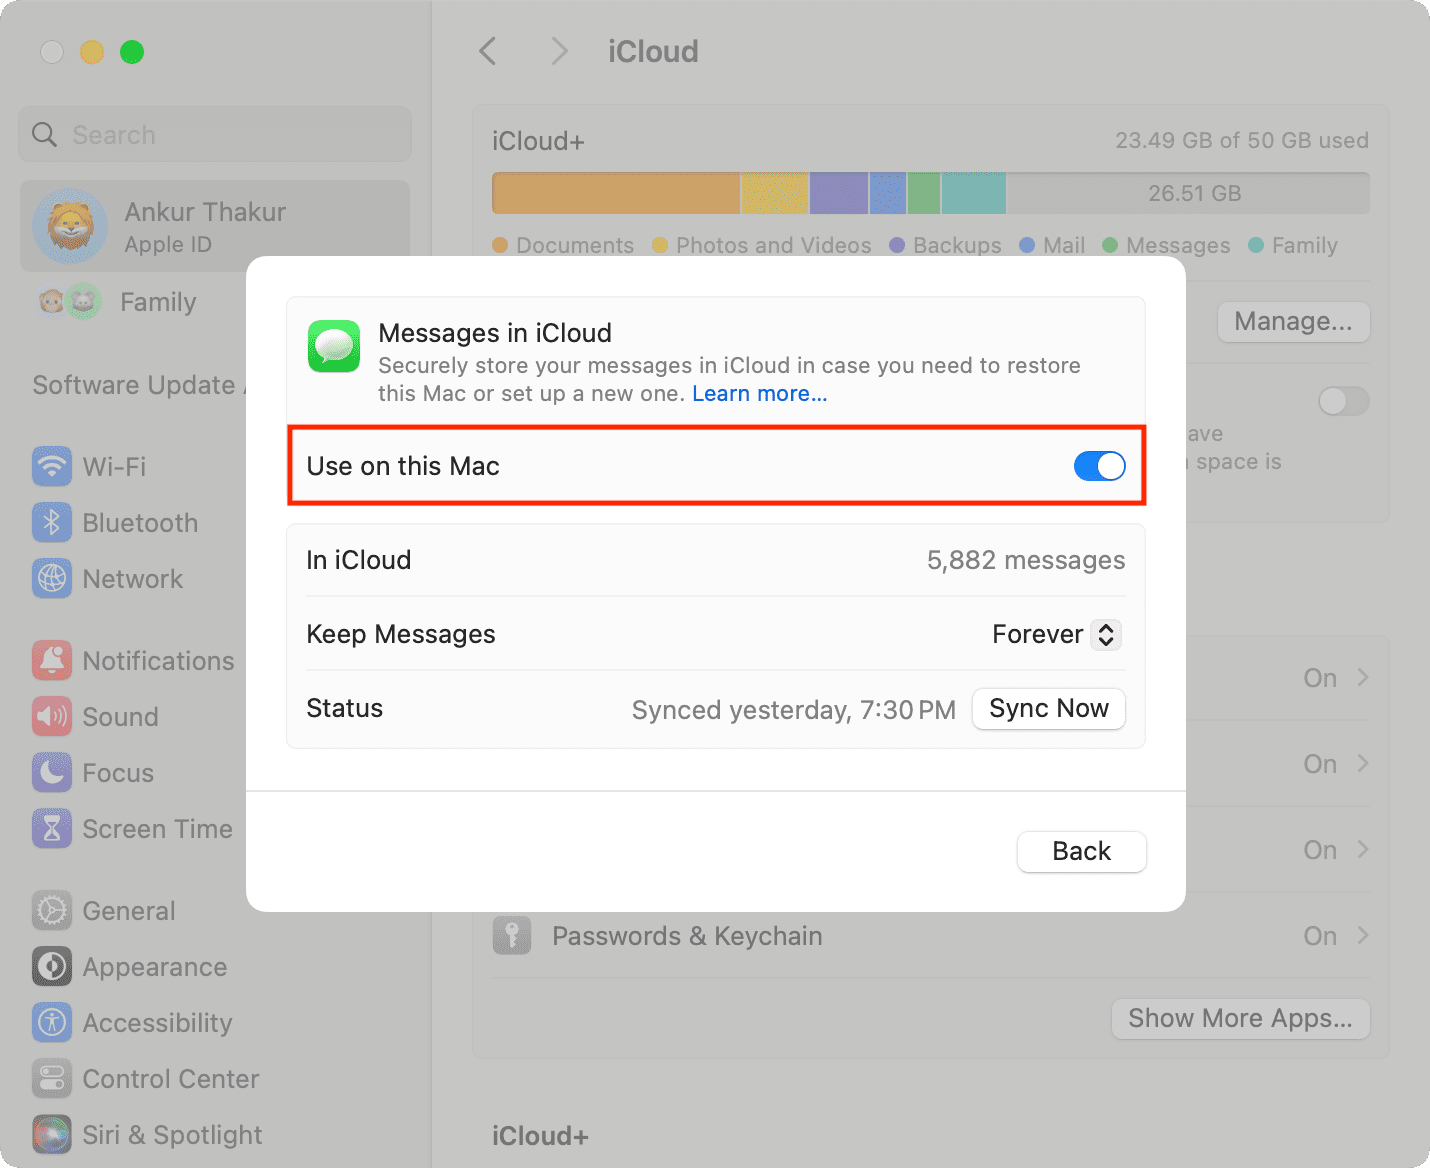
On Mac
- Launch System Settings and click your Apple Account name from the top left.
- Click iCloud > Messages.
- Turn on Use on this Mac and click Done.
On older versions of iOS, iPadOS, or macOS, go to Settings/System Settings > Apple ID > iCloud > Show All/Show More Apps > Messages in iCloud.
Depending on the number of texts and the size of attachments, the initial background sync may take anywhere between a few seconds and a couple of minutes or more. To accelerate the process, it might be a good idea to connect your device to a fast Wi-Fi network and a power source.
Not seeing some messages? Force the Messages app to sync on demand
The Messages app will sync and update all your texts and attachments automatically. However, if you find something missing and you have not deleted it, go back to the Messages in iCloud screen and hit Sync Now. Connect your iPhone to Wi-Fi if messages don’t sync over cellular data.

Two other useful tips to ensure your messages are visible on all your devices
- You must sign in with the same Apple Account on all your devices.
- Secondly, you can switch on text message forwarding on your iPhone to have your SMS and MMS on your iPad and Mac.
Turn off iCloud Messages on a particular device
You can disable this feature on a per-device basis or disable it on all devices in one fell swoop (explained later below).
- Go to the Messages in iCloud screen on your iPhone, iPad, or Mac.
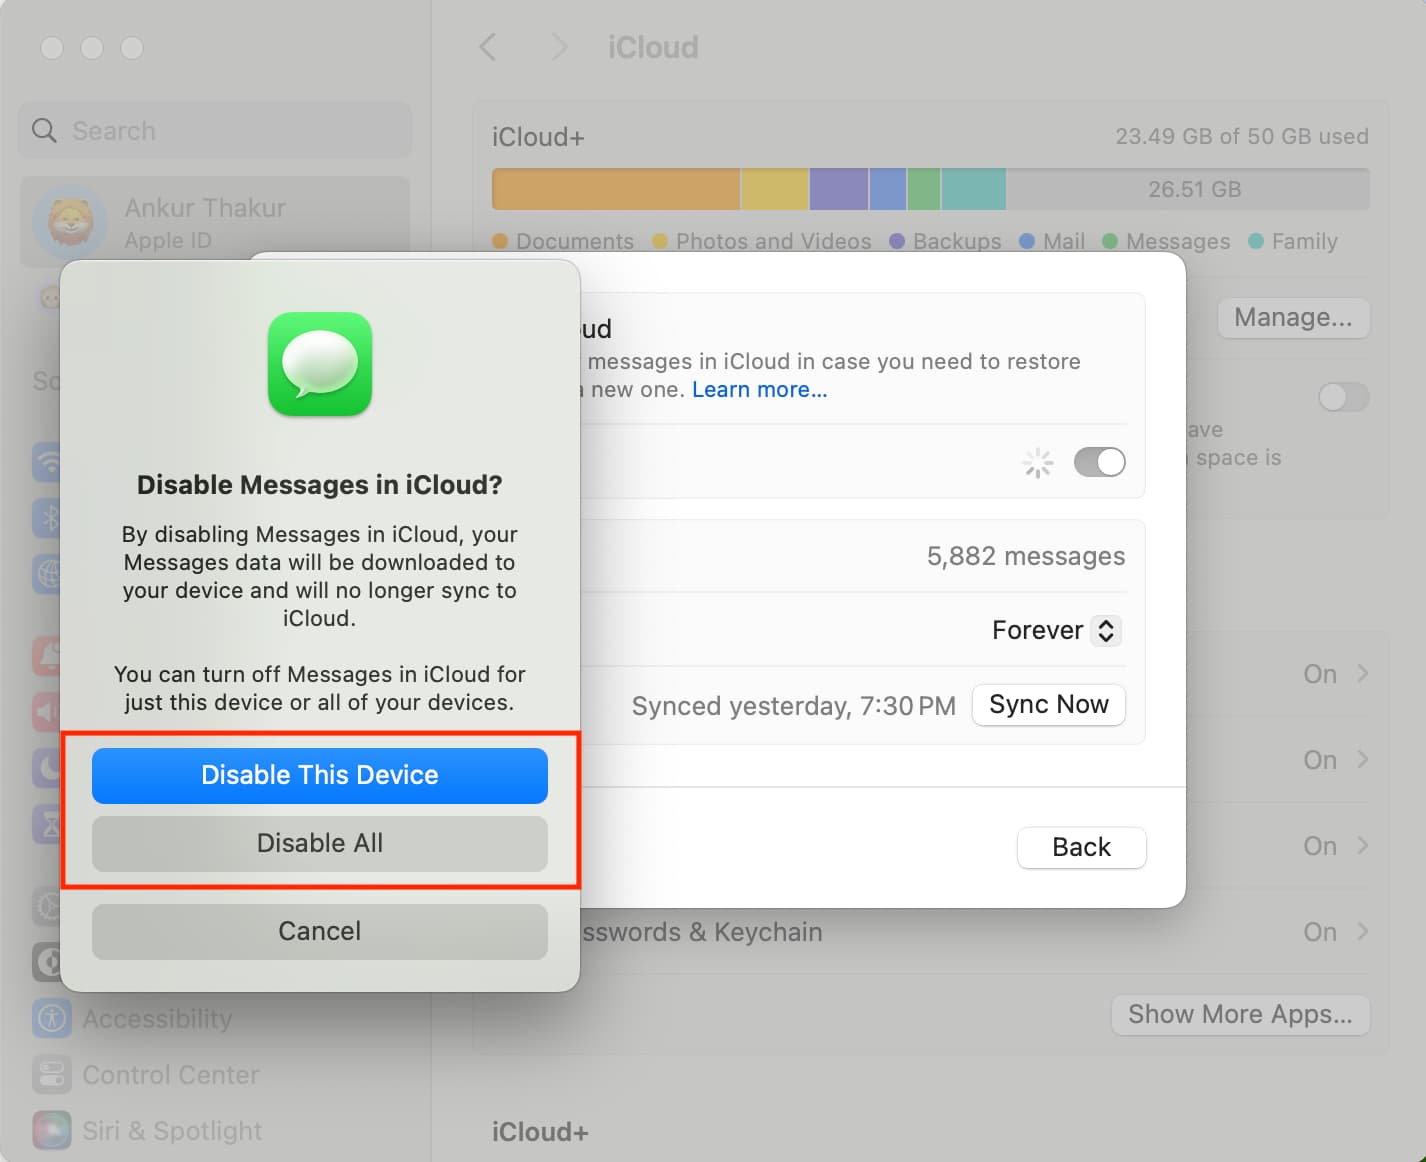
- Turn off the switch for Use on this iPhone / iPad / Mac.
- You’ll now see a prompt showing “Disable and Download Messages” or “Cancel.” Disabling the feature prompts the device to first download the full, most recent Messages database from iCloud. By disabling Messages in iCloud, your Messages data will be downloaded to your device and will no longer sync to iCloud. If you don’t want to turn off this feature, you can tap Cancel to abort this operation.

Note that if you’re on a Mac, a pop-up will appear asking you to Disable This Device (turn off Messages in iCloud for this Mac only) or Disable All (turn off Messages in iCloud across all your devices).
As a precaution, any device that still has Messages in iCloud turned on shall continue to store what you send and receive from that device in iCloud. If you want, you can disable Messages in iCloud across all your devices at once, especially if you’d like to permanently remove your chat history from Apple’s servers and free up iCloud storage.
Delete all iCloud Messages from all devices
Follow these steps to remove all your messages from iCloud and disable this feature on all your devices. You’ll have 30 days to download your messages before they’re deleted from Apple’s servers. To prevent any confusion, the device from which this action is initiated will automatically download your messages before completely turning off Messages in iCloud everywhere.
- Open iOS Settings or macOS System Settings. We’re using an iPhone for these steps.
- Return to the Messages in iCloud screen and tap Manage Storage.
- Tap Turn Off and Delete from iCloud and confirm.

To undo this operation and bring back your full conversation archive, you must visit this section in Settings within the 30-day cutoff window and tap the option labeled Undo Disable & Delete.
Important: After you turn off Messages in iCloud, your messages will be included in your regular iPhone or iPad’s iCloud backup, provided you don’t turn it off.
Check out next: How to see your recently deleted messages and recover them