Filter out junk notifications and get alerted only about the stuff you care about by turning on the quality filter option in the X app or website.
Any time someone mentions you on X, you’ll see the person’s post in your Notifications timeline.
X includes tools to help filter out the junk, so if you want to keep yourself from having to look at junk in your Notifications timeline, then you might want to enable its quality filtering tools.
You can enable the quality filter both from the web and from the mobile app on your iPhone or iPad. We’ll show you both methods, but keep in mind you won’t need to do both as your settings sync across all of your devices when you enable the quality filter from just one device.
About the quality filter
According to X, the quality filter prevents you from seeing the following in both notifications and in general searches:
- Duplicate posts that exist already and have been sent more than once
- Content that appears to be automated and not from an individual
The quality filter will not:
- Keep you from seeing content you’ve interacted with by replying
- Keep you from seeing content from people you follow on X
On web
- Visit X.com in a web browser and click Notifications from the left sidebar.
- Click the settings icon at the top right of your notifications feed.
- Click Filters, and check the Quality filter box.
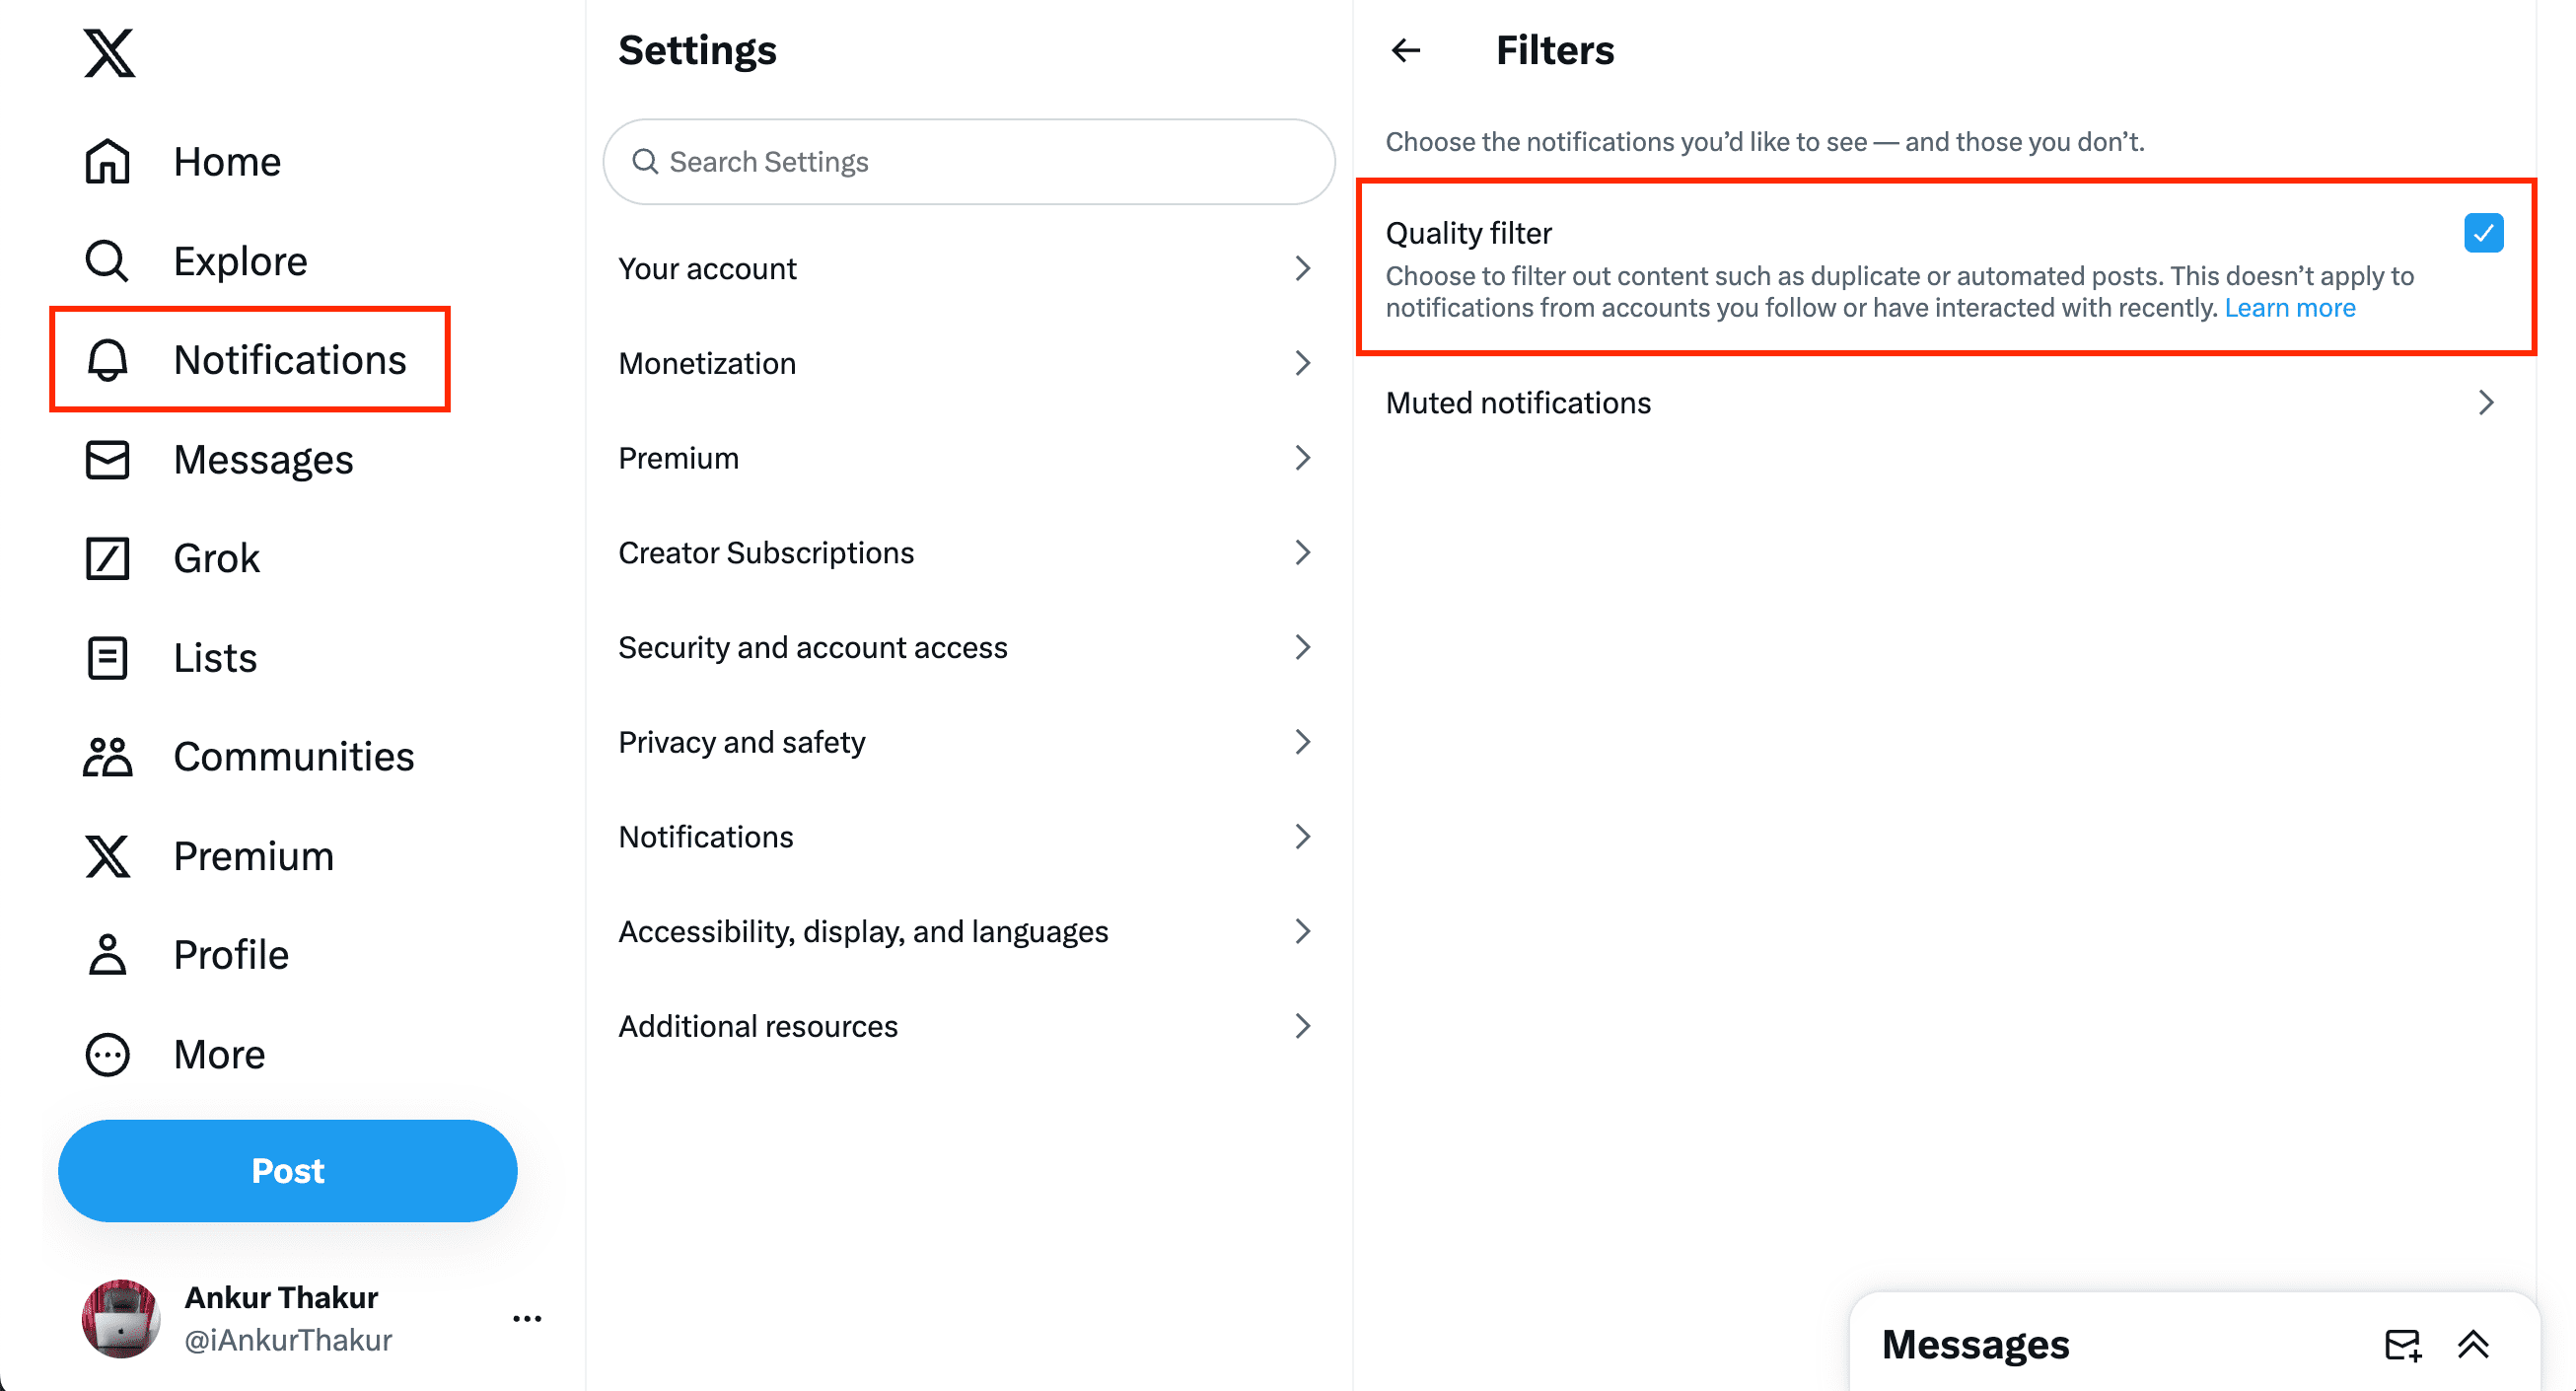
Your quality filter has been enabled and is effective immediately.
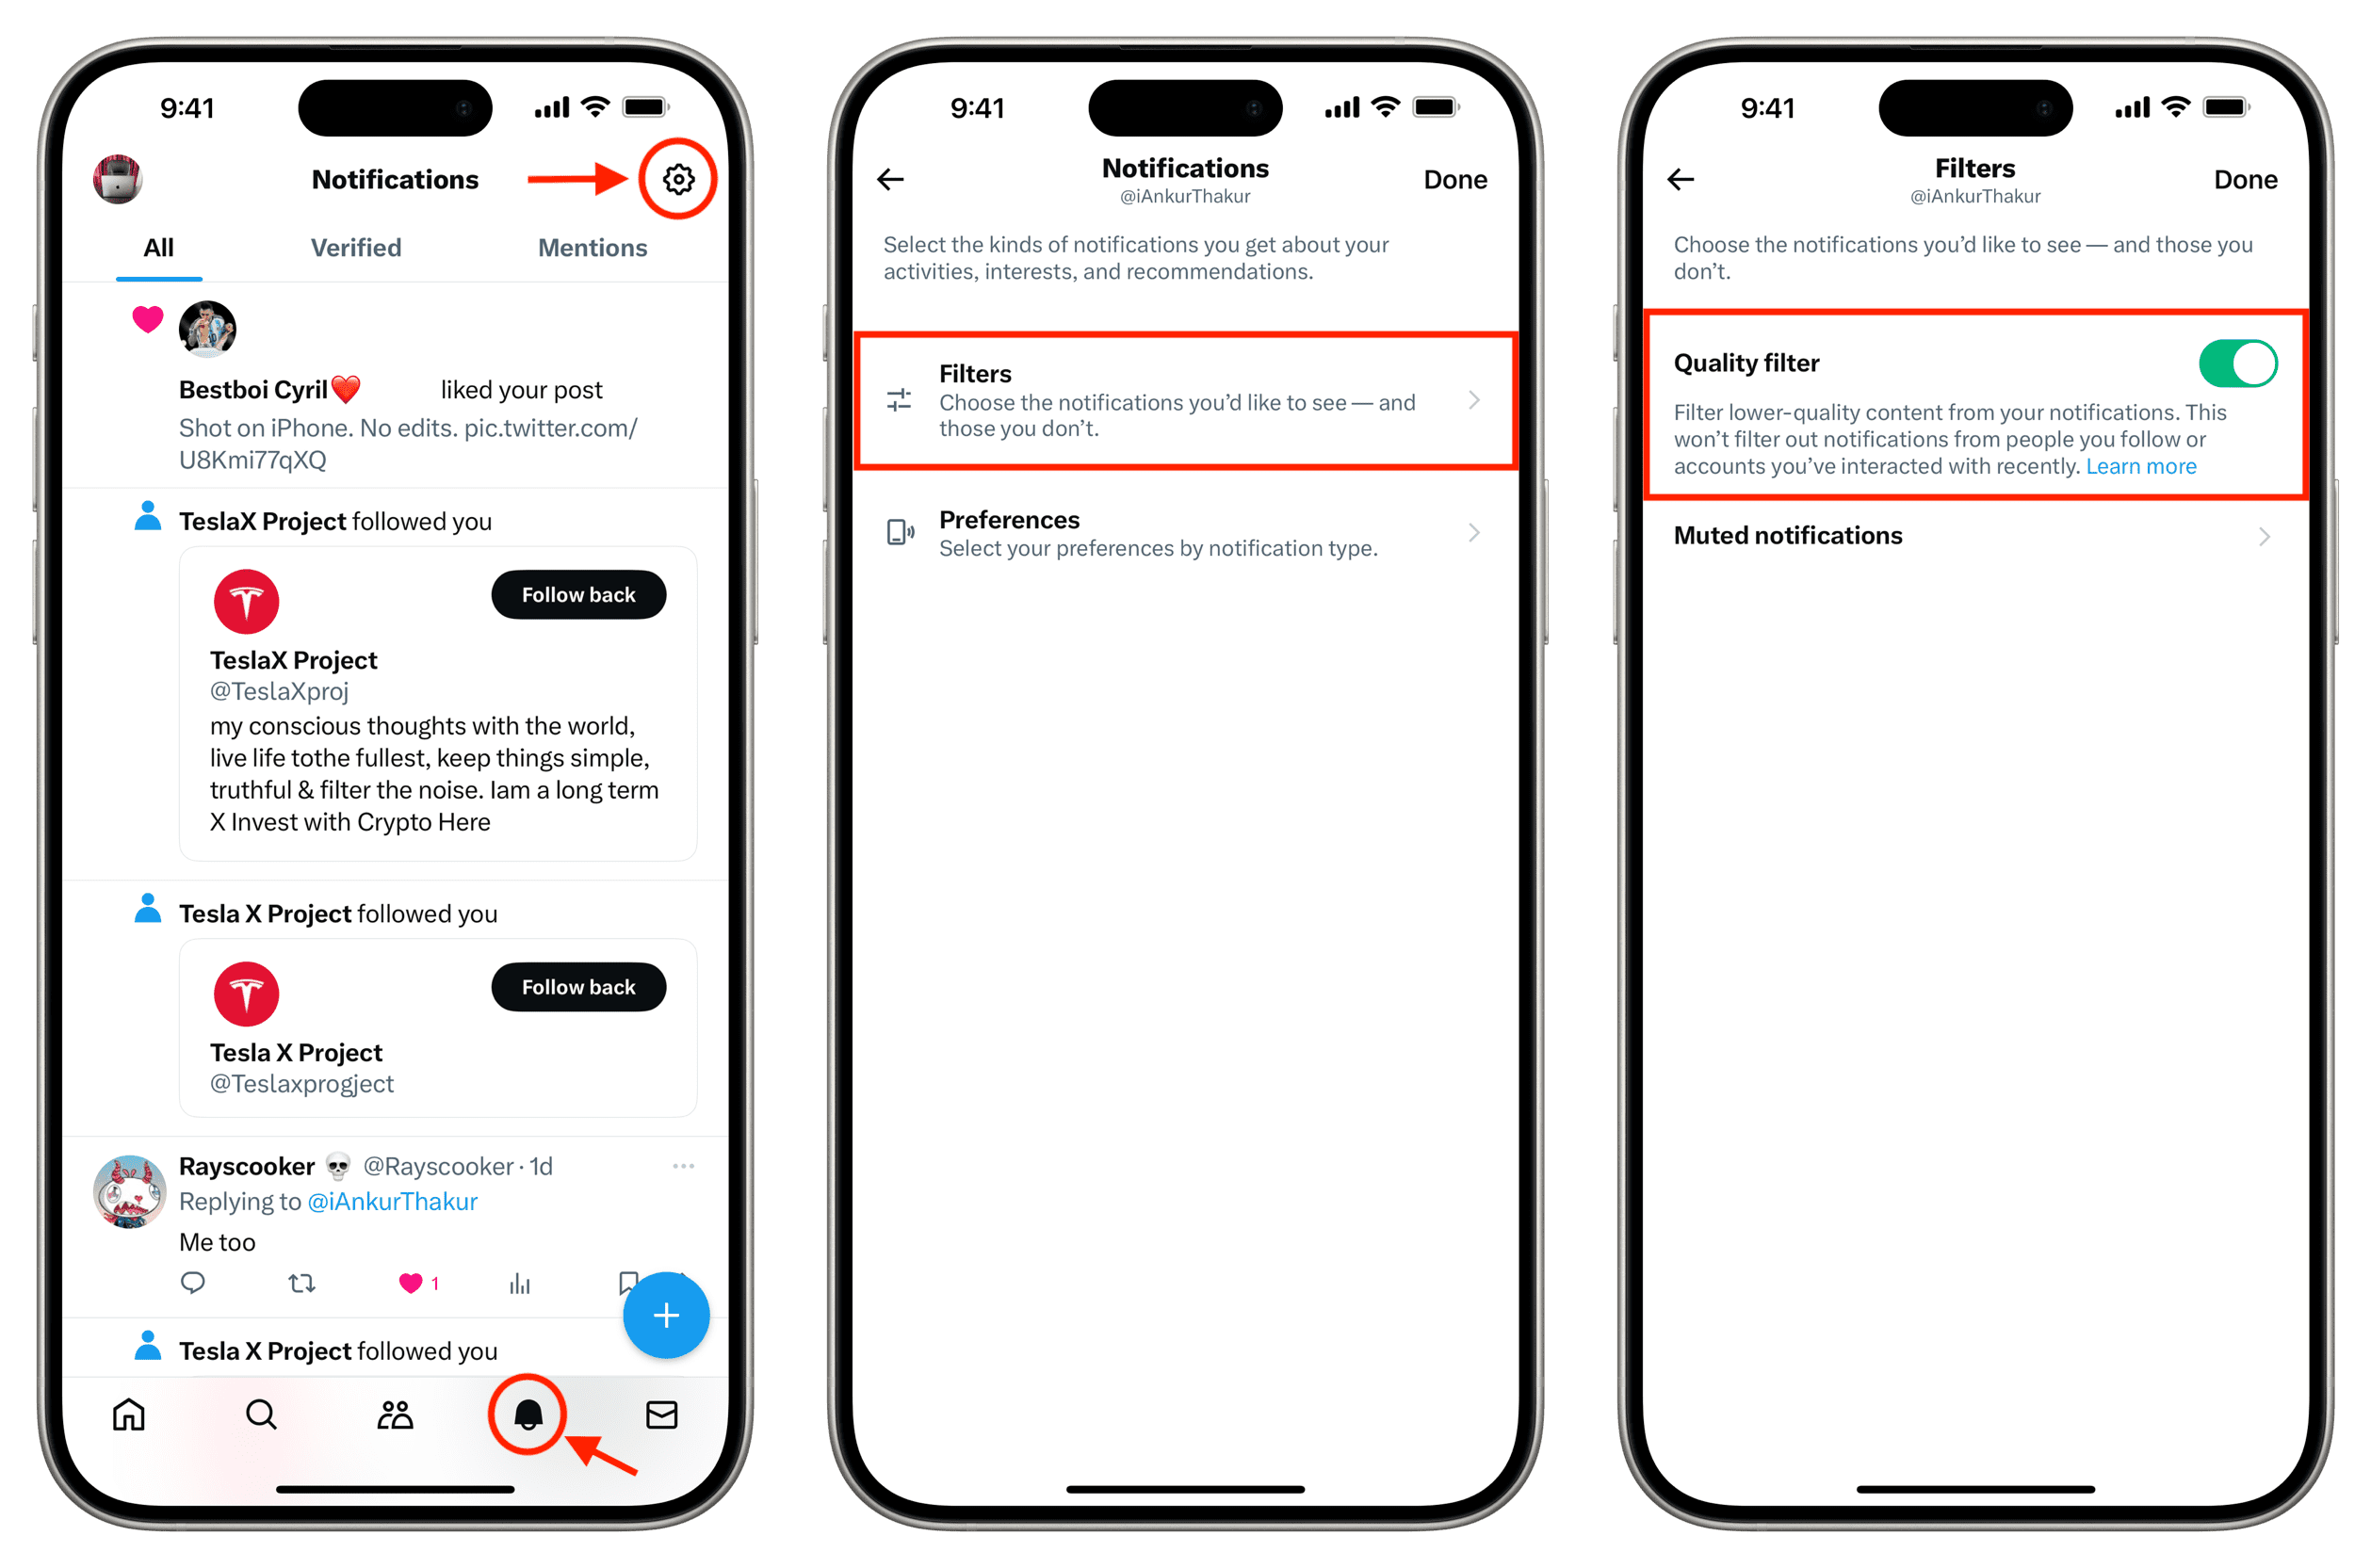
From the app
- Launch the X app on your iPhone, iPad, or Android phone.
- Go to the notifications tab and tap the settings cog button at the top.
- Tap Filters.
- Toggle on the Quality filter switch and tap Done to save your changes.
Also, check out: