A trusted device is an iPhone, iPad, or Mac, where you have previously signed in using your Apple ID. Trusted devices are used to verify your identity when signing in and keep your Apple ID secure with two-factor authentication.
In this tutorial, we will go over trusted devices for Apple ID two-factor authentication, their requirements, and some other pieces of valuable information that you should know.
What’s two-factor authentication in Apple ID?
A computer or system can identify you by asking one of these:
- Something you are (like your fingerprint or your face)
- Something you know (like Apple ID email and password)
- Something you have (physical device or code that’s only with you)
Using at least two of the above factors to confirm identity is considered excellent. This way, the computer verifies your identity at a multi-level, ensuring it’s genuinely you who is trying to gain access. This is called two-factor authentication (2FA). Source: Tom Scott’s must-watch video
Apple uses two-factor authentication to secure your Apple ID and its data.
Suppose you try to log in to your Apple ID from a friend’s computer. You enter your Apple ID email and the correct password (something you know). As an additional layer of protection, Apple will send you a six-digit code on your trusted device or trusted phone number (something you have). Once you enter this code, you have successfully verified yourself at two levels. After this, you are logged in.
In summary, two-factor authentication protects your Apple ID and ensures no one can get unwarranted access to it, even if they have your Apple ID password. 2FA is built into the core of Apple operating systems like iOS and macOS.
Must read: How to set up Two-Factor Authentication for your Apple ID
What’s a trusted device?
A trusted device is an iPhone, iPad, or Mac that Apple knows is yours. Apple can send a verification code to these trusted devices to confirm your identity when you try to sign in from a new/different device or browser.
Trusted devices can also generate offline verification codes.
What’s a trusted phone number?
Like trusted devices, trusted phone numbers are added to your Apple ID and verified by a code received on this phone number (via text or call).
When you can’t receive the verification code on your trusted devices, you can choose to get them on your trusted phone number.
To ensure you aren’t locked out, make sure you add more than one phone number to your Apple ID. You can use your number and that of a close person like a spouse or parents. This way, if you lose your phone, the verification code can be sent to your spouse’s number.
Requirements to set a device as a trusted device
- iPhone or iPad running iOS 9 or later
- iPad running iPadOS 13 or later
- Mac running OS X El Capitan or later
- Apple Watch running watchOS 6 or later can receive verification codes needed to sign in to your Apple ID. But it can’t be used as a trusted device to reset passwords.
How to add a trusted device to your Apple ID
To add a trusted device to your Apple ID, simply sign in to a new iPhone, iPad, or Mac with your Apple ID. You will receive a 6-digit code on one of your already trusted devices. Once you verify the new device entering the code sent to your other device, this new iPhone, iPad, or Mac will be added as a trusted device. Now, it can receive two-factor authentication codes too!
If you didn’t sign in with your Apple ID during setup, you can do it later from the iPhone, iPad Settings app, or Mac’s System Preferences.
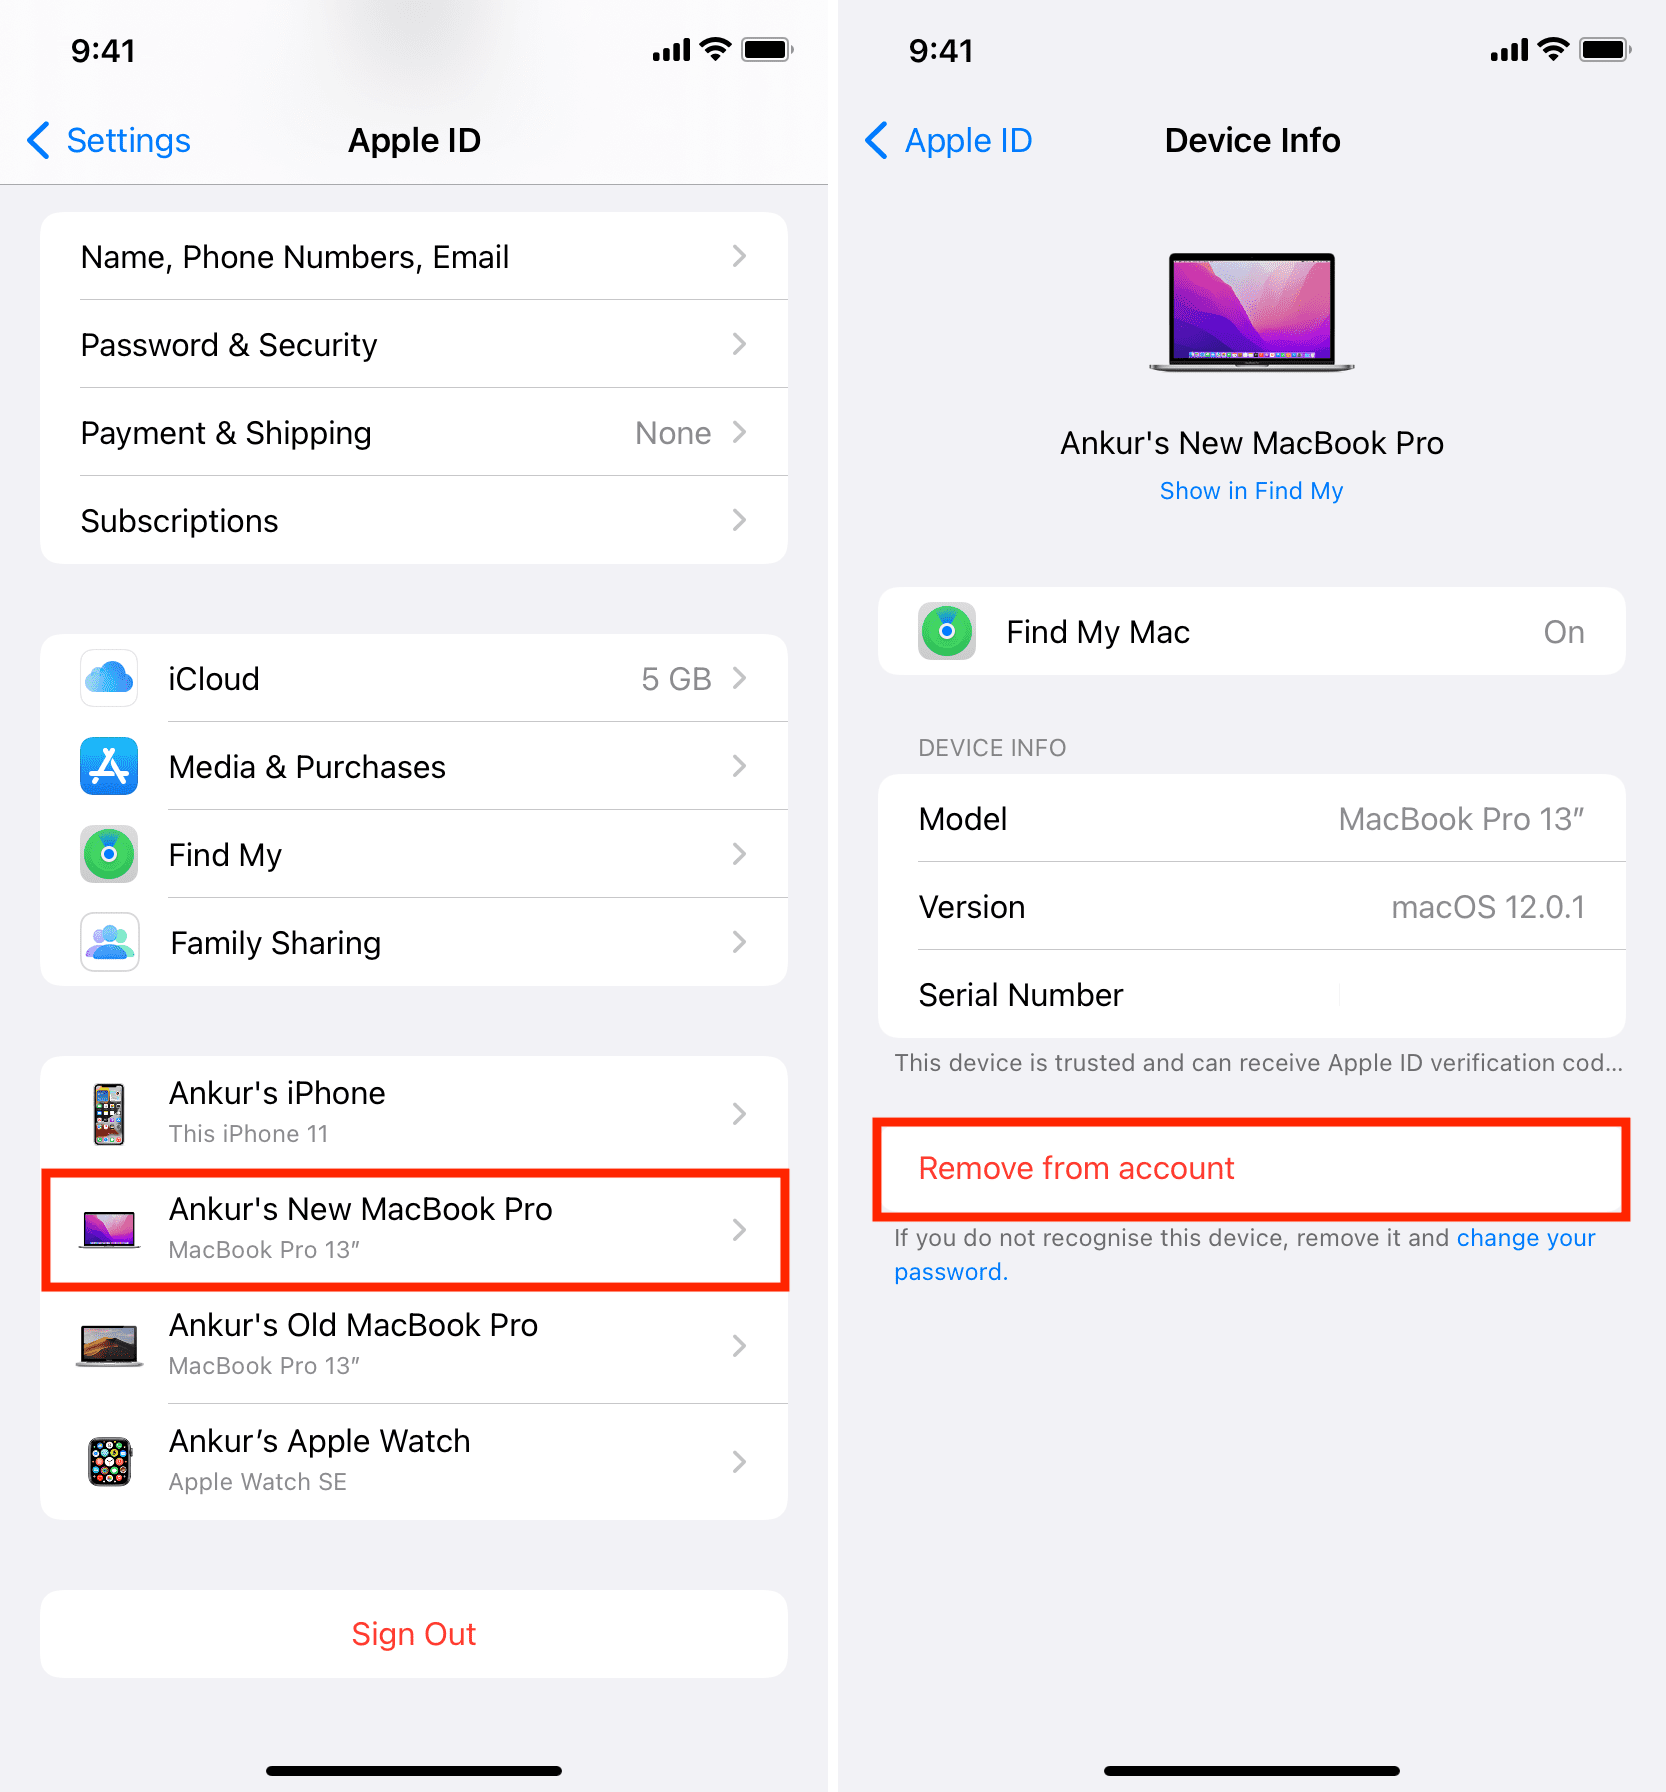
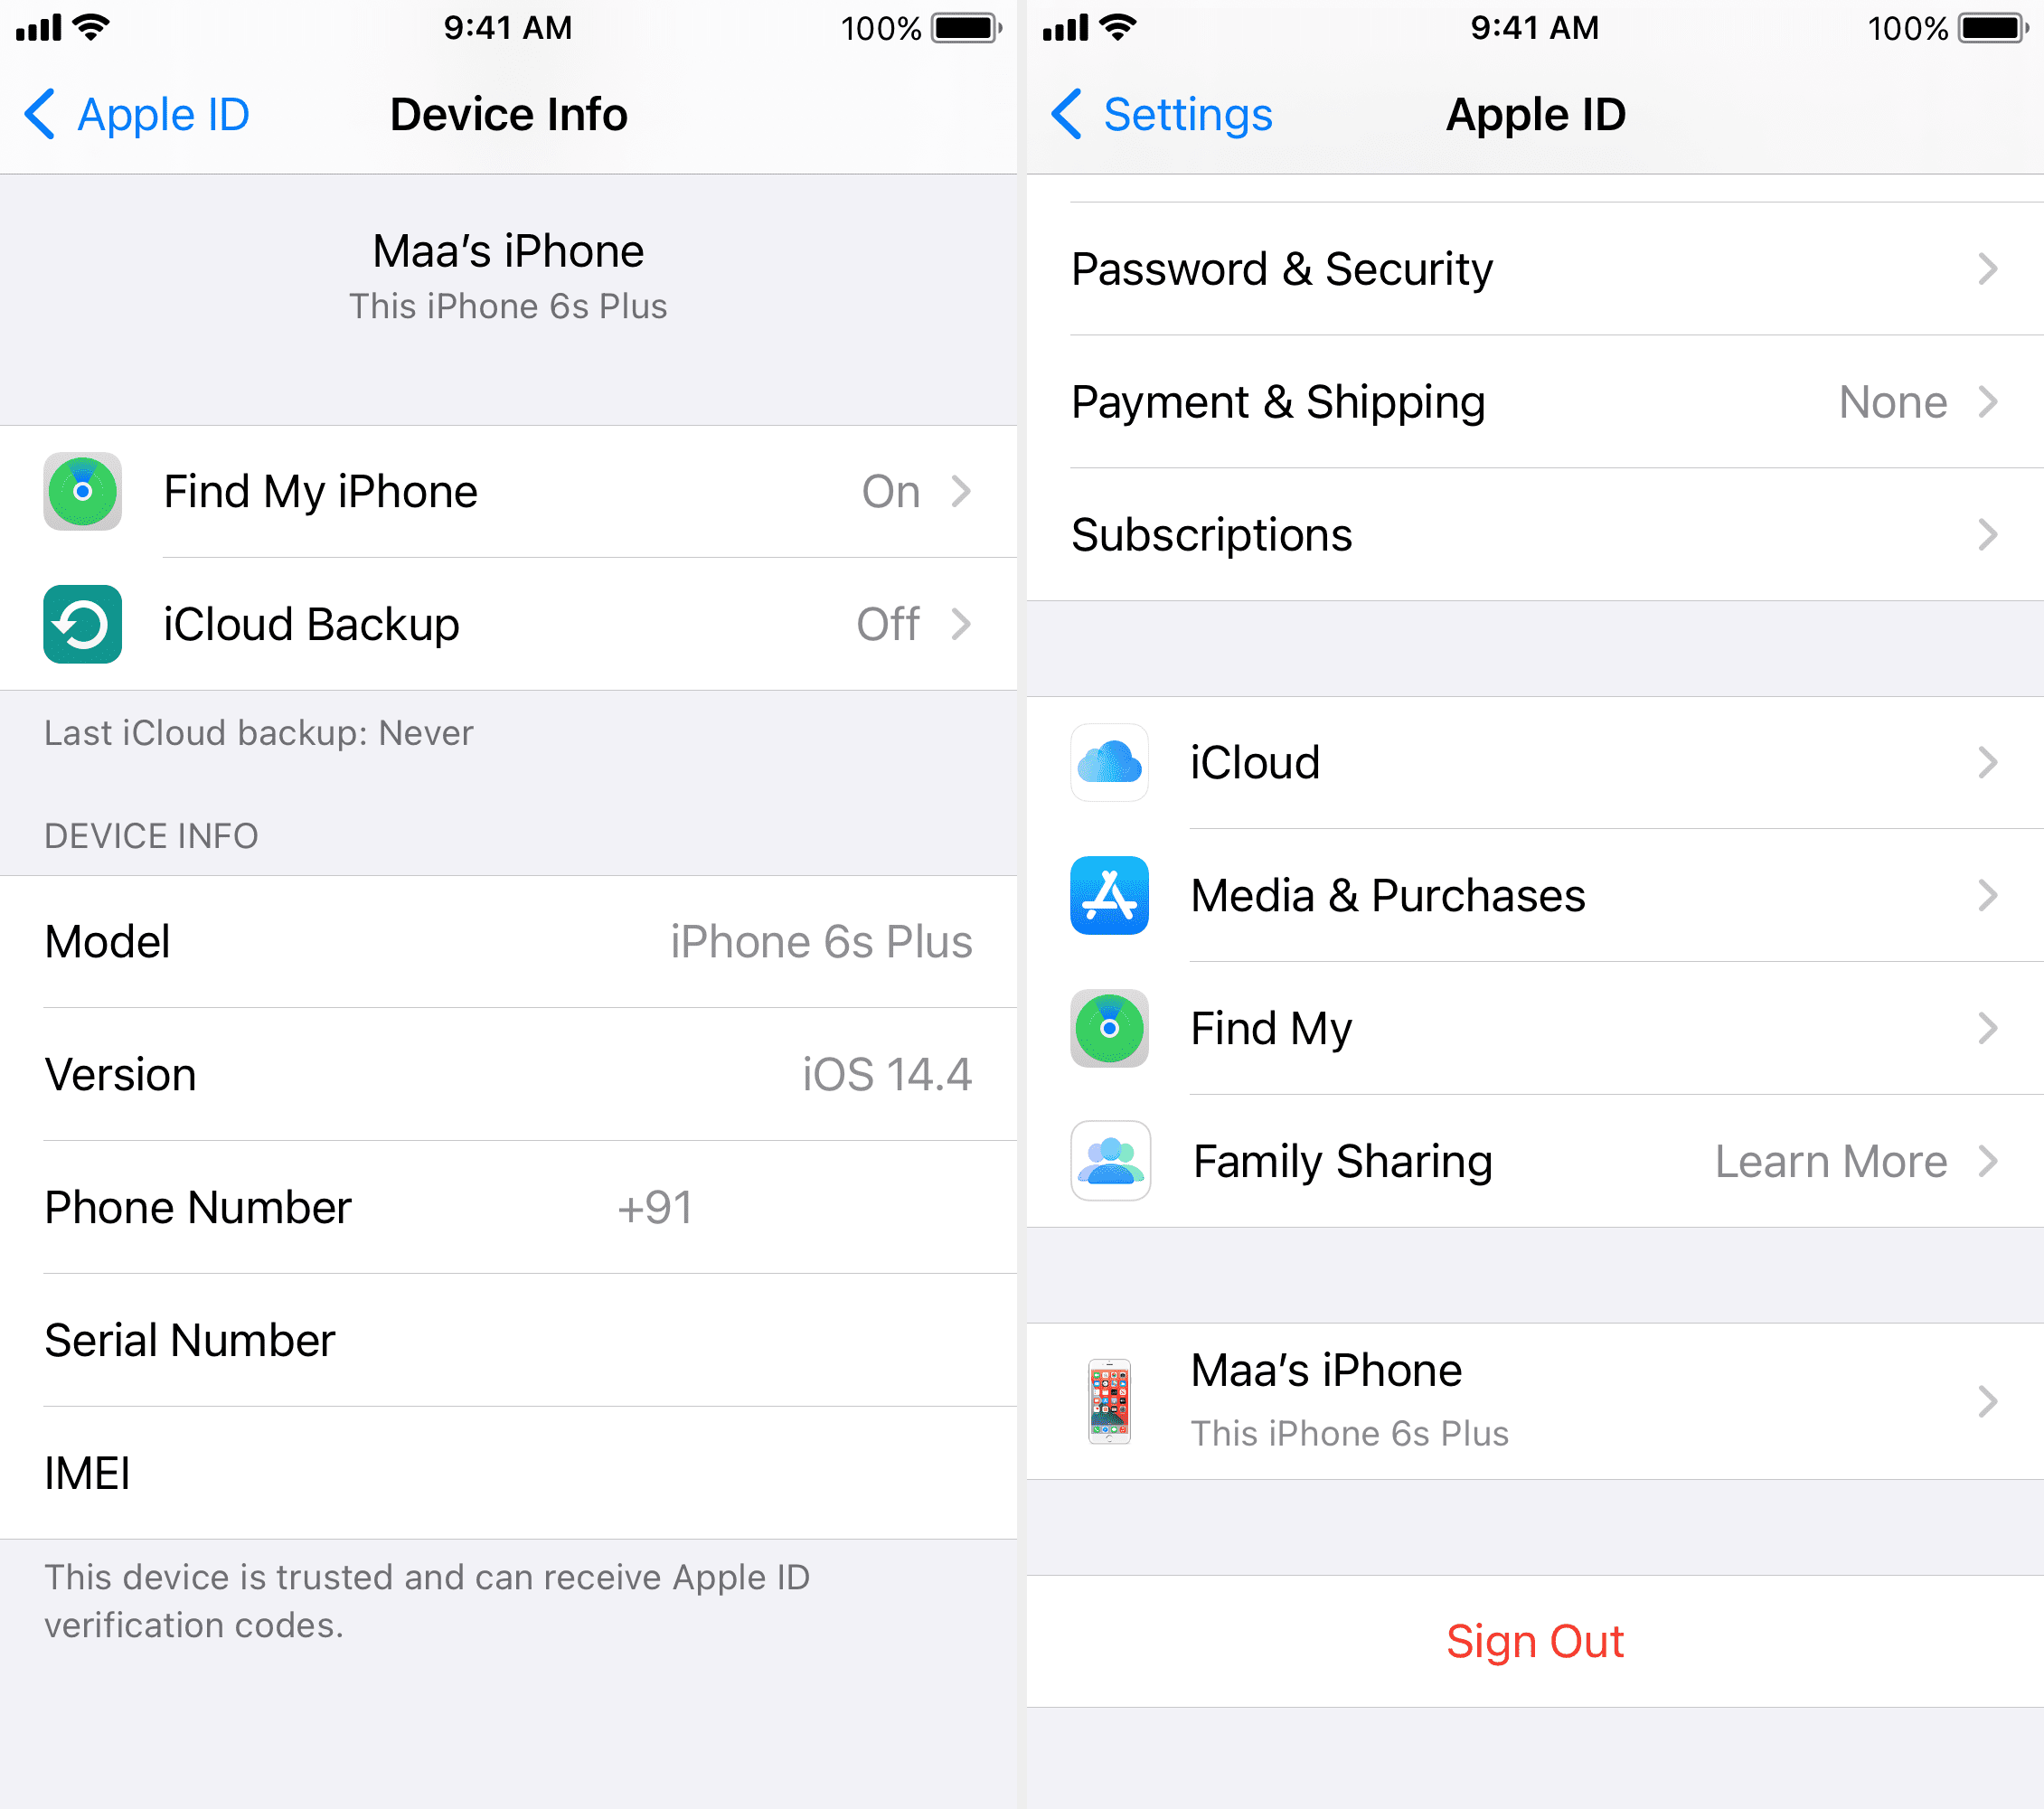
To check if your Apple device is trusted or not, follow these steps:
- Open Settings on iPhone or iPad.
- Tap your name from the top.
- Scroll down and tap a device.
- In tiny letters, it will say, “This device is trusted and can receive Apple ID verification codes.”

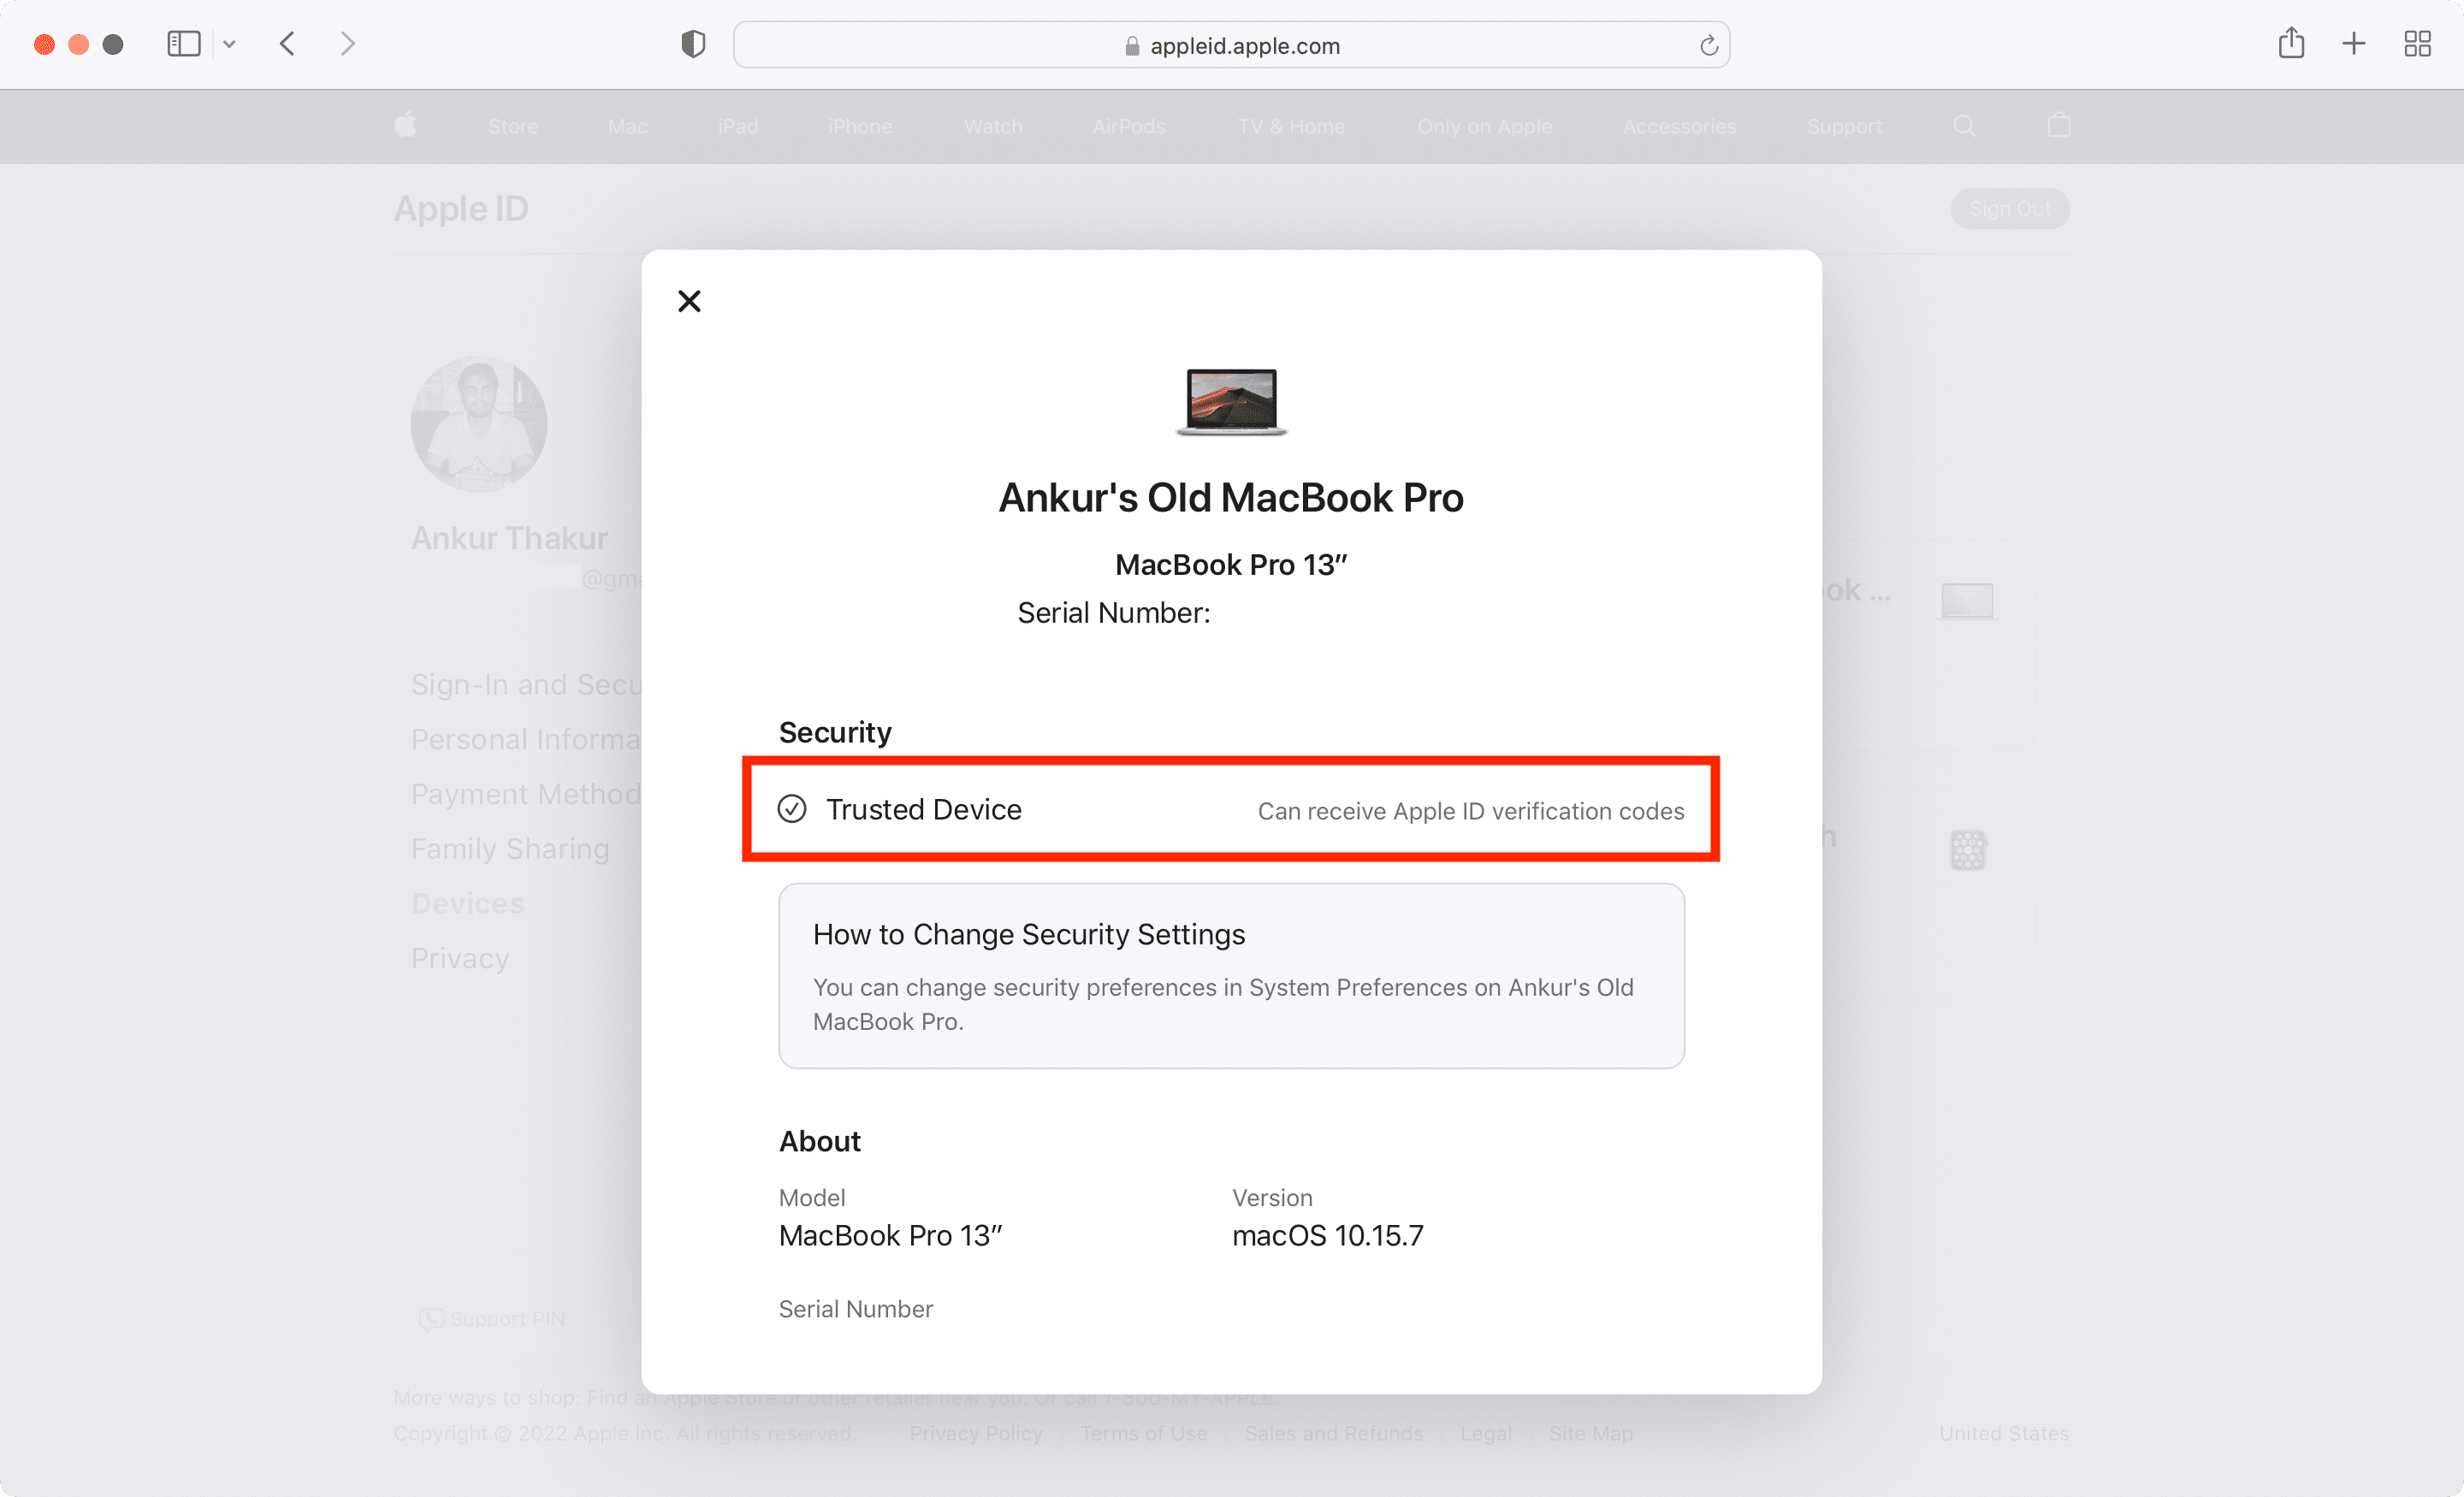
You cannot see this information in Mac’s System Preferences. But you can do that on the web.
- Go to the Manage Your Apple ID page and sign in using your Apple ID.
- Click Devices and select one of your added Apple devices.
- For a trusted device, it will display a checkmark and say, “Can receive Apple ID verification codes.”
How to generate 2FA login codes for Apple ID
Suppose you’re trying to sign in using your Apple ID but can’t receive the code Apple sends to your trusted devices or trusted phone number. Maybe there’s a network issue, or the popup with the code disappeared quickly. In these cases, you can generate the login verification code from your trusted iPhone, iPad, or Mac. You can get these codes even if the device is offline! Here’s how:
On iPhone or iPad
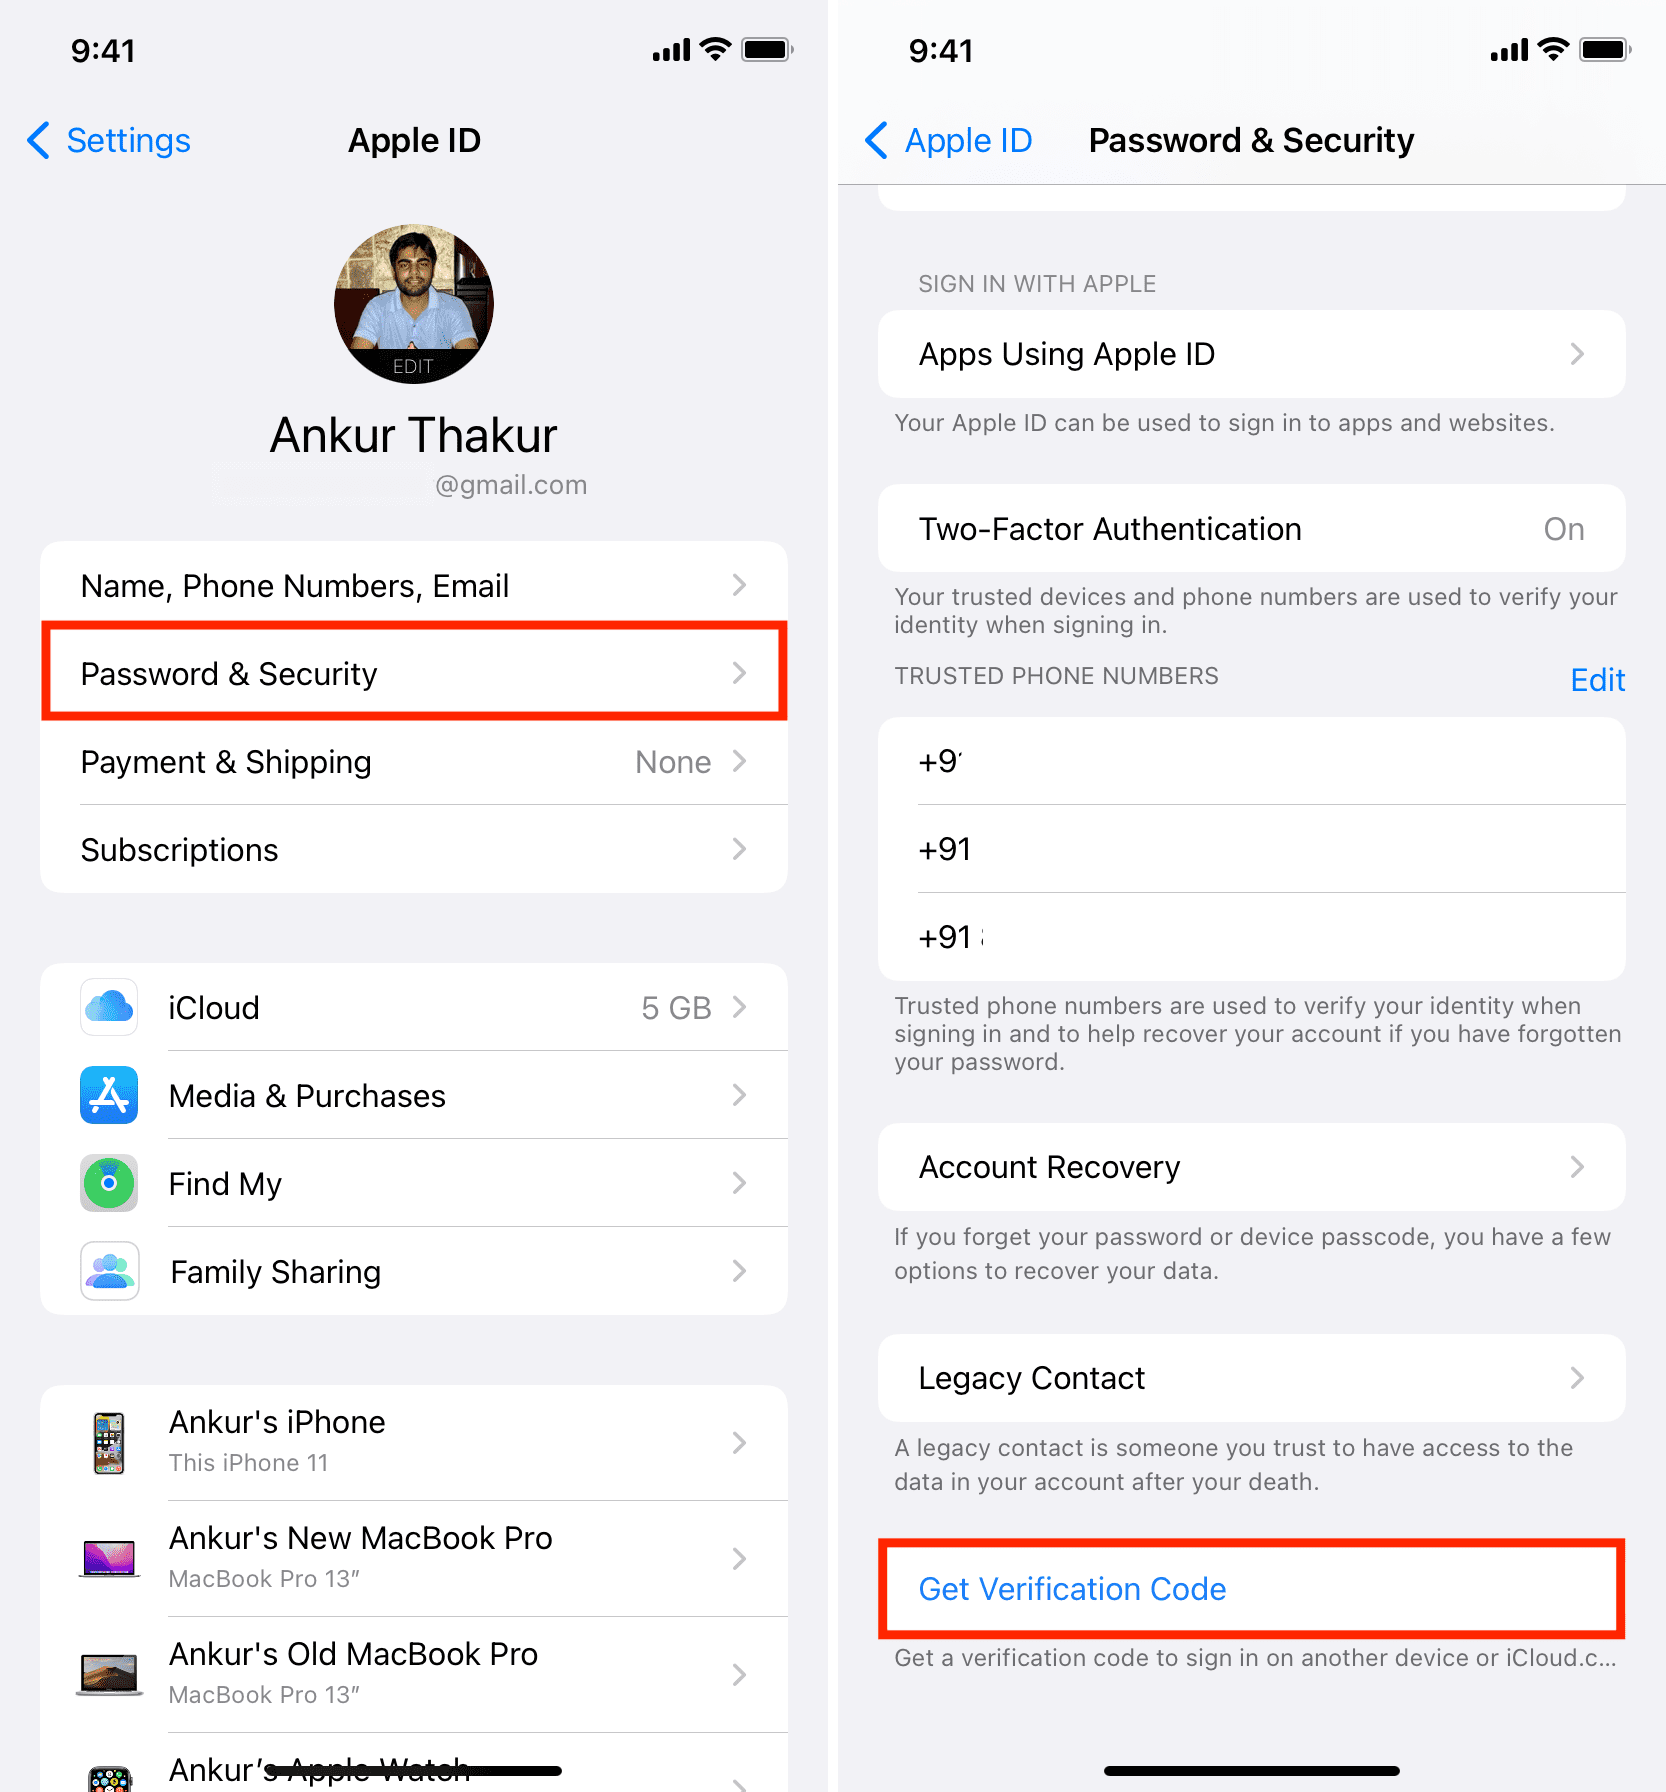
- Go to Settings and tap your name.
- Select Password & Security.
- Choose Get Verification Code. Use this code to authenticate your Apple ID sign-in process.
When your device isn’t connected to the internet, tap Password & Security and tap Get Verification Code from the popup.
On Mac
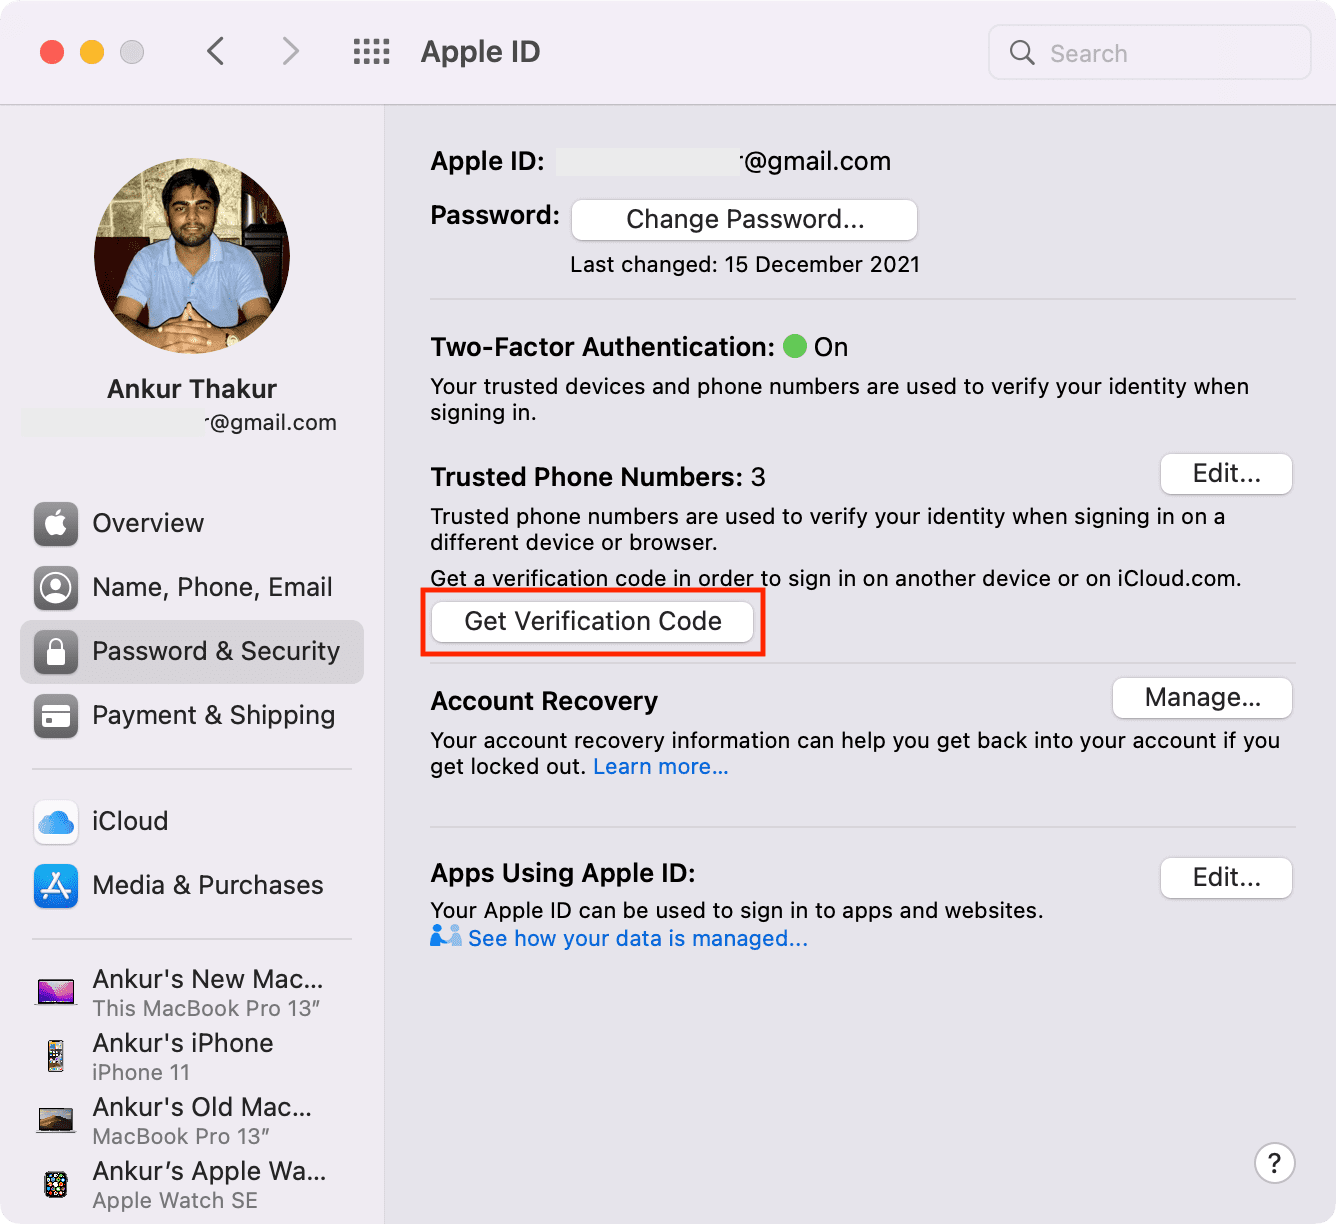
- Launch System Preferences and click Apple ID.
- Click Password & Security.
- Pick Get Verification Code.
You can get the code even when your trusted Mac isn’t connected to the internet.
How to remove a trusted device from Apple ID
To remove a device from your list of trusted devices, you will have to remove it from your Apple ID. After that, it’s delisted from your Apple ID and, therefore, won’t receive 2FA codes.
Additionally, after removing a device, you can’t use iCloud, Find My, and several other Apple services on it. You can, however, sign in to this device using another Apple ID. Or, if you change your mind, you can sign in with the same Apple ID.
Here’s how to remove trusted devices for Apple ID two-factor authentication:
Using iPhone or iPad
- Open Settings and tap your name from the top.
- Scroll down and tap a device.
- Tap Remove from account.
- Confirm by tapping Remove.
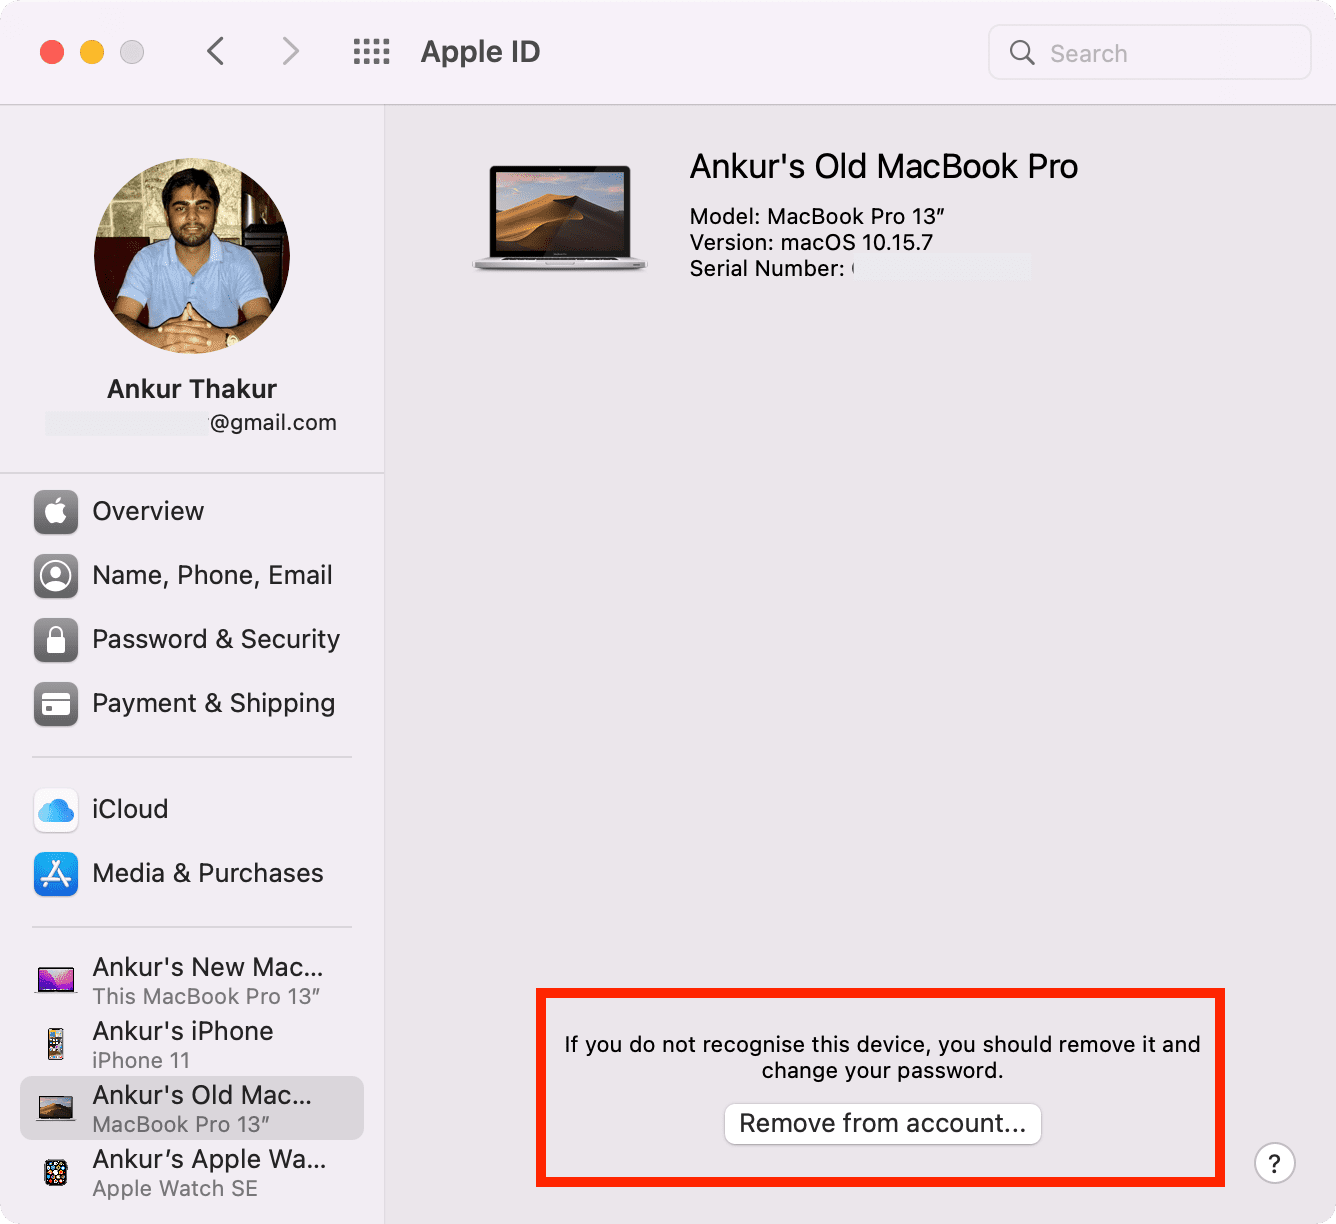
Using Mac
- Click and choose System Preferences.
- Click Apple ID.
- Select a device from the bottom left.
- Choose Remove from account.
- Select Remove to confirm.
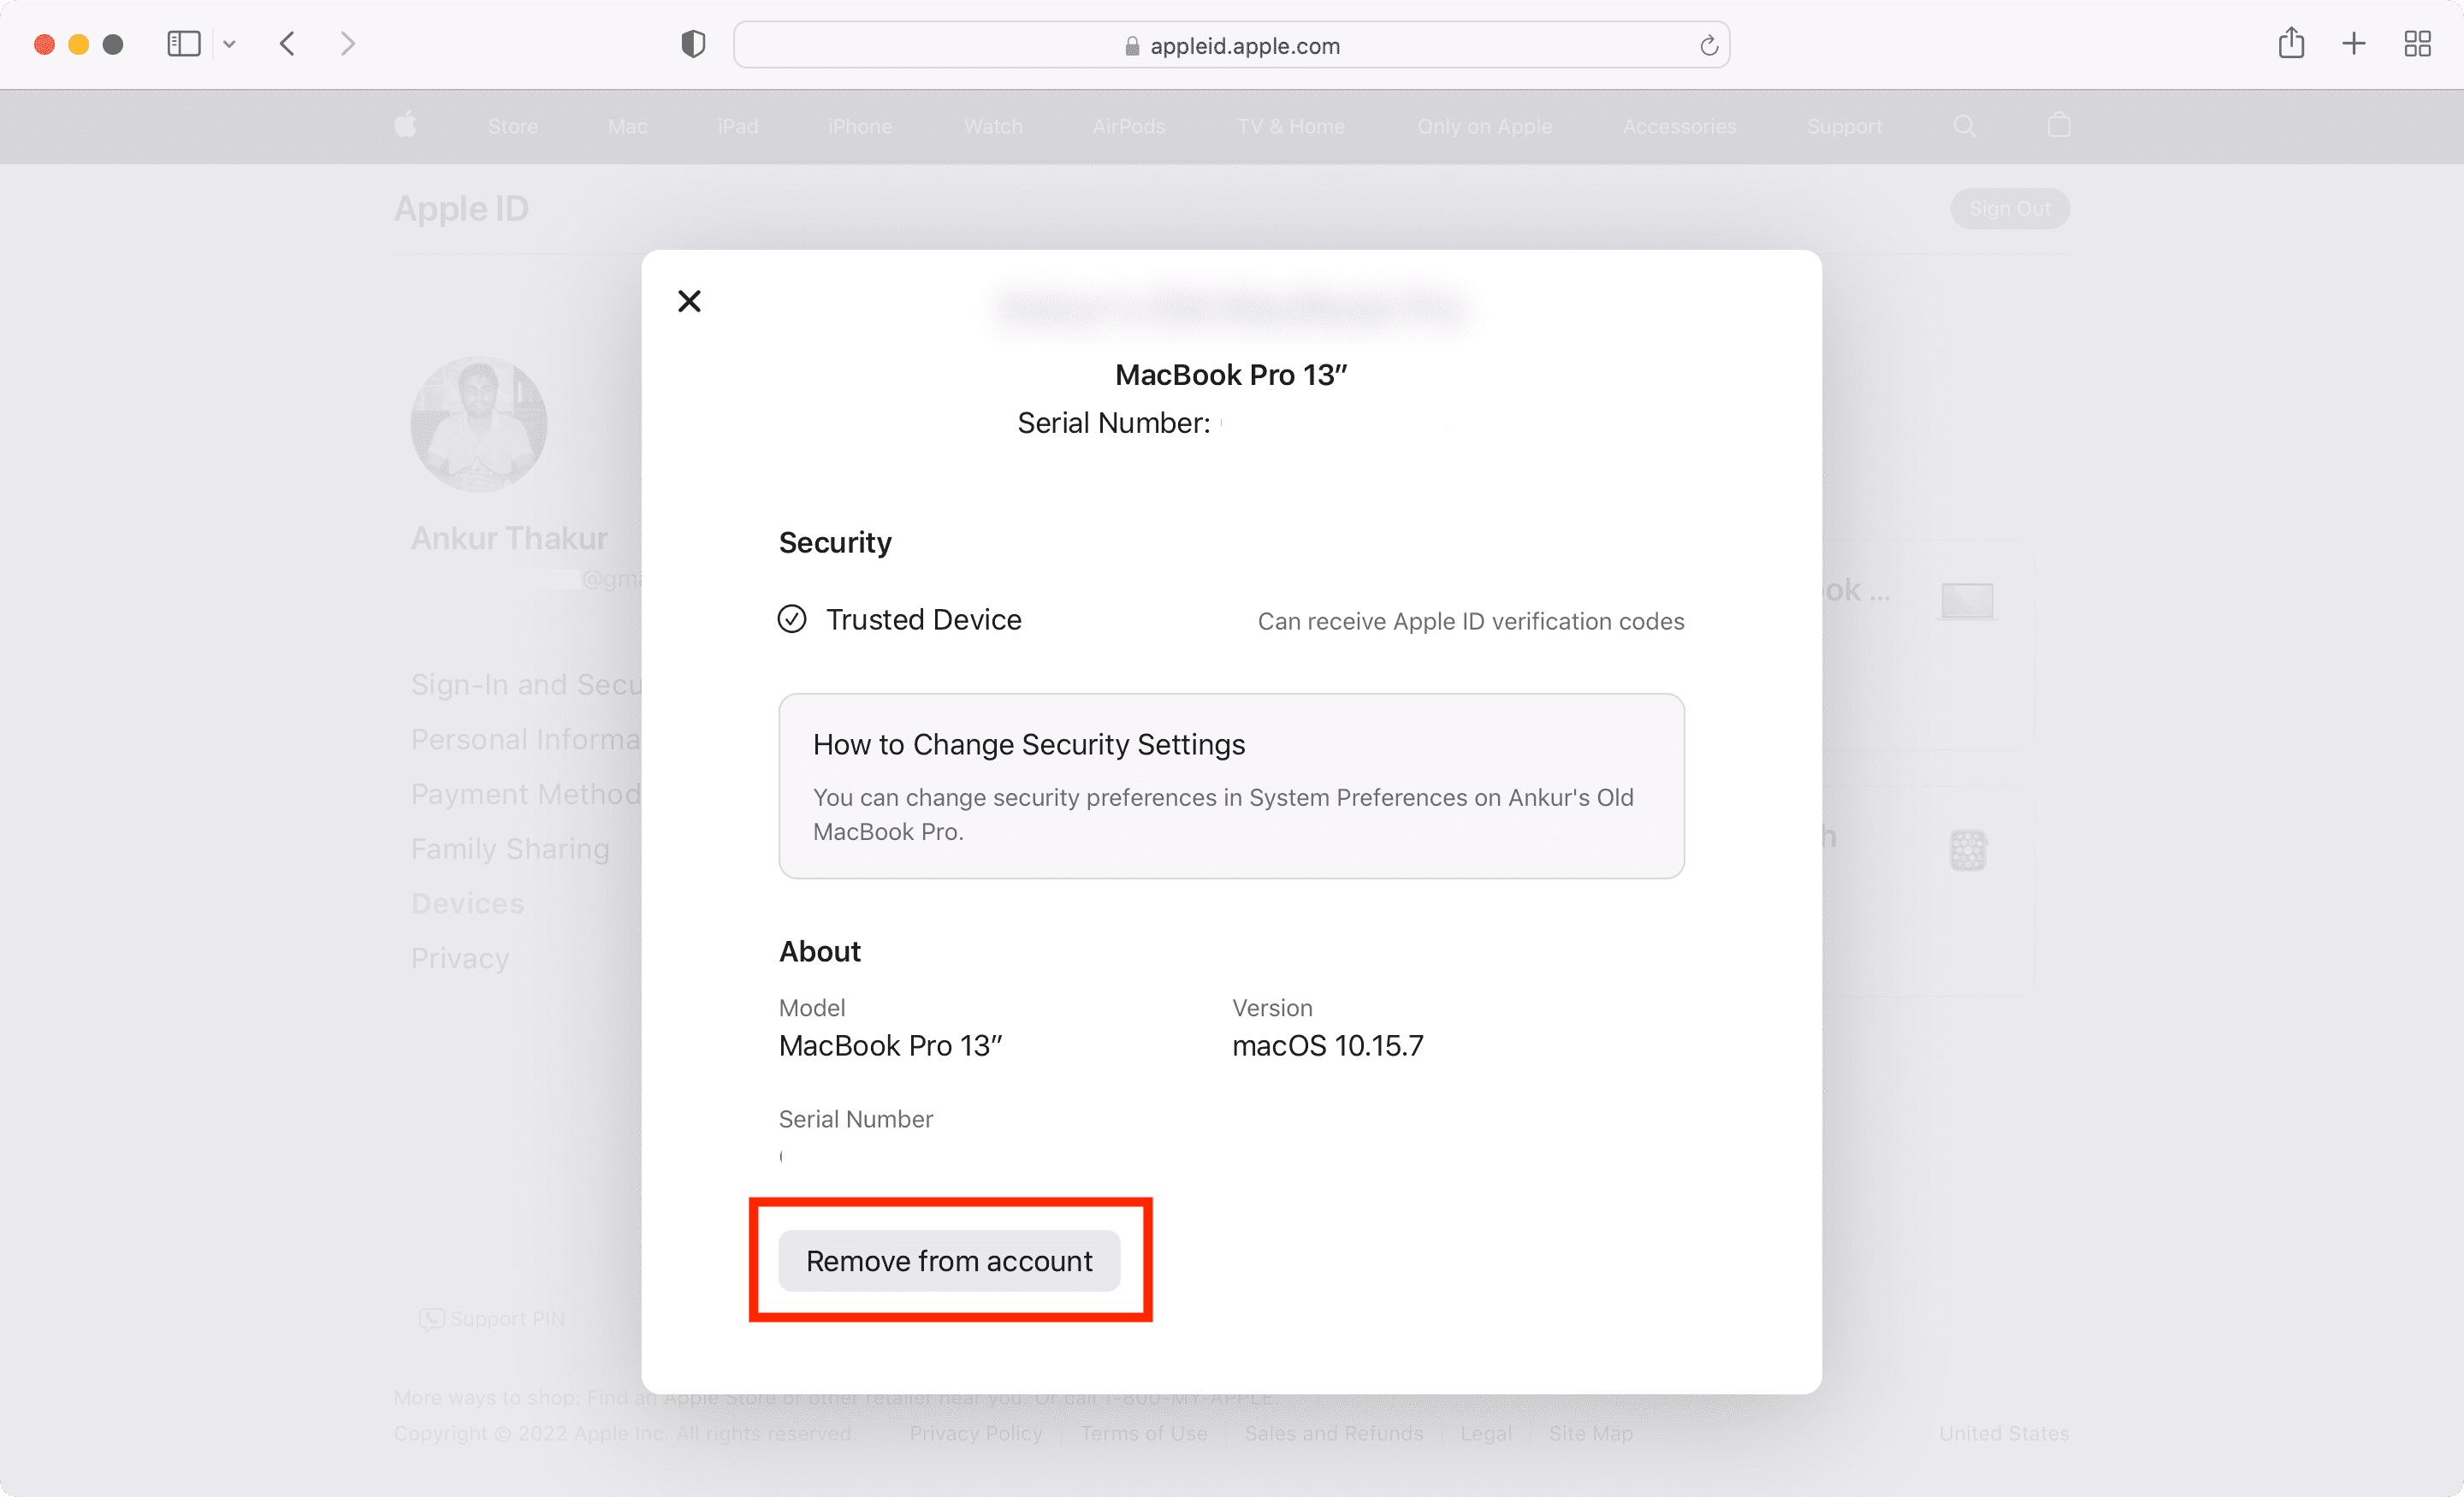
Using web browser
- Go to the Manage Your Apple ID page and sign in using your Apple ID.
- Click Devices.
- Select the desired device.
- Click Remove from account.
- Finally, click Remove.
Managing trusted devices
This is how you can add and remove trusted devices from your Apple ID. Use this only to delist old devices you no longer use.
Once you remove a trusted device, it should not show up in your list of devices under Apple ID. But if it does, that is because you’re using this Apple ID for App Store or some other service on that device. To fix this, sign out from these services or erase the device.
Must see: 15 things you must do (and not do) before selling, giving away, or trading your iPhone or iPad
Finally, if you have only one Apple device added to your Apple ID, you may not see the option to remove it from your account. In that case, if you wish to remove the device from your Apple ID, sign out of your Apple ID.
You’ll also like: