In this tutorial, we’ll show you how to remotely erase an iPhone or iPad that was lost or stolen to safeguard your personal data and privacy.
Alternatives to erasing your lost iPhone or iPad
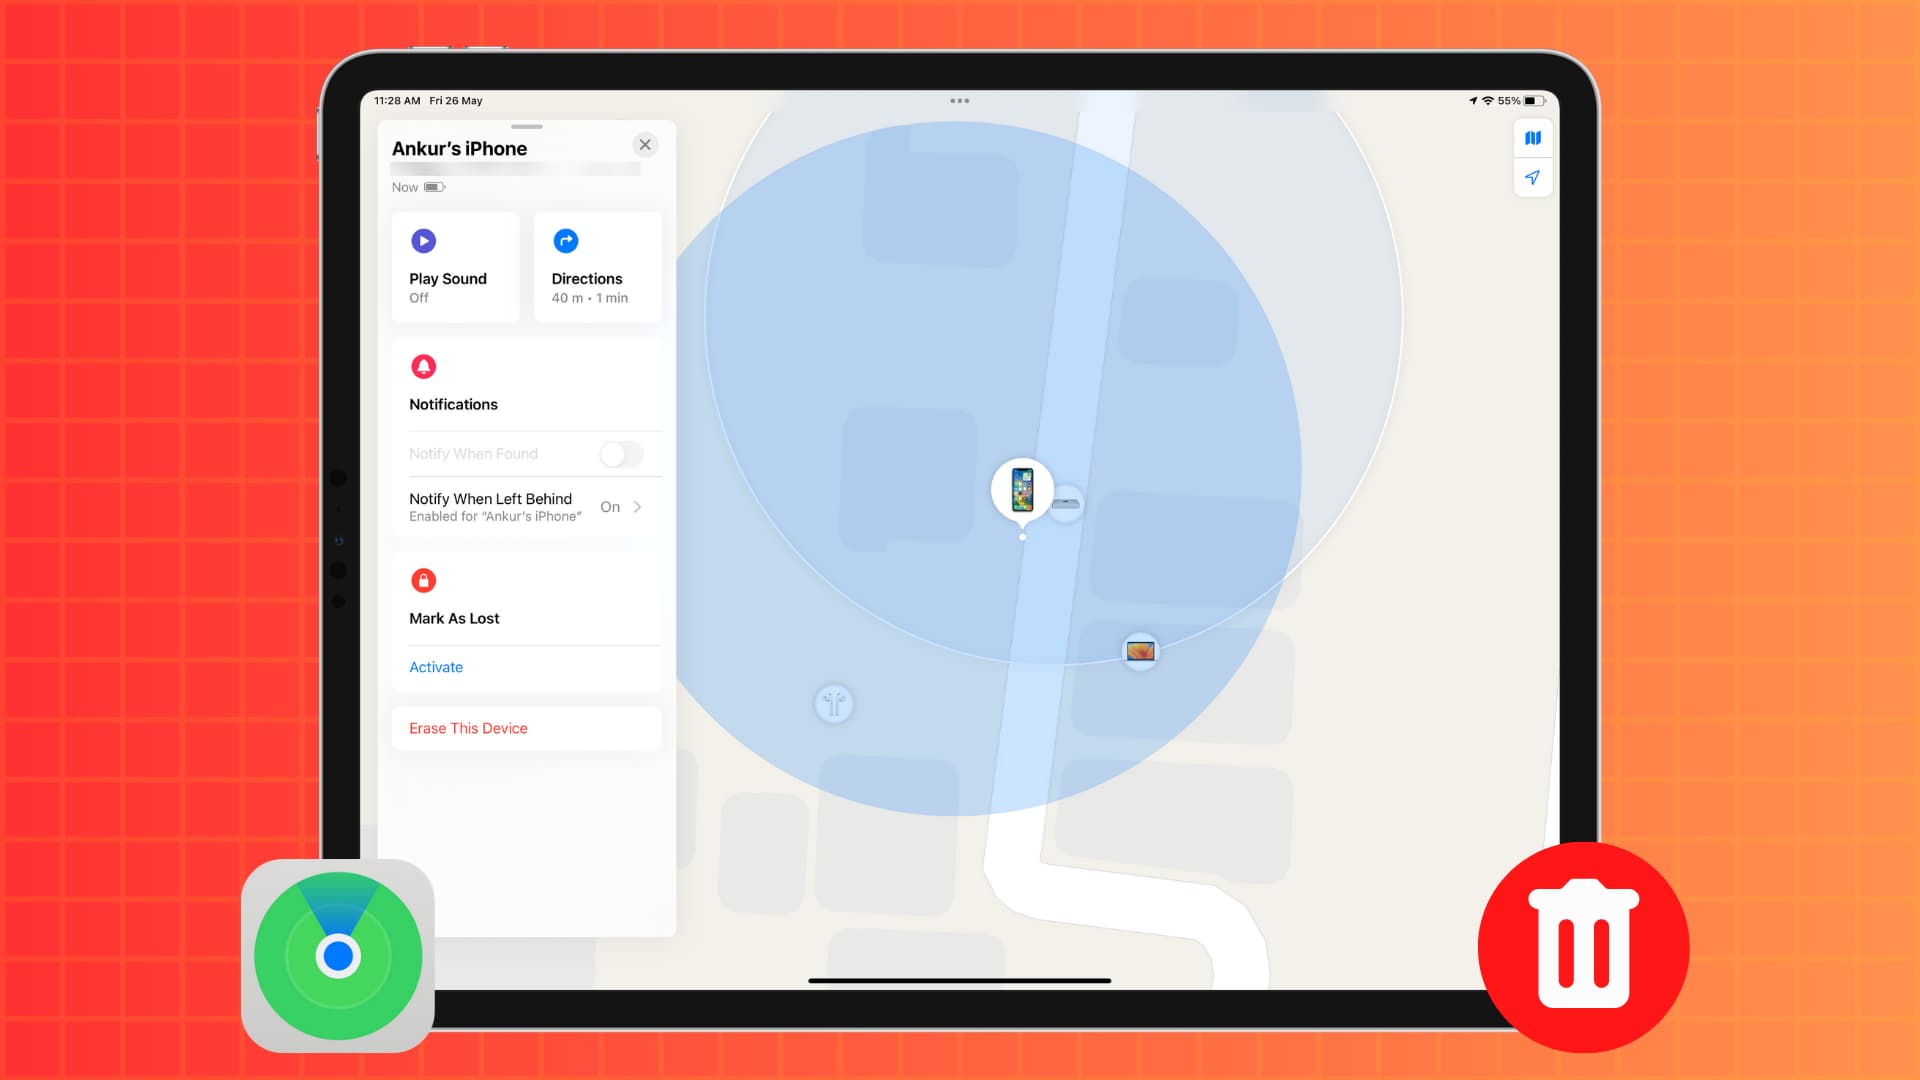
Erasing your device should be the last resort. Apple offers you two great alternatives if your iPhone or iPad is lost, stolen, misplaced, or left behind:
- You can track your lost device to see how far it’s from you, get directions to it, and even play a loud alarm-like sound.
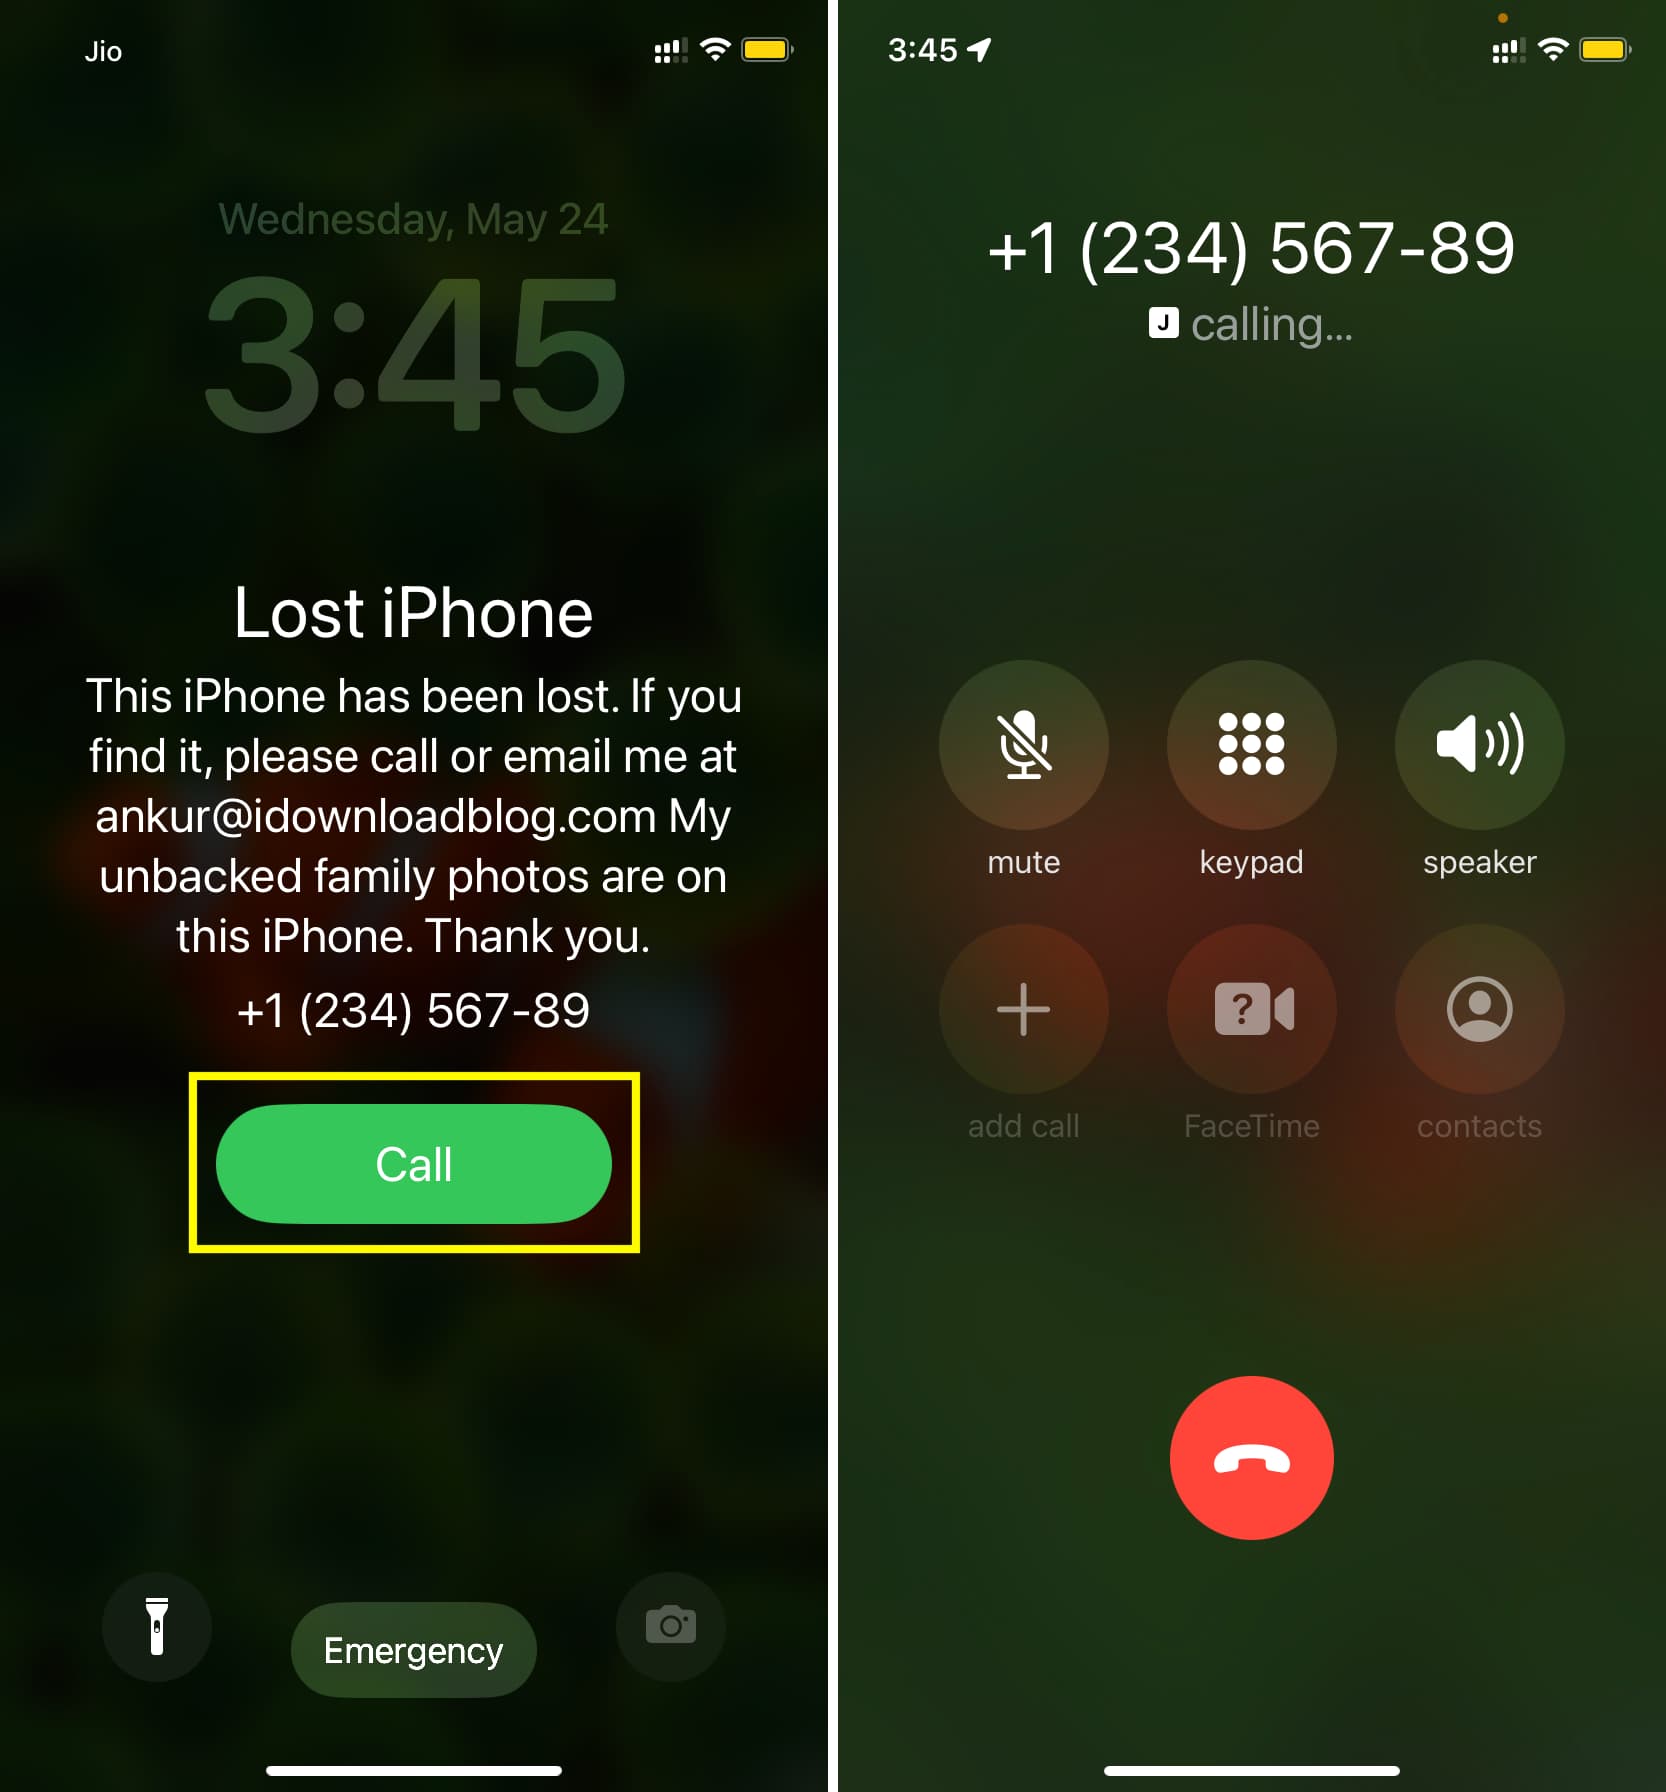
- You can activate Lost Mode on your stolen or misplaced iPhone or iPad. After this, the device is locked (even if you had not set a Lock Screen passcode earlier), and a message appears on the lost device with your phone number. The finder can read your message and call you to return the device.
What happens after you remotely erase your iPhone or iPad?
In my opinion, you should first try to track your device to know its location and put it in Lost Mode. Unless a seasoned thief has stolen your iPhone, these two modes should help you get back your lost device. On top of that, Lost Mode prevents anyone from entering your iPhone and accessing its data.
However, if you’ve given up and think it’s not possible to recover your lost device, or you’re extremely worried about the data on it, then you can go ahead and erase your stolen or lost iPhone or iPad remotely. Here’s what happens after you do that:
- All your data is wiped off from your lost iPhone or iPad.
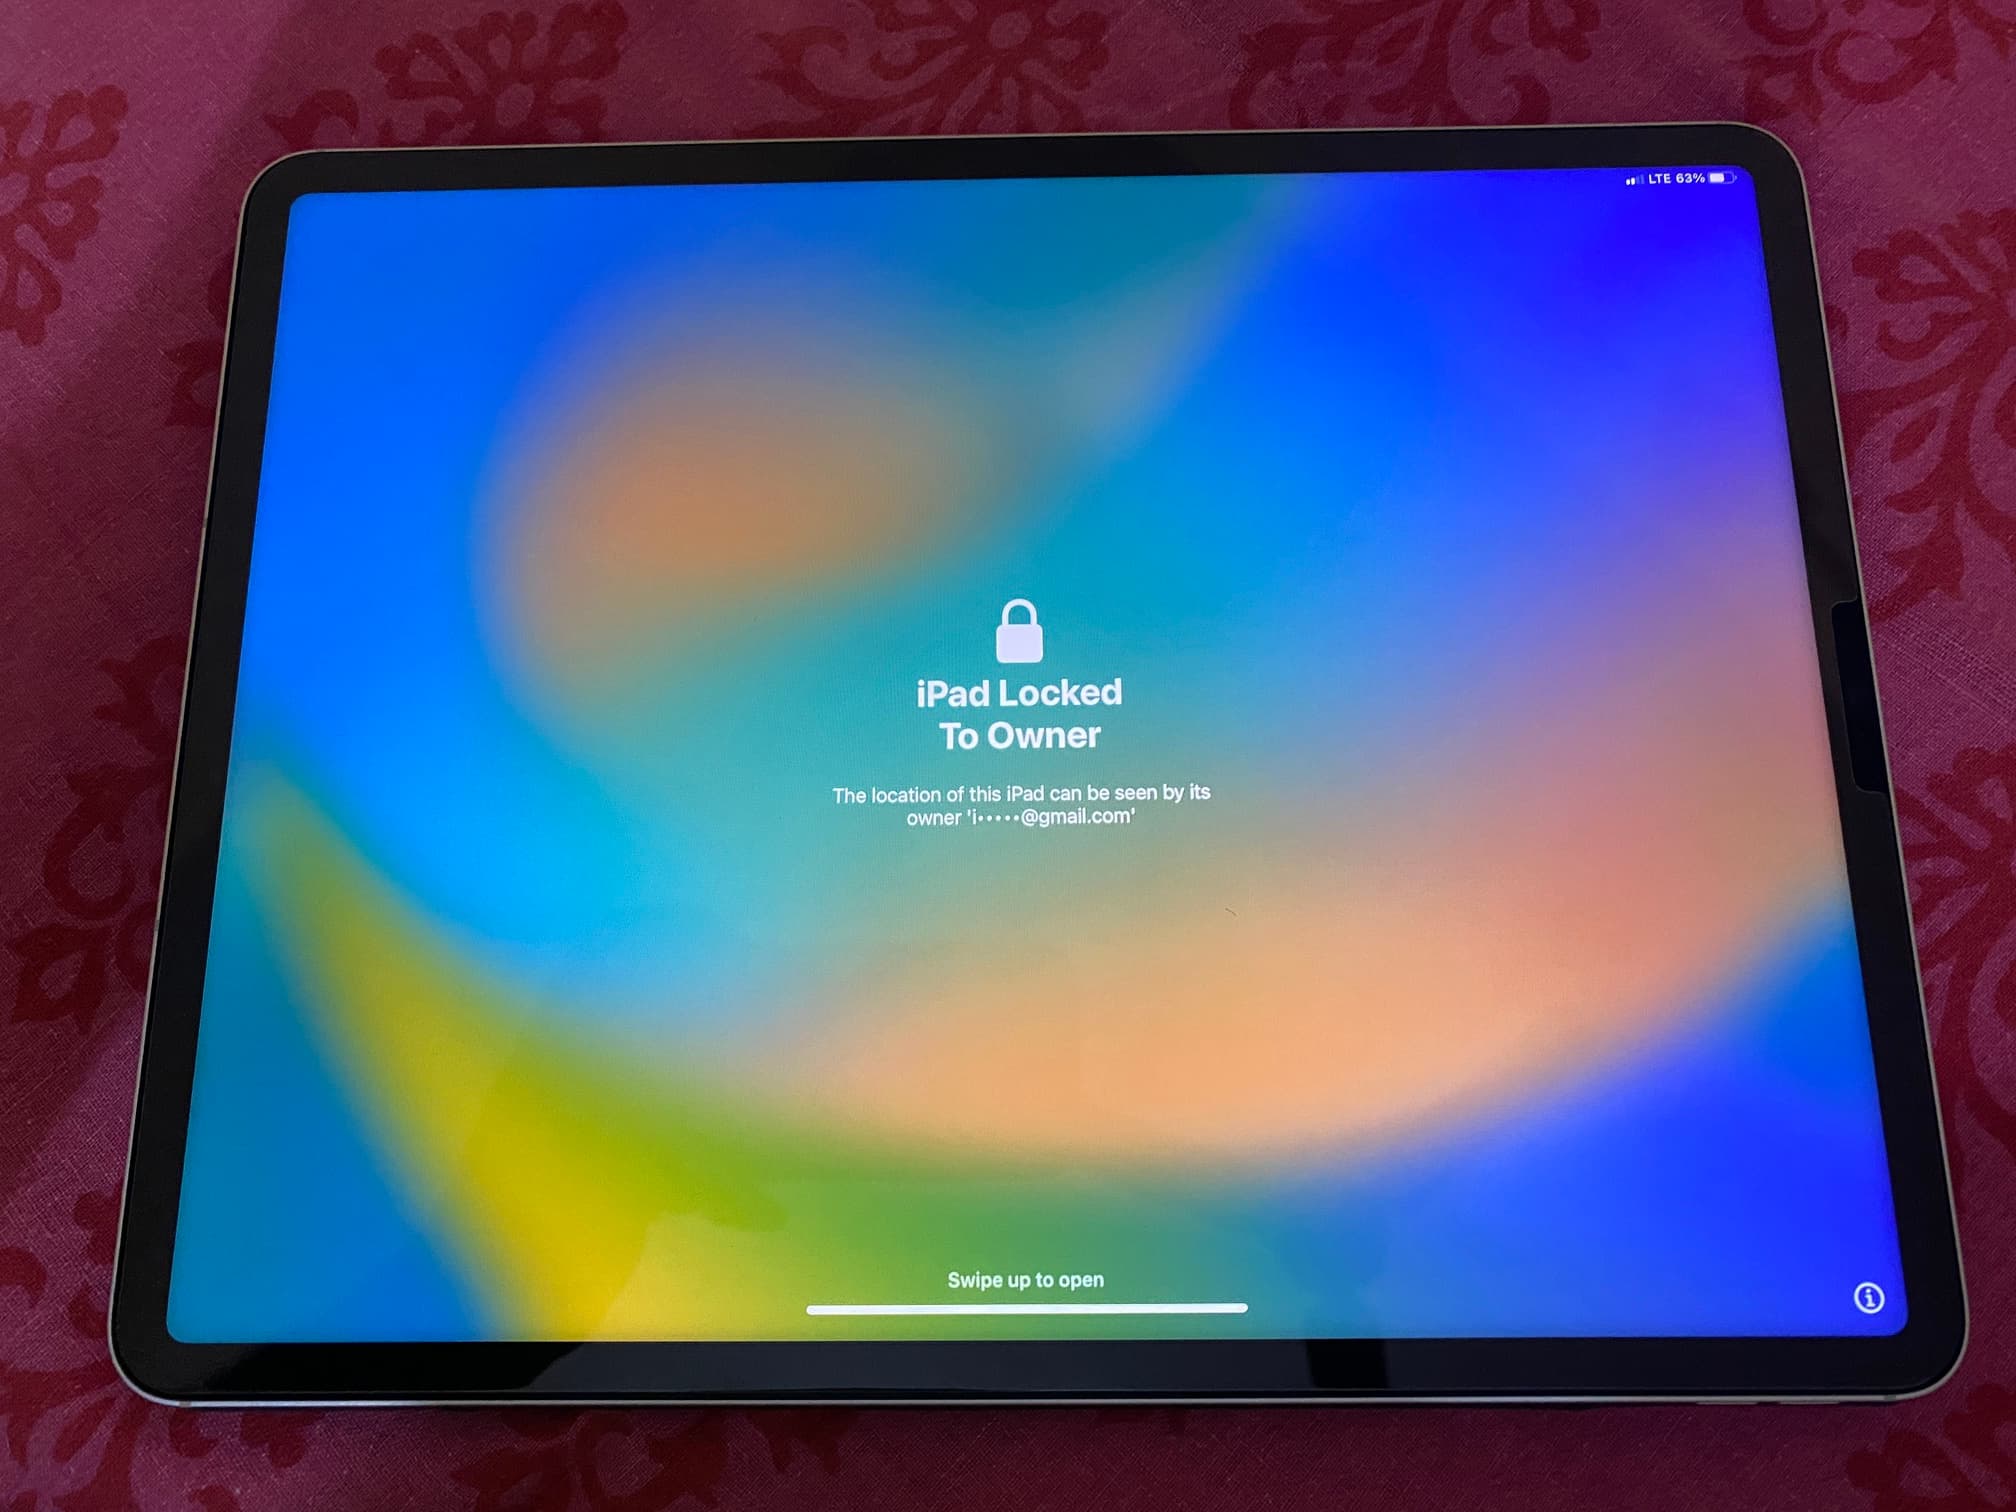
- Activation Lock remains active even after erasing your device. As a result, the finder of your lost iPhone or the thief who stole your phone cannot activate it unless they have your Apple ID and password (make sure not to share it with anybody) or the device passcode.
According to Apple Support, if the lost iPhone or iPad you remotely erased has iOS 15, iPadOS 15, or later, you can continue to use Find My to know its location or play a sound. However, if your lost iOS device is on an older version of iOS, you’ll not be able to use Find My iPhone to locate it after you have erased it remotely. So, I recommend using Lost Mode if you want to have even a sliver of hope to get back your missing phone or tablet.

Prerequisite
For this tutorial, we’ll assume that you’ve activated Find My iPhone on the device you’re trying to erase. By default, it’s already on, so there’s nothing to worry about unless you specifically turned off Find My. Obviously, if Find My iPhone or Find My iPad is not enabled on the device, you cannot find and erase it remotely.
You can use the Find My app on your Apple device or iCloud.com in a web browser to erase your lost iPhone or iPad. We’ll explain both methods below.
Remotely erase your lost or stolen iPhone or iPad
1) Open the Find My app on your iPhone, iPad, iPod touch, or Mac that’s with you.
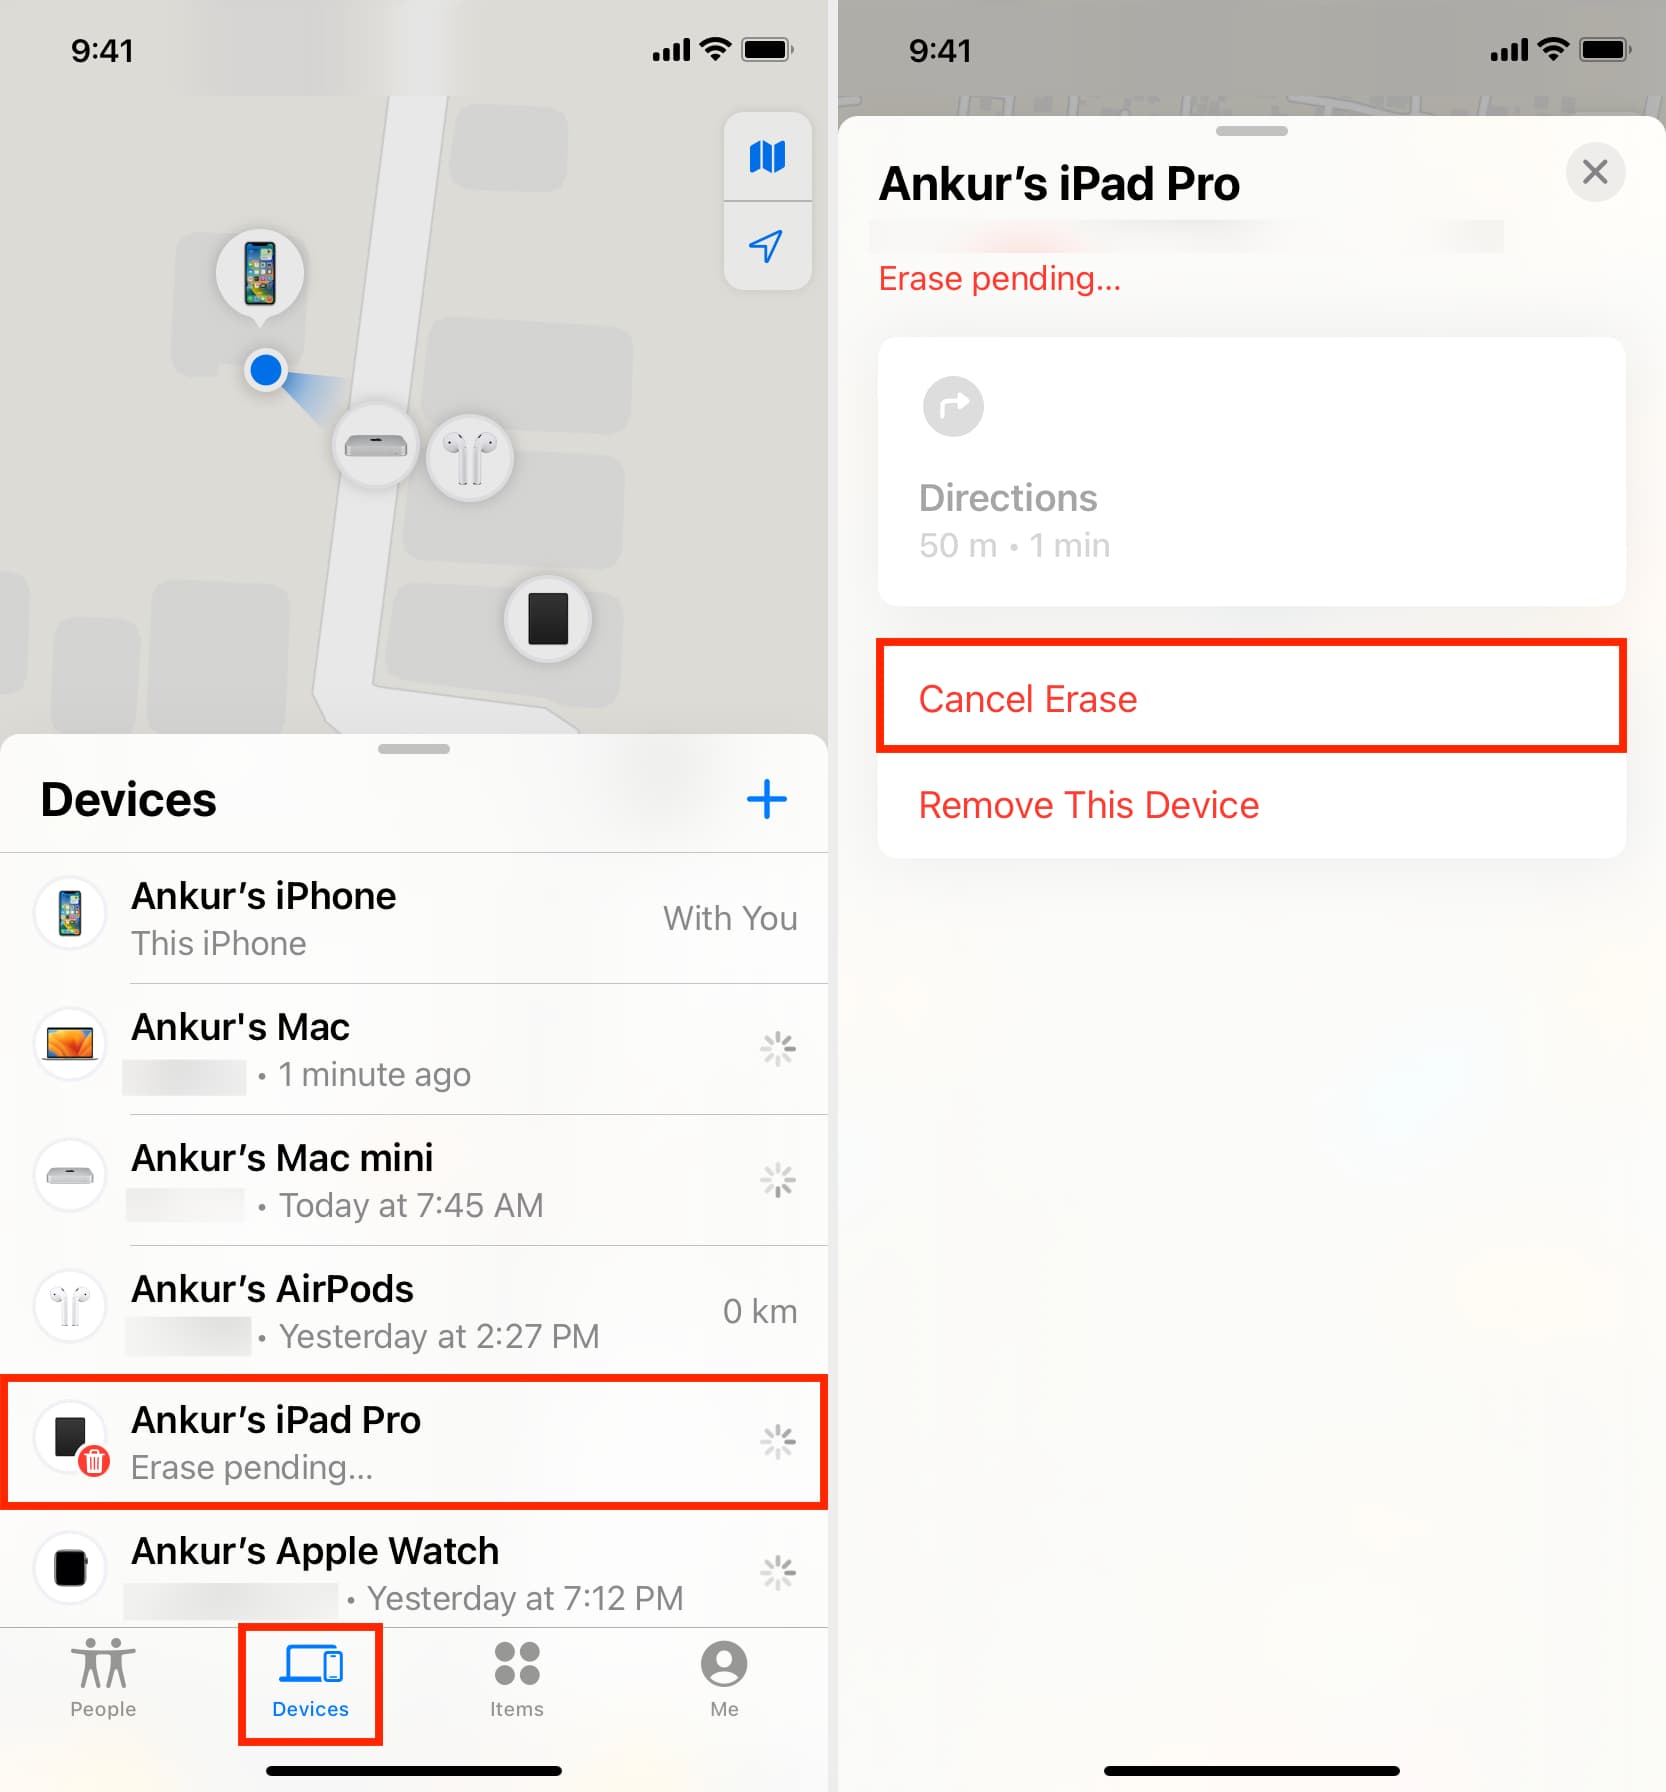
2) Go to the Devices section to see all your Apple devices registered to your Apple ID. Select the lost iPhone or iPad you want to erase. I’m erasing my iPad Pro.

3) If you’re using the Find My app on iPhone or iPad, swipe up the card to see more options. On the Find My app for Mac, click the info button ⓘ next to your lost device name on the map. Then, tap Erase or Erase This Device.
4) Tap Continue.

5) Enter a phone number you have access to and tap the Erase button. This number will be displayed on the lost device after it has been erased. Anyone who finds your misplaced iPhone can contact you at this number to return it. Note: I did not see this phone number displayed on an erased iPad.
6) Enter your correct Apple Account password and tap Erase once again. Wait on this screen until it finishes processing and you see the Cancel Erase or/and Remove Device option.

Once you follow the above steps for complete erasure, the process will begin immediately and erase all data from the lost iPhone or iPad if it is connected to the internet via Wi-Fi or cellular data.
However, if the lost iPhone or iPad is offline (i.e., it isn’t connected to the internet), the erasing process will remain pending and complete whenever that device is connected to cellular data or Wi-Fi.
Cancel erase midway
As explained, your lost device cannot be erased unless it’s connected to the internet. If you happen to find your device before it has been erased, do not turn on Wi-Fi or cellular data on it. Instead, follow these steps to cancel the pending erase request:
1) Open the Find My app on your Apple device that’s with you.
2) Go to Devices and select your lost-but-now-found iPhone or iPad.
3) Tap Cancel Erase.
4) Enter your Apple Account password and hit OK. Now, you can connect your found device to Wi-Fi or mobile data and use it like before.
After you have erased your device successfully
- You can continue to see its location in the Find My app or iCloud.com if the iPhone or iPad was on iOS 15/iPadOS 15 or later. If you can’t get the directions in the Find My app on your iOS device, try Find My on Mac or iCloud.com.
- For iPhone and cellular iPad, you can contact your carrier to get a new SIM card or cancel your account.
- You can also file a complaint with your local police station to recover your device.
- If you had bought insurance for your iPhone or iPad, go to the insurance company’s website to file a claim.
- Finally, if you’ve decided that you won’t get the device back, you can remove it from your Apple ID. After this, you won’t be able to see its location or play a sound.

Erase lost iPhone and iPad using iCloud.com
If you don’t have another Apple device with the Find My app, you can use iCloud.com in a web browser to erase your lost iPhone or iPad:
1) Visit icloud.com/find and sign in using your Apple ID that’s on the lost iPhone or iPad.
2) Select your stolen device, click Erase, and confirm.

3) Enter your Apple ID password and click the arrow button next to it. You may have to enter the verification code sent to your other trusted Apple devices or your phone number.
4) Type a phone number that will be displayed on the lost device once it’s erased, and click Next. If someone finds it, they can see this number and call you on it.

5) Enter a message to display on the erased iPhone or iPad and click Erase.

Your iPhone or iPad will be erased immediately if it’s connected to the internet. If not, it will be erased whenever it gets Wi-Fi or cellular connectivity.
Also, check out: What to do if your iPhone is lost or stolen (6 tips)