Have you ever wondered which thumbs or fingers you have added to Touch ID on your iPhone, iPad, or MacBook? In this quick tutorial, we’ll show you how to rename your fingerprints so they’re easy to identify when needed.
You can add up to five fingerprints to your iPhone or iPad and up to three fingerprints to your MacBook or Apple Magic Keyboard with Touch ID. By default, these fingerprints are called Finger 1, Finger 2, Finger 3, and so on.
But when Touch ID stops working correctly, you may want to remove an added fingerprint and re-add it. But with a generic “Finger N” name, you may not know which saved fingerprint corresponds to which finger or thumb.
Secondly, if you’ve added your spouse or family member’s fingerprint to your Touch ID, labeling them appropriately helps when you want to remove their Touch ID privileges from your device.
Thankfully, you can rename your saved prints to something more descriptive so you can quickly distinguish them. The steps differ slightly for iOS and macOS.
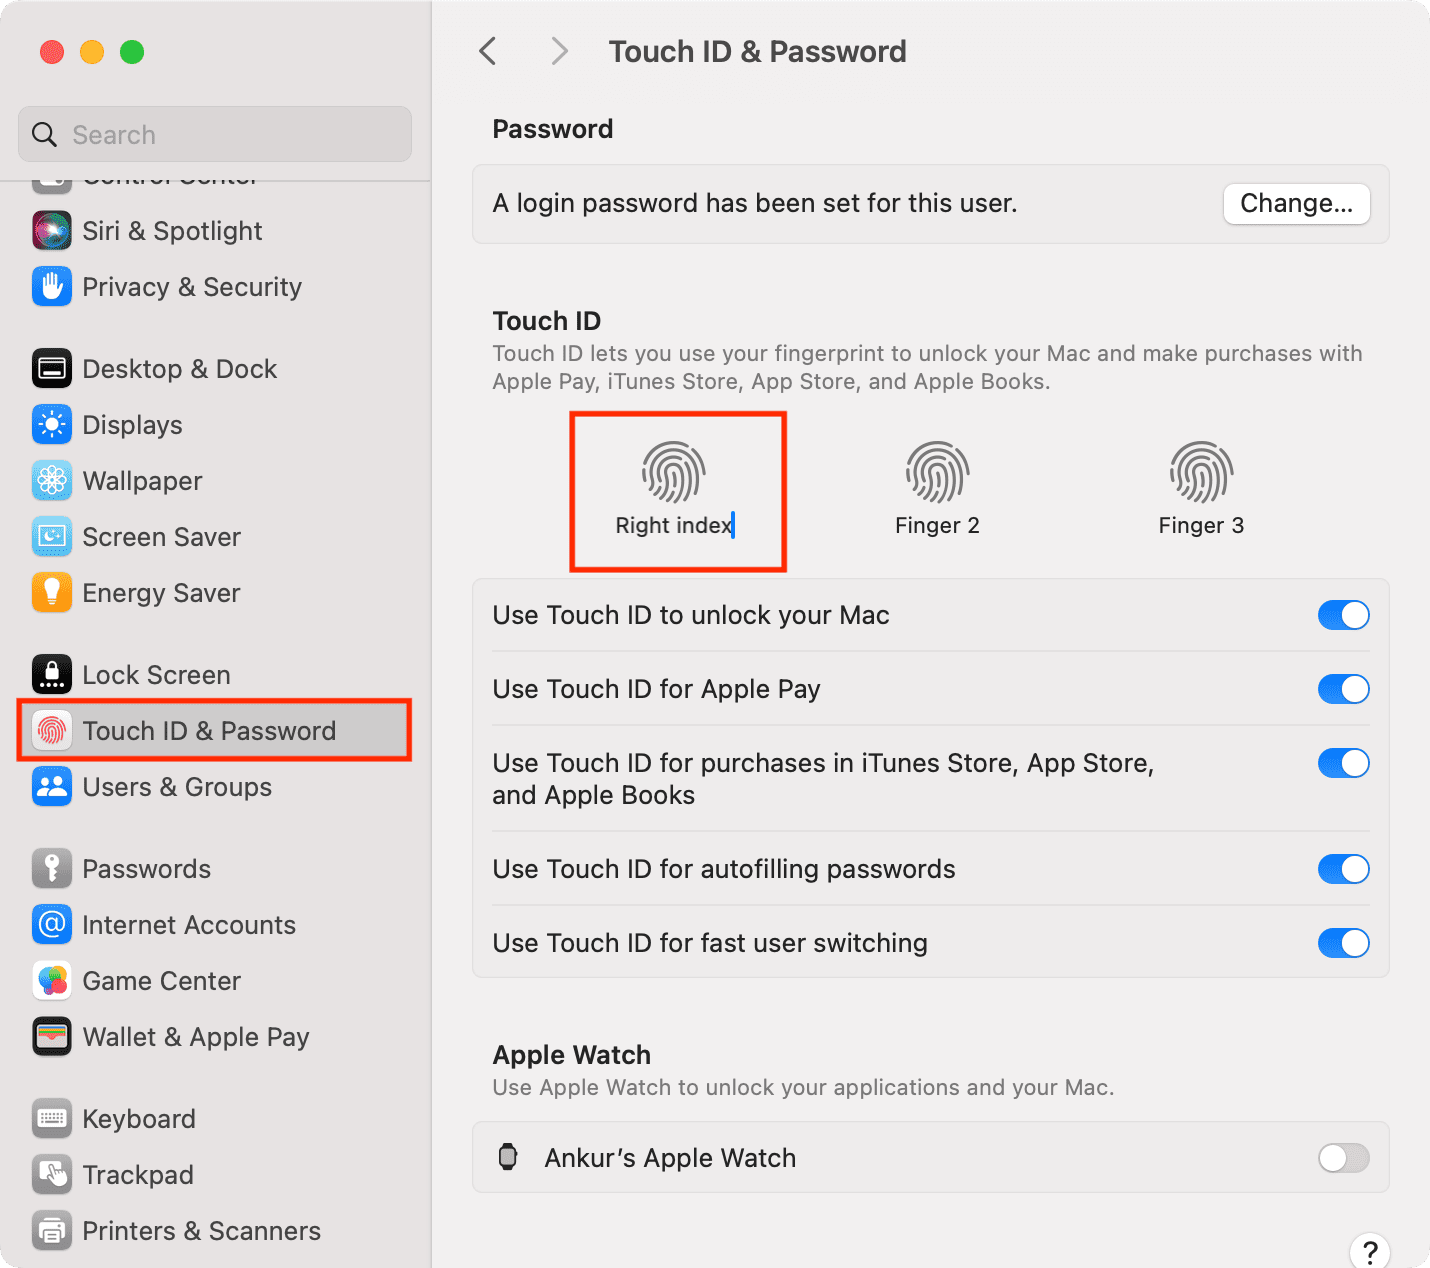
On Mac
- Open System Settings on your Apple computer.
- Click Touch ID & Password from the left sidebar.
- Take the trackpad or mouse pointer over Finger 1, Finger 2, or Finger 3 and remove their current name by repeatedly using the delete key on the keyboard.
- Now, type the new name, and it will auto-save.
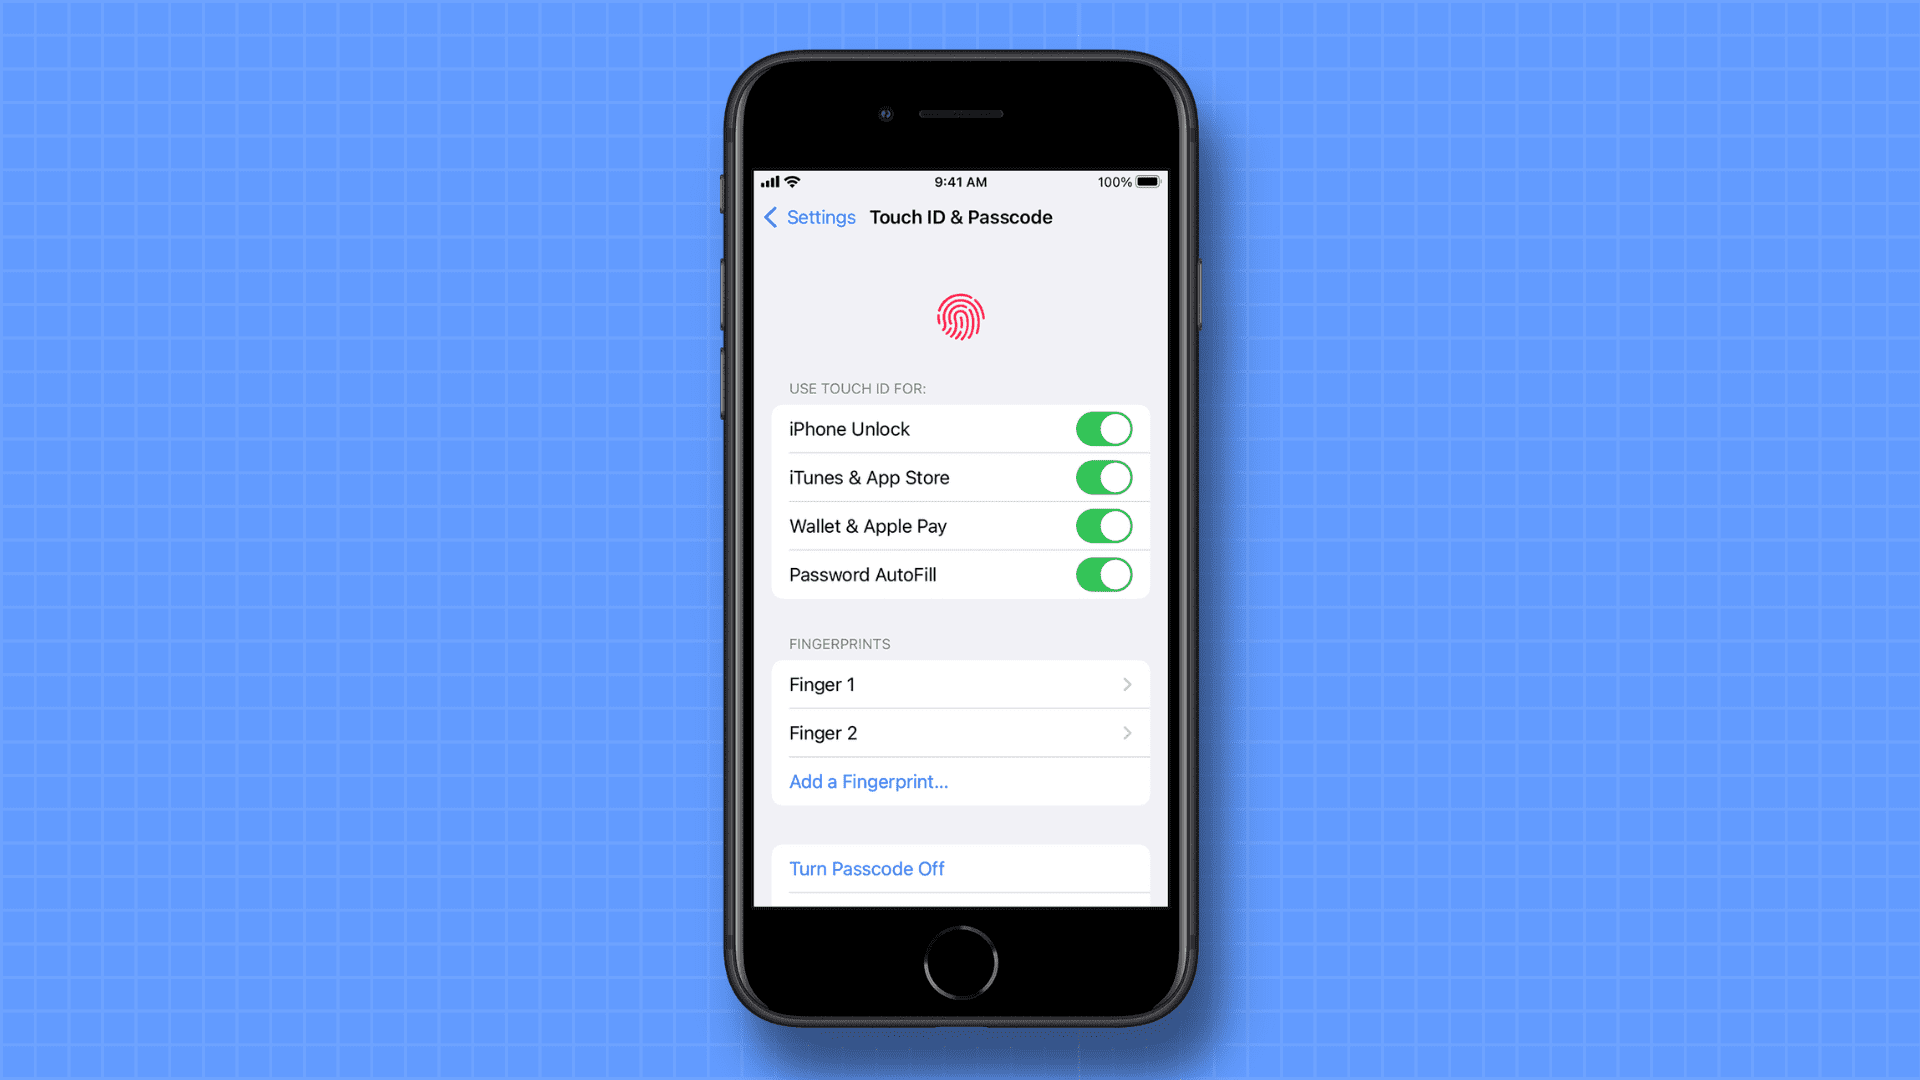
On iPhone or iPad
- Open the Settings app on your iPhone or iPad.
- Scroll down and tap Touch ID & Passcode.
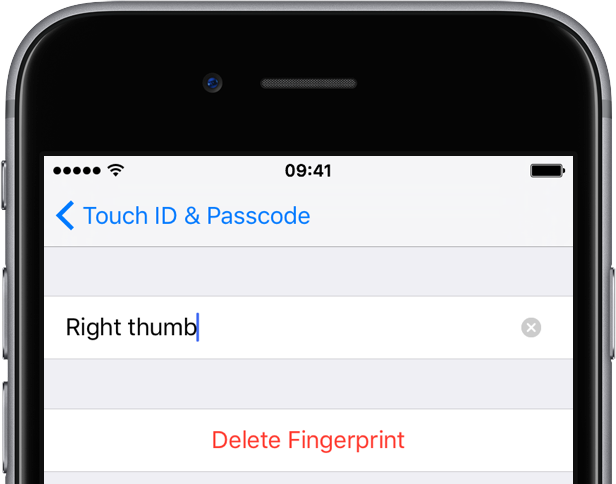
- Tap a saved fingerprint like Finger 1, Finger 2, etc.
- Give it a new name and hit the checkmark, done, or return on the keyboard.
- Now you can go back and rename the other added fingerprints.
More on fingerprints: