Reminders in iOS 5 is Apple's kick in the teeth for all those To-Do apps that litter the App Store right now. A walk through the App Store will reveal more To-Do apps than you can shake a stick at, but Apple's own Reminders app does pretty much everything you could ever need in iOS 5.
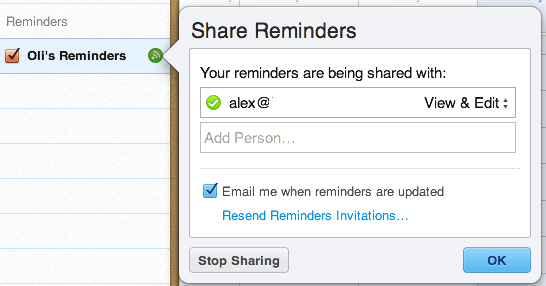
There's one Reminders feature that Apple hasn't made a very good job of promoting. You can use iCloud to share and sync your reminders and tasks with other people...