Jailbreak

Check out the most comprehensive jailbreaking coverage on the internet, including the latest news, apps, tweaks, and detailed tutorials about everything jailbreak.

Top 5 Reasons to Jailbreak Your iPad

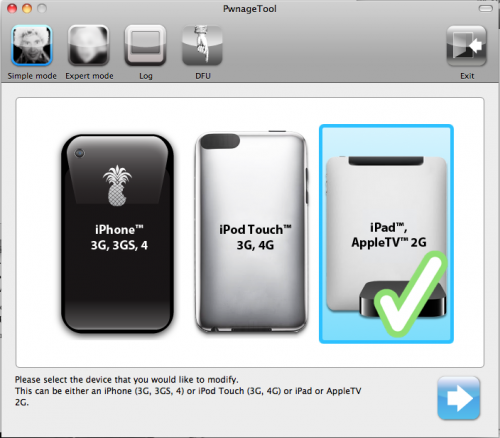
Earlier this week, the jailbreak for Apple's latest iOS 4.3.1 was released. Anyone with an iPad on the latest firmware, couldn't even attempt hacking it until last Sunday night. It was then that the Dev Team finally released a much-awaited jailbreaking solution to the masses.

But why on earth would anyone want to hack their iPad? This is a question I get asked a lot by friends and family members. In all honesty, I could go on for hours on why I have my iDevices jailbroken. Everything from my iPhone to my Apple TV2 has received the jailbreaking treatment, and everything in between.

But in the interest of time and space, I figured I would just put together a top 5 list of reasons why you would want to jailbreak your iPad. Hopefully it benefits some of you that may still be on the fence about the whole idea.


1. It's super easy

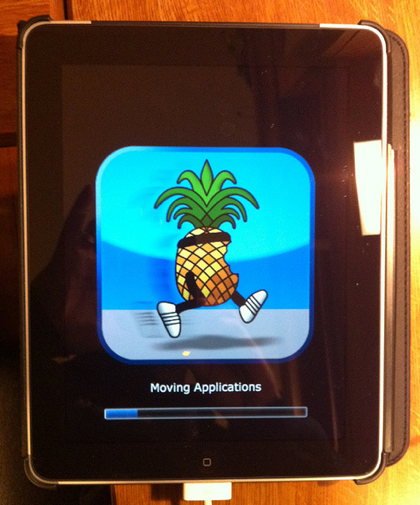
Although hacking iOS software is extremely complex, programmers like the Dev Team develop software to make the process extremely simple. These programs make jailbreaking as easy as following a few on screen instructions. If for some reason you do mess up, you can generally just restore in iTunes and start the process over.
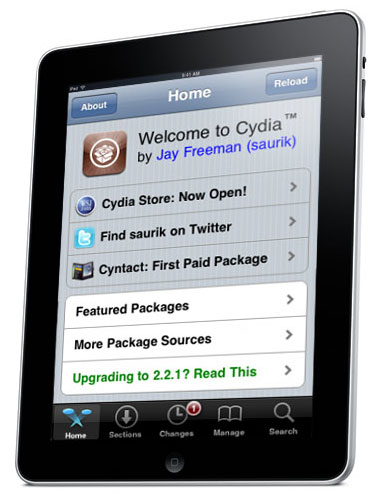
2. Cydia

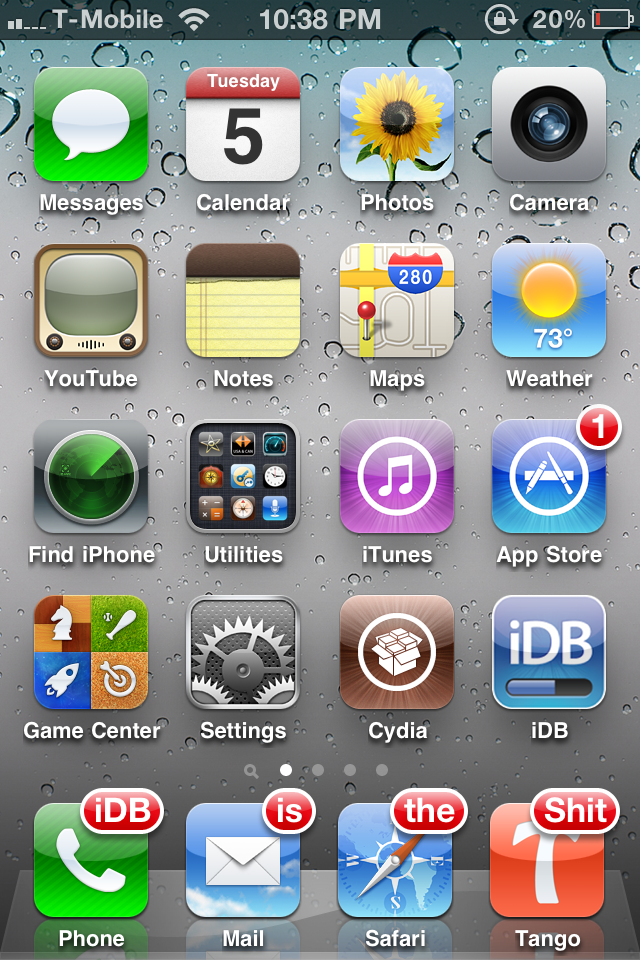
For those of you who aren't familiar with jailbreaking, Cydia is an app store very similar to Apple's App Store. It is generally the only icon that is initially added to your home screen once you have jailbroken. It contains everything from apps to iOS tweaks. Every other item on this list comes from Cydia.

3. Customizable Themes

Apple didn't build a lot of customization options into iOS. It's only been in the last year that they've allowed you change the wallpaper on your iDevice home screen. Customizable themes, allow you to give your iPad a complete makeover.

4. Tweaks

Tweaks can enable extra features, or build on old ones. Their overall purpose is to make using your iPad simpler. SBSettings is a popular tweak in the jailbreak scene. It enables a drop down menu, accessible from your iPad's top status bar, with shortcuts to Wi-Fi and bluetooth. You don't have to open Settings and go through menus to enable bluetooth, you can just tap the shortcut in SBSettings.

5. Cast Out Applications

Everything from productivity apps to full featured messangers are available in the Cydia store. Many of these were denied entry into Apple's App Store for violating one of their submission rules. Without Apple's strict limitations, developers are given the opportunity to be truly innovative.

Like I said the list could have gone on much longer than that, especially if it were broken down into specific tweaks and apps that I liked. If this interested you enough that you would like to give jailbreaking a shot, try our easy step by step guide here, or here if you have Windows.

What are the top 5 reasons you jailbreak your iPad?

Create Custom Badges For Apps with AppTag

Another day, another new jailbreak tweak released in Cydia. The latest jailbreak tweak is called, AppTag.

You know the little "badges" on applications on the home screen that notify you with the amount of new notifications you have? Well, AppTag is a cool new tweak that will allow you to create custom badges on your iDevice without the use of a computer.

UltraSn0w Update is Almost Ready for iOS 4.3.1, Fixes Bug Issues and Older Baseband Compatibility

MuscleNerd has confirmed that UltraSn0w update is coming for iOS 4.3.1 in a few days. The unlock tool has had several bugs and is currently incompatible with several older basebands.

To clarify: the upcoming UltraSn0w update will not unlock any new basebands. The update is meant for current unlockers that wish to update to the latest 4.3.1 jailbreak and keep their unlock.

Apple Once Again Sends Jailbreak Community a Direct Message

A few days ago, we reported that Scion, a subsidiary of Toyota, was trying to break into the jailbreak scene with innovative marketing methods. They were the first major corporation to direct positive attention to the community, since its inception in 2007.

This was exciting for a couple of reasons. First, a major corporation advertising in Cydia certainly made jailbreaking seem more legitimate. It also meant that other companies might follow Scion's lead.

Multiple major brand names marketing to jailbroken devices would have meant more recognition and credibility to the community as a whole. It appears that the silence from Apple was too good to be true. ModMyi is reporting today that they were asked by Apple to remove the Scion theme from their Cydia repo....

Tour of MyGreatFest Venue, World’s 1st iDevice Convention Will Take Place on September 17th

The folks at MyGreatFest will be holding the world's first iDevice/jailbreak convention later this year in London, UK. Craig and the rest of the planning team have been working extremely hard over the past months to create the ultimate convention experience for jailbreak and iDevice enthusiasts.

The details for September's convention are shaping up nicely, and there is now a video tour of the venue. The Old Truman Brewery on Brick Lane in London will be where speakers like the creator of Cydia, saurik, present talks and presentations to fellow geeks.

Certain Cydia Packages Not Yet Compatible with iOS 4.3.1, Jailbreakers Beware

The official jailbreak for iOS 4.3.1 was released yesterday, and many people are re-installing and upgrading their Cydia packages.

There are some popular Cydia apps/tweaks that are not yet compatible with iOS 4.3.1. If you rely on a certain app or tweak, you might want to make sure the desired package is compatible with the latest version of iOS before you jailbreak...

Jailbreak Your Apple TV2 on 4.3.1 with PwnageTool [Tutorial]

For those of you who own an Apple TV2 and have been looking to jailbreak it, the time has arrived. Although the ATV2 has been hacked before, this is the first official solution available for those who have the latest iOS 4.3 software.

Even the tutorial we released last week on jailbreaking your Apple TV 4.3 with Seas0nPass wasn't an official release. It was extremely buggy and required you to connect your ATV2 to your computer every time it restarted.

Well, thanks to the hard work of the Dev Team, Saurik and NitoTV, we finally have an official jailbreak solution for iOS 4.3. So for those interested in hacking their Apple TVs and adding tons of extra capabilities to that little black box, let's get started.

Important Note: This is only for 2nd generation Apple TVs, the black one. Also this particular tutorial is only for Mac users, as it uses PwnageTool which is currently only available for Mac OS.

Before we start hacking, you want to make sure your Apple TV is on the latest software version. You can do this by connecting the device to a computer with iTunes or from the Apple TV main menu. Just go to Settings > General > Update Software.

Step 1: You will need a micro-USB cable. This are the most common USB cables and are typically used to charge smartphones. Also you will need the latest version of iTunes. Finally, you need PwnageTool 4.3, which can be downloaded here. I always download tools to my desktop so I can keep track of them.

Step 2: If you updated your software via the Apple TV itself, you will still need the firmware file which you can get here. If you updated through iTunes, move along to step 3.

Step 3: Open up PwnageTool and select your device. Obviously for this tutorial we want the Apple TV2. Click the blue arrow and let the software find the file. When it's done, select the Apple TV firmware file and click next.

Step 4: PwnageTool will now create a custom jailbroken file out of the firmware, so give it some time. Once it's done working its magic, plug your Apple TV into your computer using the micro-USB cable. Make sure your power and HDMI cables are left unplugged.

Step 5: The software will walk you through the DFU process, which will prep your Apple TV for the custom firmware. If successful, it should look like this:

Step 6: You can now close PwnageTool and open up iTunes. With your Apple TV plugged in, iTunes should immediately go to the ATV page. You'll see a big button that says restore. While holding down your Mac's Option key, click restore. This should launch a Finder window and allow you to choose the custom firmware, that PwnageTool made, from your desktop.

Step 7: Let iTunes do its thing and once it says completed, you're done. Unplug your Apple TV from your computer and back into your TV set. If you see the NitoTV option in the main menu, you're jailbroken!

From here you can begin to experiment. Stay tuned to our blog as we post more tutorials on some of the cool things you can do with your new jailbroken Apple TV, such as browse the web and even watch Hulu.

Jailbreak Your iPad on 4.3.1 with PwnageTool [Tutorial]

The long-awaited jailbreak for Apple's iOS 4.3.1 is finally here. It is the first official jailbreak since Apple released iOS 4.3 almost a month ago. Those with iDevices wanting to take advantage of some of the new features in 4.3, haven't been able to upgrade without losing their jailbreaks.

That all changed in the wee hours of last night, when the Dev Team members finally released the anticipated software. The exploit is available in 2 different forms of software: PwnageTool, which is for Mac users only, and RedSn0w, which will work on either Windows or Mac.

This step by step tutorial will show you how to jailbreak your iPad on iOS 4.3.1, using PwnageTool. This software is for Mac users only. If you are on a PC, follow our RedSn0w tutorial here.

Important Note: Just remember this is not for the iPad 2, there is no jailbreak available for this device yet.

Before we get started, you want to make sure your iPad is on iOS 4.3.1. Backing up your iPad to iTunes is also recommended, better safe than sorry. But don't worry, the process is super simple and will have your iPad jailbroken in no time.

Step 1: For this tutorial, you'll need PwnageTool 4.3, which you can download here. Make sure you select the 4.3 version, as it is the only one that will work. I always download my tools to my desktop so they're easier to find.

Step 2: Load up PwnageTool, select the iPad/Apple TV option and click the blue arrow. With this method, PwnageTool should actually locate your iPad firmware on your hard drive for you, so there is no need to download the .ipsw file.  Select the iPad firmware and click next.

Step 3: Sit tight as PwnageTool does its thing, it can take a while. It is taking the file you selected and jailbreaking it. Then we will load the jailbroken firmware onto your iPad.

Step 4: Once done, you will be prompted to connect your device via usb. PwnageTool will now help you put your device into DFU mode. If you don't get it the first time, don't fret. Just wait until it's finished giving DFU instructions, and click try again. If you did it correctly, it should look like this:

Step 5: Now you can close PwnageTool. Open iTunes with your iPad still connected, and you should receive this message:

Step 6: Don't just click restore because you will just install Apple's original firmware. While holding down your Mac's Option key, click restore. This should open up a window for you to browse for the file. Select the custom firmware from your Desktop that PwnageTool just created, and restore it.

Step 7: It may take a while for iTunes to install the custom firmware on your iPad. But once completed, your iPad should restart itself and the Cydia icon should be on your home screen.

That is how you jailbreak your iPad on 4.3.1 with PwnageTool, any questions?

Jailbreak Your iPad on 4.3.1 with RedSn0w [Tutorial]

The long-awaited jailbreak for Apple's iOS 4.3.1 is finally here. It is the first official jailbreak since Apple released iOS 4.3 almost a month ago. Those with iDevices wanting to take advantage of some of the new features in 4.3, haven't been able to upgrade without losing their jailbreaks.

That all changed in the wee hours of last night, when the Dev Team members finally released the anticipated software. The exploit is available in 2 different forms of software: PwnageTool, which is for Mac users only, and RedSn0w, which will work on either Windows or Mac.

This step by step tutorial will show you how to jailbreak your iPad on iOS 4.3.1, using RedSn0w. If you are a Mac user and prefer to use Pwnage Tool, stay tuned. We will provide a tutorial for that software shortly. Either method is extremely easy, and will have your iPad jailbroken in no time.

Important Note: Just remember this is not for the iPad 2, there is no jailbreak available for this device yet.

Before we get started, you want to make sure your iPad is on iOS 4.3.1. Backing up your iPad to iTunes is also recommended, better safe than sorry.

Step 1: For this tutorial, you'll need RedSn0w which you can download here. Make sure you select version 0.9.6rc9, as it is the only one that will work. I always download my tools to my desktop so they're easier to find.

Step 2: For this method, you will need the actual 4.3.1 firmware file. If you don't know where to find it on your hard drive, just download it to your desktop from here. Make sure you download the iPad file, 4.3.1.

Step 3: Launch RedSn0w and click Browse. Find your 4.3.1 firmware from the previous step and select it.

Step 4: The software will then give you a few options before continuing. For most of us, all we need is the Cydia icon. Make sure there is a checkmark by Install Cydia and click Next.

Step 5: Plug in your device to your computer and turn it off. Now get ready to follow some onscreen instructions. RedSn0w will walk your through a few steps to put your iPad into DFU mode.

Step 6: If you're successful, RedSn0w will start its magic. Don't worry if it doesn't happen right away, just turn your iPad off, click back and try it again.

Step 7: Once the software is done loading the exploit, your iPad will restarted, and your home screen should load up with the Cydia icon installed. Success!

That is how you jailbreak your iPad on iOS 4.3.1 with RedSn0w. Any questions?

Dev Team Releases Jailbreak for iPads on iOS 4.3.1


After weeks of waiting, a jailbreak solution for Apple's latest firmware has finally been released. The announcement that so many iDevice hackers have been waiting for, arrived extremely early this morning courtesy the Dev Team.

The jailbreak released is for iOS 4.3.1. It covers the iPhone 4, iPhone 3GS, the latest 2 generations of the iPod touch, the Apple TV2, and of course the iPad. As we've reported previously, the iPad 2 cannot be jailbroken with this software.

But don't worry, if you have an iPad 2 and are itching to customize it, known iPad hacker Comex is hard at work to bring you an iPad 2 jailbreak solution. We are told he has a working exploit, but hasn't figured out how he wants to package it for mass distribution. We will certainly let you know when we have more information on his progress.

If you have an original iPad, and are wanting to jailbreak it, feel free to go ahead and upgrade to iOS 4.3.1 via iTunes.You will also want to make sure that your iTunes is updated to the latest version. If you've done both of those already, sit tight, we will bring you a complete step by step guide on how to jailbreak your iPad shortly.

Is anyone ready to jailbreak their iPad?

How to Update to iOS 4.3.1 and Preserve iPhone 4 1.59.00 Baseband [Tutorial]

Now that Redsn0w 0.9.6rc9  finally provides the long awaited iOS 4.3.1 untethered jailbreak, many iPhone 4 owners with unlocked iPhones’ have been advised to hold off upgrading to 4.3.1 as you will lose the ability to unlock, since the newer firmware will update your baseband.

Furthermore, as we've mentioned earlier this morning, the new iOS 4.3.1 firmware currently is incompatible with the Dev Team's ultrasn0w unlock tool. It is recommended that you wait for the Dev Team to update this tool before upgrading and jailbreaking.

But for those anxious to update to the new iOS 4.3.1 firmware and still preserve their iPhone 4 1.59.00 baseband so they can be guaranteed an unlock when the Dev Team updates their ultrasn0w tool, follow our tutorial below.