From screen recording to video editing and beyond, discover 17 things you can do with QuickTime Player on your Mac to boost your productivity.
QuickTime Player is a versatile application that comes pre-installed on Mac, with features that extend beyond basic video playback.
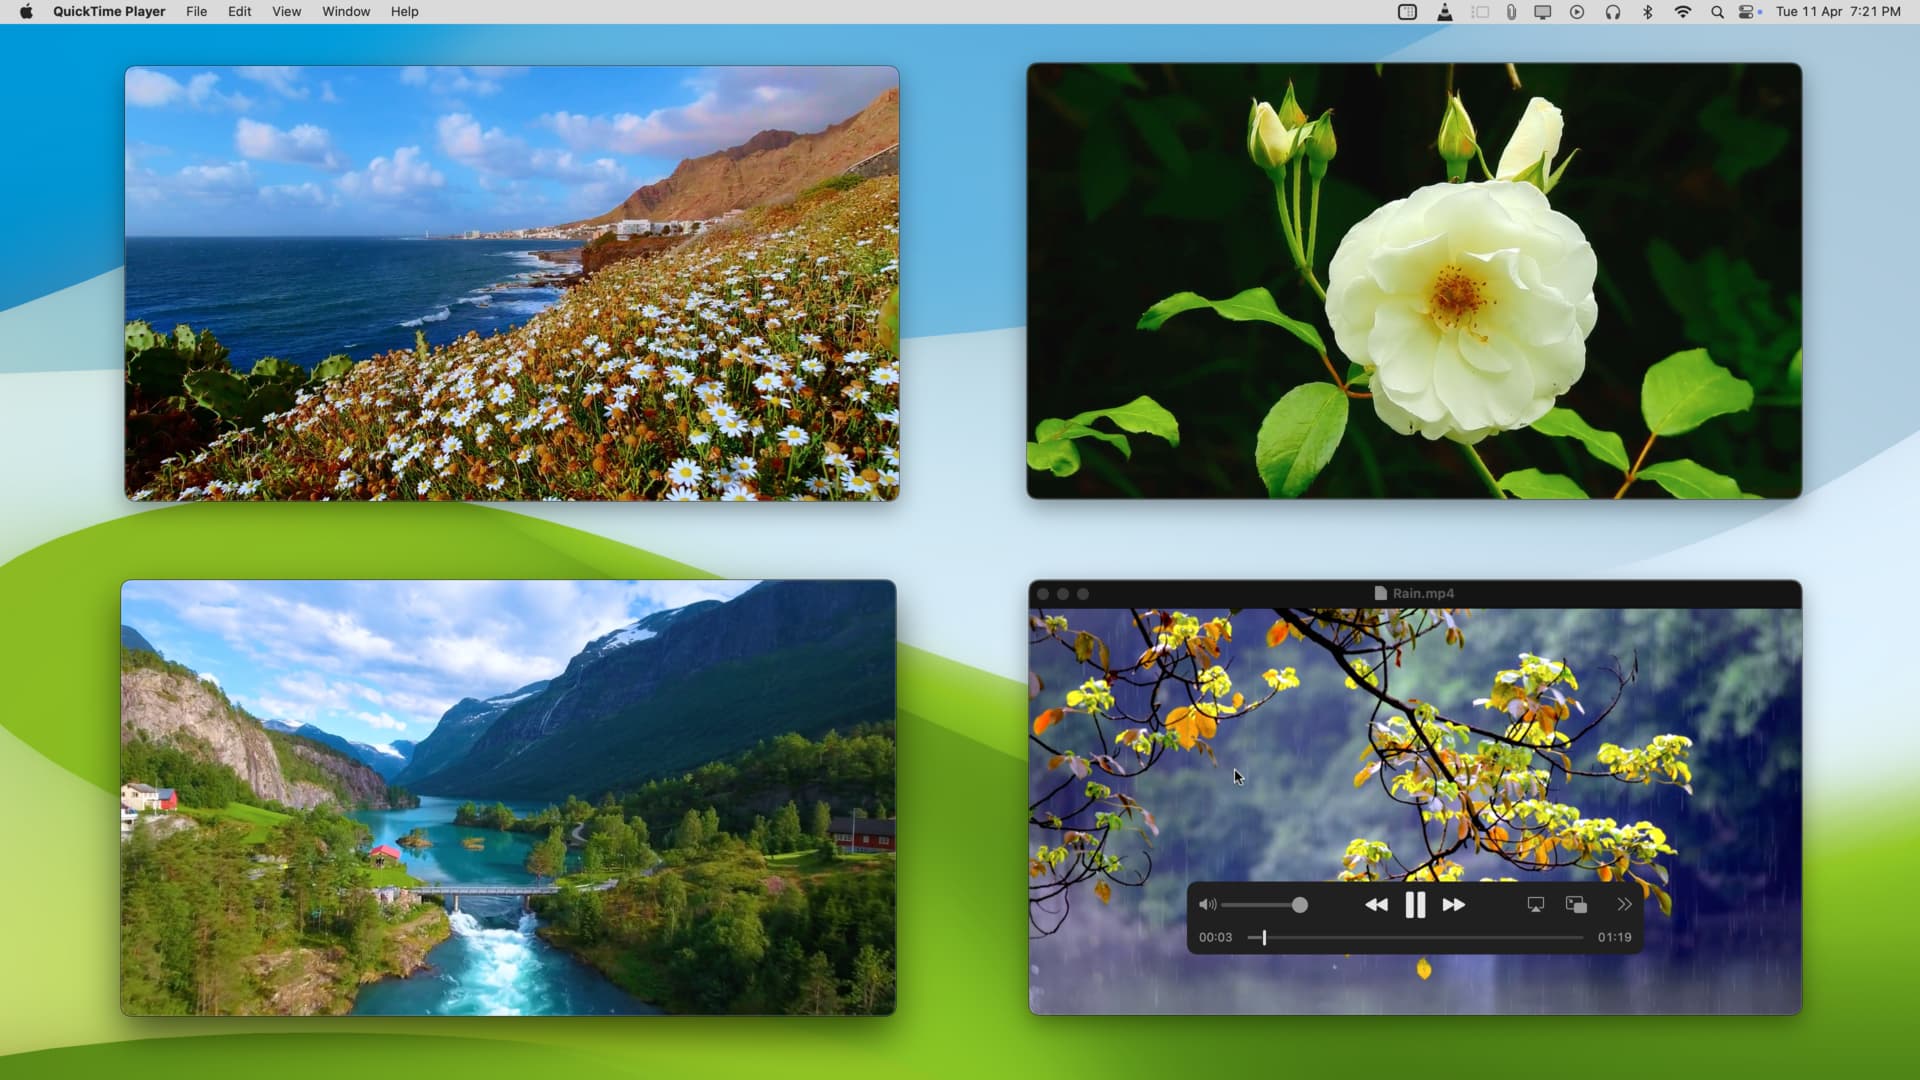
Play multiple videos at the same time
You can open multiple videos in separate QuickTime windows and play or pause them all simultaneously with a single action. It’s a neat feature; give it a try!
- Hold the Command key and select several videos in your Mac’s folder.
- Control-click or right-click and choose Open With > QuickTime Player. All videos will open in their own QuickTime windows. Decrease their sizes so that you can see more than one window on your screen.
- Now, hold the Command key and press the return / enter key to play or pause all the videos at once.
Play videos from the internet
Since QuickTime is a video player, you can obviously use it to open most downloaded video and audio files.
Aside from that, if you have the video link, you can play it directly in QuickTime instead of downloading the file and then playing it. To do that, open QuickTime and click File > Open Location > paste the video URL and hit Open.
Loop a video
If you want to watch a video on repeat, the loop feature will play it over and over again for you, so you don’t have to restart it each time manually. To do this, play a video in QuickTime and click View > Loop.
Zoom in on a video
When you’re playing a clip and want to zoom in, all you have to do is press the Command + + (plus) keys. To zoom out, hit the Command + - (minus) keys.
Save a video frame as an image
Why take a screenshot when you can save the video frame as a photo? Here’s how:
- Open a video in QuickTime Player on Mac.
- Pause the playback and scroll to the frame you want to save as a picture. Use the arrow keys for precision.
- Now, click Edit > Copy. That video frame is copied as an image to your Mac’s clipboard.
- Finally, open an app like Notes, Keynote, Pages, Word, etc., where you can paste the image and press Command + V.
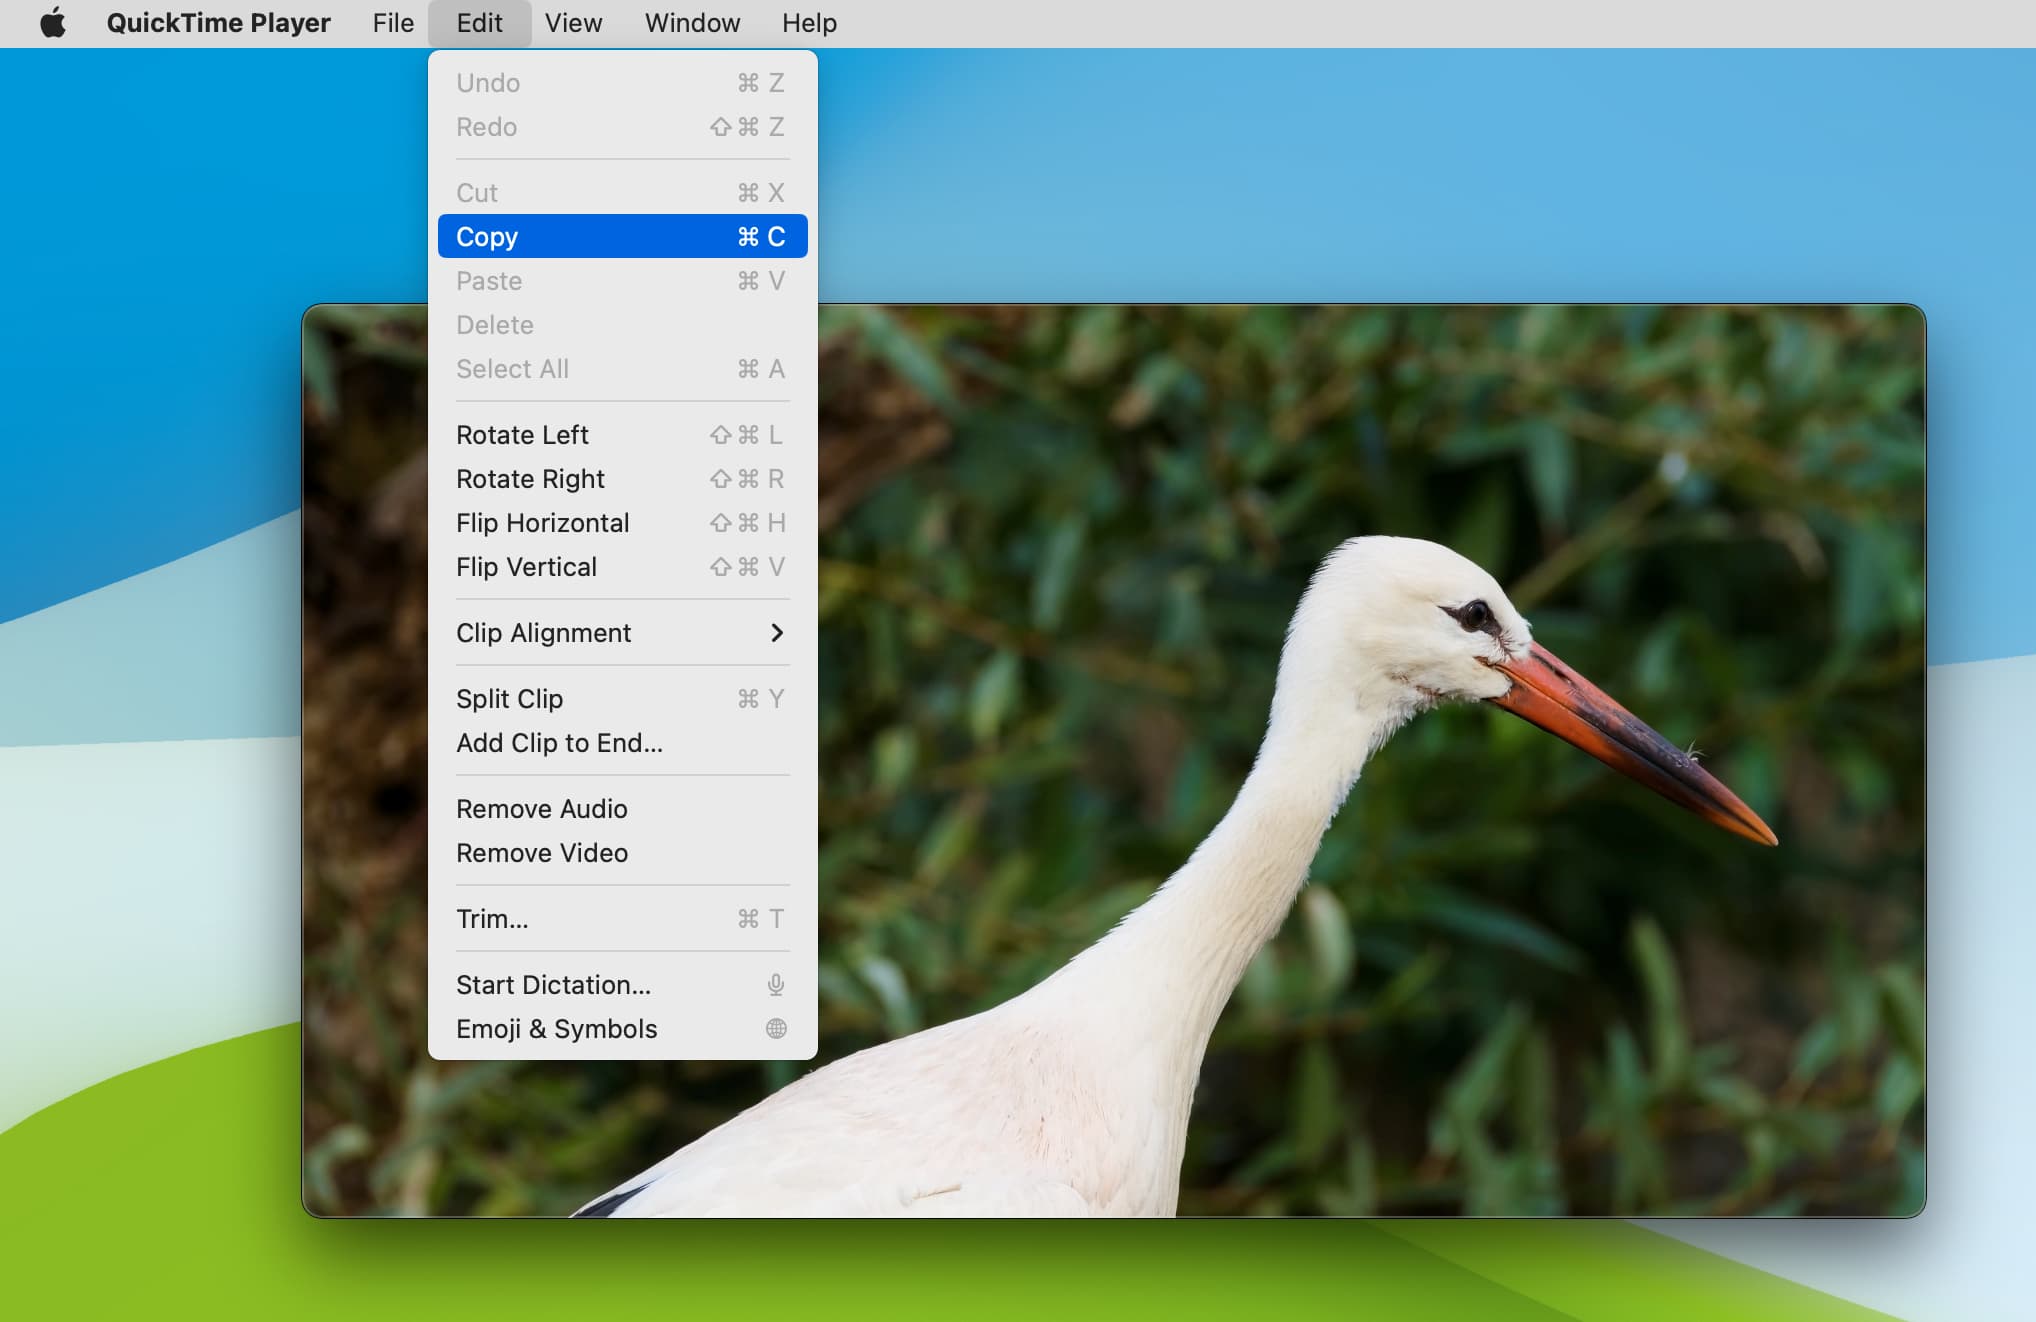
Note: You can’t paste the image directly into a Finder folder. However, you can open Apple’s Preview app and click File > New from Clipboard. Now, hit the red close button and save the image to any Finder location you want.
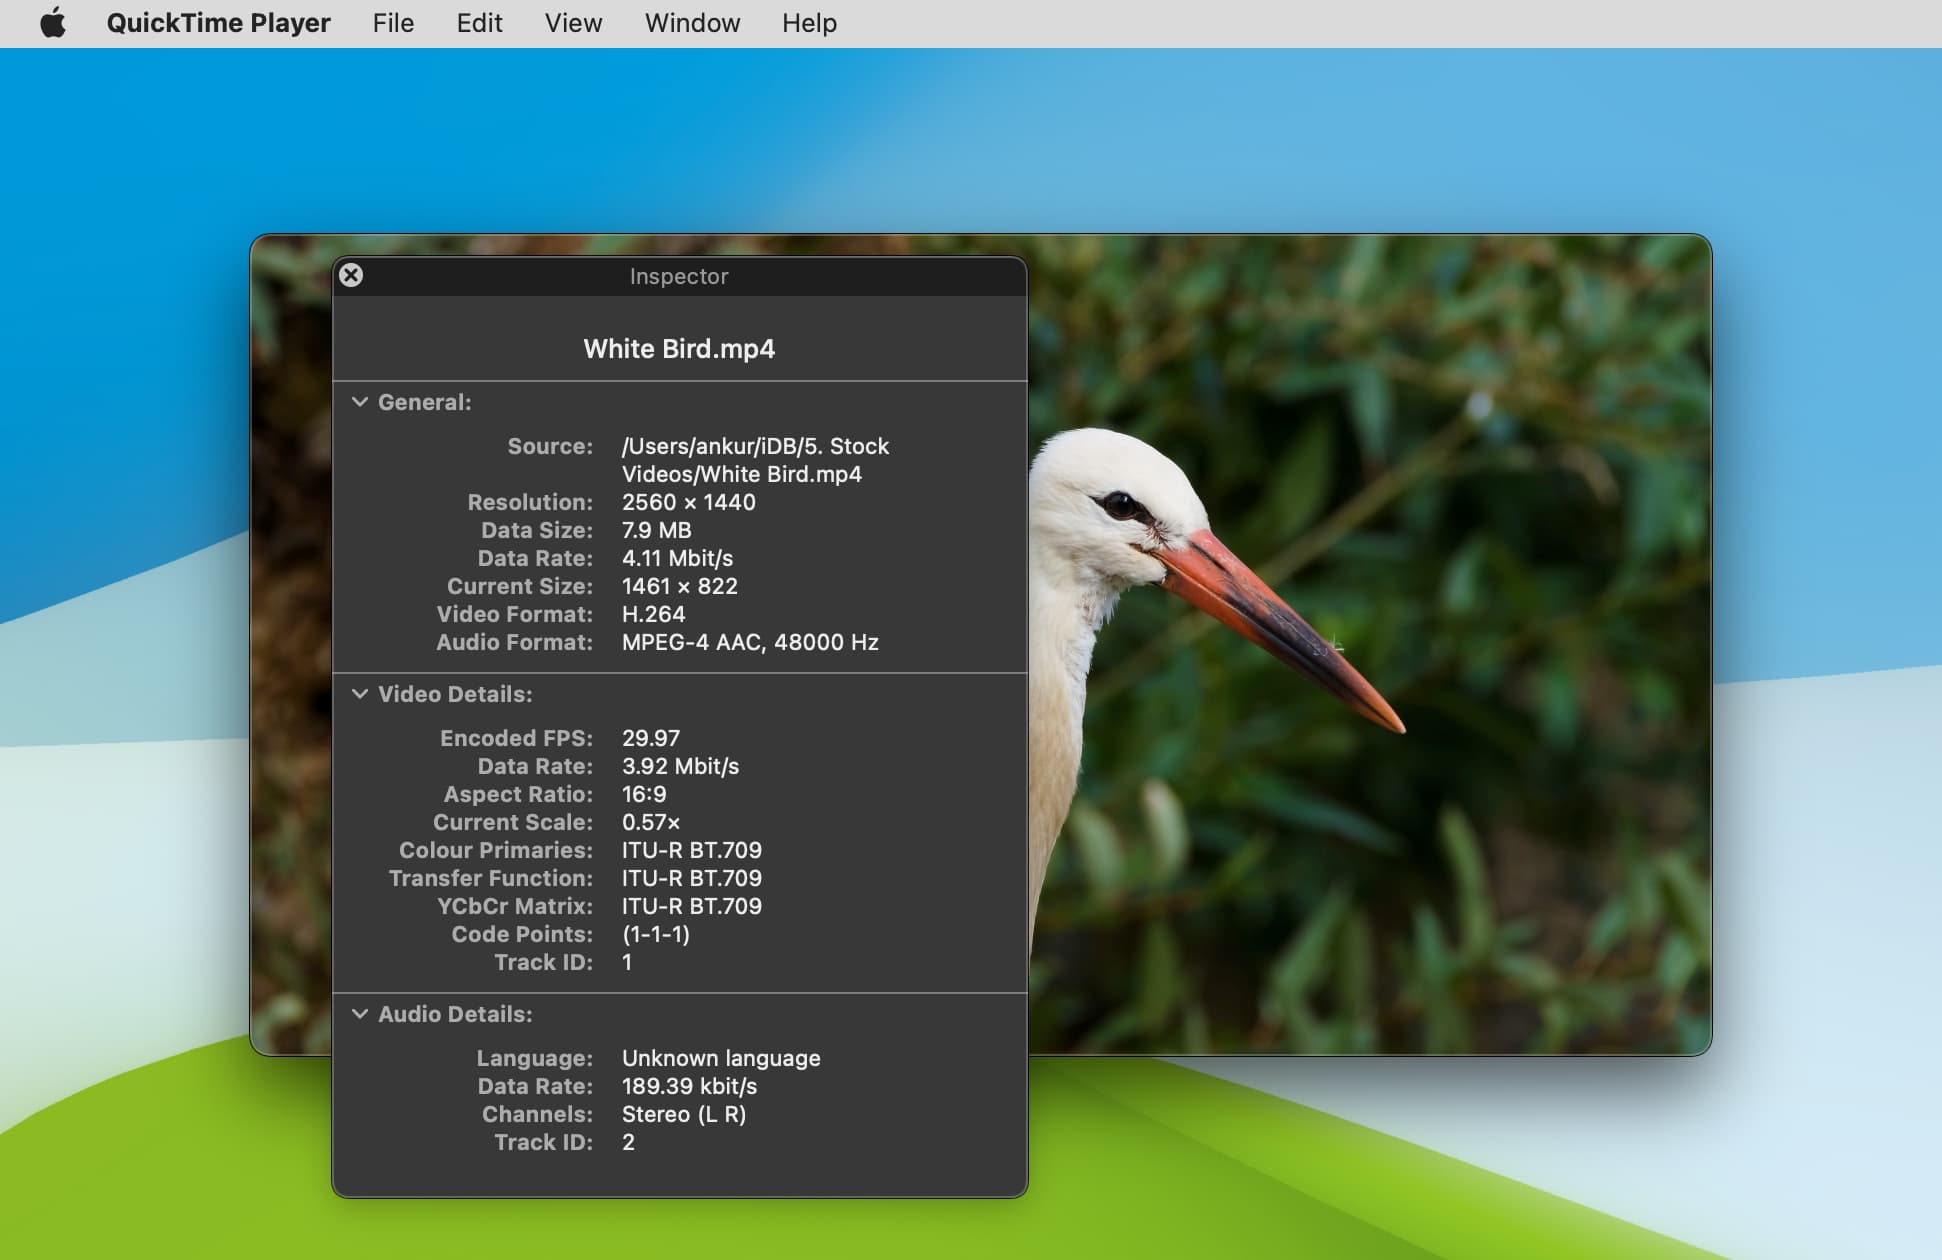
See metadata of media files
After you open a video in QuickTime Player, simply press Command + I to see its details like original resolution, size, data rate, current size/dimensions, video and audio format, FPS (frames per second), aspect ratio, audio channel, and more.
In addition to using the keyboard shortcut, you can click Window > Show/Hide Movie Inspector in Mac’s top menu bar to see the metadata.
Record your Mac’s screen
In addition to using Command + Shift + 5, you can also use QuickTime Player to record your Mac’s screen. To do this, open QuickTime and click File > New Screen Recording or press the Command + Control + N keys together.
Record your iPhone’s screen or record it during FaceTime, WhatsApp, and other calls
iOS has a built-in screen recorder, but at times, like when you want to record a FaceTime video call or WhatsApp video call, you can connect your iPhone to your Mac and record the call with audio.
Take screenshots or screen recordings of your Apple TV
Ever wanted to grab what you see on your Apple TV screen? It’s easy. Just make sure your Apple TV and Mac are on the same Wi-Fi network, and use QuickTime to take a screenshot or make a movie recording.
Record videos
All you need to do is open it and hit File > New Movie Recording.
Use it as an audio recorder
Mac has a built-in Voice Memos app, but that’s not your only option. You can record high-quality audio in QuickTime Player.
- Open QuickTime.
- Click File > New Audio Recording.
- Click the tiny arrow next to the red record button and choose the maximum quality.
- Finally, click the white and red record button.
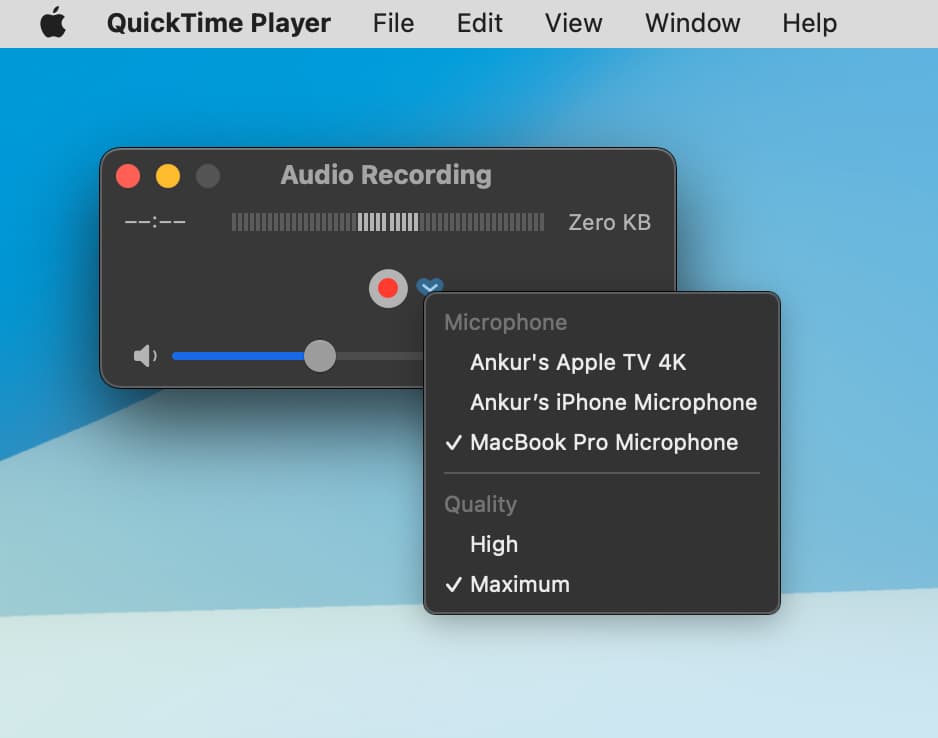
Your Mac will now record 44100 Hz, uncompressed Linear PCM 24-bit AIFF-C audio.
Edit a video
Though not as robust as iMovie or Final Cut Pro, QuickTime Player does offer some handy options to edit your video. This includes tools to rotate the clip, flip it, remove audio or video, trim it, etc. You can access these by clicking Edit in the top menu bar. Our dedicated tutorial shows you how to do all this.
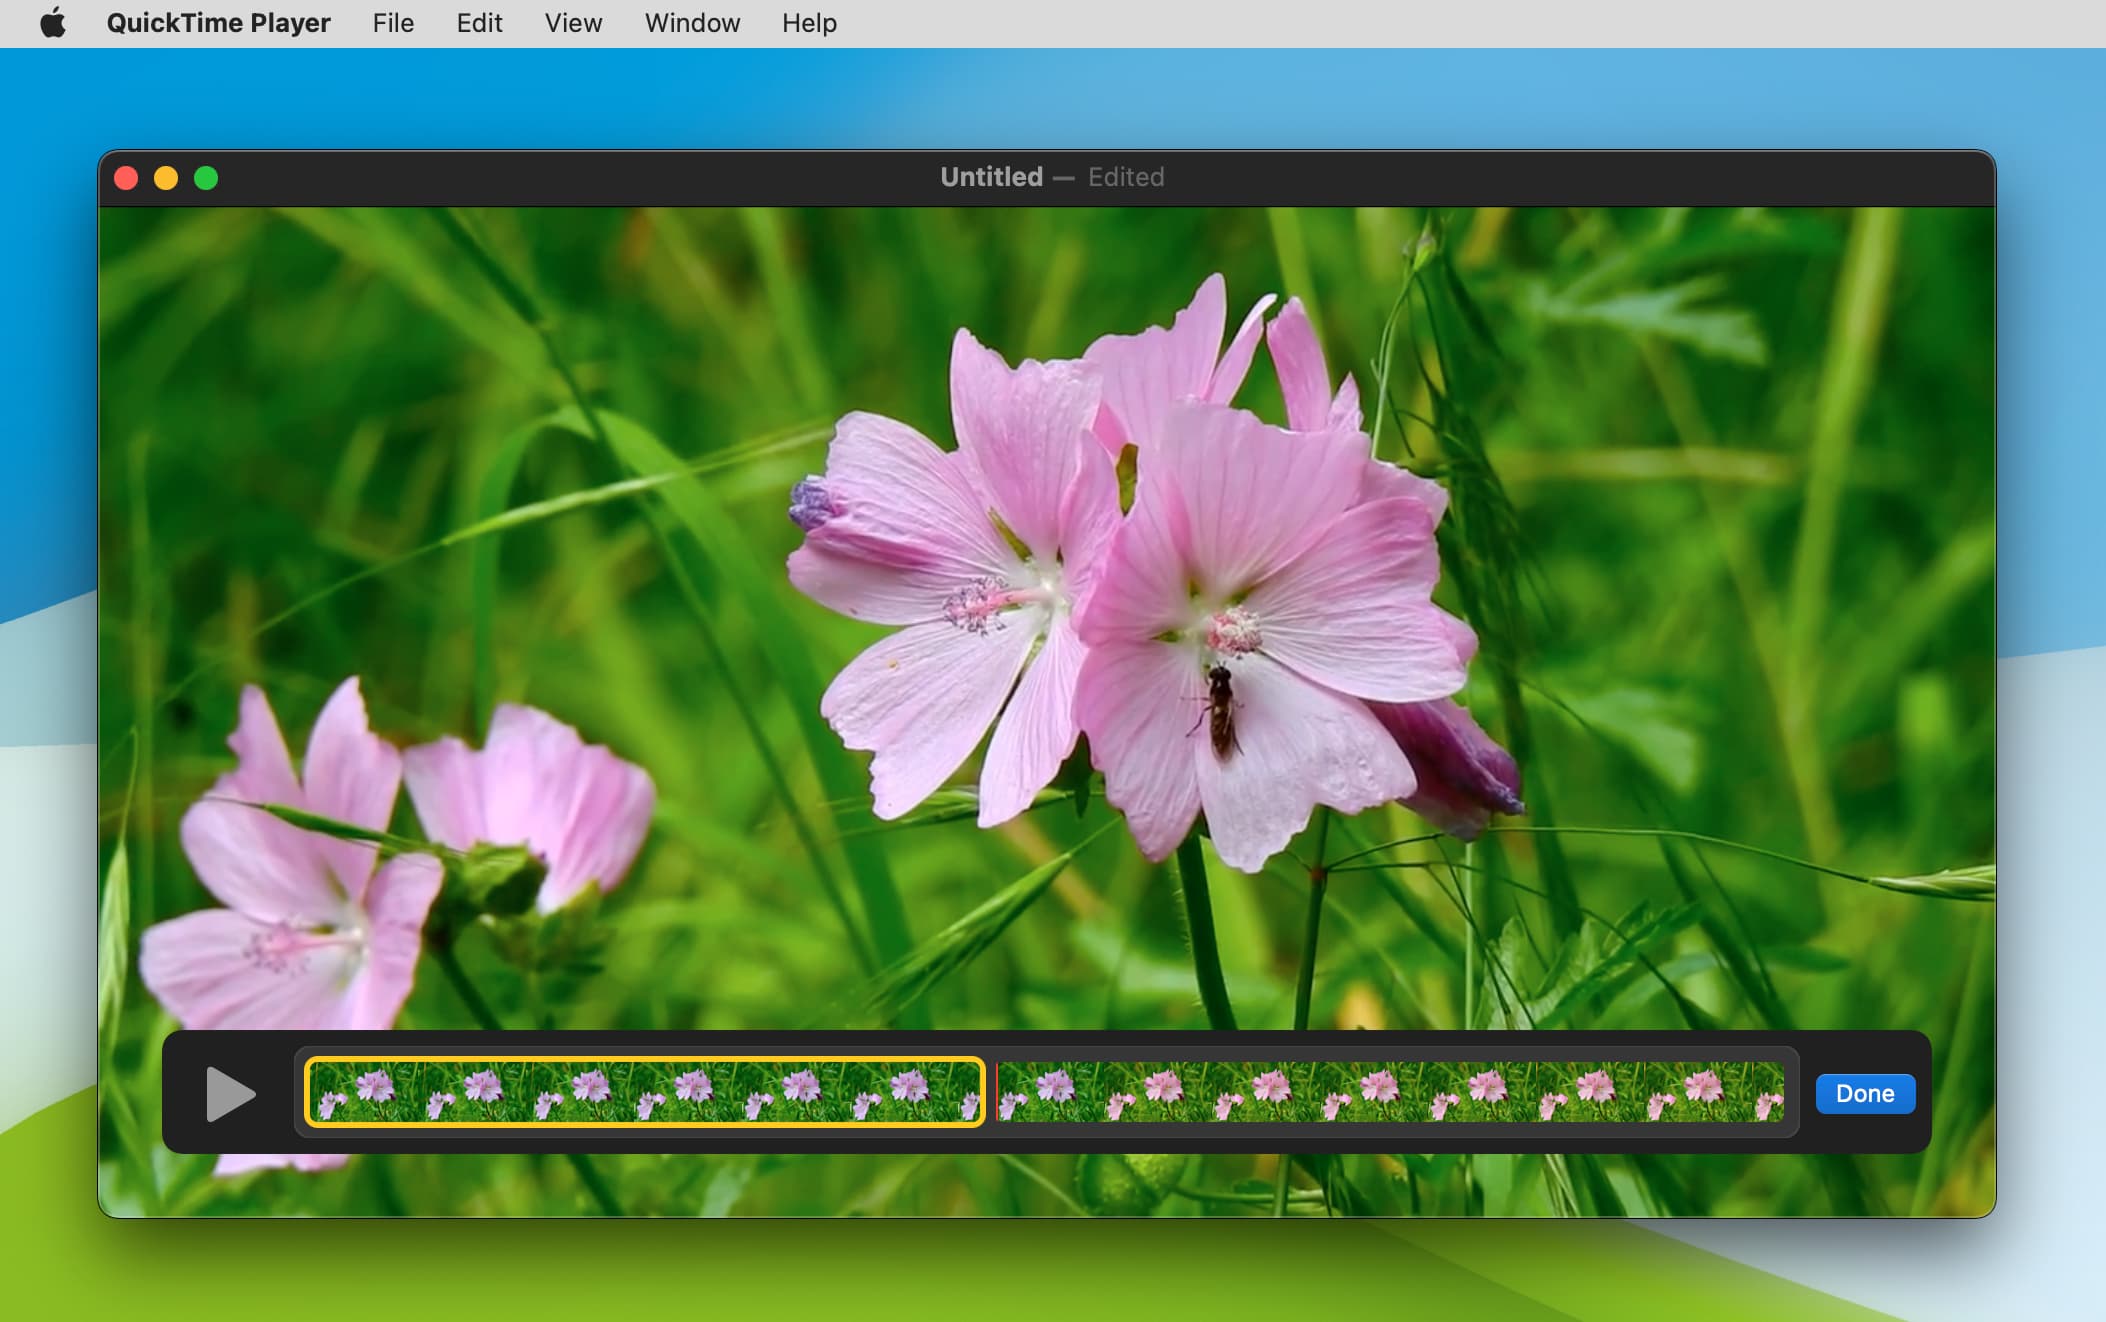
Merge two or more videos into one
- Open the first video in QuickTime Player.
- Click Edit > Add Clip to End > select one or more videos and hit Choose media. You’ll see the videos appear side by side on a thin timeline at the bottom of the QuickTime screen. Tip: You can also drag a video and drop it over QuickTime to add it to the editing timeline.
- To change the order of a clip, select it on the timeline and drag it before the other video.
- With everything done, click File > Export As > choose a resolution and hit Save.
Split a video
- Open the video in QuickTime Player on Mac.
- In the top menu bar, click View > Show Clips.
- Now, drag the red line to the position from where you want to split the video clip.
- Click Edit > Split Clip.
- Next, choose the other unwanted clip and press the delete key to get rid of it.
- Finally, save the remaining video. You can do it simply by clicking the red close window button.
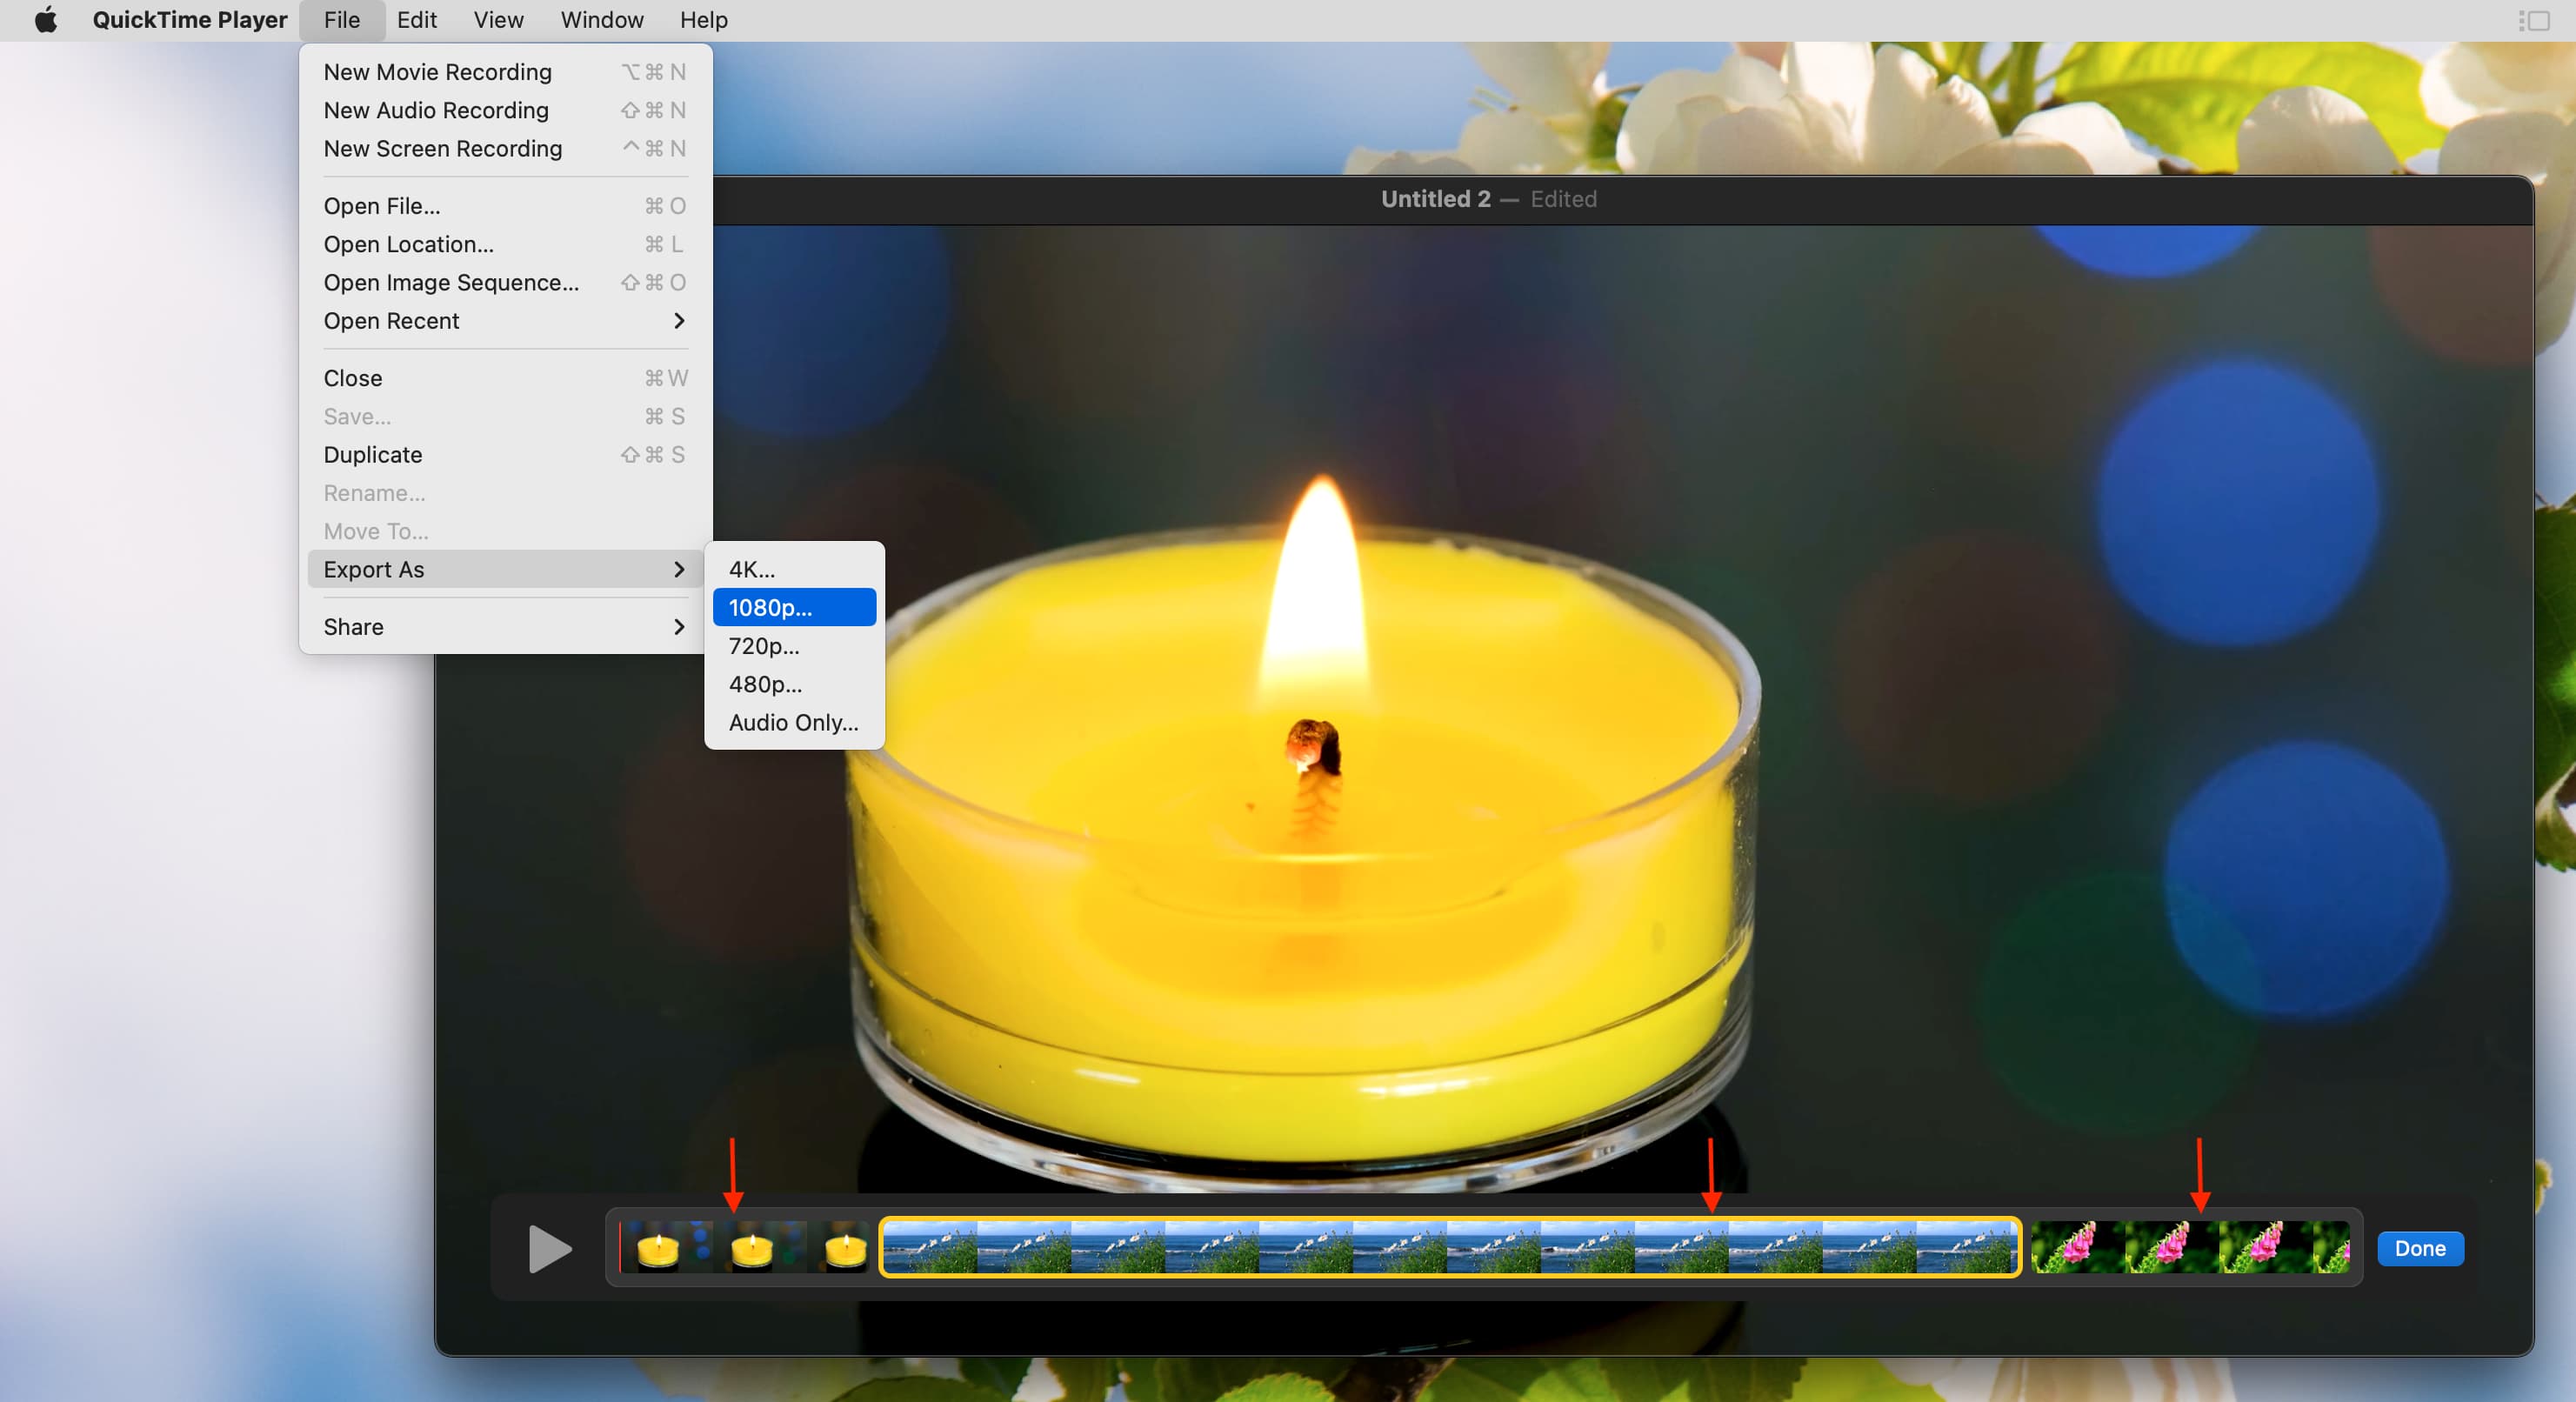
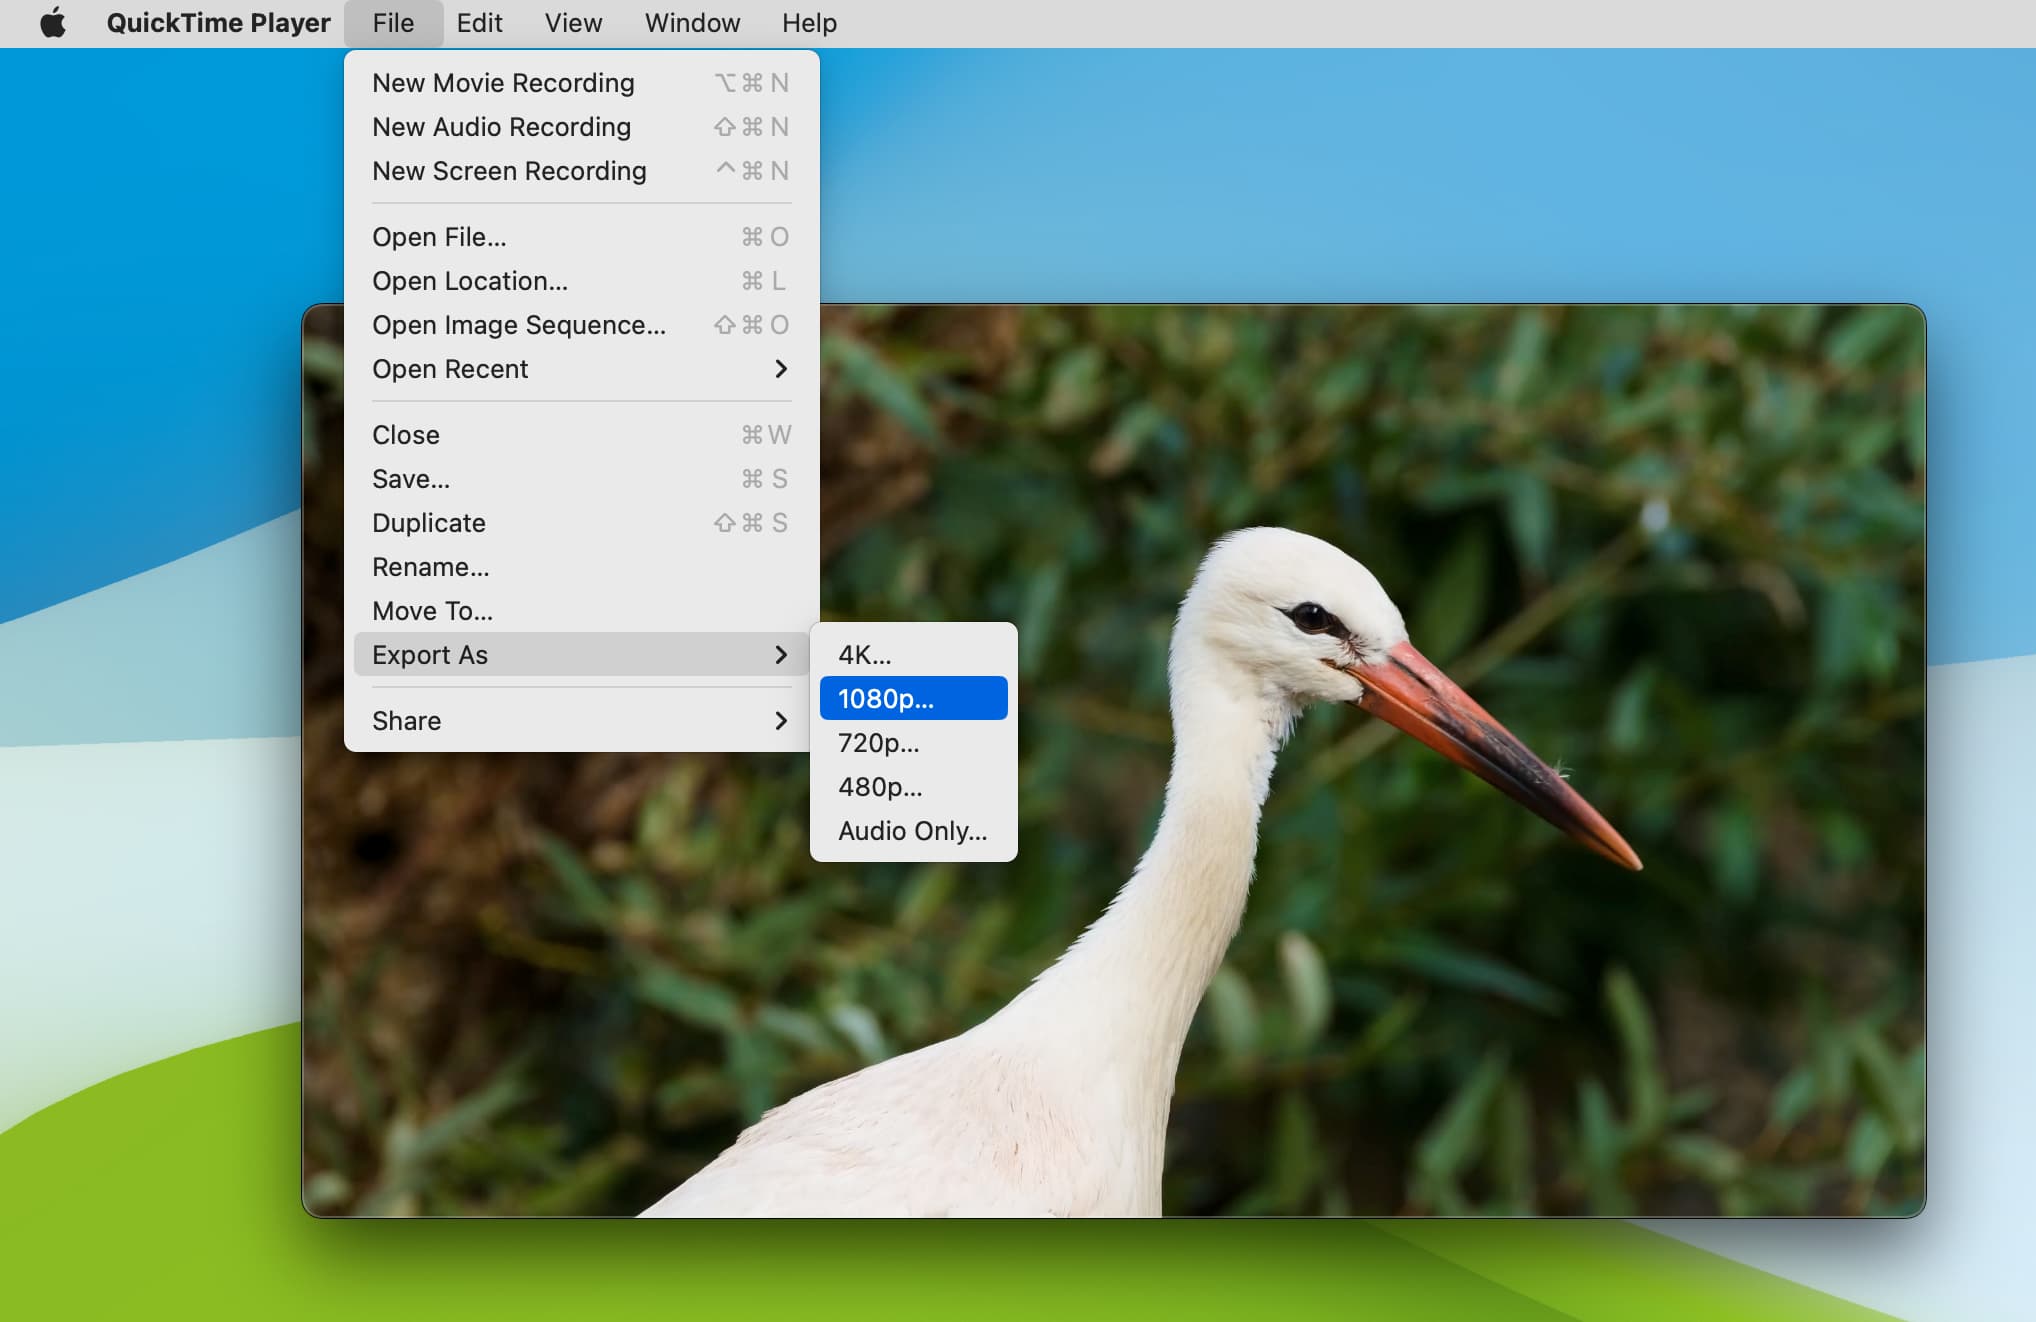
Reduce the video quality or change video codecs
Imagine you have a 4K video that you want to downgrade to 1080p so that it can be played on low-end phones and tablets. Instead of downloading an extra app, you can have QuickTime handle this.
- Open the video in QuickTime Player on Mac.
- Click File > Export As and choose 1080p or another lower quality. When you pick 1080p, you may also see an additional menu to change the codec, where you can select Smaller File Size (HEVC) or Greater Compatibility (H.264).
- Finally, click Save to export the converted video.
Extract the audio from a video file
You can open the video in QuickTime and click File > Export As > Audio Only > Save to extract the audio part of any video file. The audio will be saved as an m4a file.
Create a video or GIF using an image sequence
If you took many photos in a sequence, like a burst photo, you can turn them all into a video using these steps.
- Open QuickTime Player on your Mac.
- Click File > Open Image Sequence in the top menu bar.
- Now, select all the photos or a folder with those photos and click Choose media.
- Change the resolution, frame rate, and codec if needed. Finally, click Open. QuickTime will prepare the video, and then you can play it or save it as a MOV file by clicking the red window close button.
- Once you have a short video of a few seconds, you can use sites like ezgif.com to convert it into a GIF.
Bonus: Best QuickTime alternatives for watching videos
Finally, even though QuickTime Player is a feature-packed and free app, you may want to know about a few alternatives for instances when you have to play files in MKV format. Here are two that I use on my Mac in addition to Apple’s built-in video player:
Fun fact: QuickTime player was also available for Windows PC, but was discontinued in 2016. However, you can still download QuickTime 7.7.9 for Windows from Apple’s official website.