Follow along as we guide you through all the possible solutions to fix the built-in camera or externally connected webcam not working on your Mac.
1. Does your Mac have a webcam?
First, you must know that not all Macs have built-in cameras. Sure, all Mac notebooks (Pro, Air, Neo) have a camera at the top. Similarly, iMac desktops have a built-in camera. However, Mac Pro, Mac mini, and Mac Studio don’t have a built-in camera. On these Macs, you’ll have to rely on an external webcam or use a monitor that has a camera at the top. If you’re unsatisfied with the quality of your MacBook’s built-in camera, use a third-party camera or use your iPhone as a webcam.

2. Is the camera covered or blocked?
Some people, including Mark Zuckerberg, cover Mac’s camera. (Apple doesn’t want you to do that and has a support article on this.)
In case you have put a tape or sticker over the camera, remove it. Plus, if you’re using an external webcam, make sure its cap or cover is removed.
3. Does the camera work in Photo Booth?
Photo Booth is an app that comes preinstalled on all Macs. Open it and check whether your Mac’s camera works. If it does, the problem lies in the specific app where you’re trying to use the camera.
4. Allow the app to use your Mac’s camera
Let us say you aren’t able to use the camera in Zoom, Skype, or other third-party apps. This can be because during setup, or when you opened the app for the first time, or when you first initiated a video call, it asked your permission to access your Mac’s camera, and you didn’t allow that.
Follow these steps to allow an app to use your Mac’s camera:
- Open System Settings and select Privacy & Security.
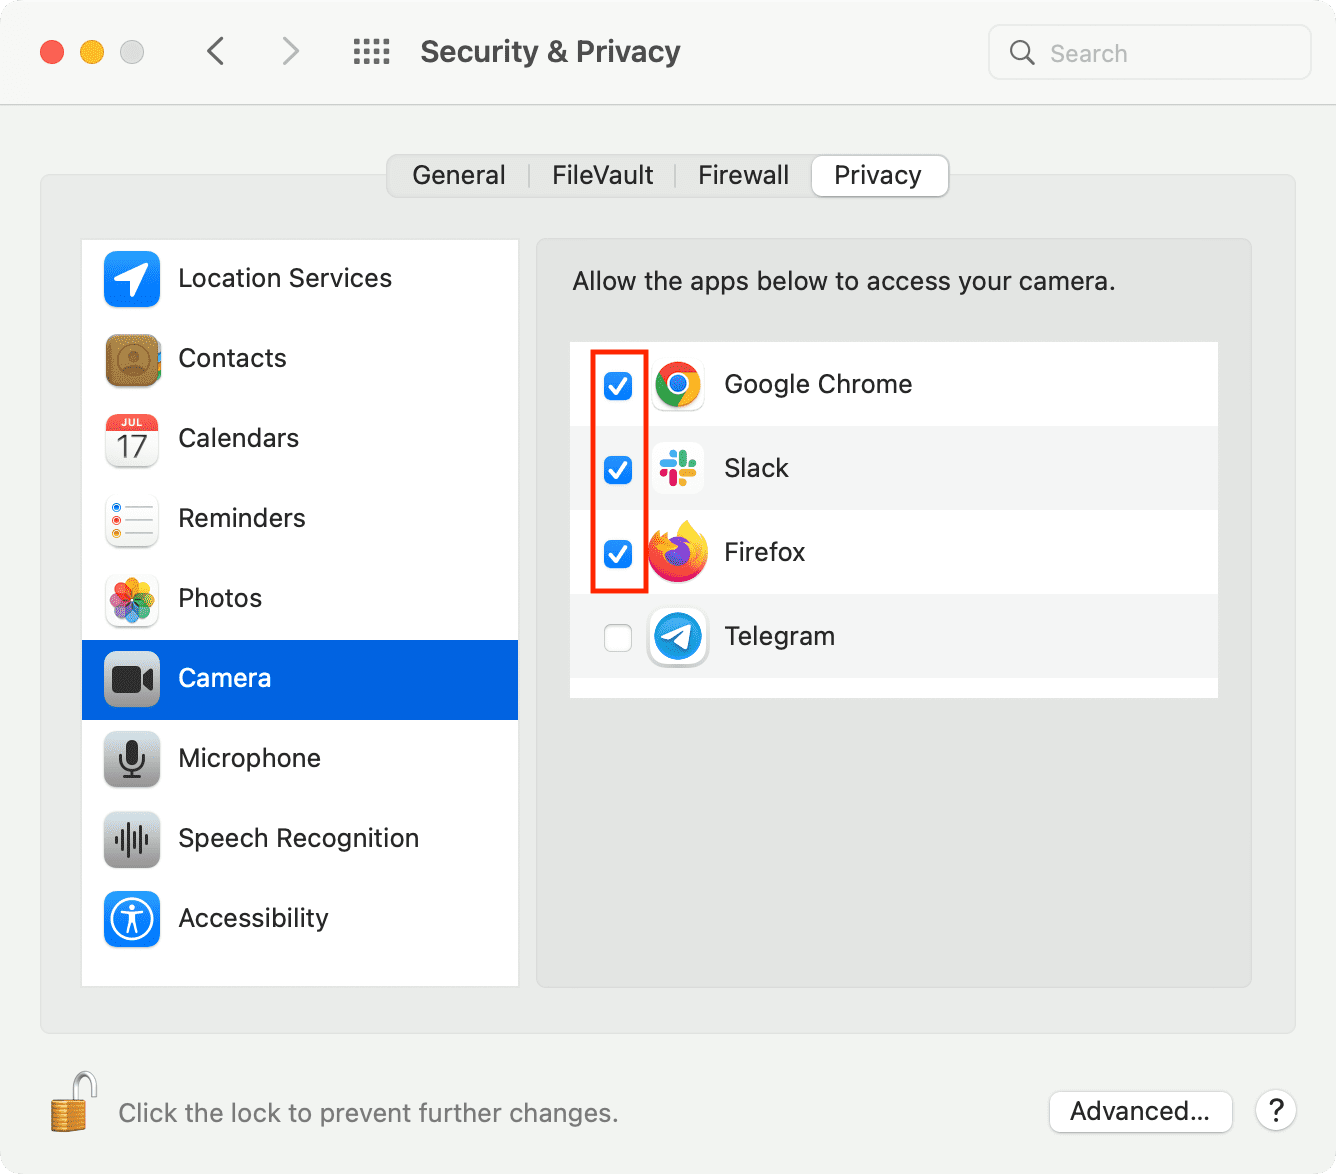
- Click Camera and make sure the app is allowed to use it.

Once this is done, quit the app and relaunch it. Now, it can use your Mac’s built-in or connected camera, and you should have no problems with video calls.
If you’re on an older version of macOS, head to System Preferences > Security & Privacy > Privacy tab and select Camera from the left sidebar. Next, click the padlock and enter your Mac’s password or Touch ID to authenticate. Finally, check the unchecked box for the app you want to give camera access.
5. Choose the right camera in the app’s settings
It’s possible that you might have chosen conflicting or wrong settings inside the app. The easiest way to identify the problem is by opening the app in question and pressing Command + , (Comma) keys to go to its settings. From here, make sure the camera settings are correct.
If you have connected more than one camera to your Mac, choose the correct one, that is, the one that works. If you’re unsure, the best approach is to go with your MacBook’s or iMac’s built-in camera.
6. Force quit apps that use the camera
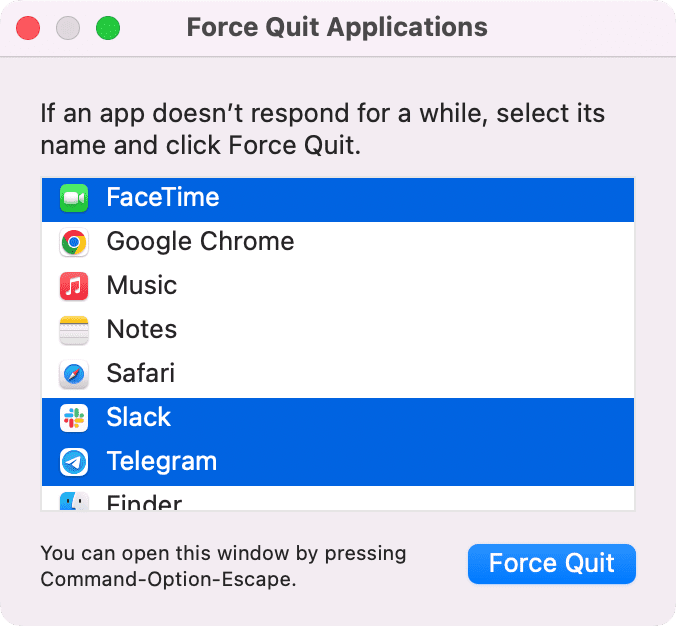
Things may conflict if you open several apps that use the Mac’s camera. For instance, if you launch FaceTime, Zoom, Microsoft Teams, Slack, and Photo Booth at the same time or keep them open, none of the apps may get your Mac’s camera feed.
To fix this, quit all such apps and open only the one you need to use now. In case an app is frozen or not responding, press the Command + Option + esc keys to open the Force Quit window, select the app, and click Force Quit.
7. Restart your Mac
Often, all you need to do to fix your Mac’s non-working camera is to restart the machine. To do that, click the Apple icon () from the top left and choose Restart.
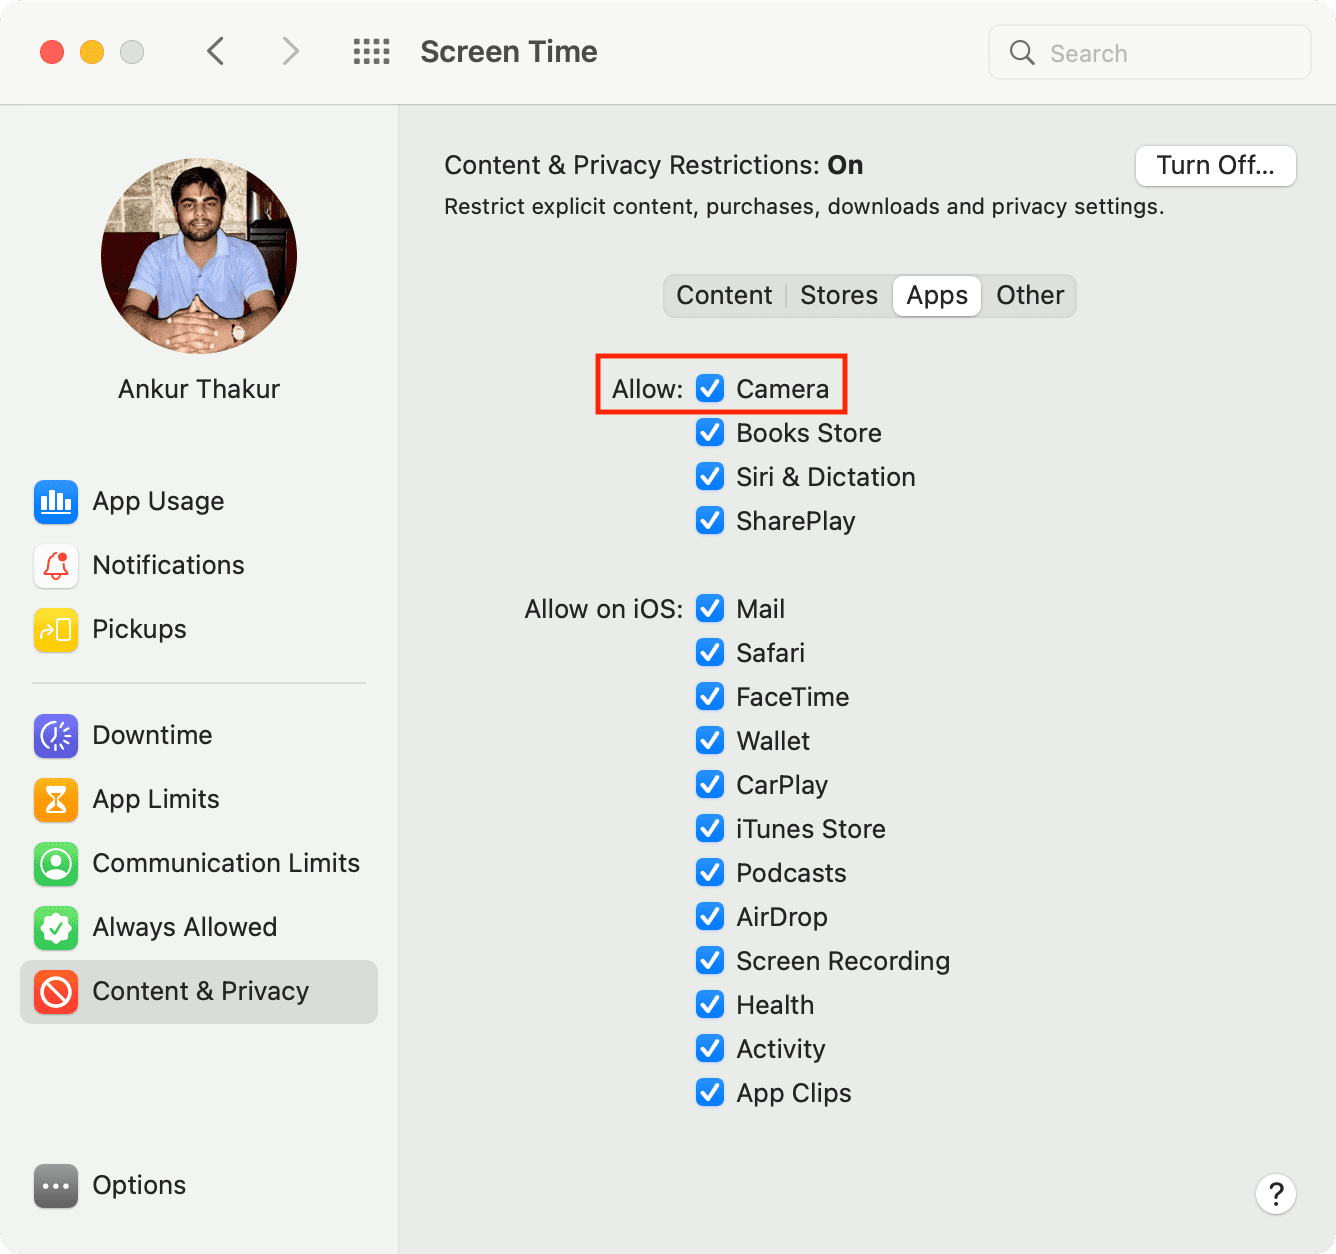
8. Unrestrict Mac’s camera from Screen Time
Just like iPhone and iPad, you can configure Screen Time on your Mac and restrict things like Camera or FaceTime.
- Open System Settings and select Screen Time.
- Click Content & Privacy.
- Select App & Feature Restrictions.
- Make sure the switch for Allow Camera is enabled.

On older versions of macOS, head to System Preferences > Screen Time > Content & Privacy > Apps, and make sure Camera is checked, which means it’s allowed to work.
9. Quit macOS camera processes
If you couldn’t get your Mac’s camera to work after a restart or un-restricting it from Screen Time, follow these steps to kill its processes and refresh everything:
- Quit all apps that use the camera. To be on the safe side, you can also save your work and quit all open apps.
- Next, open Terminal on your Mac.
- Type or copy & paste
sudo killall VDCAssistantinto the Terminal and hit the return / enter key. - Next, type or copy & paste
sudo killall AppleCameraAssistantinto the same Terminal window and hit the return / enter key.
Your Mac’s camera should work now, and the “No camera available” alert should be a thing of the past.
10. Use another app and see if Mac’s camera works
Is Mac’s camera not working in FaceTime, Zoom, or a specific app? If yes, open another app that uses your Mac’s camera and see if it works there. You can also go to a site like WebCamera.io, allow it to access your Mac’s camera, and check things here.
11. Update the application or reinstall it
You’ll face errors and problems when using an old version of Zoom or other apps on your Mac. To address this, update the app, and things should be alright.
12. Check for the camera in Mac’s System Report
Do the following if your Mac alerts you that no camera is connected, or if, despite the above fixes, the problem persists.
1) Hold the Option key, click the Apple icon from the top menu bar, and click System Information.
2) Select Camera from the left sidebar.
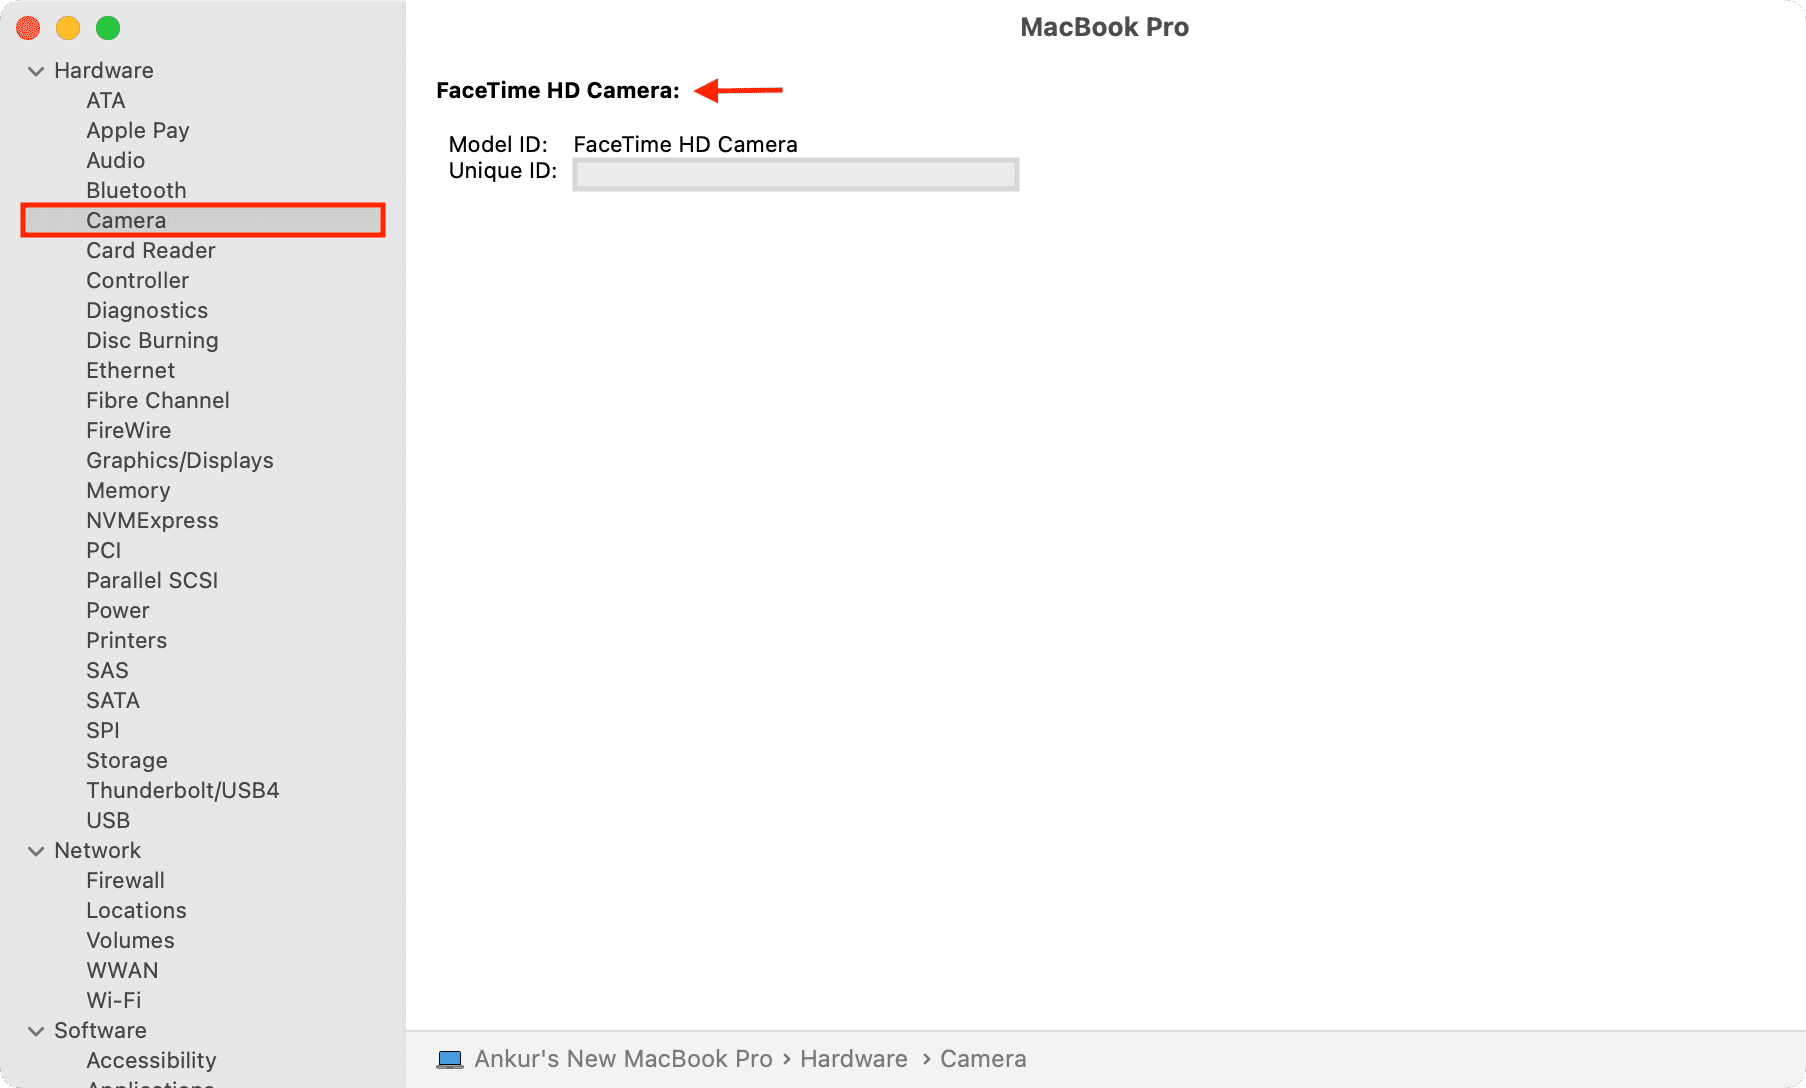
3) It will show you the built-in camera and other ones connected to your Mac. In case you see “No video capture devices were found” here, that means:
- Your Mac doesn’t have a camera.
- The camera is broken on a hardware level.
- The external camera isn’t connected properly to your Mac. Make sure you check the connection.
13. Disconnect connected accessories
In rare cases, externally connected accessories may prevent the built-in camera or a third-party camera from working properly. Disconnect such connected drives, dongles, etc., from your Mac and see if it helps restore the camera.
14. Update your Mac
Old versions of macOS and newer versions of apps may not play nicely with one another. Plus, older builds of macOS can have unaddressed bugs. To fix all these issues, update your Mac by installing the latest available version of the operating system.
15. Run Apple Diagnostics to identify the problem
Still no luck fixing your Mac’s camera issues?
Start your Mac in Apple Diagnostics or Apple Hardware Test mode. After that, note the error code. If the code begins with N, like NDC001, NDC003, NDC004, NDC005, and NDC006, that means there is a problem with your Mac’s camera. Contact Apple Support to get it fixed.
16. Reset Mac’s SMC
If you’re still unable to use your MacBook camera, go ahead and reset the SMC.
Note: This applies only to Intel-based Macs. Skip this if your Mac has Apple silicon (M1, M2, M3, M4, M5, and later).
17. Did you drop your Mac, or did something fall on it?
One of my friends dropped his MacBook from the upper seat on a train, which created a dent and broke the built-in camera. The other day, I dropped my MacBook’s huge charger on the top of my MacBook; luckily, it didn’t do any damage.
If you had a similar situation, chances are the built-in camera is displaced from its original position and thus not working. The only way to fix such hardware issues is by taking your computer to an Apple Store or authorized service center.
18. Contact Apple Support if the camera light flashes
Is the tiny light next to your Mac’s camera continuously flashing green? If yes, chat with Apple Support, and they should assist accordingly.
More on video calling: