Learn how to add, edit, change, manage, and delete watch faces directly from your Apple Watch or iPhone to keep the look fresh and suitable for different occasions.
Add a new watch face
You can do this directly from your Apple Watch or your iPhone.
From Apple Watch
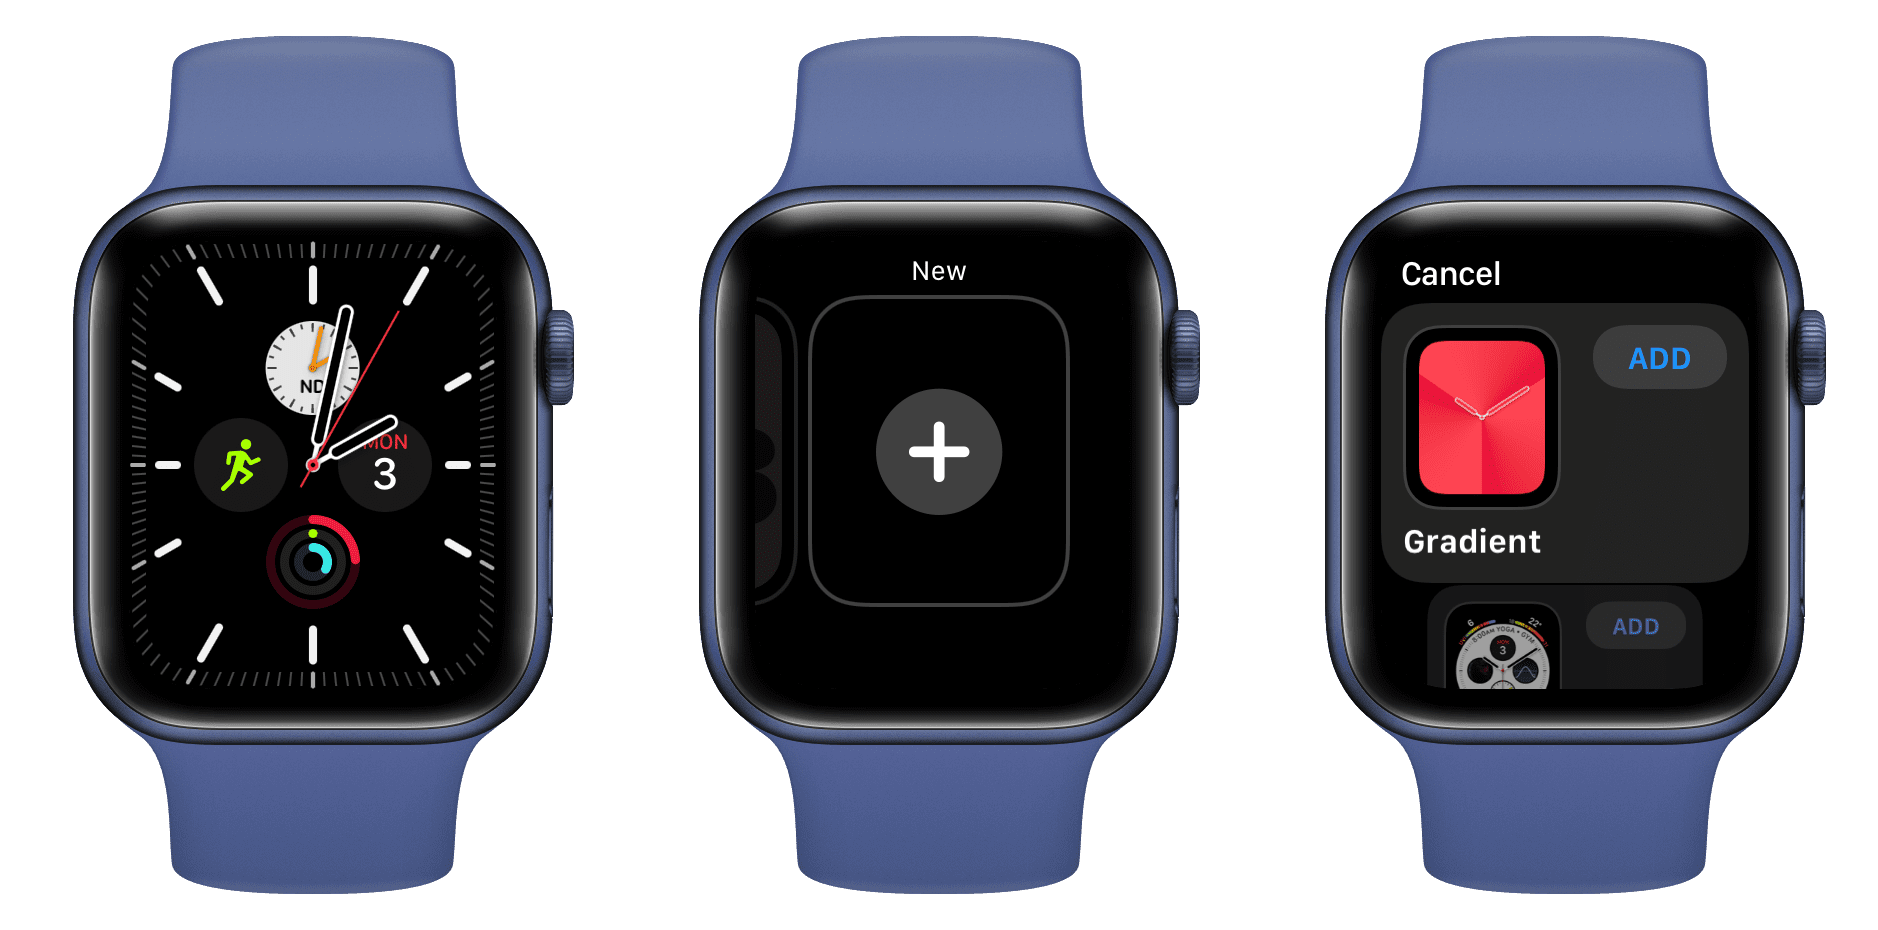
- Touch and hold the current watch face, and it will shrink down.
- Swipe left until you reach the end. From here, tap the big plus button (+).
- Use a finger or Digital Crown to go through the many watch faces. Tap ADD next to the one you like.
- Swipe left and right to set watch style, dial, color, complications, etc. Note that not all watch faces offer these settings. Rotate the Digital Crown to swipe through various options.
- Finally, press the Digital Crown until you see the new watch face.
From iPhone
It’s easy to add new watch faces directly from the comfort of your big iPhone screen.
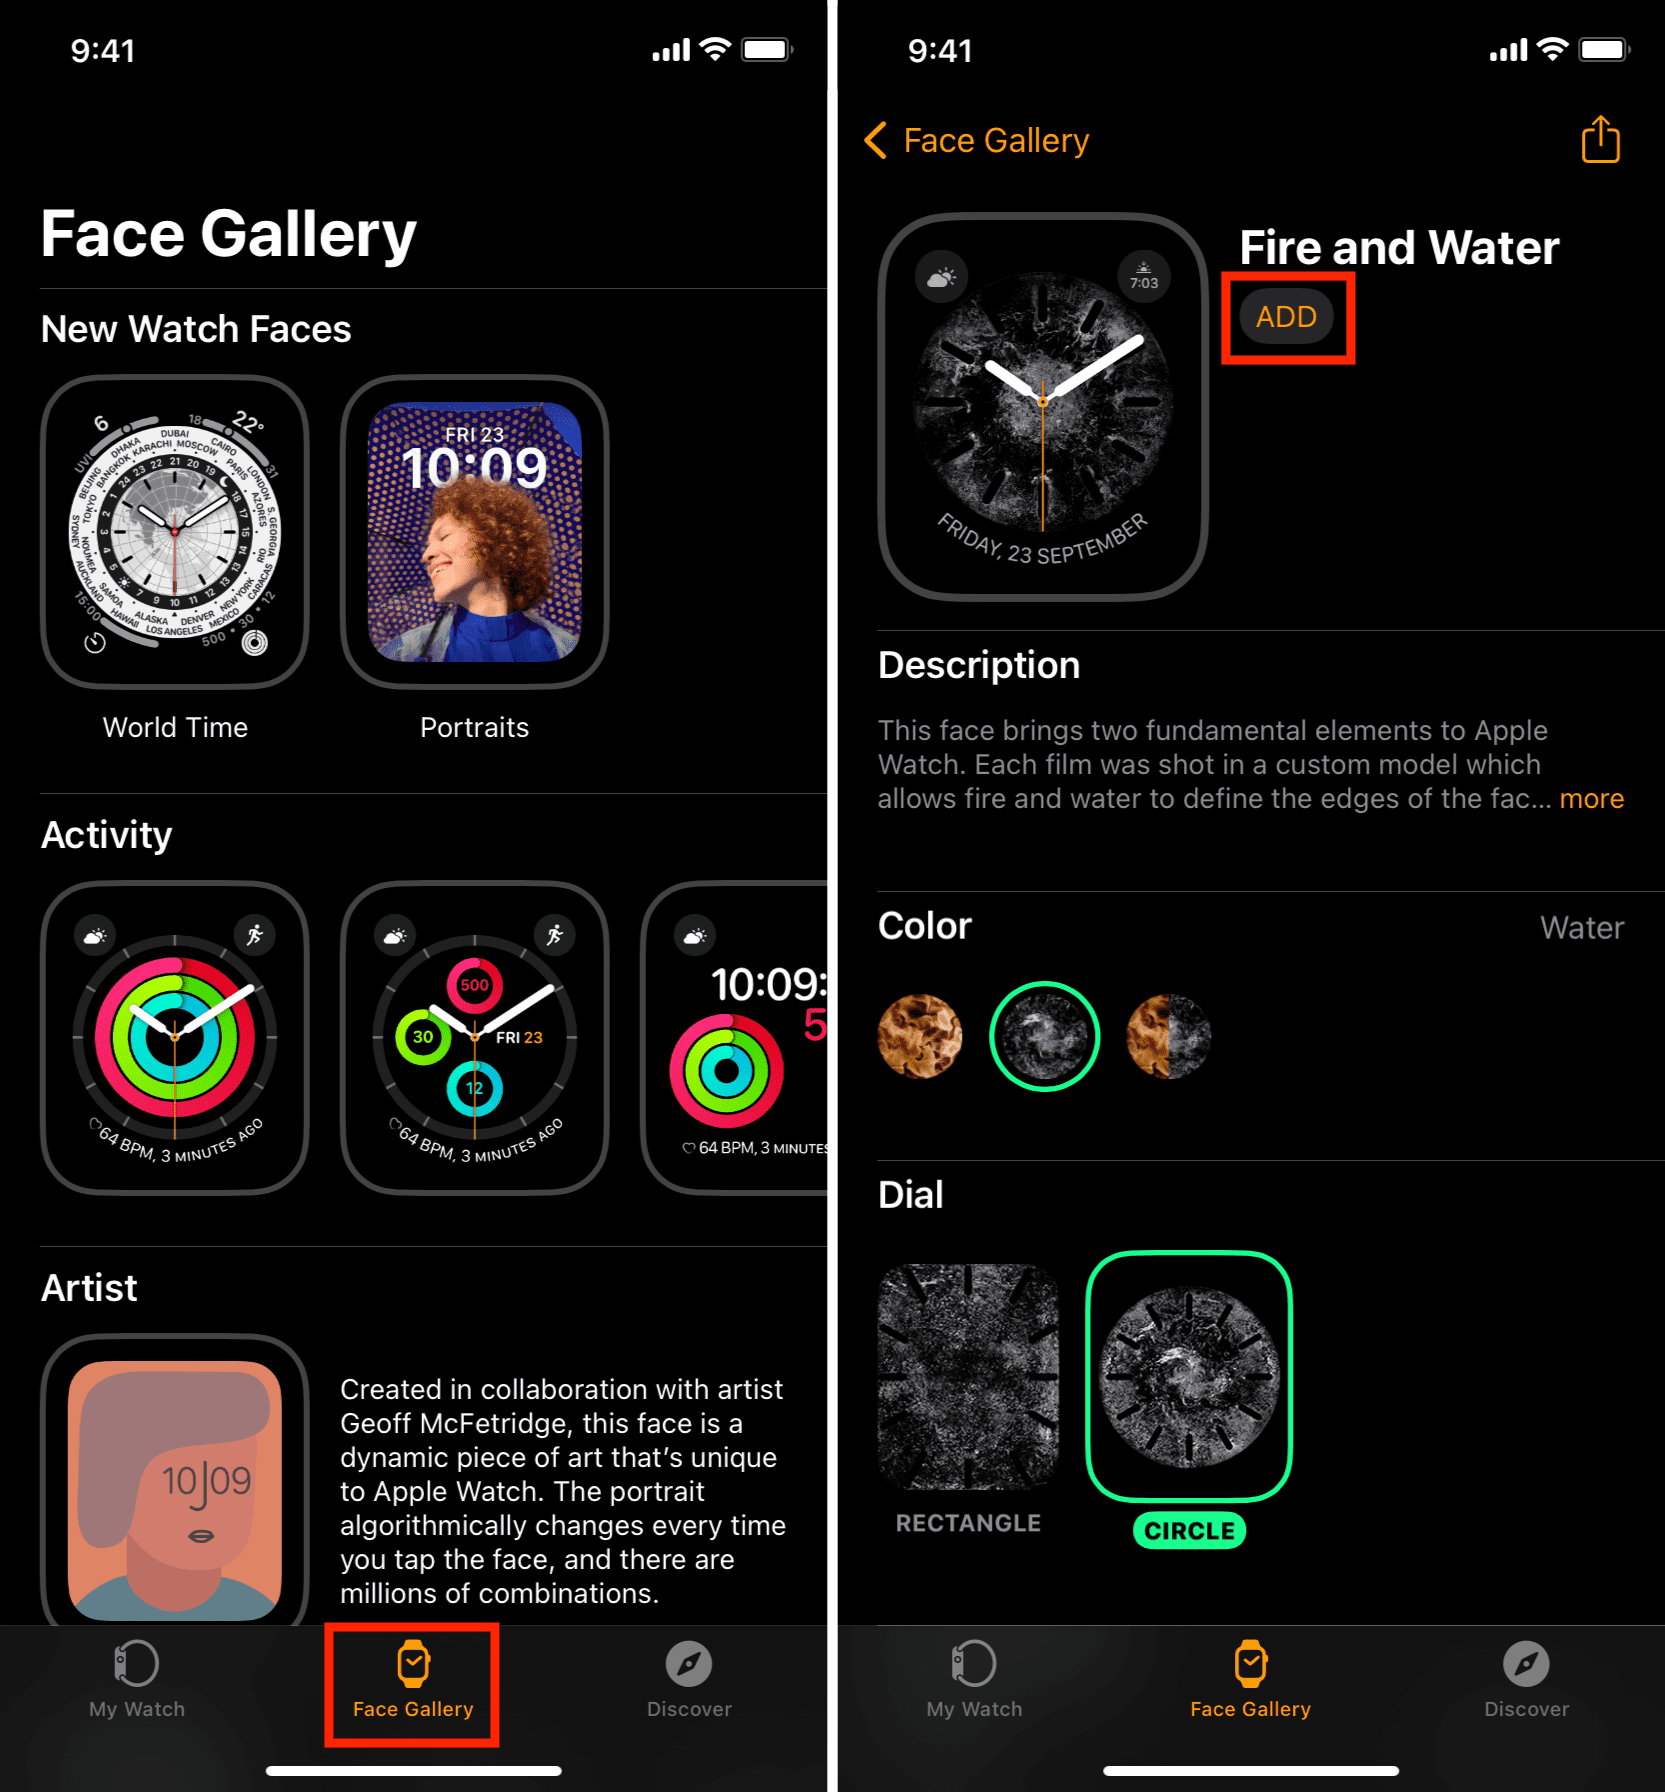
- Open the Watch app on your iPhone and tap Face Gallery from the bottom.
- Scroll through the list and tap the watch face that looks good.
- Customize the color, style, and complications as available for that watch face.
- With everything in order, tap the ADD button from the top.
Switch to a different watch face
To spice up the look of your Apple Watch, you may not want to stick with one watch face only.
After you have added multiple watch faces to “My Faces,” touch and hold the current watch face, and it will shrink in size. Now, swipe and tap the one you want to set.
Also see: How to automatically change your Apple Watch face based on time or location
Edit the current watch face
Watch faces aren’t set in stone, and you can edit them whenever you want, right from your right or your phone.
From Apple Watch
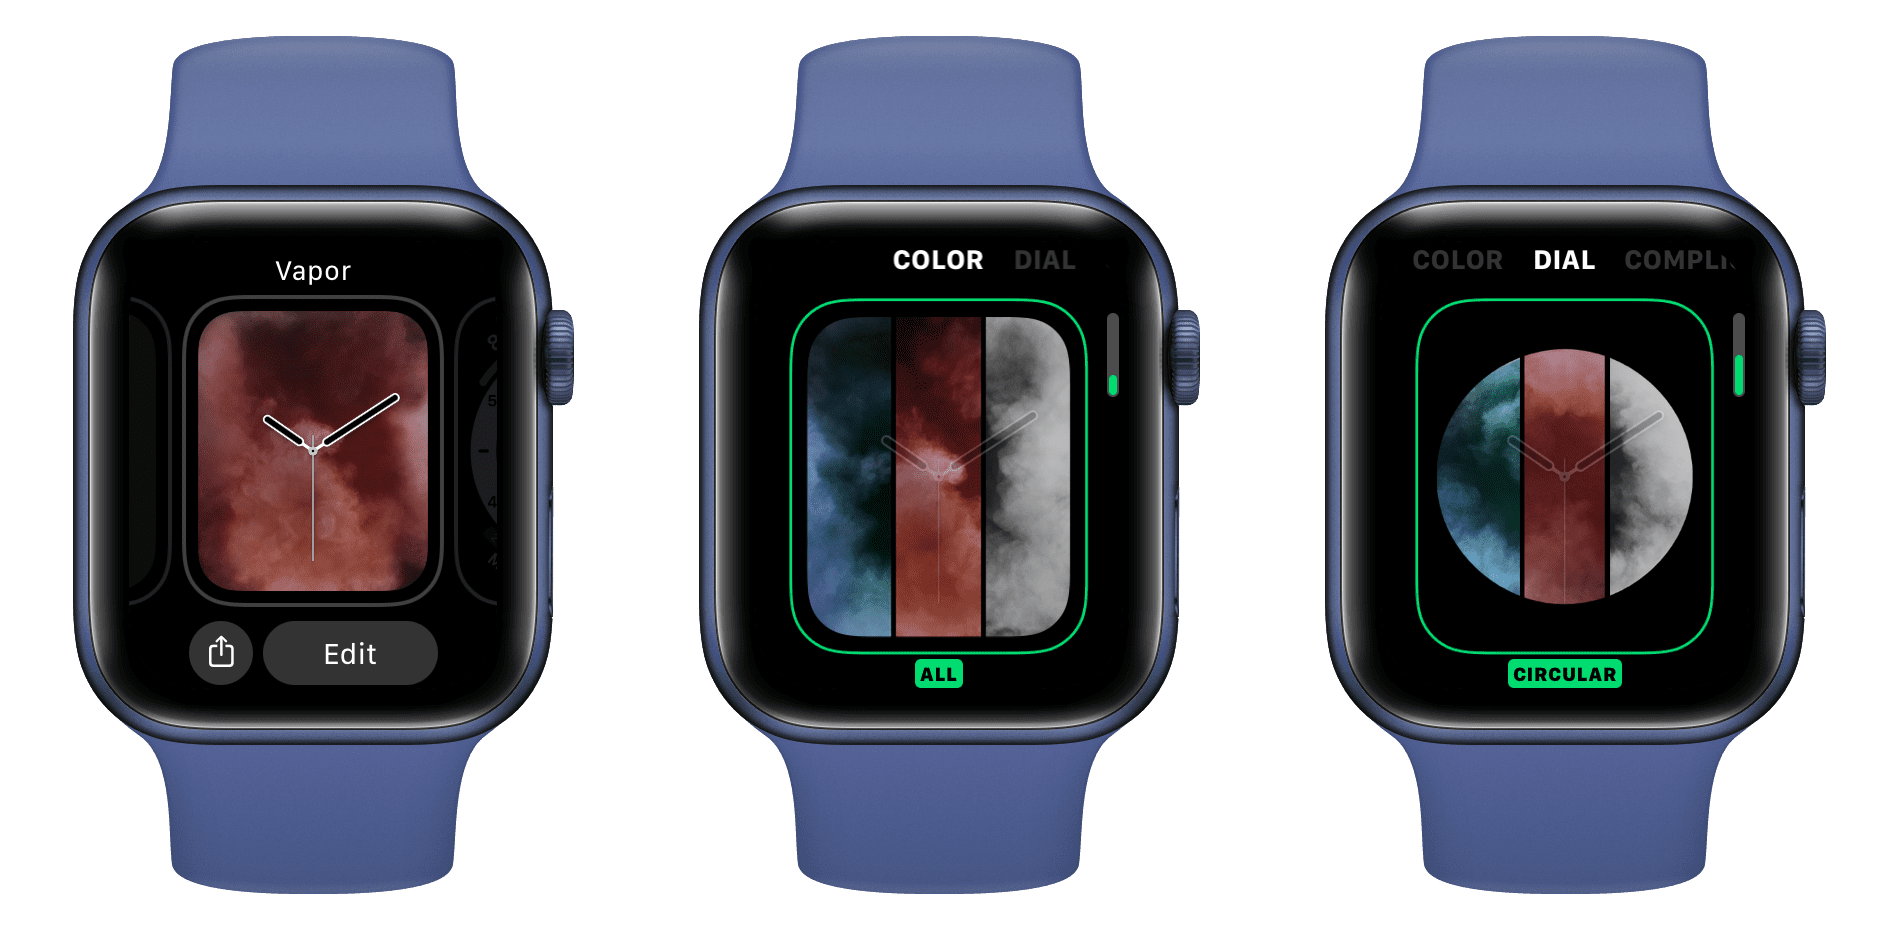
- Touch and hold the watch face until it shrinks down.
- Get to the watch face you want to re-customize and tap Edit.
- Swipe left and right and up and down to change the style, color, complications, etc.
- With changes made, press the Digital Crown to save the changes and exit the editing screen.
From iPhone
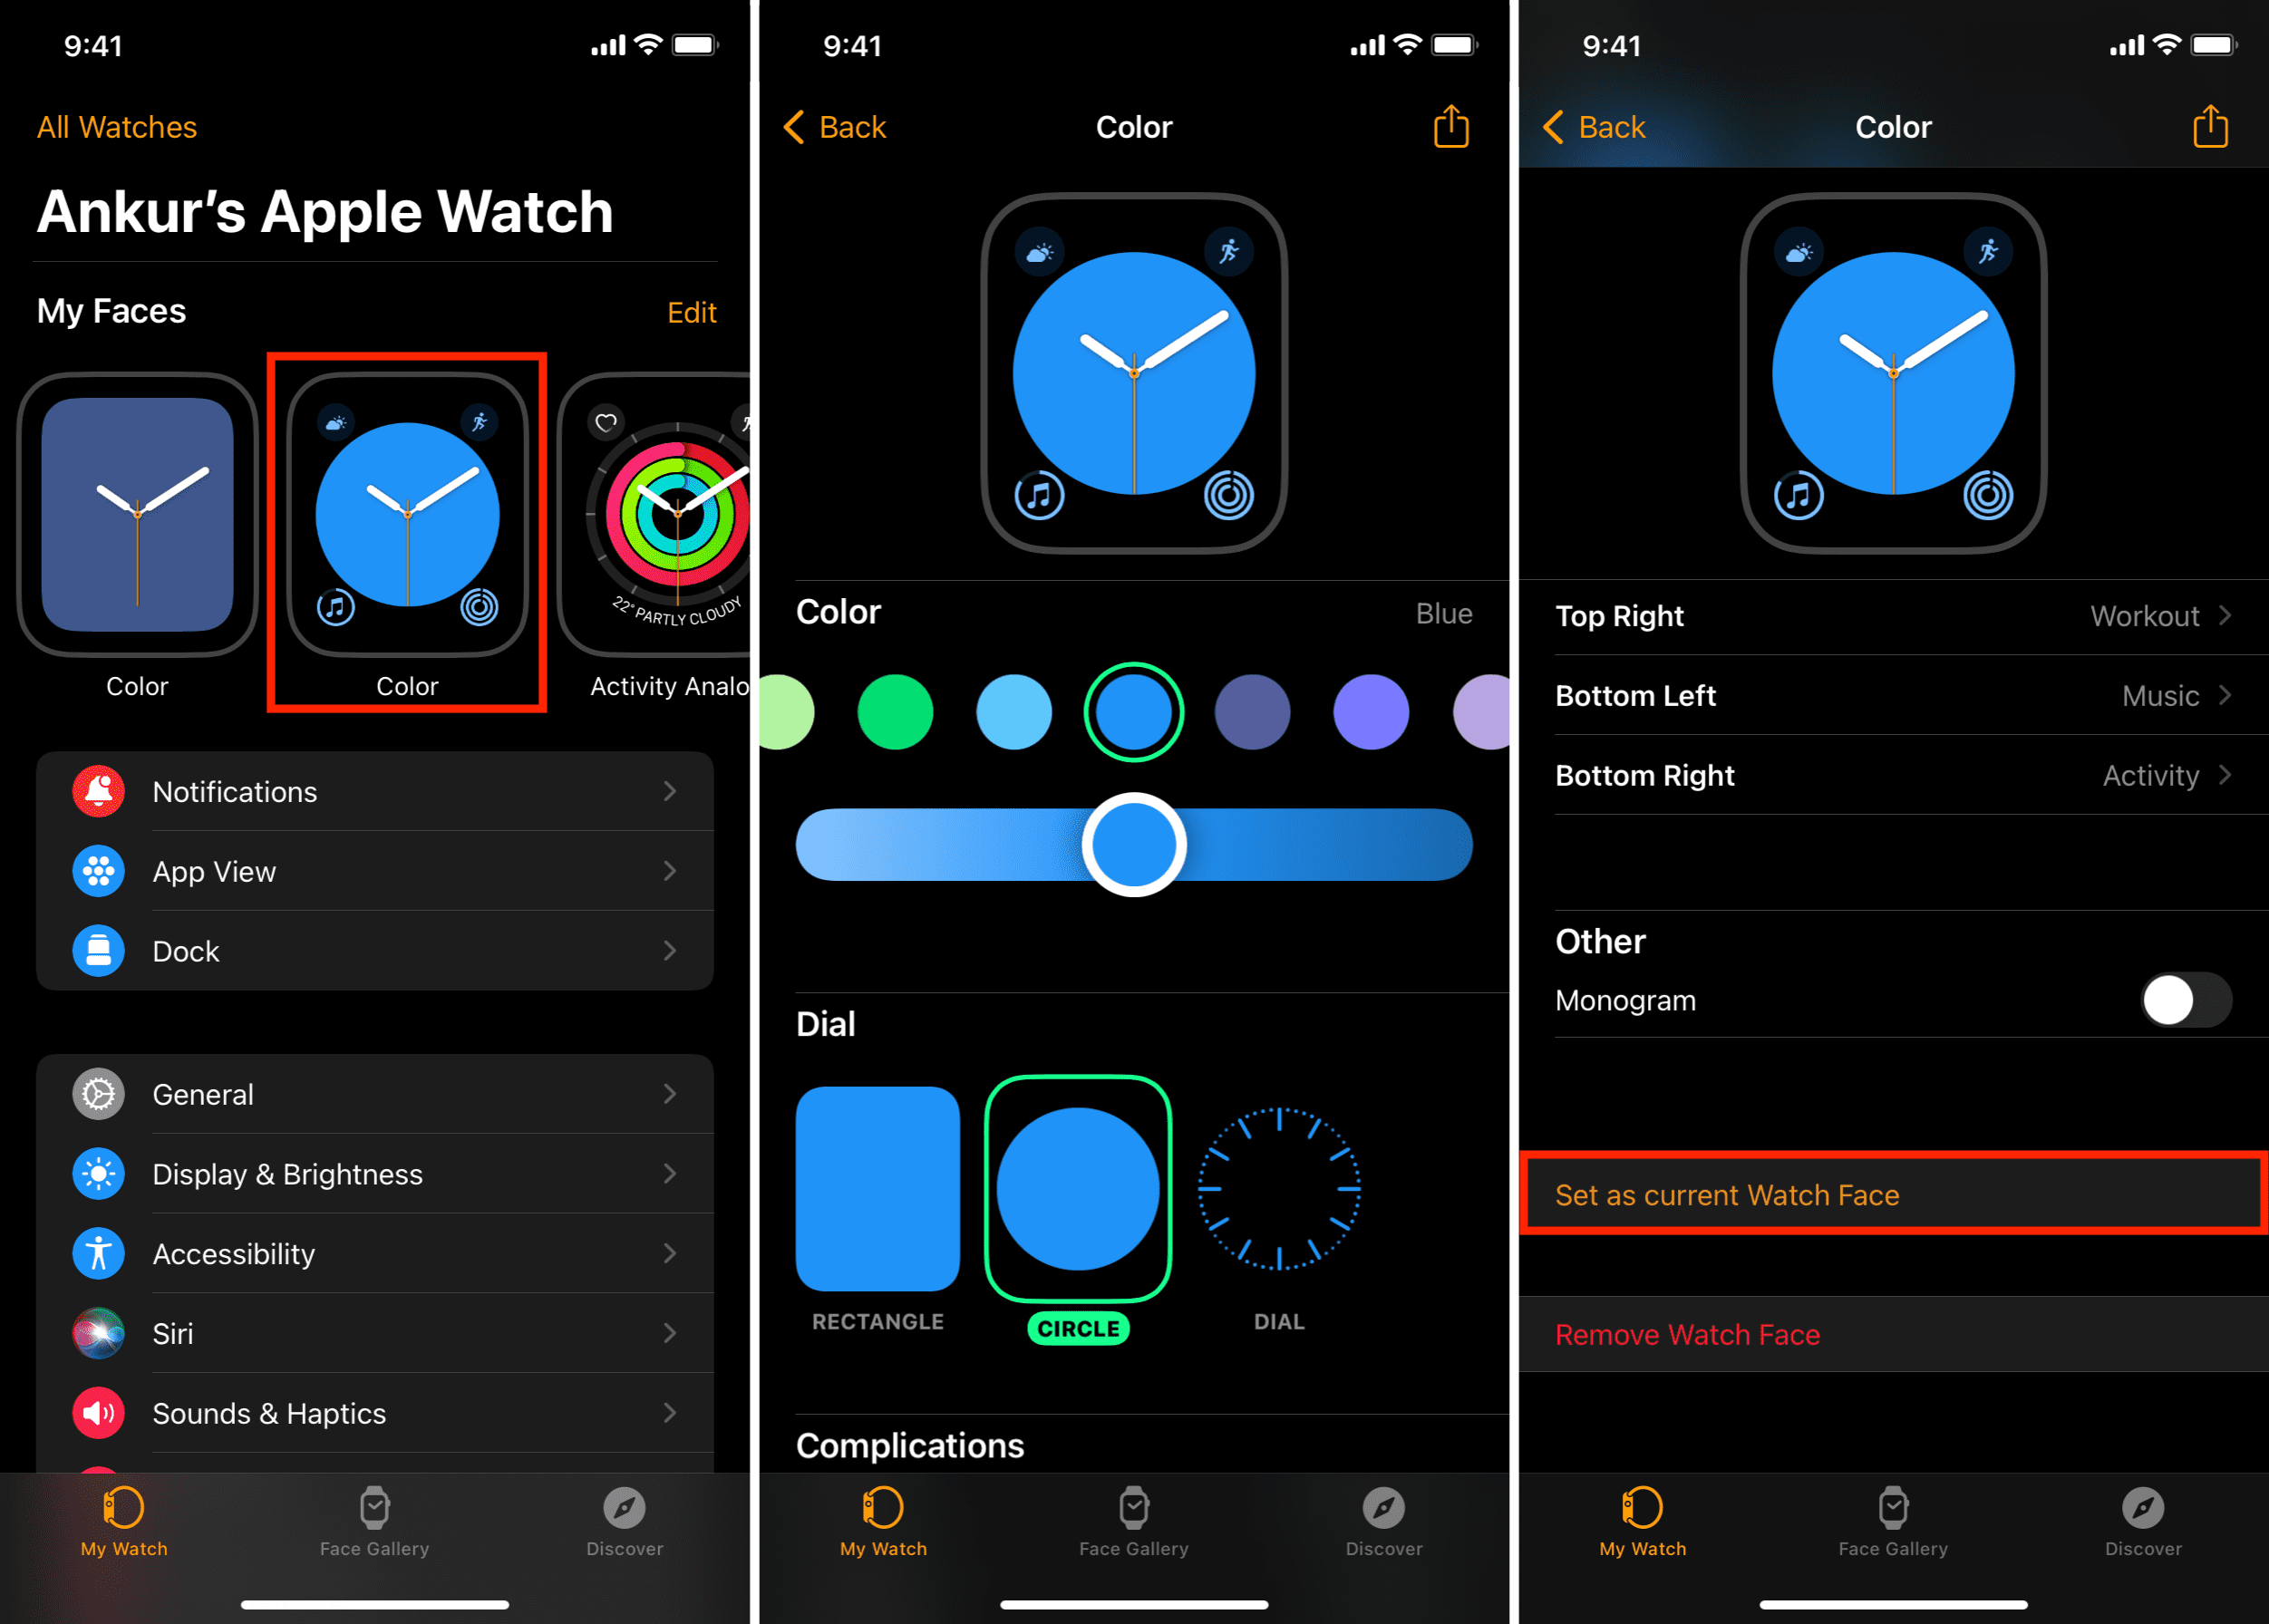
- Open the Watch app and make sure you are in the My Watch tab.
- Swipe horizontally in the “My Faces” section at the top and tap the watch face you want to edit.
- Make the changes and then tap Set as current Watch Face or hit the Back button.
Rearrange watch faces
It’s easy to change the order of your Apple Watch faces.
From Apple Watch
- Touch and hold the current watch face until it shrinks down.
- Touch and hold a watch face and move it left or right until you see [watch number] of [watch number] editing screen.
- Drag the watch face to the left or right to change its position.
- Press the Digital Crown to exit the editing screen.
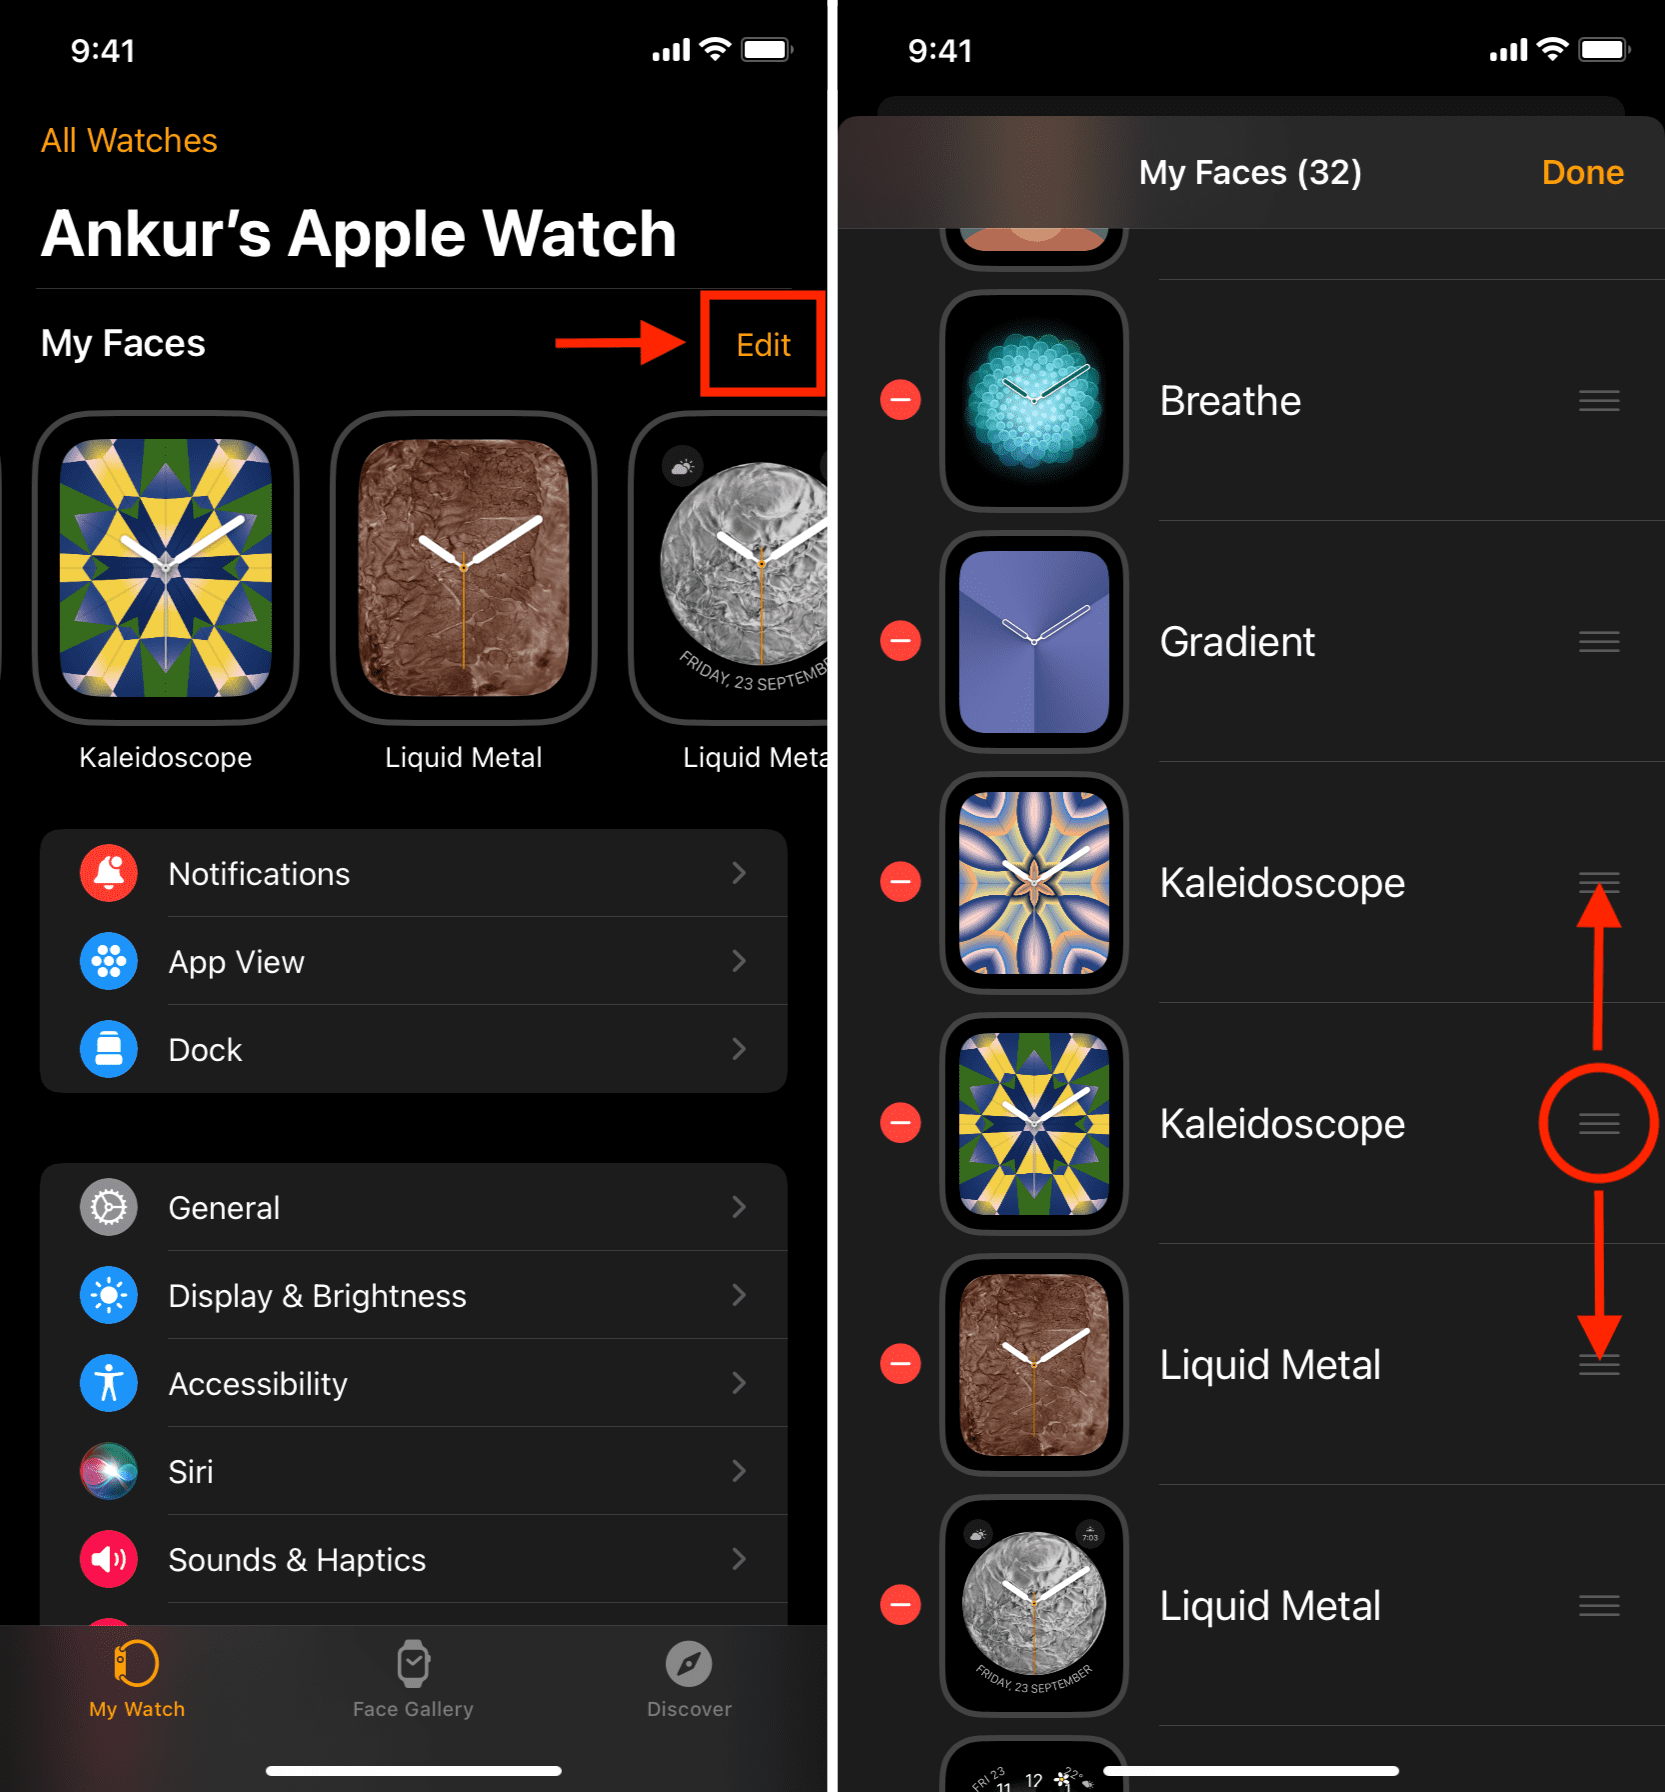
From iPhone
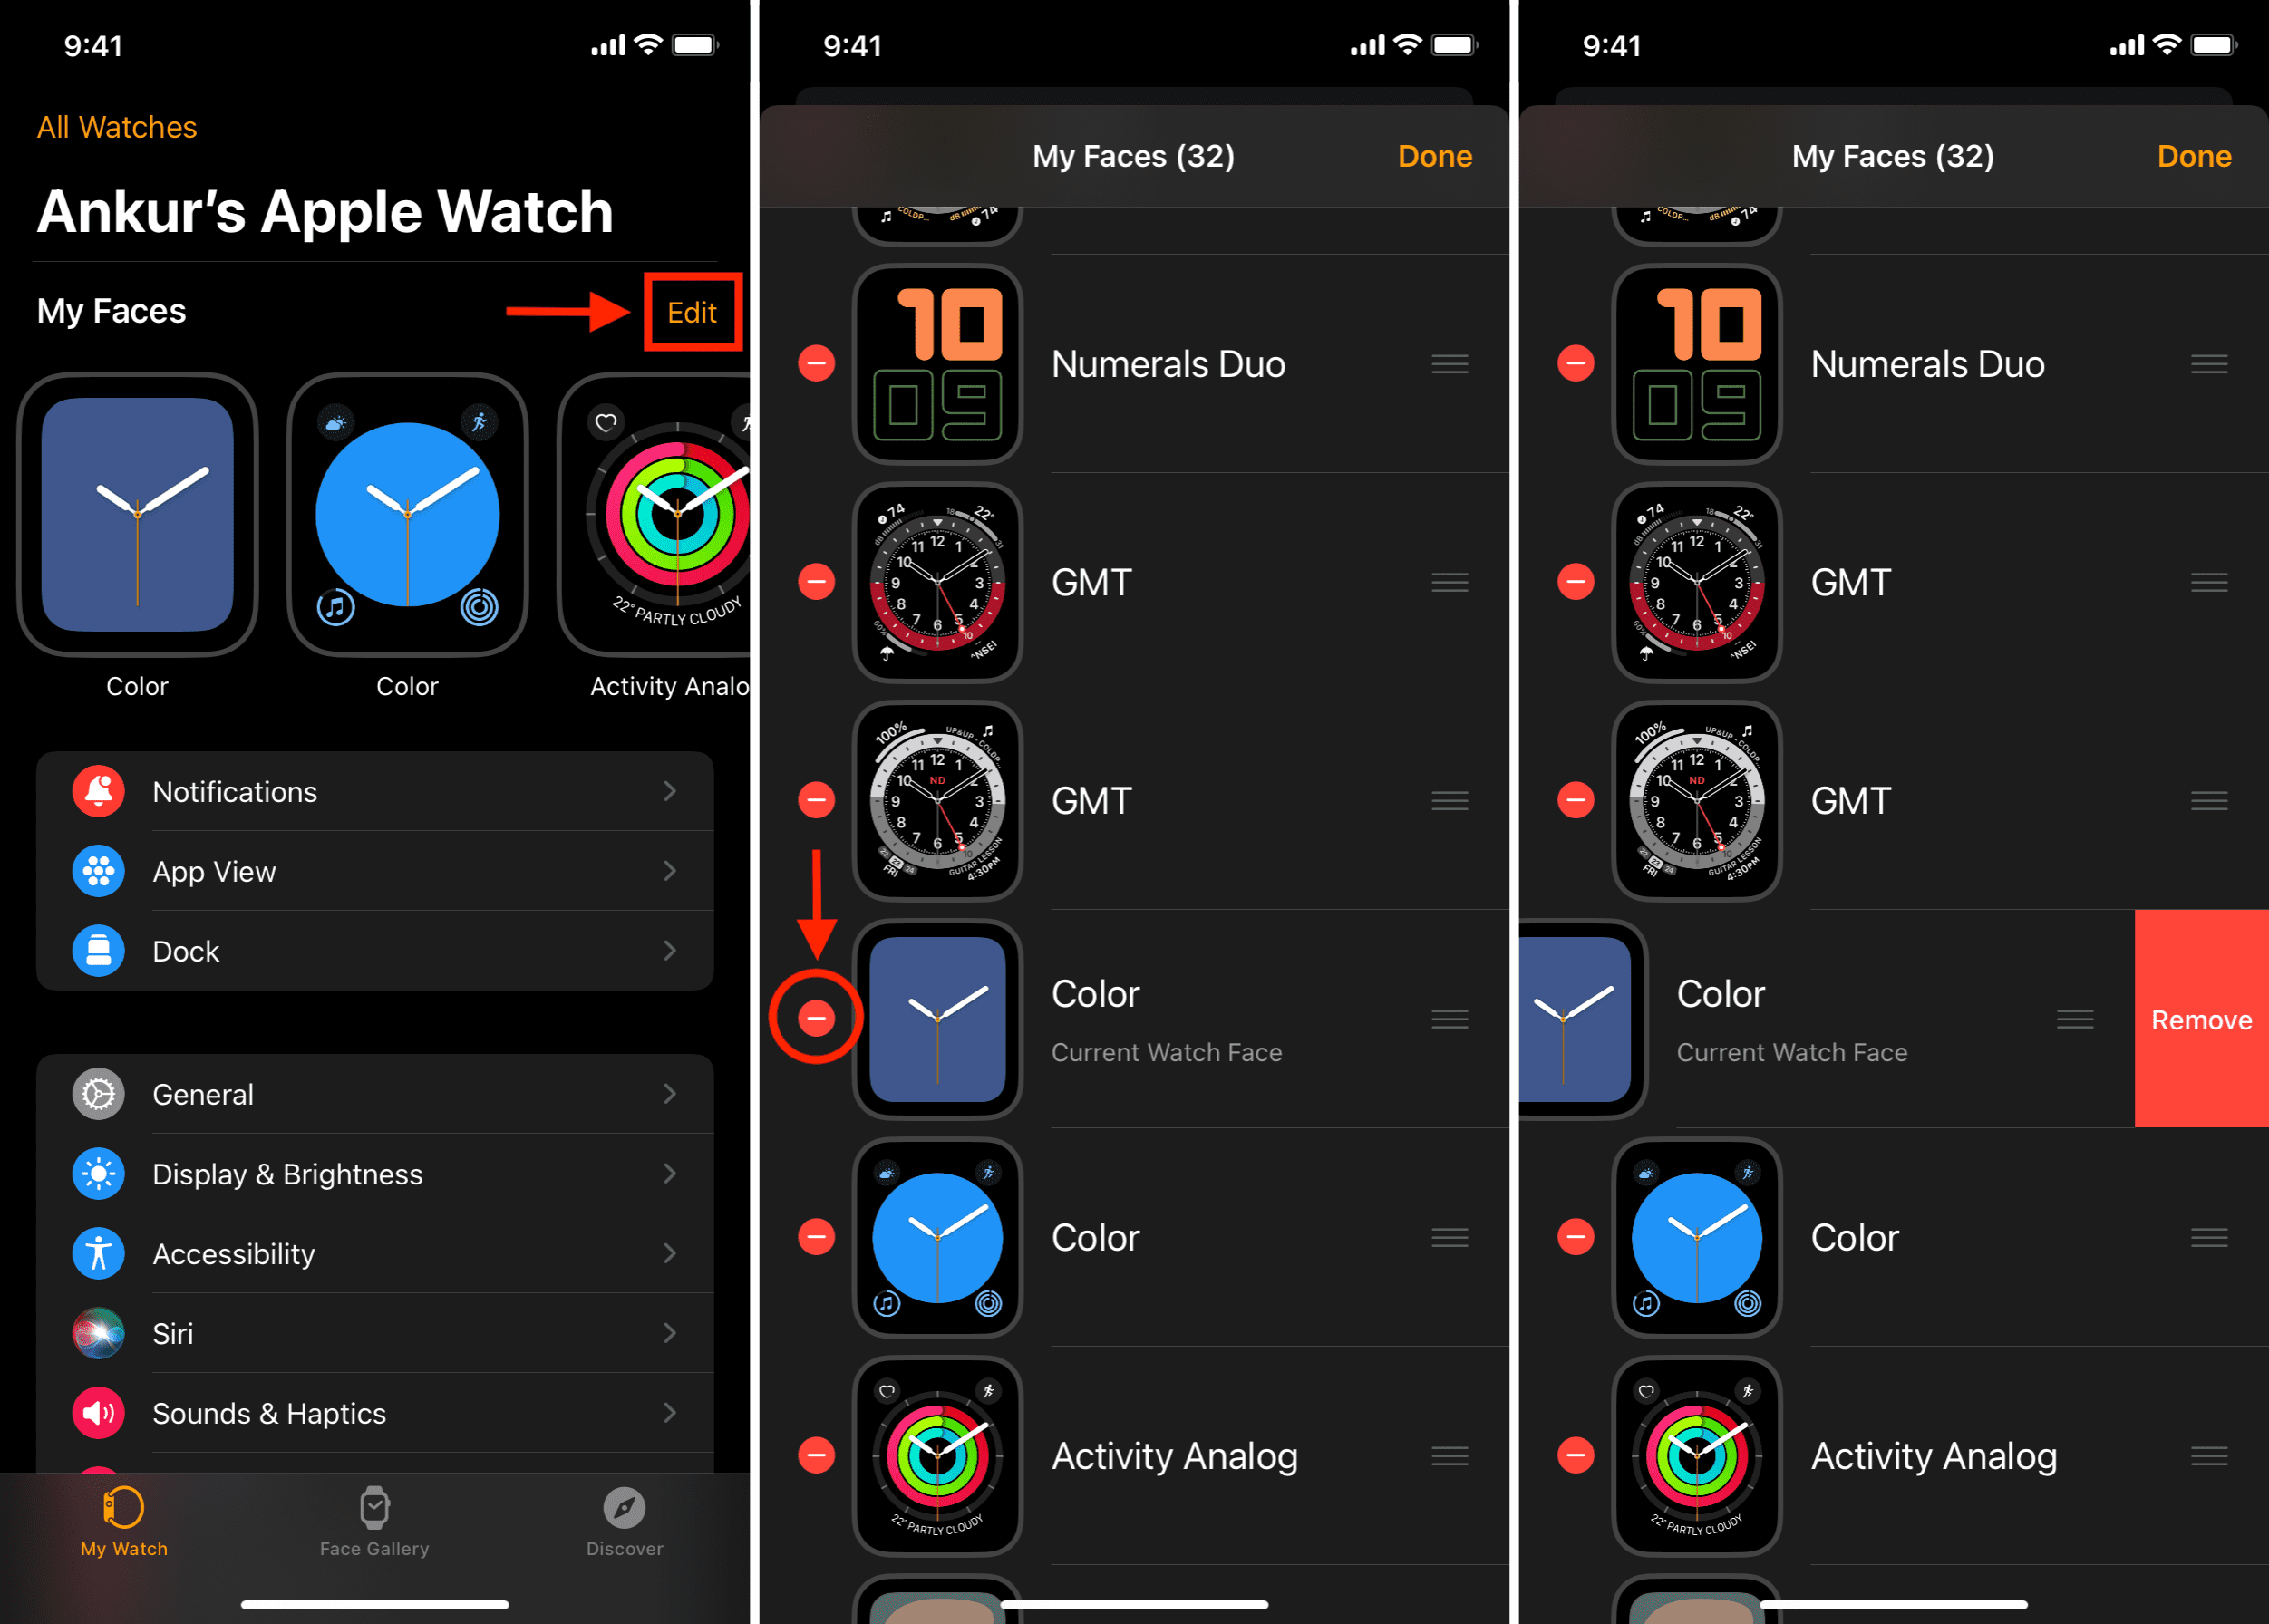
- Open the Watch app and tap Edit next to the My Faces section at the top.
- Touch and hold the hamburger icon next to a watch face and drag it up and down to change the position.
Delete a watch face
If a watch face no longer suits your style, you can delete it. Remember that you can get it again and re-edit it by following the initial steps mentioned above.
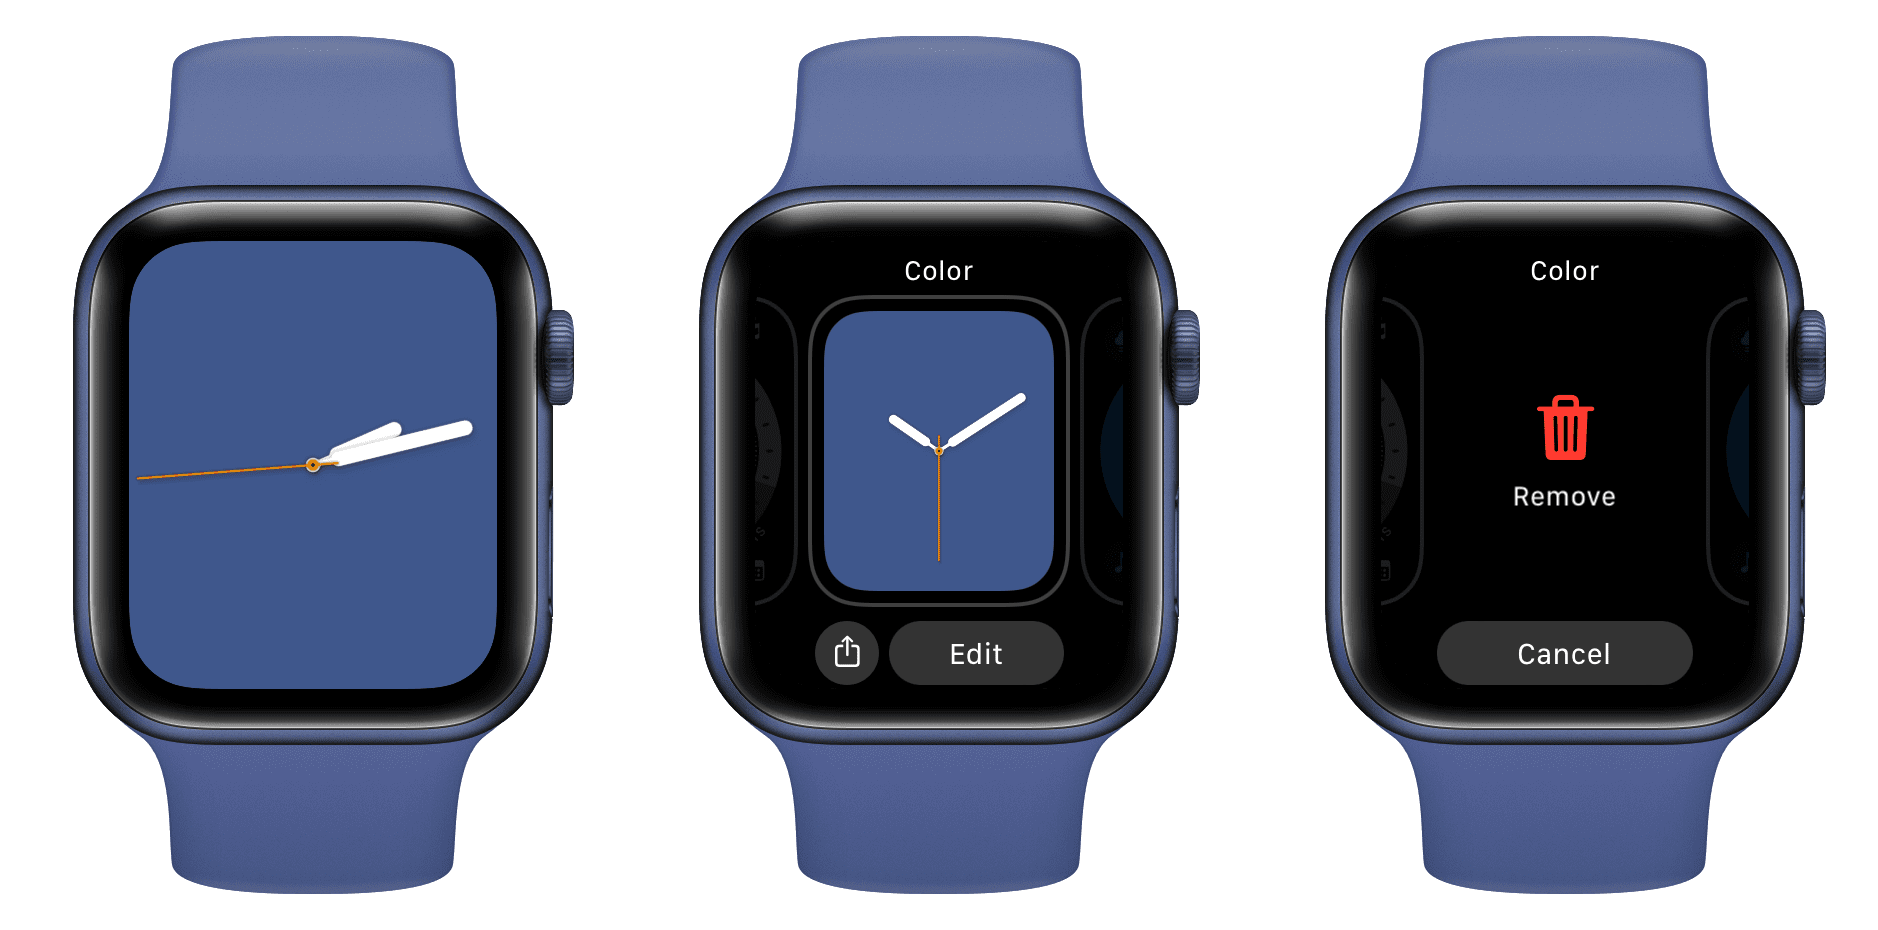
From Apple Watch
- Touch and hold the current watch face until it shrinks down.
- Swipe up on the shrunk watch face.
- Tap Remove.
- Press the Digital Crown to return to a new watch face.
From iPhone
You have two ways to do that.
Method 1: Tap a watch face in the My Faces section and tap Remove Watch Face.
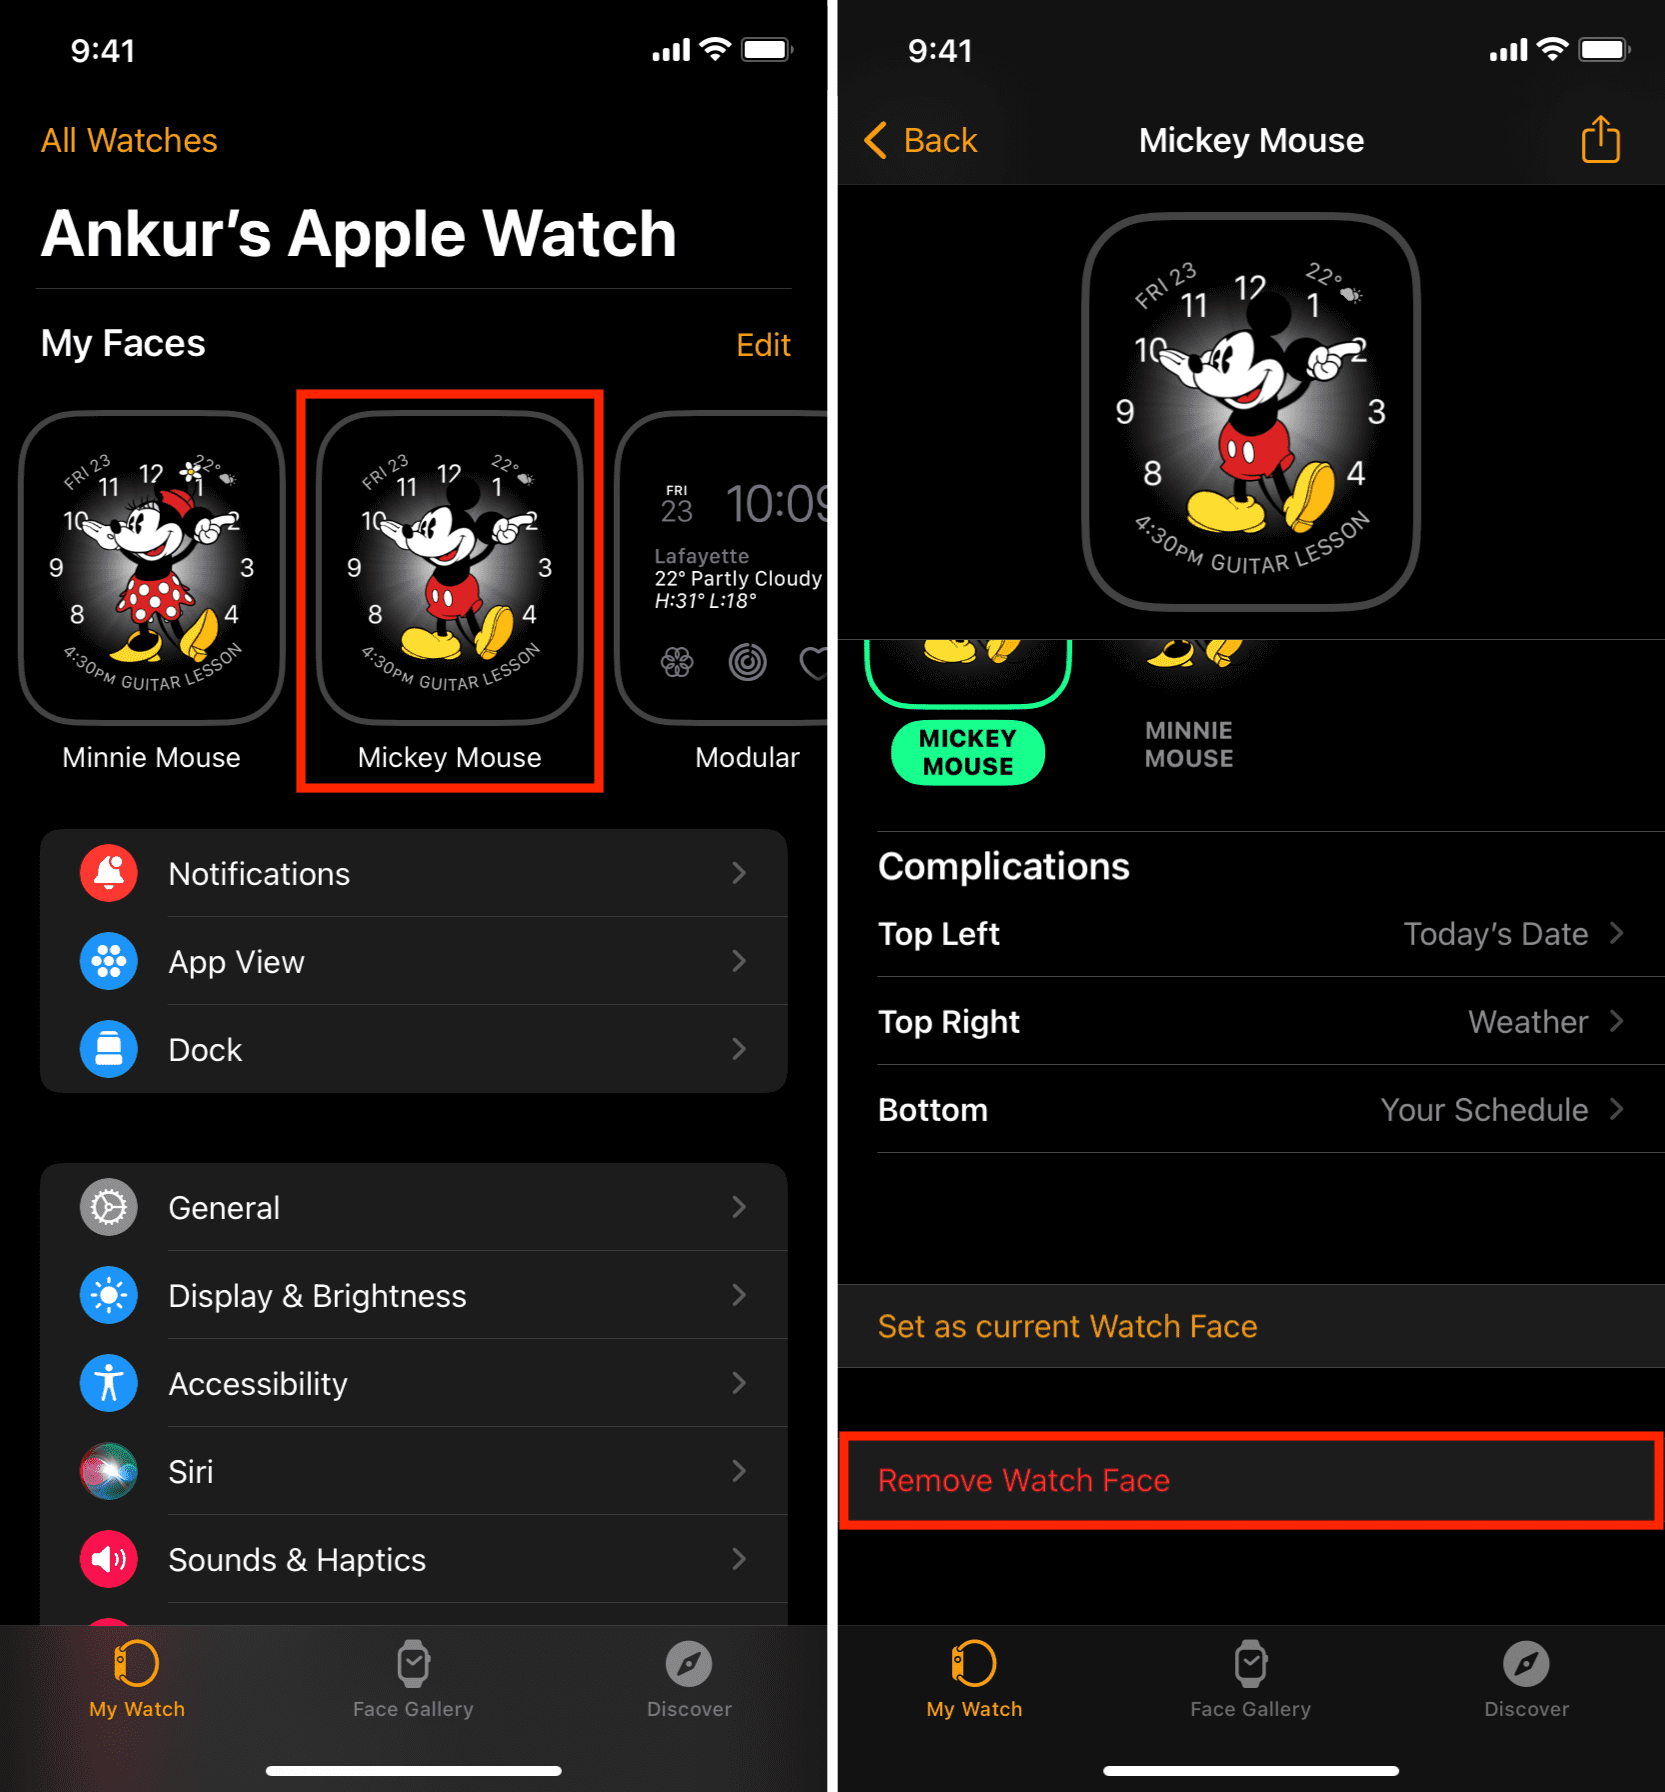
Method 2: Tap Edit next to My Faces in the Watch app. After that, tap the red minus button for a watch face, followed by Remove > Done.
On a related note: