Learn how to move your iPhone backup from your Mac to an external drive and reclaim local storage space on your computer.
It’s always a good idea to back up your iPhone in case you lose your device or if something goes wrong with it.
Most users back up to iCloud, provided they are on a paid iCloud+ plan or have excluded several apps from being backed up to keep the backup size under 5 GB. The other option is to connect the iPhone to a Mac or PC and back it up.
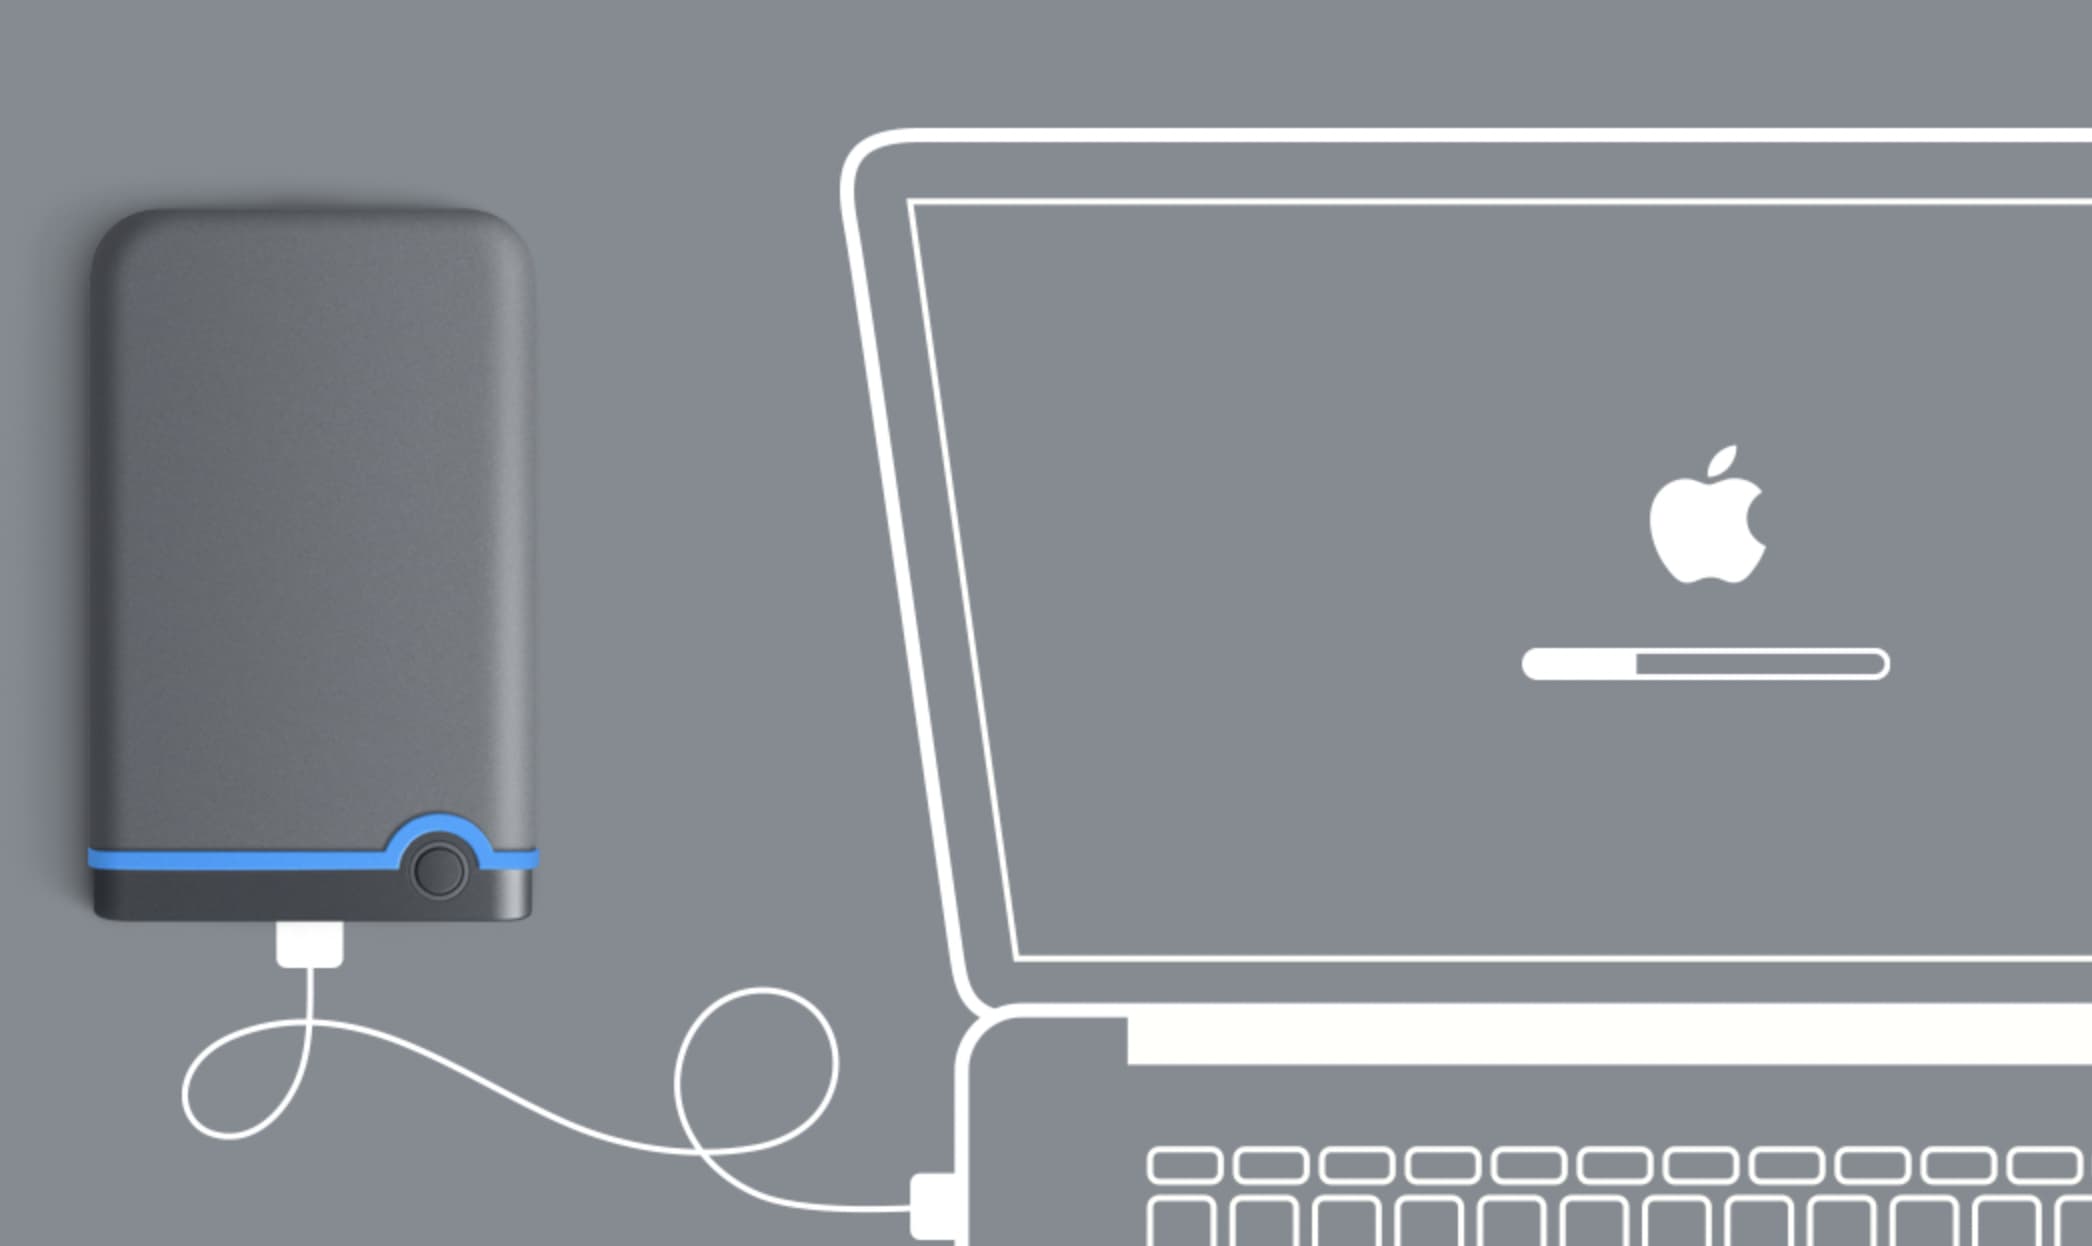
Unlike iCloud, where you can exclude some apps and reduce the backup file size, you have no such option when backing up to a computer. As a result, iPhone and iPad backups created on your Mac can take up a lot of space, especially if you’ve got plenty of apps, photos, and other data. Fortunately, you can store the backup file on your external hard drive if your computer is running low on space.
Back up your iPhone to an external drive
It involves two easy steps.
Step 1: Find your iPhone backup on Mac
Before backing up an iPhone to an external drive, you’ll first need to locate where the backups are being stored on your Mac.
1) Connect your iPhone to your Mac using a cable and launch Finder.
2) Select your iPhone from the left sidebar.
3) Click Manage Backups.
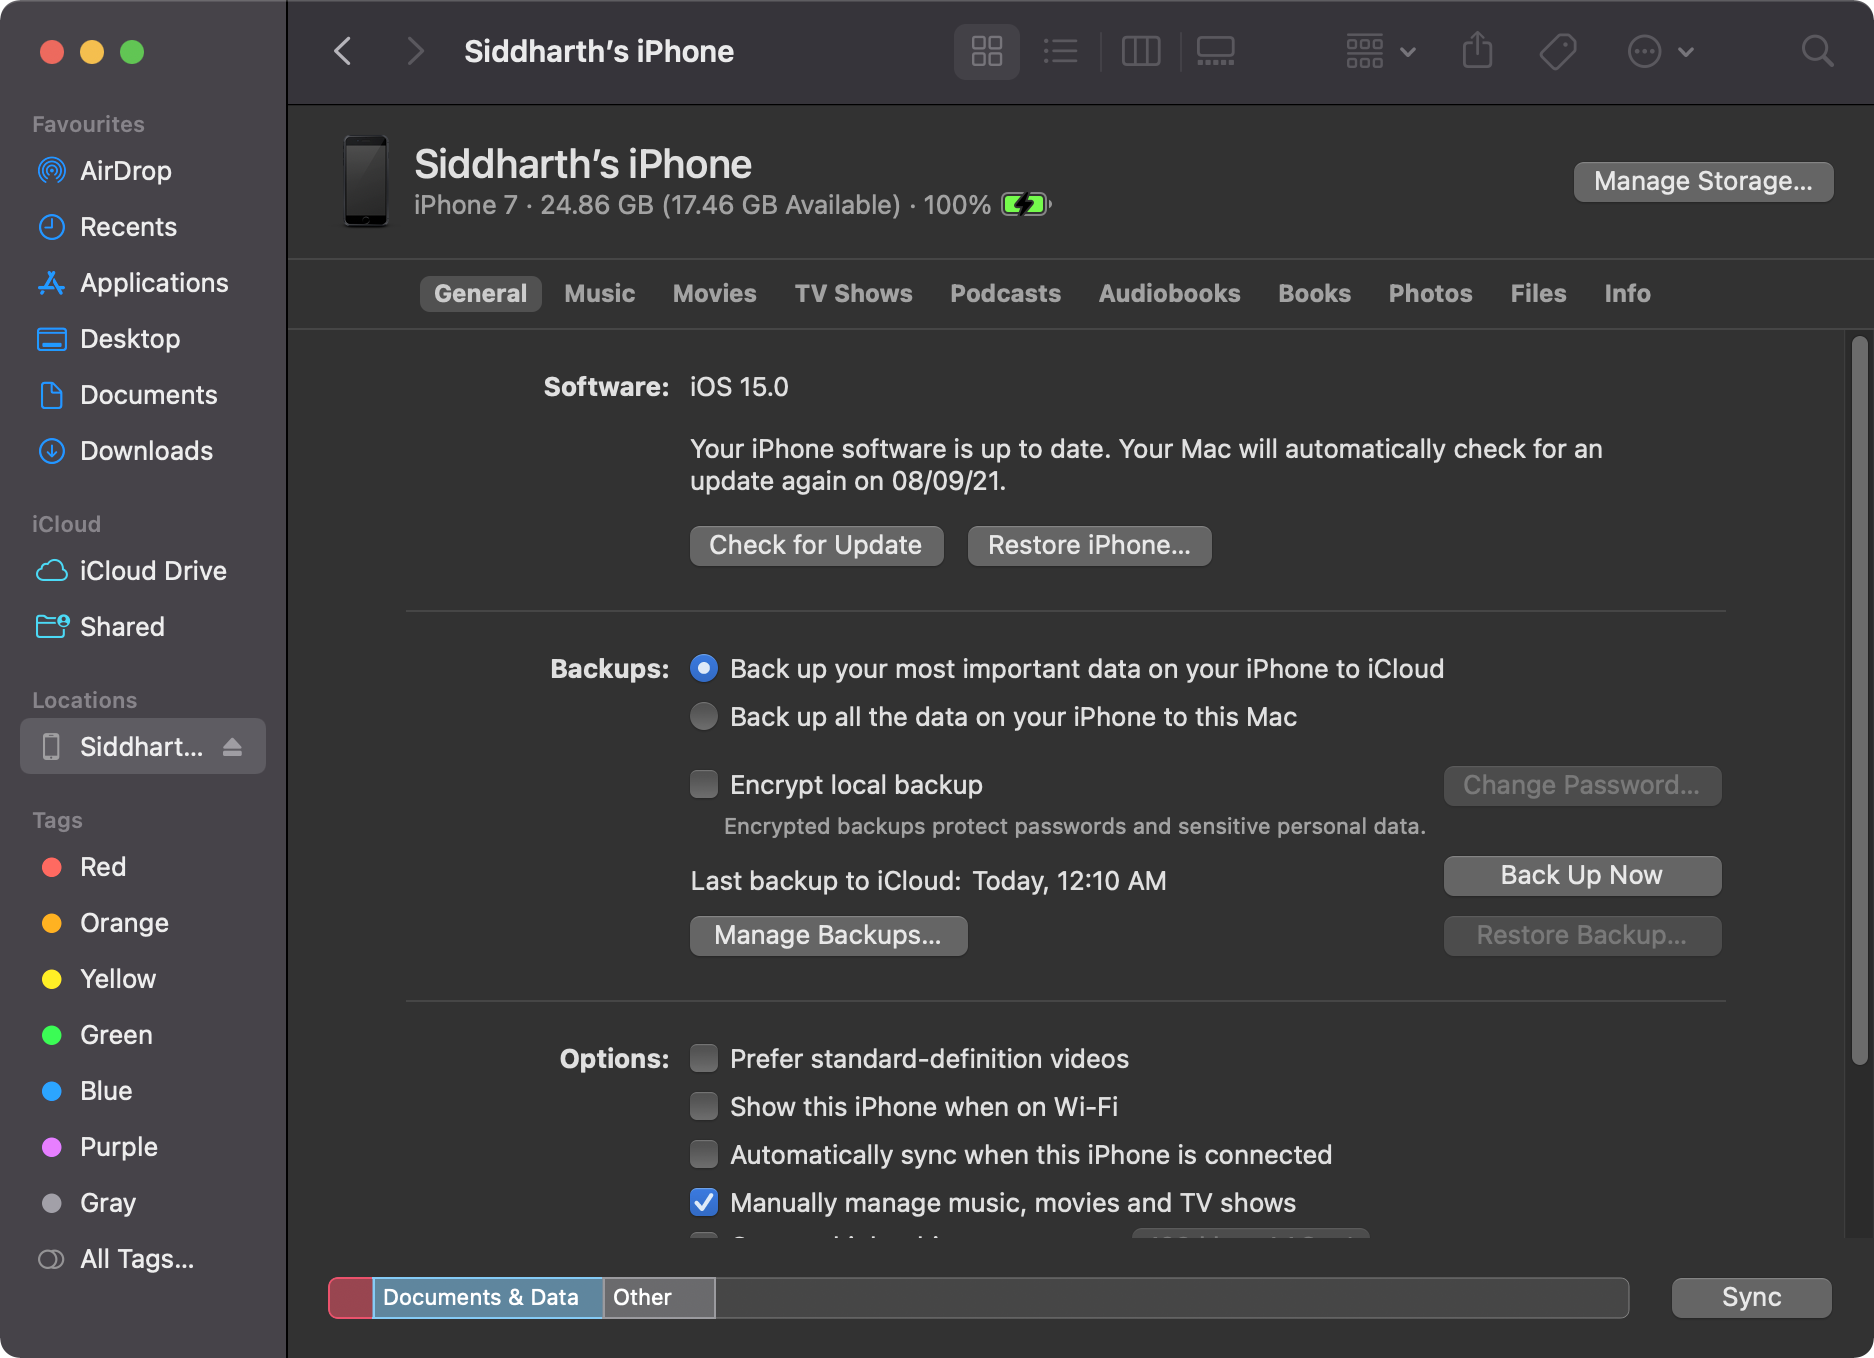
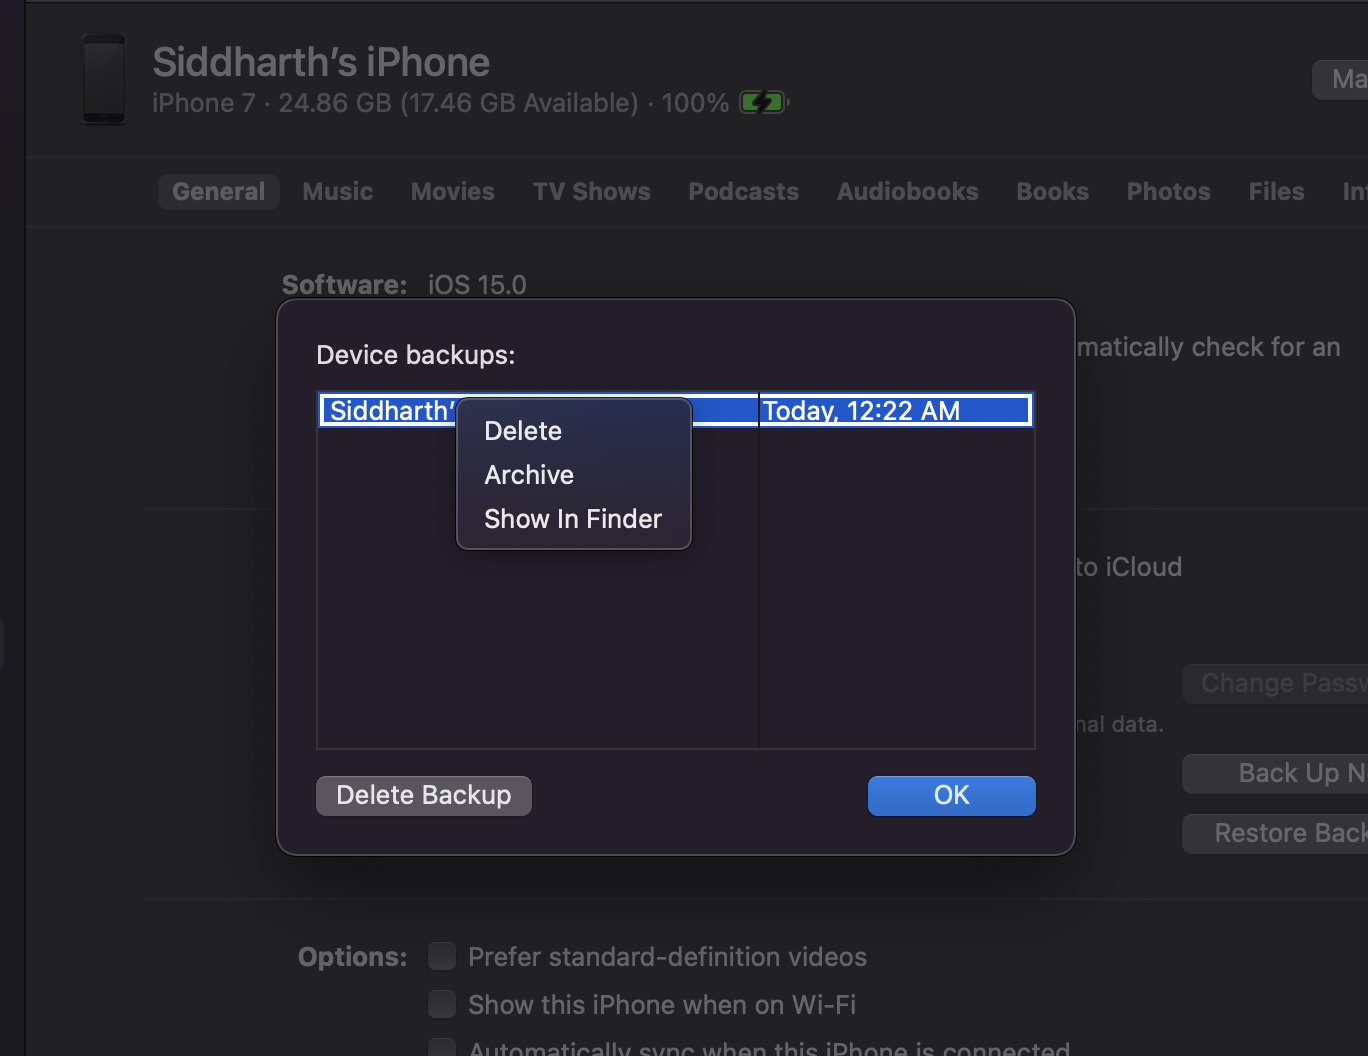
4) You should see your latest local backup listed here. Click on the backup while holding the Control key, and then select Show in Finder.
You have now found the location of your iPhone backup on your computer.
Step 2: Move your iPhone backup to an external drive
Now that you’ve located where your iPhone backup folder is, you should be able to transfer the backup to an external hard drive or SSD in no time.
1) Locate the backup using the steps mentioned above.
2) Select the folder inside the Backup folder.
3) Right-click to copy the folder and paste it into your connected external hard drive. Or you can simply drag the folder to the external drive.
4) You can rename the folder on your drive to make it easier to find.
If you plan to always back up your iPhone to the external drive, check out the method below.
Permanently change iPhone backup location
Changing the default location for iPhone backups on your Mac requires a little bit of fiddling. You’ll need to create a Symlink to the external hard drive, so your Mac automatically uses that location for future backups.
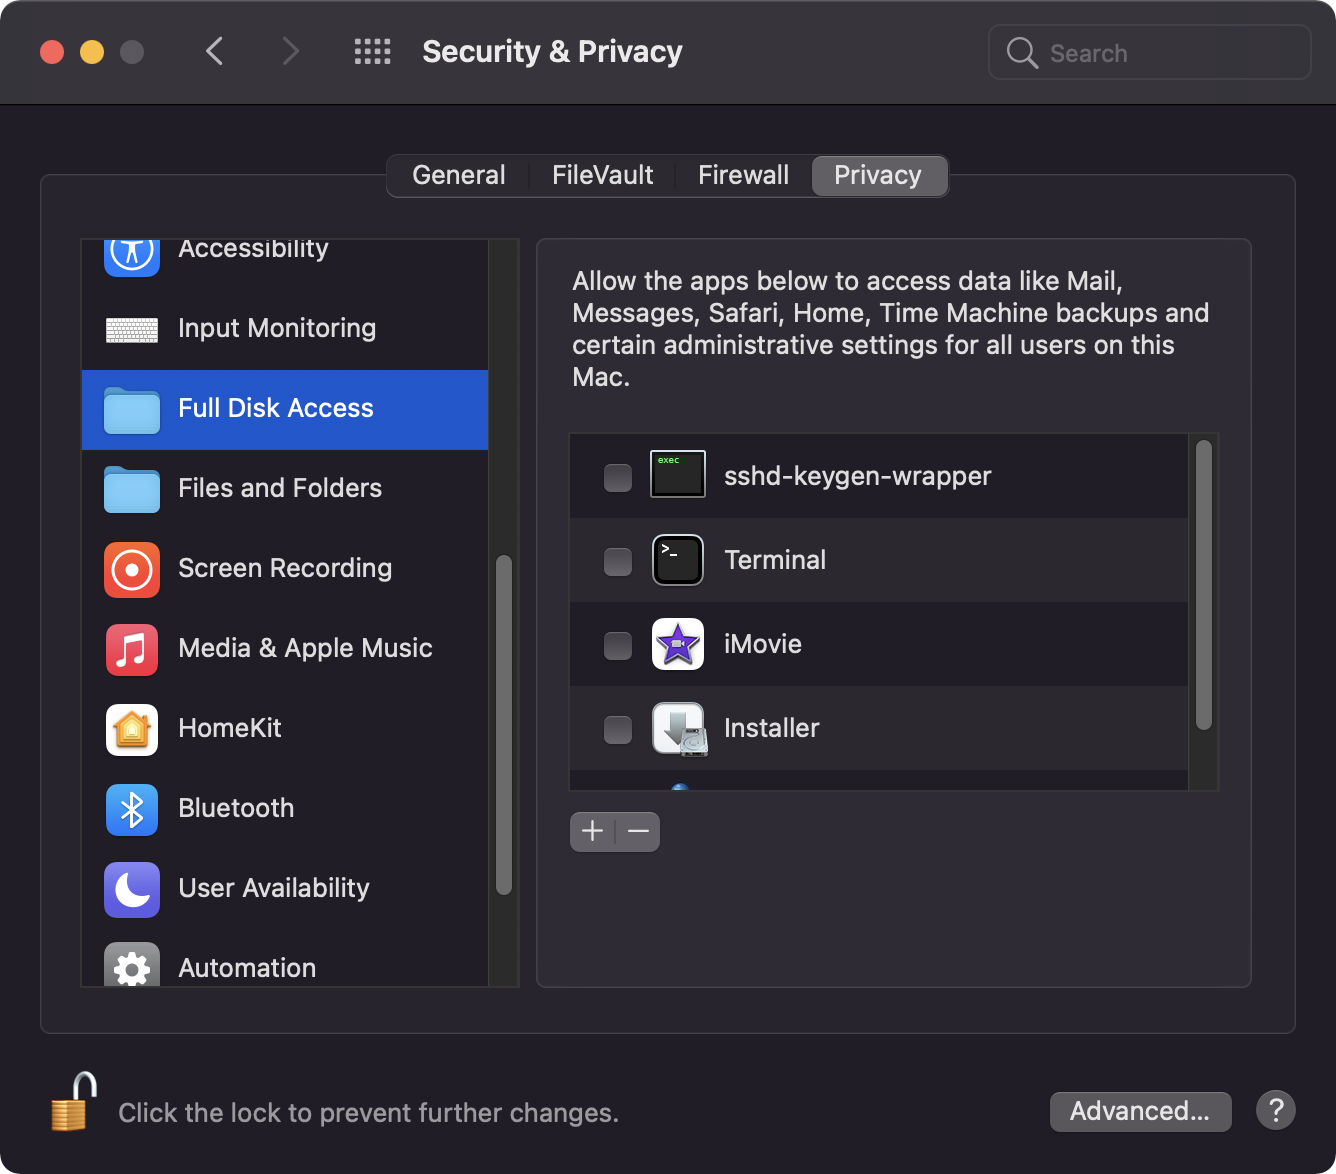
1) Open System Settings and go to Privacy & Security > Full Disk Access. Now, make sure the switch for Terminal is enabled.

If you’re on an older version of macOS, go to System Preferences > Security & Privacy > Privacy tab. Now, click the lock icon and authenticate. After that, select Full Disk Access and check the box for Terminal. If you can’t find Terminal in the list, click the plus (+) button to add it.
2) Launch Terminal on your Mac.
3) Paste the following code into Terminal
ln -s /Volumes/ExternalHarddiskName/ios_backup ~/Library/Application\ Support/MobileSync/Backup/
4) Replace ExternalHarddiskName with the name of your connected external hard disk.
5) Hit the return / enter key and close Terminal.
The Symlink should now be successfully set up, and you can check this by creating a new iPhone backup. Make sure that the external hard drive is connected whenever you manually back up your iPhone.
On a related note: