Are there times when you sit down to work on your Mac and struggle to see items on the screen? Whether it’s the app icons on your desktop, text in emails or webpages, or simply your mouse pointer, there are ways to improve your screen space.
You should never have to strain to read or see what’s on your computer screen. So, we’ll show you several adjustments you can make to improve your Mac experience.
Find your pointer faster
Starting with the simple things, you may have trouble seeing your pointer on the screen or just lose track of where it is.
Increase the pointer size
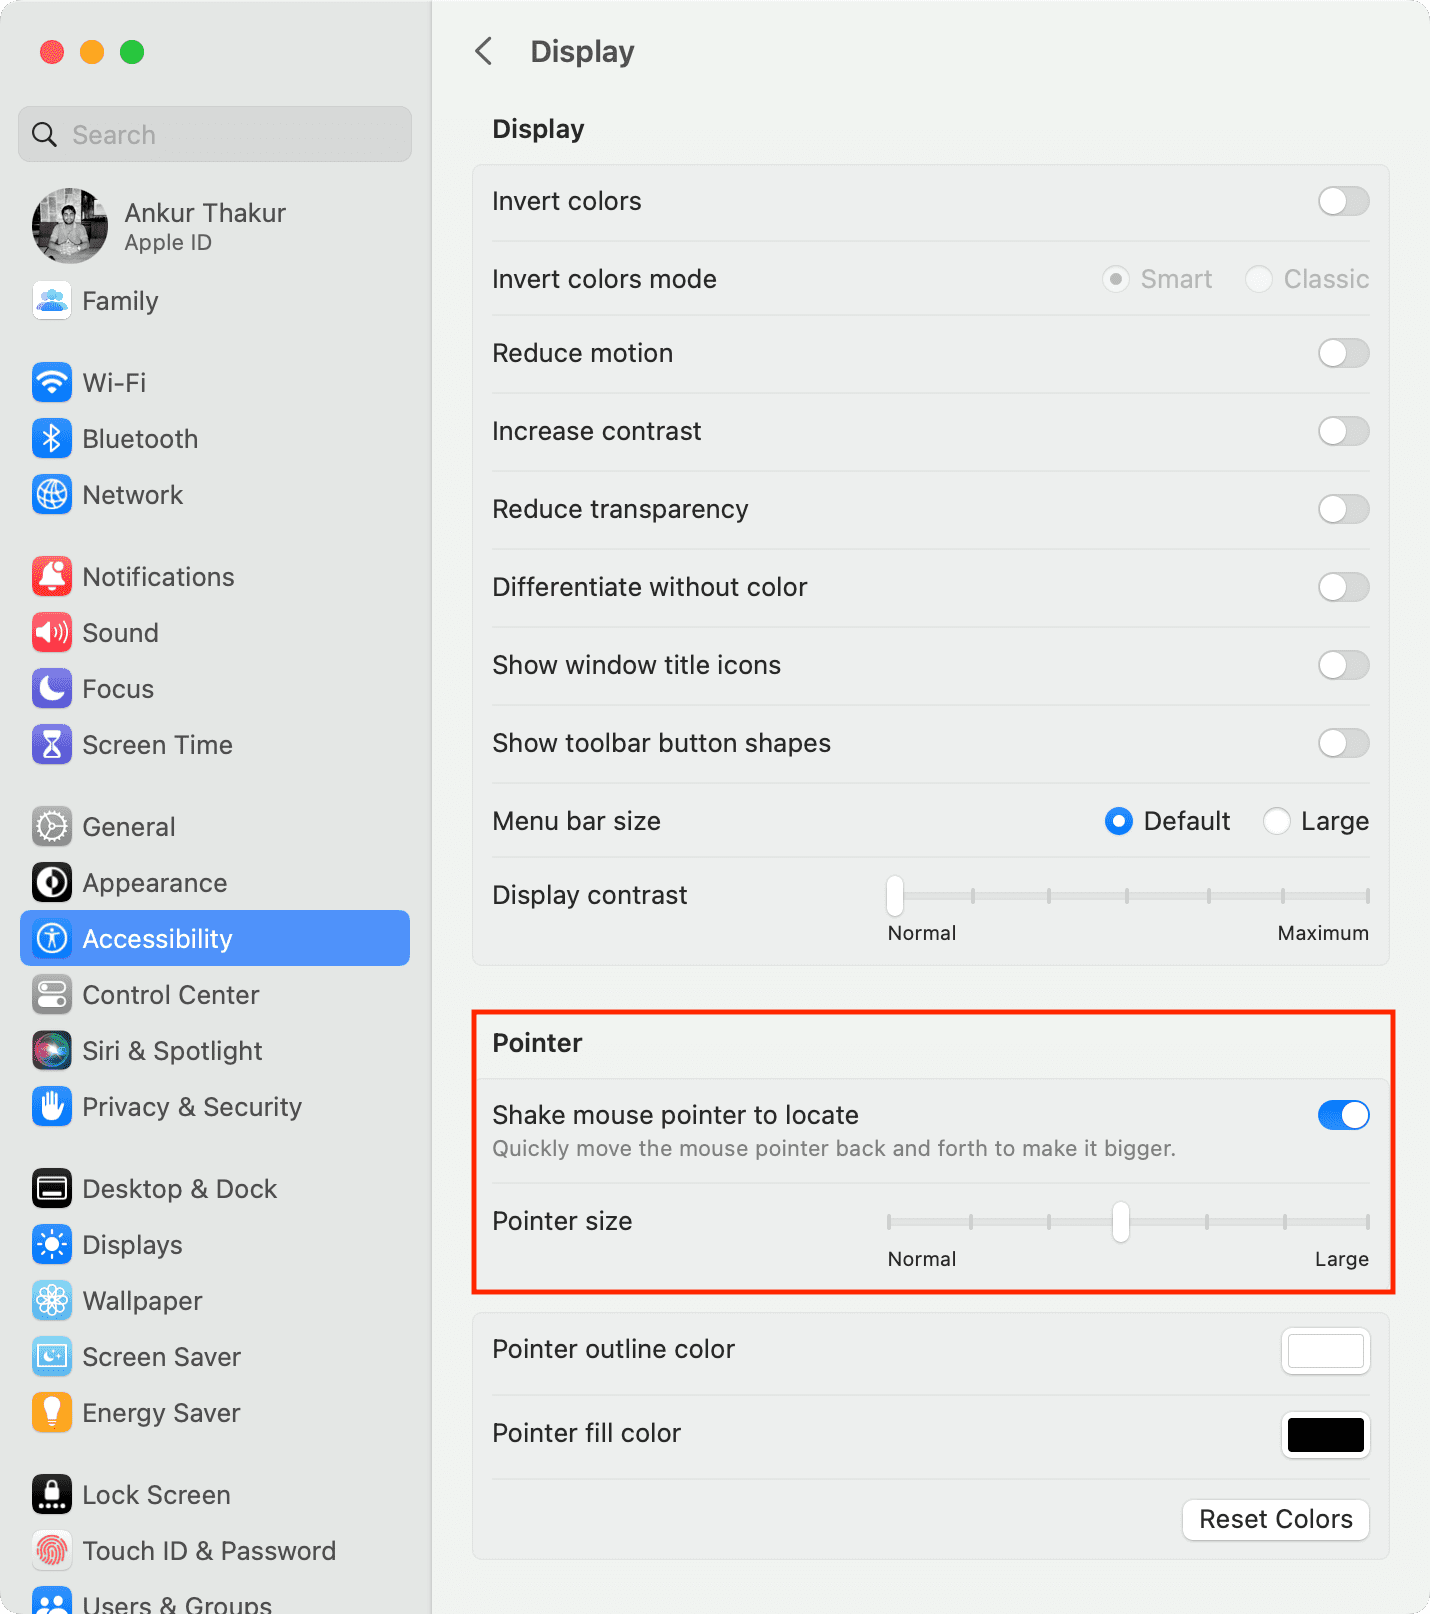
You can adjust the size of your pointer, so it’s easier to spot. Open System Settings and go to Accessibility > Display. Use the Pointer size slider to increase the size of your mouse or trackpad pointer.
Shake to find the pointer
A super handy feature on Mac is that you can shake your mouse to briefly increase the size of the pointer and thus making it simpler to find. This setting is in the same spot as the cursor size above. Go there and enable Shake mouse pointer to locate.
Related: How to control your Mac cursor with head movements
Make text bigger in specific apps
If it’s reading words that you’re having a hard time with on Mac, you can make the text size bigger. We’ll show you how to do this in a few default Mac apps like Mail and Messages.
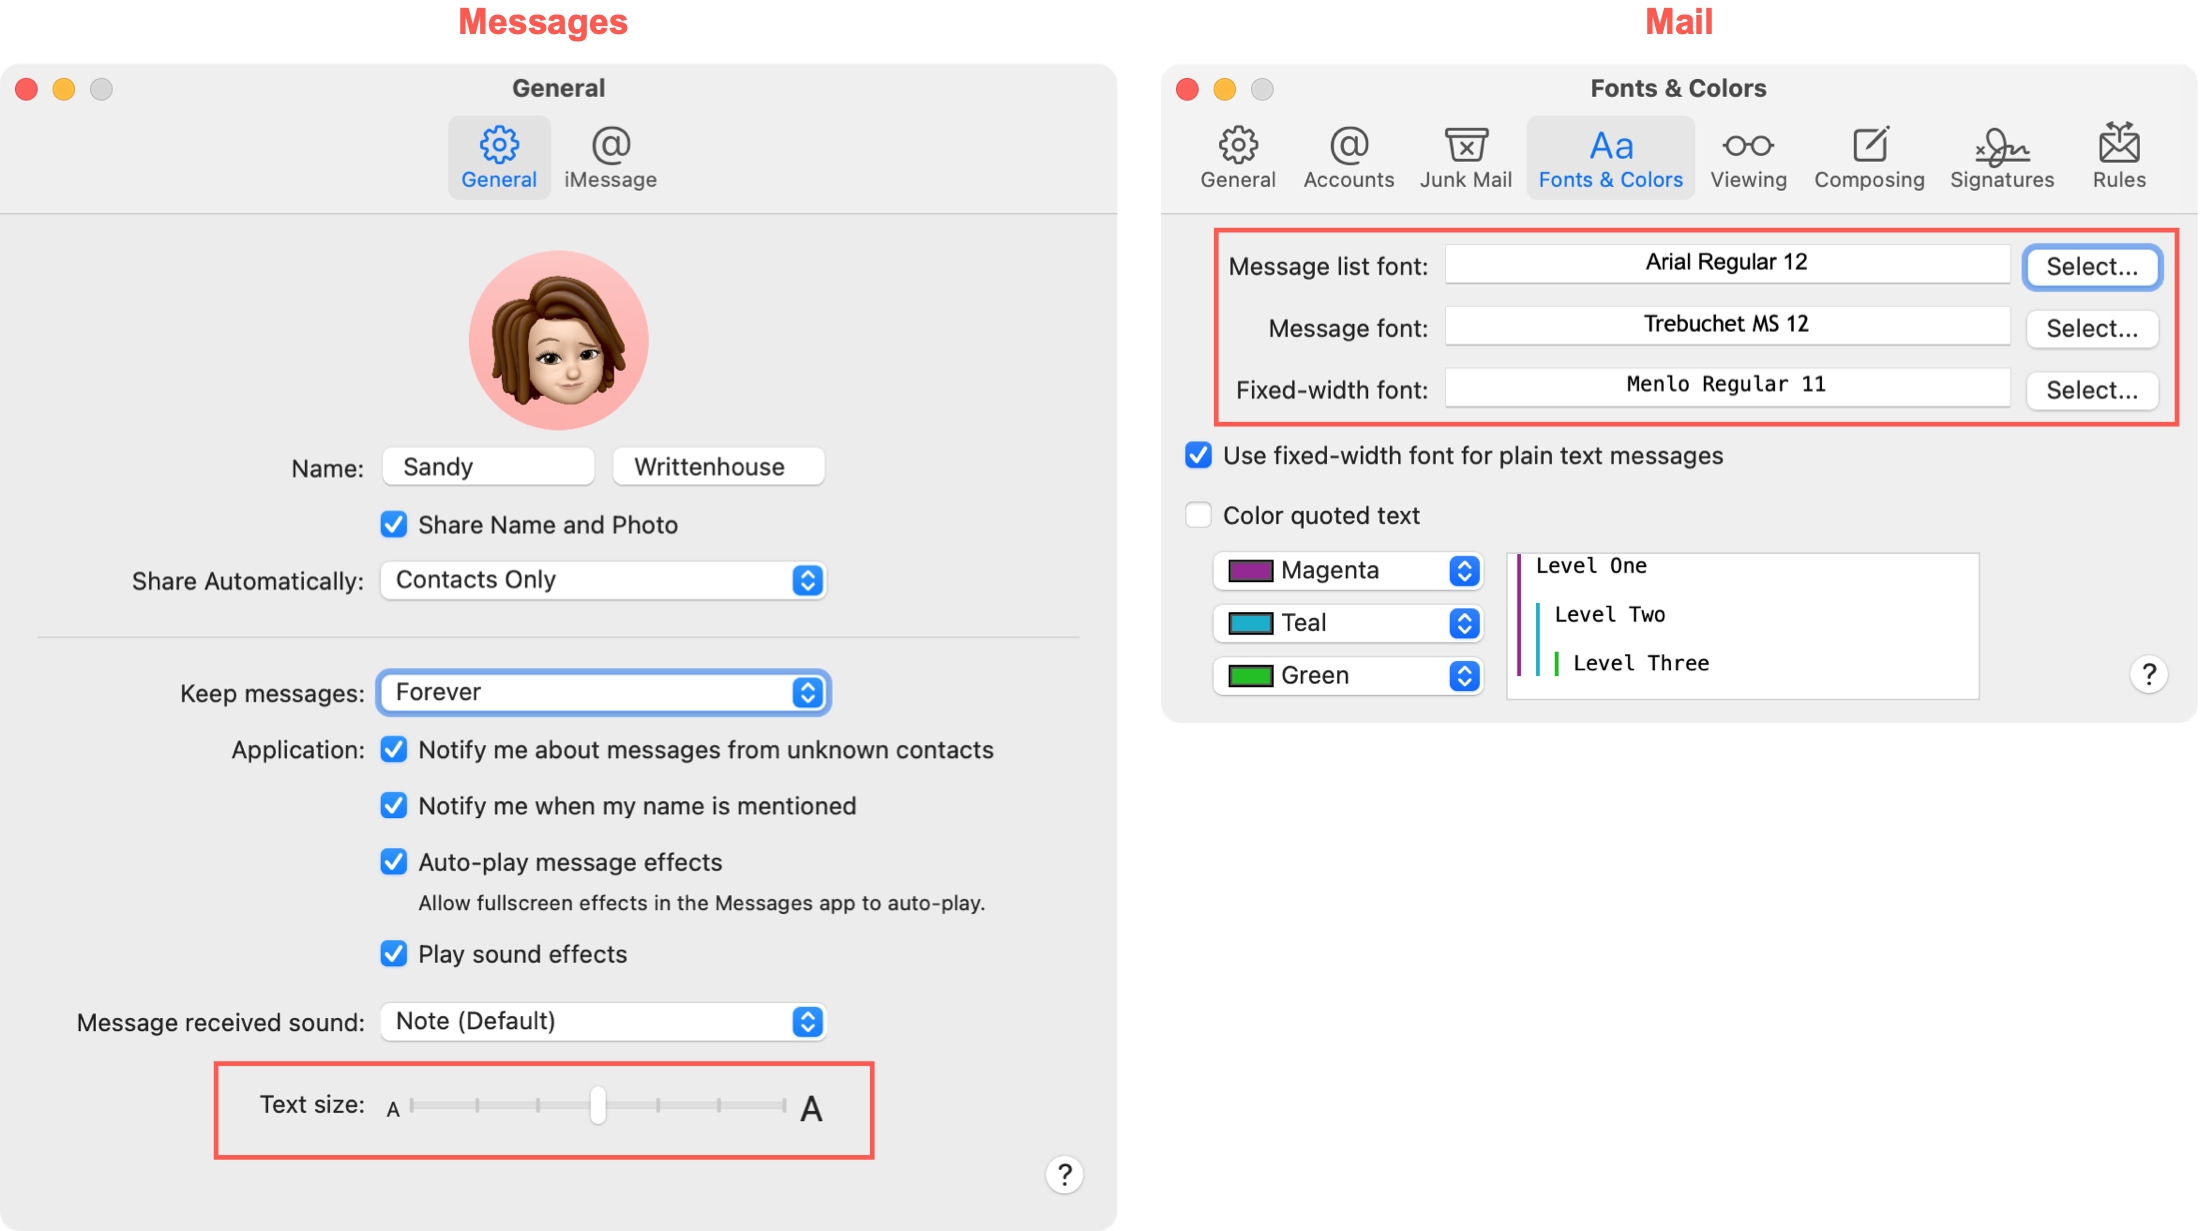
Font size in Messages: Go to Messages > Settings and on the General tab. From here, move the slider at the bottom for Text Size.
Font size in Mail: Go to Mail > Settings, and on the Fonts & Colors tab, change the text sizes using the Select button for each font at the top.
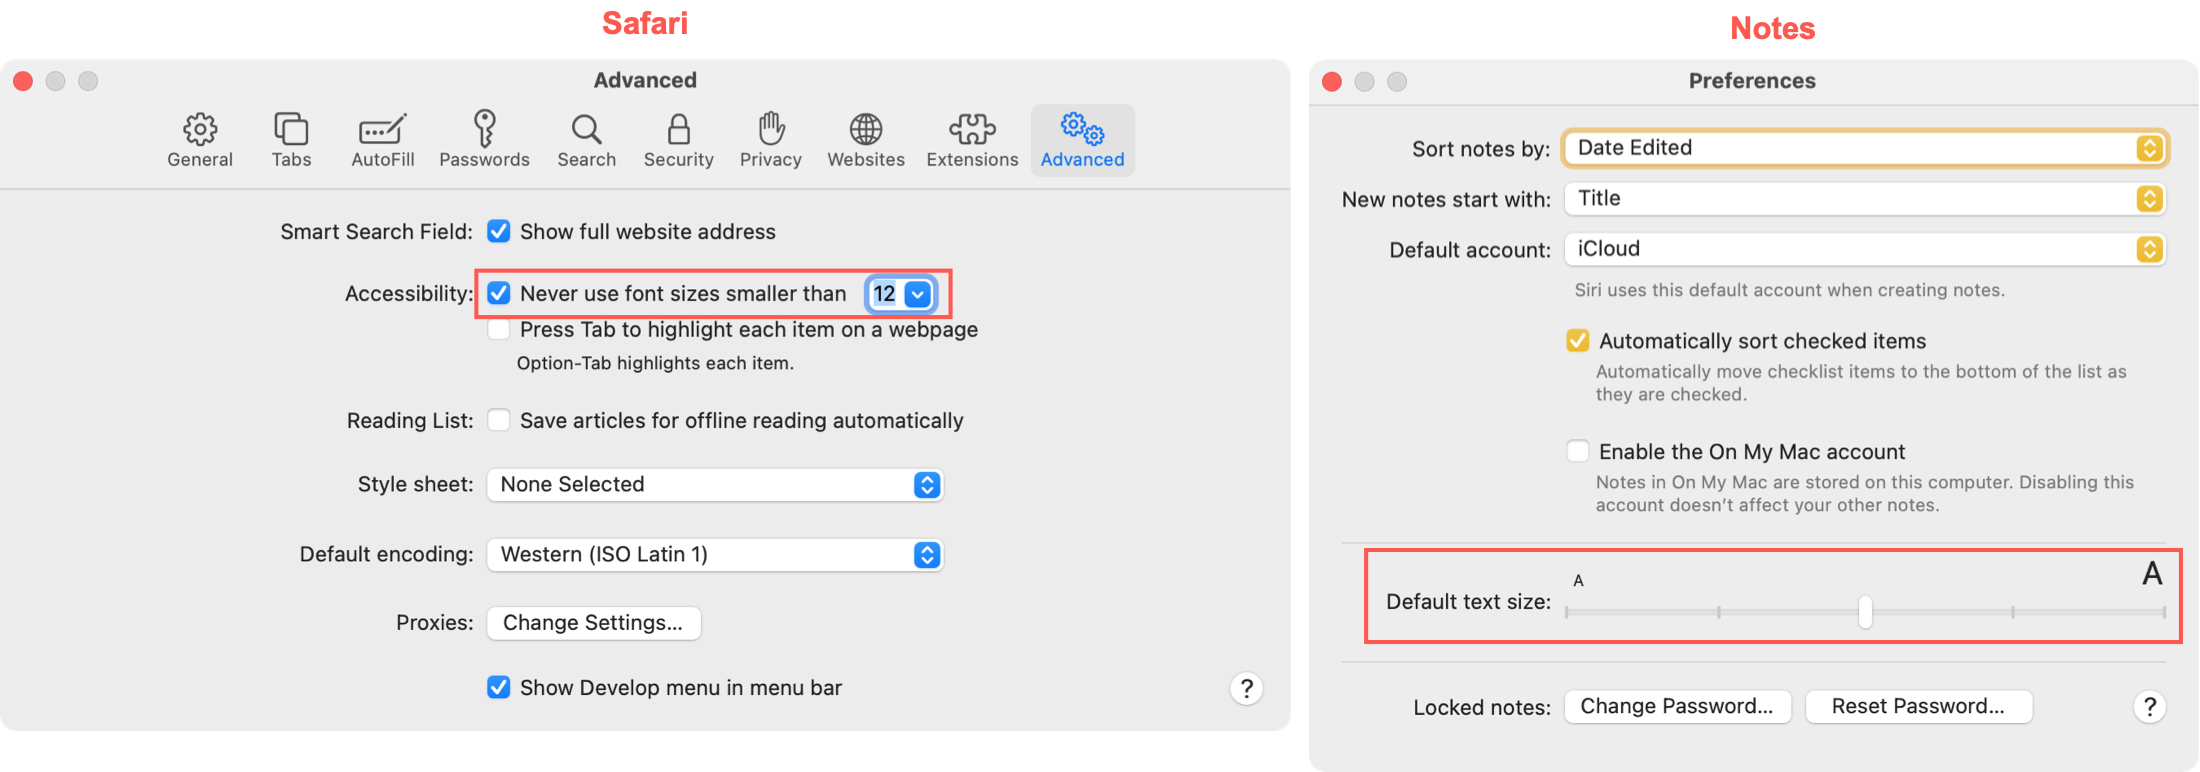
Font size in Safari: Go to Safari > Settings, and on the Advanced tab, check the box for Never use font sizes smaller than and pick a minimum size in the drop-down list.
Font size in Notes: Go to Notes > Preferences and move the slider at the bottom for Default Text Size.
For other Apple or third-party apps on your Mac, check the app’s Settings/Preferences or the Help section for instructions on increasing the font size if available.
Make desktop text and icons larger
In addition to increasing the size of the text in apps, you can make your screen font and icons larger as well. You can do this for text and icons on your desktop, in Finder, in your sidebars, and in your menu bar.
Text and icons on your desktop
You can increase the size of the items on your desktop pretty easily. Right-click or hold Control and click an empty spot on your desktop and select Show View Options. Choose a Text Size from the drop-down list and use the slider for the Icon Size.
Related: How to organize your Mac desktop for efficiency
Text and icons in Finder
You can change the size of the font in Finder if you use Icon, List, or Column view. Open Finder and click View > Show View Options from the menu bar. Choose a Text Size and Icon Size.
For an overarching larger icon size in sidebars, head to System Settings > Appearance and select Small, Medium, or Large for Sidebar Icon Size.
In macOS Monterey and earlier, this option is in System Preferences > General.
You can increase the size of the text in the menu bar. Head to System Settings > Accessibility. Select Display, and select Large as the Menu bar size. You’ll need to log out and back in to see this change.
Related: How to customize Dock and menu bar on Mac
Use system-wide large text
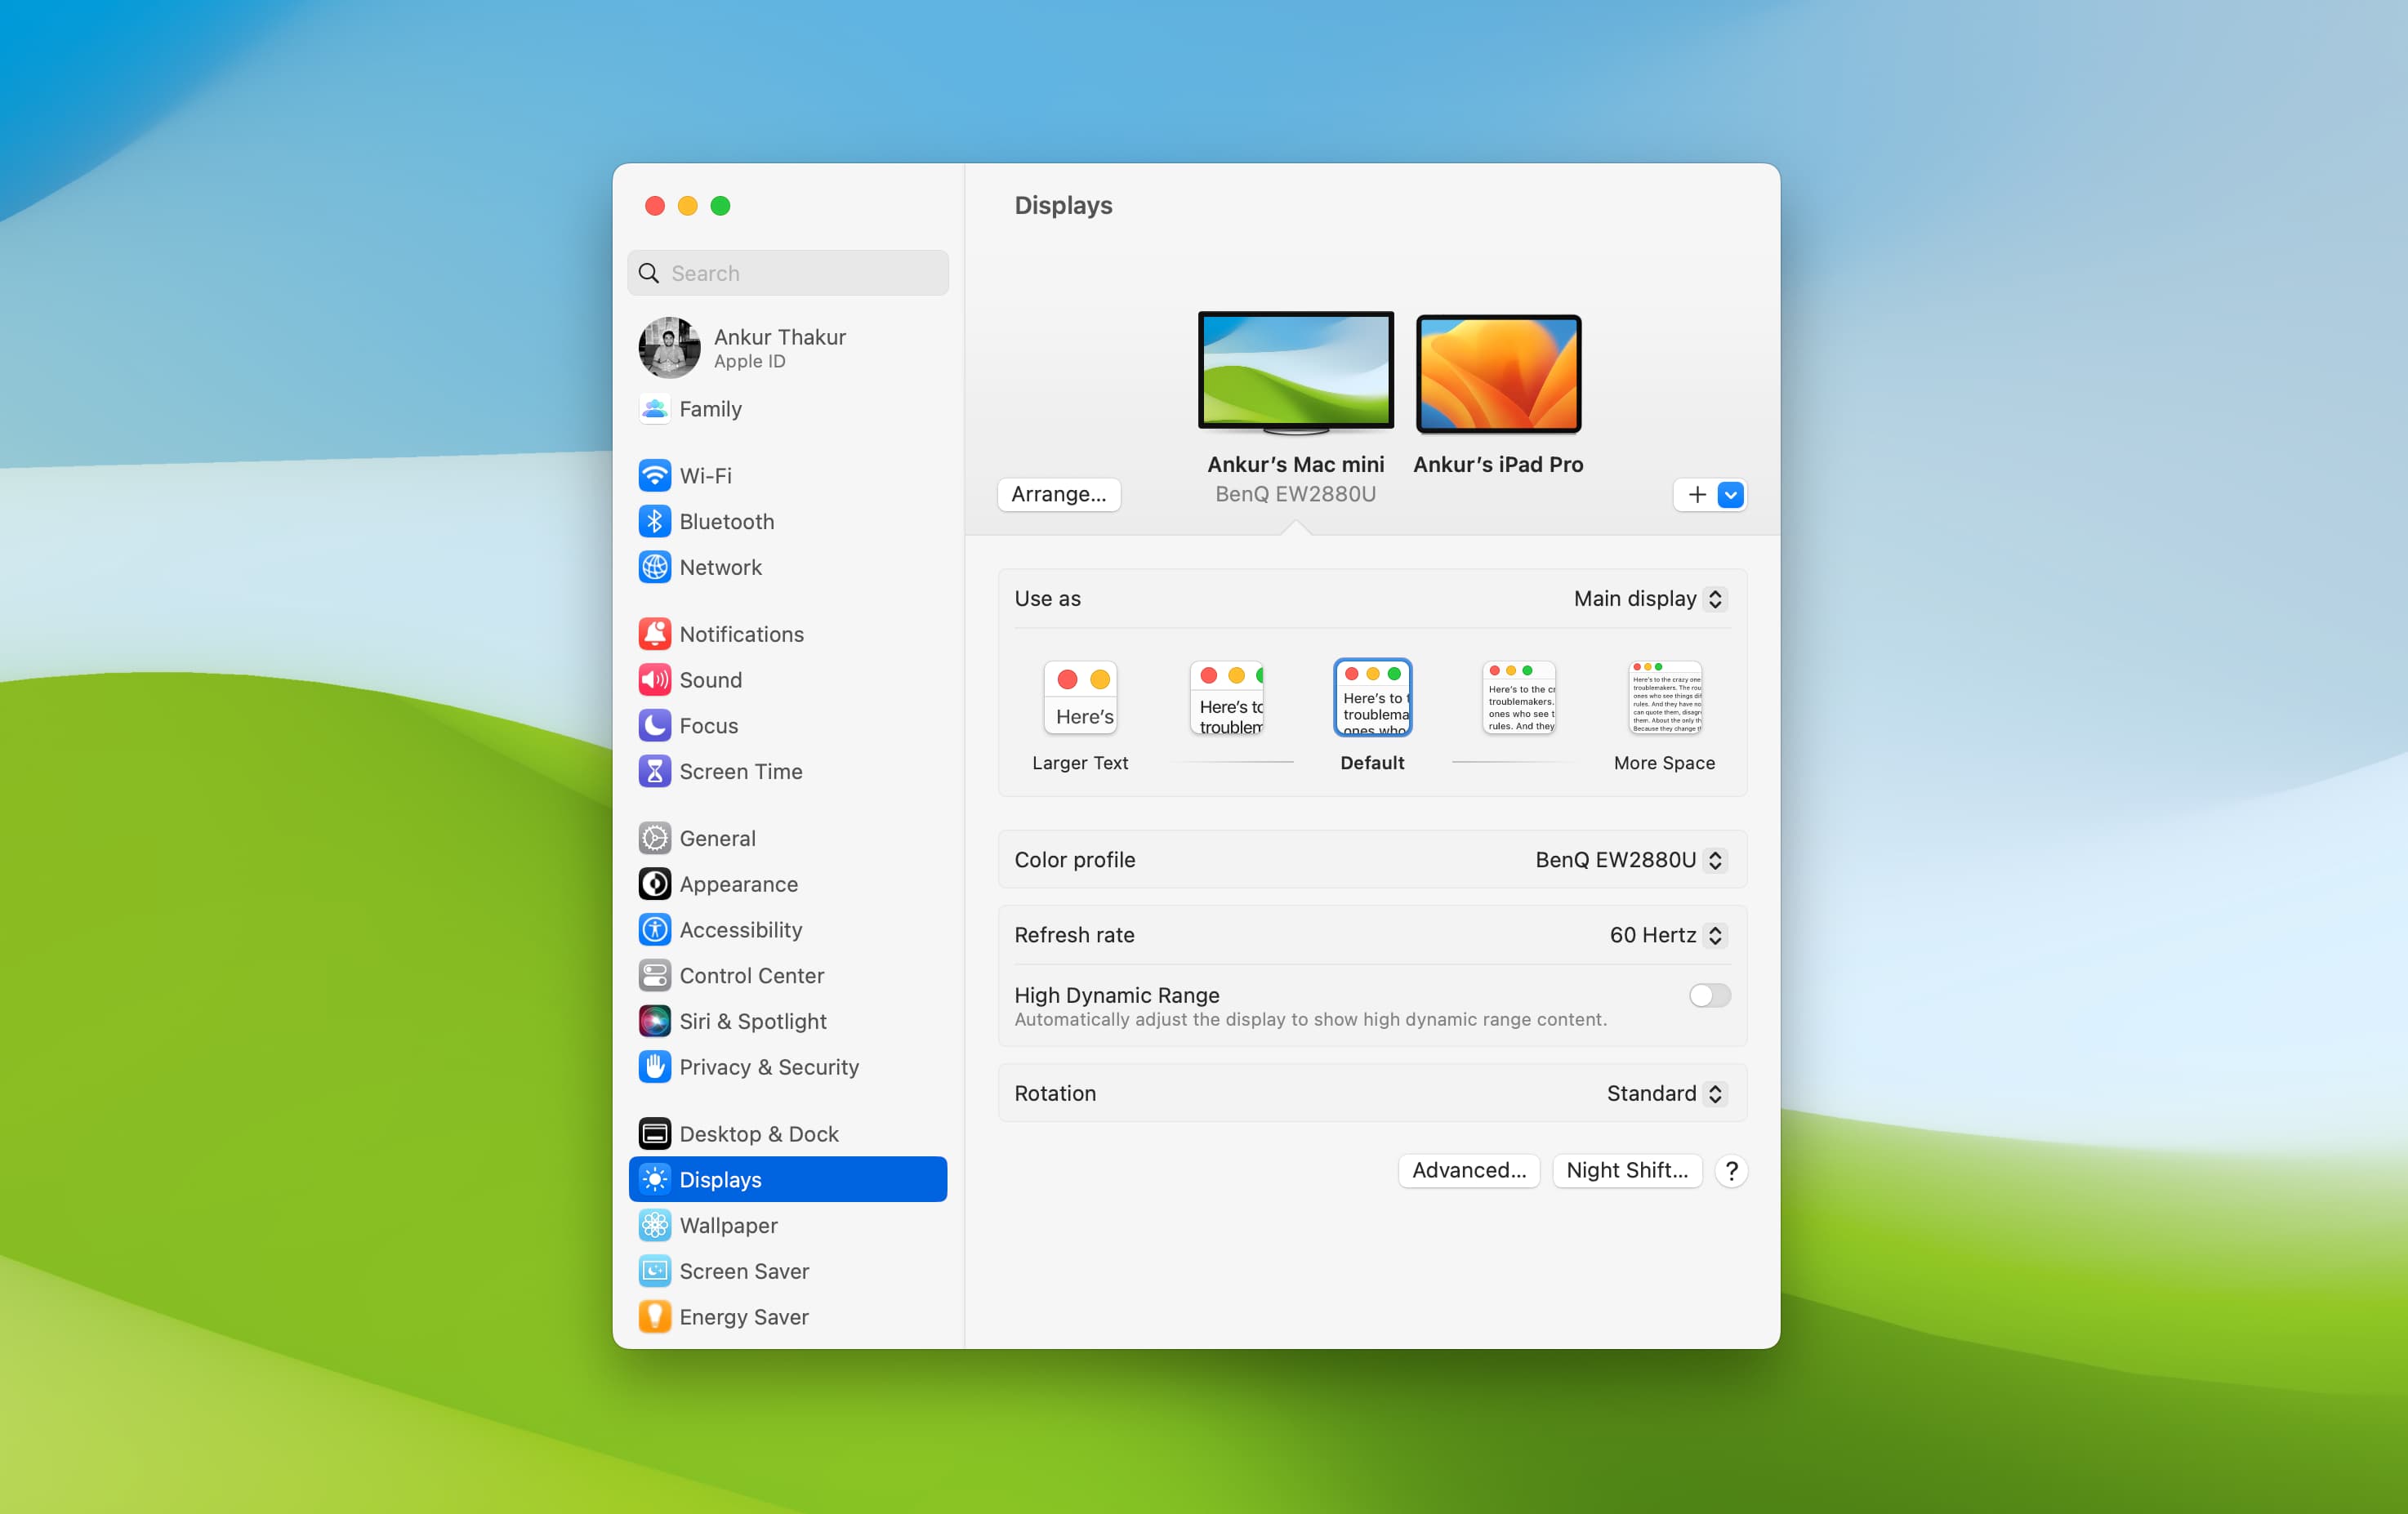
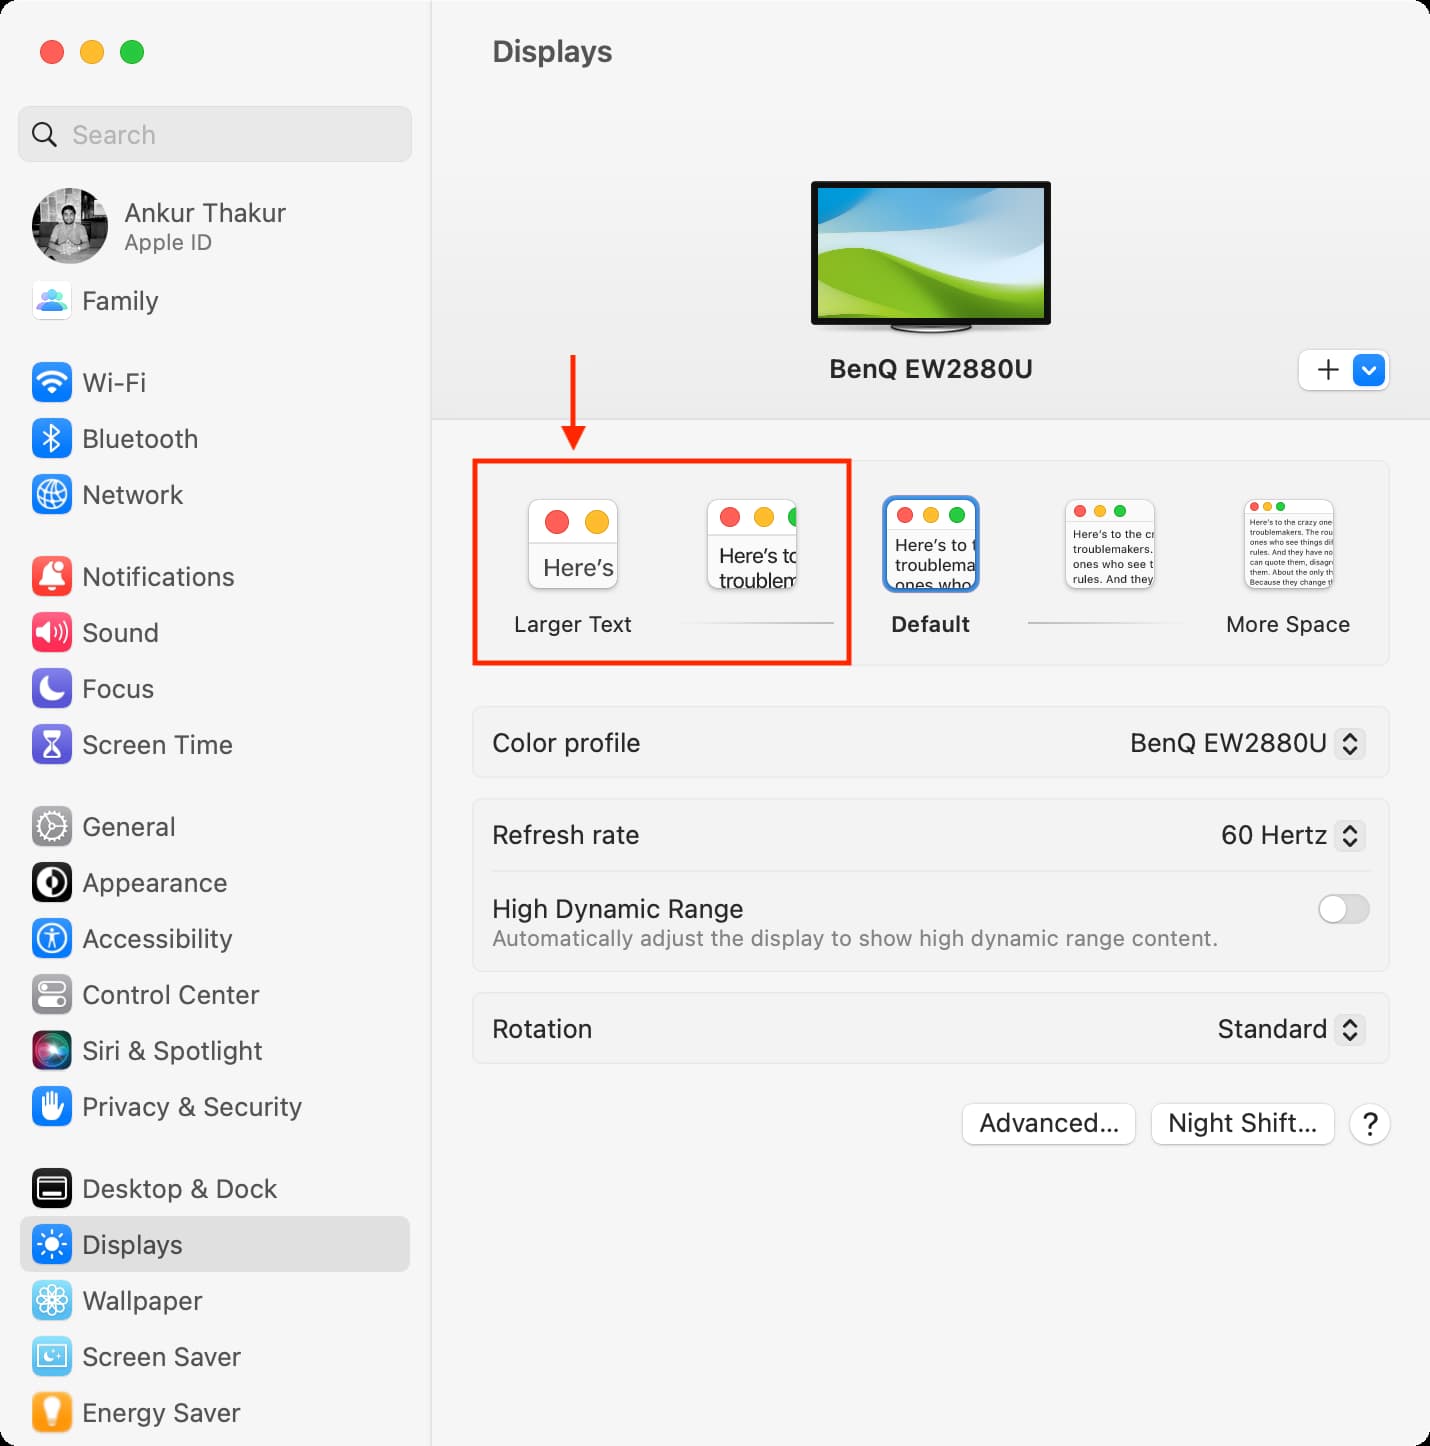
Besides the above finer options, you can also significantly increase the overall text size of all apps and windows. To do that, go to System Settings > Displays and choose an option next to Larger Text.
Adjust the appearance of your desktop
You can make some simple tweaks to make items easier to view on your desktop, in menus, and for borders. These types of adjustments are related to the colors on your screen.
Reduce transparency
Turn transparent areas of the desktop gray in System Settings > Accessibility. Select Display and enable Reduce transparency.
Make borders darker
Darkening the borders also reduces transparency and makes things simpler to see. Go to System Settings > Accessibility. Select Display and enable the switch for Increase contrast.
Invert the colors
If seeing white on black is easier on your eyes, you can head to System Settings > Accessibility > Display and enable Invert Colors.
Use shapes instead of or with color
For statuses and information, you can choose to see shapes instead of or in addition to colored text. Go to System Settings > Accessibility > Display and enable Differentiate without color.
Change the display contrast
Adjust the overall contrast for the display. Head to System Settings > Accessibility > Display and move the Display contrast slider.
Apply color filters or a tint
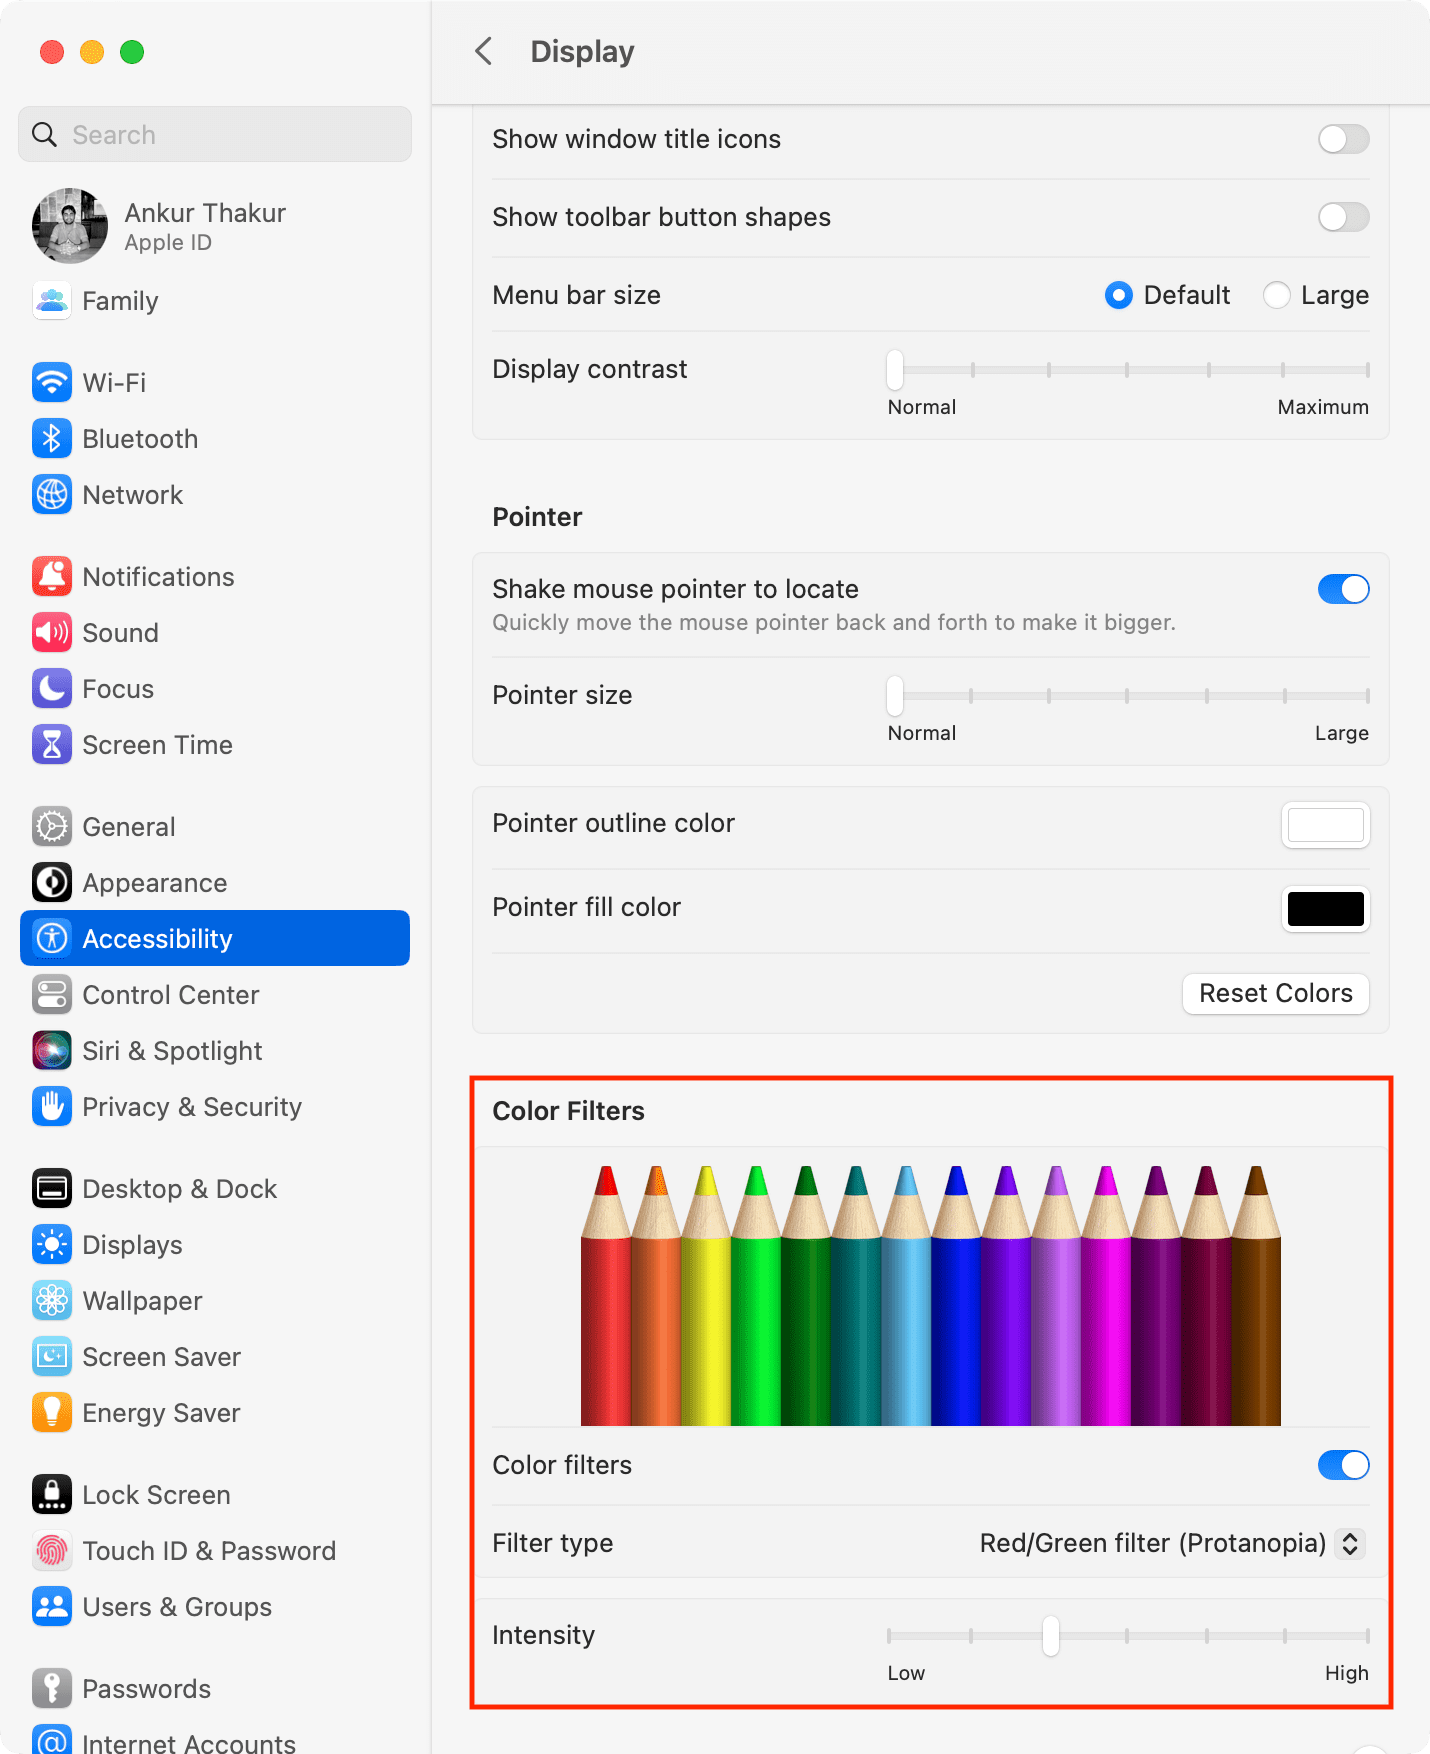
For protanopia, deuteranopia, tritanopia, or a color tint, you can use filters. Go to Mac’s System Settings > Accessibility > Display. Enable Color Filters. Select the Filter Type and then use the adjustments options that display to personalize the filter or color tint.
Use Night Shift
Another built-in Mac feature called Night Shift can make your screen easier on the eyes. You can turn it on quickly from the Control Center or schedule it to turn on regularly.
- In Control Center, click Display and then the Night Shift.
- To Schedule Night Shift, open System Settings > Displays and click the Night Shift.
Other ways to improve the screen appearance
Here are a few additional settings and options to check out for the appearance of your screen.
- Enable Dark Mode on your Mac – for an overall darker appearance.
- Change your wallpaper and screen saver – for something less colorful or busy.
- Enable and use screen zoom on your Mac – to magnify parts of your screen.
- Use Safari zoom to automatically make websites larger on Mac – for easier web reading.
Hopefully, these tips for making changes to your Mac will help you read items or see the screen better. Let us know if one or more was just what you needed for a better experience. Or, if you have a tip like this you’d like to share, leave a comment below!