Want to view your spreadsheet data in different ways? In this tutorial, we will show you how to use basic categories in the Numbers app on your Mac.
Apple Numbers gives you various features for viewing and analyzing your data. One such feature is called a Category. With categories, you can arrange your data into groups. This lets you see specific data sets in a new way. In addition, you can create subcategories to further identify the data you need.
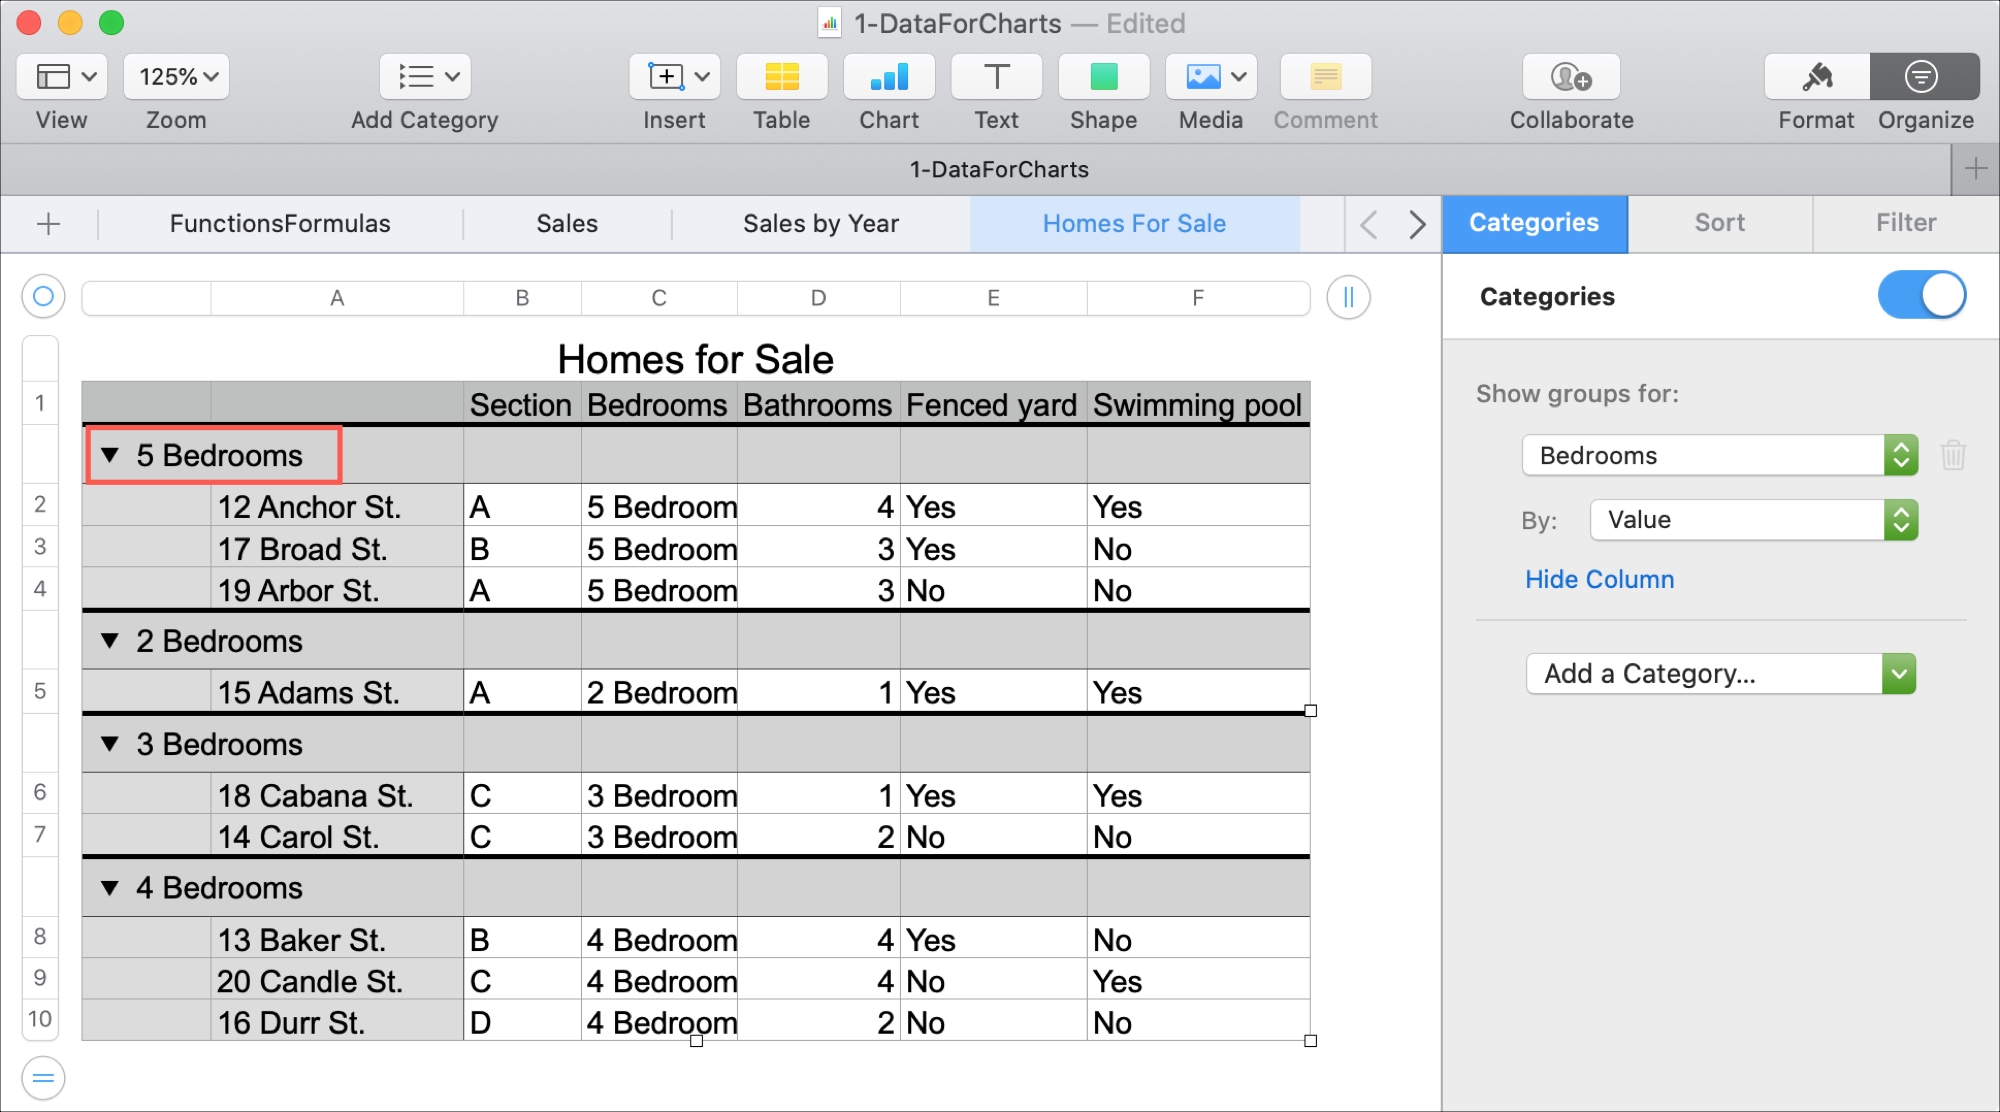
For example, say you have a Numbers spreadsheet for real estate. You want to group together homes with five bedrooms, four bedrooms, and so on. And within those bedroom groups, you want those with five bathrooms, four bathrooms, and so on. Using categories, you can create these groups and subgroups to then show those houses your client is looking for.
This is just one example of how categories can help you in Numbers; there are plenty of other situations where this feature comes in handy. To get started, this tutorial shows you how to work with basic categories in Numbers on Mac.
The basics of categories in the Numbers app
As you’ll soon find out, using categories in Numbers can get quite complex. If you’re manipulating a large amount of data and adding calculations to those groups, things can get complicated quickly.
Since we cannot cover every aspect of categories in this one piece, we’ll start off with the basics instead. We’ll show you how to create a category or group, add a subcategory, turn a category off and on, and delete a category.
Create a category with a column
You can create a category using a source column (column containing the data you need) in a couple of quick ways.
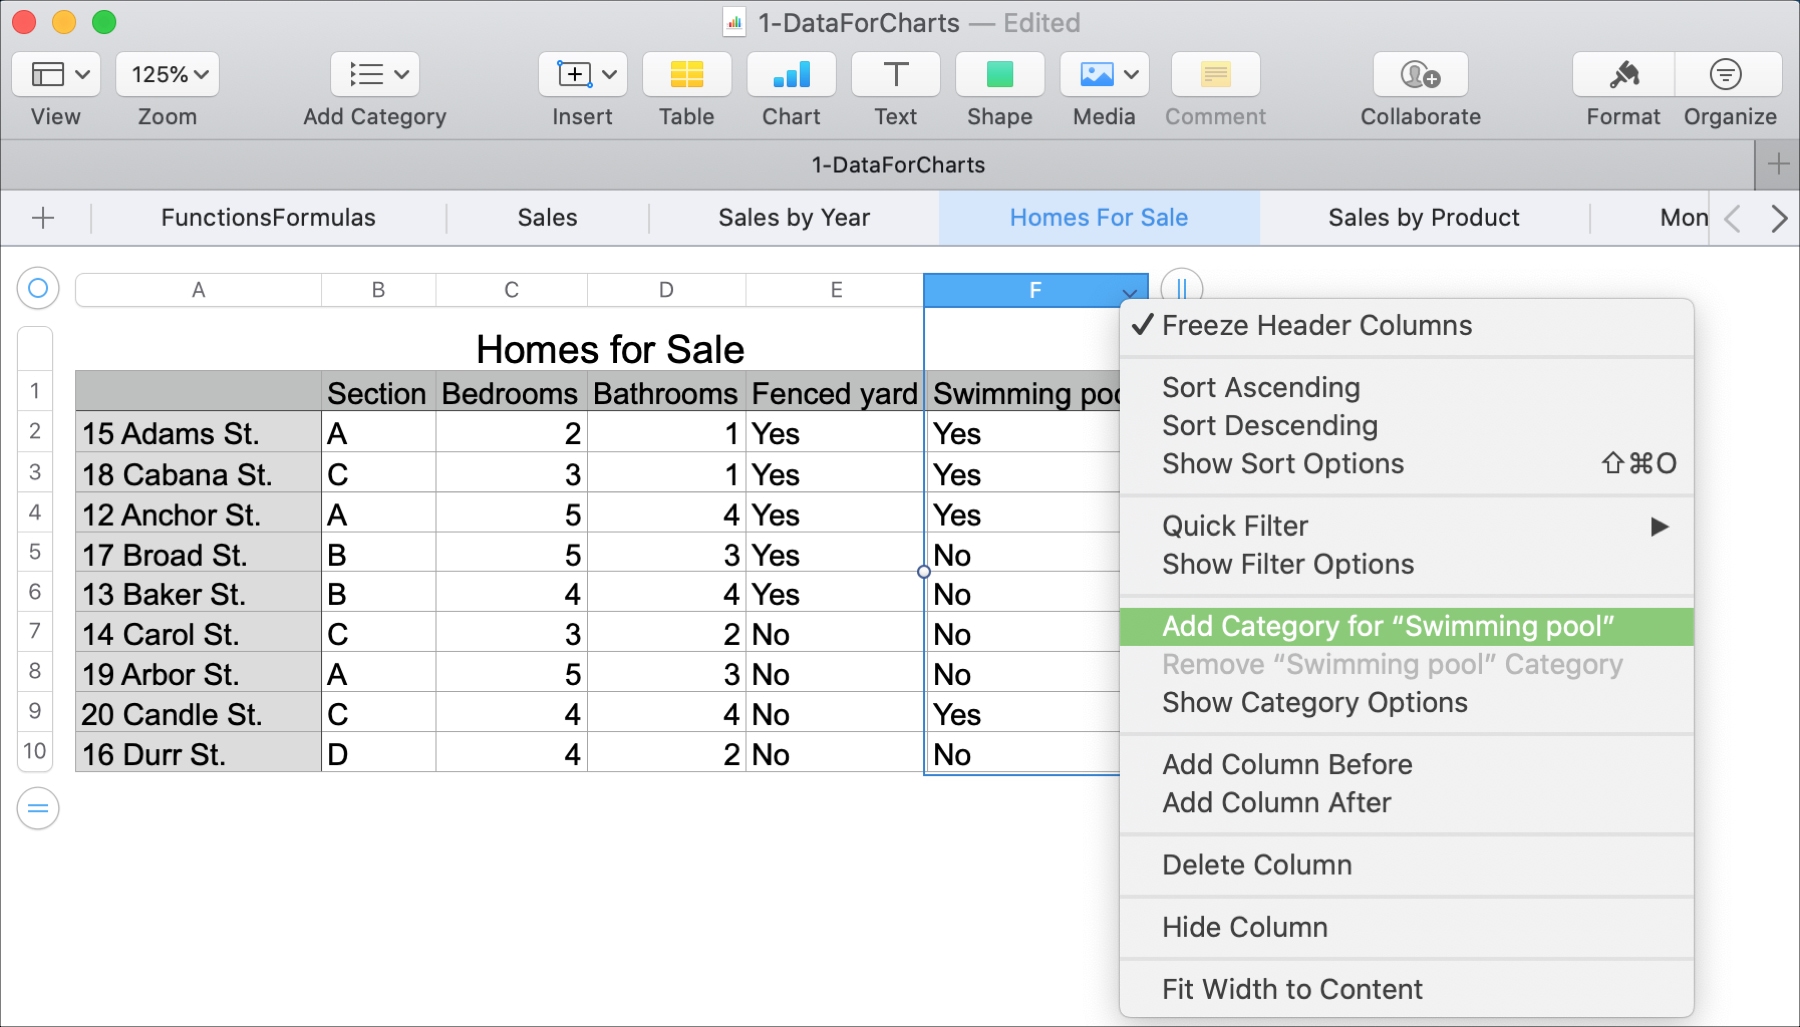
- Click the arrow next to the column header and choose Add Category for [“column”].
- Pick a column, click Organize from the menu bar, and select Add Category for [“column”].
You’ll immediately see your table adjust and group your data according to the category for the column you select. These quick options work well if you plan to only use one category.
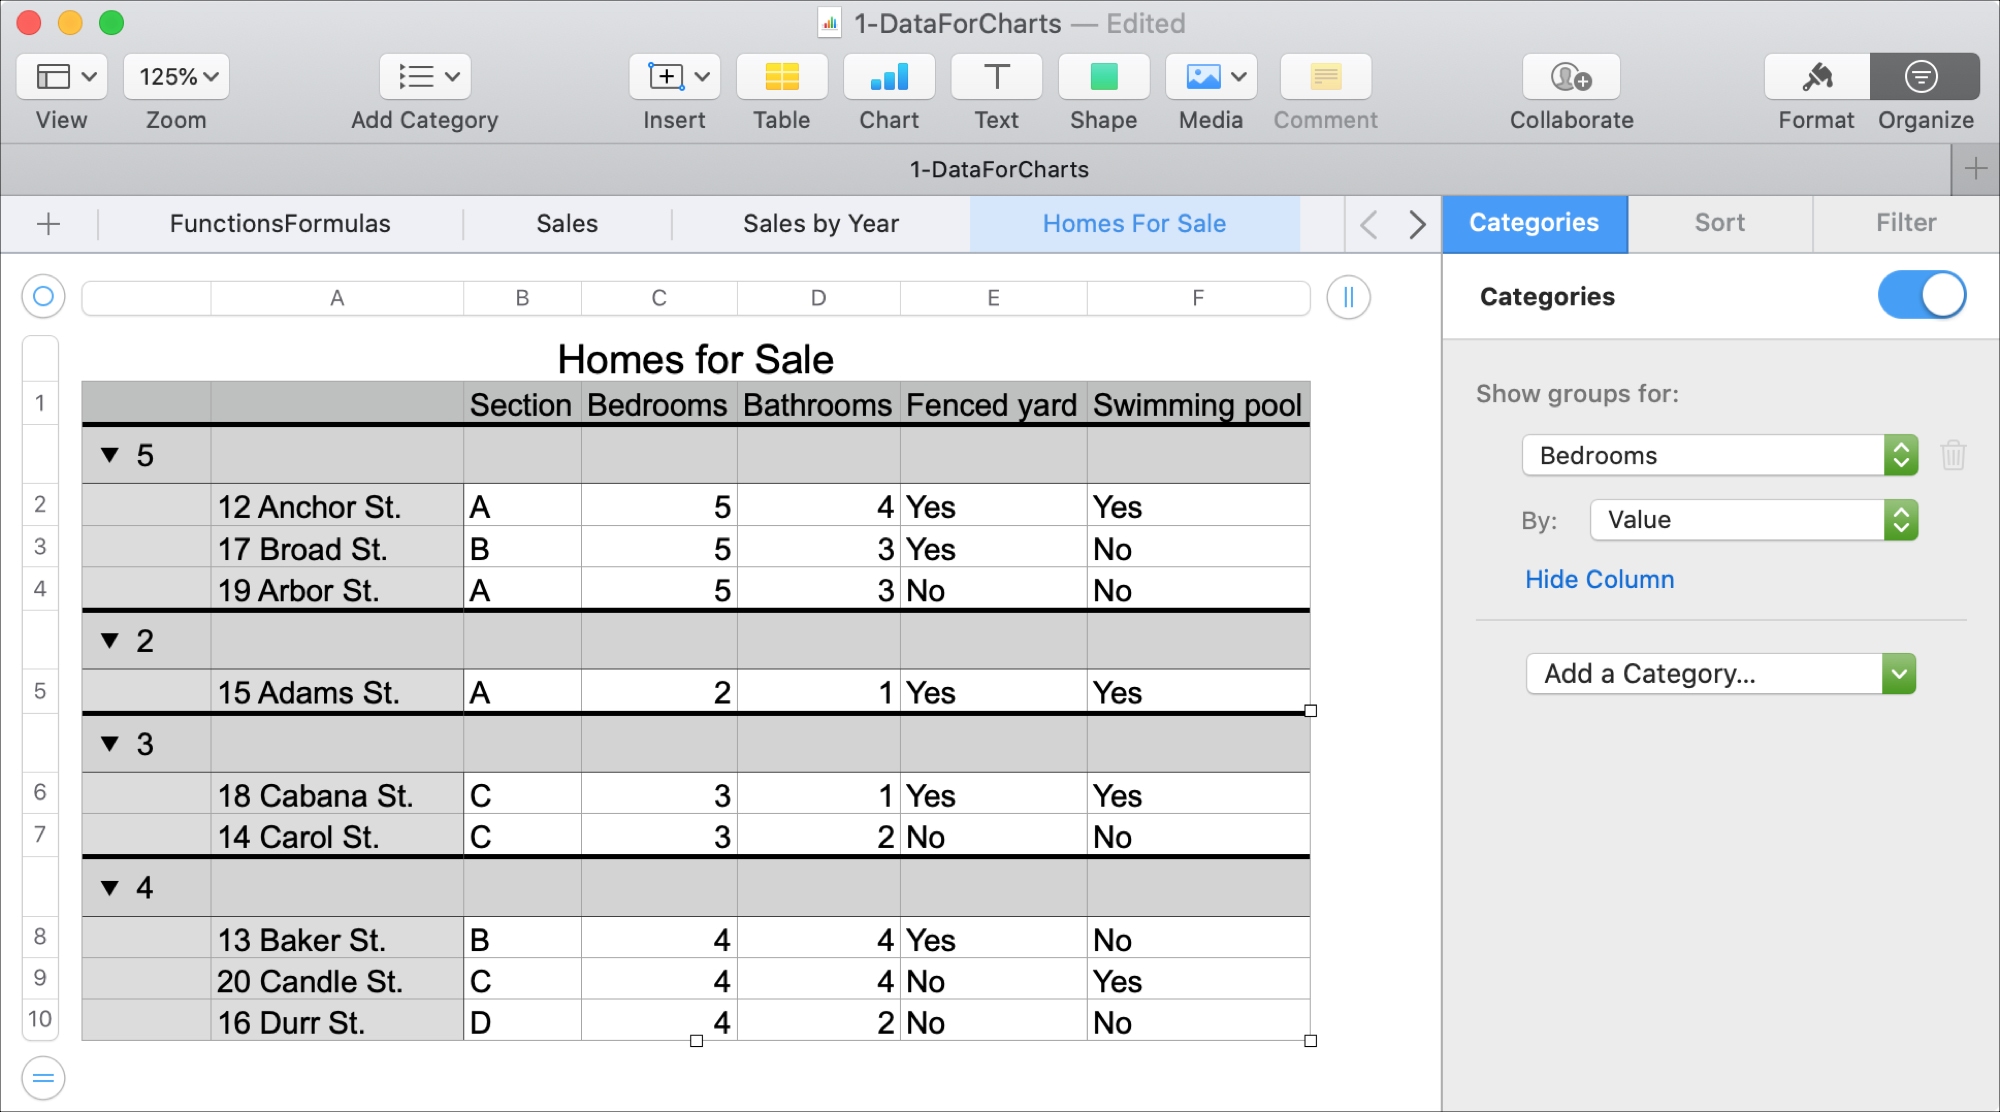
Create a subcategory
If you want to manipulate your data further using subcategories, you can start with one of the options above, click Organize on the top right of the Numbers window, and select the Category tab. You’ll see that quick option you selected above that you can then build from.
If you want to go directly to the sidebar to build your category structure, do one of the following:
- Click Organize on the top right of the Numbers window and select the Category
- Click the arrow next to the column header and choose Show Category Options.
- Pick a column, click Organize from the menu bar, and select Show Category Options.
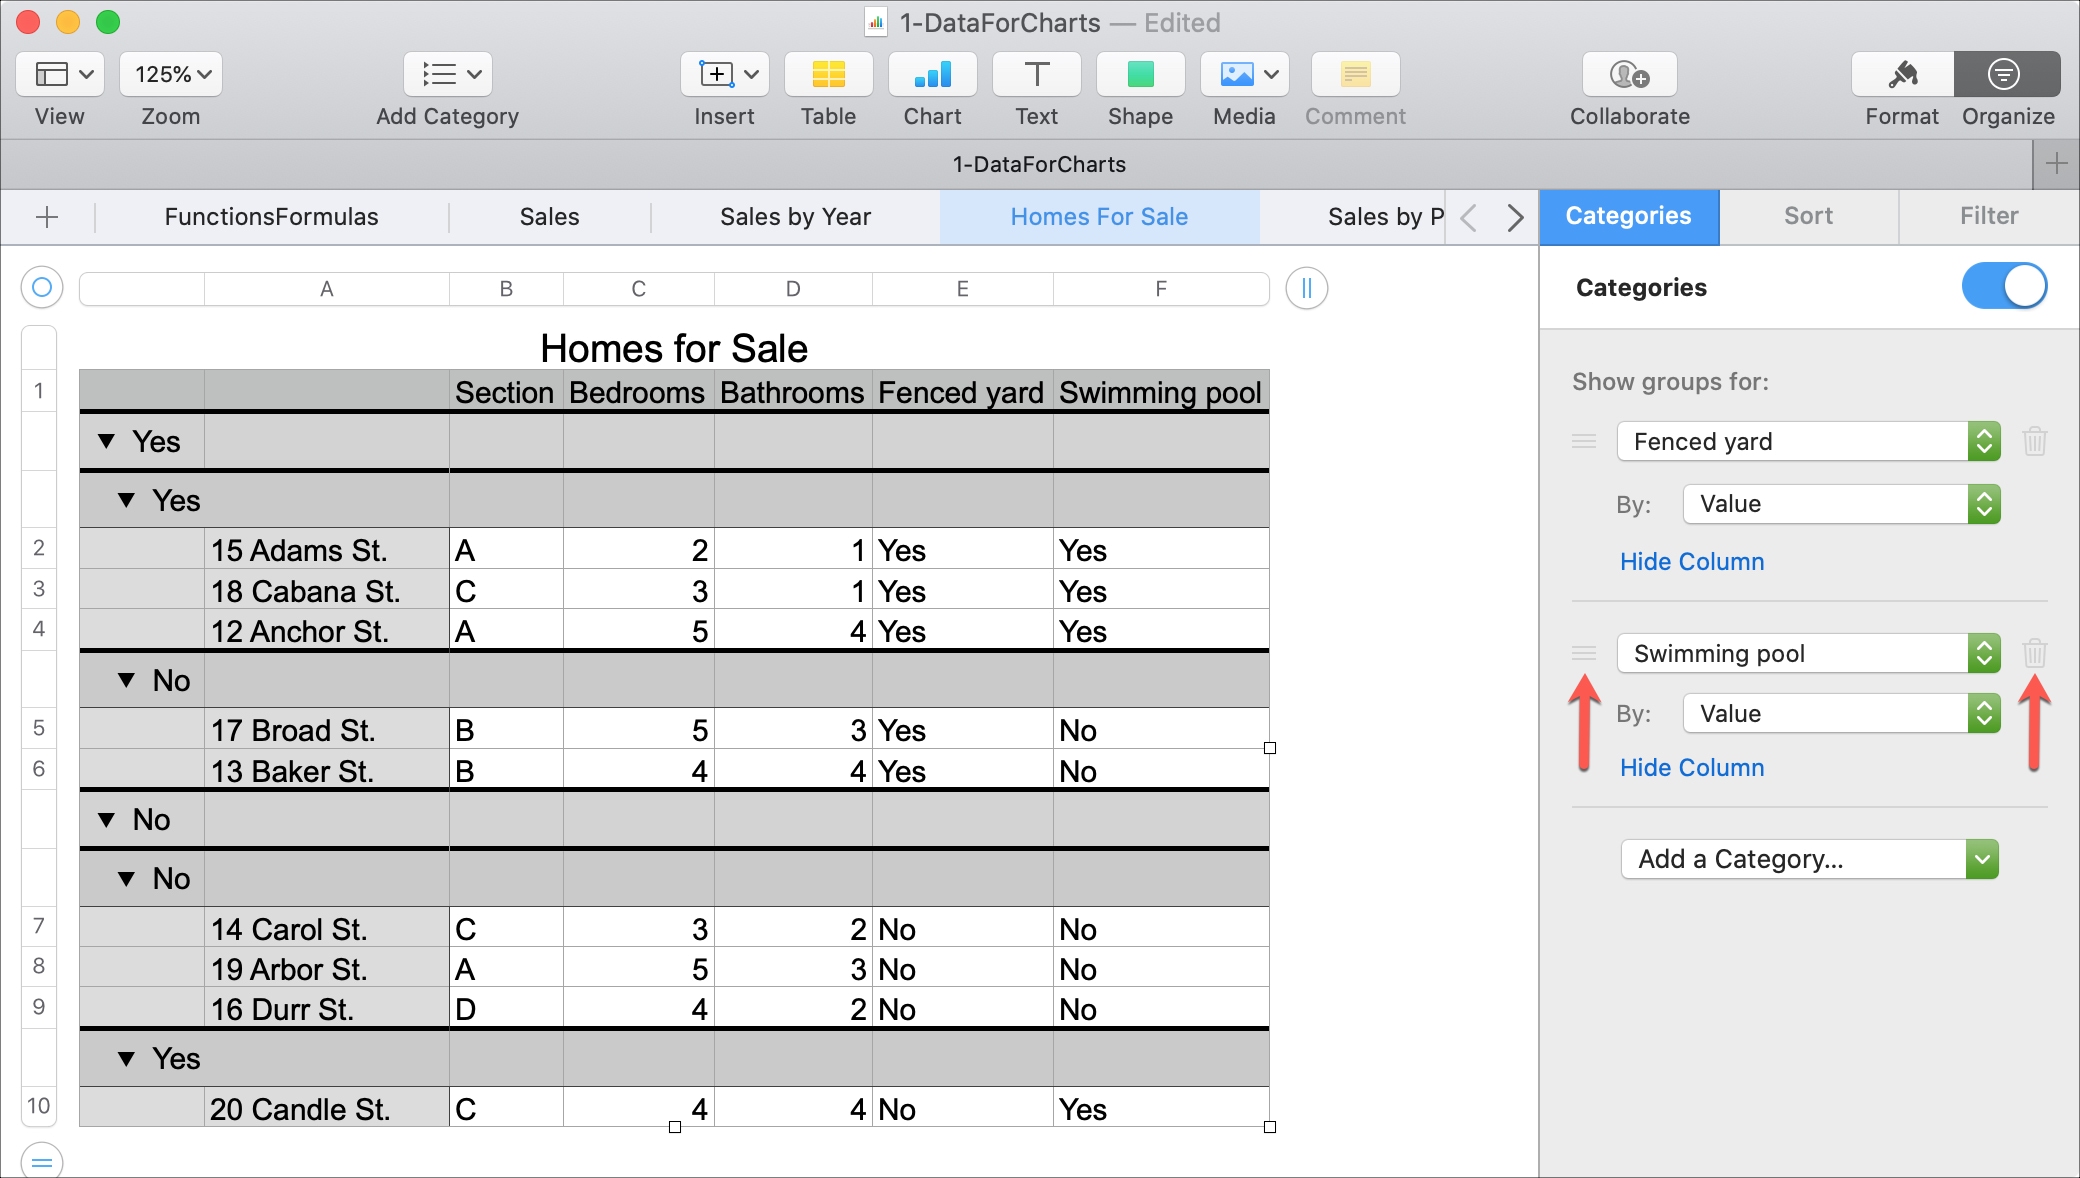
At the top of the sidebar, choose the source column you want to base your category on from the drop-down box and optionally a By value. Once your table adjusts and your data is grouped, click the subsequent drop-down box in the sidebar to add your subcategory.
In our example, we want a category for homes with a fenced yard first and then those with a swimming pool second.
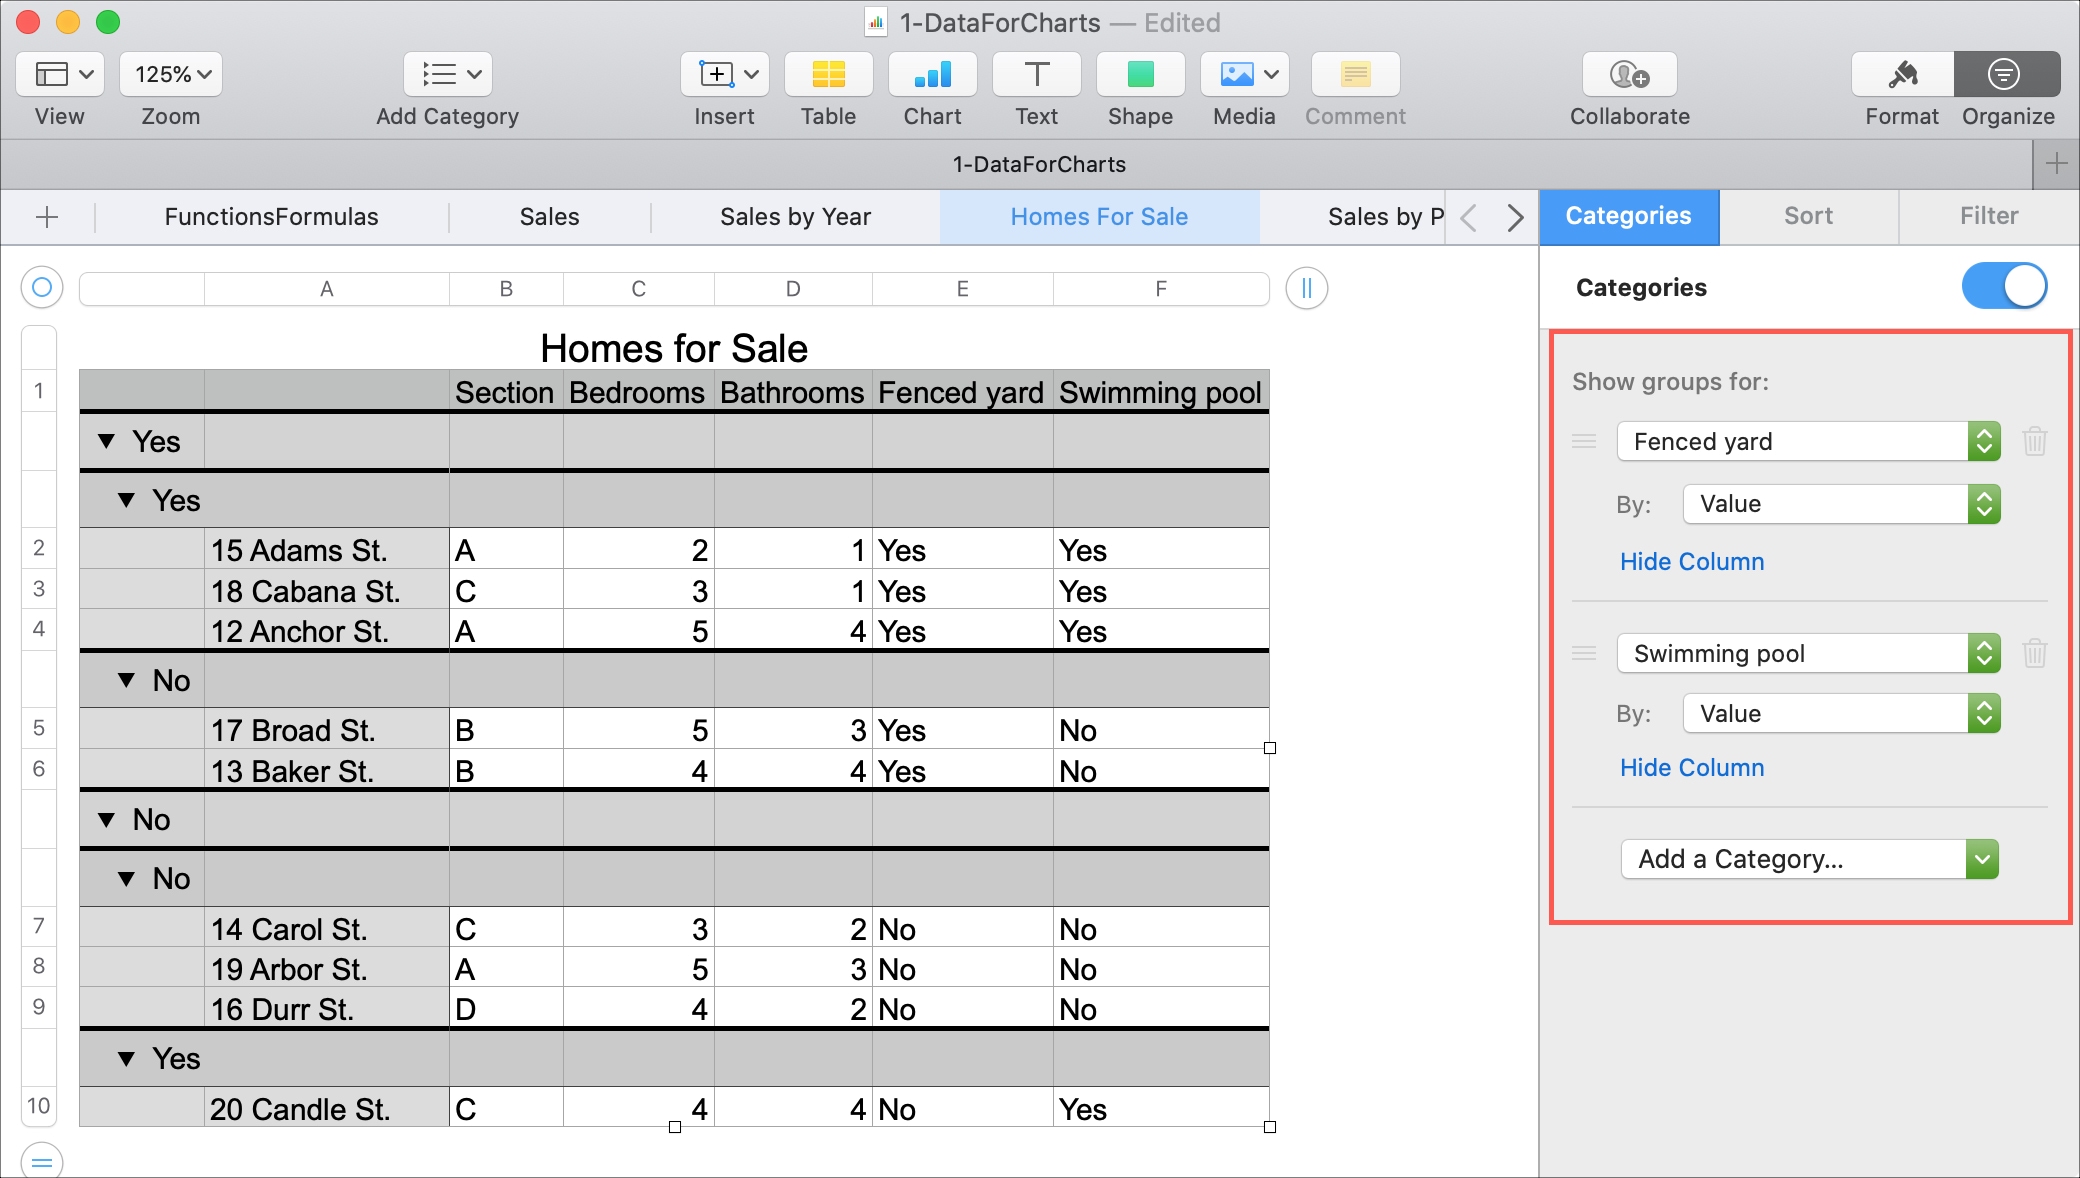
You can create up to four subcategories within one main category in a table.
Create a category with selected rows
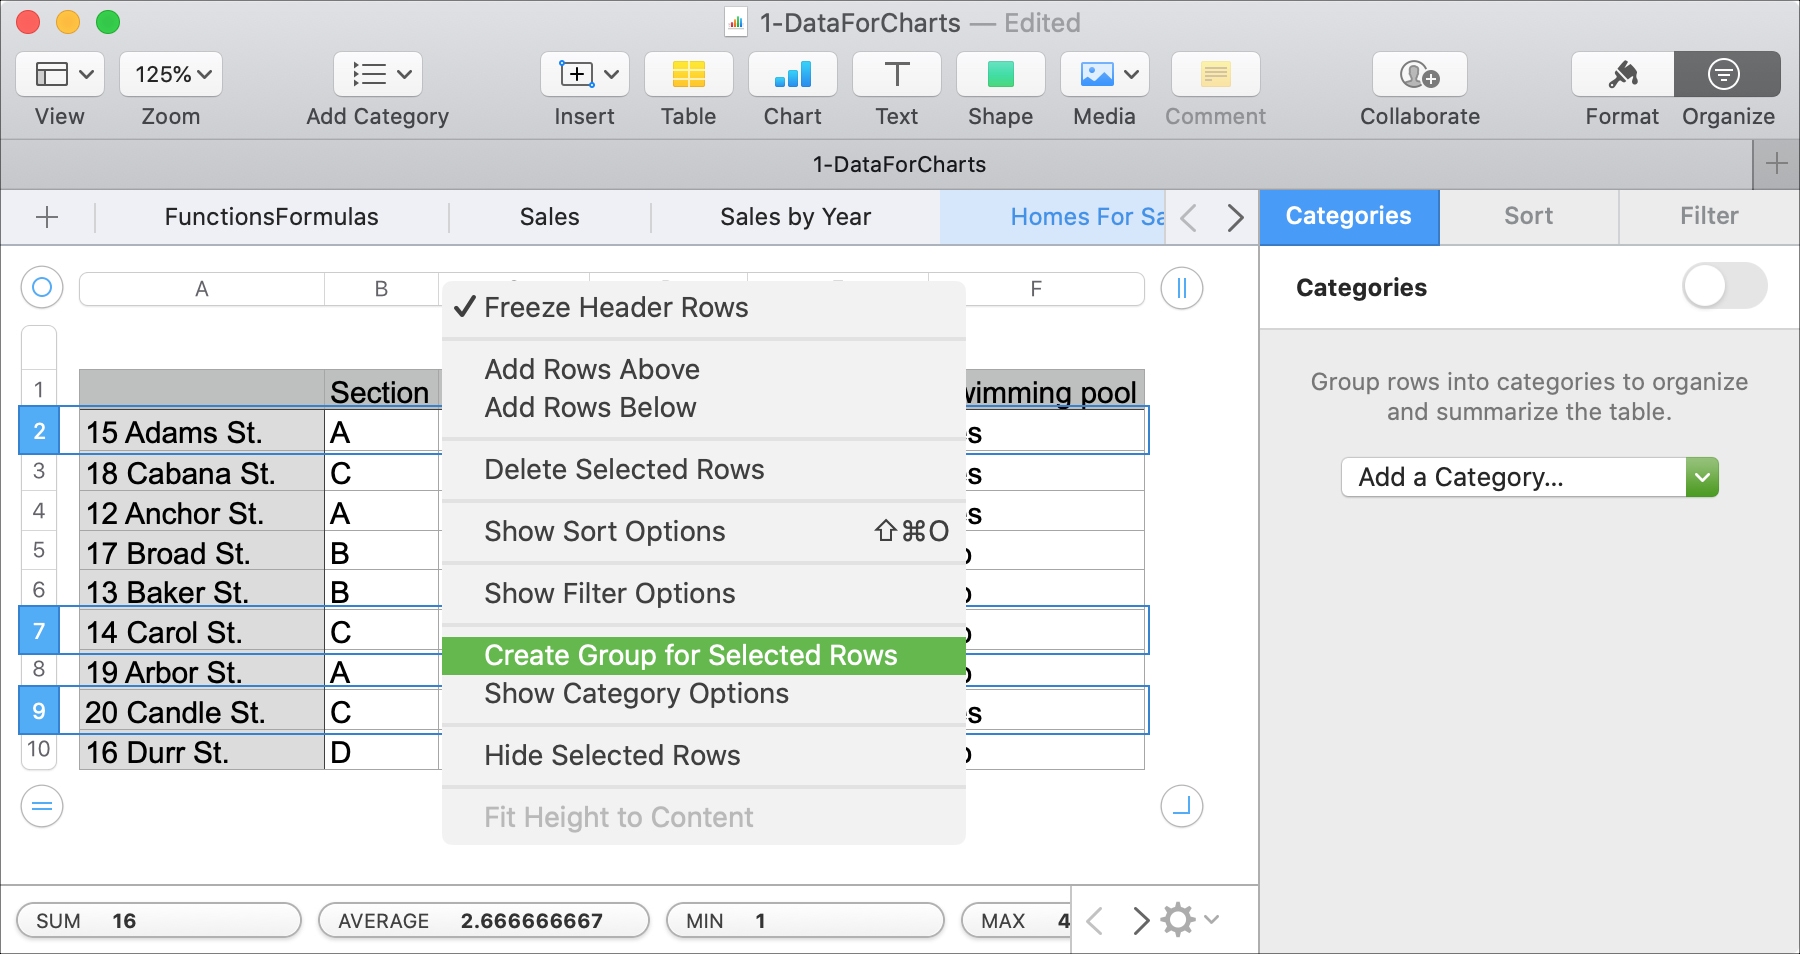
If the data in your table does not have a source column for you to create a category from, you can make your own groups with selected rows. Using our Homes for Sale sheet as an example, maybe there are several random homes we know our client would like to see.
1) Select the rows for the group. You can drag through a range with your cursor or hold Command as you click each one.
2) Right-click any one of the selected rows or the arrow next to a header and choose Create Group for Selected Rows.
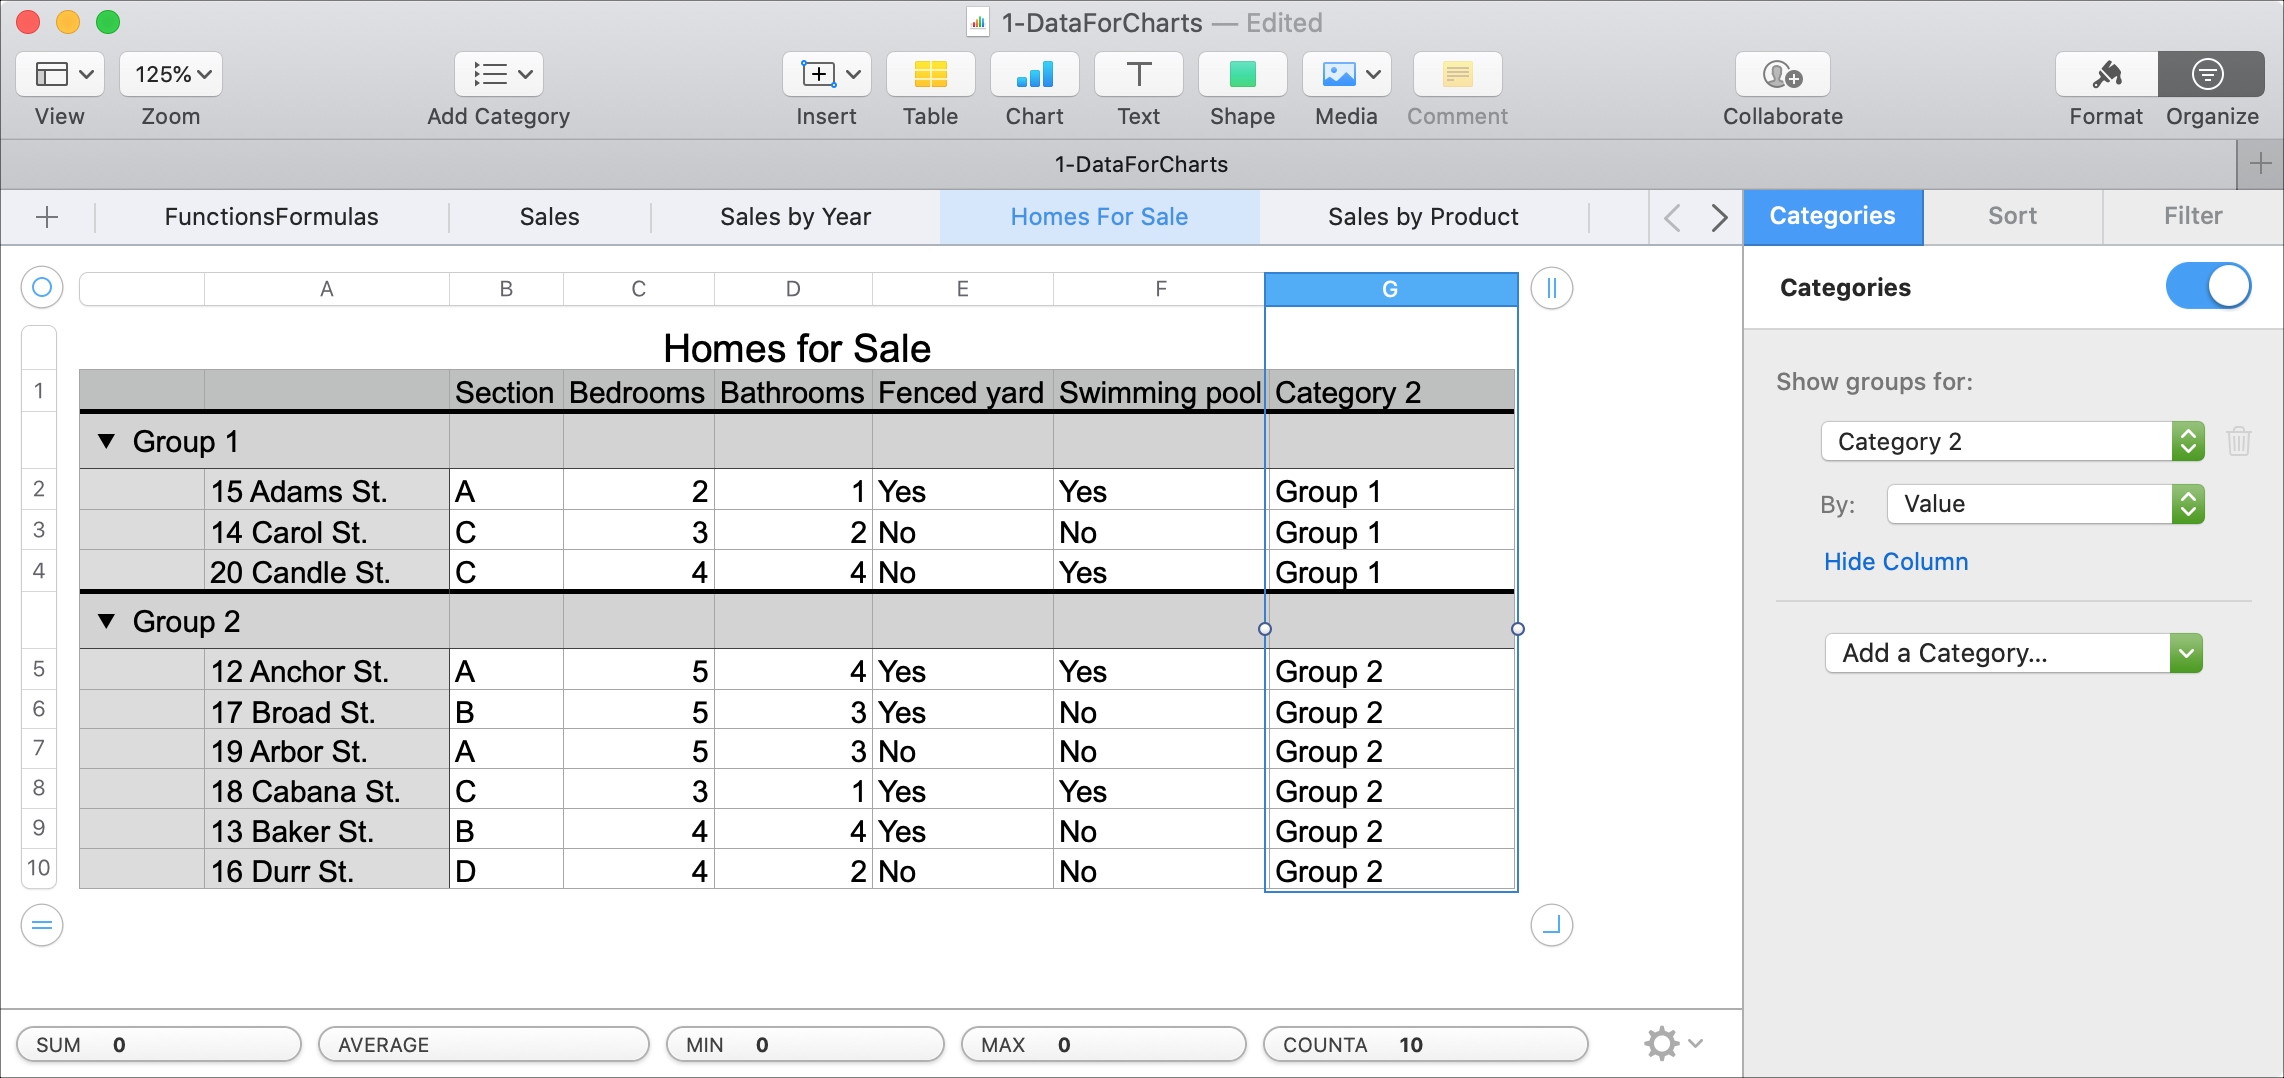
3) You’ll see groups created in your table. The first group is for the rows you selected, and the second is for all remaining rows.
You’ll also notice a new column in your table labeled Category. This column indicates those Group 1 and Group 2 rows. You can hide this column from your table, just like you can hide the source column for the first set of category instructions, and we’ll show you how to do it next.
Hide category columns
Whichever way you decide to categorize and group your data, you can hide the source column or Category column.
Make sure the Organize sidebar is open with Category selected. Below the column in Show groups for, click Hide Column. The link will change to Unhide Column after you hide it, so you can reverse the action if you like.
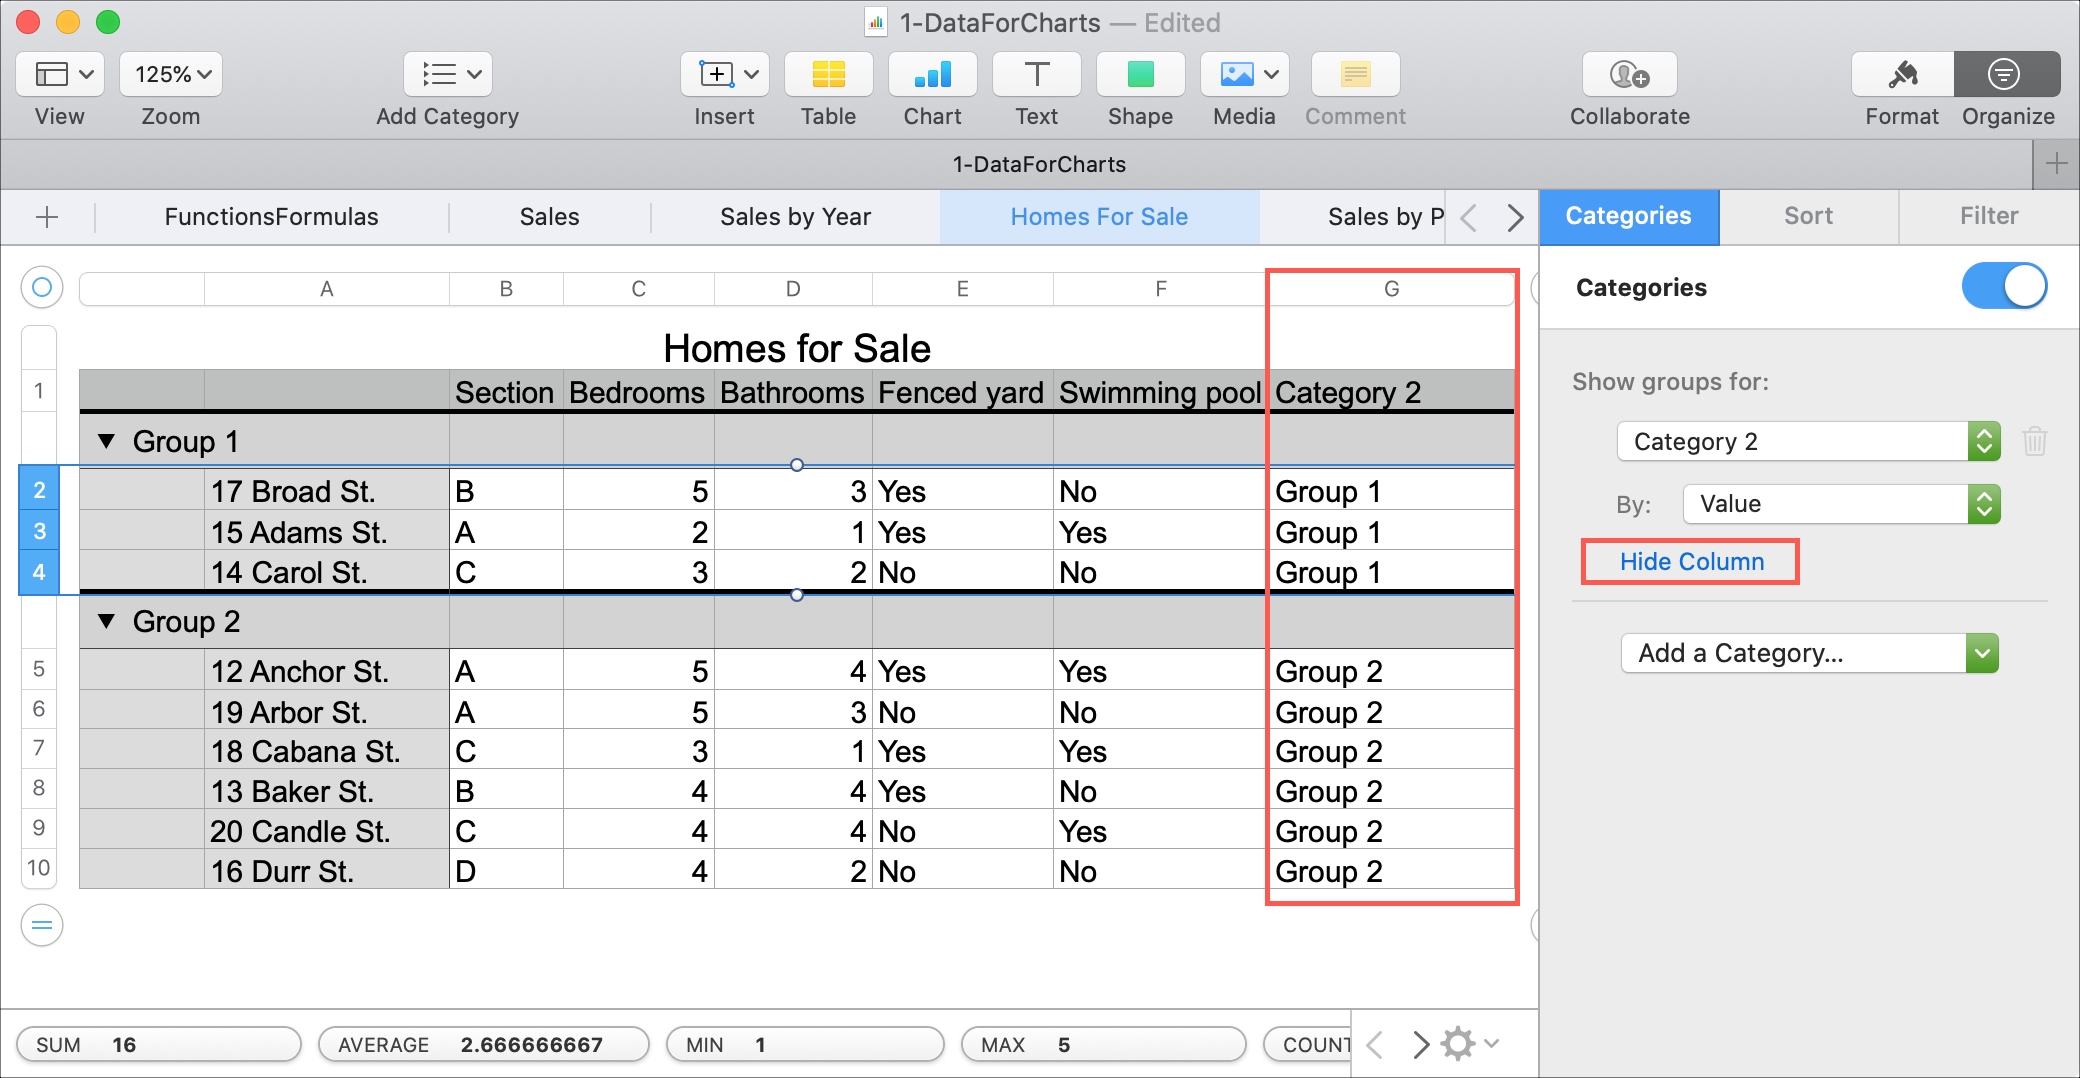
This is a handy way to make your table more compact and reduce redundancy for that source or Category column.
Change category or group names
The names Numbers gives to your categories and groups are provided by default. For example, if you create a category based on the number of bedrooms in a house, each category name will be a number.
And if you create a group using selected rows, each group will be named Group 1, Group 2, and so on.
But to make those groupings more meaningful, you can rename them.
Simply double-click the cell containing the name of the category or group, enter the new name, and hit Return.
Rearrange or remove categories or groups
If you want to rearrange the hierarchy of the categories and subcategories, click the three lines to the left of a category in the sidebar and then drag it to its new location.
To remove a category, click the trash can icon next to it in the sidebar. You will not receive a confirmation that you want to delete the category. So, keep in mind that you can also turn off categories rather than deleting them if needed.
Turn off categories
You can disable categories you create to view your data in its original form temporarily and without deleting a category.
Open the Organize > Category sidebar and slide the toggle at the top to turn off categories.
Categories and groups give you a great way to organize and view your data in Numbers. But there are other ways as well, depending on your needs. You can check out our tutorials for filtering your data in Numbers or how to sort your data.