
Have you ever wanted to share an email with someone but didn’t necessarily want to forward it to them? Or maybe you wanted to use an email with nice feedback from a client or customer in one of your documents or presentations?
There are situations like these, along with more, when a link to an email that you can share with others comes in handy. If you use Spark for your email communications, you have access to this convenient feature.
Here’s how to create a link to an email Spark on Mac, iPhone, and iPad.
Create an email link in Spark on Mac
In Spark on Mac, you can create an email link from your inbox or the email window. Just follow these steps.
1) Click the More button (three dots) in the toolbar.
2) Select Create Link.

3) You’ll see a Link icon appear on the right of the toolbar and the URL should be copied to your clipboard. If it’s not on your clipboard, go to the next step.
4) Click the Link icon and you’ll see the URL at the top along with a few options.
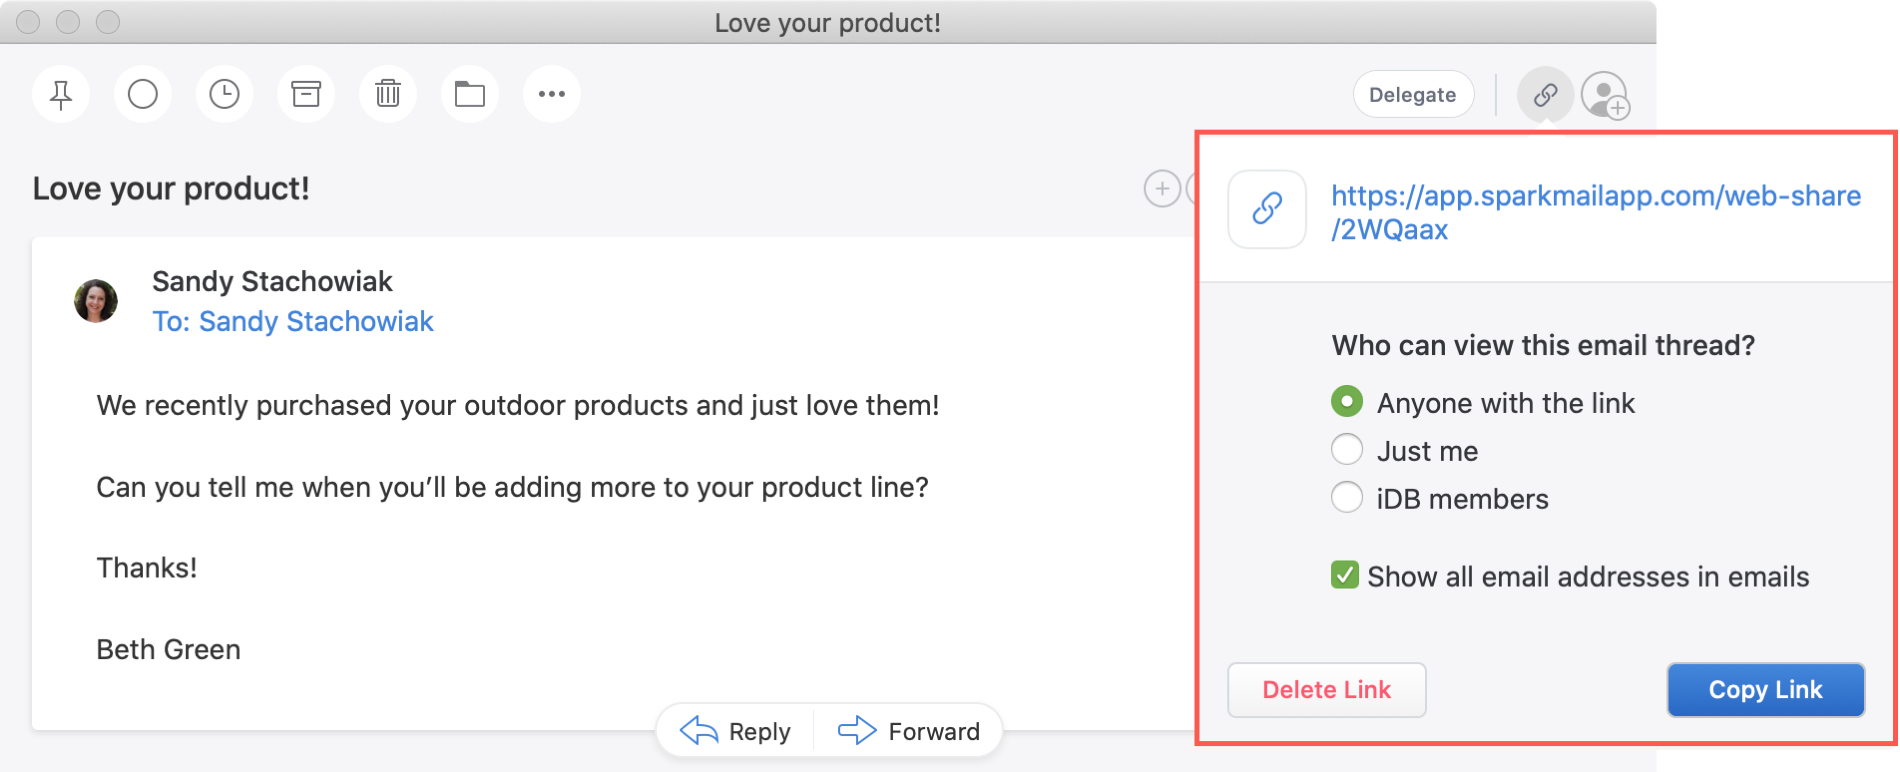
Who can view this email thread?: You can choose who can read that email with the link. Pick from anyone with the link, just you, or those within your organization. The latter is based on the email account and address you used.
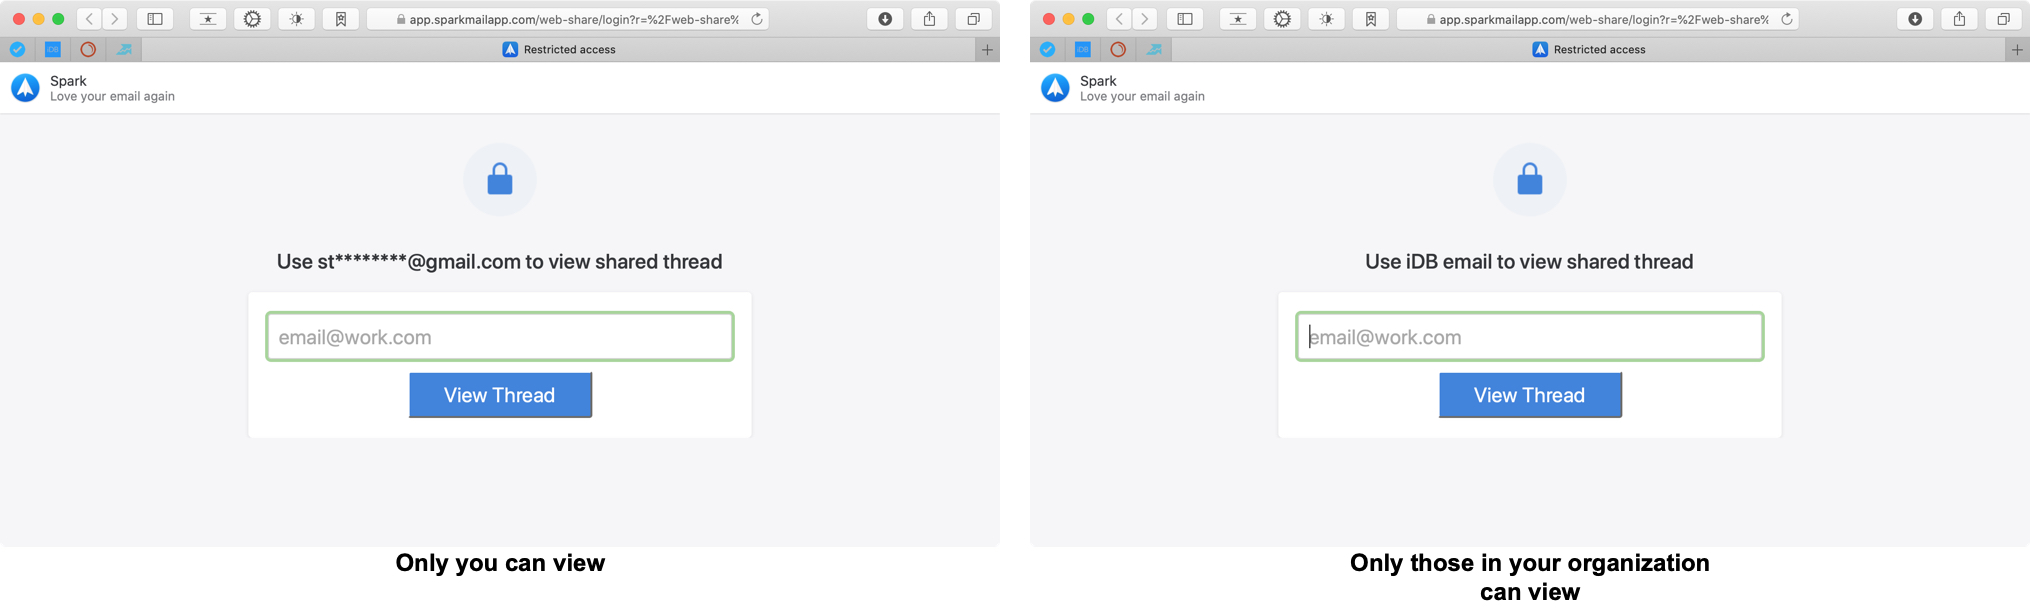
If someone without access to view the email enters the link into their browser, they’ll receive a message like one of those below.
Show all email addresses in emails: If you don’t want to display the email addresses involved with the thread when the link is used, you can uncheck this option.
Delete or Copy Link: Use one of these buttons to delete the link completely or copy it to your clipboard.
When you paste the link into your browser, you’ll get a nice, clean view of the email along with an option to open it in the Spark app.
Create an email link in Spark on iPhone and iPad
It’s just as easy to create an email link in Spark on your iPhone or iPad. Select the email to open it and then do the following.
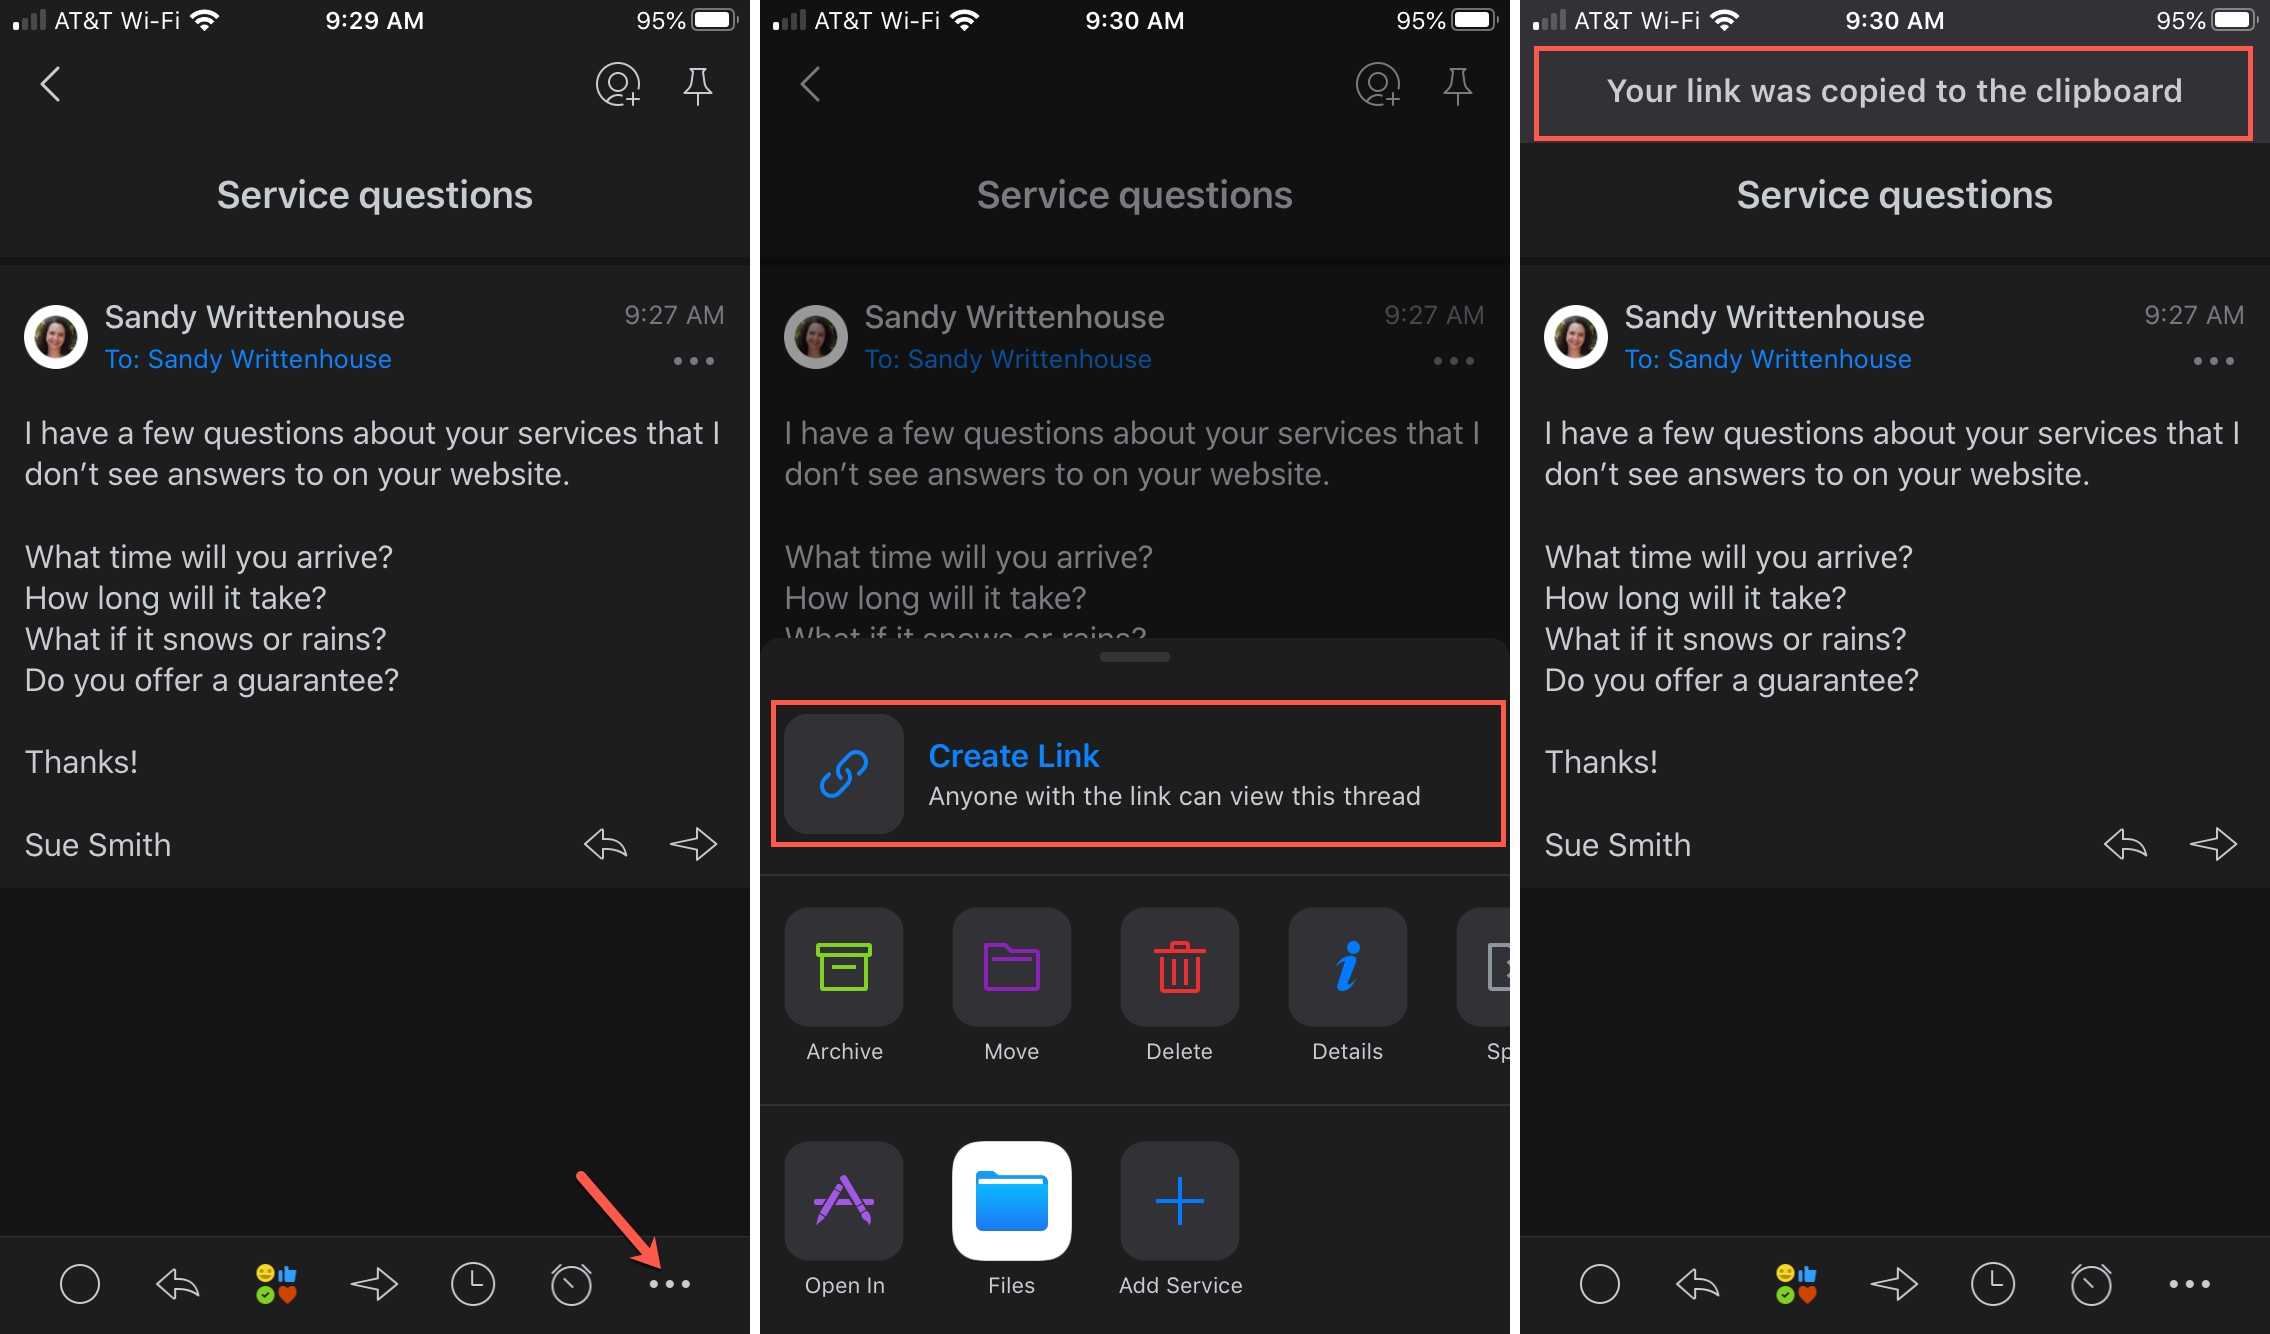
1) Tap the More icon (three dots) on the bottom right.
2) Select Create Link.
3) You’ll see a message that the link was copied to your clipboard.
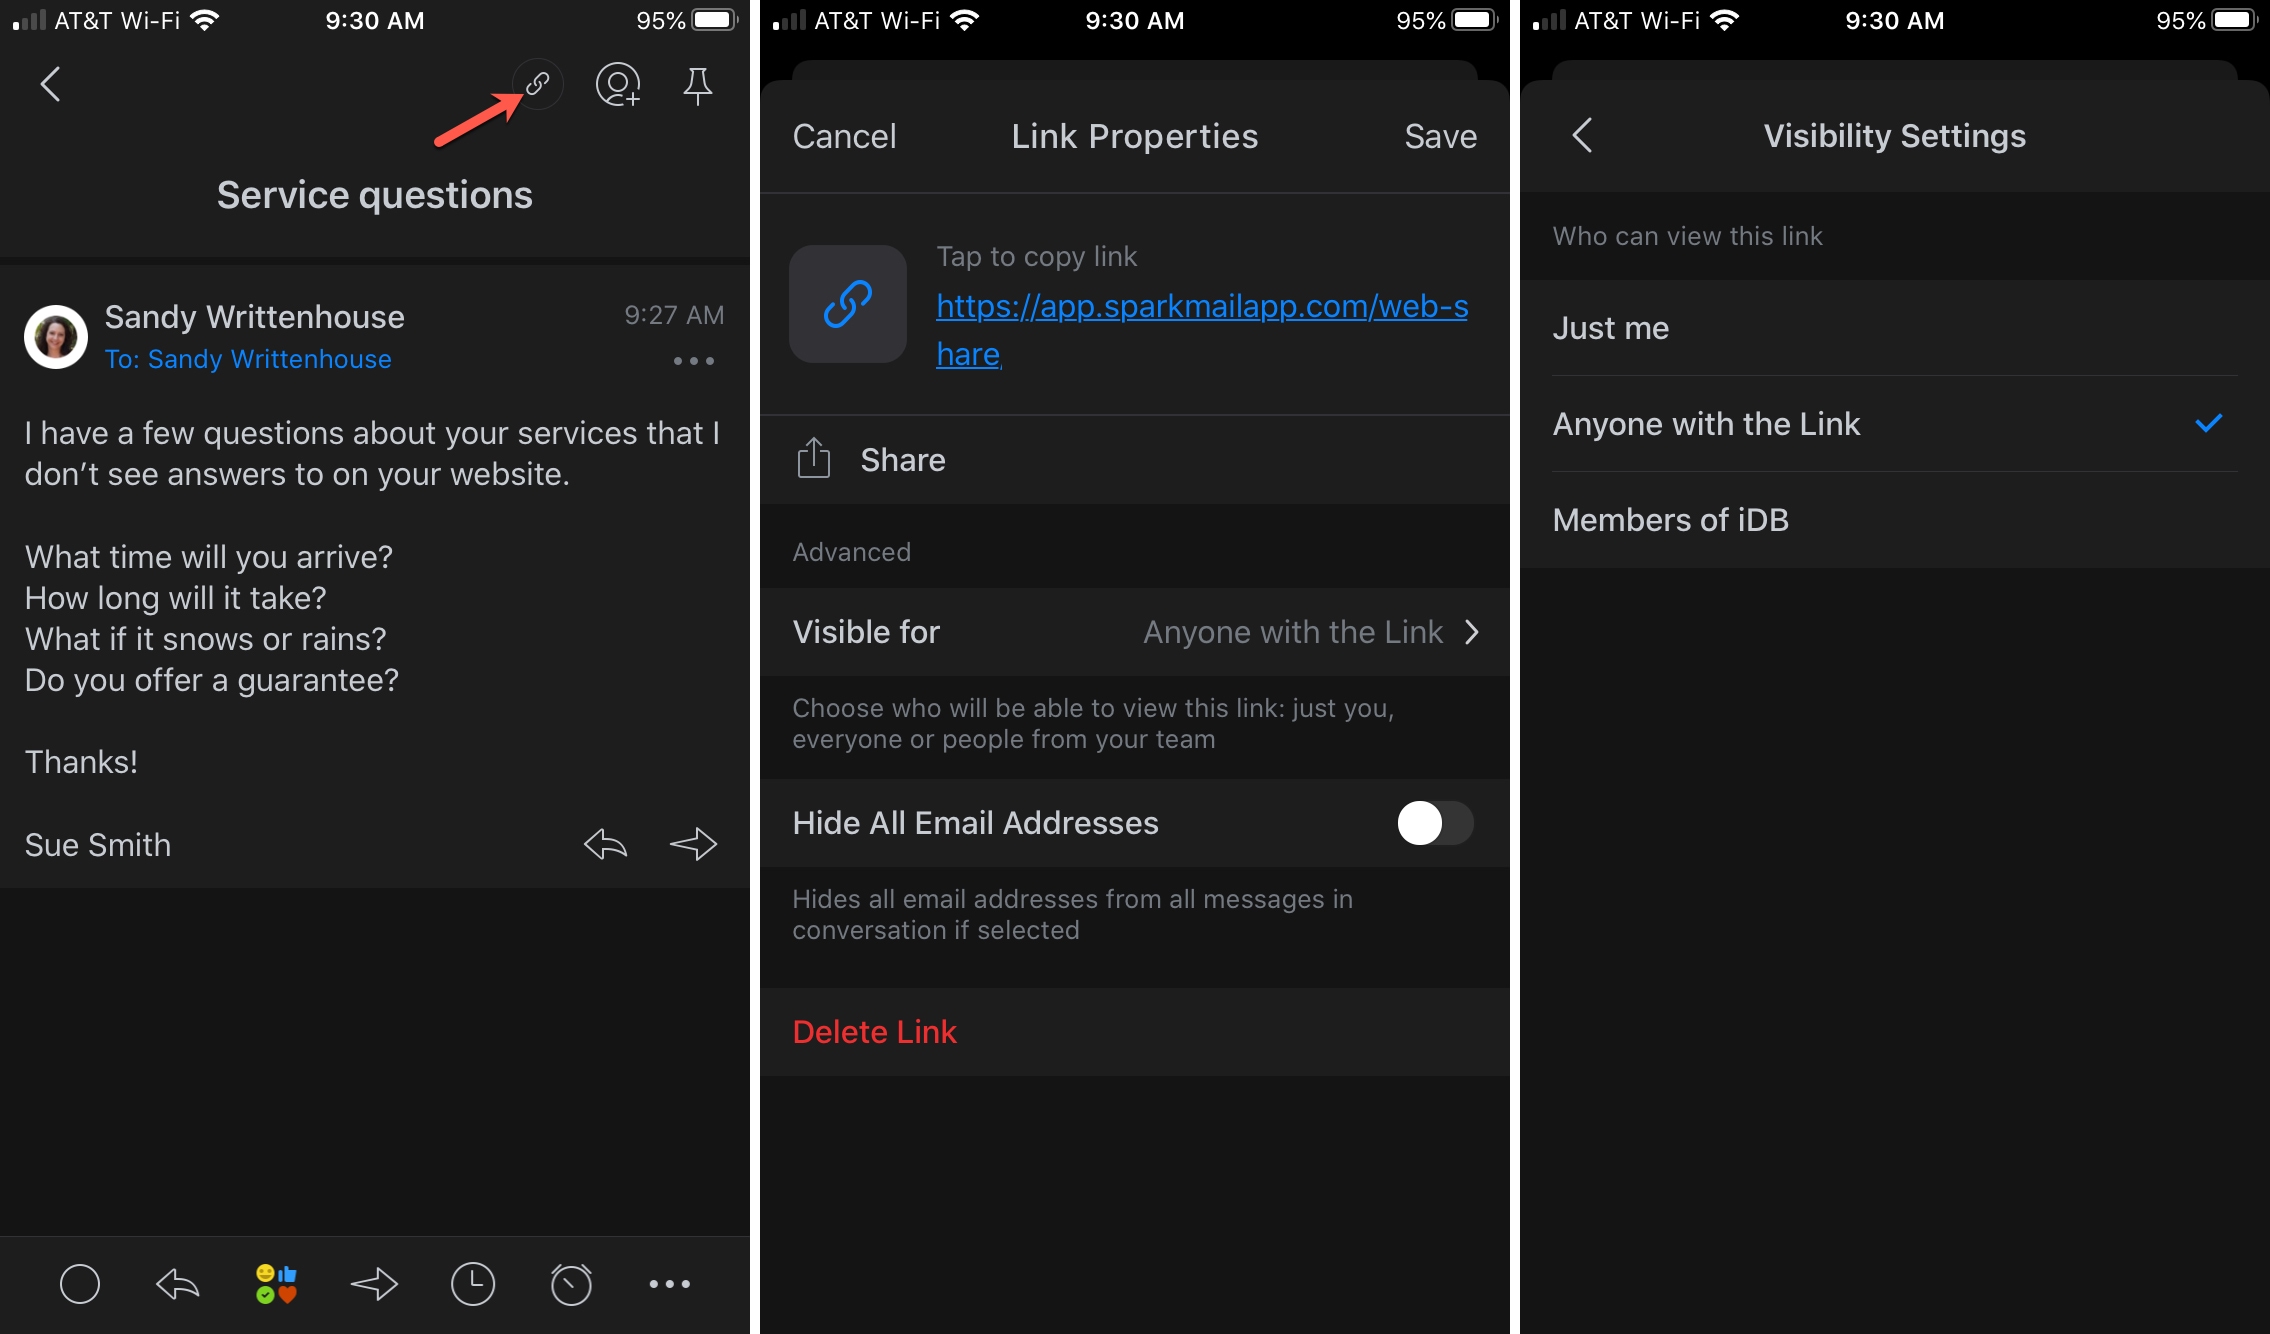
4) Like on Mac, you’ll also notice a Link icon at the top of the email. Tap it to adjust the settings for who can view the link and if email addresses should display. You can also copy, delete, or share the link from this screen.
5) If you make any changes, tap Save. Otherwise, you can tap Cancel and go back to the email.
Wrapping it up
Creating a link from an email in Spark is easy and with the options for who can view the email and other settings, you have some flexibility as well.
Are you going to use this cool Spark feature in the future? Let us know!
And for more help with Spark for your business or company, check out how to delegate emails to others or how to use Spark for team collaboration.