Find out how to add a word to your Mac’s dictionary so it stops being tagged as misspelled and no longer shows a red dotted line underneath when you type it.
If you do a lot of writing for work or school on your Mac, then you likely misspell a word here and there. And with handy built-in tools like autocorrect, you can have those errors corrected for you. But there are some words that are simply spelled uniquely, like company names, people’s names, app names, or brands. That’s when autocorrect can be a detriment.
If you type a few words often that you want your Mac to permanently recognize, you can add them to your Mac’s dictionary. This lets you bypass that squiggly line that screams out whenever you type the word your Mac thinks is misspelled.
We’ll show you a couple of ways to add as well as remove words from the built-in dictionary on macOS.
Add words to the Mac dictionary
If you’re typing one of those oddly spelled words in an Apple application like Pages, Notes, or Keynote, it’s super easy to add it to the dictionary.
The misspelled word will have a red squiggly underline. Simply right-click or hold the Control key and click to bring up the context menu. Then select Learn Spelling.
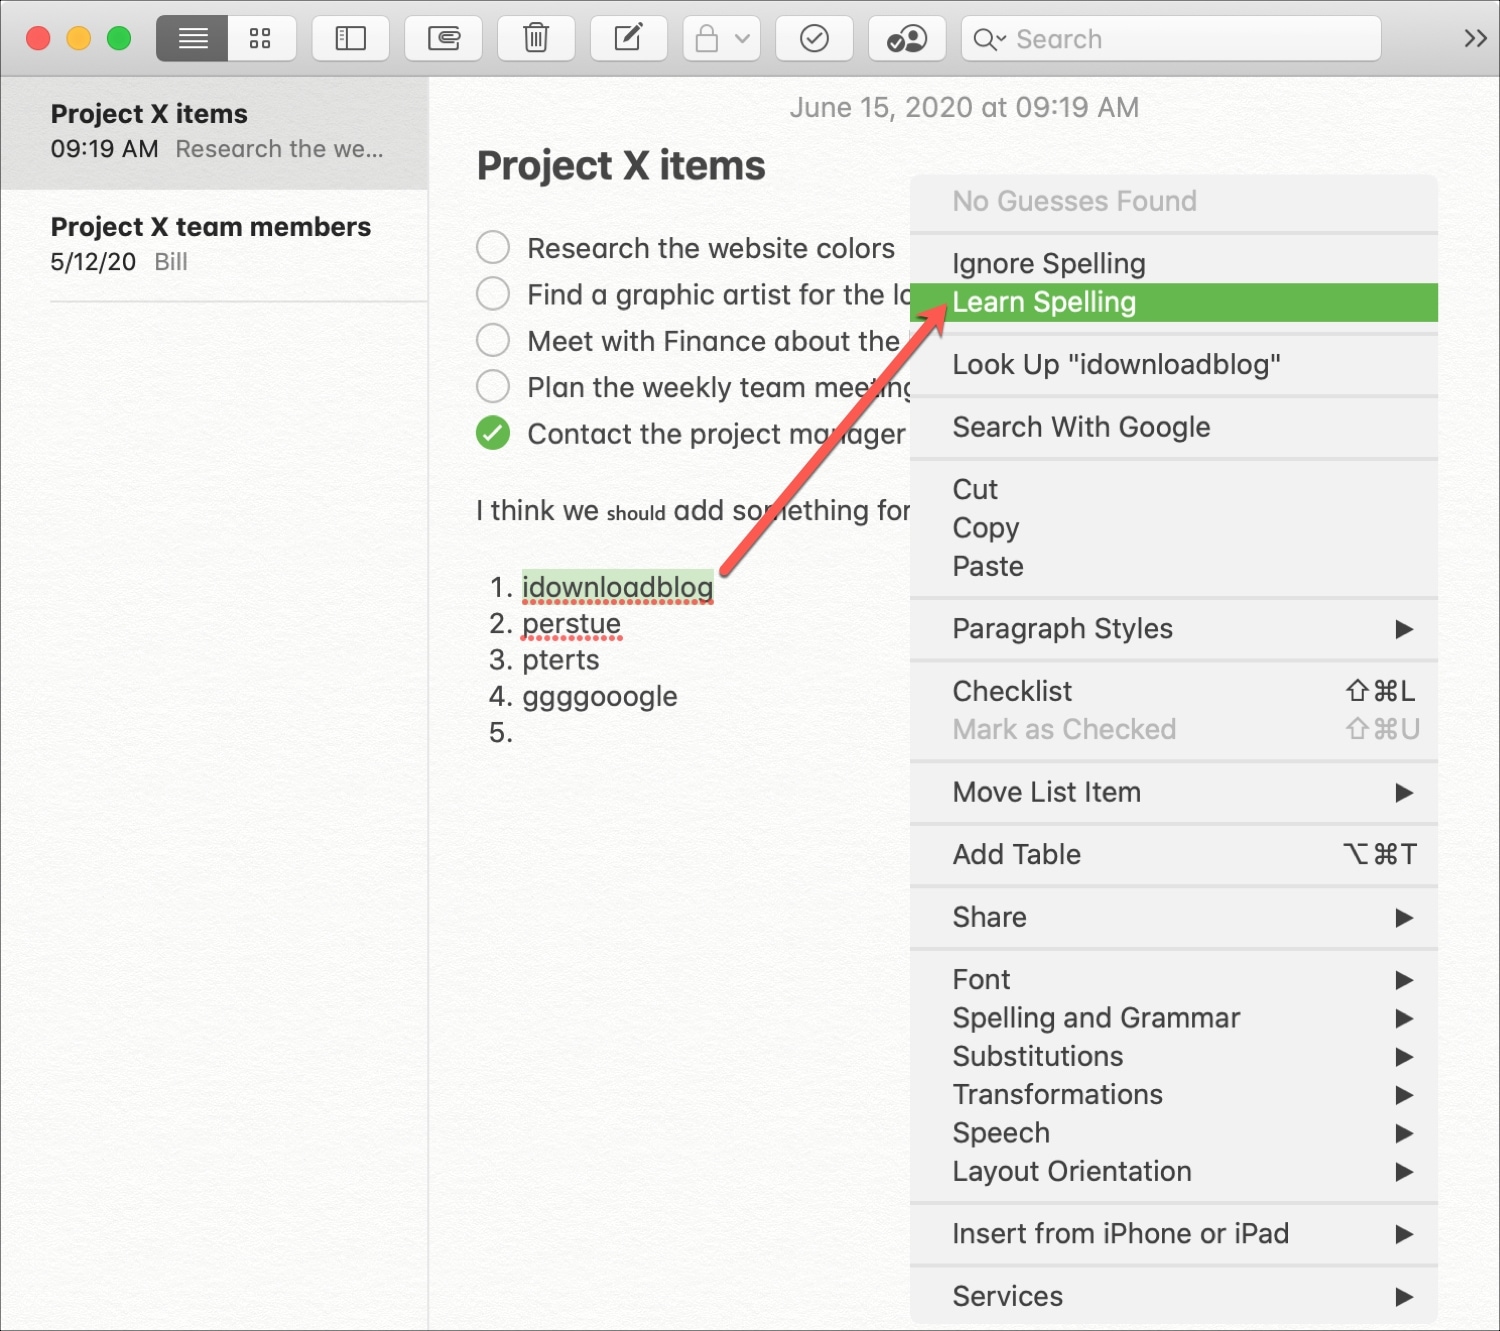
Once you do this, the word will be added to the Mac dictionary and, moving forward, won’t be called out by the red squiggly line.
Note that some third-party apps, like Microsoft Word, have their own dictionaries. So, the built-in Mac dictionary may not apply.
Remove words from the Mac dictionary
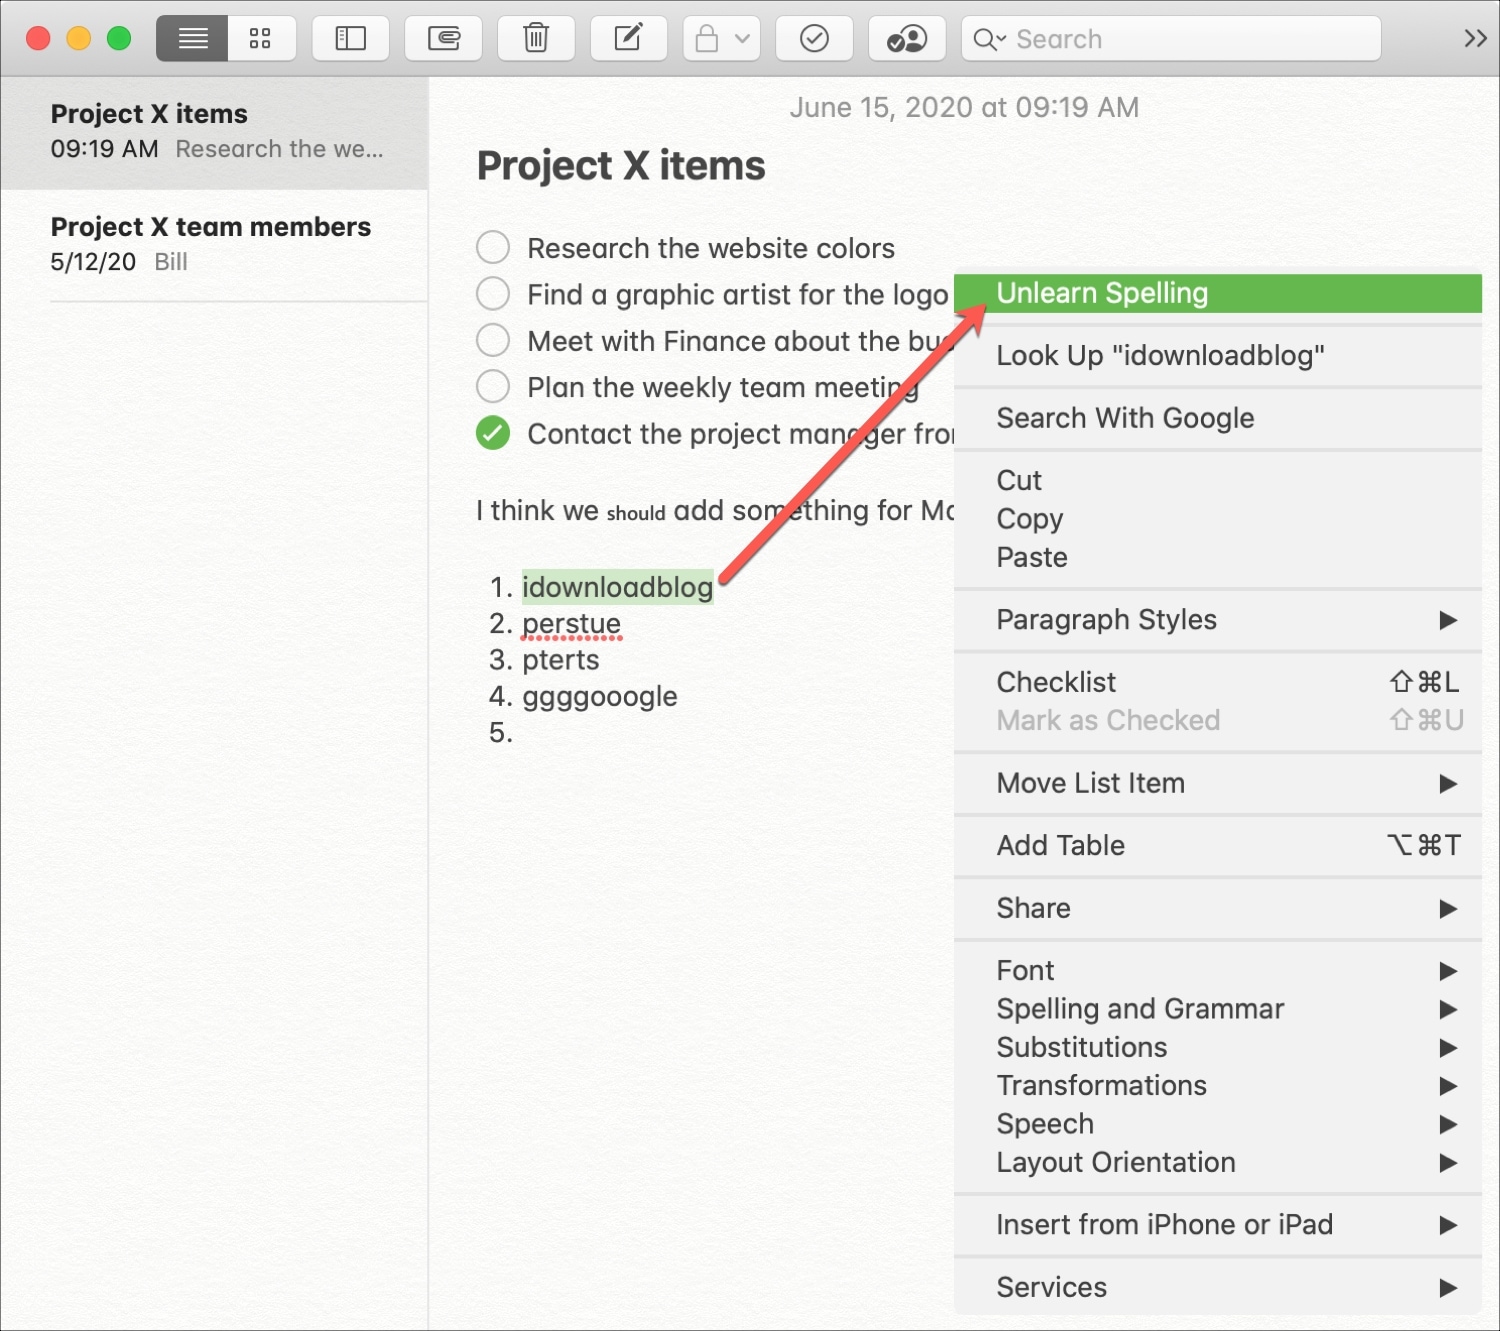
If you want to remove words from the Mac dictionary, this is just as simple. Right-click or hold Control & click to bring up the context menu, and select Unlearn Spelling.
Add and remove several words at once to your Mac’s dictionary
The above steps for adding and removing words are convenient if you’re only dealing with a word or two. But if you have a list of words that you’d like to add (or remove) to your Mac dictionary, you can do it all at one time.
1) Head to your Library folder and choose the Spelling subfolder. To do this, open Finder and click Go > Go to Folder from the top menu bar. Then, enter the following address and hit the return/enter key.
~/Library/Spelling

2) You’ll see a file called LocalDictionary. This text file holds words that you add to the dictionary. Open it with TextEdit by double-clicking if TextEdit is your default editor or by right-clicking and choosing Open With > TextEdit.

3) Add or remove words from the list, and then simply close the file when you finish. Your changes will be remembered and applied the next time you type those words.

Keep in mind that you may not see changes to the LocalDictionary file immediately if you add words using the Learn Spelling steps above. Personally, I had to log out of my Mac (Apple icon > Log Out) and back in before I saw my additions. Restarting the computer will also help.
These days, we see a lot of words spelled differently, it seems. And if your business name, application, or even your own name has a unique spelling, it’s easy to make sure you don’t see a misspelling indicator when you type it on your Mac. Are you going to start taking time to add words to your Mac’s dictionary? Let us know below!
Also, check out: