The checkra1n team officially released the checkm8 bootrom exploit-based checkra1n jailbreak tool this weekend as a public beta to the masses, and while we’d seriously recommend holding off until the tool comes out of beta, we’d totally understand if you’re a bit antsy to go hands-on with things right now.
In this tutorial, we’ll be showing you how to use the checkra1n jailbreak tool to liberate a supported iPhone, iPad, or iPod touch.
Prerequisites
Before you can jailbreak with checkra1n, you’ll need to know a few prerequisites:
- The tool is only for macOS and Linux at this time (support for Windows is coming soon)
- The tool is semi-tethered, which means you’ll need a computer to boot jailbroken if you power off
- The tool supports 64-bit A5-A11 devices from the iPhone 5s to the iPhone X with the exception of a few: iPad Air 2, iPad (5th generation), and iPad Pro (1st generation).
- Your device must be running iOS 12.0 or later
- The tool is experimental on the following handsets: iPhone 5s, iPad mini 2, iPad mini 3, iPad Air
- Cydia is installed by default, but other package managers will be optional in the future
Running iOS or iPadOS 14?
If you’re using iOS or iPadOS 14, then you’ll want to read the following notes to learn about the security of jailbreaking with checkra1n.
At this time, checkra1n only officially supports A8, A8X, A9, A9X, A10, and A10X devices running iOS or iPadOS 14. This means that you can jailbreak these devices without any strings attached and expect at least the same level of security that you’d have without the jailbreak. The aforementioned devices include all of the following:
- iPhone 6s, 6s Plus, SE, 7 and 7 Plus
- iPad 5th, 6th and 7th generations
- iPad Air 2
- iPad mini 4
- iPad Pro 1st and 2nd generations
- iPod touch 7
If you are running iOS or iPadOS 14 on an A11-equipped device, including the iPhone 8, 8 Plus, or X, then you can still jailbreak with checkra1n, but there’s a catch. Users will need to turn on the “Skip A11 BPR check” option in the checkra1n app before jailbreaking. Upon doing so, the jailbroken device will boot up without a passcode. This isn’t recommended for most users because it disables authentication and user security, but may be a viable way for developers to test their work on a newer device. It remains to be seen if the checkra1n team can find a workaround for this inconvenience, but you’ll want to read more about what this means for you and what you can do to protect your data in our comprehensive post.
So without further ado, if you’ve got a supported device and want to jailbreak, then let’s get started!
How to jailbreak with checkra1n
If you meet all the criteria above and you’re ready to jailbreak with checkra1n, then follow the steps below:
1) Plug your device into your Mac with an MFi-certified Lightning to USB-A cable. Trust your device if necessary.
2) Download the checkra1n jailbreak tool from the checkra.in team’s official website. Don’t download this jailbreak tool from anywhere else besides the official website, or else it may contain malware.
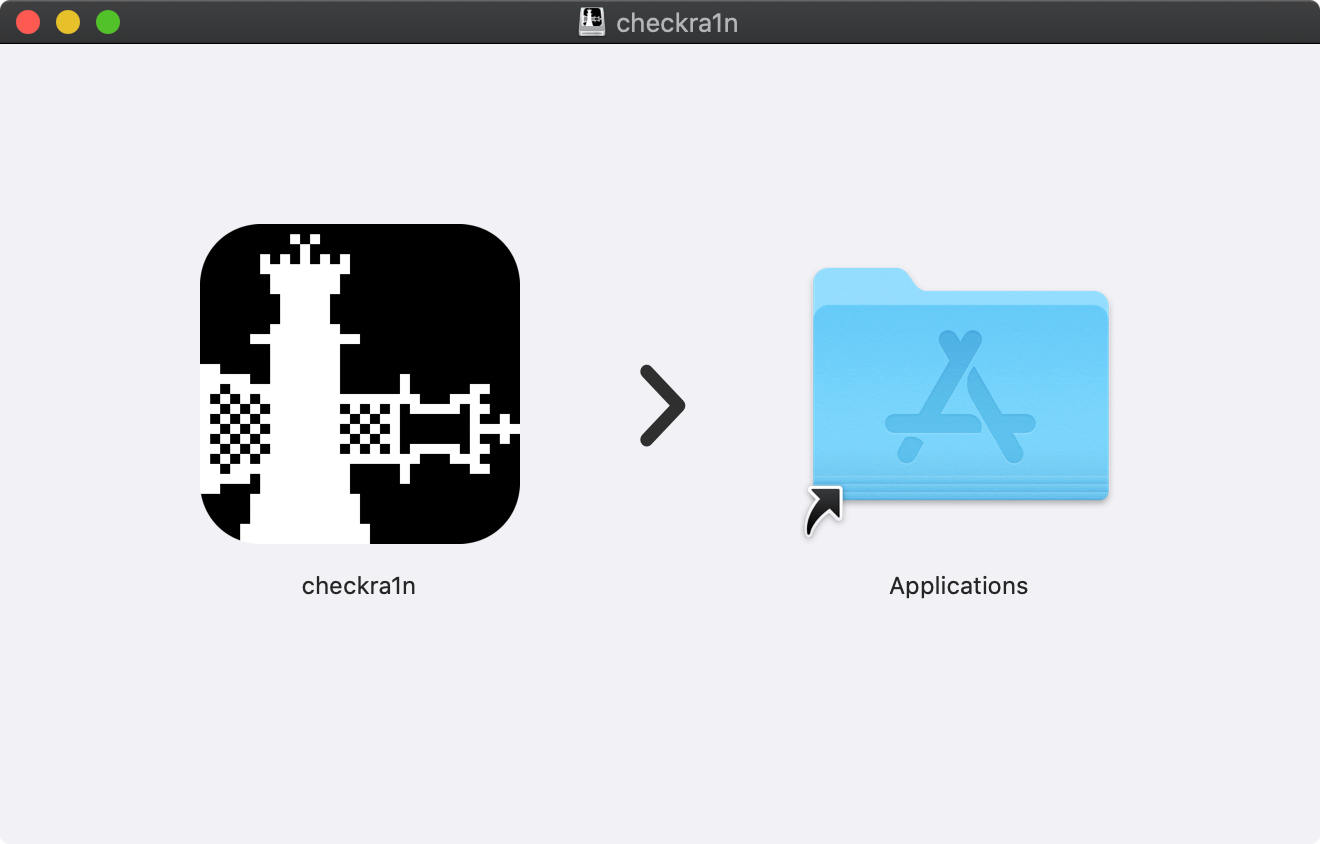
3) After the download completes, double-click on the .dmg file to open it and then drag the checkra1n app into your Mac’s Applications folder:
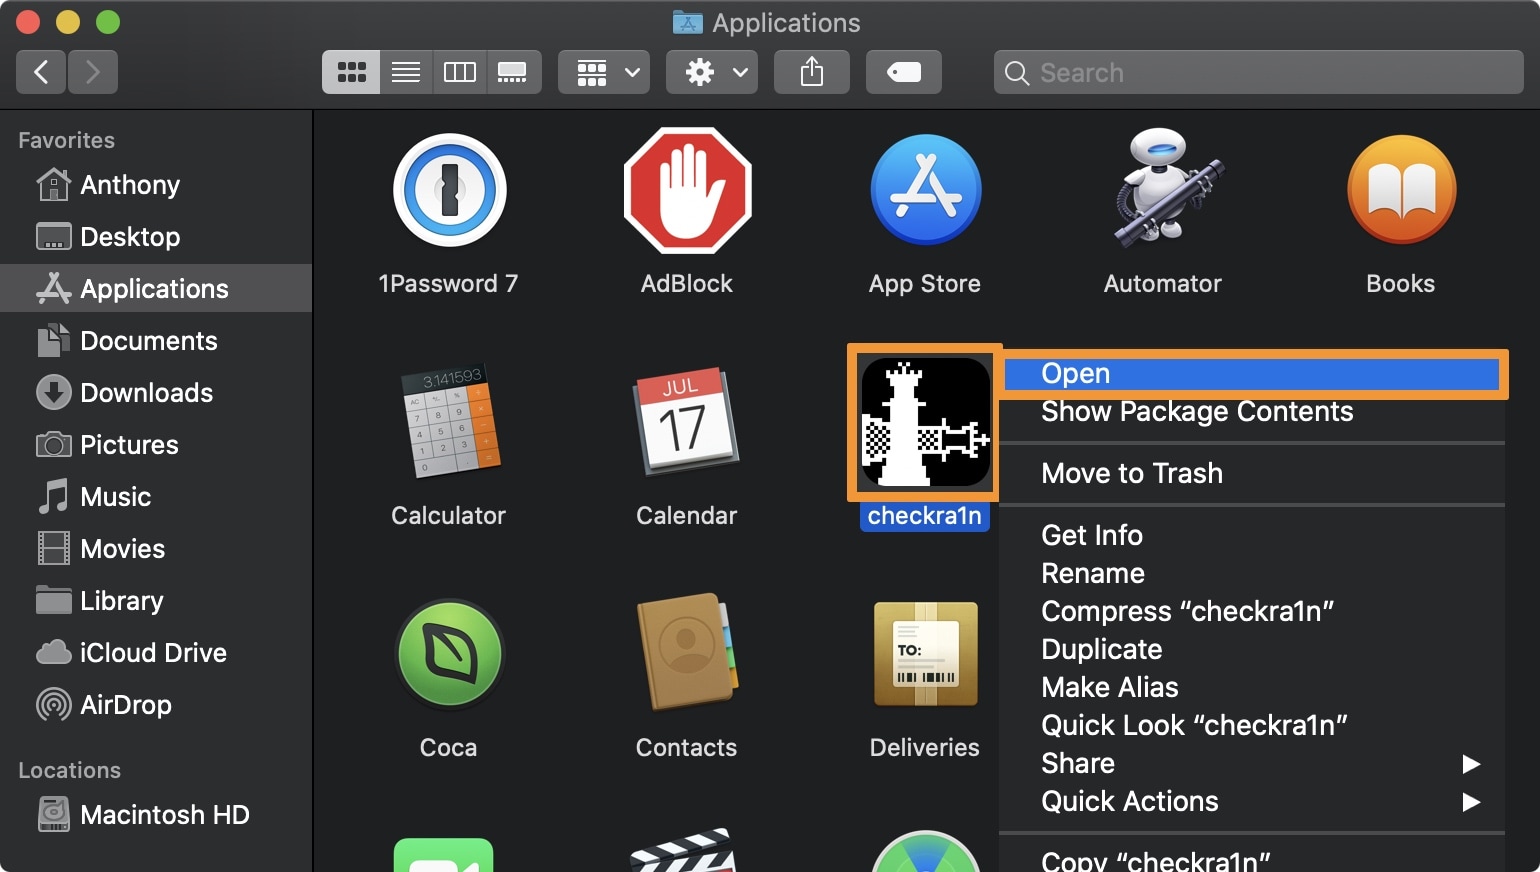
4) Next, open your Mac’s Applications folder, right click on the checkra1n app, and click on the Open option:
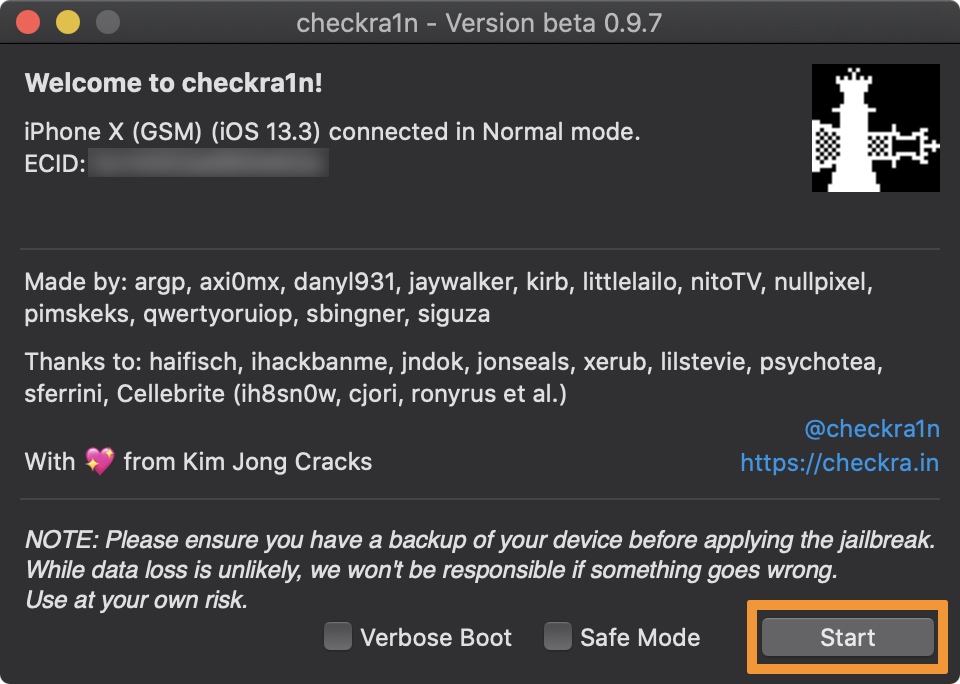
5) The checkra1n GUI should open and automatically detect your device and firmware type. Click the Start button:
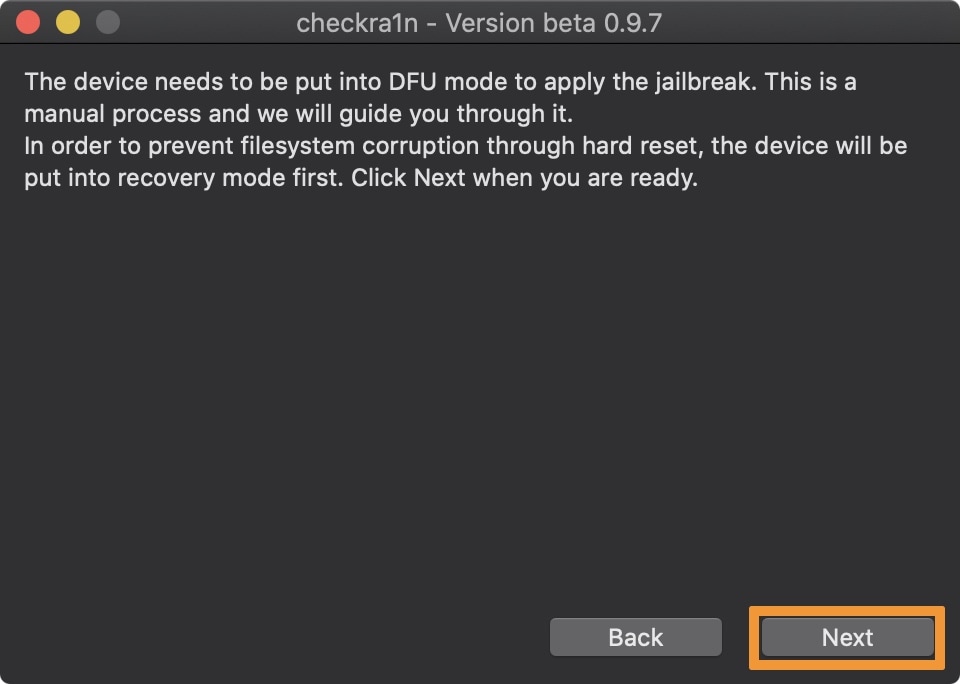
6) Checkra1n will want to put your device into Recovery Mode before proceeding. Click the Next button:
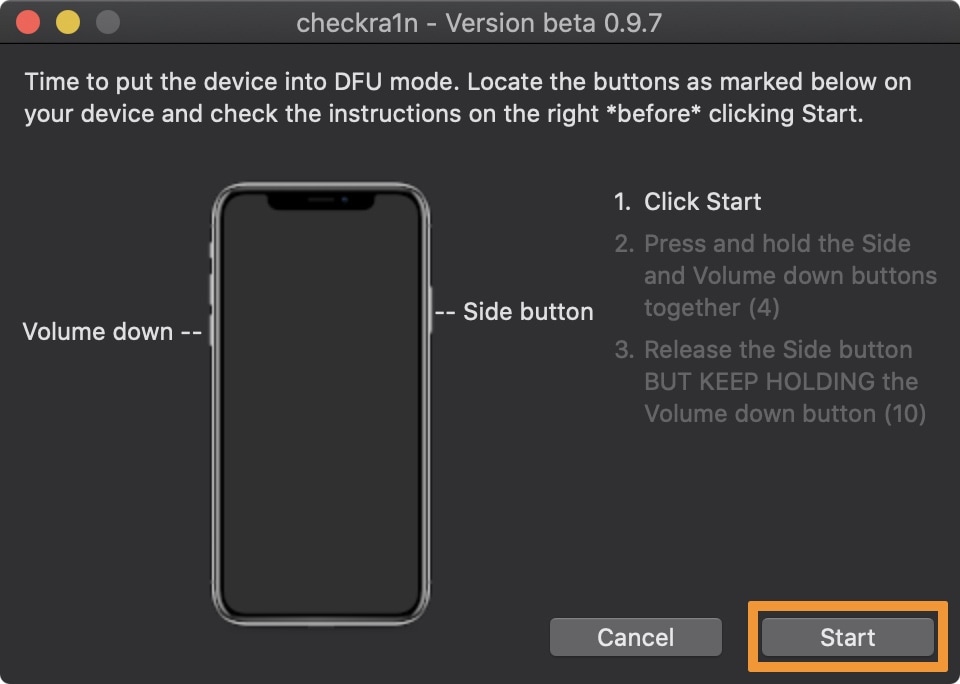
7) You will now want to follow the on-screen instructions to enter DFU mode. Click on the Start button and then do exactly what the application says for your particular device:
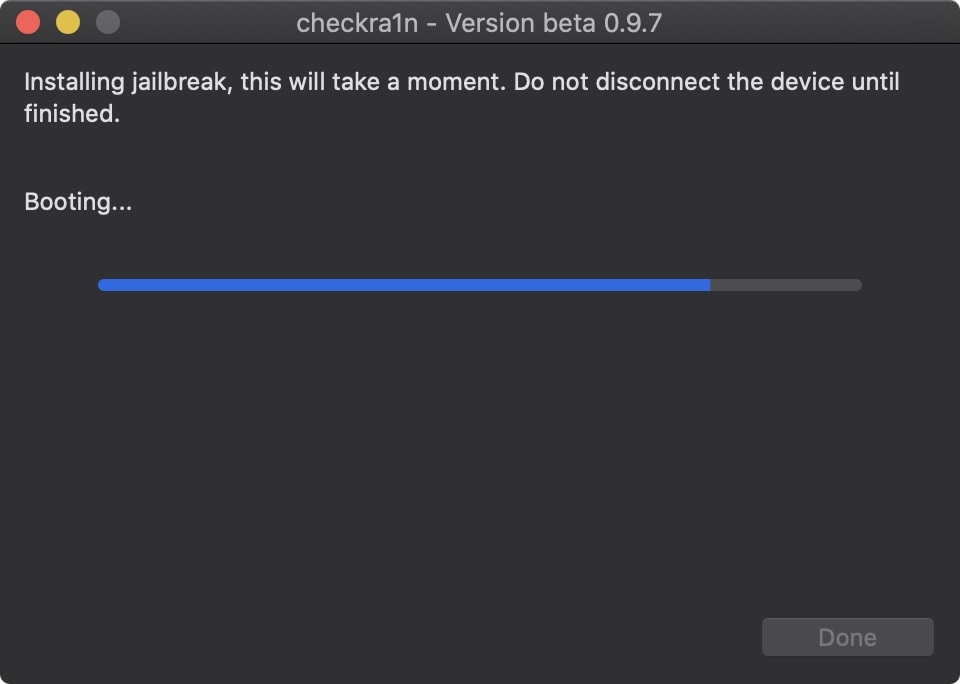
8) After you successfully enter DFU mode, checkra1n will begin exploiting and jailbreaking your device:
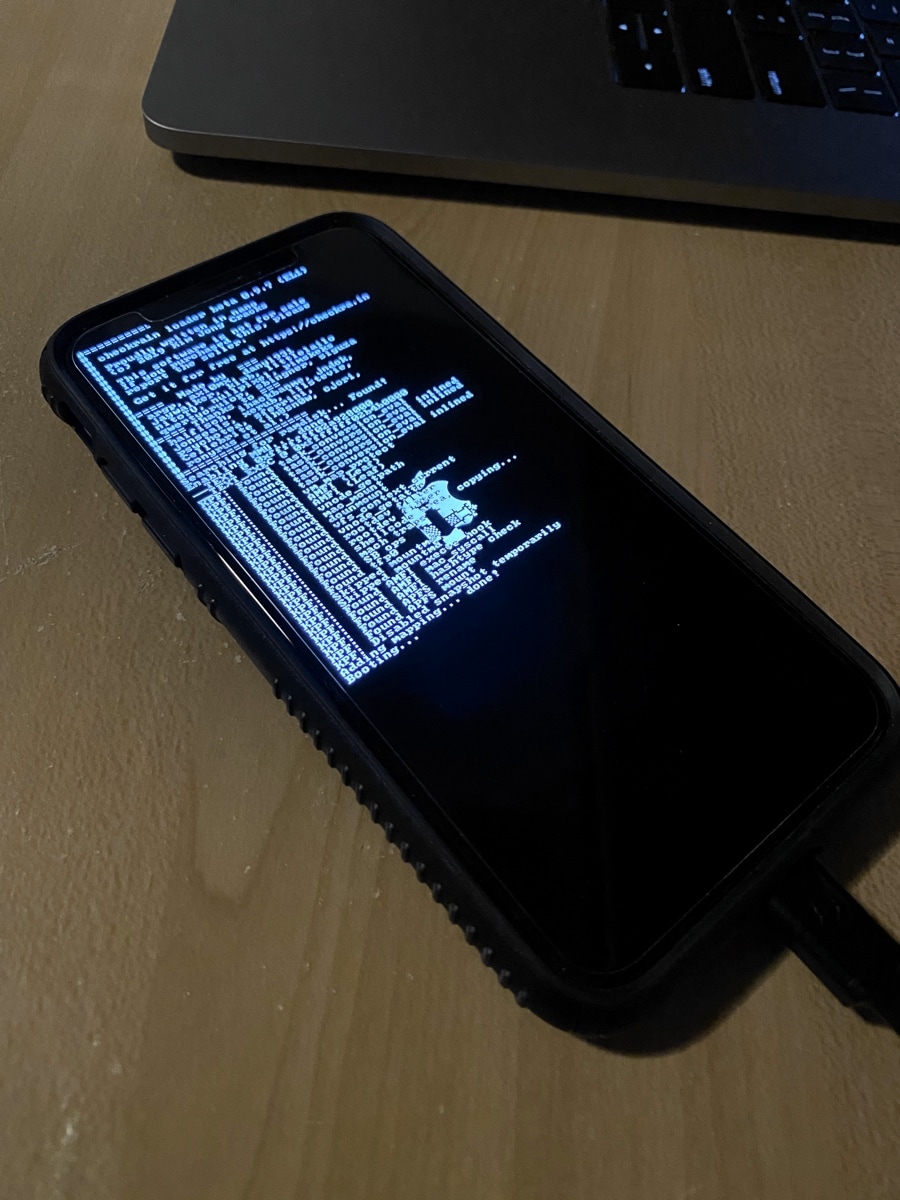
9) Your iOS device should now display the checkra1n-themed verbose boot screen. Please do not disconnect it until after the jailbreak completes:
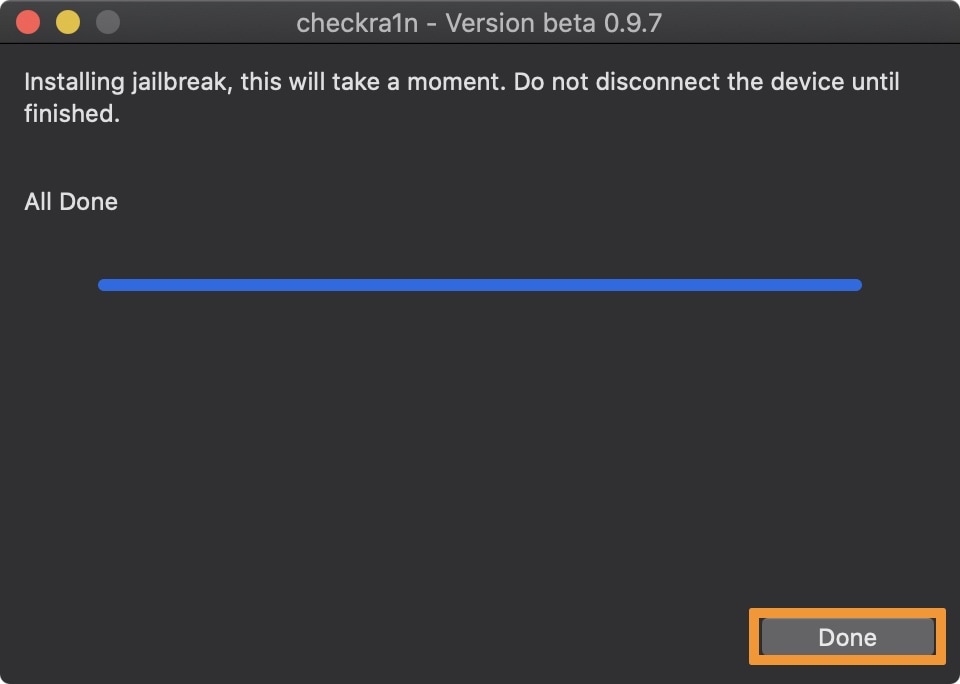
11) After the jailbreak finishes, you can click on the Done button to close the macOS checkra1n application:
12) Turn your attention to your iOS device, and you should now see the checkra1n loader app on the Home screen. Open it:
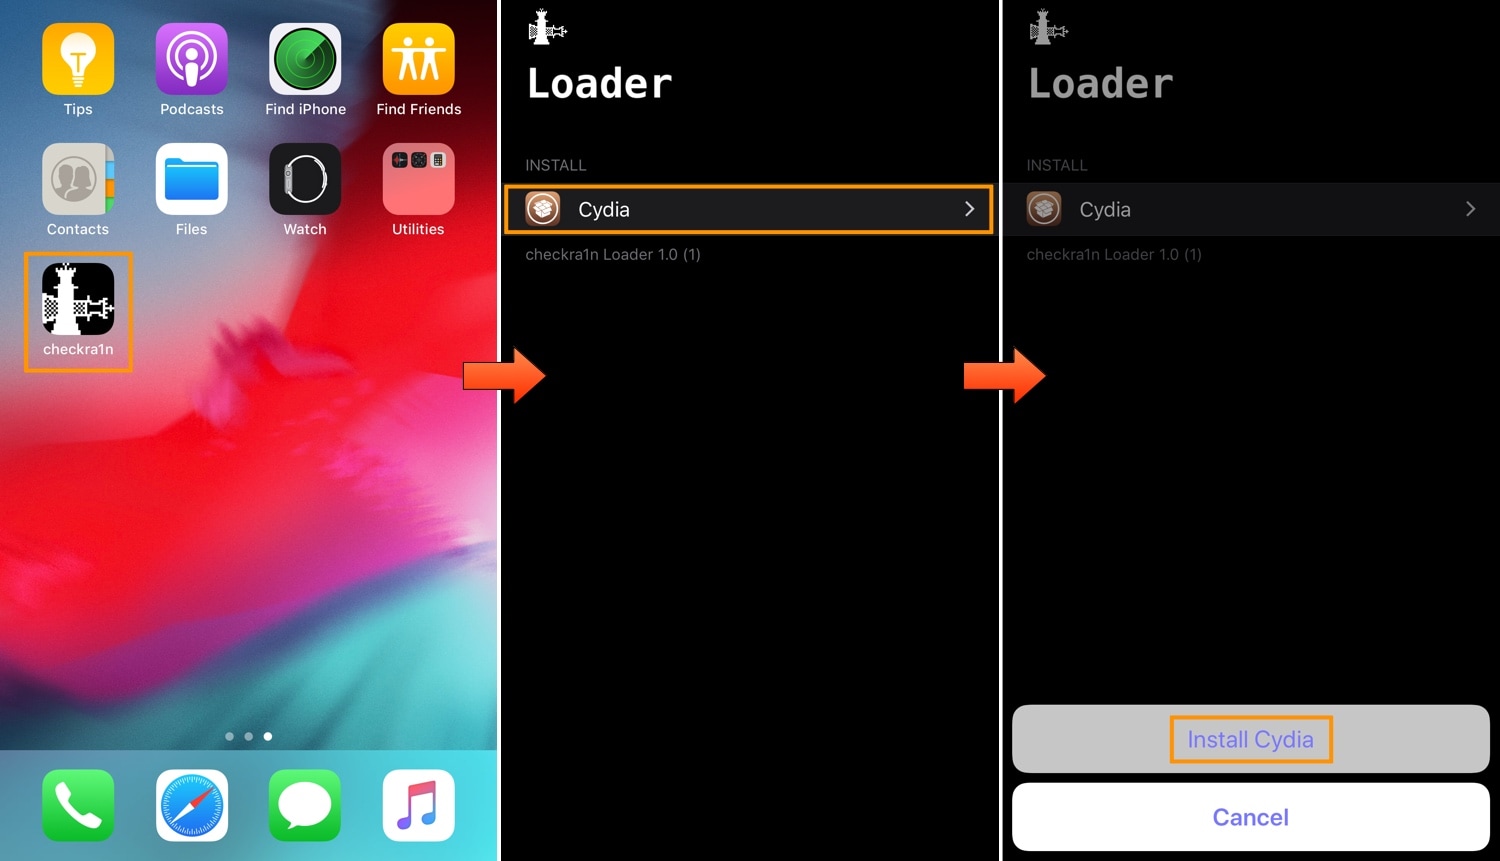
13) Tap on the Cydia cell, then on the Install Cydia button that appears.
14) The checkra1n loader will then begin downloading the base system and installing Cydia:
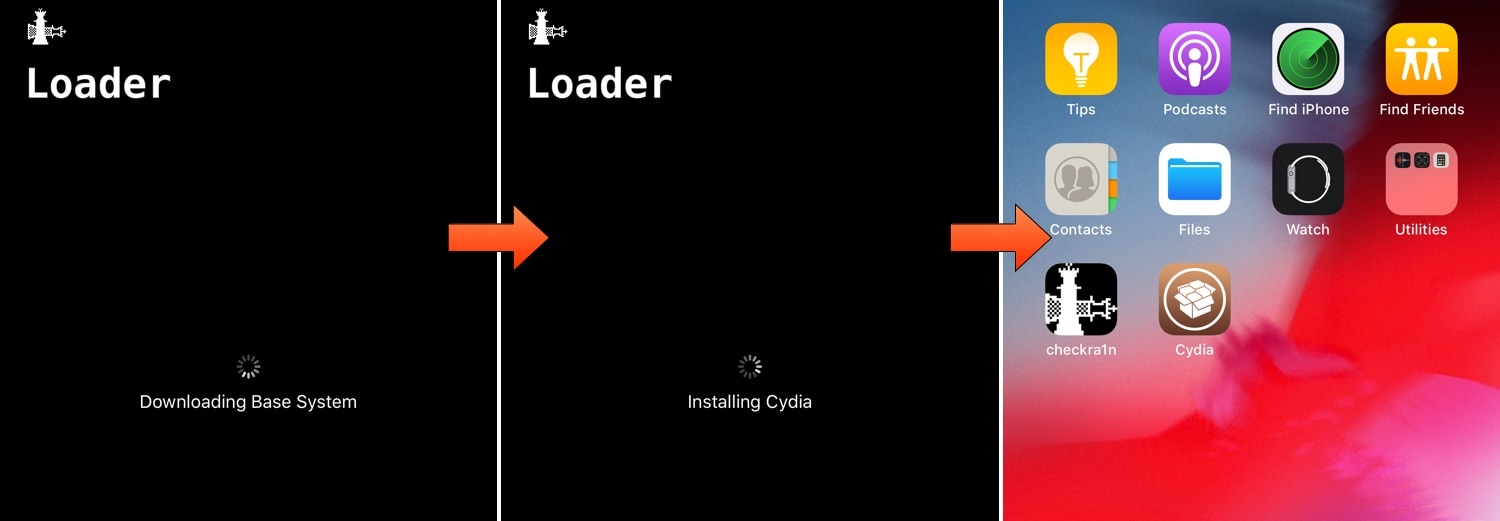
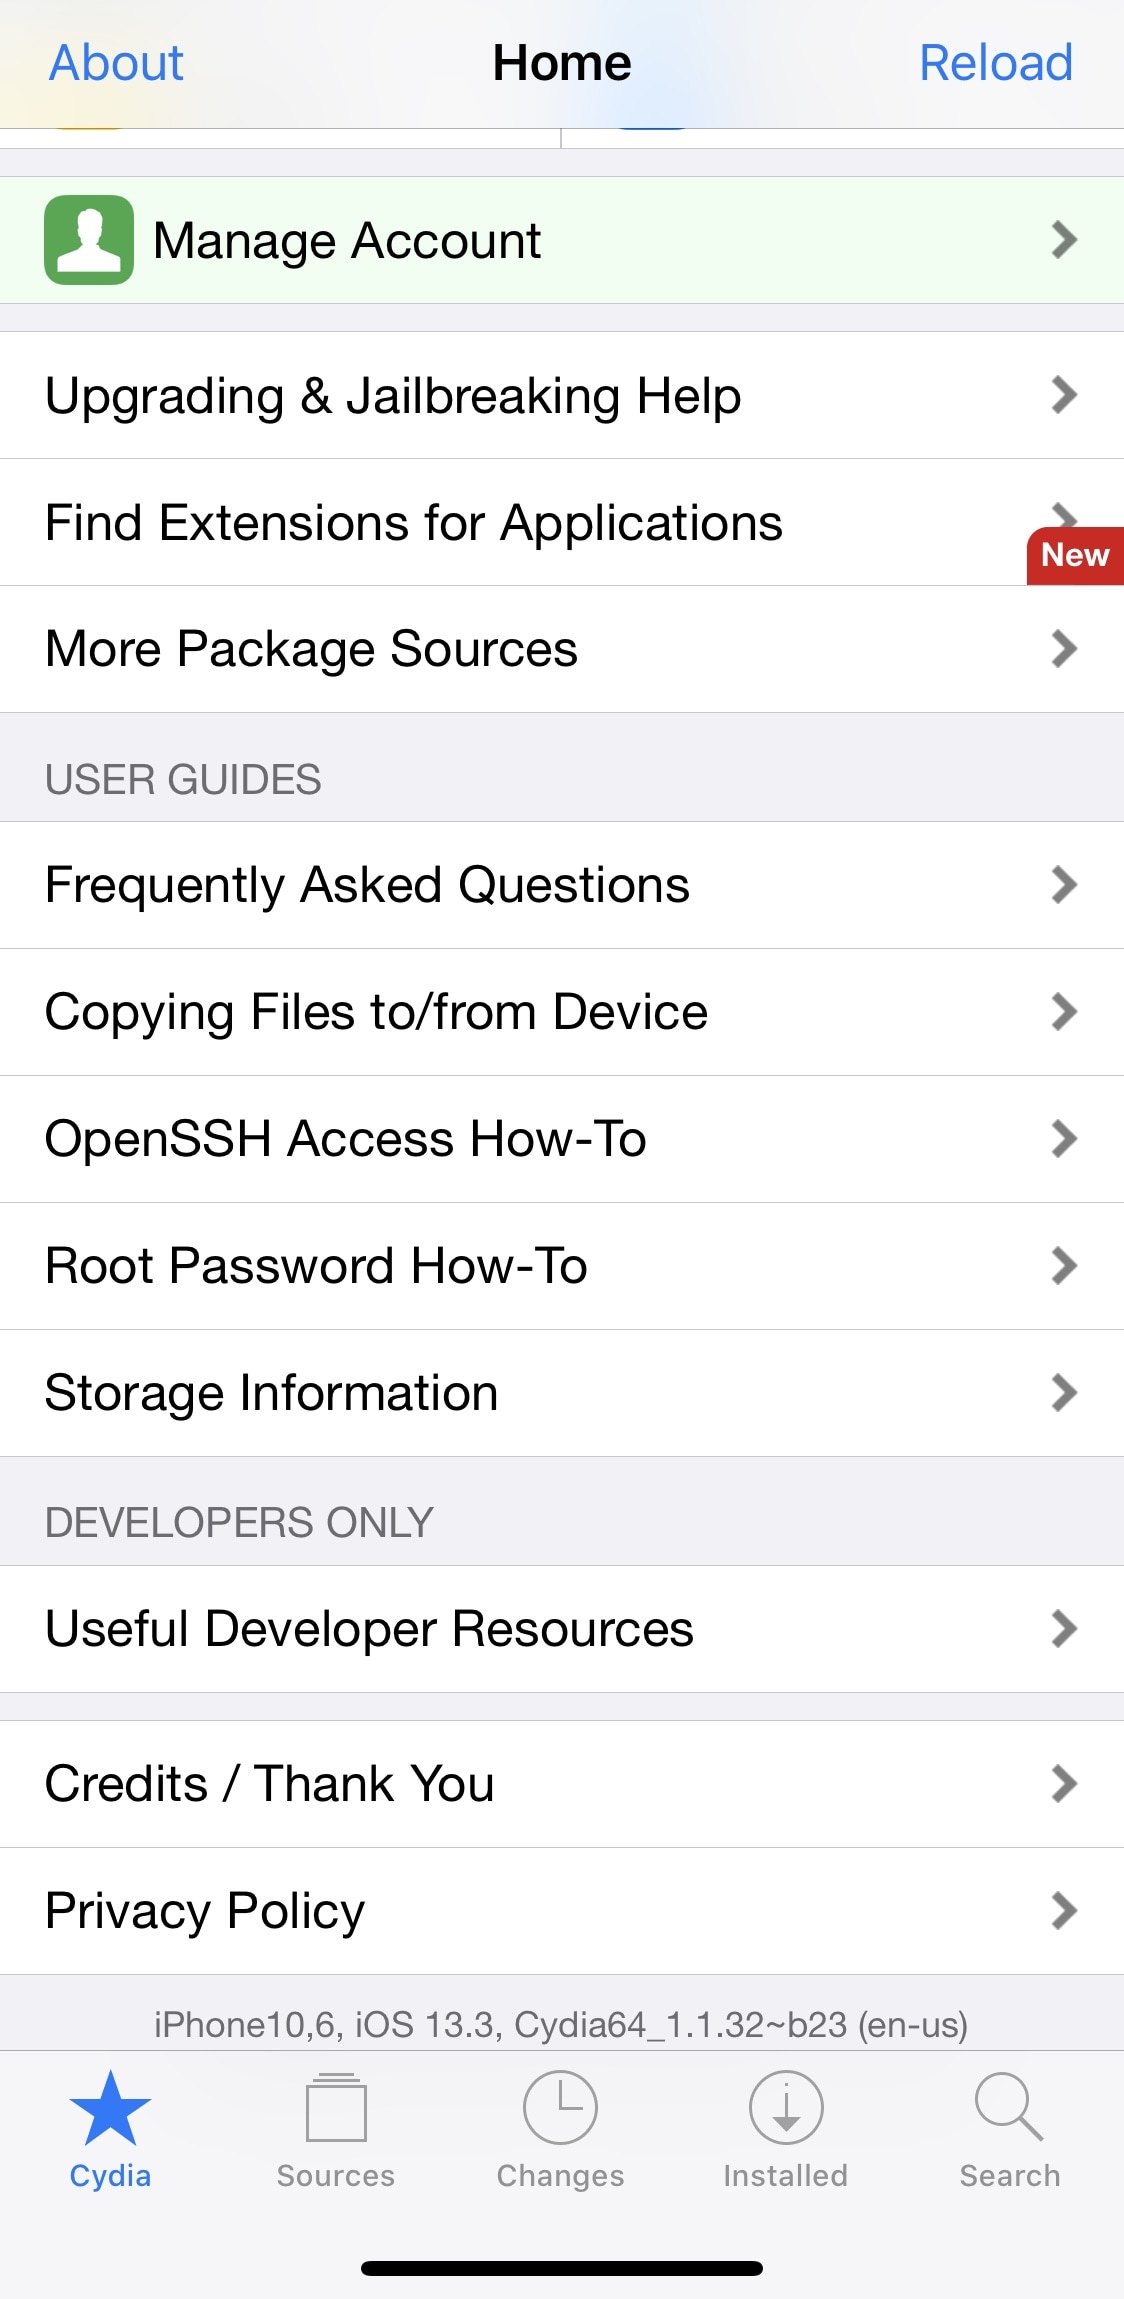
15) When finished, the app will close and Cydia will appear on your Home screen. When you launch it, you should see a familiar interface:
Having trouble? Try these simple troubleshooting steps.
Congratulations, jailbreak complete!
Did the jailbreak process work smoothly for you? Let us know in the comments section.