Enable Guided Access to limit what someone else can do on your iOS device by keeping them locked to a single app on the screen. You can also use Guided Access to block touch access to selected parts of the iPhone or iPad screen.
Things you can do with Guided Access
My nephew loves to play with my iPad. I have a special folder with kids’ books just for him. He loves flipping through the pages of Wreck-it-Ralph, Wheels on the Bus HD, and all of the Dr. Seuss apps. He is autistic, so buttons, tabs, and anything he can tap easily distract him. If I’m not vigilant, he will be out of his book and into my Facebook app even before I realize it.
Thankfully, with Guided Access, I can restrict him to just one app and make sure that his hands don’t accidentally (or purposefully) tap something that they should not.
Similarly, Guided Access on iPhone and iPad lets busy parents stop kids, or just about anyone for that matter, from accidentally clearing progress in games, sharing stuff online, posting to social media, deleting images, and whatnot.
For example, in Mail, use Guided Access to stop the Delete button from functioning. And in the Facebook app, Guided Access can keep the little ones from posting unwanted photographs on your Facebook page.
Aside from keeping your kids from doing something you don’t want them to, Guided Access can also be used to turn your iPhone or iPad into so-called kiosk mode that temporarily restricts the device to a single app. As an example, you can use Guided Access on an iPad for your restaurant to keep the customers limited to the menu app and prevent them from going to other apps. Or, retail clerks can use it to keep the public locked on one app, such as Square Register.
Note: Guided Access works with any app that’s installed on your iOS device, including Apple’s own software. However, it doesn’t work in the Settings app, so you don’t accidentally restrict access to important settings and features.
Turn on and set up Guided Access
1) Open the Settings app on your iPhone or iPad and go to Accessibility > Guided Access.

2) Turn on Guided Access and tap Continue if you see a pop-up.
3) Now adjust its settings:
- Passcode Settings: You must set a six-digit Guided Access passcode to stop users from ending a session. Write it down somewhere safe, and don’t confuse it with your Lock Screen passcode. If your device has Face ID or Touch ID, toggle it here as a more convenient way of ending Guided Access with facial or fingerprint verification. Note that if you can’t set up the passcode now, you can do that while activating Guided Access (explained below). Tip: You can also choose not to turn on Face ID or Touch ID in Guided Access or go to Settings > Face ID/Touch ID & Passcode and remove the child’s face or fingerprint to prevent them from using it to exit Guided Access.
- Time Limits: Play a sound or have the remaining Guided Access time spoken before time ends. You can limit how long a child can use an app after starting Guided Access.
- Accessibility Shortcut: Set whether Accessibility shortcuts are available during a session. If so, triple-clicking the Side/Home button while in a session pops up a menu with your favorite Accessibility shortcuts.
- Display Auto-Lock: Use this option to change the time after which your iPhone or iPad locks automatically after inactivity. You can leave it at Default or pick from 30 seconds to 15 minutes, up to Never.

Now that you have switched on Guided Access, here’s how to use it.
Activate and use Guided Access
1) Launch an app you want to keep the child locked to.
2) Triple-press the iPhone Side button on iPhone X or later, the iPad’s top power button, or the circular front Home button to enter the session screen. The currently active app will zoom out a little to make room for additional controls.

3) Tap Session Settings (formerly Options) to pull up an overlay where you can turn off specific hardware buttons, sensors, and touch screen or impose limitations on other features:
- Side/Top/Home Button: You can keep it off or turn it on to let the person lock the device during a Guided Access session.
- Volume Buttons: Use it to allow or restrict the volume buttons from being used.
- Motion: Disable it to prevent the screen from switching between portrait and landscape, or from responding to other motions.
- Software Keyboards: Turn it off to stop all keyboard input and prevent typing.
- Touch: Turn this off to have Guided Access ignore all screen touches.
- Dictionary Lookup: Keep it switched on to allow kids to look up word definitions, translate foreign words to English, and more.
- Time Limit: Choose how long your child can use an app.
Tap Done after adjusting the above options.

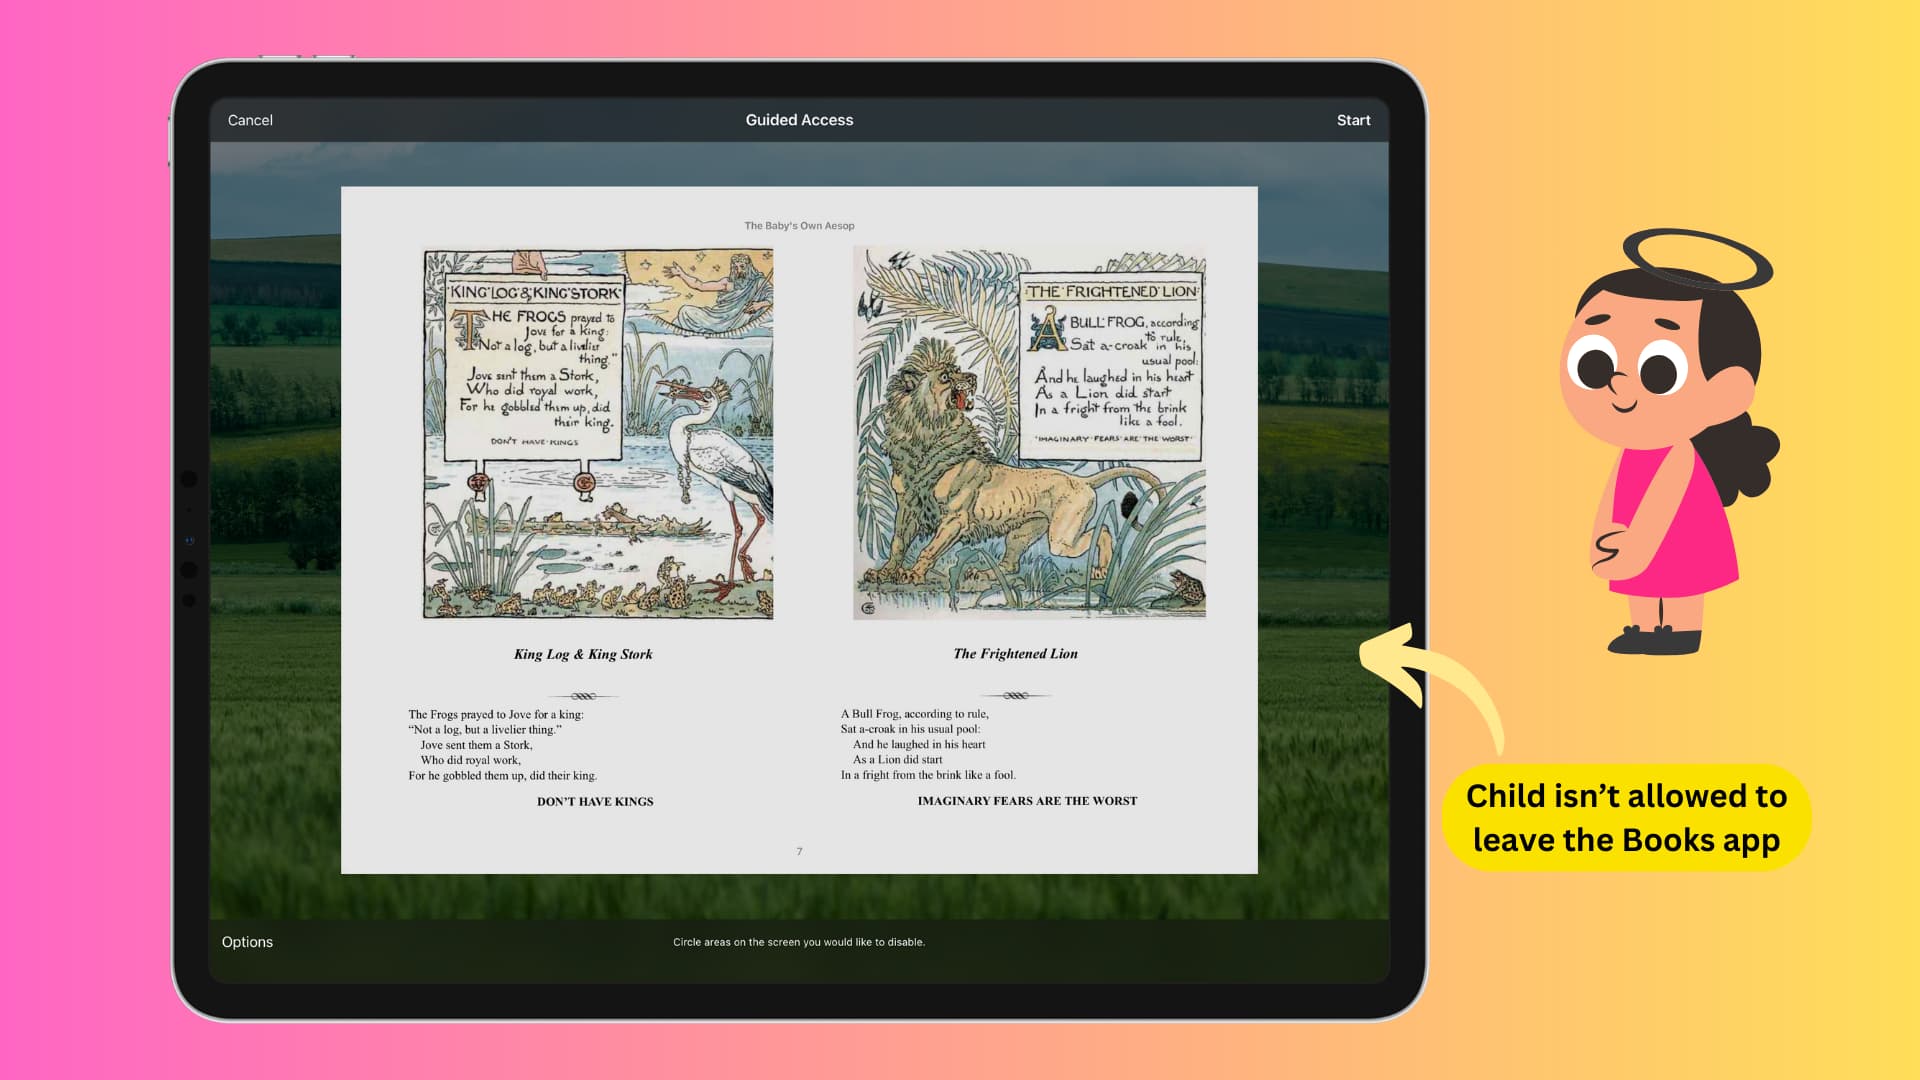
4) Optional: If you want to restrict certain app controls and disable specific areas of the app screen, draw a circle or rectangle around any part of the user interface you want to stop from responding to touch input. iOS vectorizes the drawing so you can drag the mask into position or use the handles to adjust its size.
For example, you may want to restrict actionable buttons inside the Photos app to prevent a mischievous junior from deleting your photos or applying unwanted edits. As these controls are found sitting alongside the screen’s bottom, simply mask them out with a few strokes of your finger, and you’re done.
You can even stop everything on the screen from responding to touch if you’d like.

5) Finally, tap Start to activate Guided Access.

Note: If you haven’t created a Guided Access passcode beforehand in Settings > Accessibility > Guided Access > Passcode Settings > Set Guided Access Passcode, you’ll be prompted to create one now or immediately after following step 2.
Your iPhone is now locked to this app, and swiping up or pressing the Home button won’t take you to the Home Screen.
End Guided Access or change its settings and resume it
Once you want to end Guided Access and return to using other apps on your iPhone or iPad, simply triple-press the Side/top/Home button, enter your Guided Access passcode or authenticate with Face ID/Touch ID, and tap End. If you don’t want to end the sessions just yet but change settings, tap Session Settings, make the adjustments, and hit Resume.

On rare occasions, even after you’ve switched on Guided Access, you may not be able to activate it with a triple-press of the Side button. Do the following if you find yourself in such a situation.
Go to Settings > Accessibility > Accessibility Shortcut. You’ll see that Guided Access is selected and grayed out. Leave it as it is, and choose some other option like Color Filters.
Now, open the app where you want to use Guided Access, then triple-press the Side button. You’ll see a menu asking you to choose Guided Access and the other Accessibility feature. Choose Guided Access.

Once you’ve used Guided Access, you can go back to the Accessibility Shortcut screen and unselect the extra option you selected earlier. From now on, Guided Access should trigger perfectly with a triple-press of the Side button.
If the problem continues, turn off Guided Access and turn it back on. Restarting your iPhone will also help.
Also, check out: 15 child-focused features on iPhone and iPad