Set up a custom keyboard shortcut on your Mac to export web pages and documents from apps like Safari, Notes, Pages, Keynote, and Numbers as PDFs.
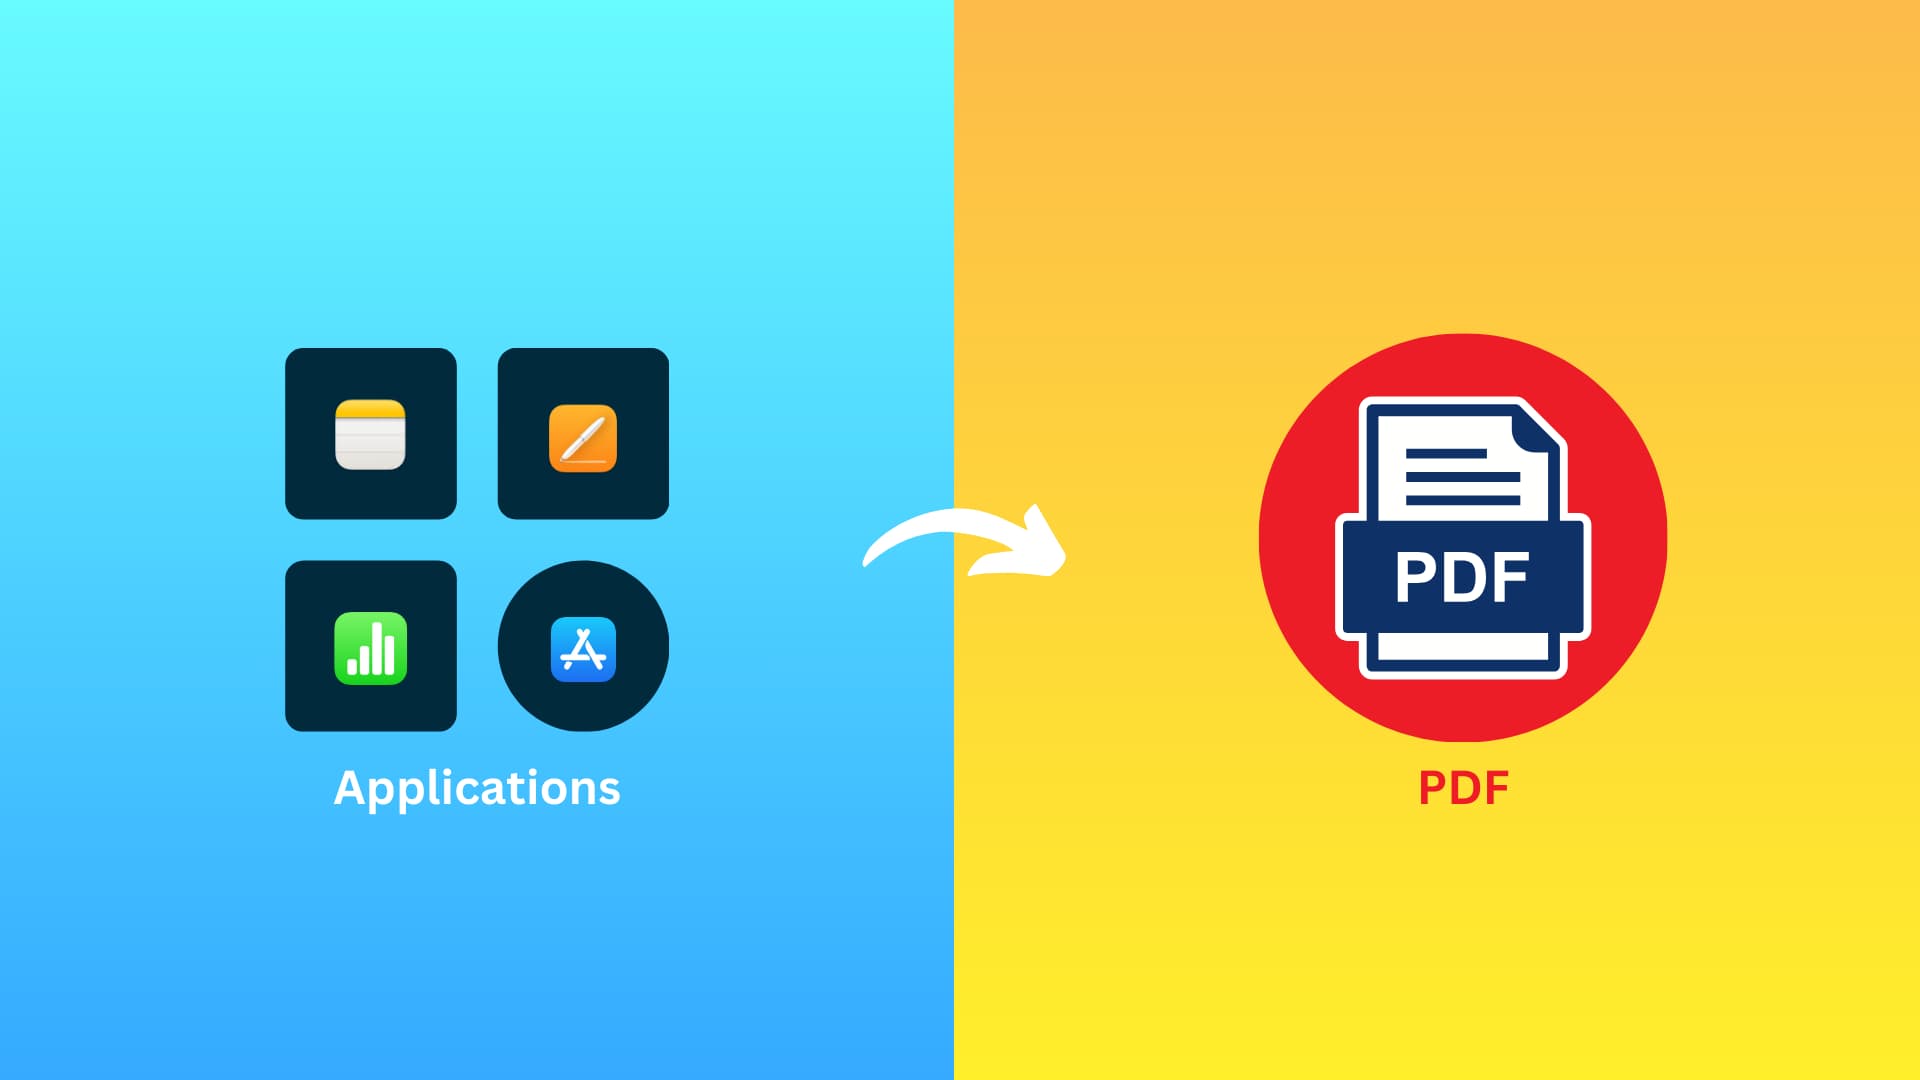
Do you often use the Export to PDF or Export > PDF functions on your Mac? If so, why not save yourself some hassle and set up a keyboard shortcut for doing it? It’ll make life a lot easier for PDF power users.
Set up a keyboard shortcut for ‘Export to PDF’
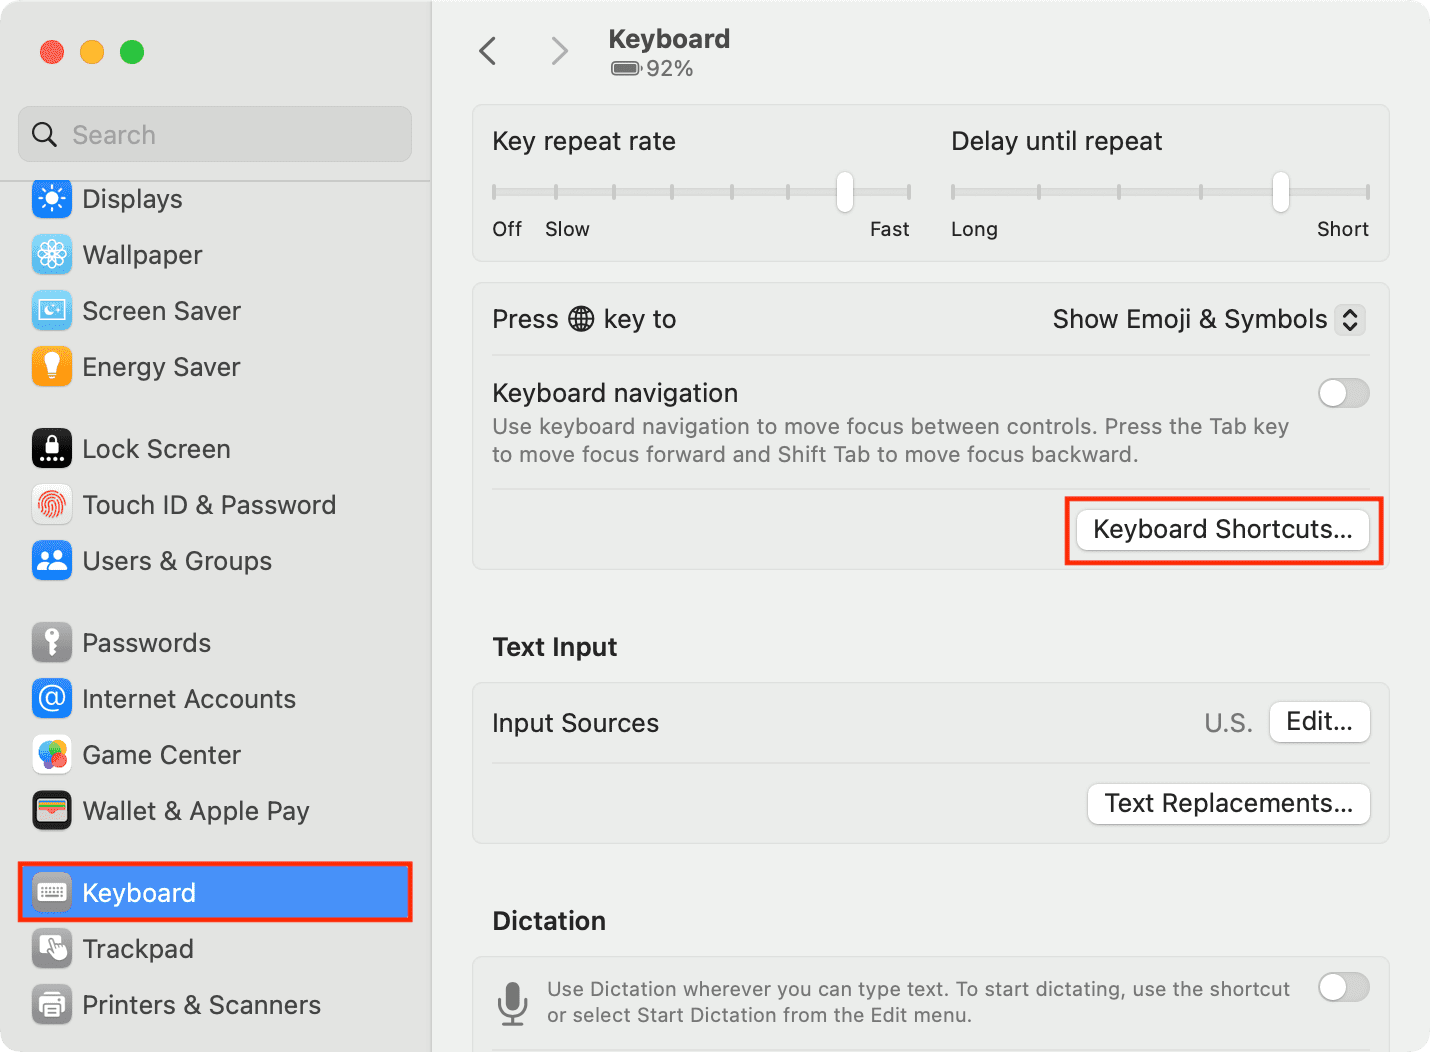
1) Launch System Settings on your Mac and select Keyboard.
2) Click Keyboard Shortcuts.
3) Select the App Shortcuts option from the left side.
4) Click the plus button (+).
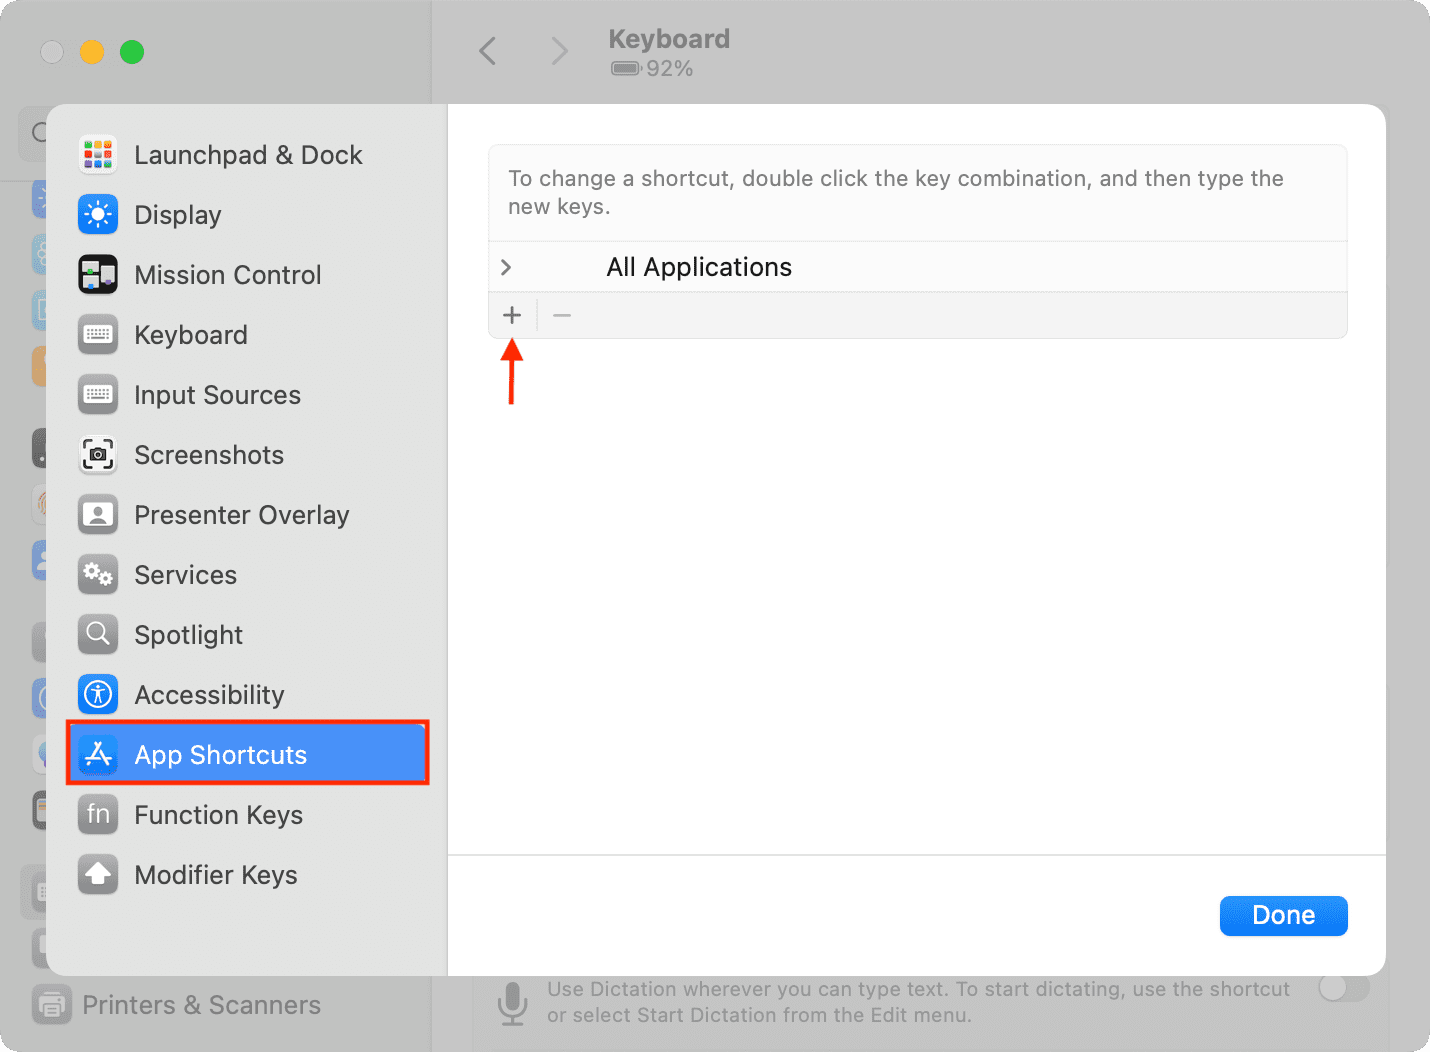
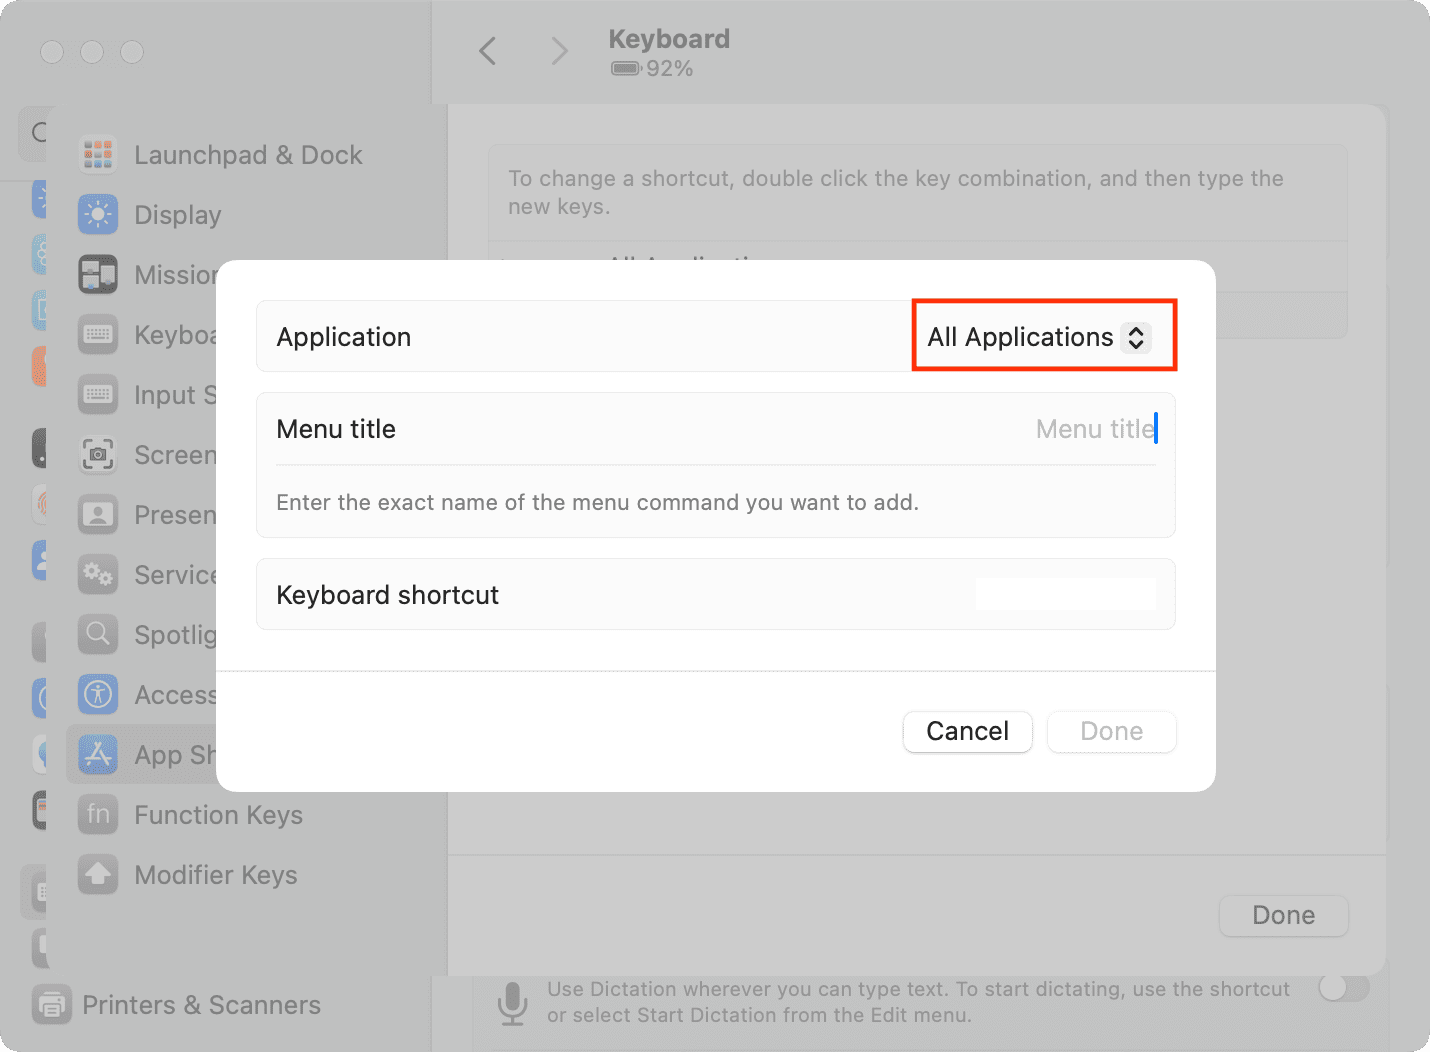
5) Choose the Application you want to use the shortcut in or use the All Applications option to use the shortcut in any supported app.
6) Here’s where things get a little tricky, so pay attention:
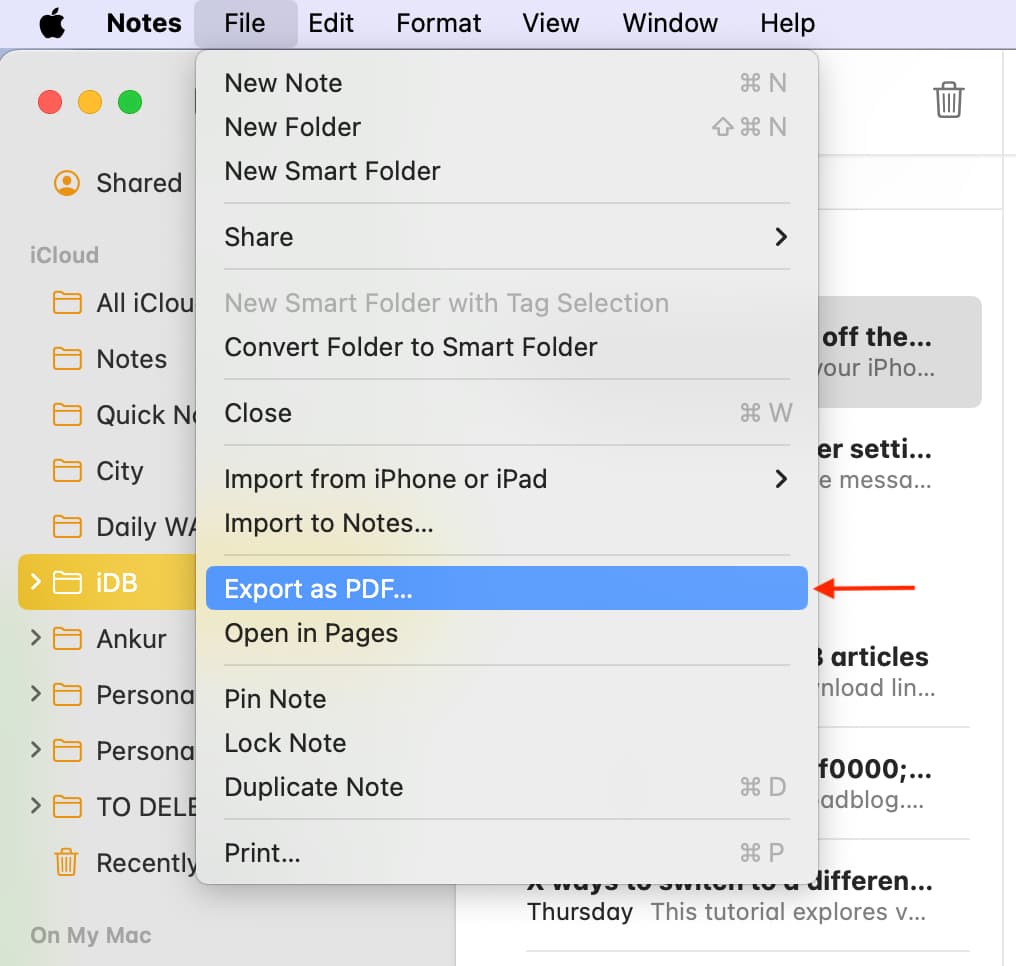
- Open the app you’re making a shortcut for and visit the File menu in the top menu bar. If you see Export to PDF… then follow scenario 1 below.
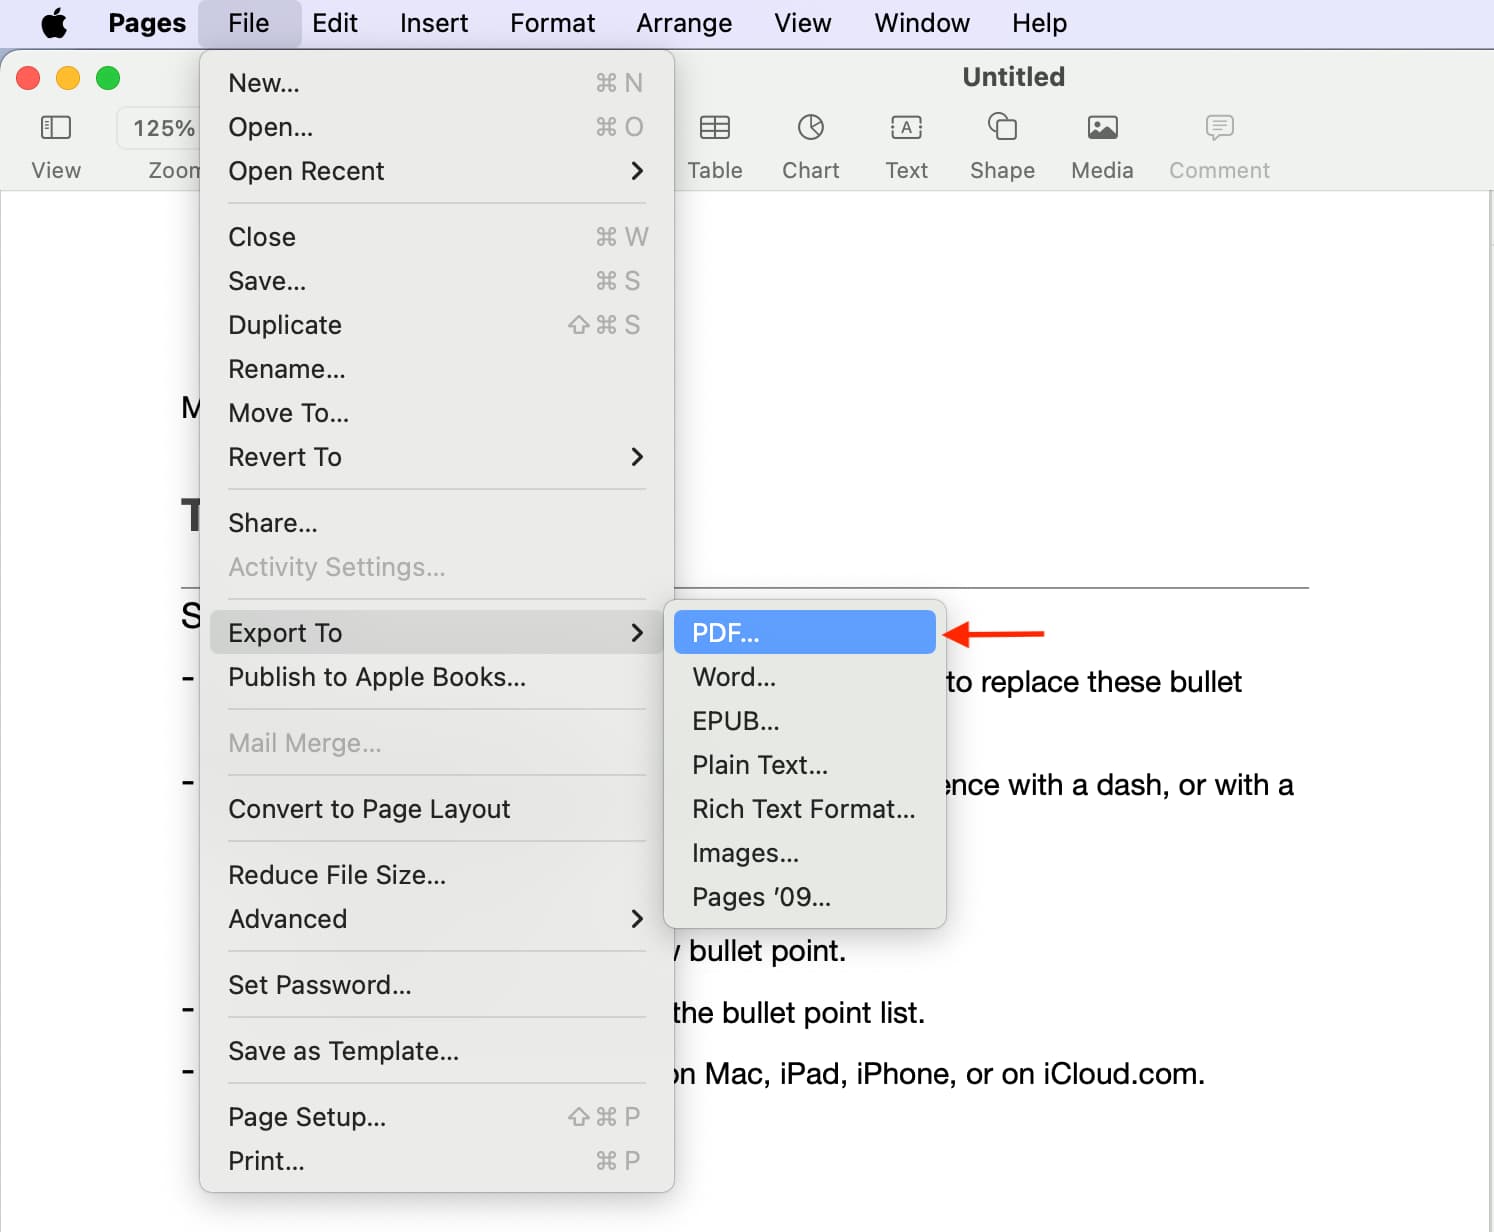
- If you see Export To > PDF…, then follow scenario 2 instead.
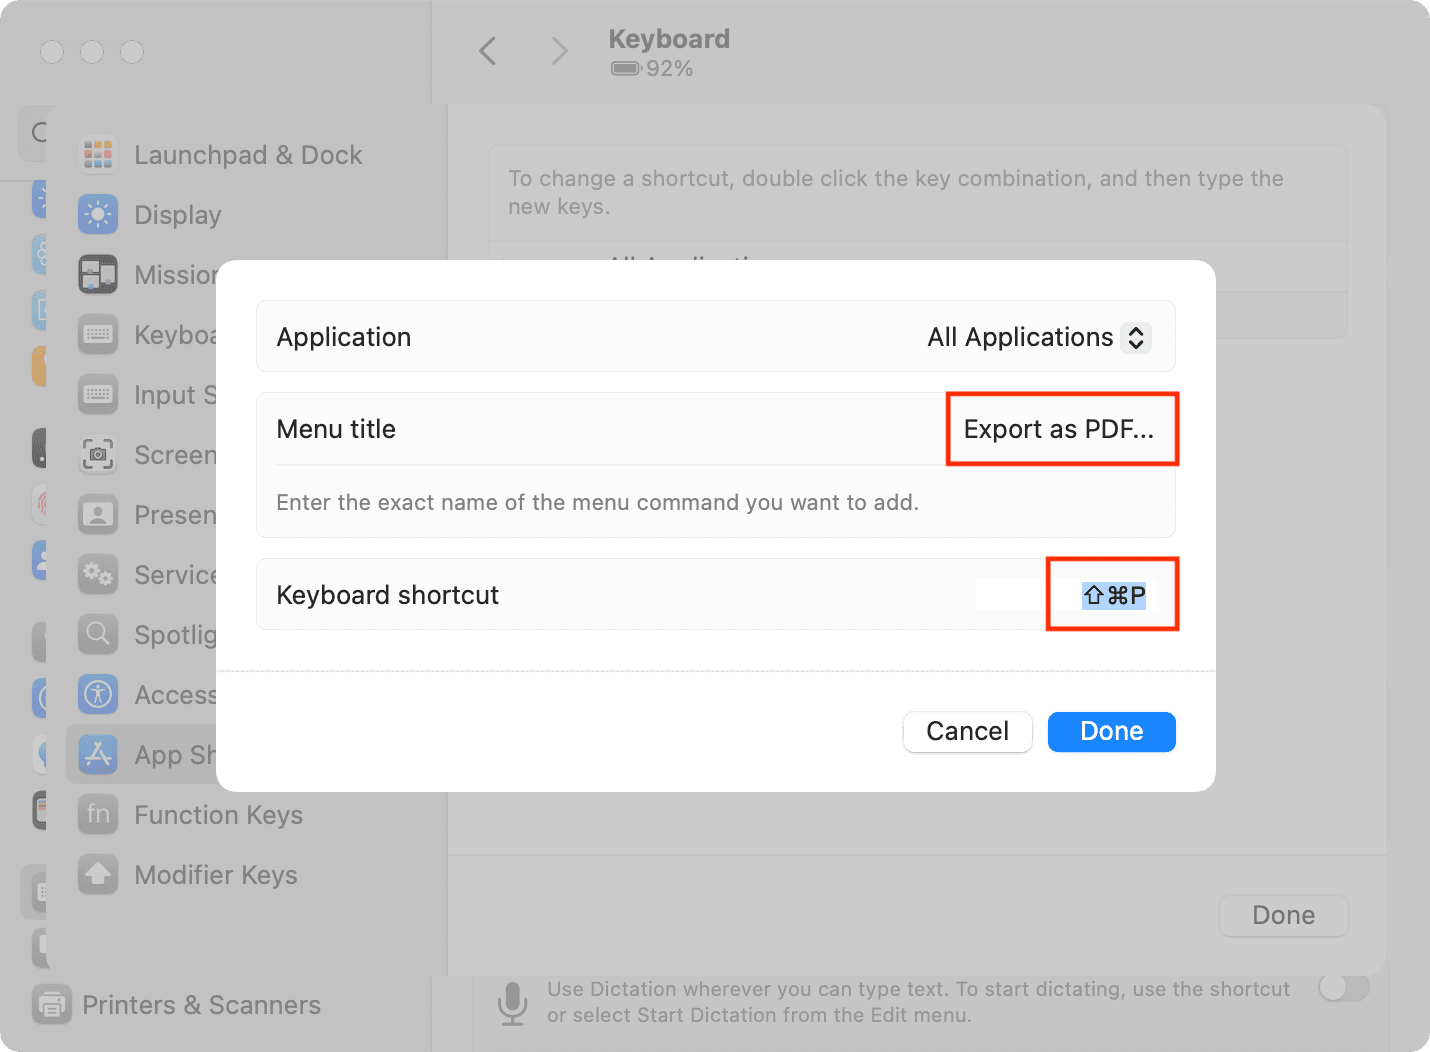
Scenario 1: In the keyboard settings you opened in step 5, enter “Export as PDF…” (with the three dots) in the Menu title text field. This works for a number of system apps like Mail, Notes, and Safari.
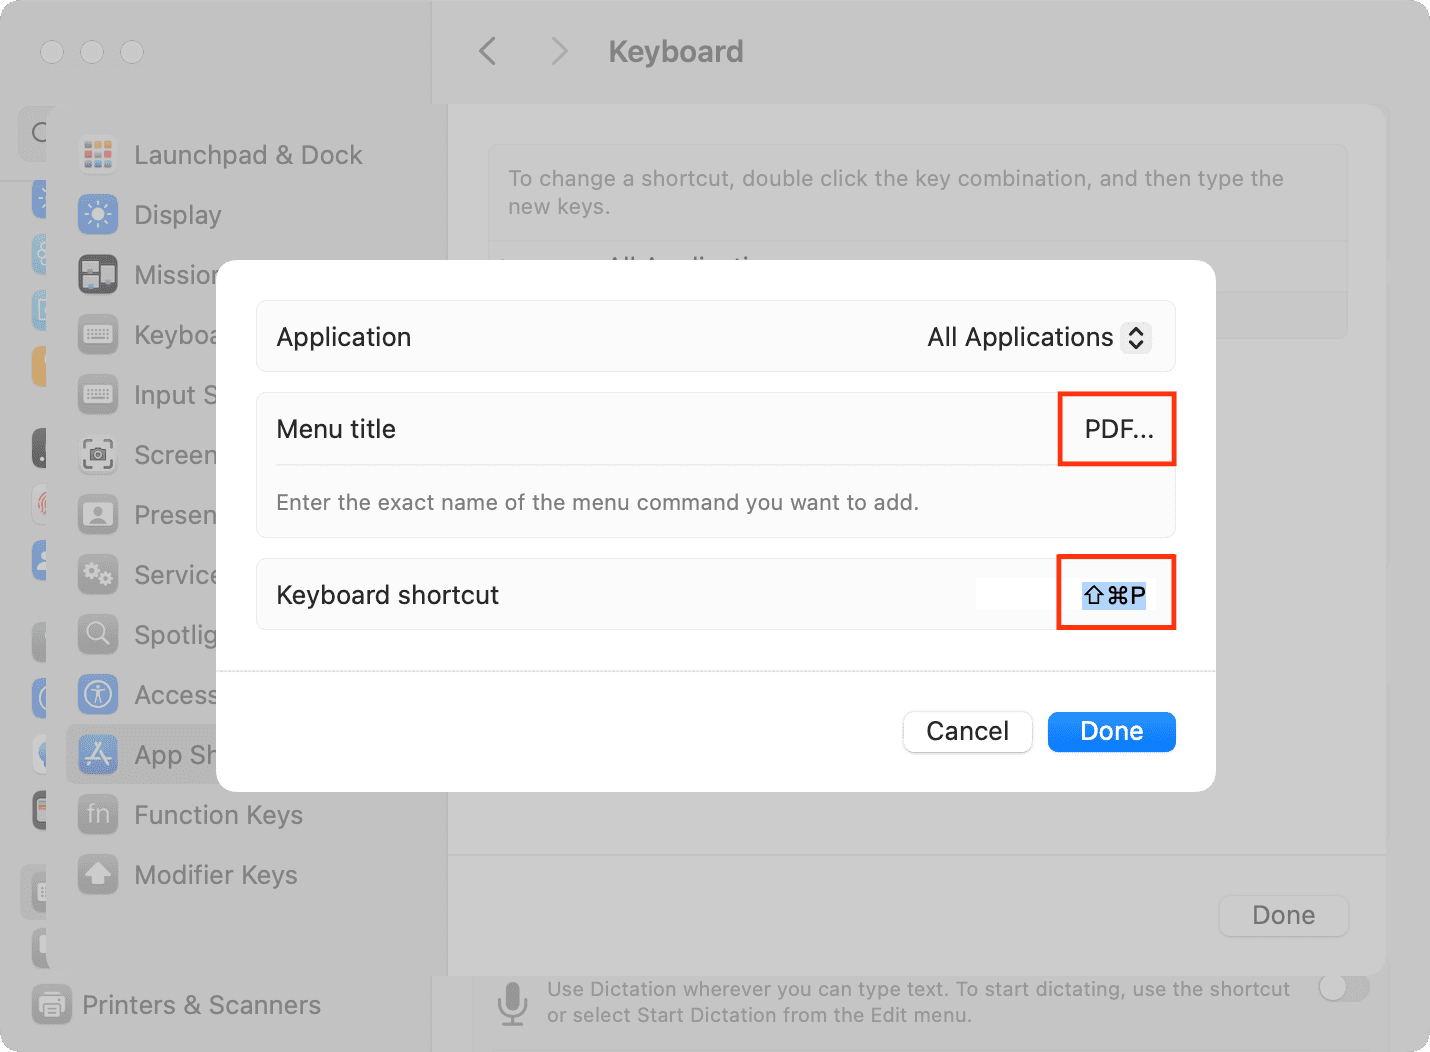
Scenario 2: In the keyboard preferences you opened in step 5, enter “PDF…” (with the three dots) in the Menu title text field. This is necessary for iWork apps like Keynote, Numbers, Pages, and other non-stock apps.
Note: If you see anything other than “Export to PDF…” or “Export to > PDF…” in the menu, then you’ll use the lowest level of the menu command. It’s unlikely your results will vary, but if you see something different, drop us a comment below.
7) Choose a keyboard shortcut by selecting the Keyboard shortcut text field and pressing the keys you want to use. We recommend shift + command + P.
8) Click Done > Done to save your changes.
Now you’ve successfully added the Export to PDF keyboard shortcut to your Mac. When you attempt to use it in another app, such as Notes, this should happen.
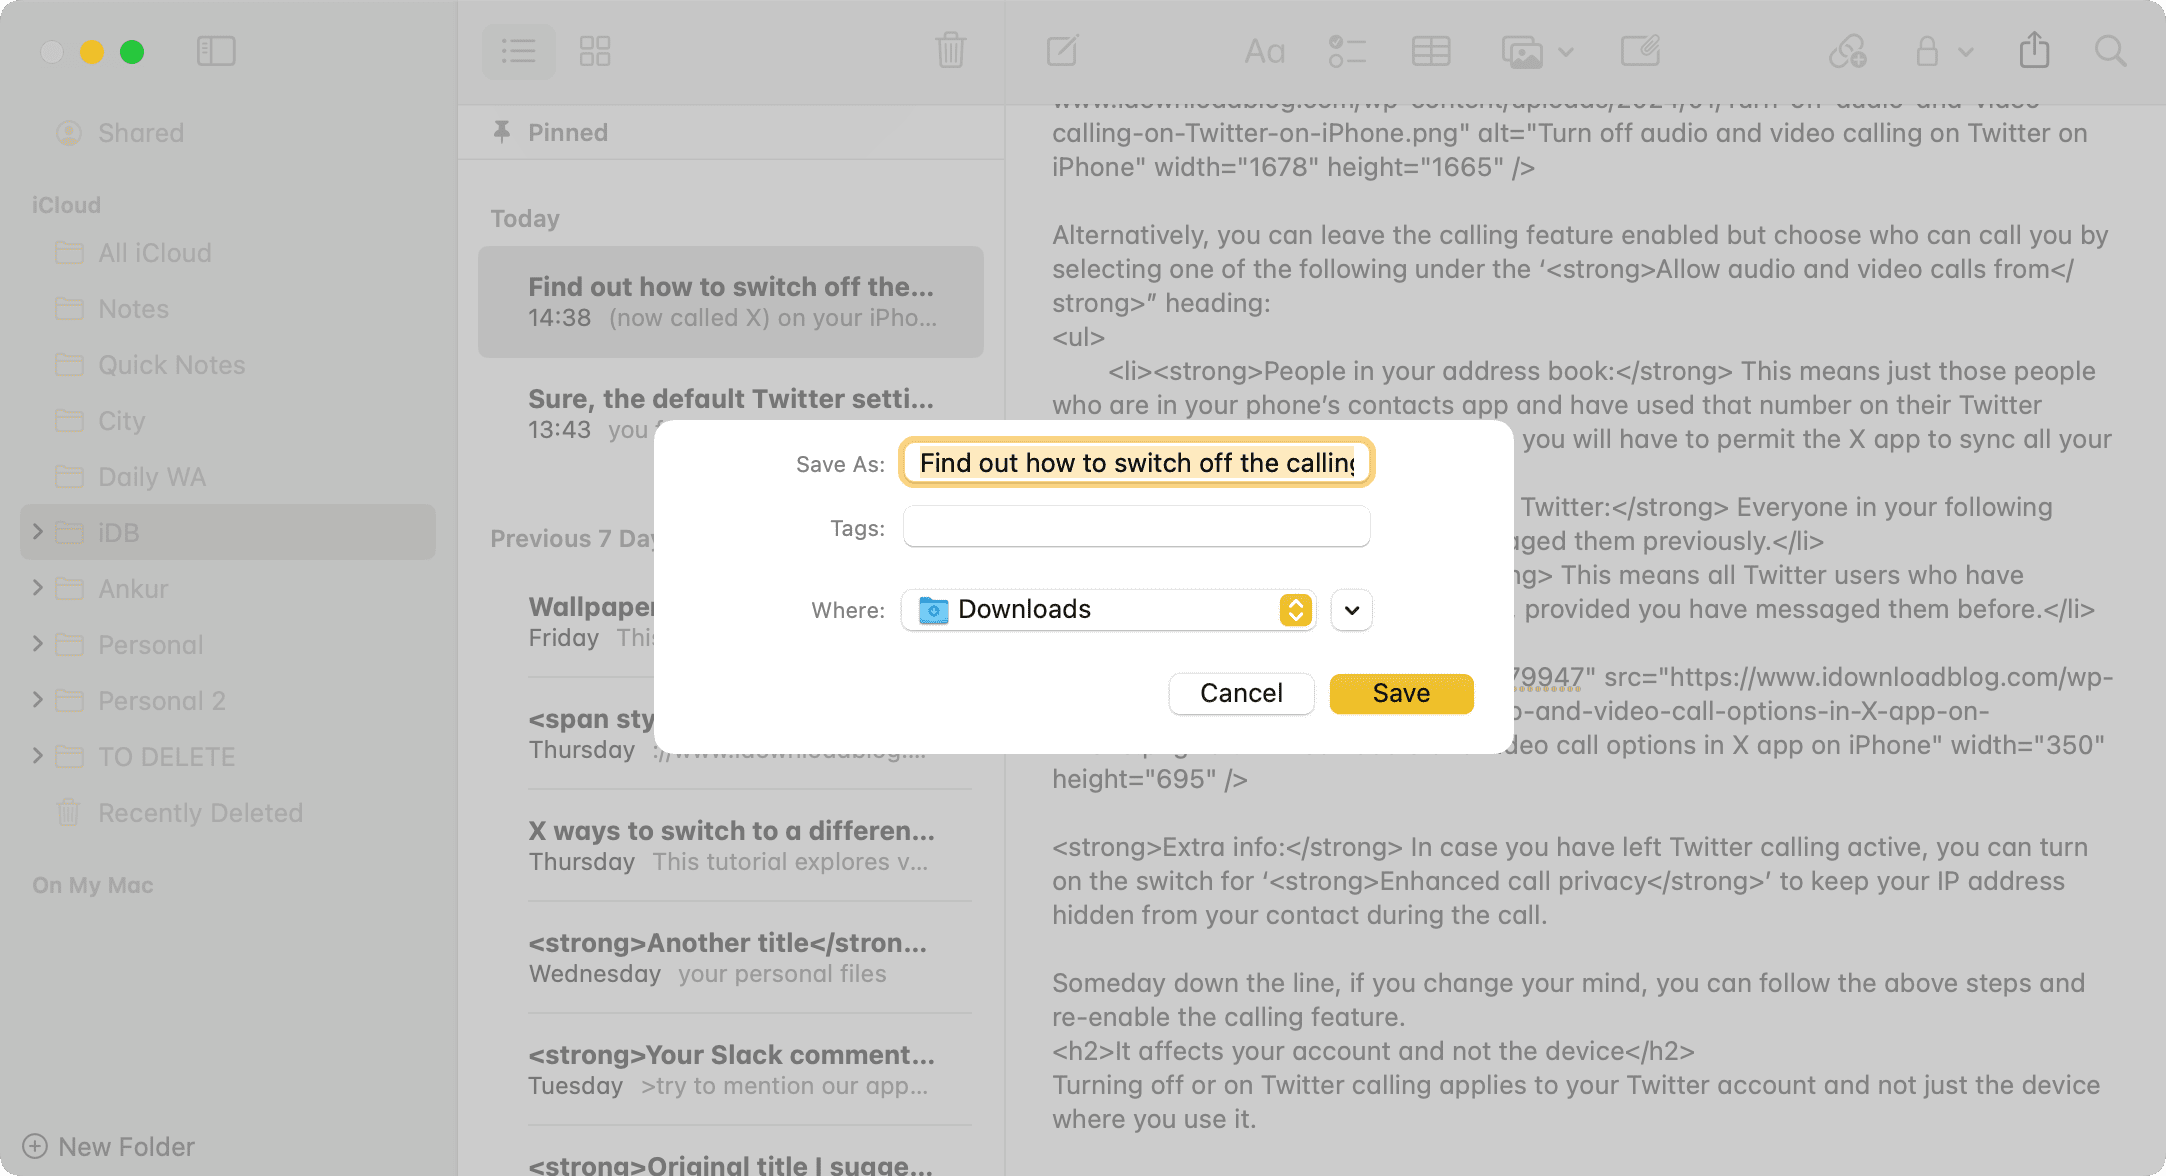
When you click the Save button, it should save a PDF file to your chosen output folder.
With the Export to PDF command ported over to a simple keyboard shortcut, you no longer have to go looking for it from the menu bar. While it doesn’t work in every app, it works in most of them and should make life a lot easier for those of you who are PDF fanatics.
On a related note: