I have a friend who nearly lost all of his photos of his daughter. He had his iPhone for just about two years and he took tons of pictures of her. She wasn’t even two years old yet, so basically, her whole life was on his iPhone. One day, his phone crashed, and he couldn’t figure out what happened to it. His pictures were lost.
He was eventually able to recover his photos, but not without hours of work and days of anxiety. When I asked him why he didn’t just back his photos up, he had no good response. Always back up your precious photos. Seriously. Always back up your photos!
Here are a few different ways to back up your photos and videos so you’ll never have to face the dreaded lost memories again.

How to back up your iPhone photos and videos
When you set up your iPhone, it starts storing your photos in iCloud by default. This makes it possible for you to save a lot of photos, but you should find another way to back them up or you will lose the ones that don’t fit into the 5GB of free iCloud storage that you get.
1. Use Mac’s Photos app
If you have a Mac, you can safely store all your iPhone photos locally on your computer for free. Here’s how:
- Connect your iPhone to your Mac via cable.
- Open the macOS Photos app.
- From the sidebar, under Devices, click your iPhone’s name.
- Tap Allow on your iPhone if asked. In a few seconds, you’ll see all your iPhone pictures and videos appear inside Mac’s Photos app.
- Select the desired photos or press Command + A to select all.
- Depending on your selection, click Import Selected or Import All New Items.
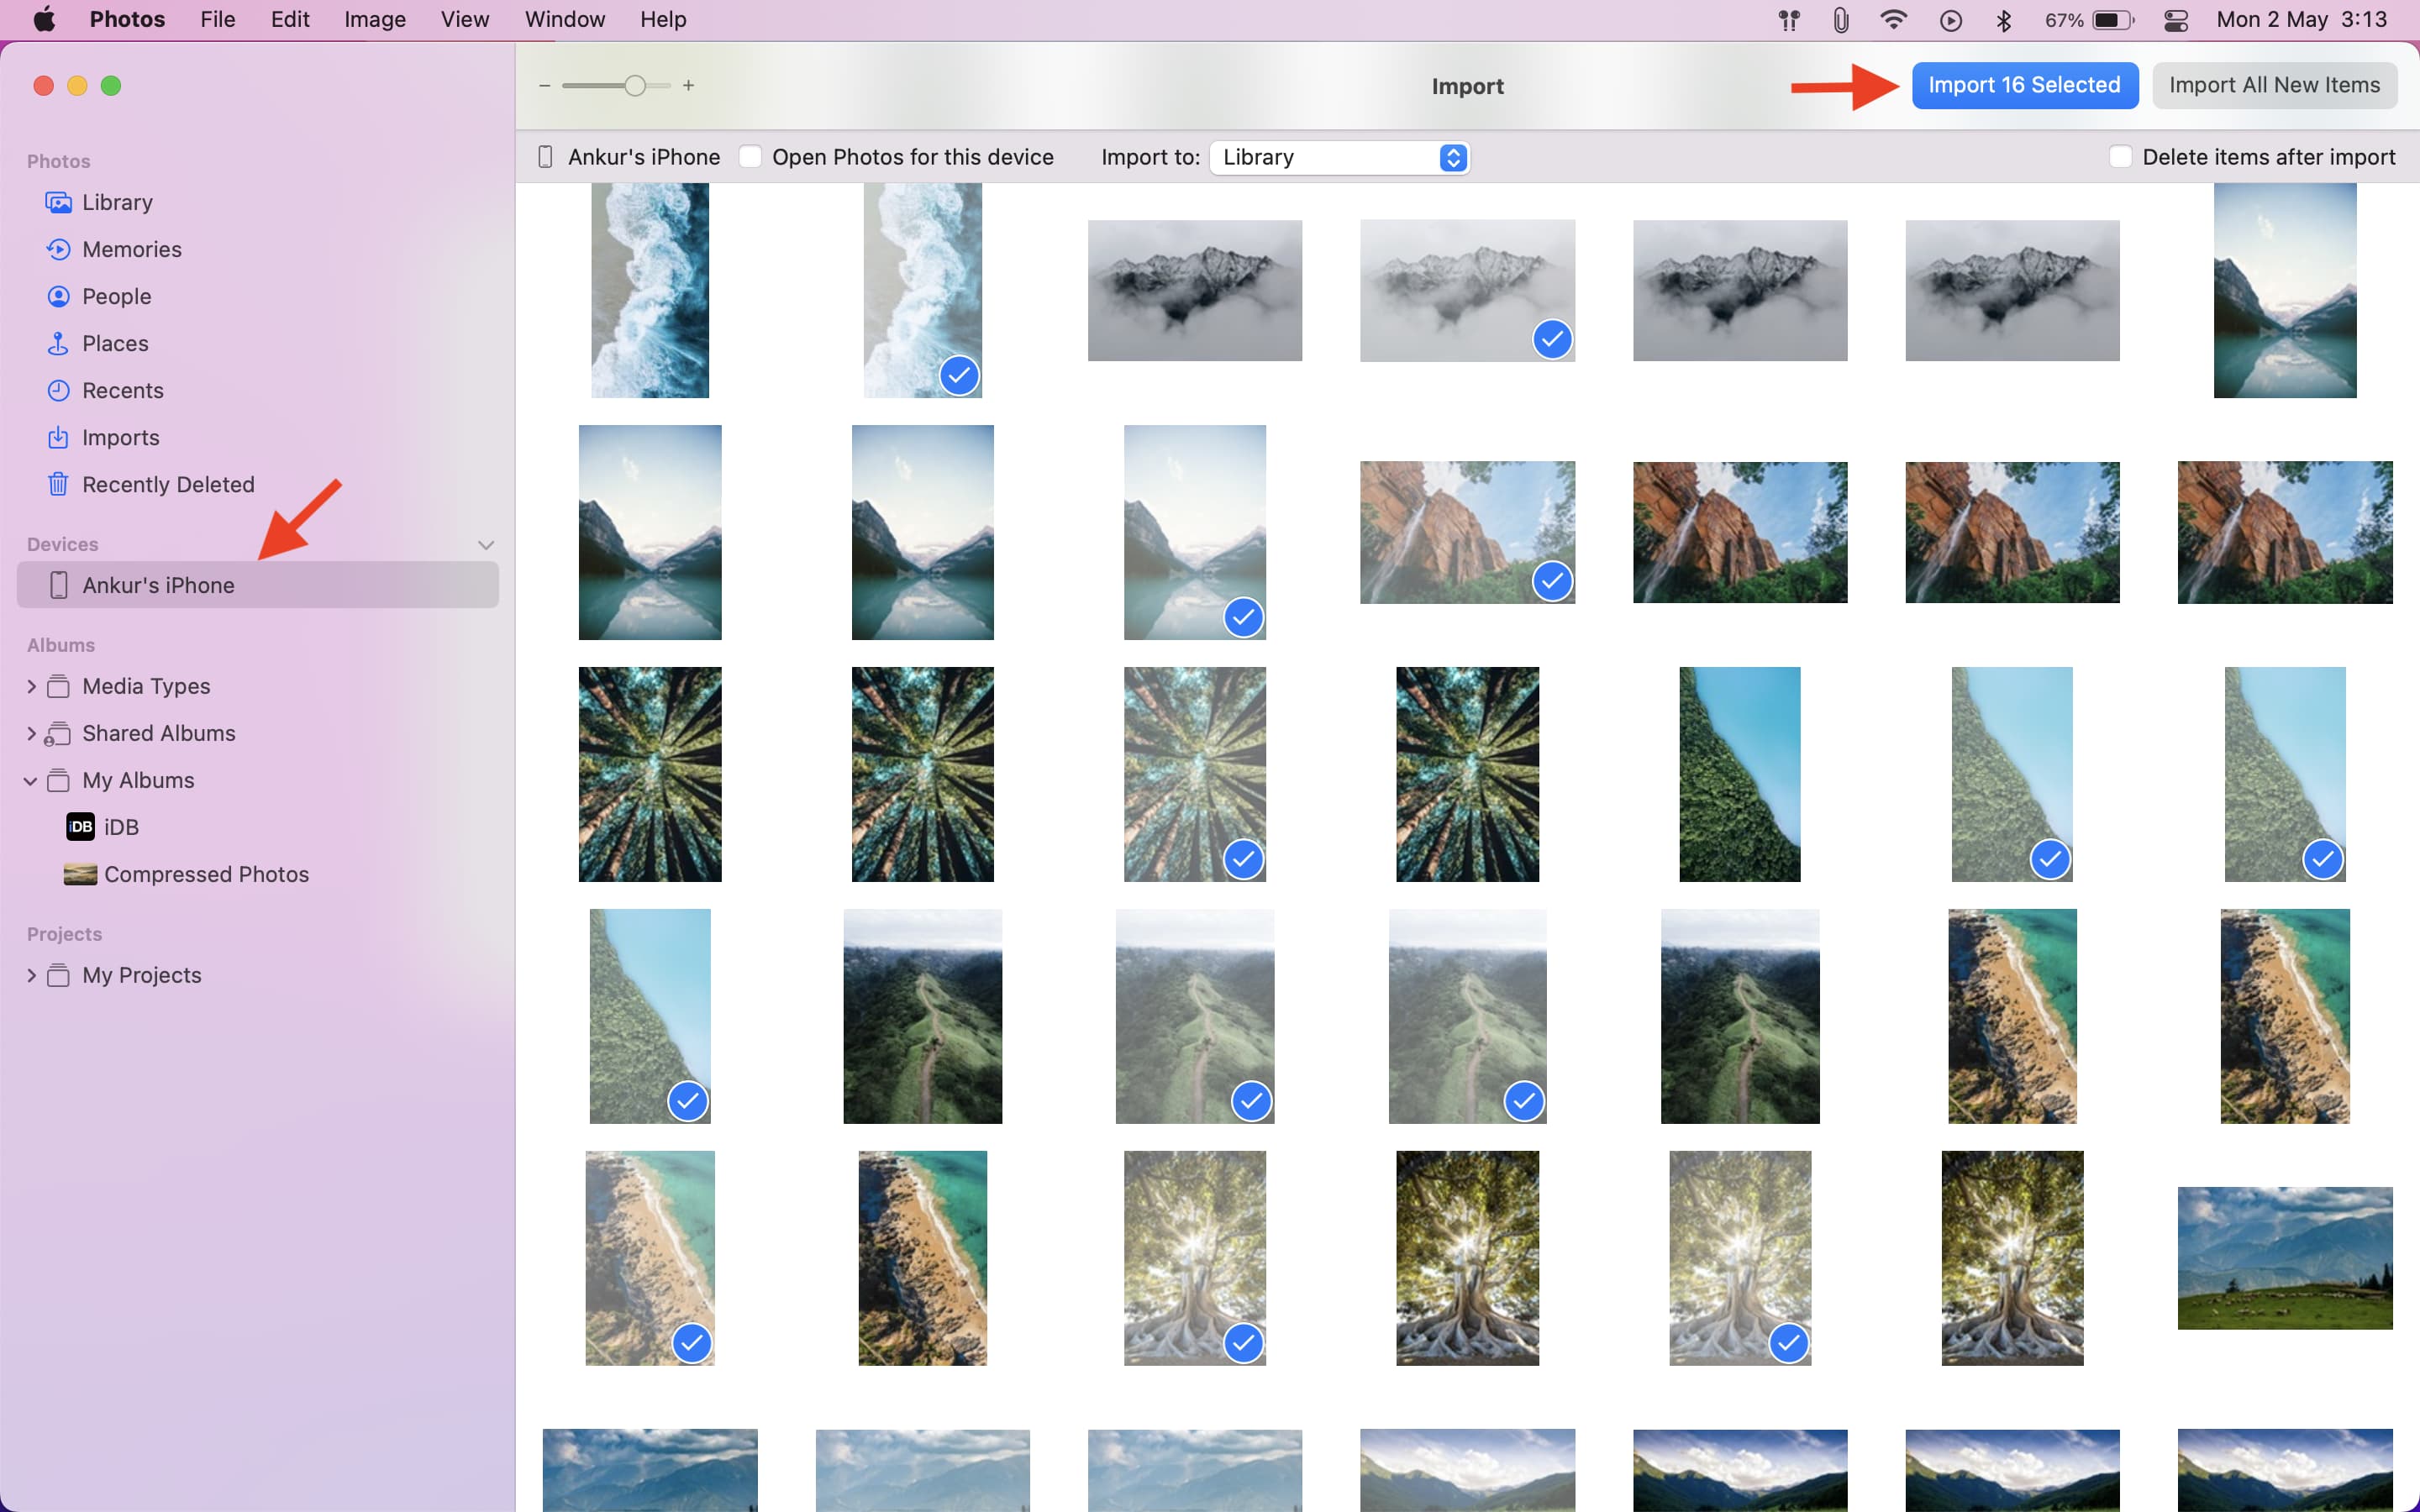
Don’t unplug or fidget with the device until the photos are transferred.
In the future, you can make it a habit to connect your iPhone to the Mac every Sunday, follow the above steps, and click Import All New Items. This will import only the new, previously un-imported images from your iPhone to your Mac.
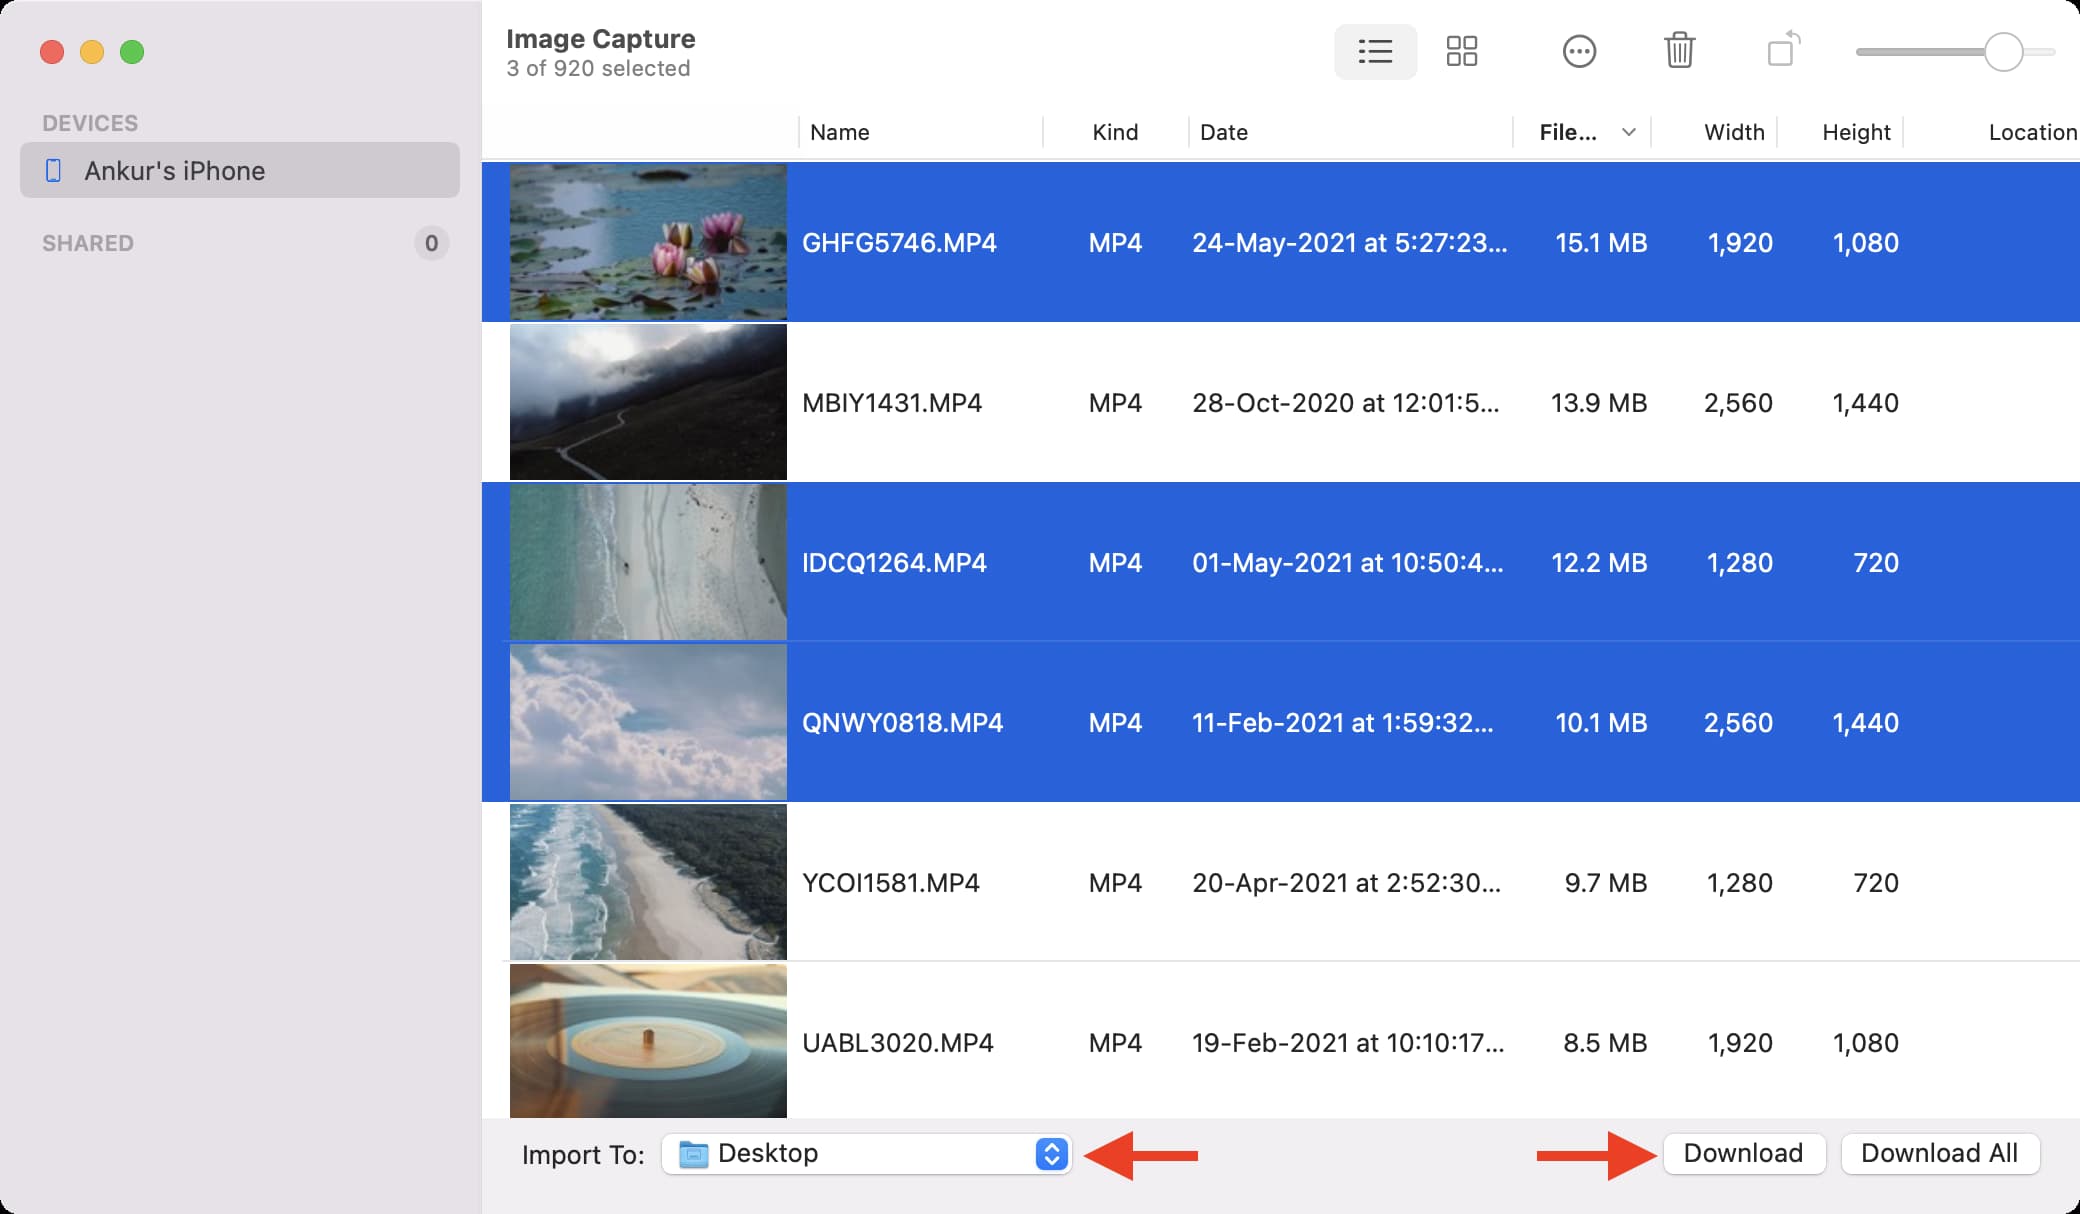
2. Use Image Capture or AirDrop pictures regularly
Image Capture comes built-in on all Macs. You can use this to import photos from your iPhone to any folder on Mac. Besides that, you can also AirDrop your important pictures and videos from your iPhone to your Mac for safekeeping. Here are the steps to use both Image Capture and AirDrop to transfer photos from iPhone to Mac.
Must see: 10 free ways to send large videos and files from iPhone
3. Use iCloud Photos
With iCloud Photos, your iPhone, iPad, and Mac can automatically upload new images and save them to iCloud. These pictures are accessible on all your Apple devices, web browser, and Windows PC.
iCloud Photos is fantastic and effortless. However, you only get 5GB of free storage with every Apple ID, and iCloud Photos fills this up very quickly. After that, your device backups will fail, notes will not save, and you will see annoying iCloud popups unless you free up iCloud storage.
Therefore, to sanely use iCloud Photos, you should upgrade to a paid iCloud+ plan, and get 50 GB or more cloud storage.
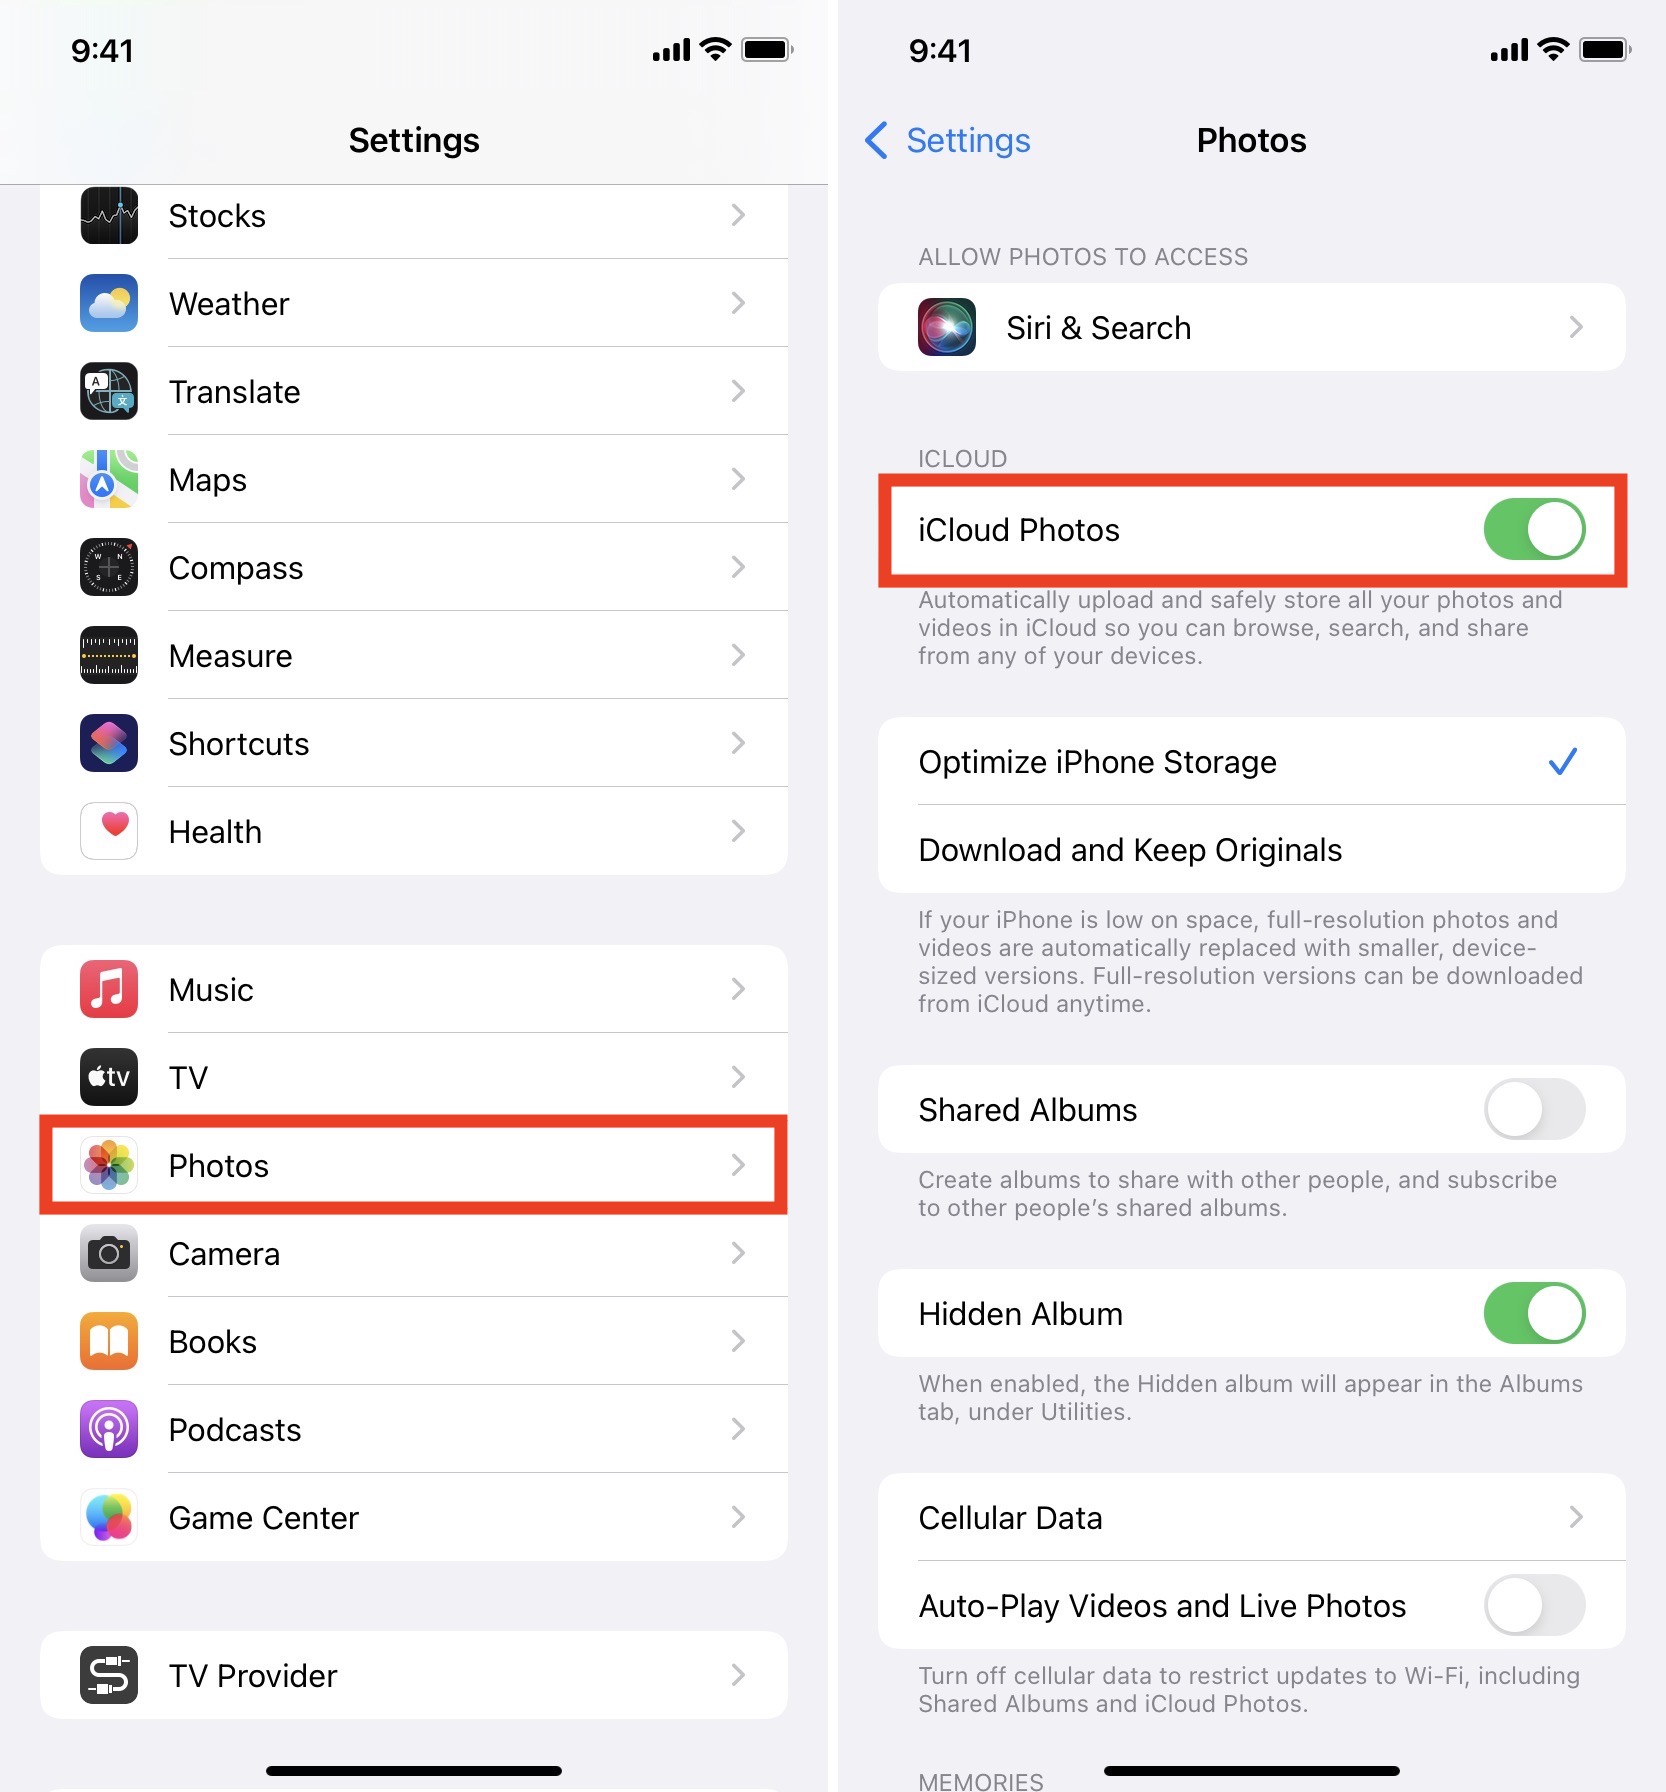
After buying an iCloud plan, go to iPhone Settings > Photos and enable iCloud Photos. From now, your iPhone will automatically back up your photos and videos. Make sure to explore the other options you see on the Photos settings screen.
4. Use Google Photos
Google Photos offers 15GB free instead of the 5GB that iCloud does. Plus, Google Photos is available as an app on Android as well. So, if an extra 10 GB and the possibility of quickly accessing your iPhone photos on Android excites you, look no further. You can set up Google Photos to upload all your pictures and videos from your iPhone.

5. Use Flickr
With a paid Flickr subscription, you can store unlimited photos from your iPhone to Flickr and access them on any device. The plans start at $8.49 per month, $6.67 per month when billed annually, or $5.99 per month if you go with the two-year plan. You can learn how to use Flickr here.
6. Use Dropbox
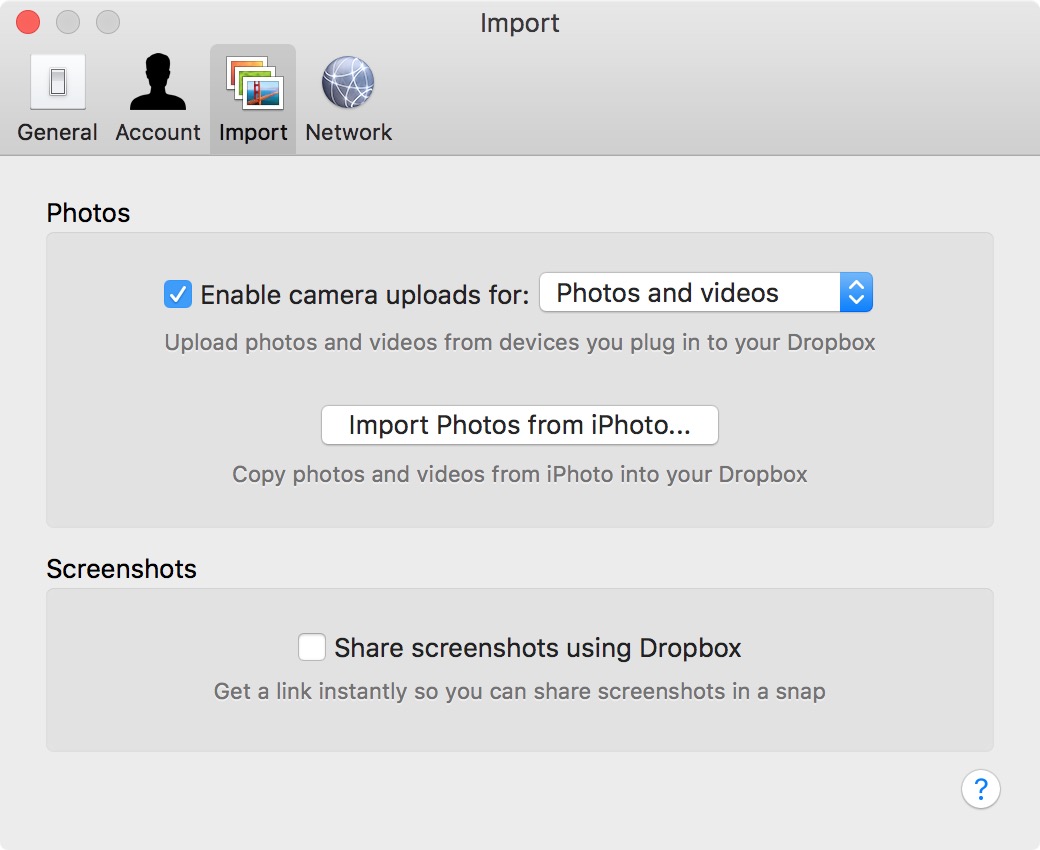
If you own a Dropbox account, you can also automatically store your photos in their cloud. If you connect your iPhone to a computer with Dropbox installed, you can turn on Camera Upload, and photos and videos will automatically download to Dropbox.
To do so, go to Dropbox > Settings > Preferences > Import, and check Enable camera uploads. You can then choose to import both photos and videos, or photos only. Doing so will automatically import your photos to Dropbox when your iPhone is connected.
However, keep in mind that Dropbox has a limited amount of free storage available. When you run out, you have to pay for an upgrade. You get 2GB of storage with a free account.
Dropbox can also automatically upload images that you take with your iPhone. You’ll, of course, need to download the Dropbox app first and create an account if you don’t already have one.
When you first launch the Dropbox app, it will offer to save your photos to Dropbox, as seen in the screenshots below.
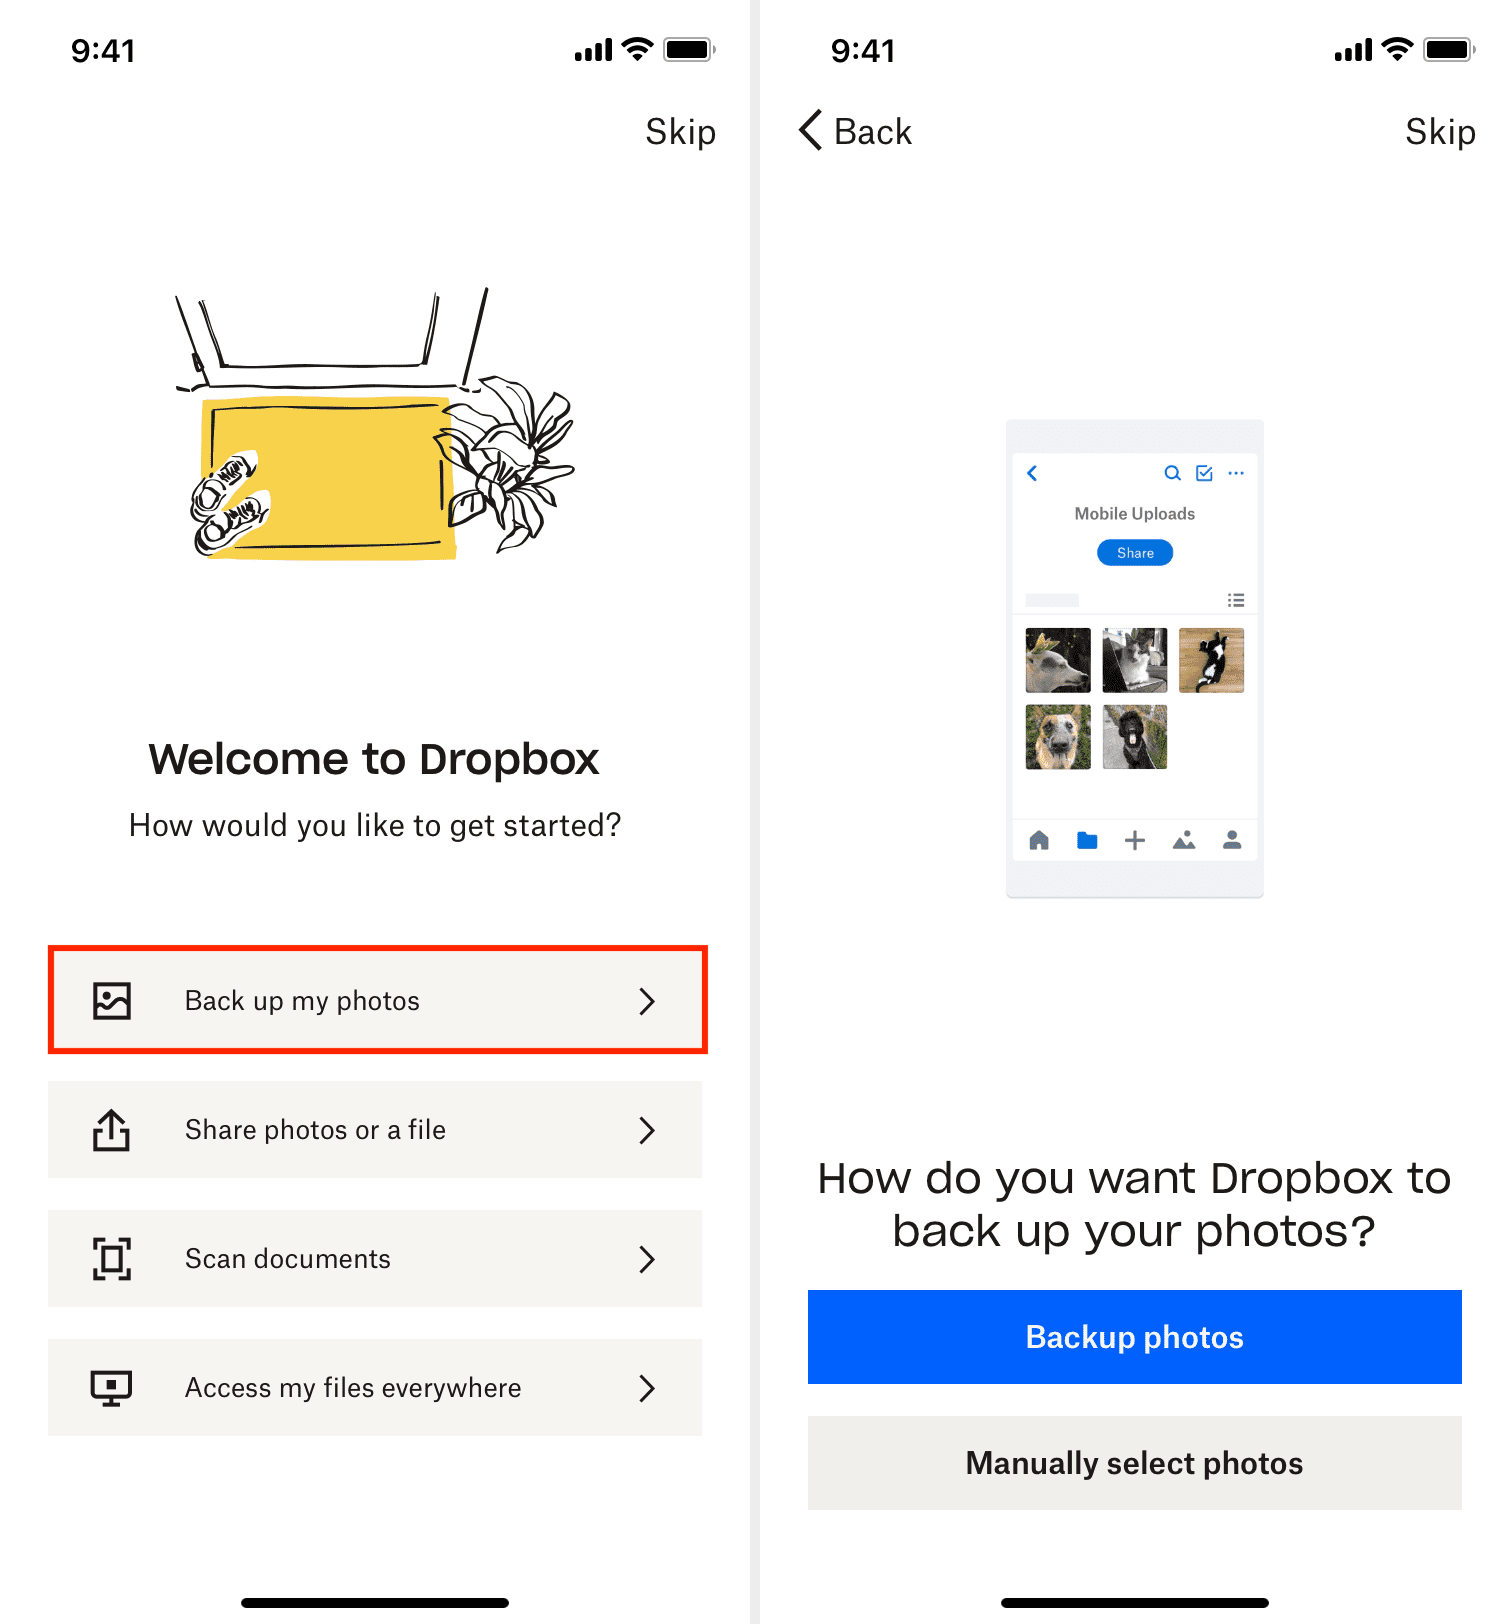
If you didn’t enable this feature at launch but want to do it now, follow these steps:
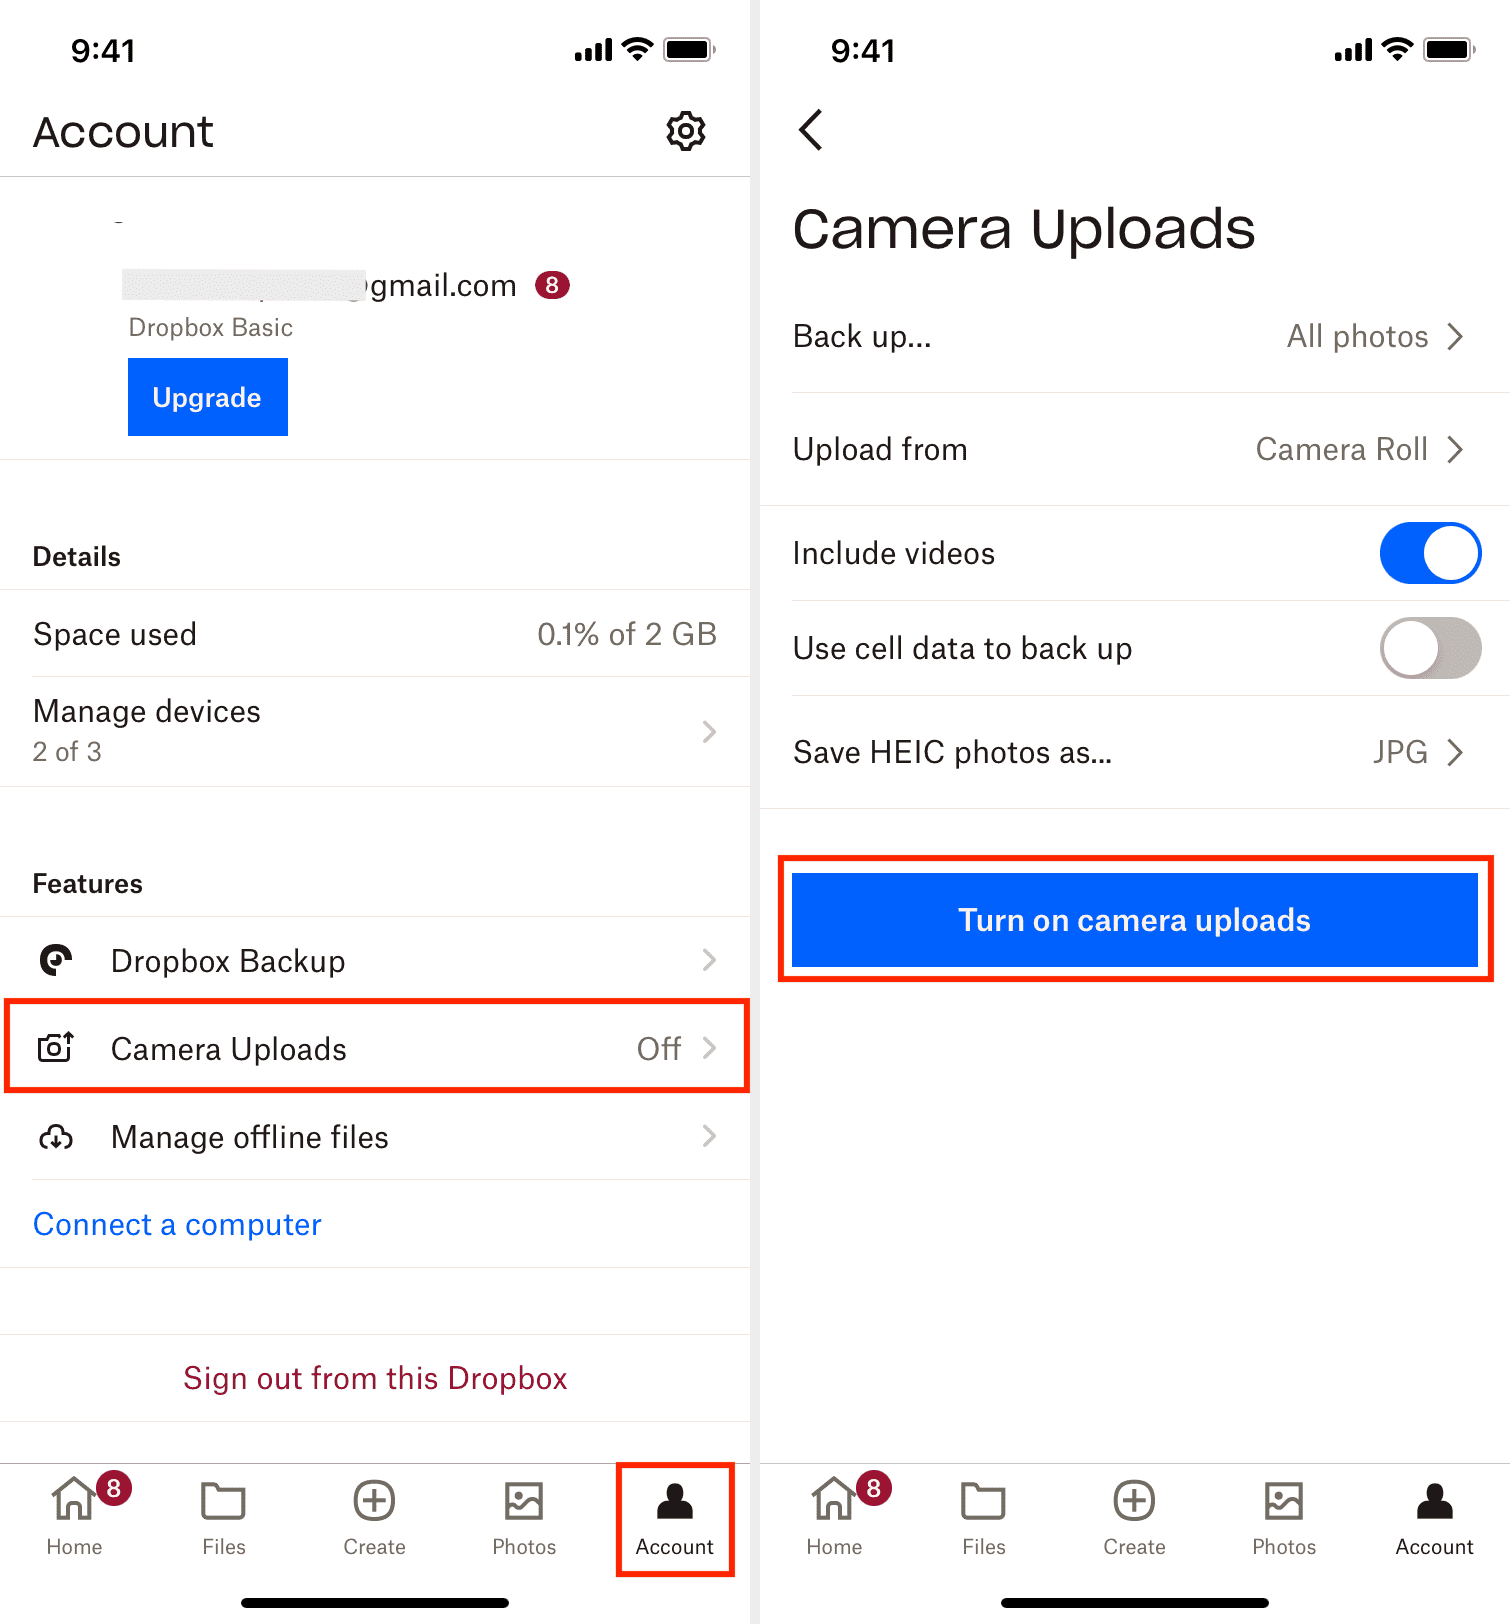
- In the Dropbox app, tap Account from the bottom right.
- Choose Camera Uploads.
- Select Turn on camera uploads.
- You can also choose to include videos or use cellular data to back up.
Note that Dropbox also allows you to manually upload selected photos rather than upload all of them at once. One way to do that is by going to the Dropbox app and tap Photos > Choose photos to upload.
Alternatively, you can tap Upload from and then choose only a specific album to upload to Dropbox
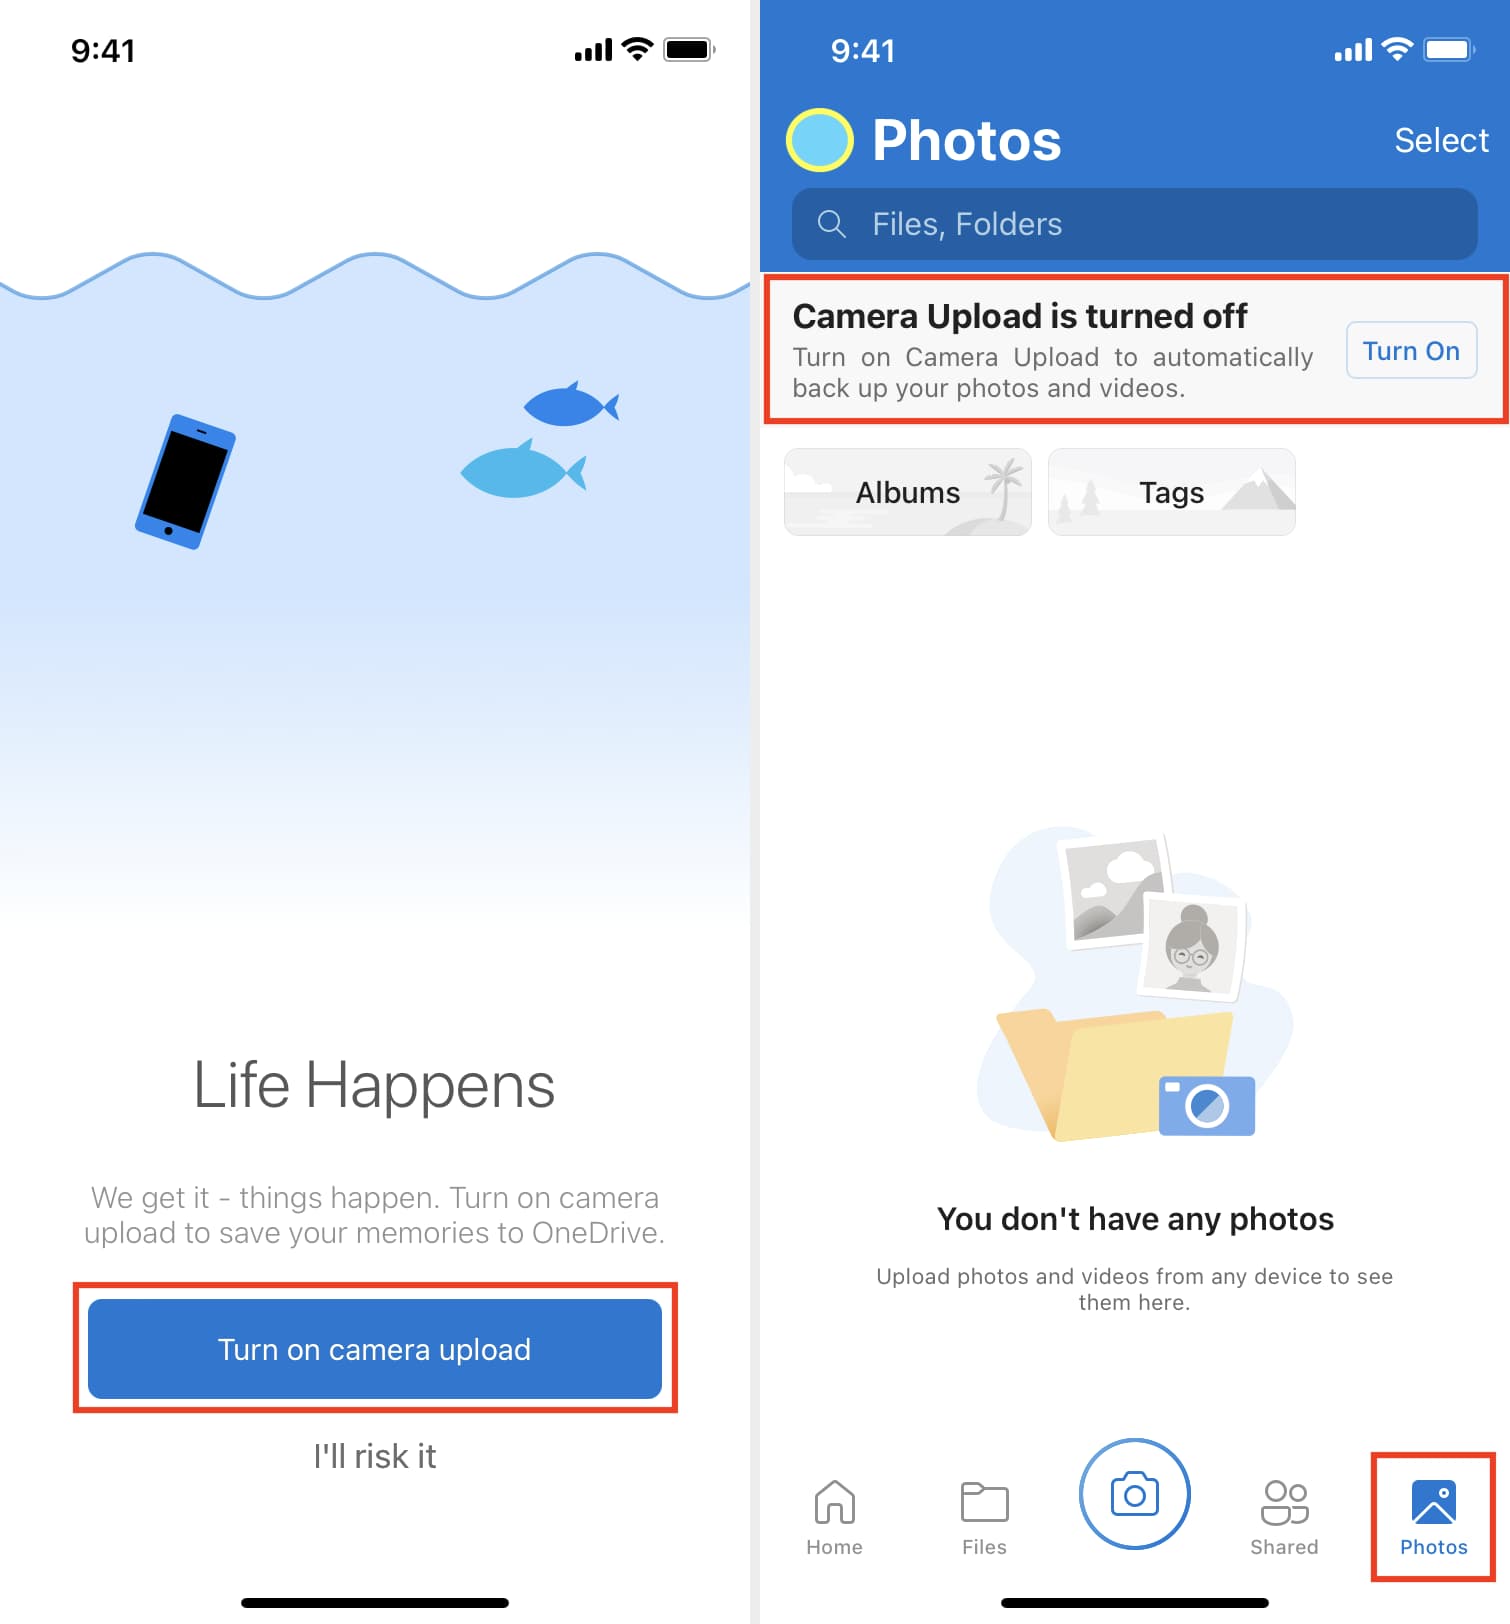
7. Use Microsoft OneDrive
Most cloud storage services like OneDrive let you enable camera upload that saves all your iPhone photos to the cloud. As with all cloud storage providers, you will have to pay and get a subscription, as the free OneDrive tier offers only 5GB of storage. You can learn how to upload photos to OneDrive here.
Now you have learned about different ways to back up your iPhone and iPad photos. Don’t be like my friend and think you’re immune to the possibility of losing everything.
Check out next: