Tips

Why and how to turn off Background App Refresh on iPhone & iPad

Background App Refresh in iPhone settings

You can turn off Background App Refresh on your iPhone or iPad to save cellular data and extend the battery life.

In this tutorial, we'll tell you what Background App Refresh is and how to disable it for all apps or only selected apps. Plus, we'll show you how to turn it off only for cellular data or for both cellular data and Wi-Fi.

How to keep your US phone number when moving internationally

My family and I are moving to France for a couple of years, and while we plan on using a French cellphone plan, we also want to conserve our US phone numbers for when we return to the US on vacation, and more importantly for when we return for good.

I don’t really want to get into the reasons why we want to conserve our phone numbers because it is beyond the point. But if like us you want to live overseas while keeping your US phone number, know it is pretty simple to accomplish, in exchange of a small fee. Read on for the details.

How to adjust the intensity of bright colors on iPhone and iPad

Since iOS 7.1, Apple's mobile operating system has included a feature that allows you to manually adjust the display's white point to your liking. A white point, also known as reference white or target white, defines the color white in reproduction.

Lowering the white point makes bright colors on your iPhone, iPad or iPod touch's screen more intense. Conversely, increasing the white point reduces the intensity of bright colors, thereby helping extend the run time of your iPhone or iPad.

The ability to manually adjust the white point so that it matches a white surface in your room is particularly handy for owners of devices that lack Apple's True Tone display technology.

How to adjust the intensity of bright colors on iPhone and iPad

1) Launch the Settings app on your device.

2) Tap Accessibility.

3) Tap Display & Text Size underneath the Vision heading.

4) Slide the button labeled Reduce White Point to the ON position.

5) Now drag the slider underneath the button to the right to make bright colors less intense or move it to the left to lower the white point, which will make bright colors more intense.

Reducing the intensity of the screen's battery-hogging backlight by increasing the white point is one of the nearly dozen proven ways to save battery life on iPhone and iPad.

TIP: To get to this feature faster, set it as a triple-click Home button action in Settings → General → Accessibility → Accessibility Shortcut.

Again, don't confuse Reduce White Point with the True Tone feature.

True Tone ≠ Reduce White Point

What exactly is the difference between True Tone and Reduce White Point?

True Tone is Apple's display technology currently found on iPad Pro models which changes the white point of the display on the fly while simultaneously adjusting brightness in order to compensate for the lighting in the environment

The Reduce White Point option does not take advantage of the ambient light sensors in your device like True Tone does. As a result, you cannot tell your device to adjust the white point of its display dynamically to match the current lighting conditions in a room.

Put simply, should lighting conditions change you'll need to repeat these steps to manually recalibrate the intensity of bright colors for the current ambient lighting.

Have you ever wanted to set the screen brightness on your iOS device below the normal threshold? If so, the Low Light filter in your Zoom accessibility settings is your friend.

Need help? Ask iDB!

If you like this how-to, pass it along to your support folks and leave a comment below.

Got stuck? Not sure how to do certain things on your Apple device? Let us know via help@iDownloadBlog.com and a future tutorial might provide a solution.

Submit your how-to suggestions via tips@iDownloadBlog.com.

How to use Control Center without 3D Touch

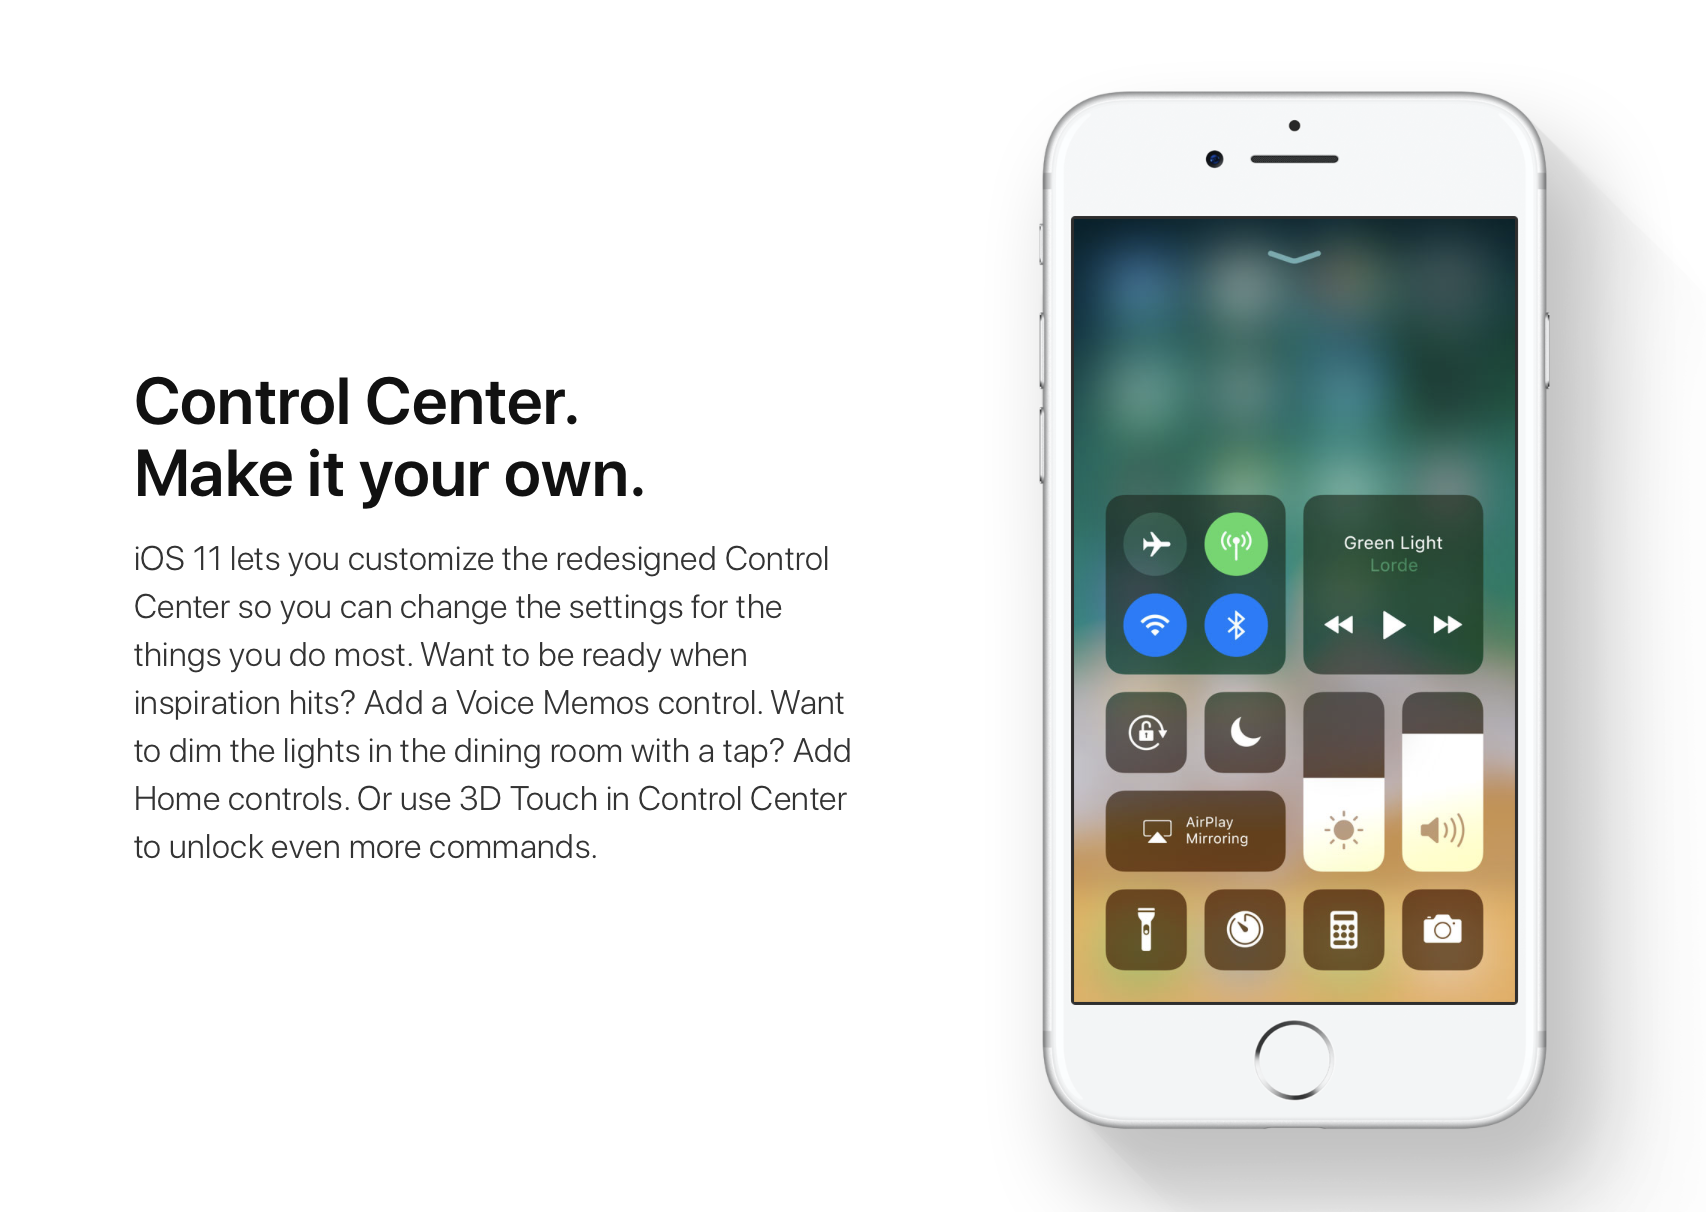
iOS 11 offers more customization for Control Center than ever, allowing you to make it your own by disabling toggles you rarely use. If puts frequently used controls all on one page, many of which can be expanded to reveal additional options when pressed with 3D Touch.

For instance, you can press the Home toggle lightly to bring up your HomeKit scenes, press the Now Playing toggle with 3D Touch to expand media controls, press the Apple TV Remote toggle to navigate your Apple TV or type some text into it, and much, much more.

So far, so great. But what if your device lacks 3D Touch?

Unlike prior iOS editions that didn't provide a fallback mechanism for 3D Touch interactions on non-3D Touch devices, iOS 11 allows you to use all of the features the redesigned Control Center has to offer without having to own a 3D Touch device.

Our resident video editor Andrew O'Hara details how iOS 11's Control Center works on devices that don't include 3D Touch features, like iPads and iPhone 6 and older models.

https://www.youtube.com/watch?v=cpSoo5_TqIQ

Subscribe to iDownloadBlog on YouTube.

Continue reading for step-by-step instructions on using Control Center without 3D Touch

How to use Control Center without 3D Touch

1) Access Control Center by swiping up from the bottom of the screen

TIP: Enable Access Within Apps in Settings → Control Center to have your device respond to that gesture when you're using an app.

2) Tap and hold on the control to expand it.

In Andrew's example, he long-taps the Brightness toggle to access controls for turning Night Shift on or off. You can long-tap other Control Center items that are expandable. For example, long-tapping the Volume control enlarges the slider as if you pressed it with 3D Touch.

iPad lacks Taptic Engine so you won't feel haptic feedback when long-tapping.

That's it, boys and girls, now you know how to interact with Control Center on iOS 11 without actuating having to have a 3D Touch device. This tip should be especially useful for iPad owners as Apple's tablets lacks 3D Touch features.

TUTORIAL: How to force-quite iPad apps on iOS 11

Don't forget you can selectively enable or disable nearly two-dozen different toggles and change the order in which they appear in Control Center under Settings → Control Center → Customize Controls, including new system toggles and features like Screen Recording, Voice Memos, Low Power Mode, Apple TV Remote, Accessibility Shortcuts and more.

To lear more about iOS 11's Control Center, watch another walkthrough video below.

https://www.youtube.com/watch?v=UGWjmt6UXJI

Aside from drag and drop, iOS 11 brings five different types of tap gestures, including a longer tap to move multiple apps on the Home screen, a special half-long tap to pull up an extra Dock menu and a long-tap in the notifications overlay to access additional options.

Need help? Ask iDB!

If you like this how-to, pass it along to your support folks and leave a comment below.

Got stuck? Not sure how to do certain things on your Apple device? Let us know via help@iDownloadBlog.com and a future tutorial might provide a solution.

Submit your how-to suggestions via tips@iDownloadBlog.com.

How to stop iCloud Photo Library from eating into your iPhone’s cellular data plan

iCloud Photo Library is an optional feature on iPhone, iPad, iPod touch and Mac that uploads every photo and video you take or import to iCloud and keeps everything synchronized across all your Apple gear. I've been using it for years and it really “just works”.

On iOS 10 and earlier, Photos syncs with iCloud each time your device connects to Wi-Fi and the battery is charged. On iOS 11 and later, Photos can also use your iPhone's cellular data connection to sync and update the image library.

Do you take many photos on the go? Are you on a metered rather than an unlimited plan? Then you don't need me to tell you that you must ensure you're not wasting huge amounts of cellular data to this feature.

Here's how to stop the Photos app from eating into your iPhone's cellular data plan.

Before we get to it, keep in mind the following:

iOS 10 and earlier—Your Photos library syncs with iCloud each time your device connects to Wi-Fi and the battery is charged. iOS 11 or later—You decide if Photos syncs with iCloud via cellular or Wi-Fi only.

In other words, you should double-check that cellular updates for iCloud Photo Library are turned off only if you're on iOS 11 or later. Folks on older iOS editions needn't do that because Photos syncs with iCloud only when their iPhone is connected to power and Wi-Fi.

How to stop iCloud Photo Library on iPhone from using cellular data

12-megapixel images and 4K videos captured on your iPhone take up quite a bit of storage space. For most people, there's no point allowing iOS to gobble up cellular data just to keep the image library synchronized with iCloud at all times.

Thankfully, you can prevent this from happening, and here's how:

1) Launch the Settings app on your iPhone or cellular iPad.

2) Tap Photos in the list.

3) Tap Cellular Data.

4) Slide the button labeled Cellular Data to the OFF position.

This device will no longer use your carrier's cellular data for updating the Photos library. Any changes to your image library will automatically upload to iCloud as soon as the device connects to power and Wi-Fi.

TIP: If you really need Photos to be in perfect sync with iCloud at all times, even on the go, via cellular and Wi-Fi, be sure to slide the toggle labeled Unlimited Updates to the ON position.

The feature's description says “unlimited updates may cause you to excess your quota“.

Need help? Ask iDB!

If you like this how-to, pass it along to your support folks and leave a comment below.

Got stuck? Not sure how to do certain things on your Apple device? Let us know via help@iDownloadBlog.com and a future tutorial might provide a solution.

Submit your how-to suggestions via tips@iDownloadBlog.com.