If you’re going to walk away from your Mac for a minute, you might want to start your screen saver. You may not want to lock your computer or put it to sleep but just display your screen saver instead.
There are three quick and easy ways to create a shortcut to start your screen saver, and we’ll walk you through each one.
Create a screensaver shortcut with Hot Corners
You can access your Hot Corners settings in a couple of spots in System Preferences. But for this, we’ll do it from the Screen Saver area.
So open System Preferences with the icon in your Dock or by clicking the Apple icon () > System Preferences from the menu bar. Then, follow these steps:
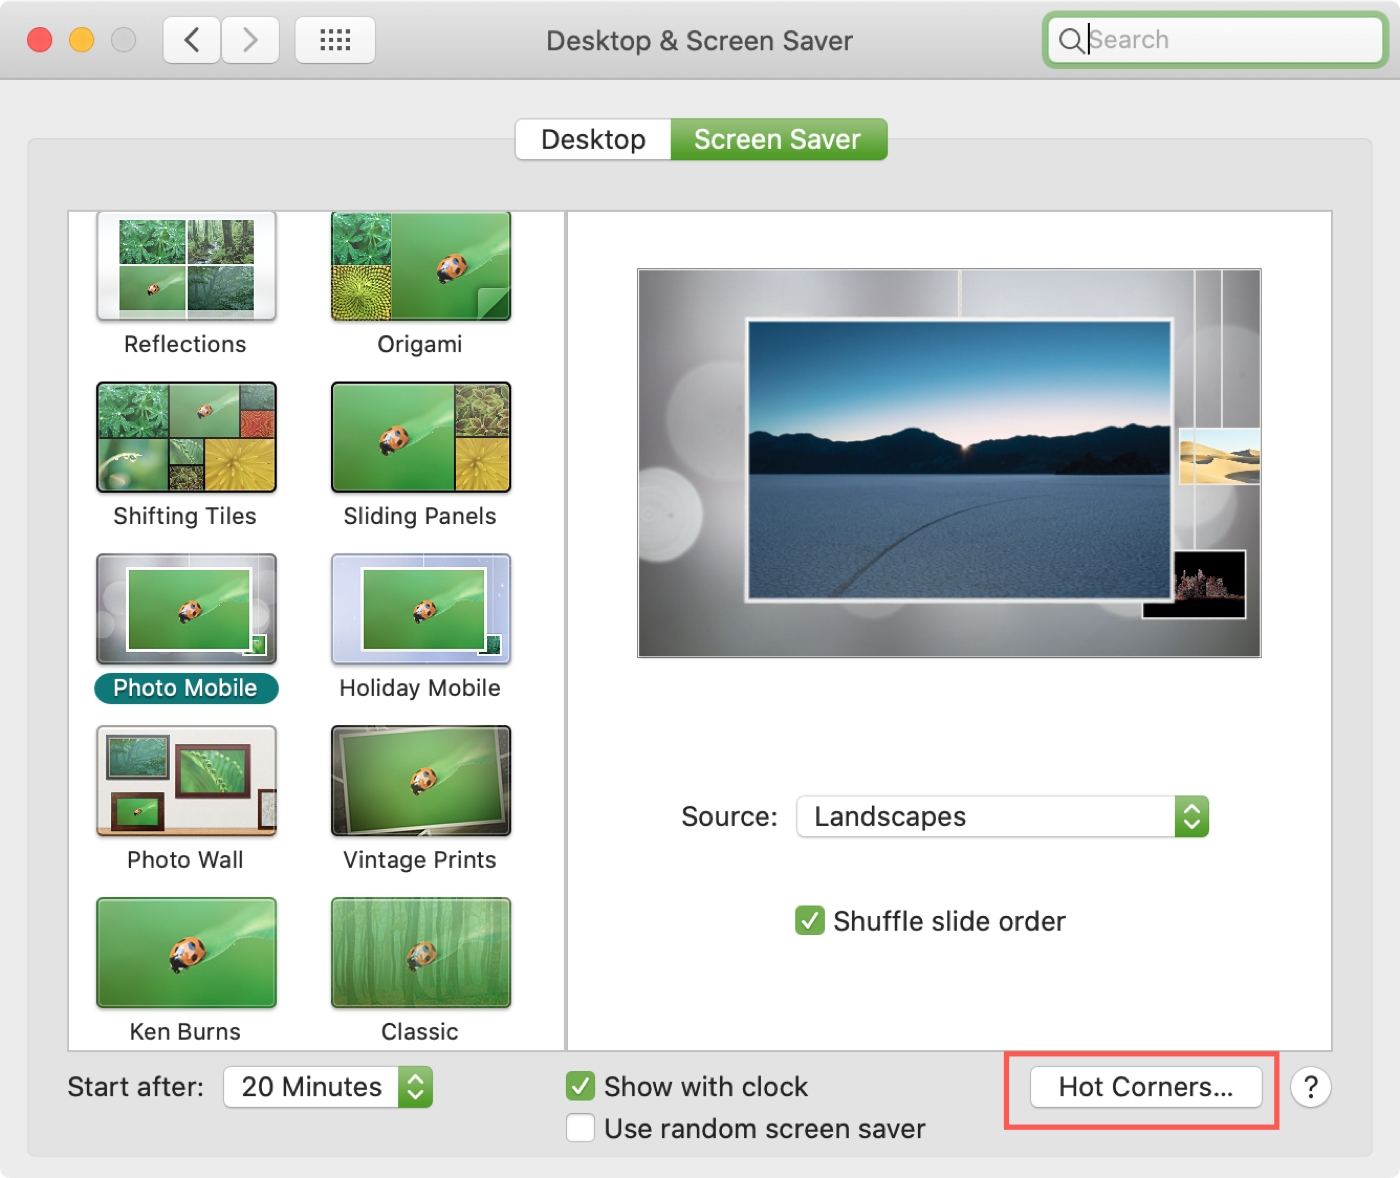
1) Select Desktop & Screen Saver.
2) Click the Screen Saver tab and then click the Hot Corners button.
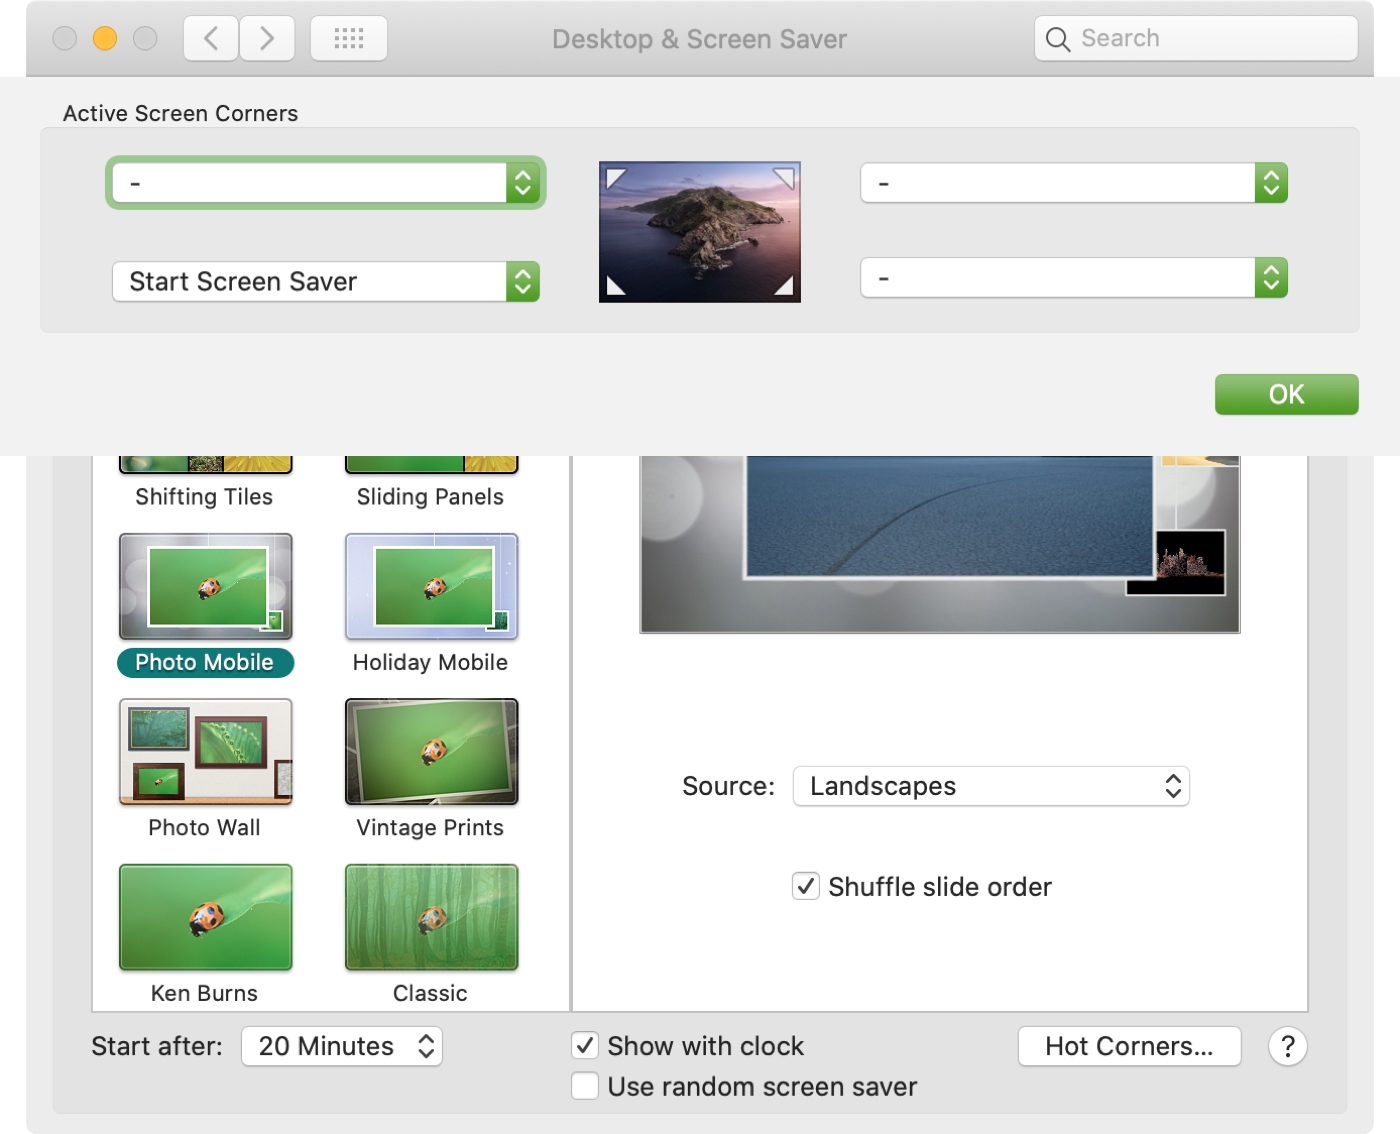
3) Choose which corner you’d like to use and in the drop-down menu for it, pick Start Screen Saver.
4) Click OK and then close the settings if you’d like.
Now test out the Hot Corner by moving your cursor to it. You should see your screen saver start right up.
Create a screensaver shortcut with a Dock icon
Another cool trick for starting your screen saver is with an icon in your Dock.
1) Click Go > Go to Folder from the Finder menu bar.
2) In the box, enter the following location and click Go.
/System/Library/CoreServices
3) When the folder opens, find ScreenSaverEngine and drag it to your Dock.
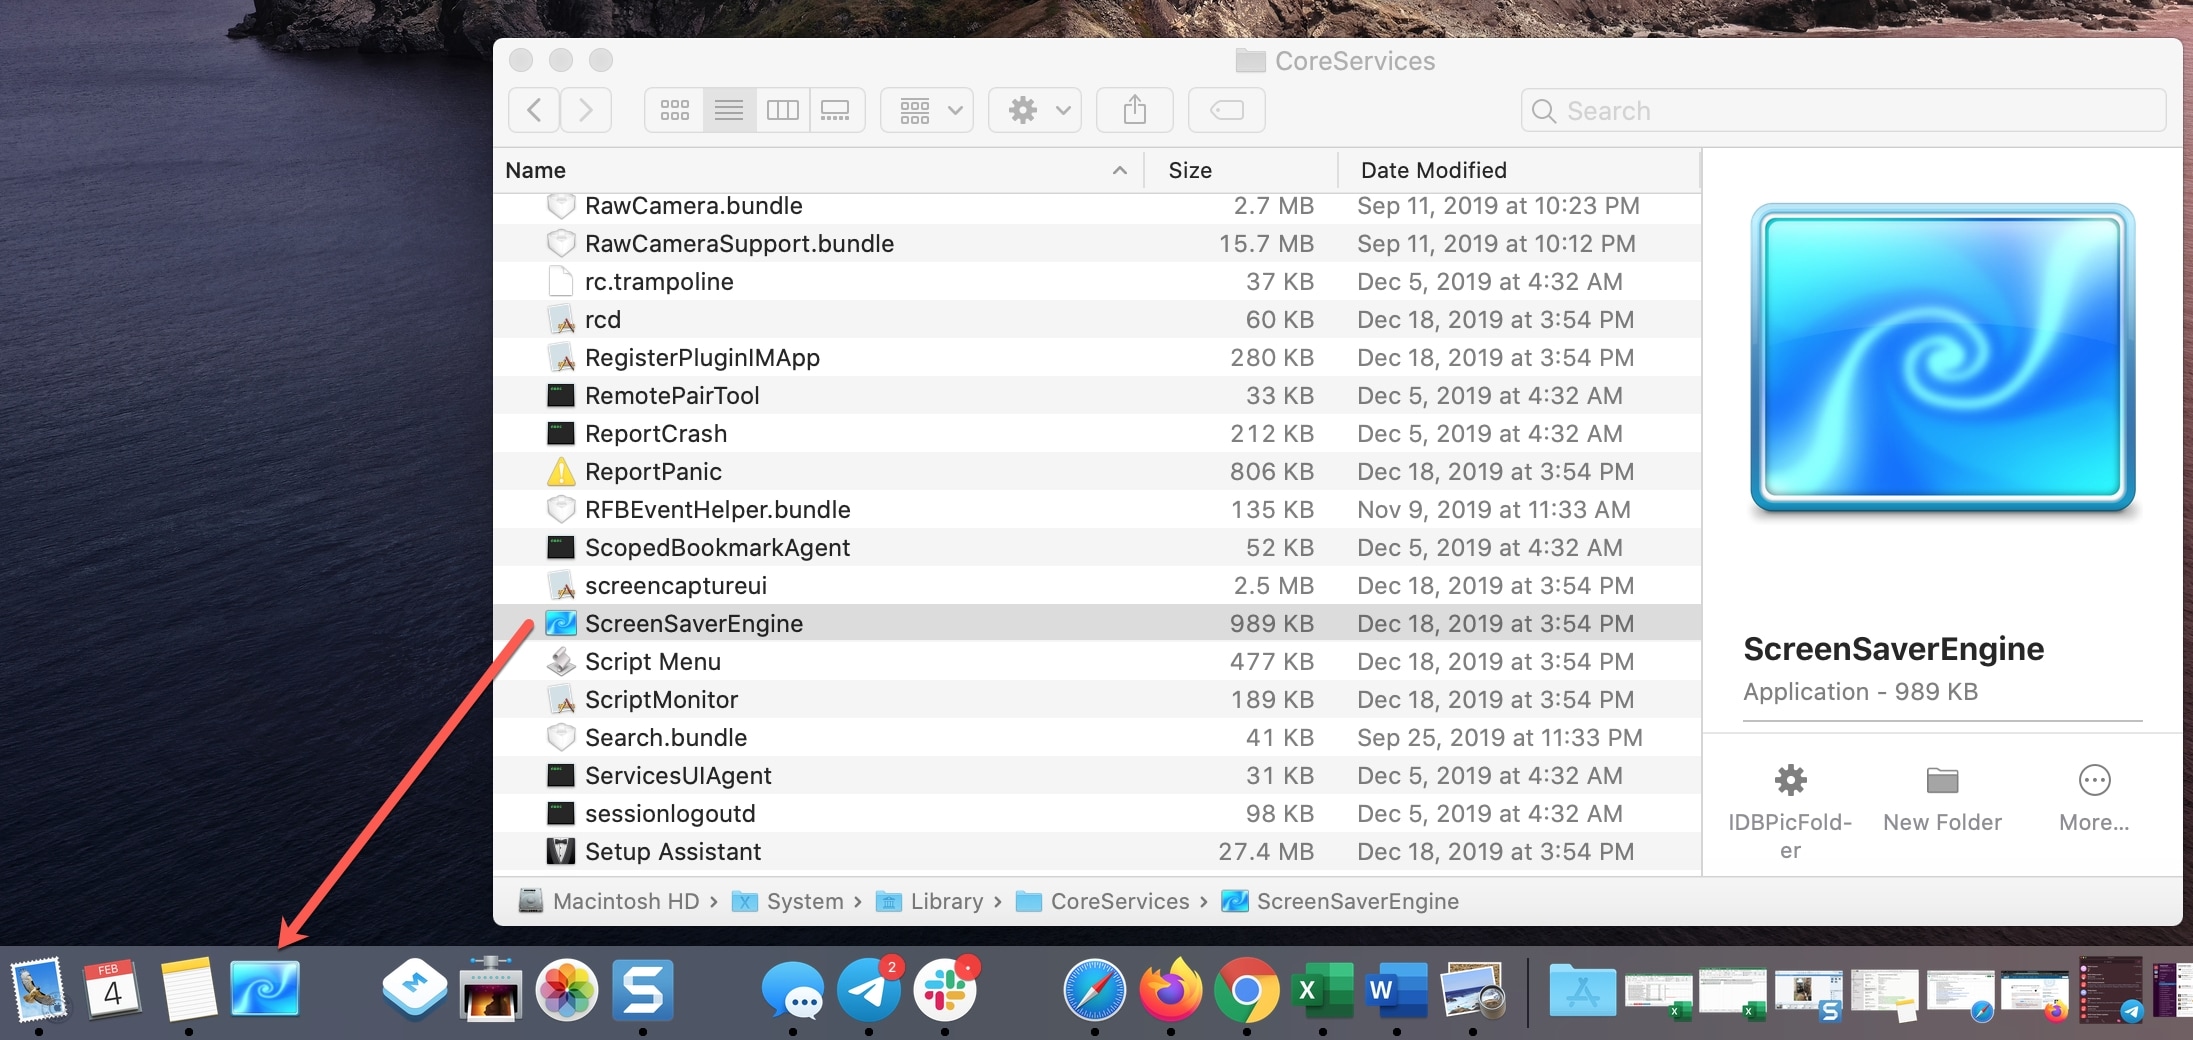
Click that icon you just added to your Dock, and your screen saver will pop right up!
Create a screensaver shortcut with your keyboard
If you prefer to use a keyboard shortcut to start your screen saver, you can do this by creating an Automator service. Even though this shortcut takes more time to set up, once you do, it’s there whenever you need it.
Create the service
1) Open Automator from the Applications folder in your Dock or with Spotlight.
2) Click New Document, pick Quick Action, and hit Choose.
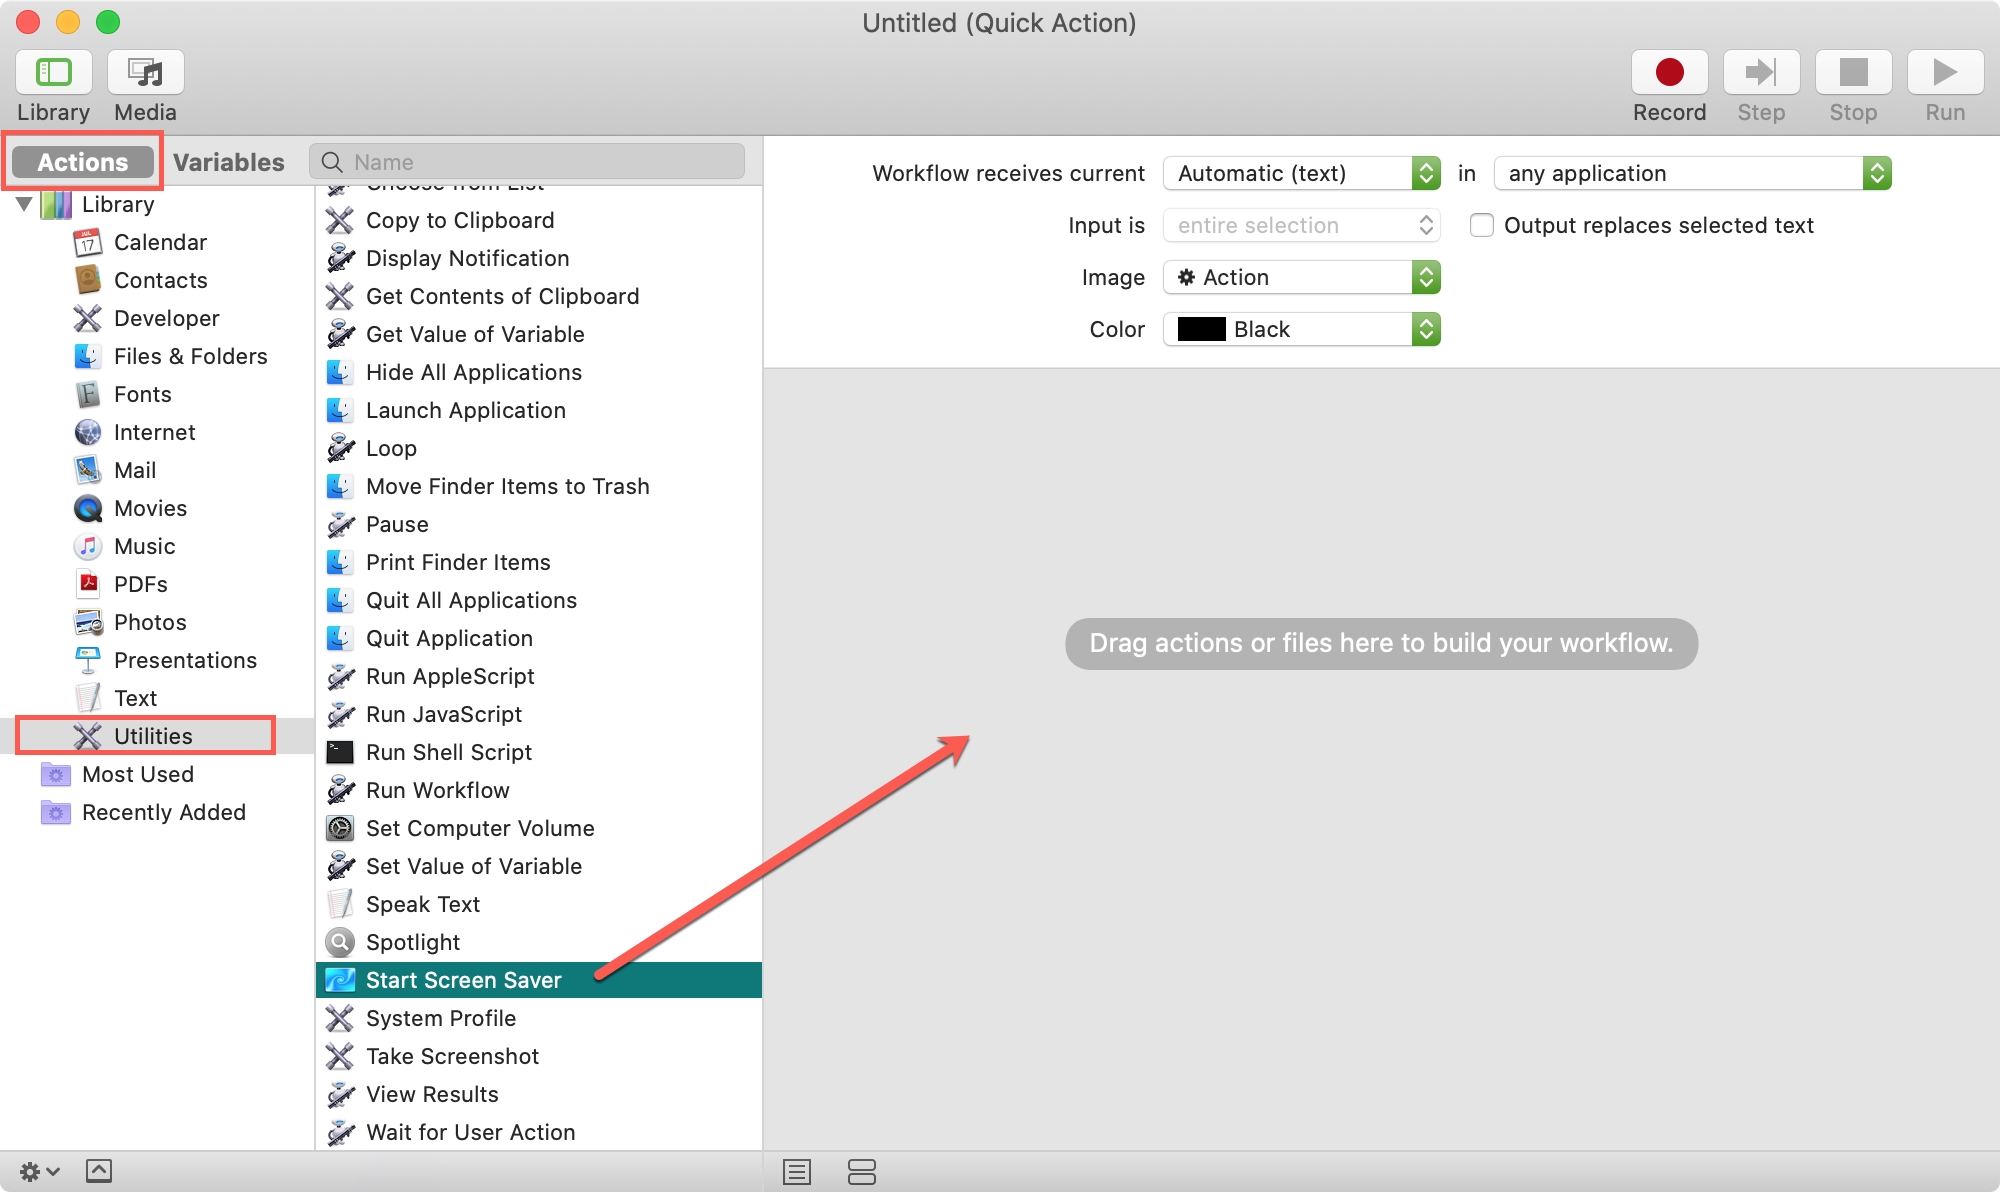
3) On the left, make sure Actions is selected at the top and click the Utilities item.
4) Directly to the right, find Start Screen Saver, and drag it to the Workflow window. You can leave the settings at the top of the Workflow window as-is with Workflow receives set to Automatic (Nothing).
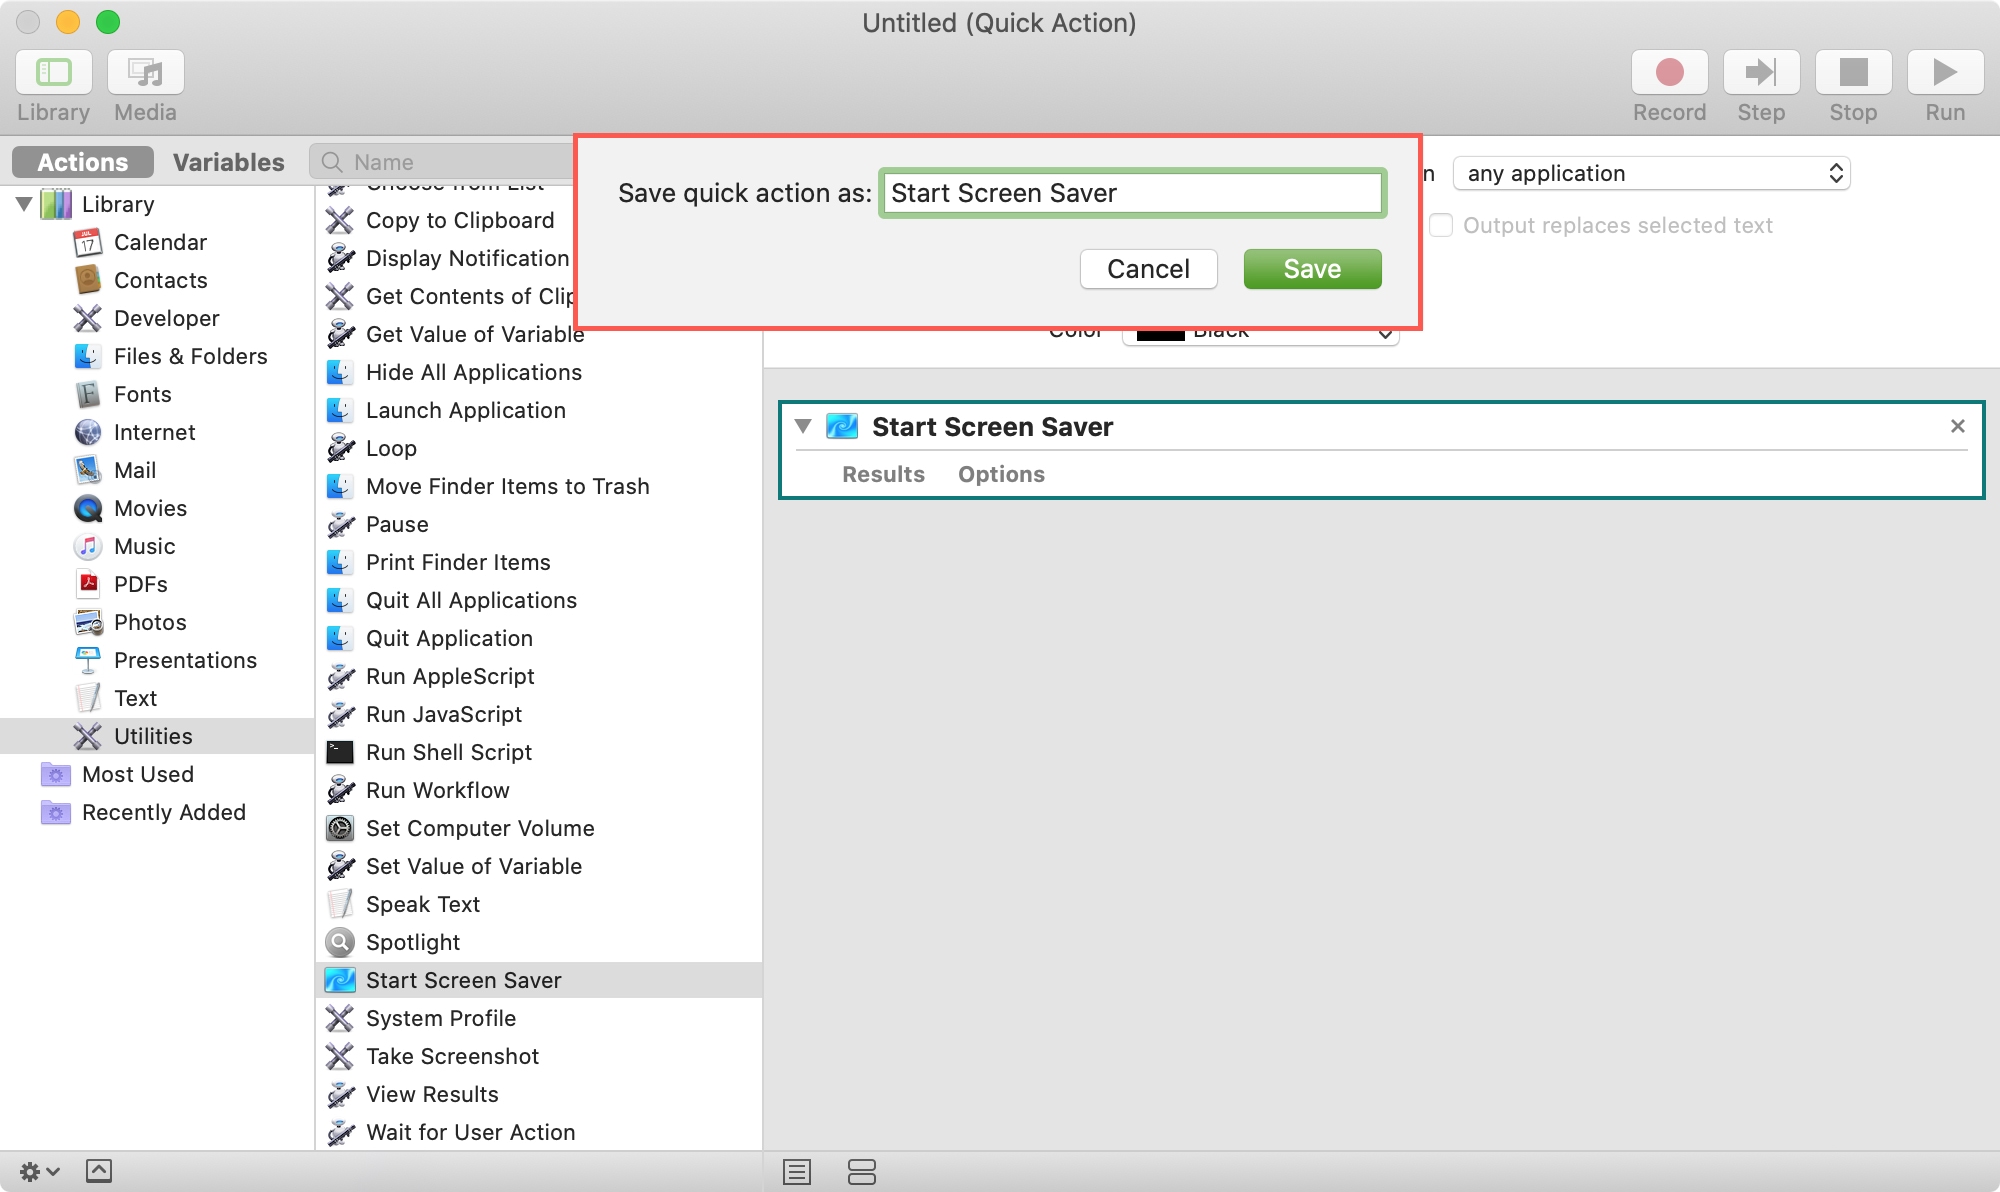
5) Click File > Save from the menu bar, give your workflow a name like “Start Screen Saver,” and hit Save.
Now that you’ve created the service or Quick Action, you’ll set up the keyboard shortcut for it.
Add the keyboard shortcut
1) Open your System Preferences with the icon your Dock or Apple icon > System Preferences from the menu bar.
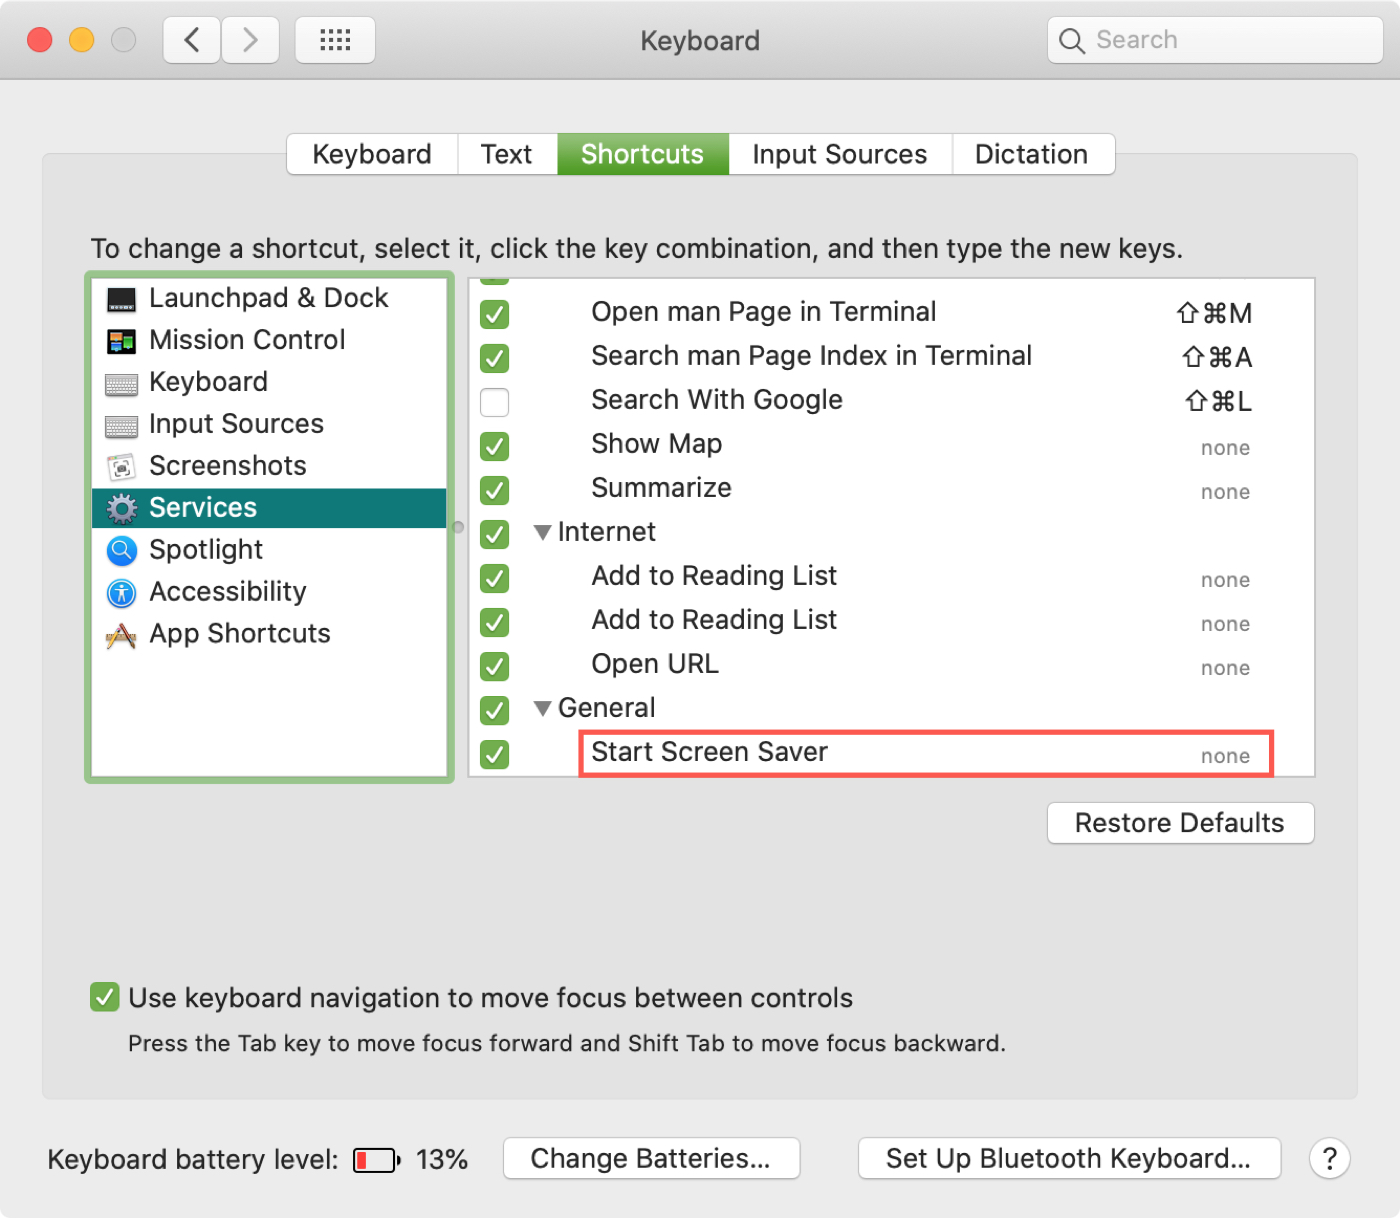
2) Select Keyboard and click the Shortcuts tab.
3) On the left, pick Services.
4) On the right, under General, you should see the name of the Quick Action you just created. Make sure that the service is checked. Then, click to the right of the name where it says None and enter the keyboard combination you want to use.
Note: If you pick a keyboard shortcut that’s already in use, the combination will not apply, so you’ll need to choose a different one.

You can close the System Preferences and try out your new keyboard shortcut.
With these easy ways to start the screen saver on your Mac, surely one of them is just what you’ve been looking for. Whether it’s a Hot Corner, Dock icon, or keyboard shortcut, which one will you set up? Let us know in the comments below.
Other related tips: