In this step-by-step tutorial, we’ll show you how to add a trusted phone number to your Apple Account for two-factor authentication (2FA) purposes. These steps will also help if you want to remove an existing phone number and stop it from receiving 2FA login codes.
Most active Apple Accounts have two-factor authentication turned on. This adds an extra level of security and helps keep your Apple ID, iCloud, and all its cloud data safe.
With two-factor authentication activated on your Apple Account, you’ll need to verify with a code sent to your trusted Apple devices or your phone number every time you want to log in to your Apple Account or iCloud on a new device or web browser.
This 2FA code is asked for after you enter the correct Apple Account email address and password. As a result, in the rare event that someone knows your account password because you disclosed it unknowingly, or it appeared in a password breach, the two-factor authentication will still block the unauthorized person from logging in to your Apple account.
Two-factor codes are not automatically sent to your mobile number because there is a better and safer way to do so than SMS: every time you try to log in from a new device, the 2FA code is sent to your trusted Apple devices, like iPhone, iPad, Mac, and Apple Watch.
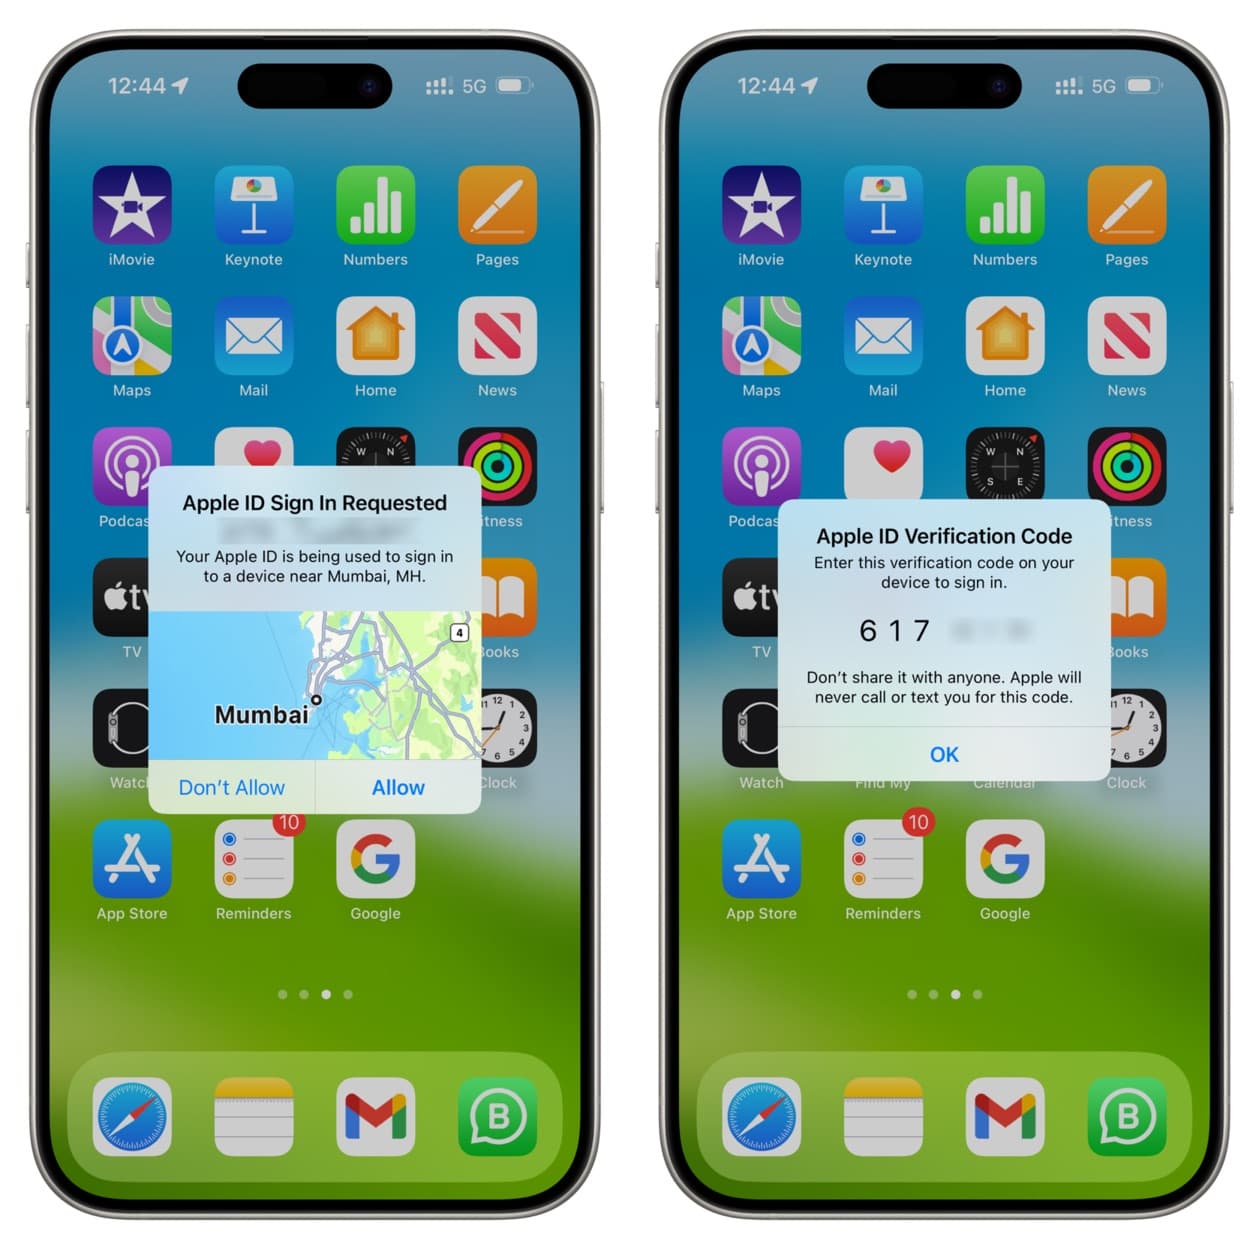
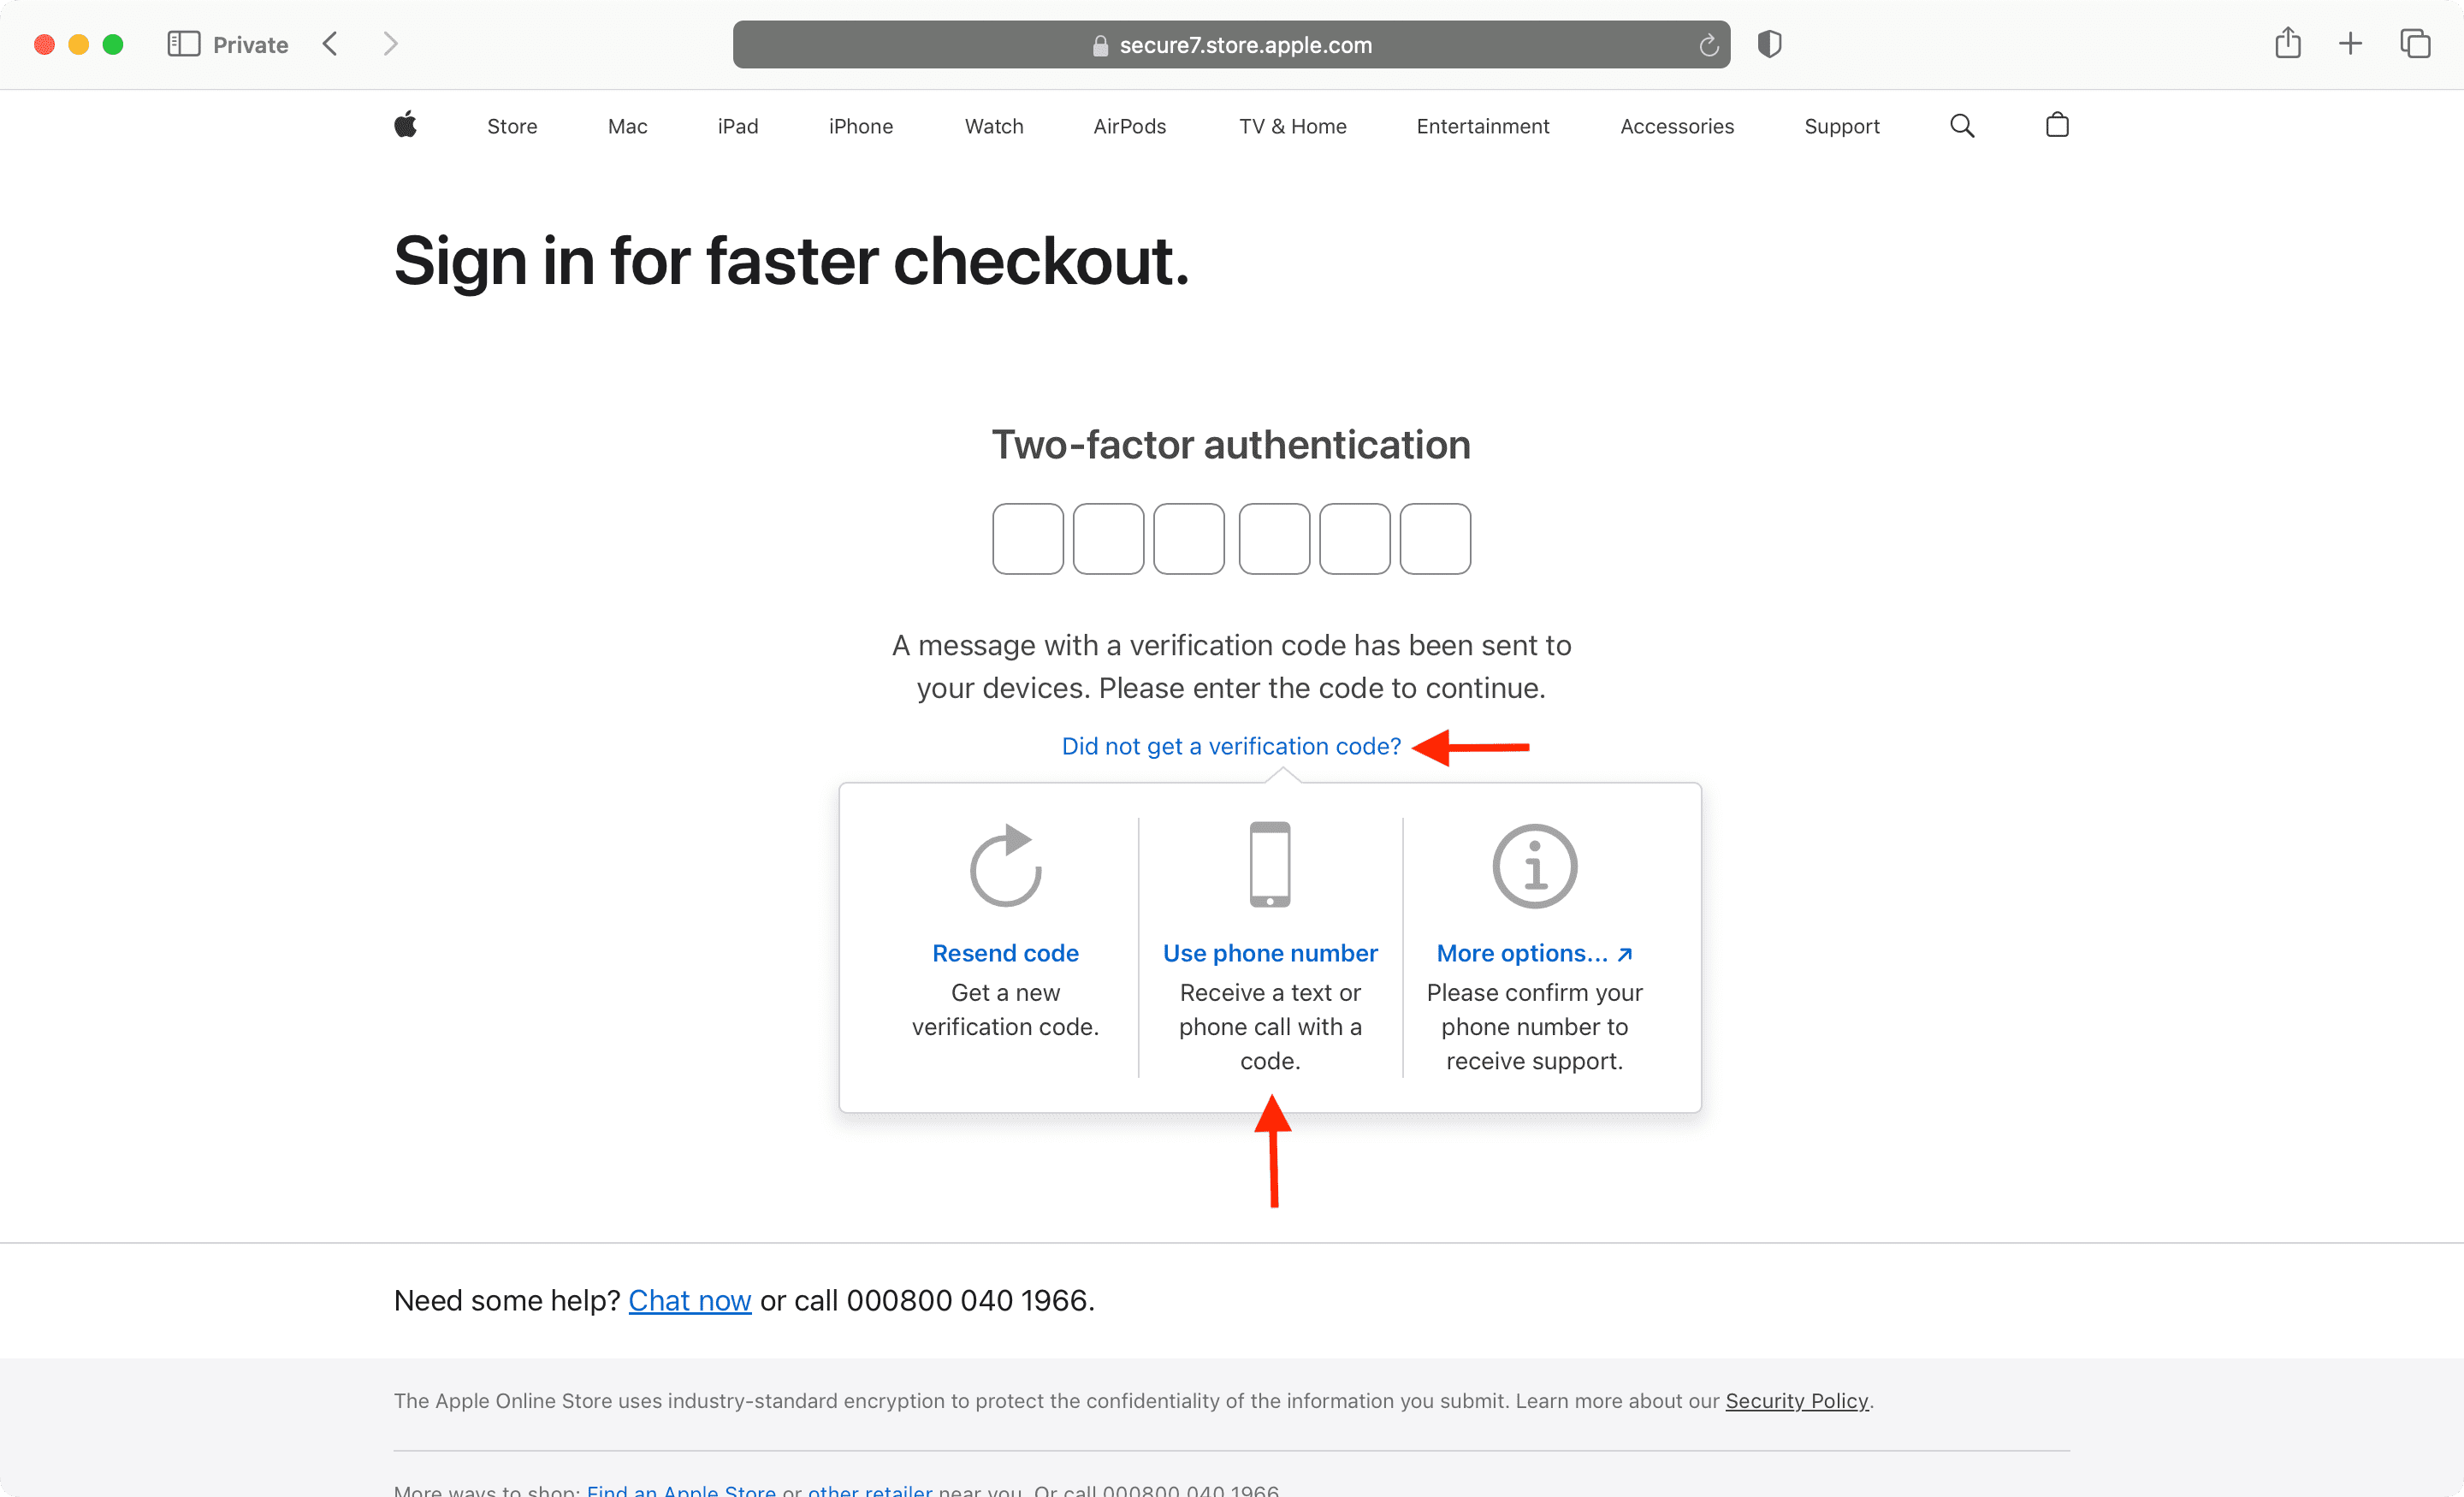
However, if you cannot receive the sign-in two-factor code on your trusted device for some reason, then the sign-in code is sent to your trusted mobile number. All you have to do is tap “Did not get a verification code?” and select “Use phone number” to get the code via text message or call.
You must have at least one phone number added as backup for two-factor authentication.
But Apple advises you to consider verifying more than one phone number, such as a home phone or a number used by a family member or close friend. You can use these to sign in if you can’t access your own mobile number.
Add or remove phone number for Apple Account two-factor authentication
1) Open the Settings app on your iPhone or iPad and tap your Apple Account name at the top.
2) Tap Sign-In & Security > Two-Factor Authentication. You’ll see all your trusted Apple devices and trusted phone numbers (if any) listed here.

Follow the remaining steps to add a new number or remove an existing one.
To add a new phone number:
- Tap Add a Trusted Phone Number and enter your device passcode. Note that if you use Stolen Device Protection, authenticate, start a one-hour security delay if prompted, then return to follow these steps after an hour.
- Make sure the correct country is selected, and type the phone number you want to add for two-factor authentication. Then, choose to verify the number using text message (SMS) or phone call, and hit Continue.
- Enter the code you receive on your phone number to add this new number to your Apple Account for two-factor authentication.

To remove an existing phone number:
- Tap the phone number added to your account.
- Tap Remove from Account and confirm.

2FA and SMS security
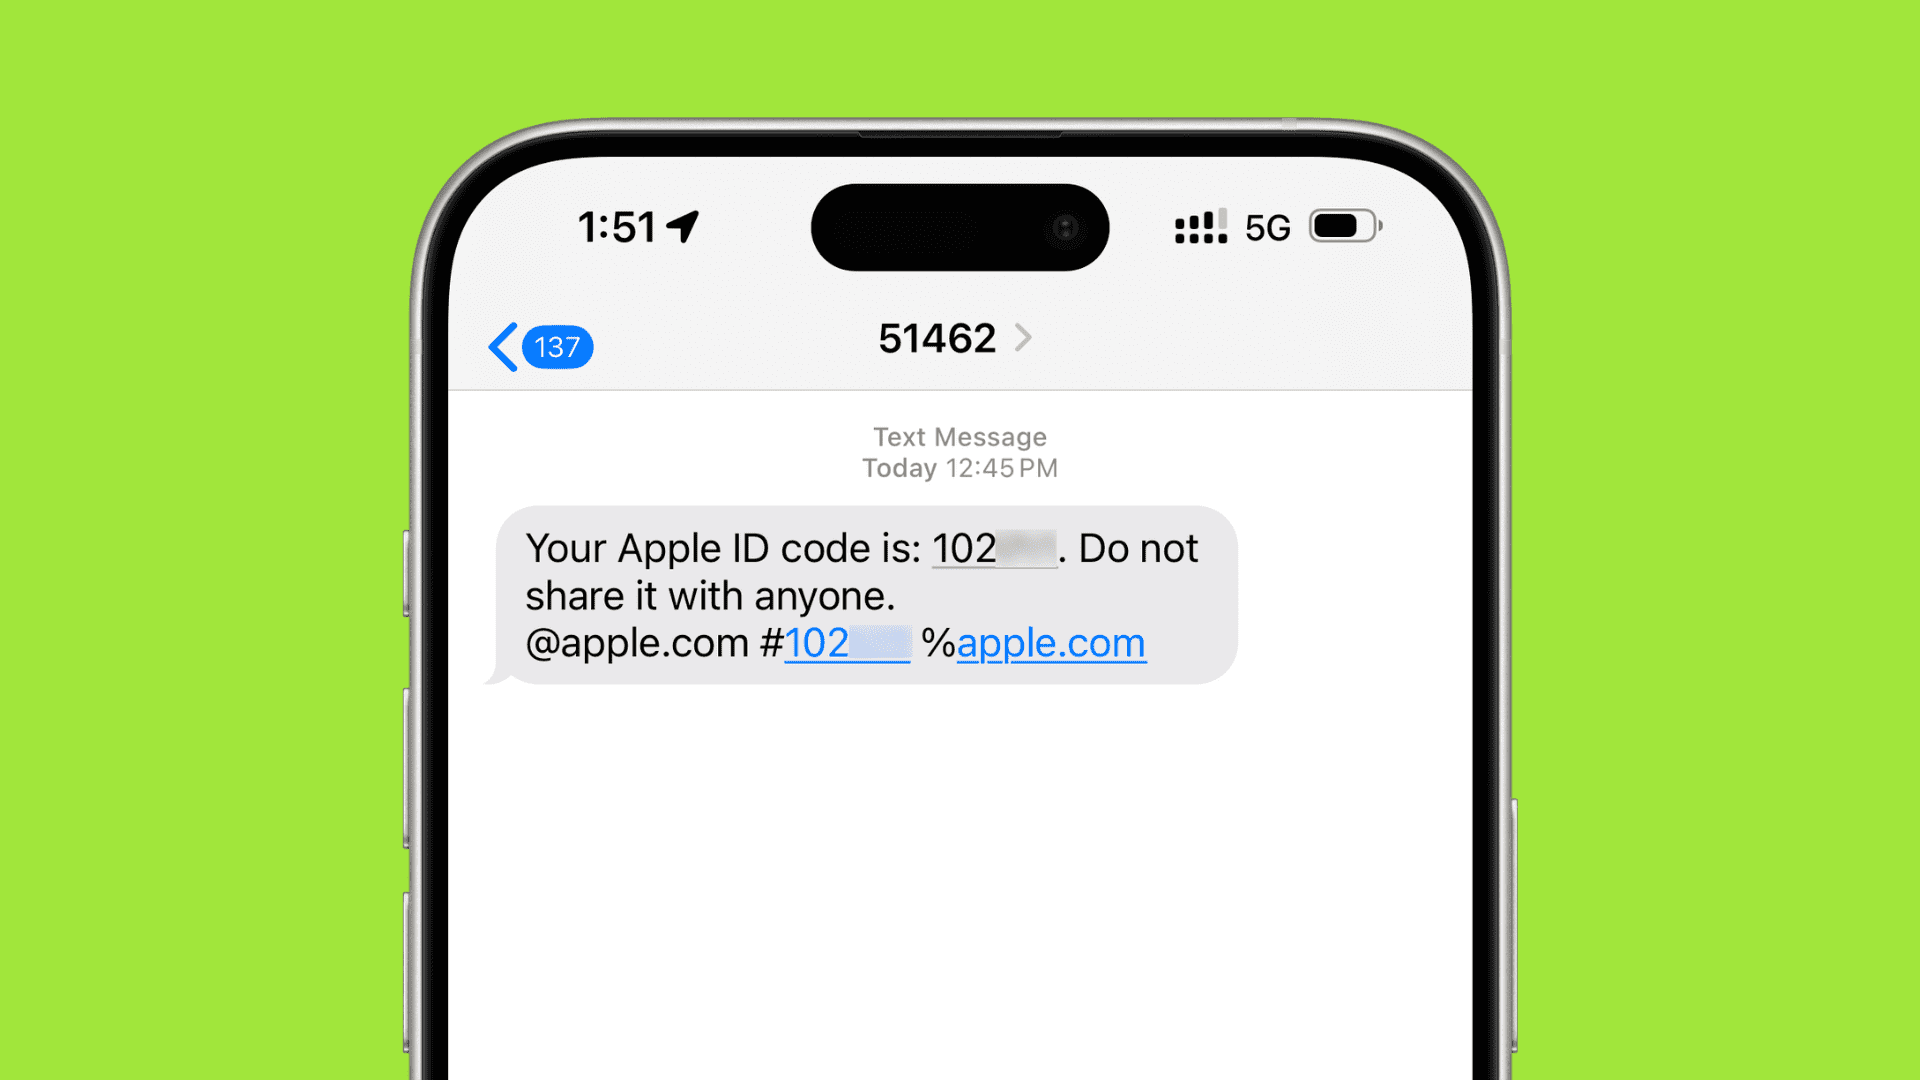
Unless all of your trusted devices are unavailable or offline, you’re advised to avoid having your 2FA verification code sent to your phone number via SMS or automated phone call. That’s because sending security codes via text messages has been proven vulnerable to hijacking and spoofing attacks stemming from social engineering.
“SMS is just not the best way to do this,” warns security researcher and forensics expert Jonathan Zdziarski. “It’s depending on your mobile phone as a means of authentication in a way that can be socially engineered out of your control.”
SMS is the weakest link in two-step logins. For instance, a rogue party might call up your carrier and impersonate you to convince support to redirect your text messages to their SIM card.
Zdziarski explains:
SMS has turned that ‘something you have’ into ‘something they sent you.’ If that transaction is happening, it can be intercepted. And that means you’re potentially at some level of risk.
Besides, various authoritarian governments might be tempted to hijack the SMS messages that a political dissident might need to verify their identity with Apple’s 2FA system.
Also, check out: