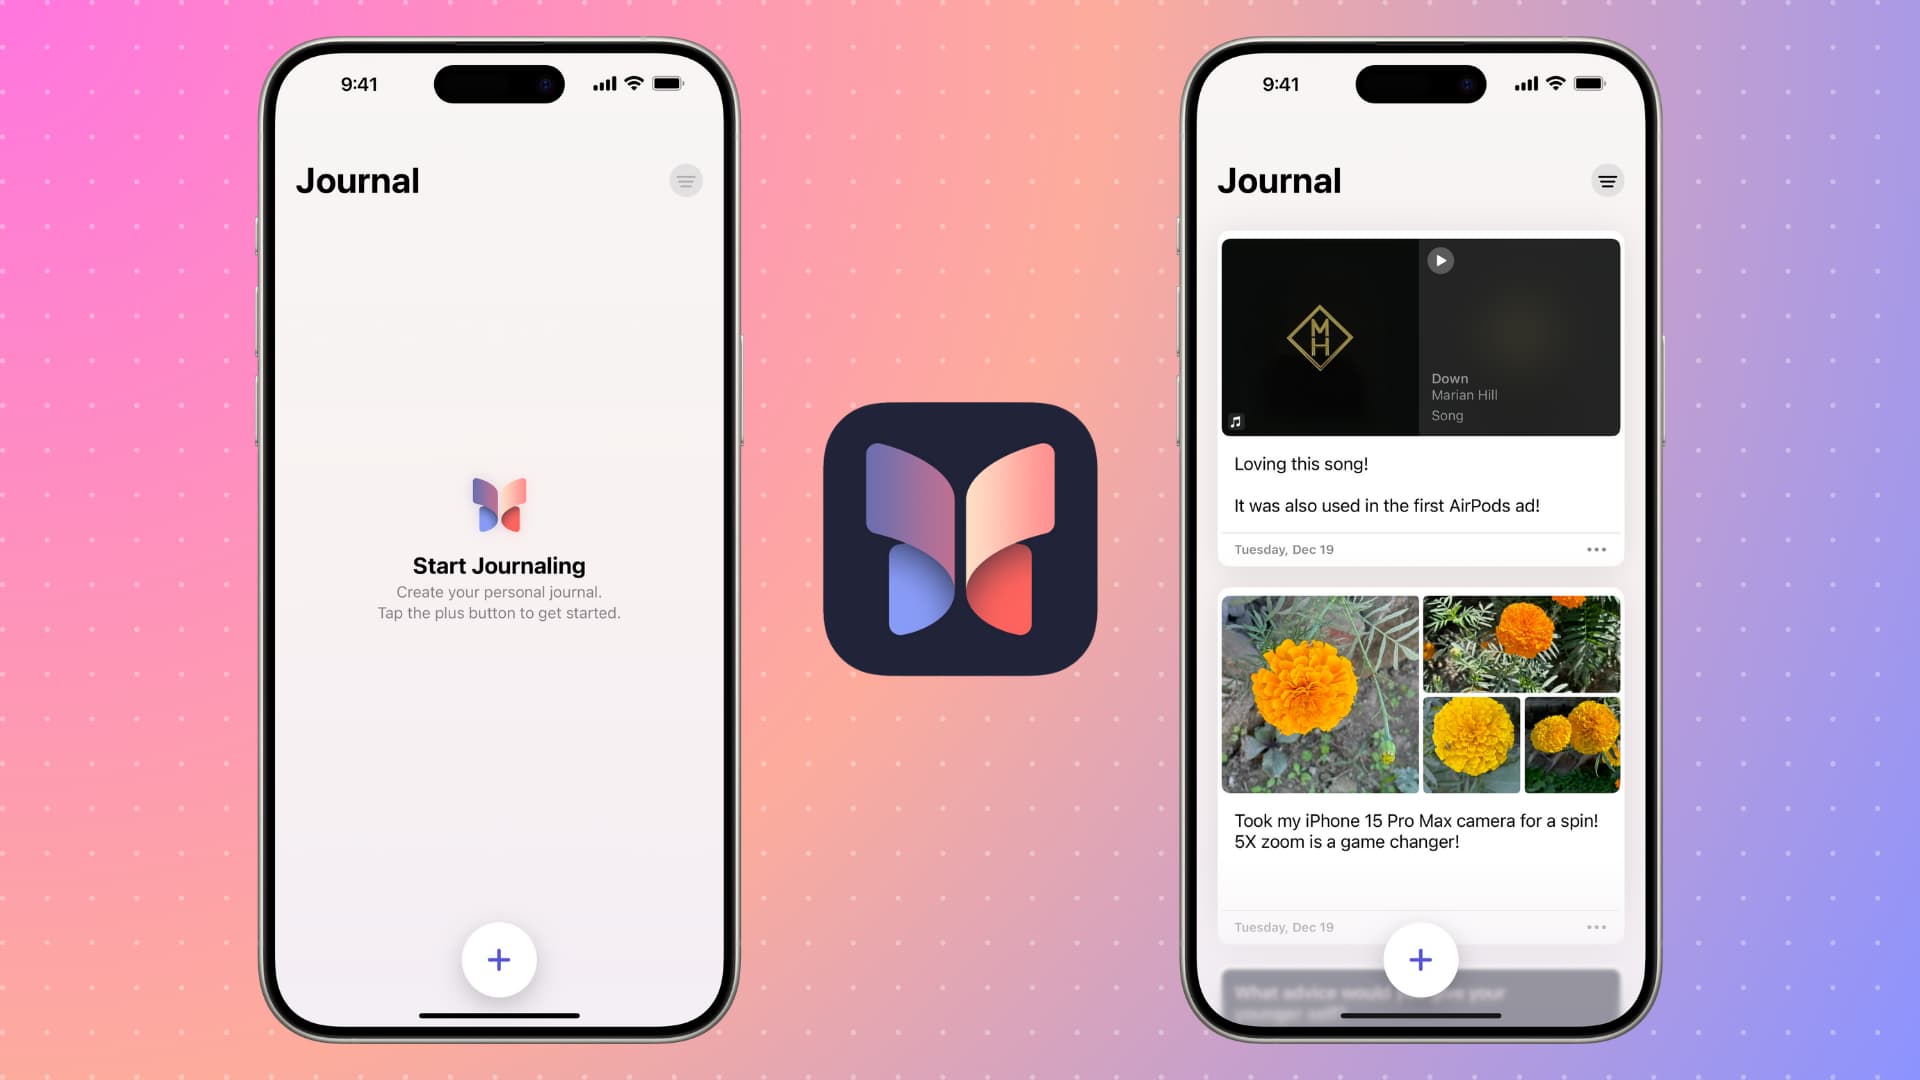
In this tutorial, we will tell you everything you need to know about using Apple’s Journal app on your iPhone. Learn how to make diary entries and preserve memories that you can revisit in the future and reminisce about those special moments.
The App Store is full of great journaling apps for iOS and Mac. And now, Apple has also joined the party by introducing its own Journal app (and Journaling Suggestions framework that third-party developers can add to their apps).
Get the Journal app
You will automatically get Apple’s Journal app after you update your iPhone to iOS 17.2 or later. In case you have deleted the app, you can redownload it from the App Store.
The Journal app is not yet available for iPad or Mac. A future update may bring it to these platforms.
Tip: If you want to have a uniform journaling experience, you can try the Day One app, which is available on all major platforms, including Android.
Set up the Journal app
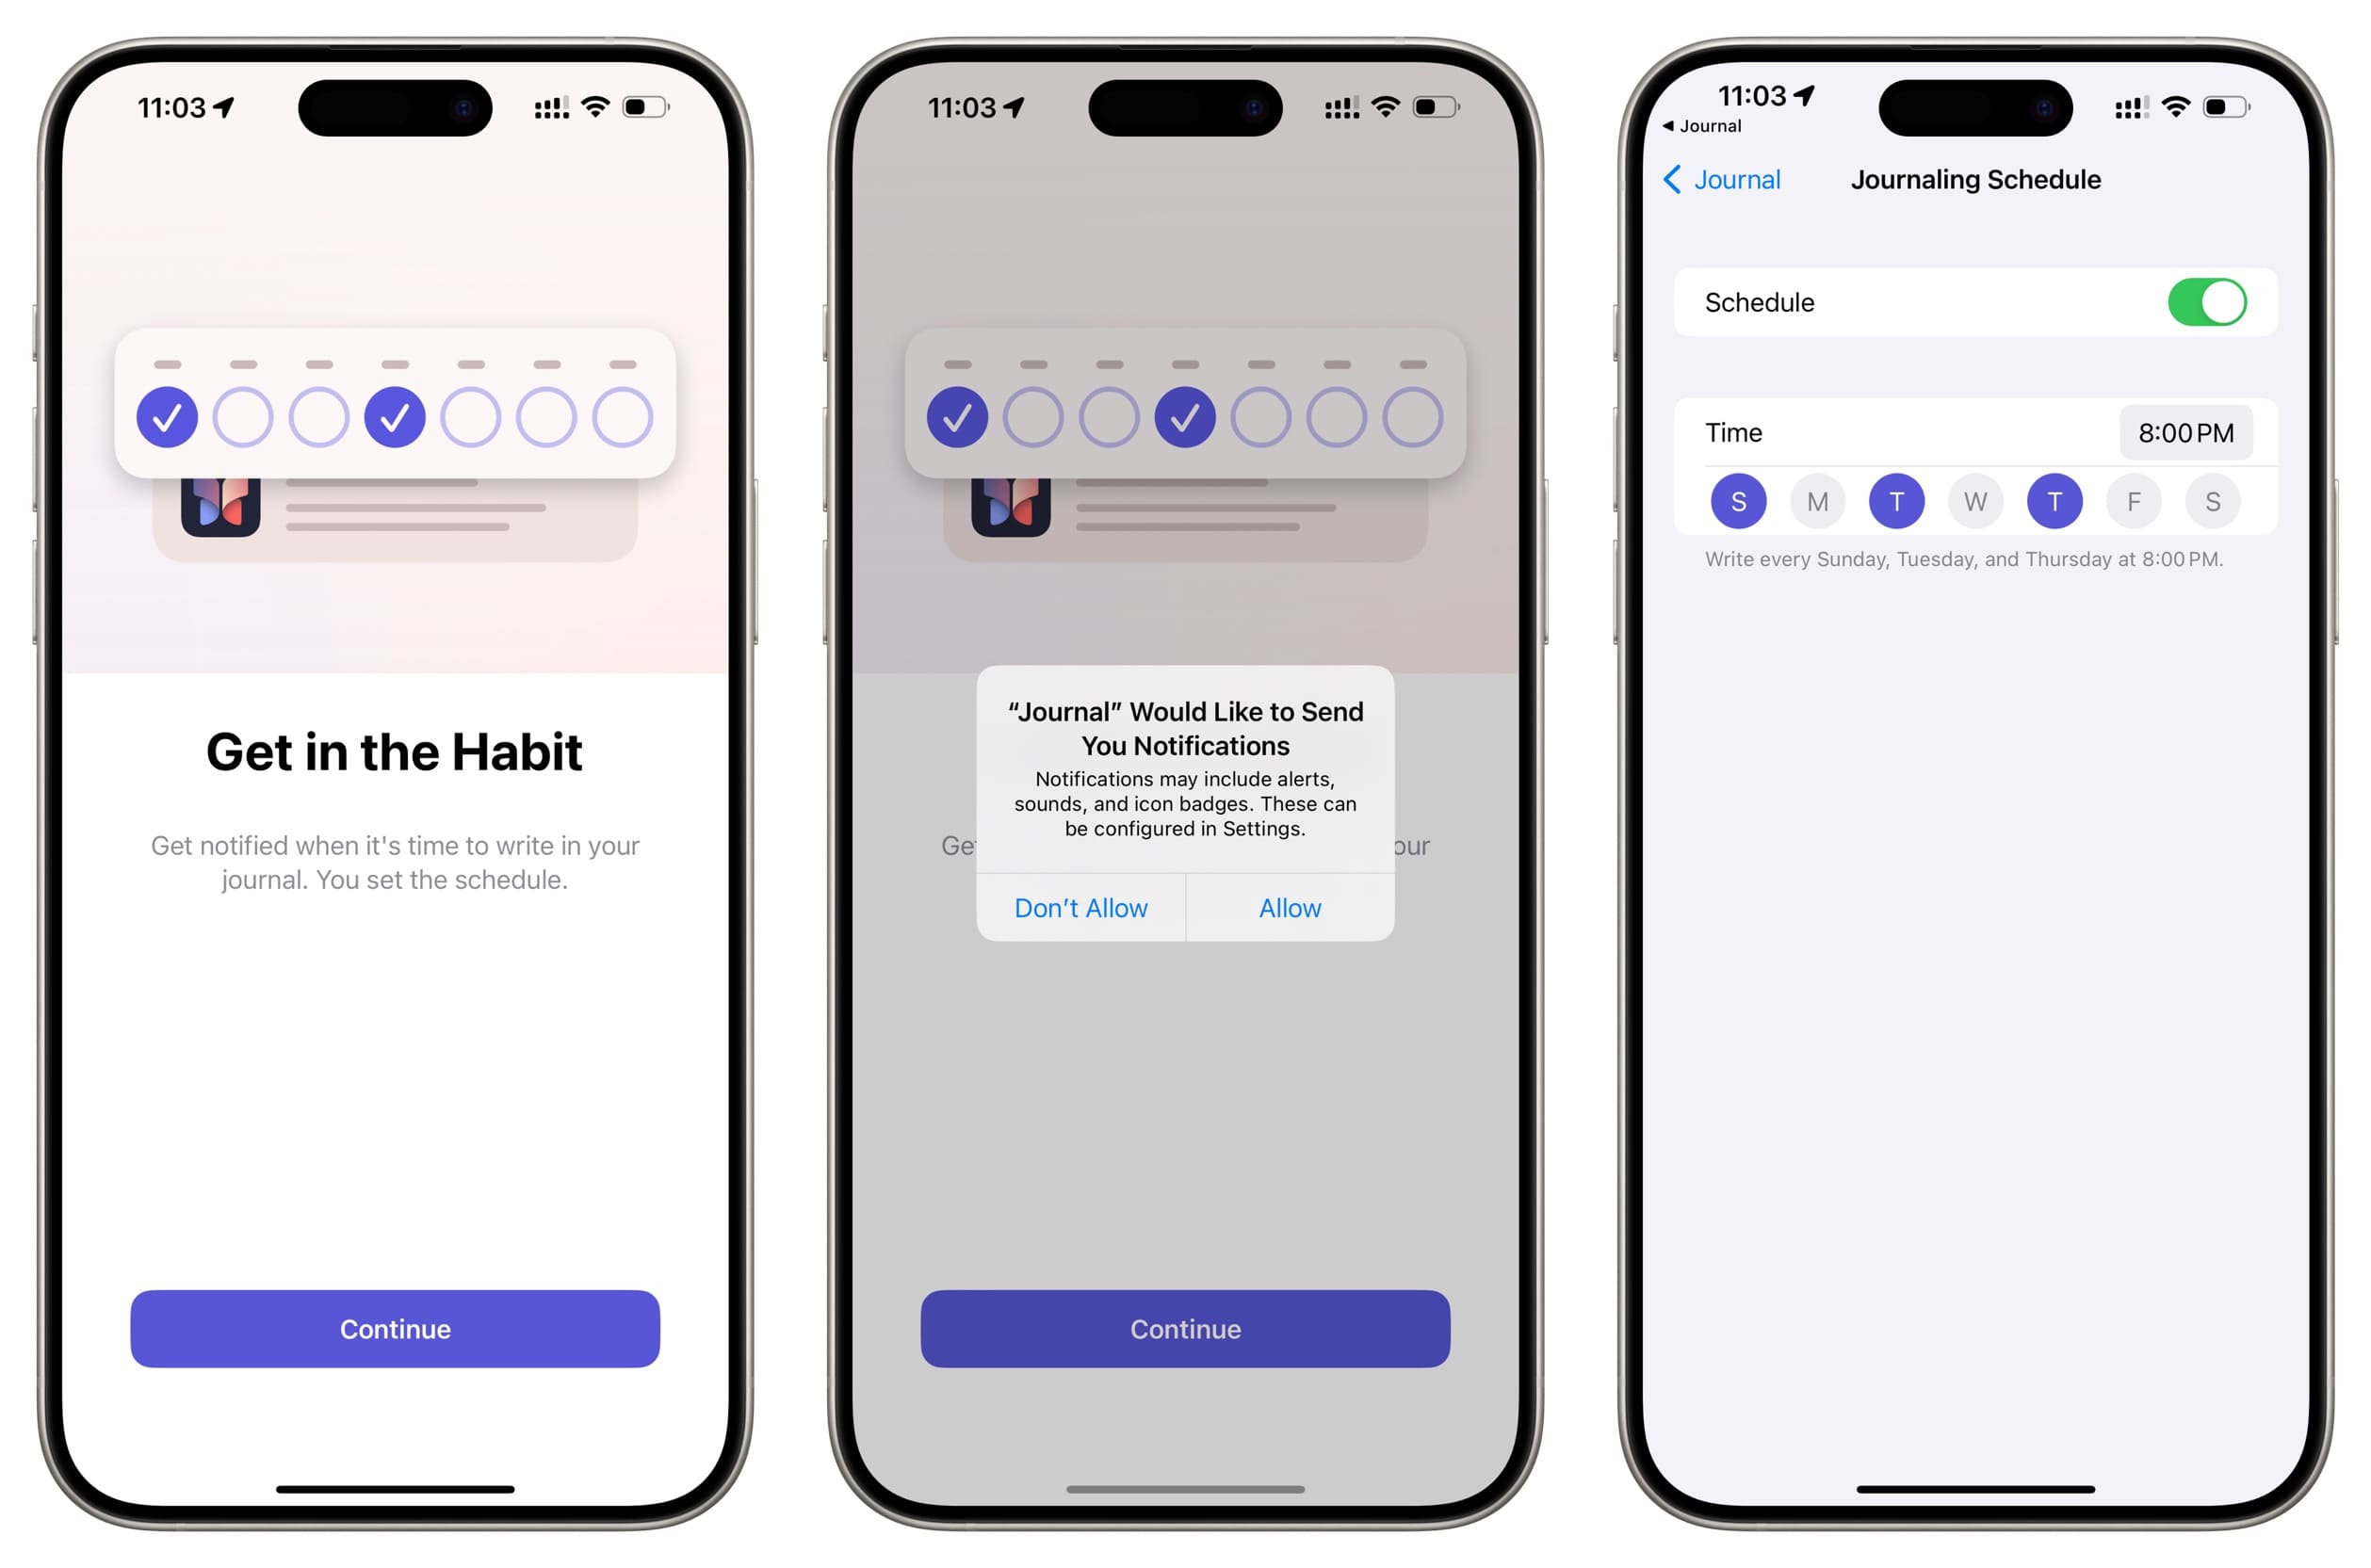
When you open the Journal app for the first time, you will see simple splash screens to:
- Get notified to make a journal entry.
- Set up a journaling schedule. If you want to journal every day, select all seven days of the week and pick a suitable time.
4 ways to add an entry to the Journal app
Journal lets you make entries from scratch or based on recent activity, like pictures you took while on vacation, the song you listened to, the person you talked with, and more.
After initial set up, go back to the Journal app. You may get an alert to turn on journaling suggestions. We recommend enabling it to make your job easier. You can turn it off in the future.
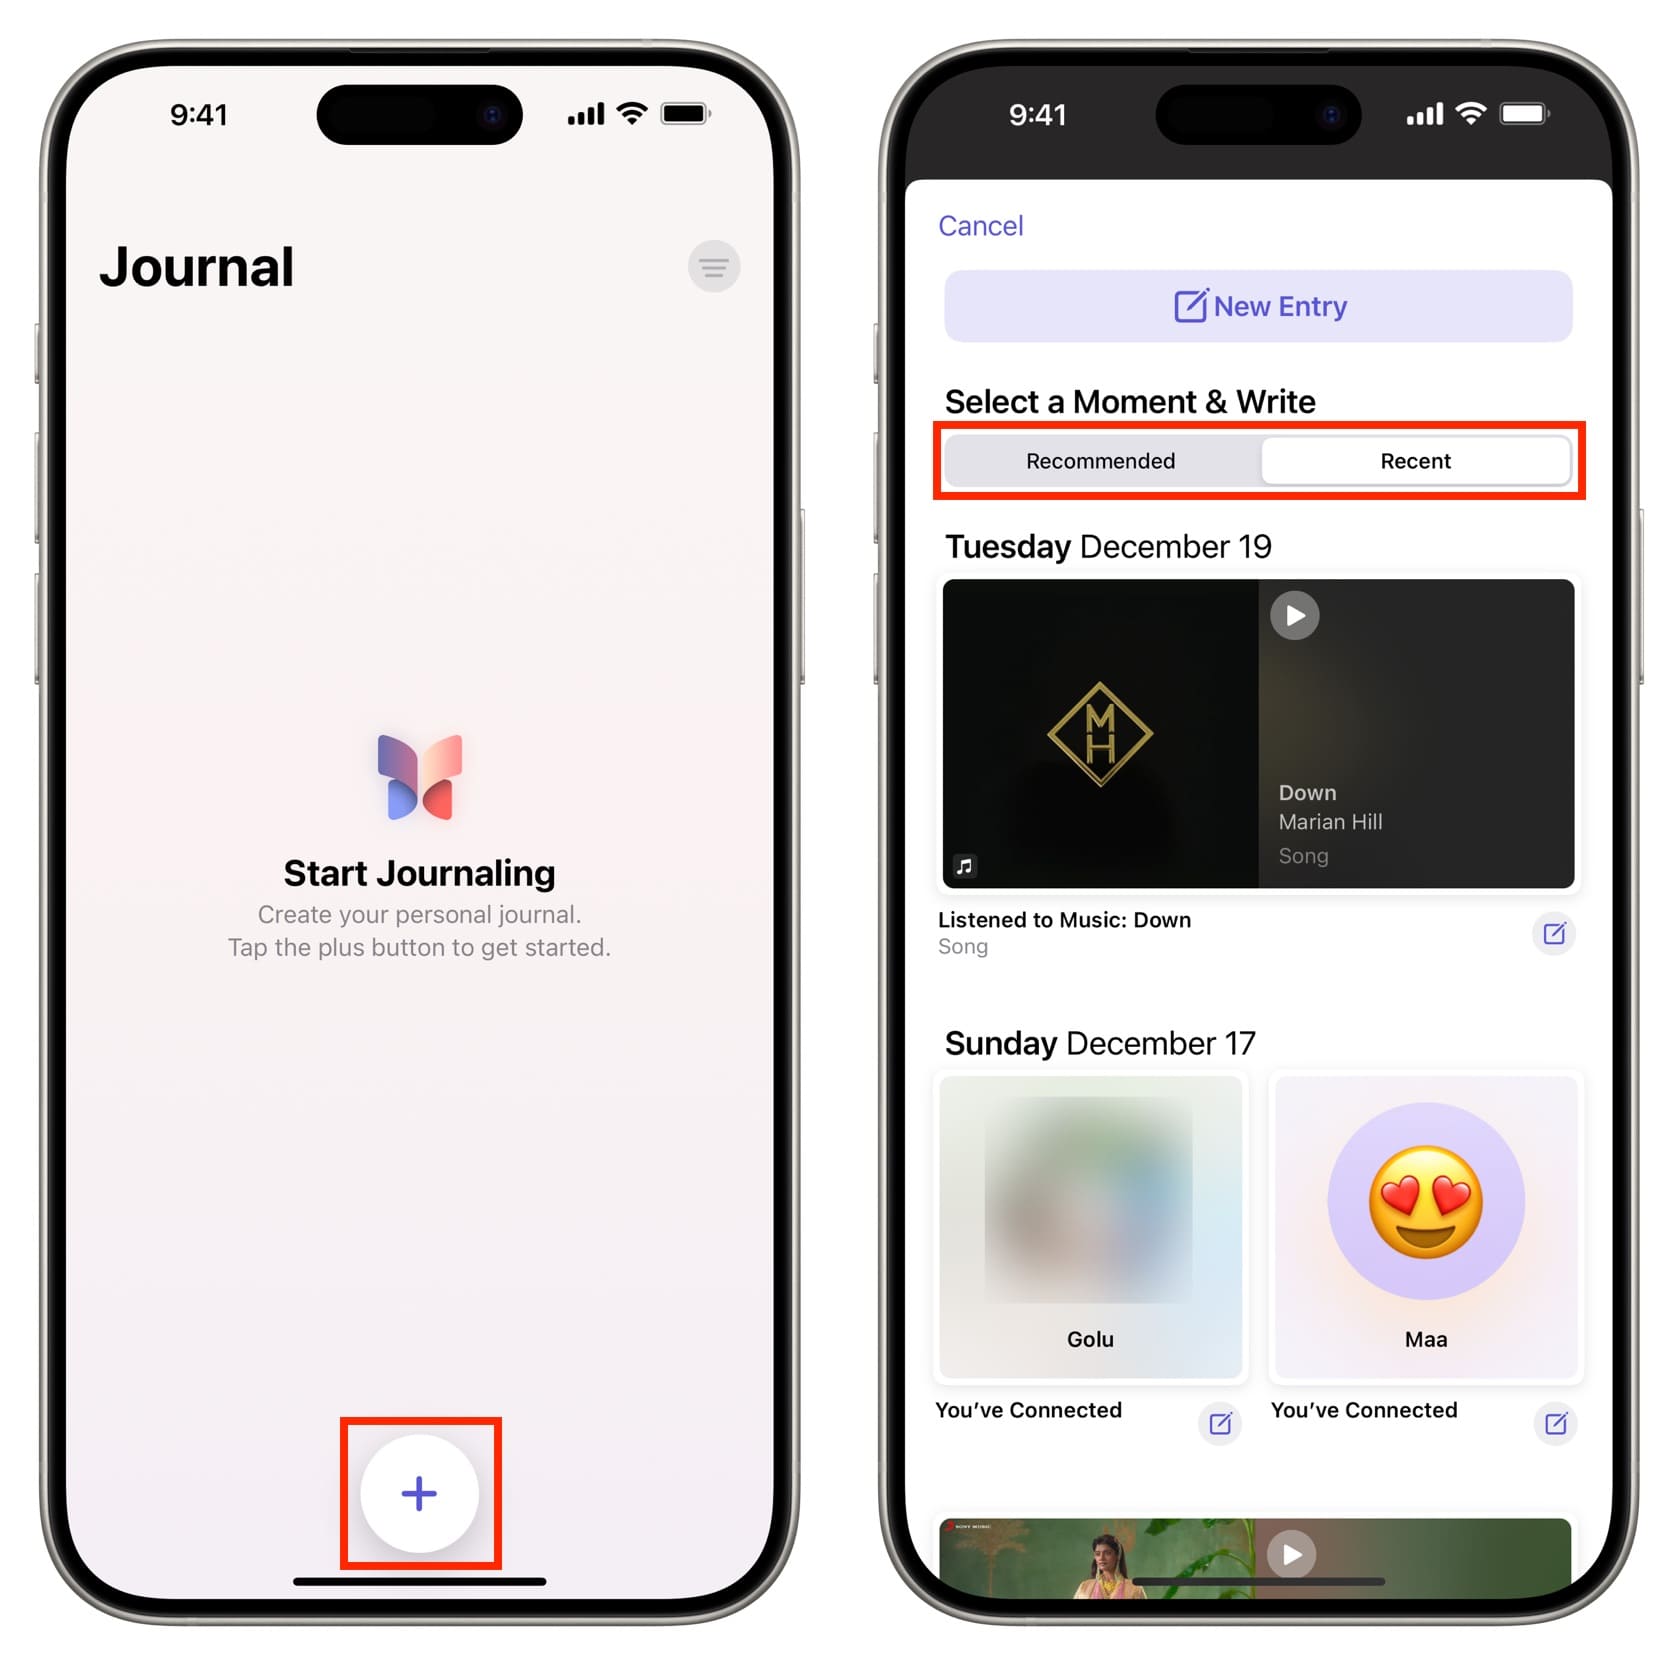
1. From journaling suggestions
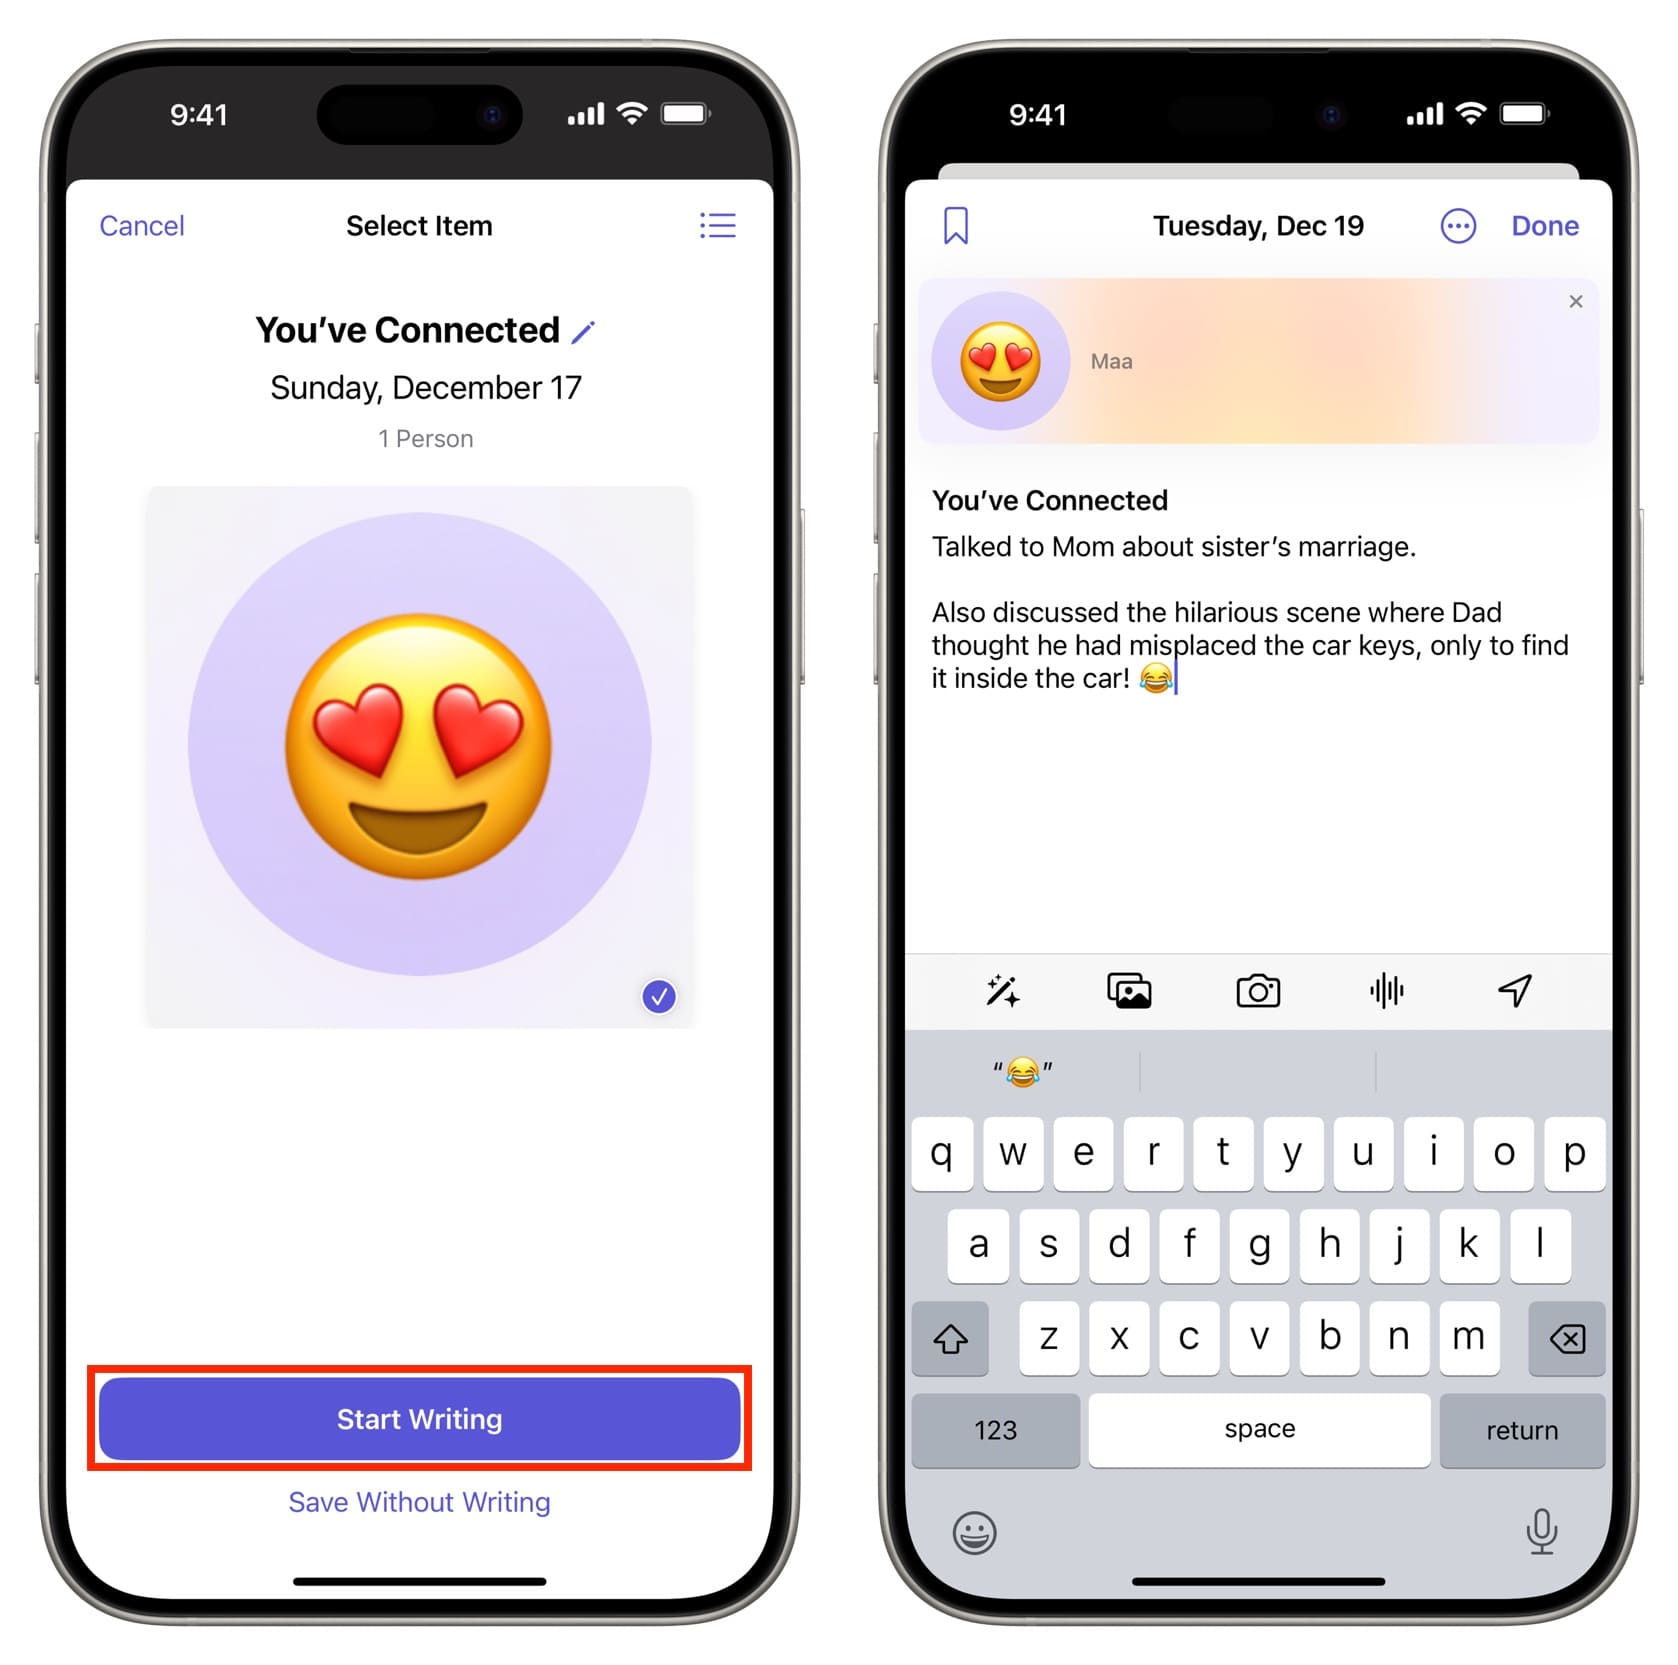
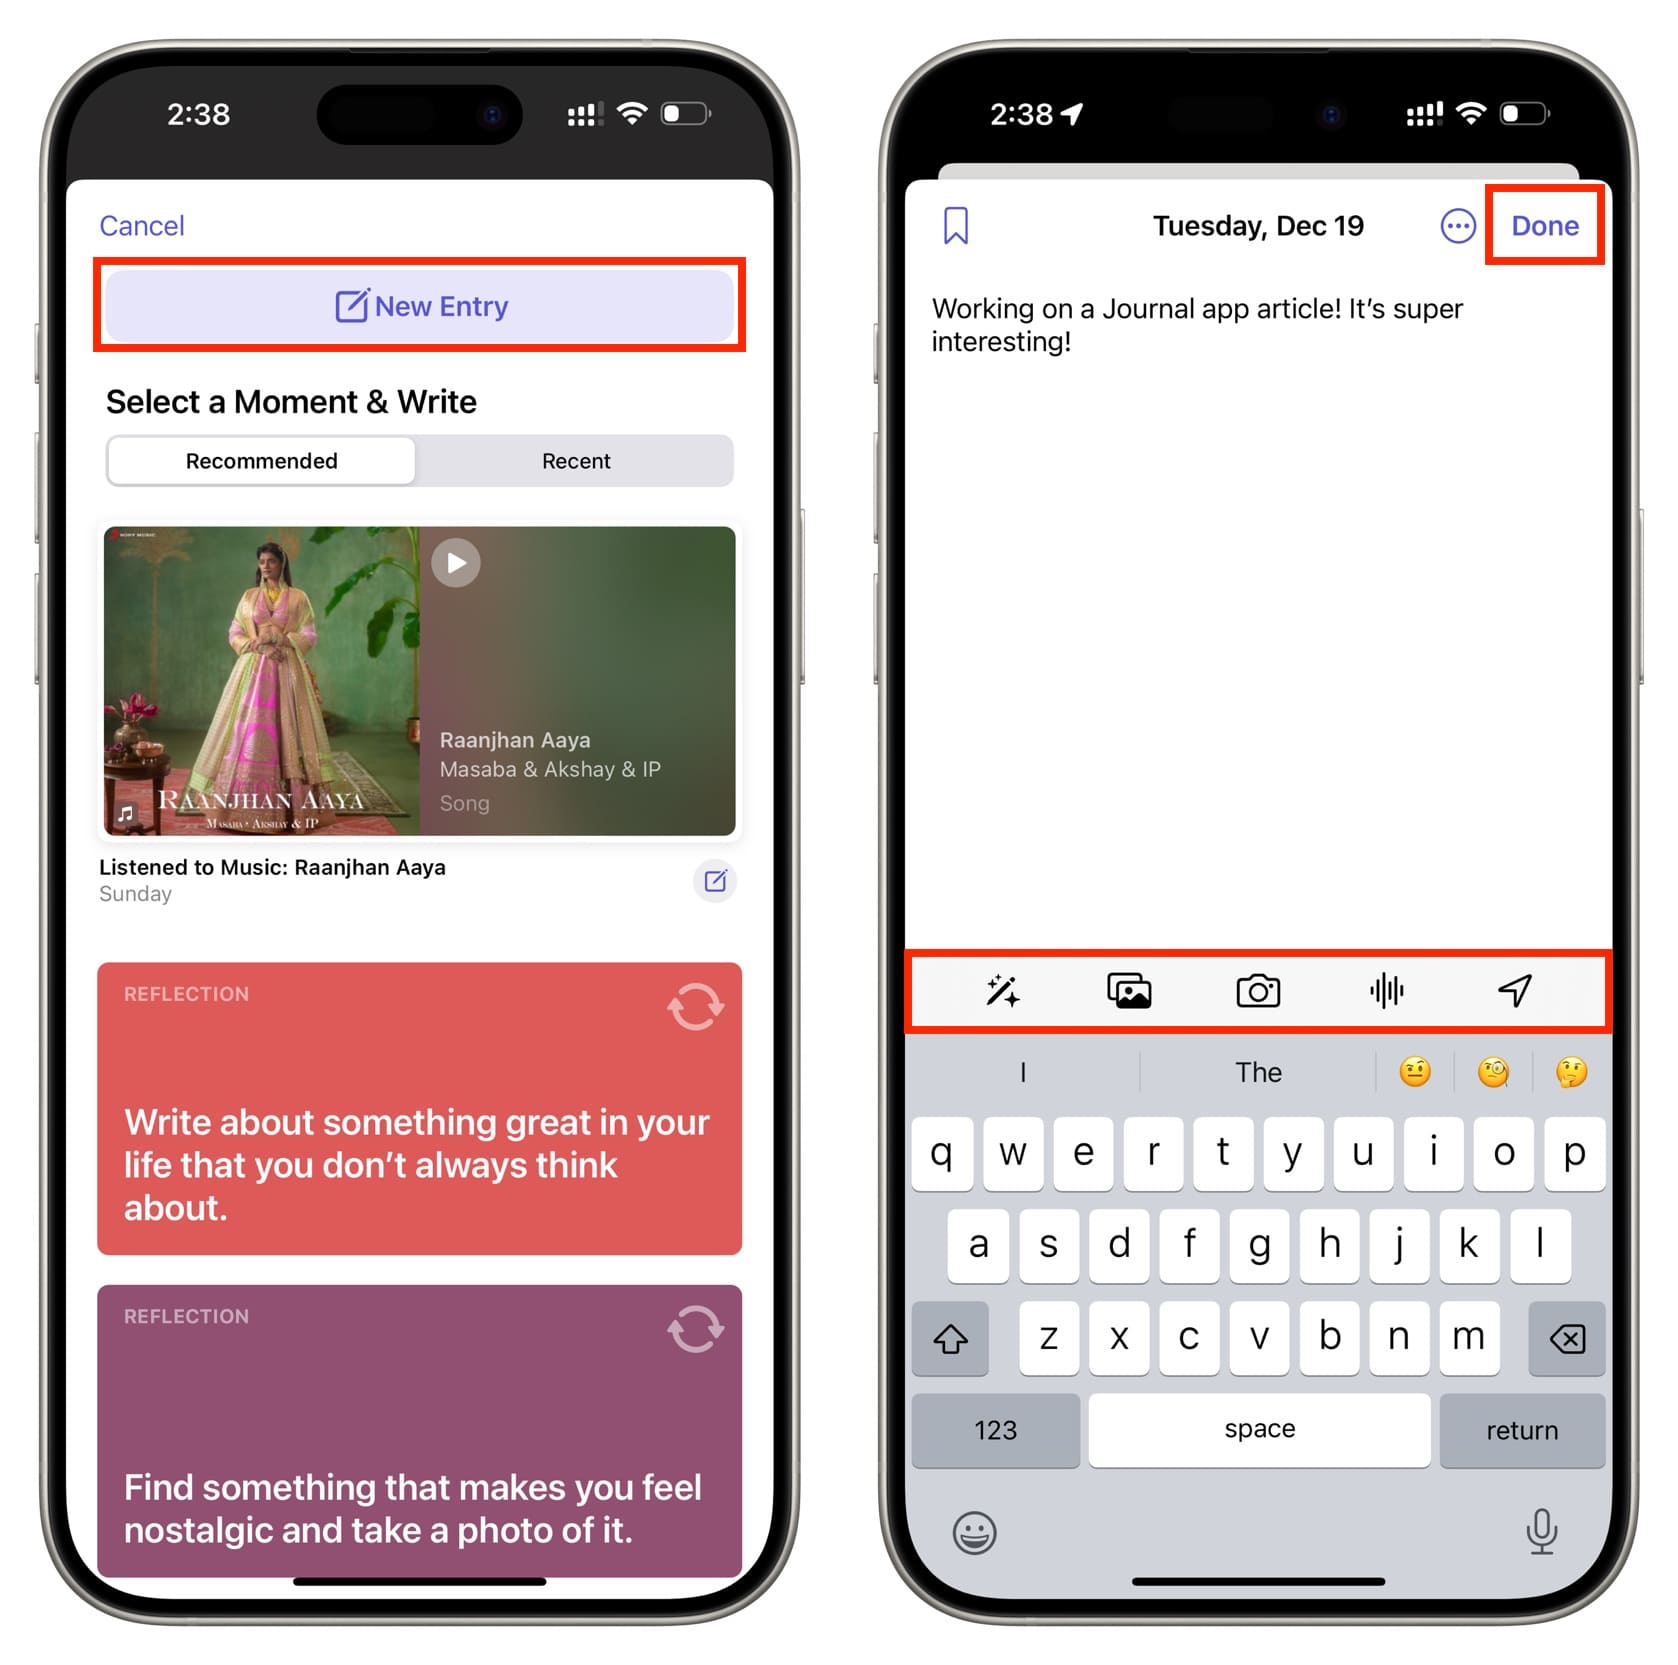
Tap the plus button and select a Recommended moment, or tap Recent and pick a photo, phone call, song you listened to, and more. Next, tap Start Writing and make an entry.
For instance, I can select my recent call with my mother, tap Start Writing, and note that we talked about my sister’s marriage, dad losing the car key and finding it inside the car, and other such moments. Alternatively, I can also choose not to write and just tap Save Without Writing. But this will give less context when I read this entry in the future.
Tip: Don’t like a recommended or recent suggestion? Touch & hold its tile and tap Remove.
2. Start journaling from scratch
You can choose not to start with a suggestion and instead begin with a clean slate. Just tap the plus button followed by New Entry from the top and start writing.
While doing this, you can tap the icons above the keyboard to add a journaling suggestion, select media from the Photos app, take a picture on the spot, record audio, and add location information.
3. Reflect on something
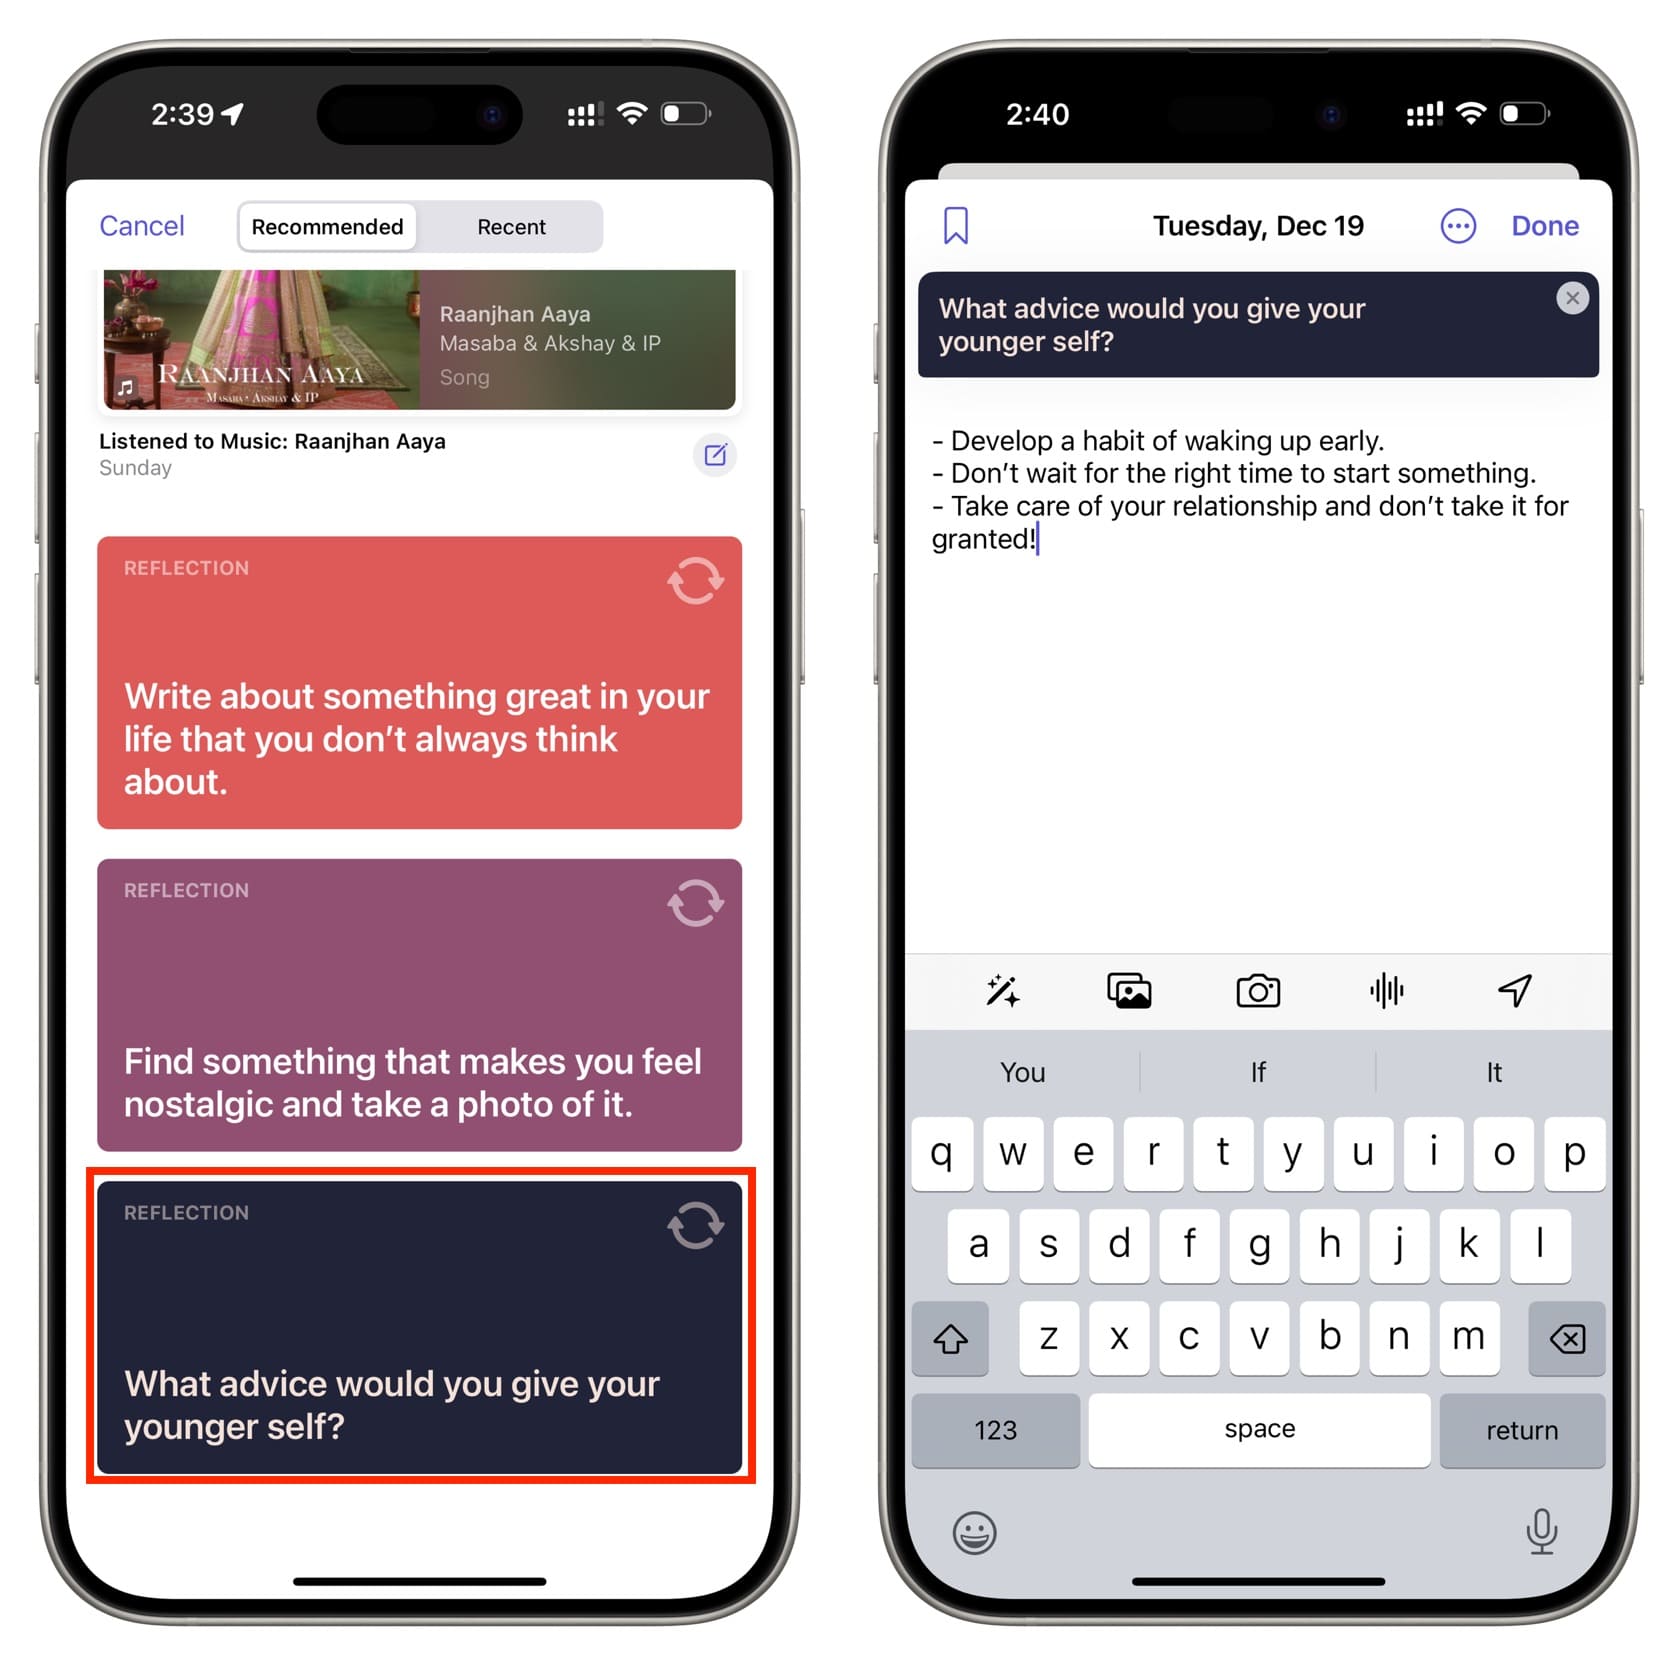
In addition to making a personal diary entry, you can also answer some questions or note things to later reflect on. To do that:
- Tap the plus button and scroll to the bottom of the Recommended suggestions.
- Here, you will see some questions and statements. Tap one and write its answer.
- If you don’t like a question here, tap the refresh icon to change it to something else.
4. Add to Journal from another app
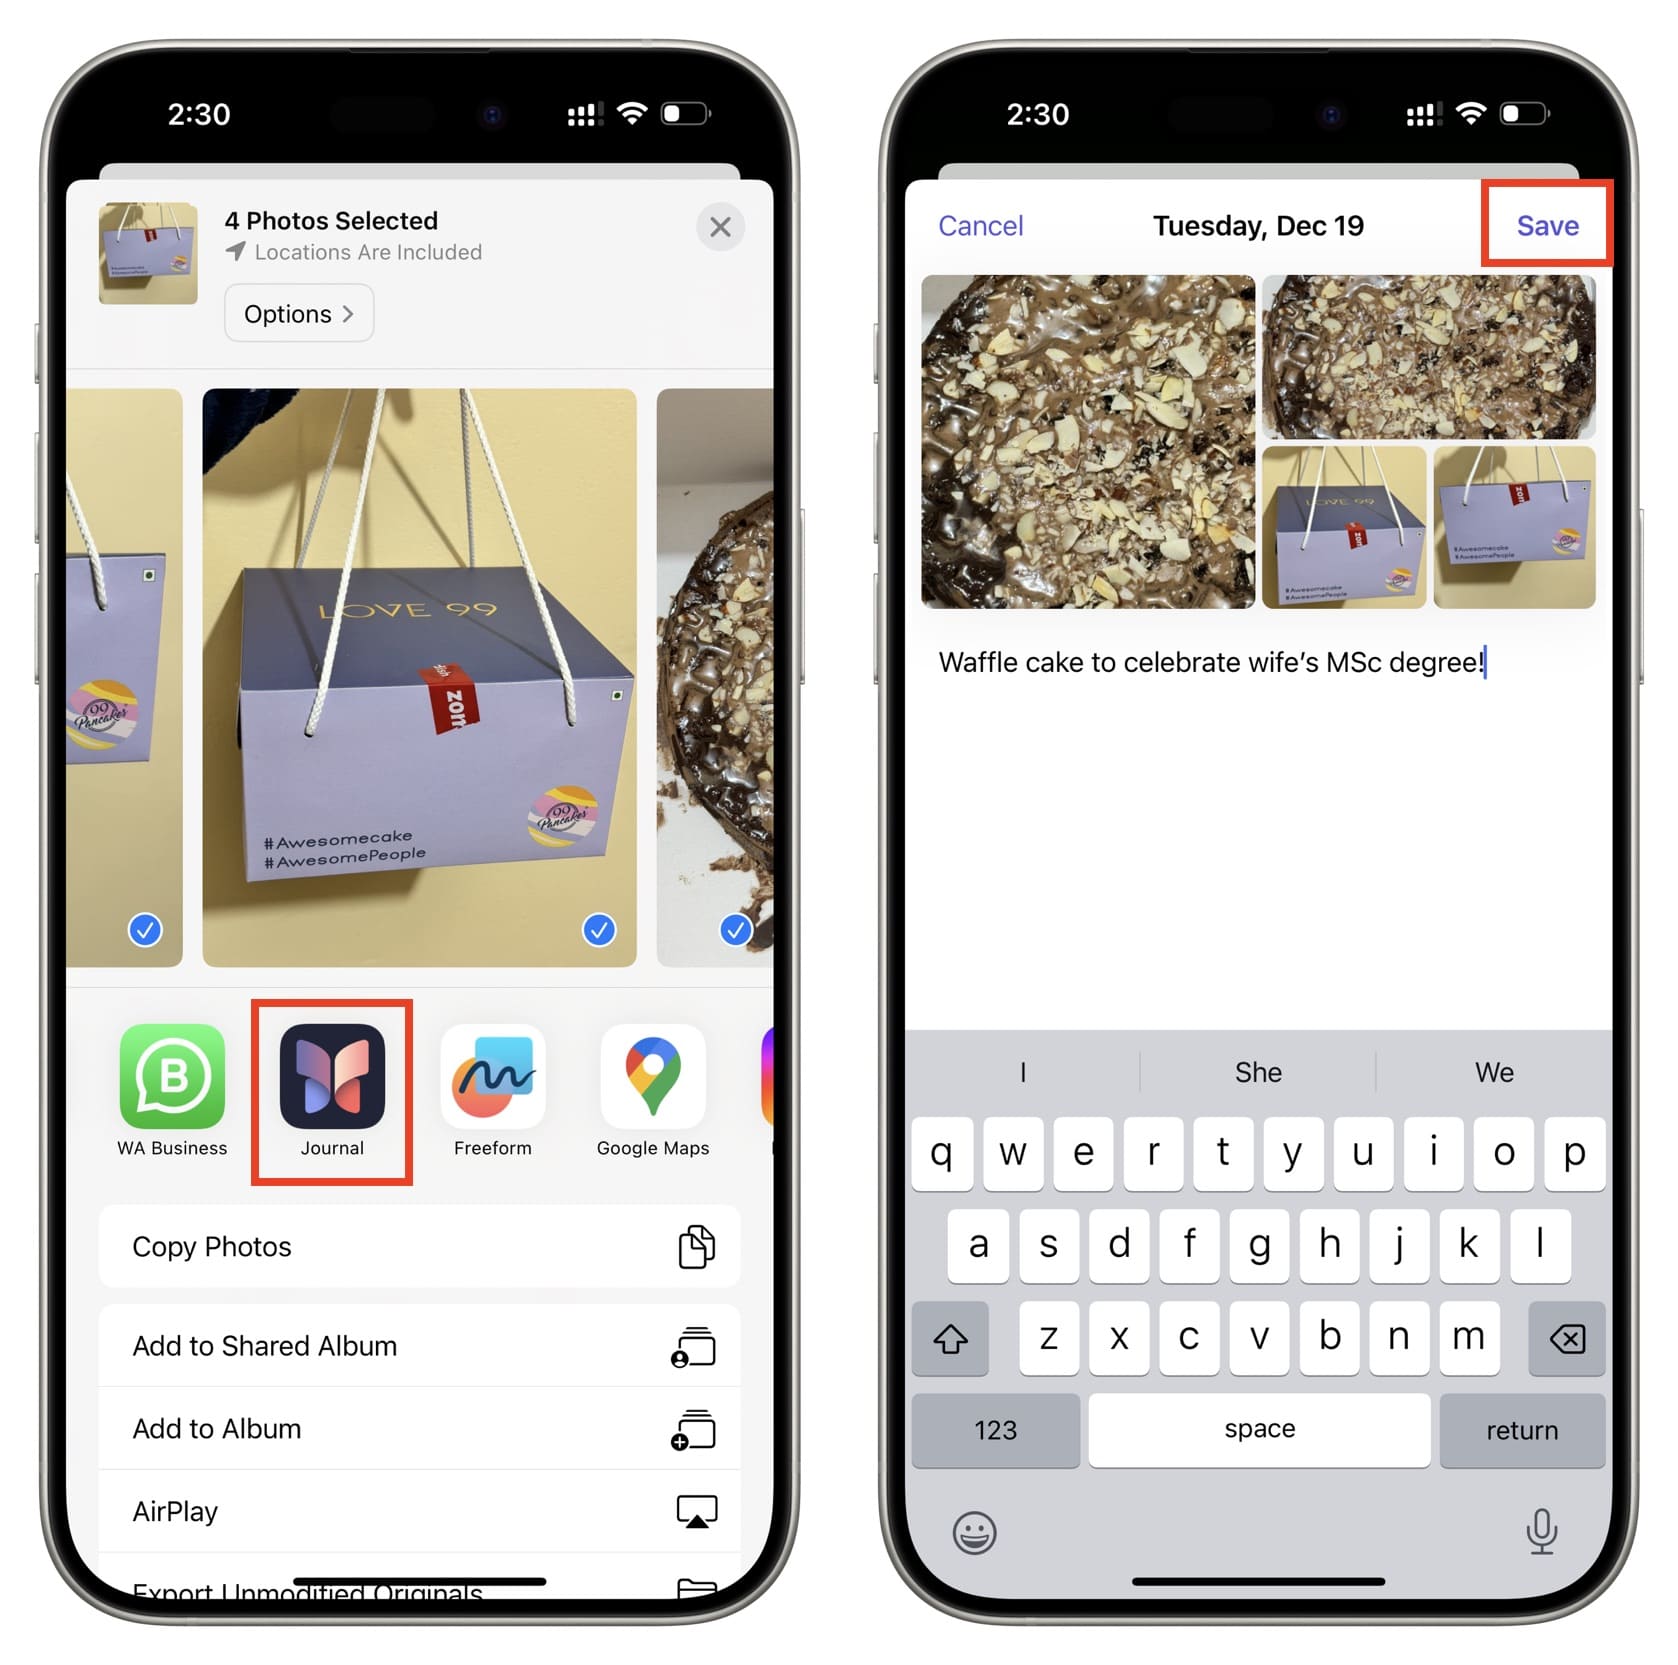
Imagine you’re browsing through your photo library and find a memorable shot. To add it to your Journal, tap the share button and choose Journal from the iOS Share Sheet. It works with several apps like Music, News, Safari, Voice Memos, Messages, and more.
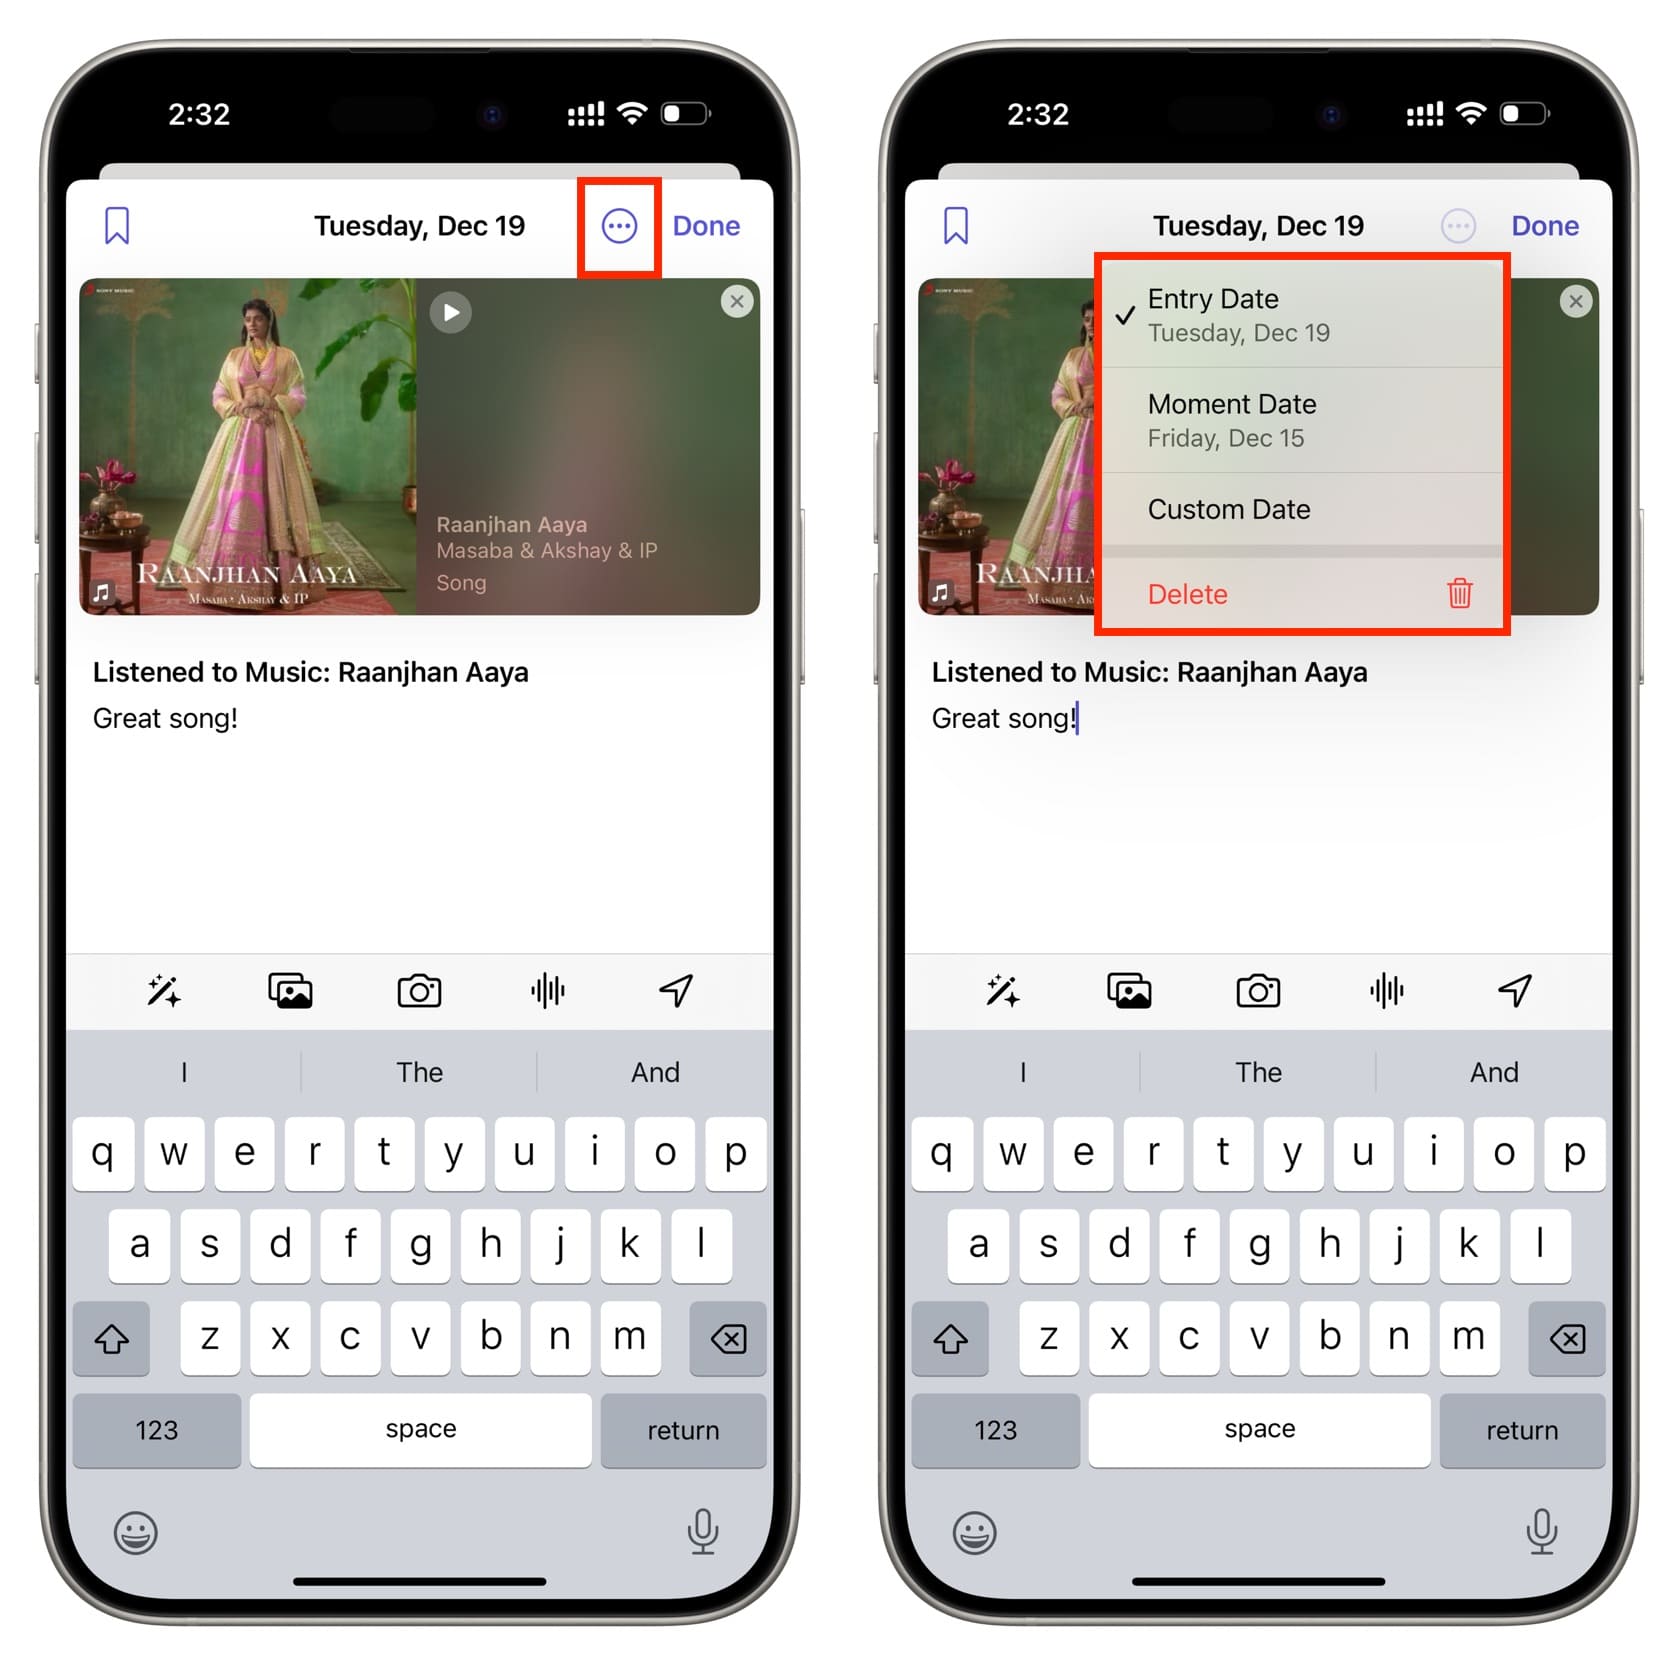
Set a desired entry date
Tap the three dots menu button while adding or editing an entry, and you can pick from today’s date, moment date (like when you took the photo or made the call), or enter a custom date.
See your journal entries
Simply open the Journal app, and you will find your entries here. If it has a song, you can tap to play it. Similarly, you can tap a photo memory and relive the moment.
You can also tap the filters button in the top right and sort them based on Bookmarked, Photos, Videos, Music & Podcasts, Reflections, Conversations, etc.

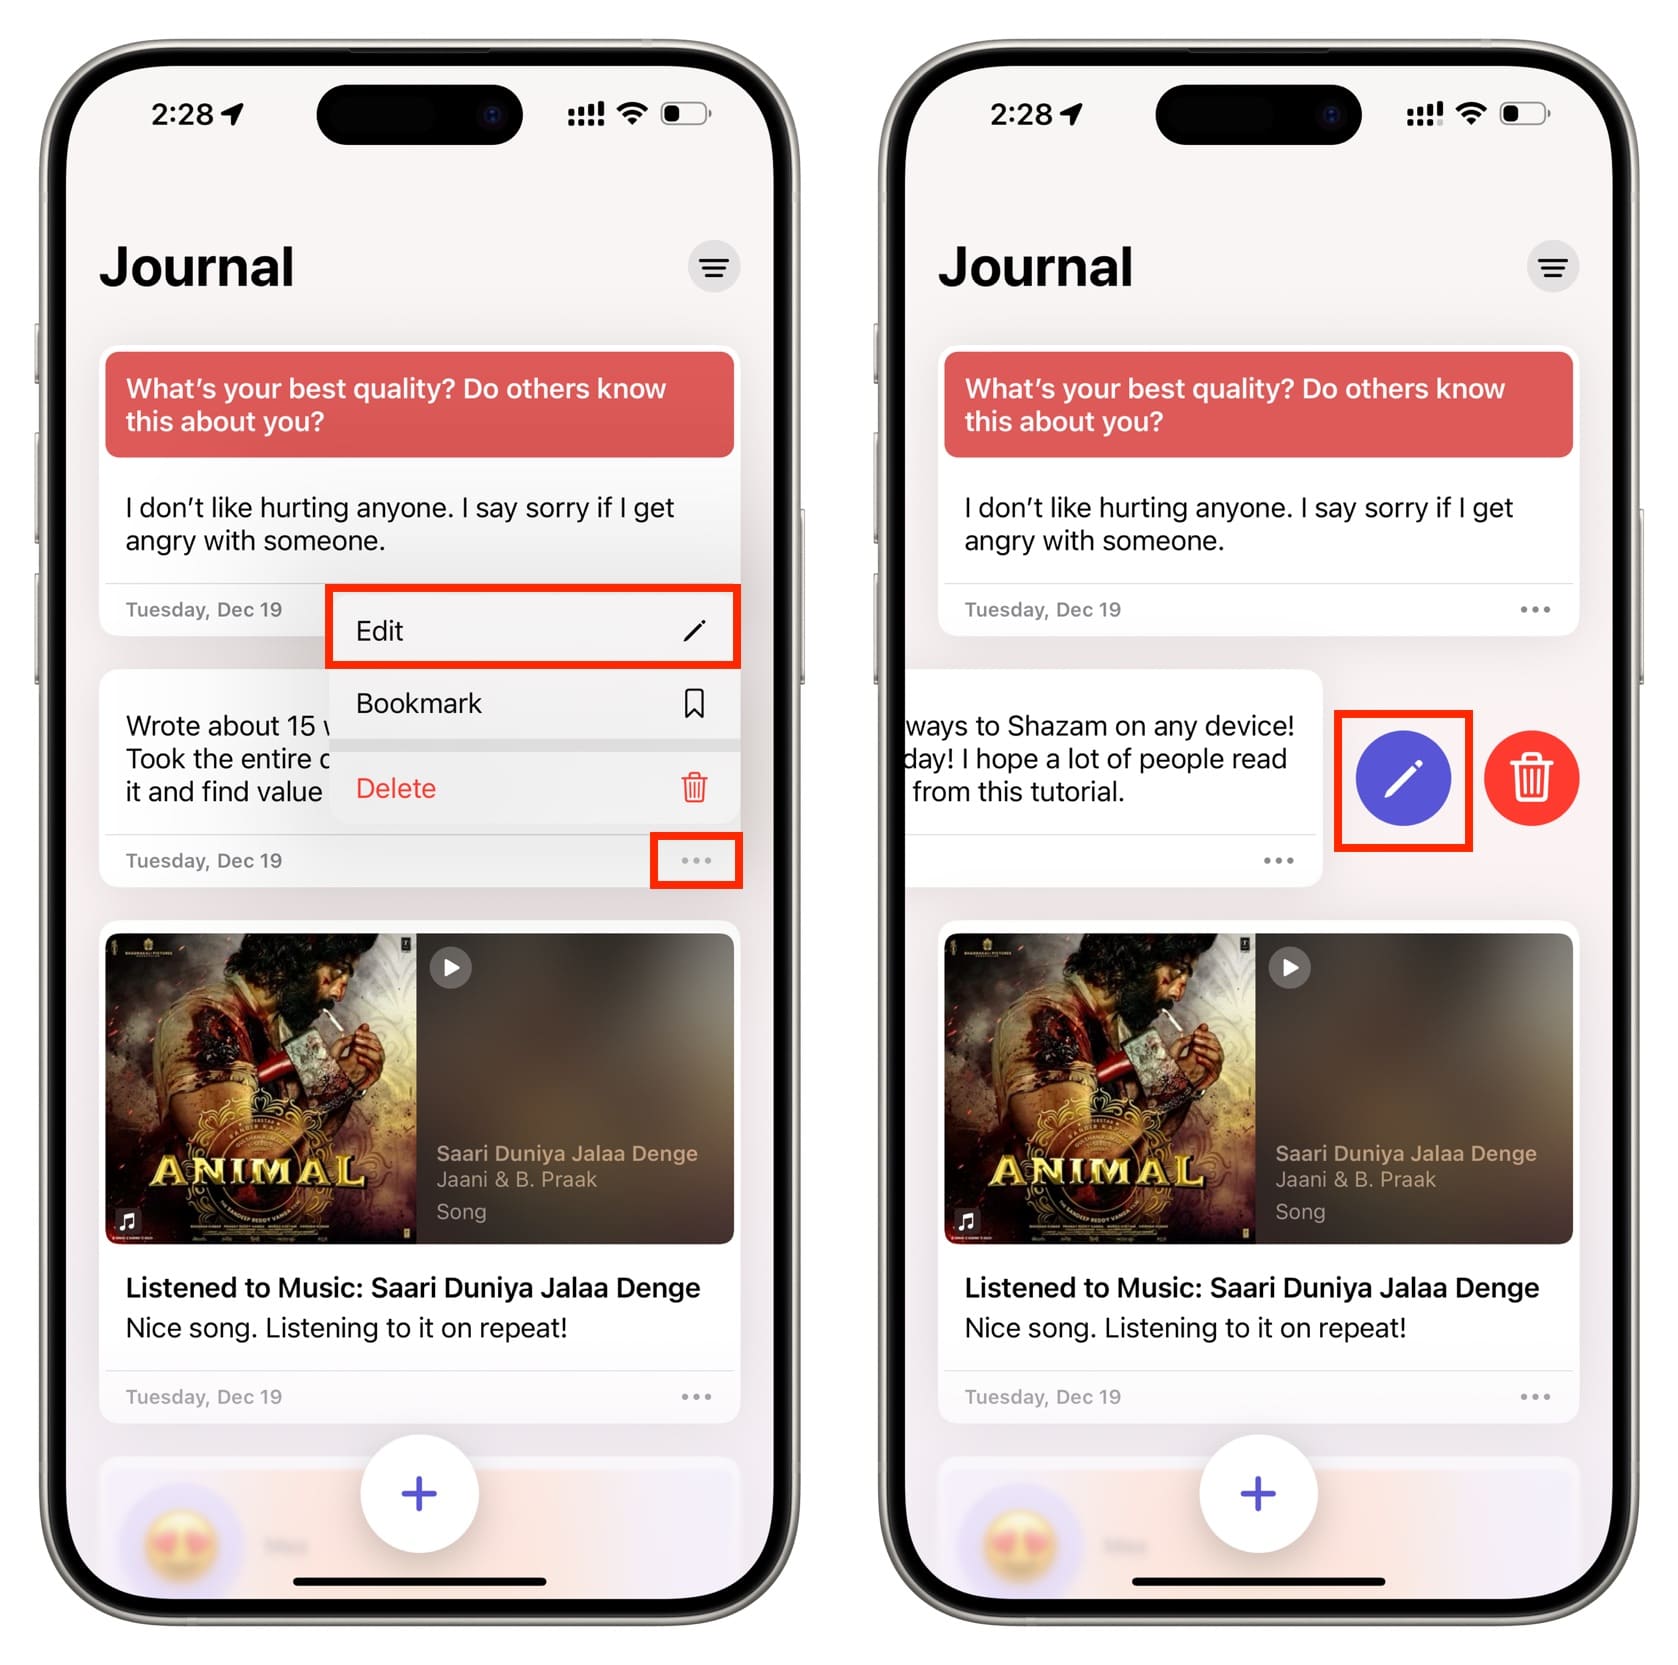
Edit a journal entry
Tap the three dots icon for a journal entry and choose Edit. You can also swipe left and tap the purple pencil icon to edit it. Now, make your changes and hit Done.
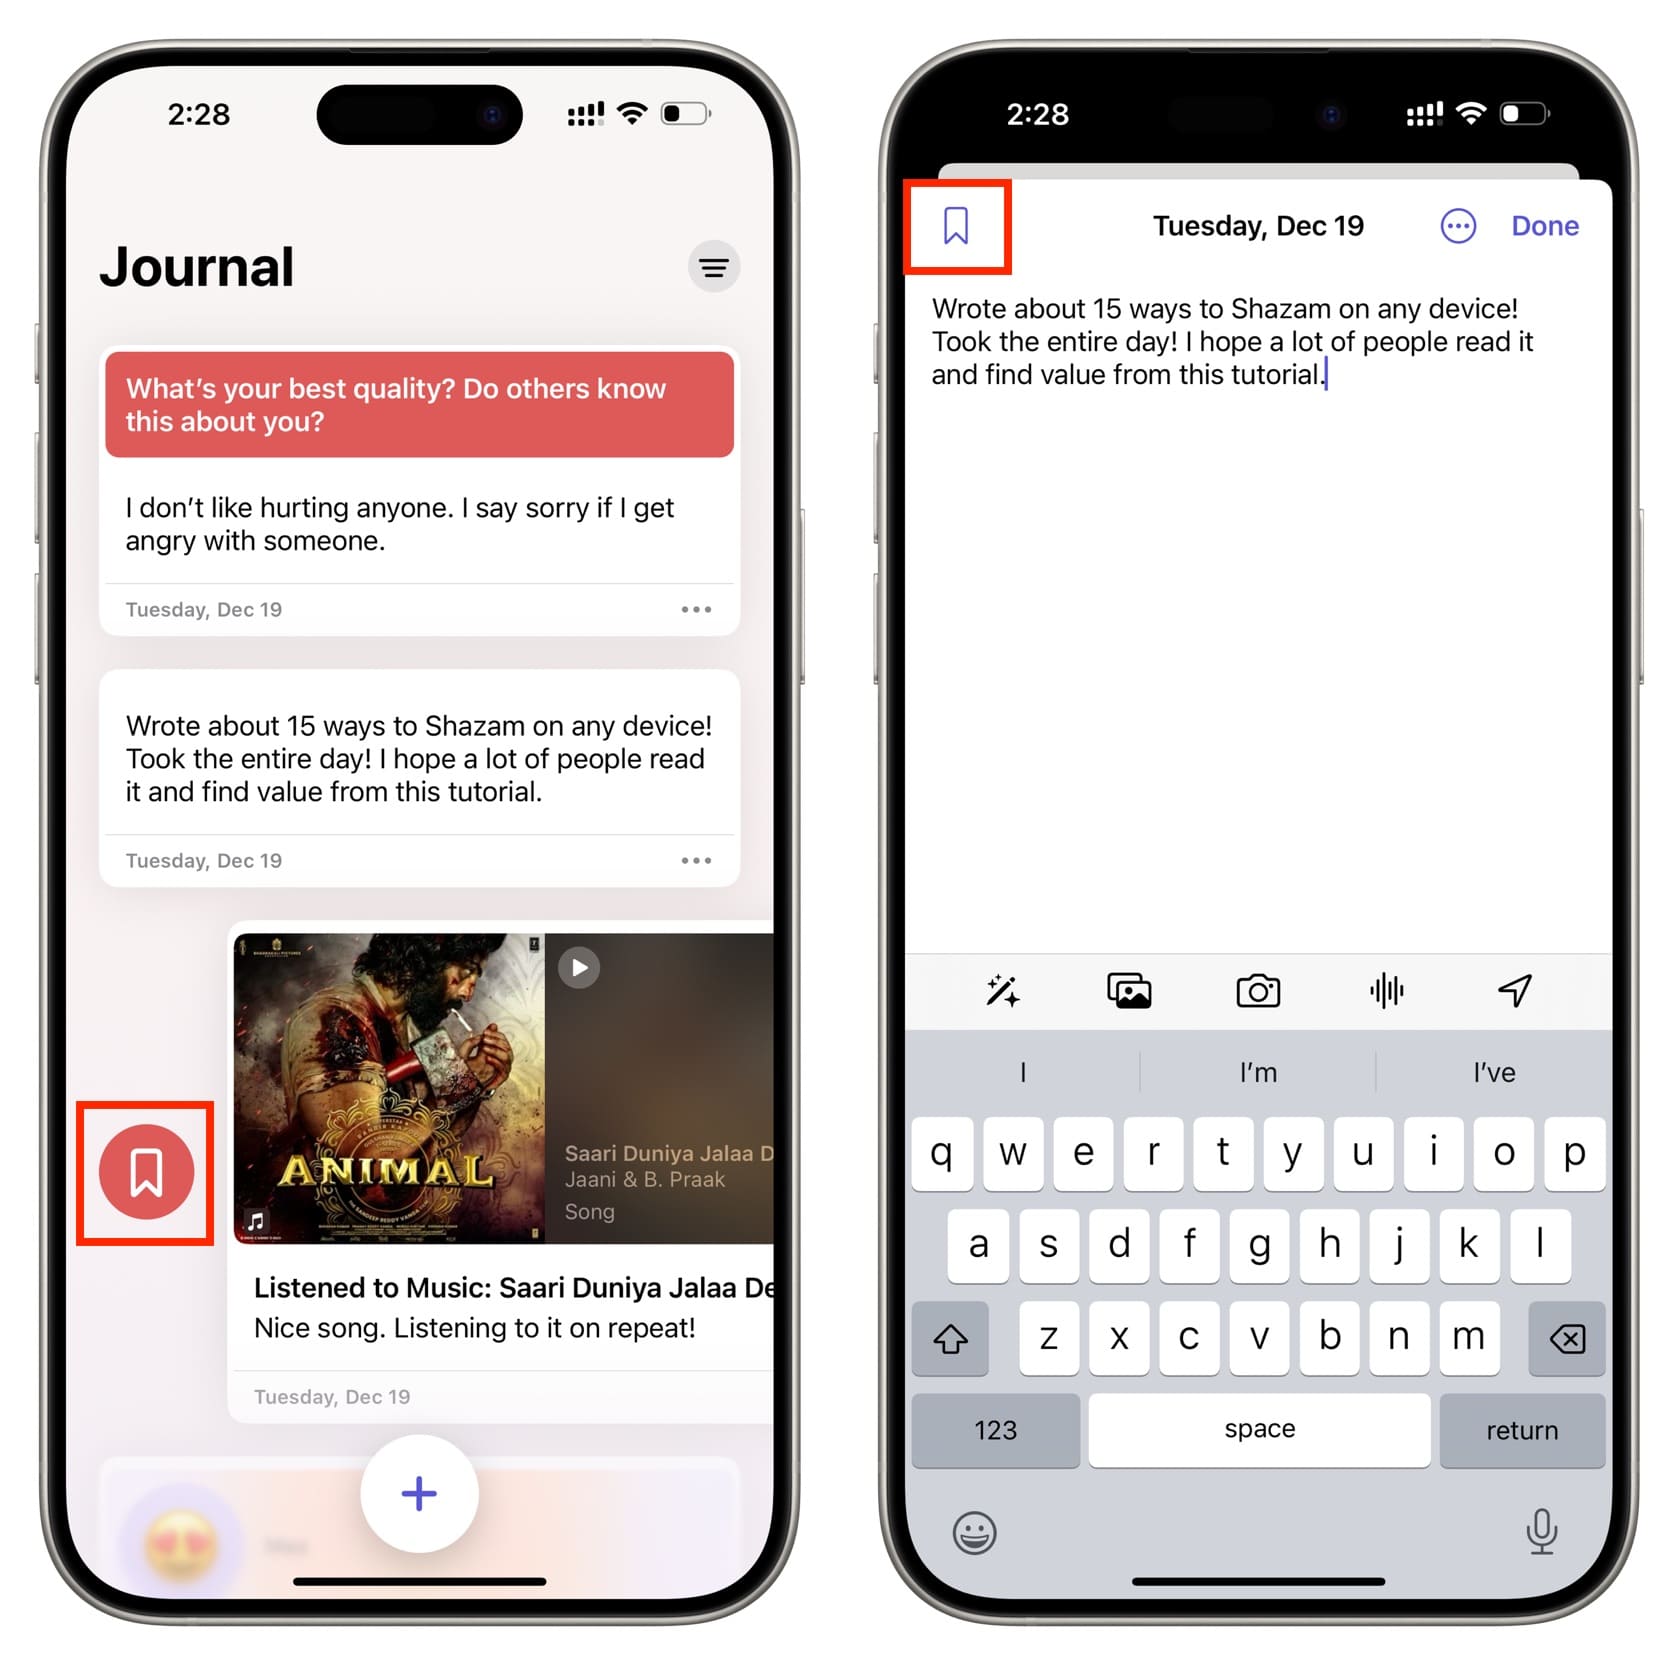
Bookmark entries
You can bookmark extra special entries and then use the filters button to see just those.
- Swipe right on an entry and hit the bookmark icon.
- Tap the three dots icon while writing or editing an entry, and tap the bookmark icon.
- Tap the three dots icon under an entry and choose Bookmark.
Delete a journal entry
Touch & hold an entry and choose Delete or swipe right and hit the red trash icon. You can also start editing the journal entry and tap the three dots icon, followed by Delete.
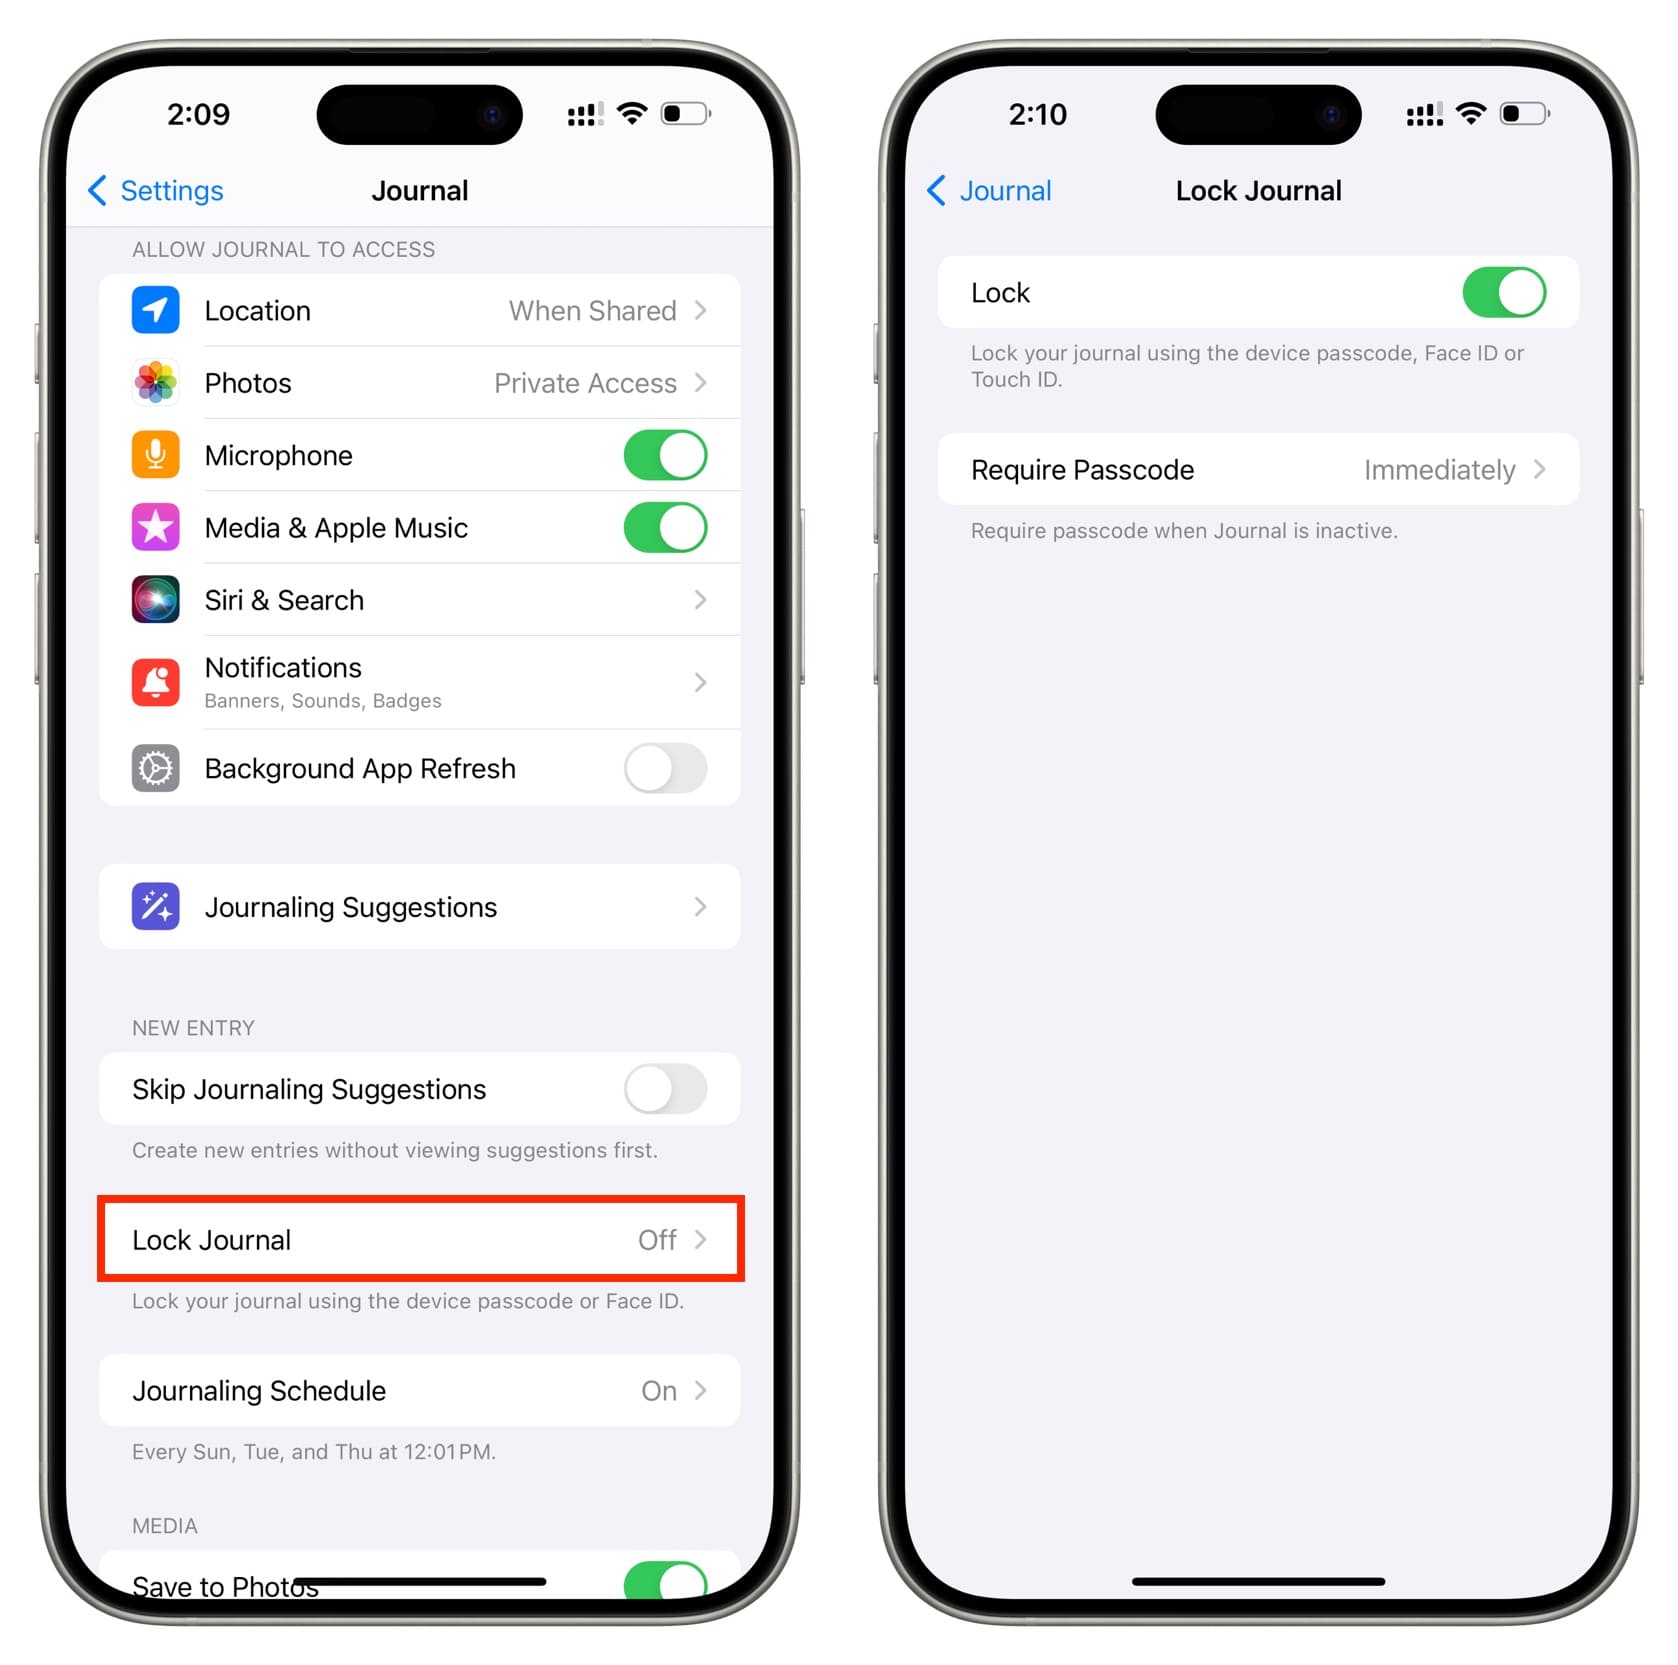
Lock or unlock your journal
Protect your memories by going to iPhone Settings > Journal > Lock Journal. From here, turn on the Lock switch. Next, you can leave the app to auto-lock after one minute of going out of it or set it to lock immediately for maximum privacy. After this, you will need to authenticate with Face ID, Touch ID, or your iPhone passcode to get inside the Journal app.
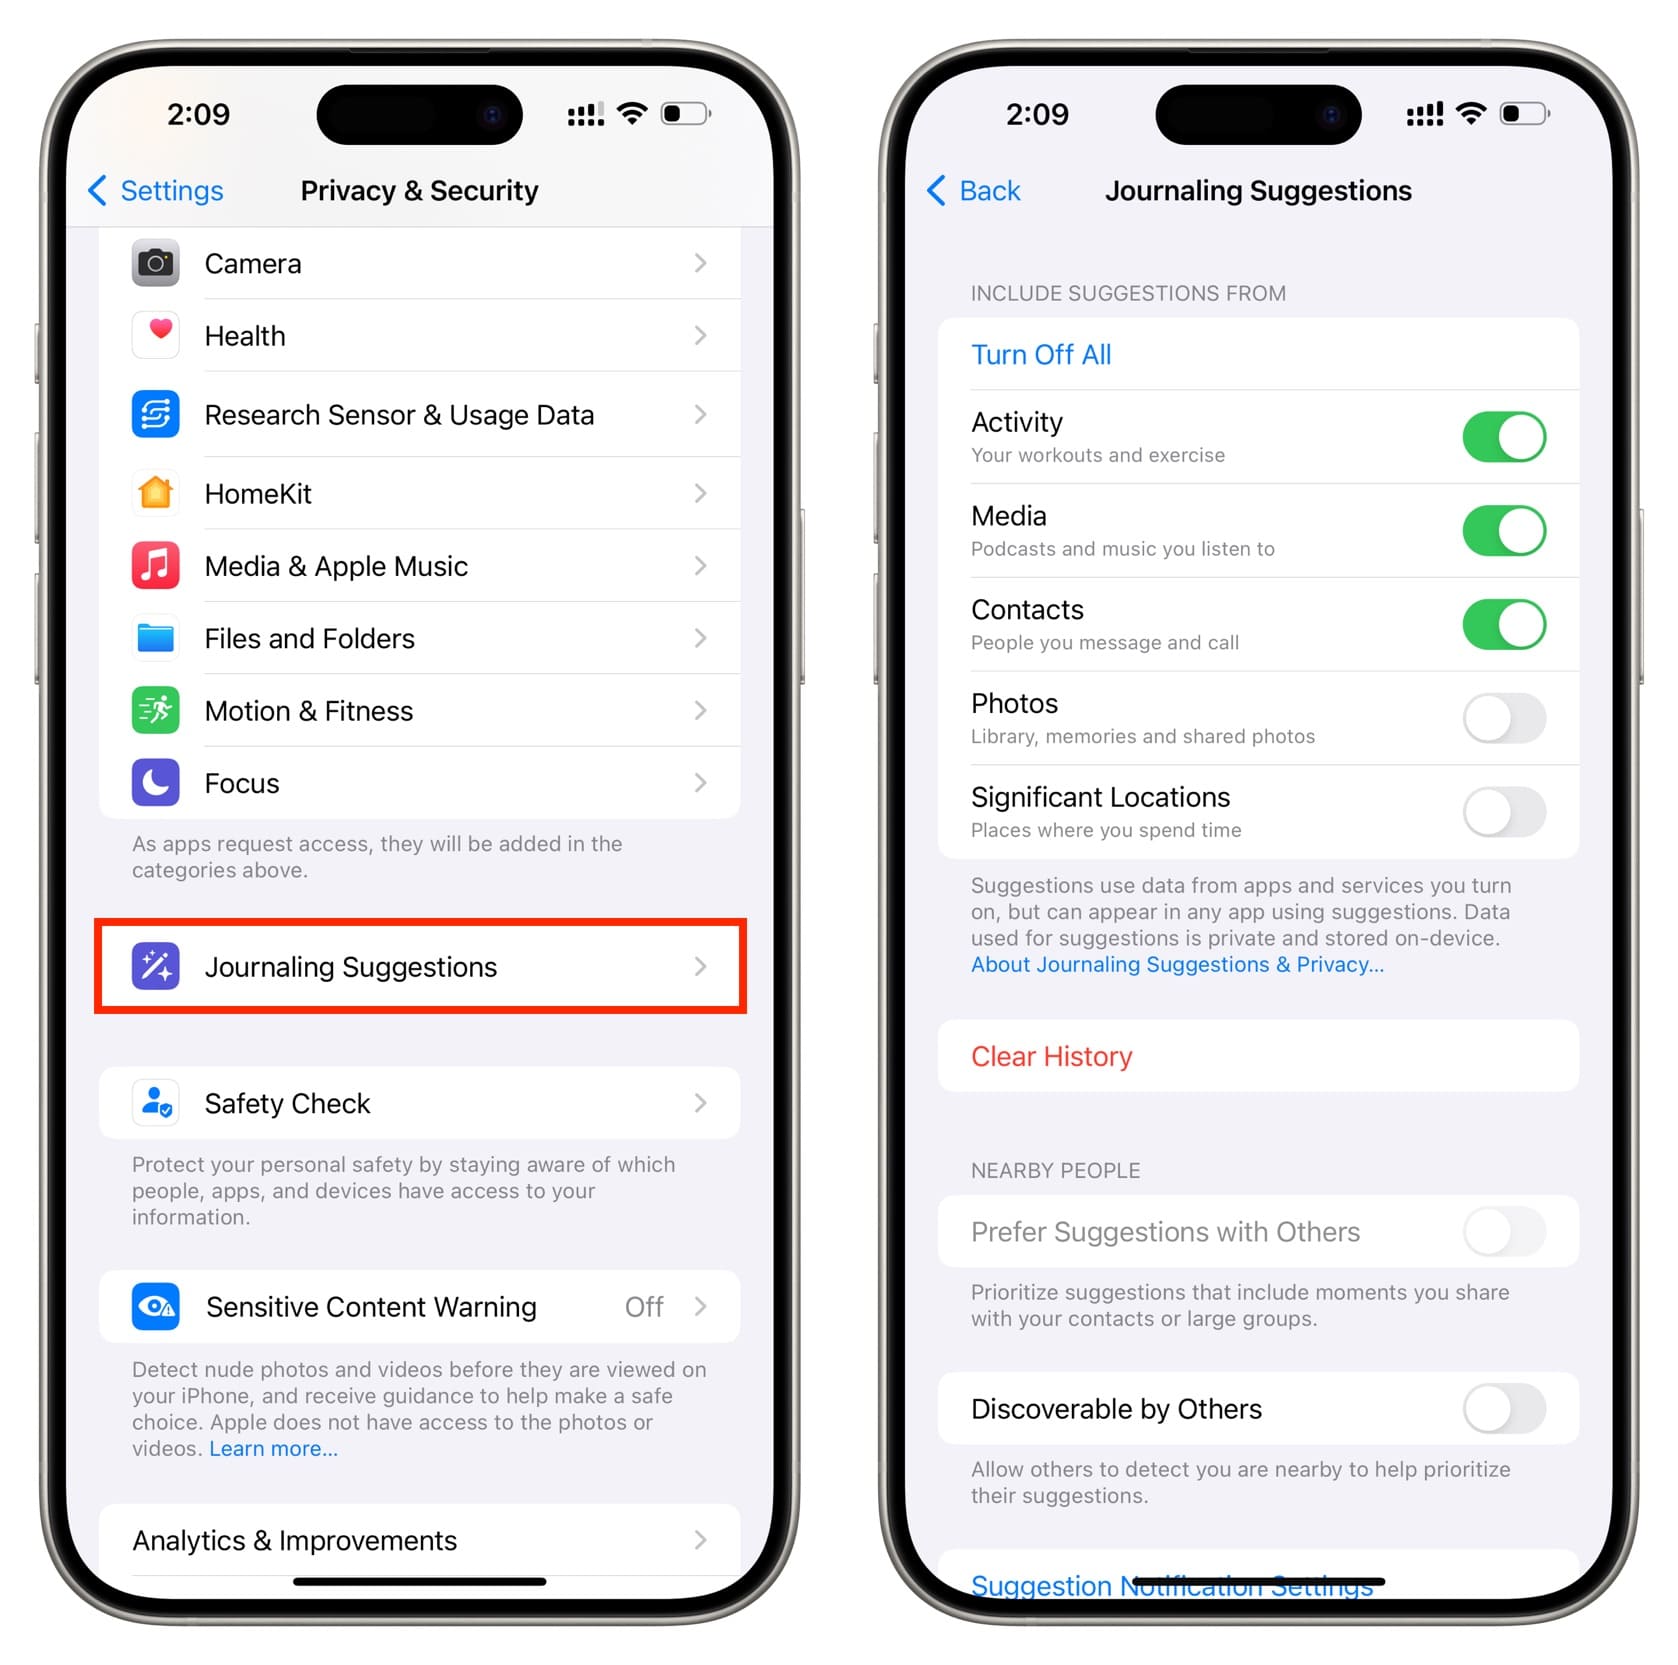
Customize your journaling suggestions
Go to iPhone Settings > Privacy & Security > Journaling Suggestions. From here, you can turn off all suggestions or do it for workouts & exercise, podcasts & music, photos, and significant locations. You can also choose to change Nearby People suggestions and discoverability.
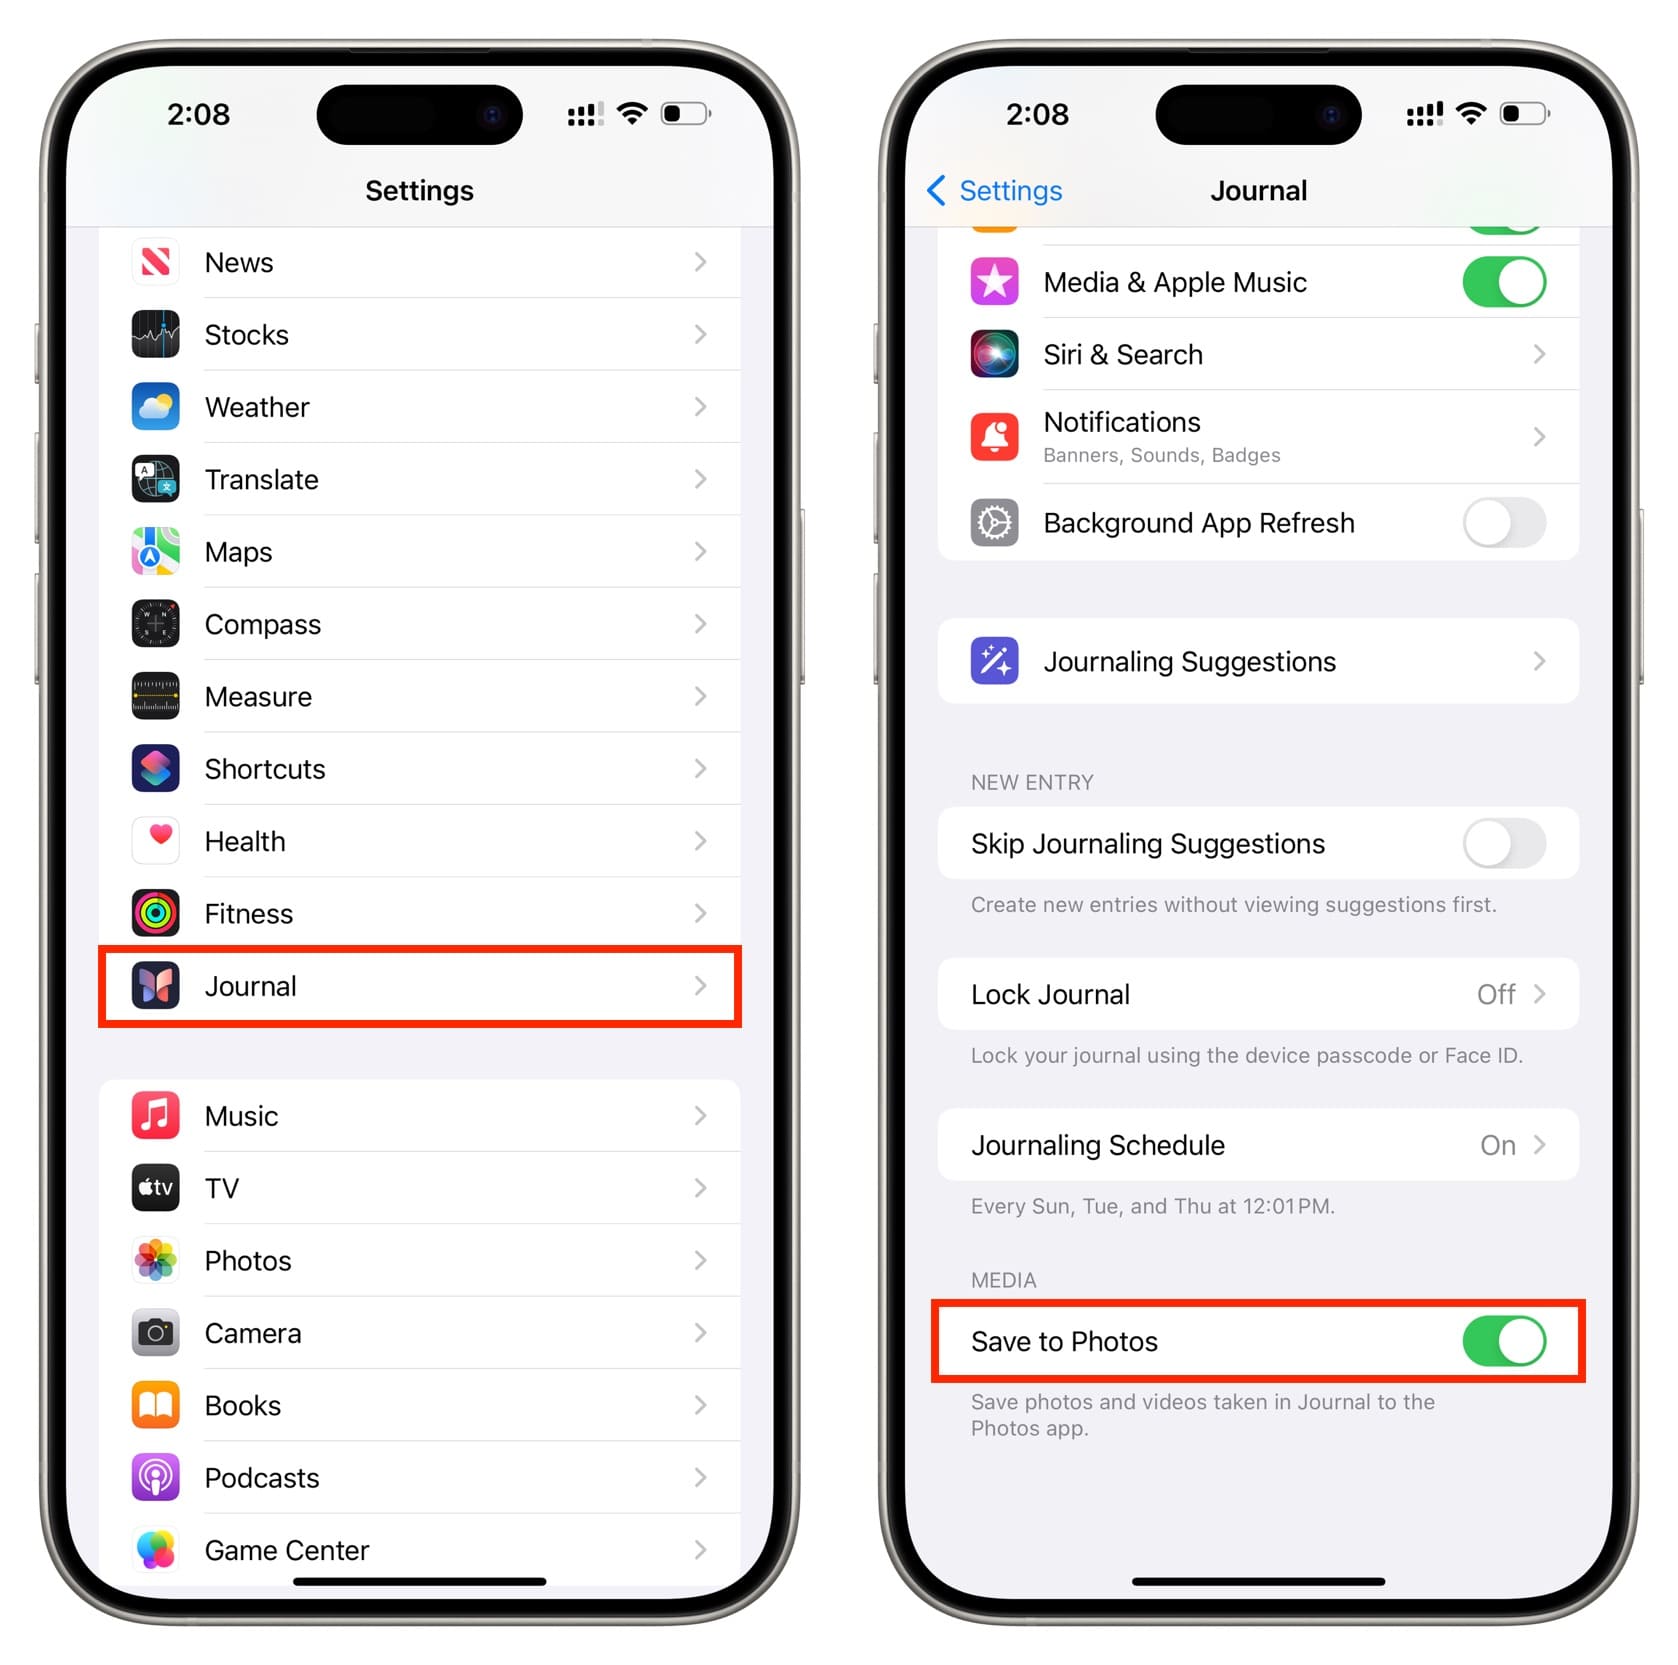
Save journal pictures to iPhone Photos
Go to iPhone Settings > Journal and turn on Save to Photos, which will save the pictures you take inside the Journal app (while making an entry) to the Photos app.
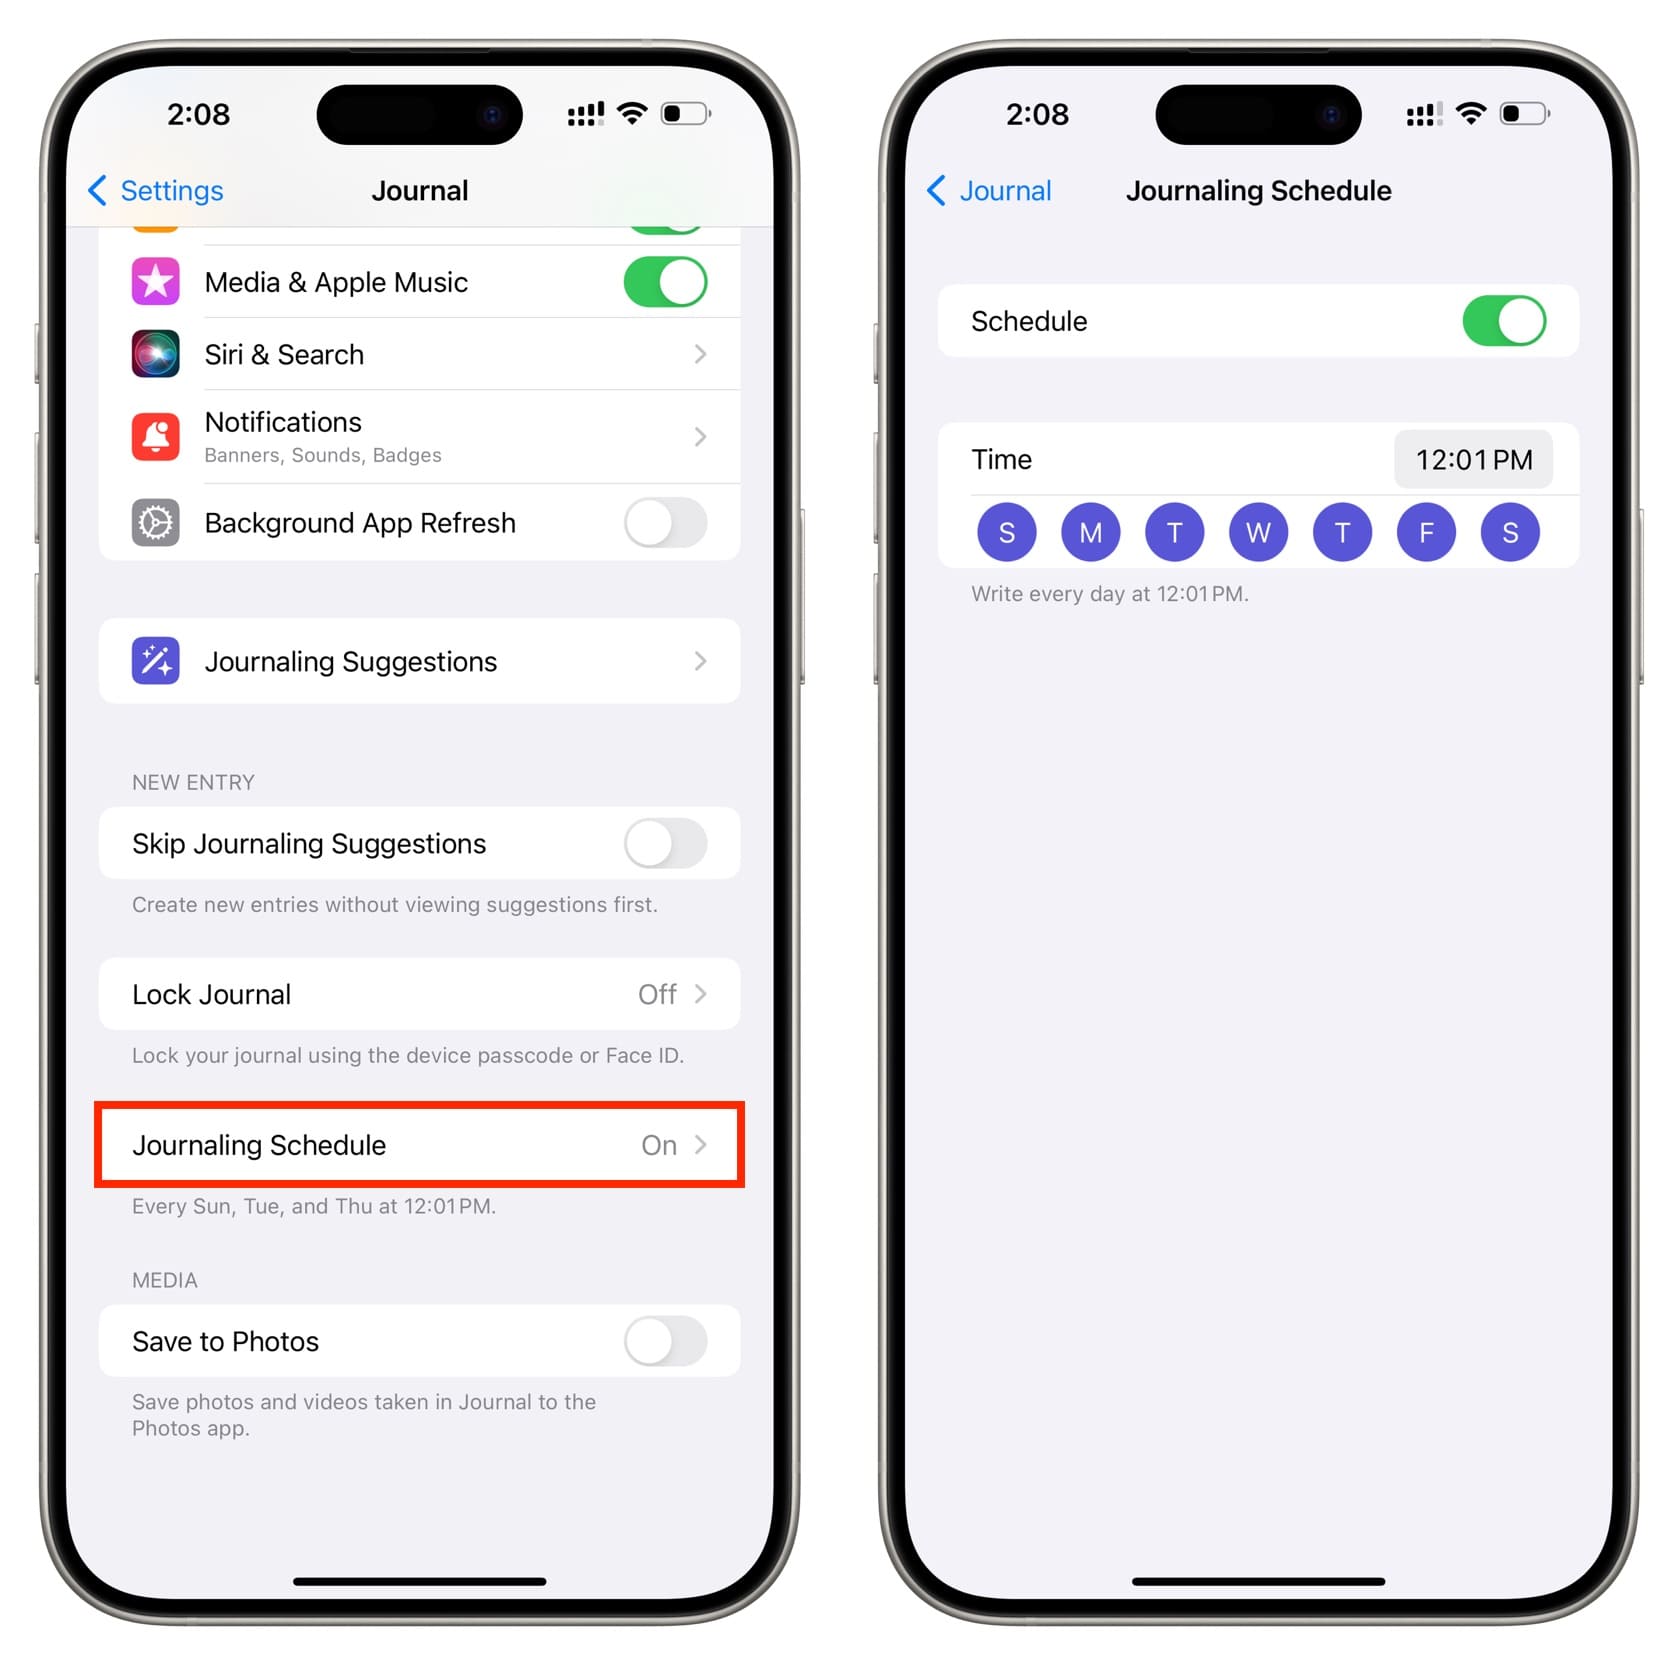
Tweak your journaling schedule
You’re prompted to configure your schedule when you open the Journal app for the first time. But later down the road, you can change its notification time or increase and decrease the number of days you want to make journal entries.
To do that, go to Settings > Journal > Journaling Schedule.
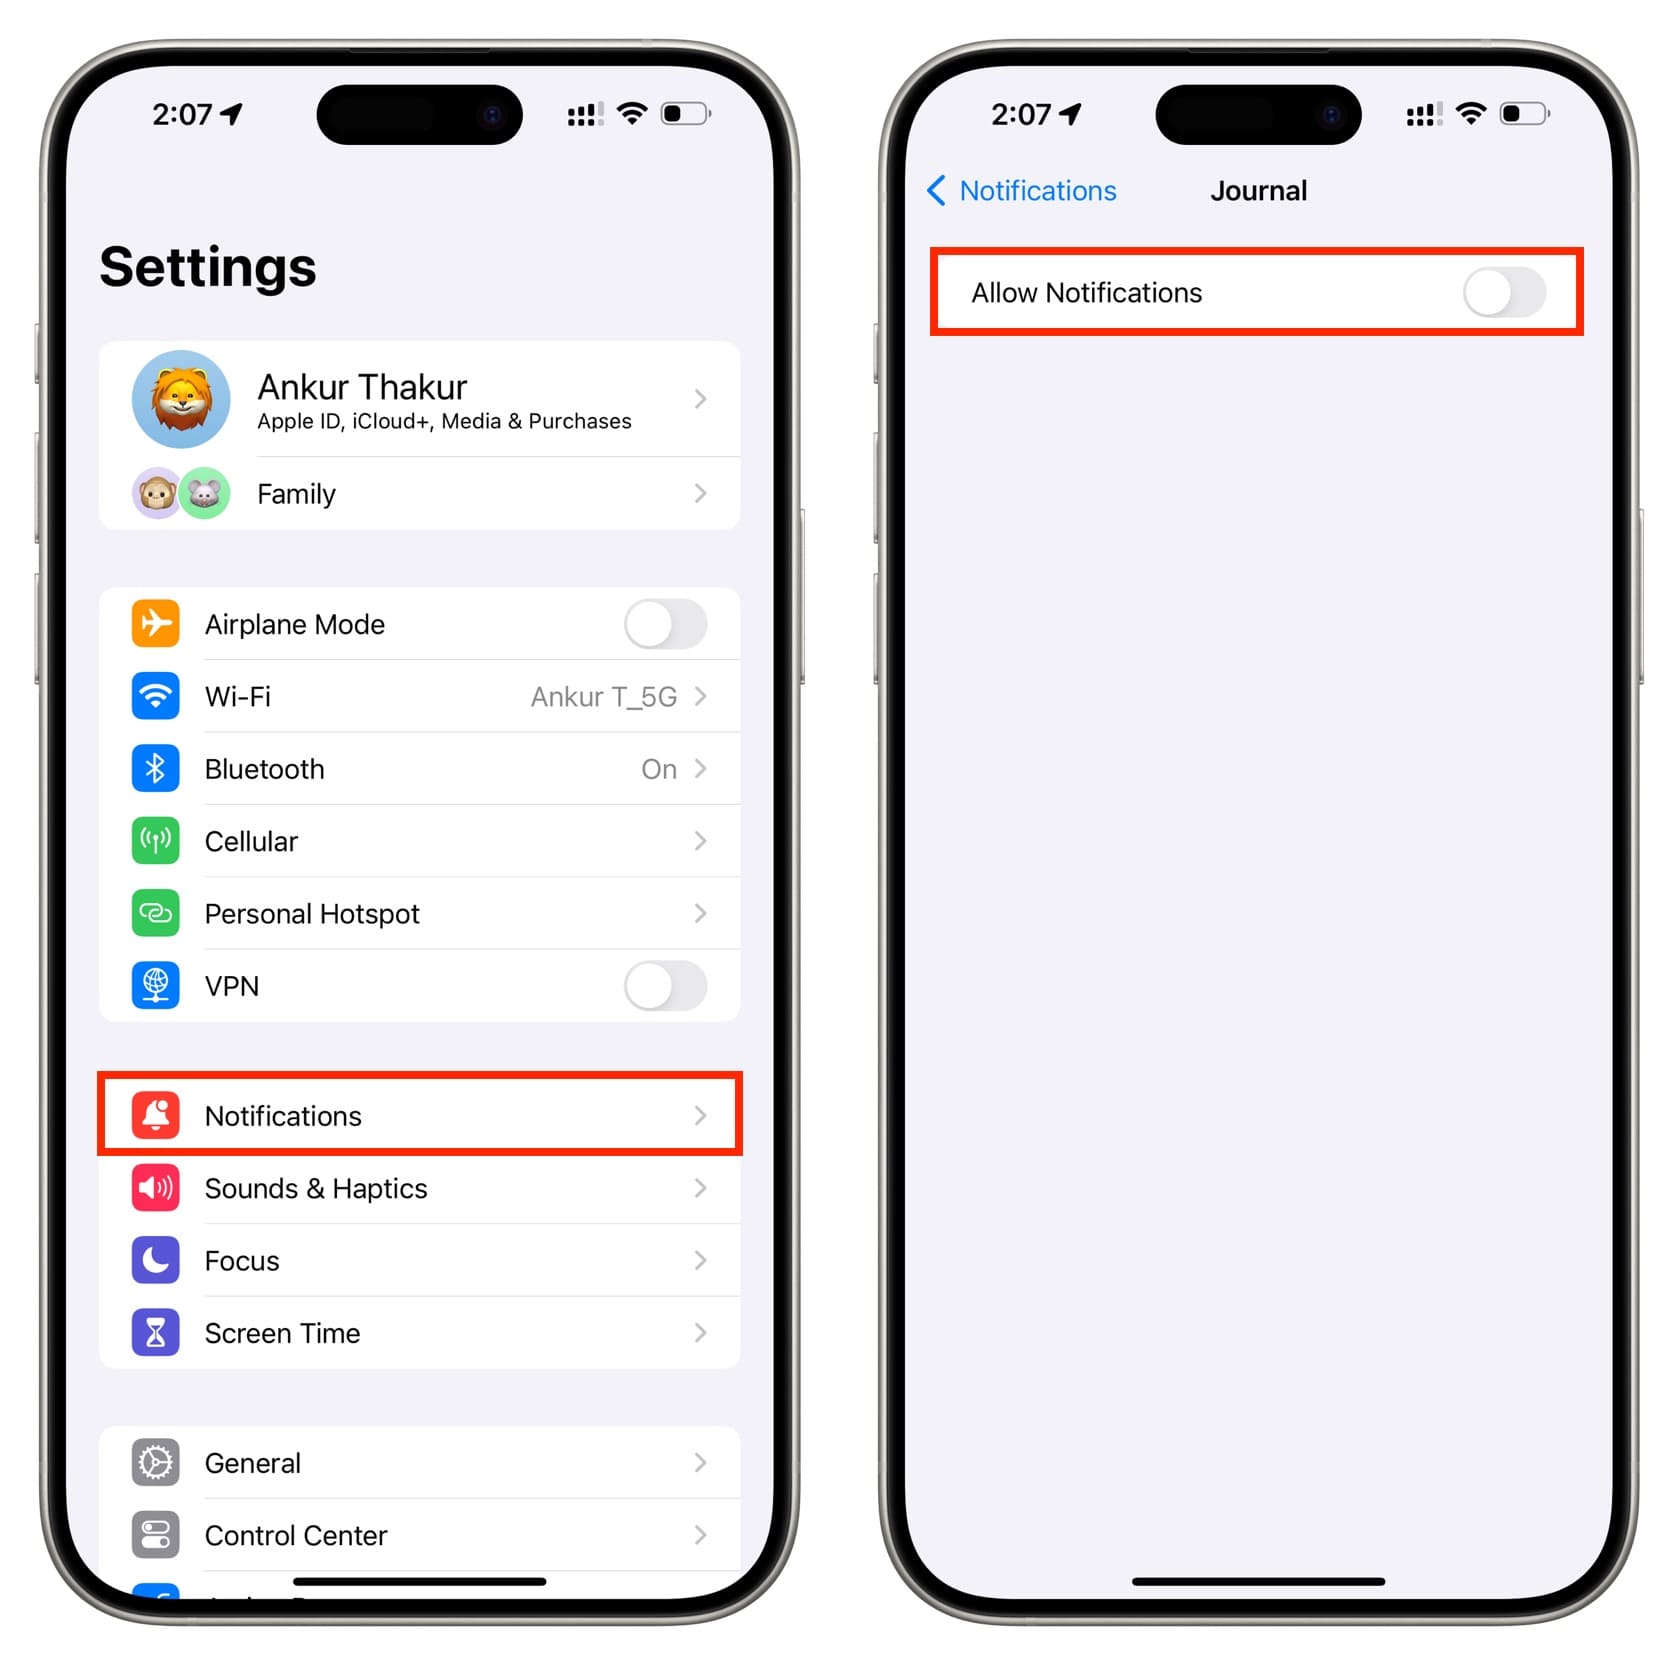
Turn off Journal notifications
If you do not want to get notified to make diary entries, go to iPhone Settings > Journal > Journaling Schedule and turn off the Schedule switch. You can also go to Settings > Notification > Journal and turn off Allow Notifications.
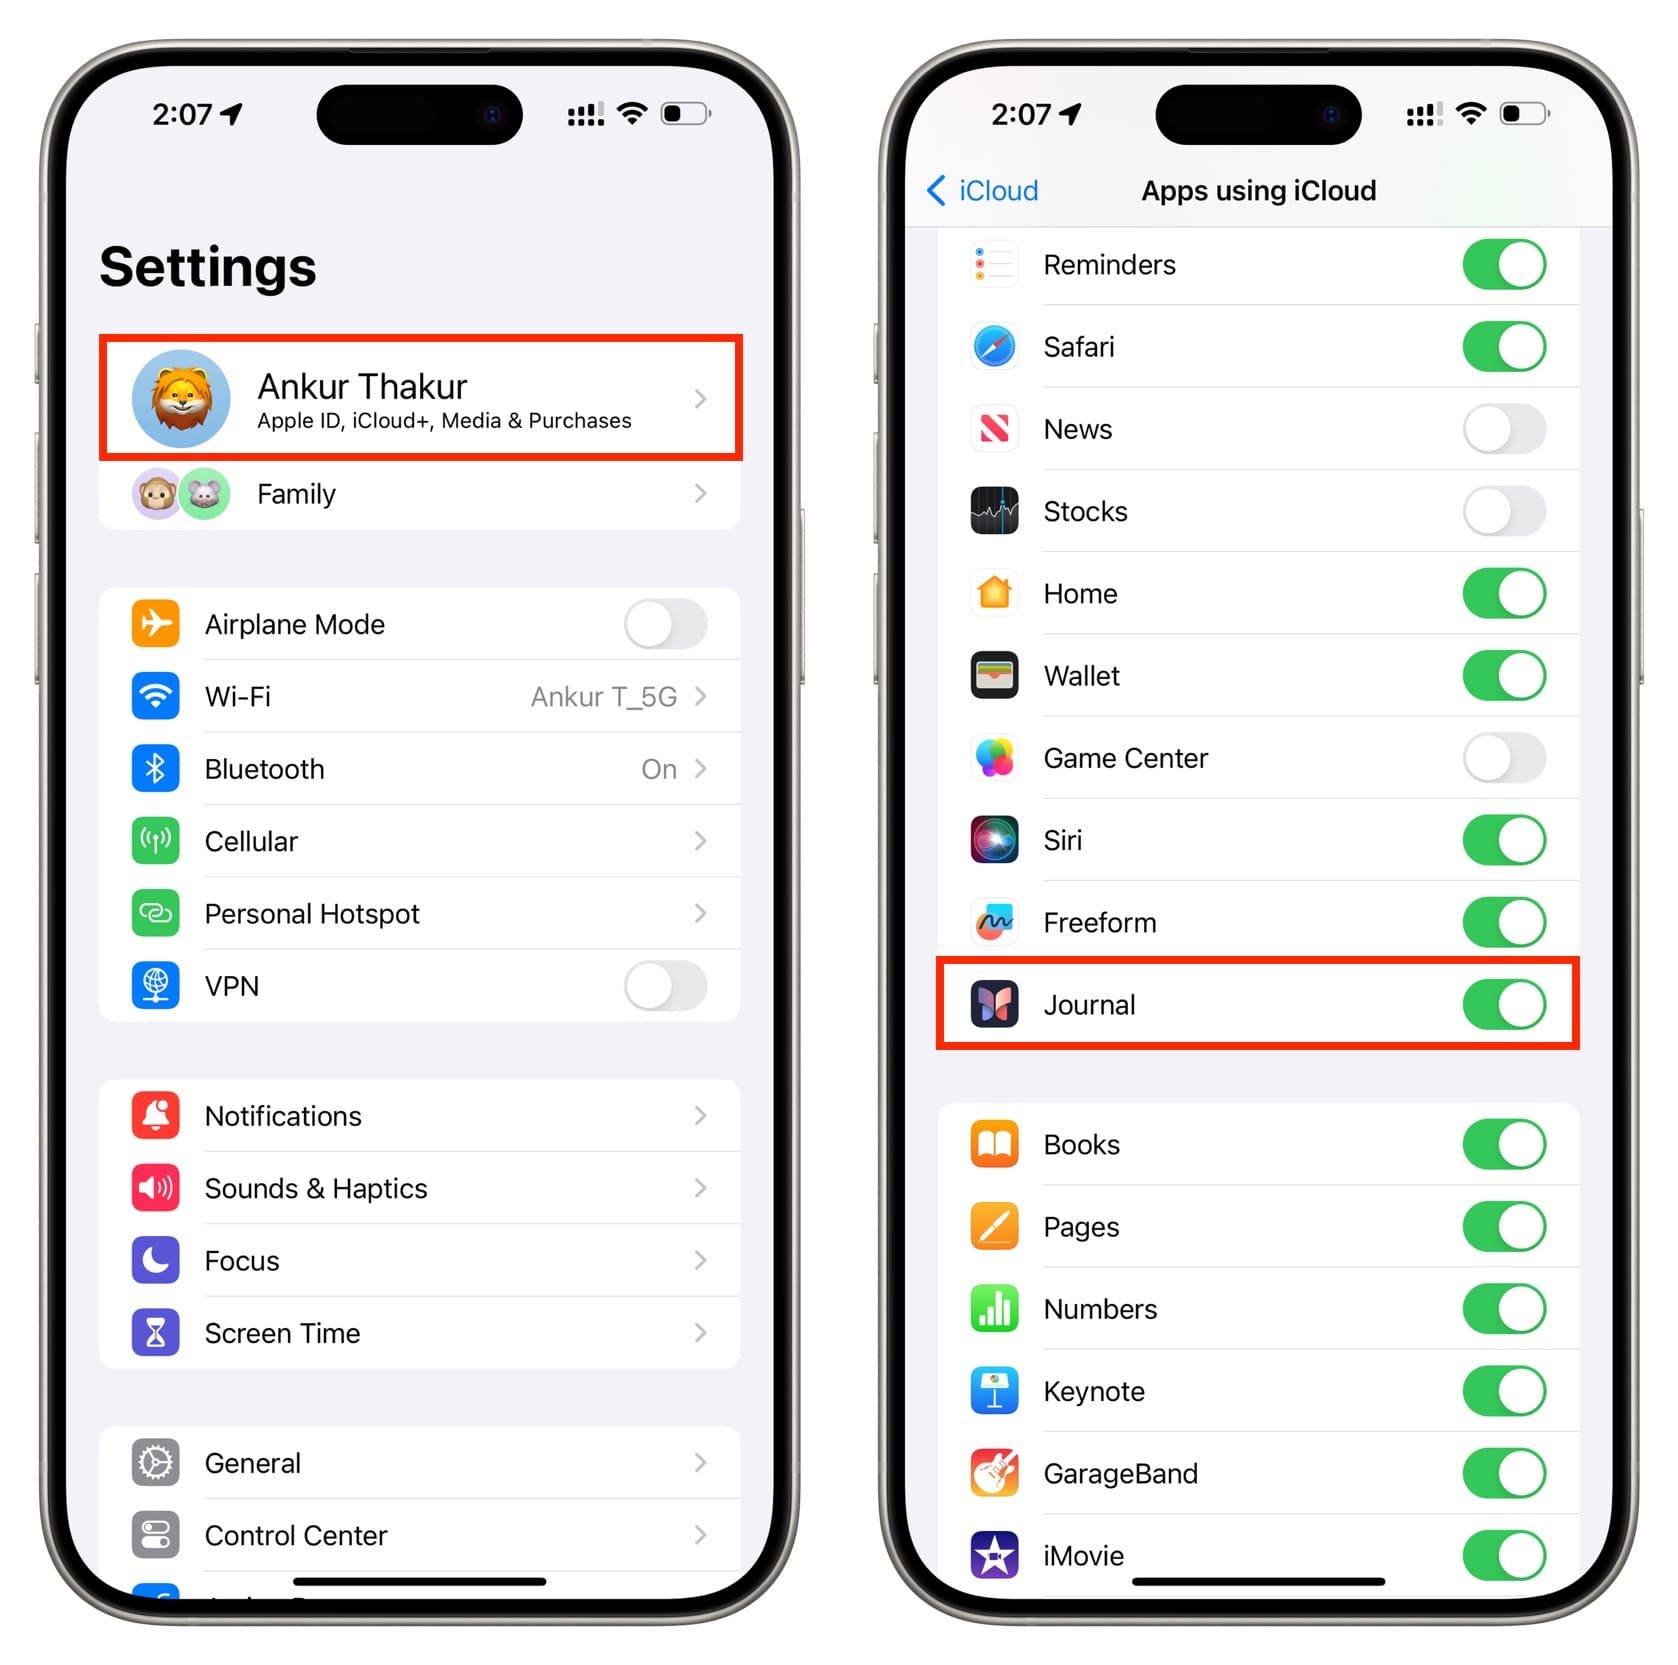
Back up your journals to iCloud
You won’t want to lose your diary entries if you switch to another iPhone or erase it for some reason. Therefore, you should back up your journals to iCloud. To do that:
- Open iPhone Settings and tap your name from the top.
- Tap iCloud > Show All and make sure the switch next to Journal is turned on.
Check out next: How to share a Memory from Photos on iPhone, iPad, and Mac