Check out these free methods to convert WebP images that many websites use to JPG, PNG, or other formats on your Mac.
Google developed the WebP image format as an alternative to JPEG and PNG for use on websites. WebP (and AVIF) images load faster because of their smaller file size compared with other popular formats.
When a downloaded image is saved with a .webp extension appended to the end of the file name, you know it’s encoded in the WebP format. However, some apps may not read this format at all. But don’t worry, if you have issues working with WebP images in some apps, you can easily convert them to JPG, PNG, HEIC, or other image formats on your Mac by following the steps in this tutorial.
Use Mac’s Preview app
- Double-click the downloaded WebP image to open it in the built-in Preview app or right-click the image and choose Open With > Preview.
- Click File from the Preview app’s menu bar and choose the Export option.
- Click the Format menu and choose between the available image formats, including HEIC, JPEG, JPEG-2000, OpenEXR, PDF, PNG, and TIFF.
- Set the Quality slider to a desired point between Least and Best.
- Make sure the export location folder is set to your desired location, then hit the Save button.

Preview will convert and save the WebP image in the selected format, like JPG. Images encoded in JPG or PNG are pretty much everywhere as these formats are almost universally supported across all apps, websites, and services.
Use macOS Quick Actions
Quick Actions make it easy to perform certain tasks anywhere you can right-click a file, like the Finder or your desktop, without opening an app. Follow these steps to convert a WebP image into JPEG or PNG right from the Quick Actions menu on a Mac.
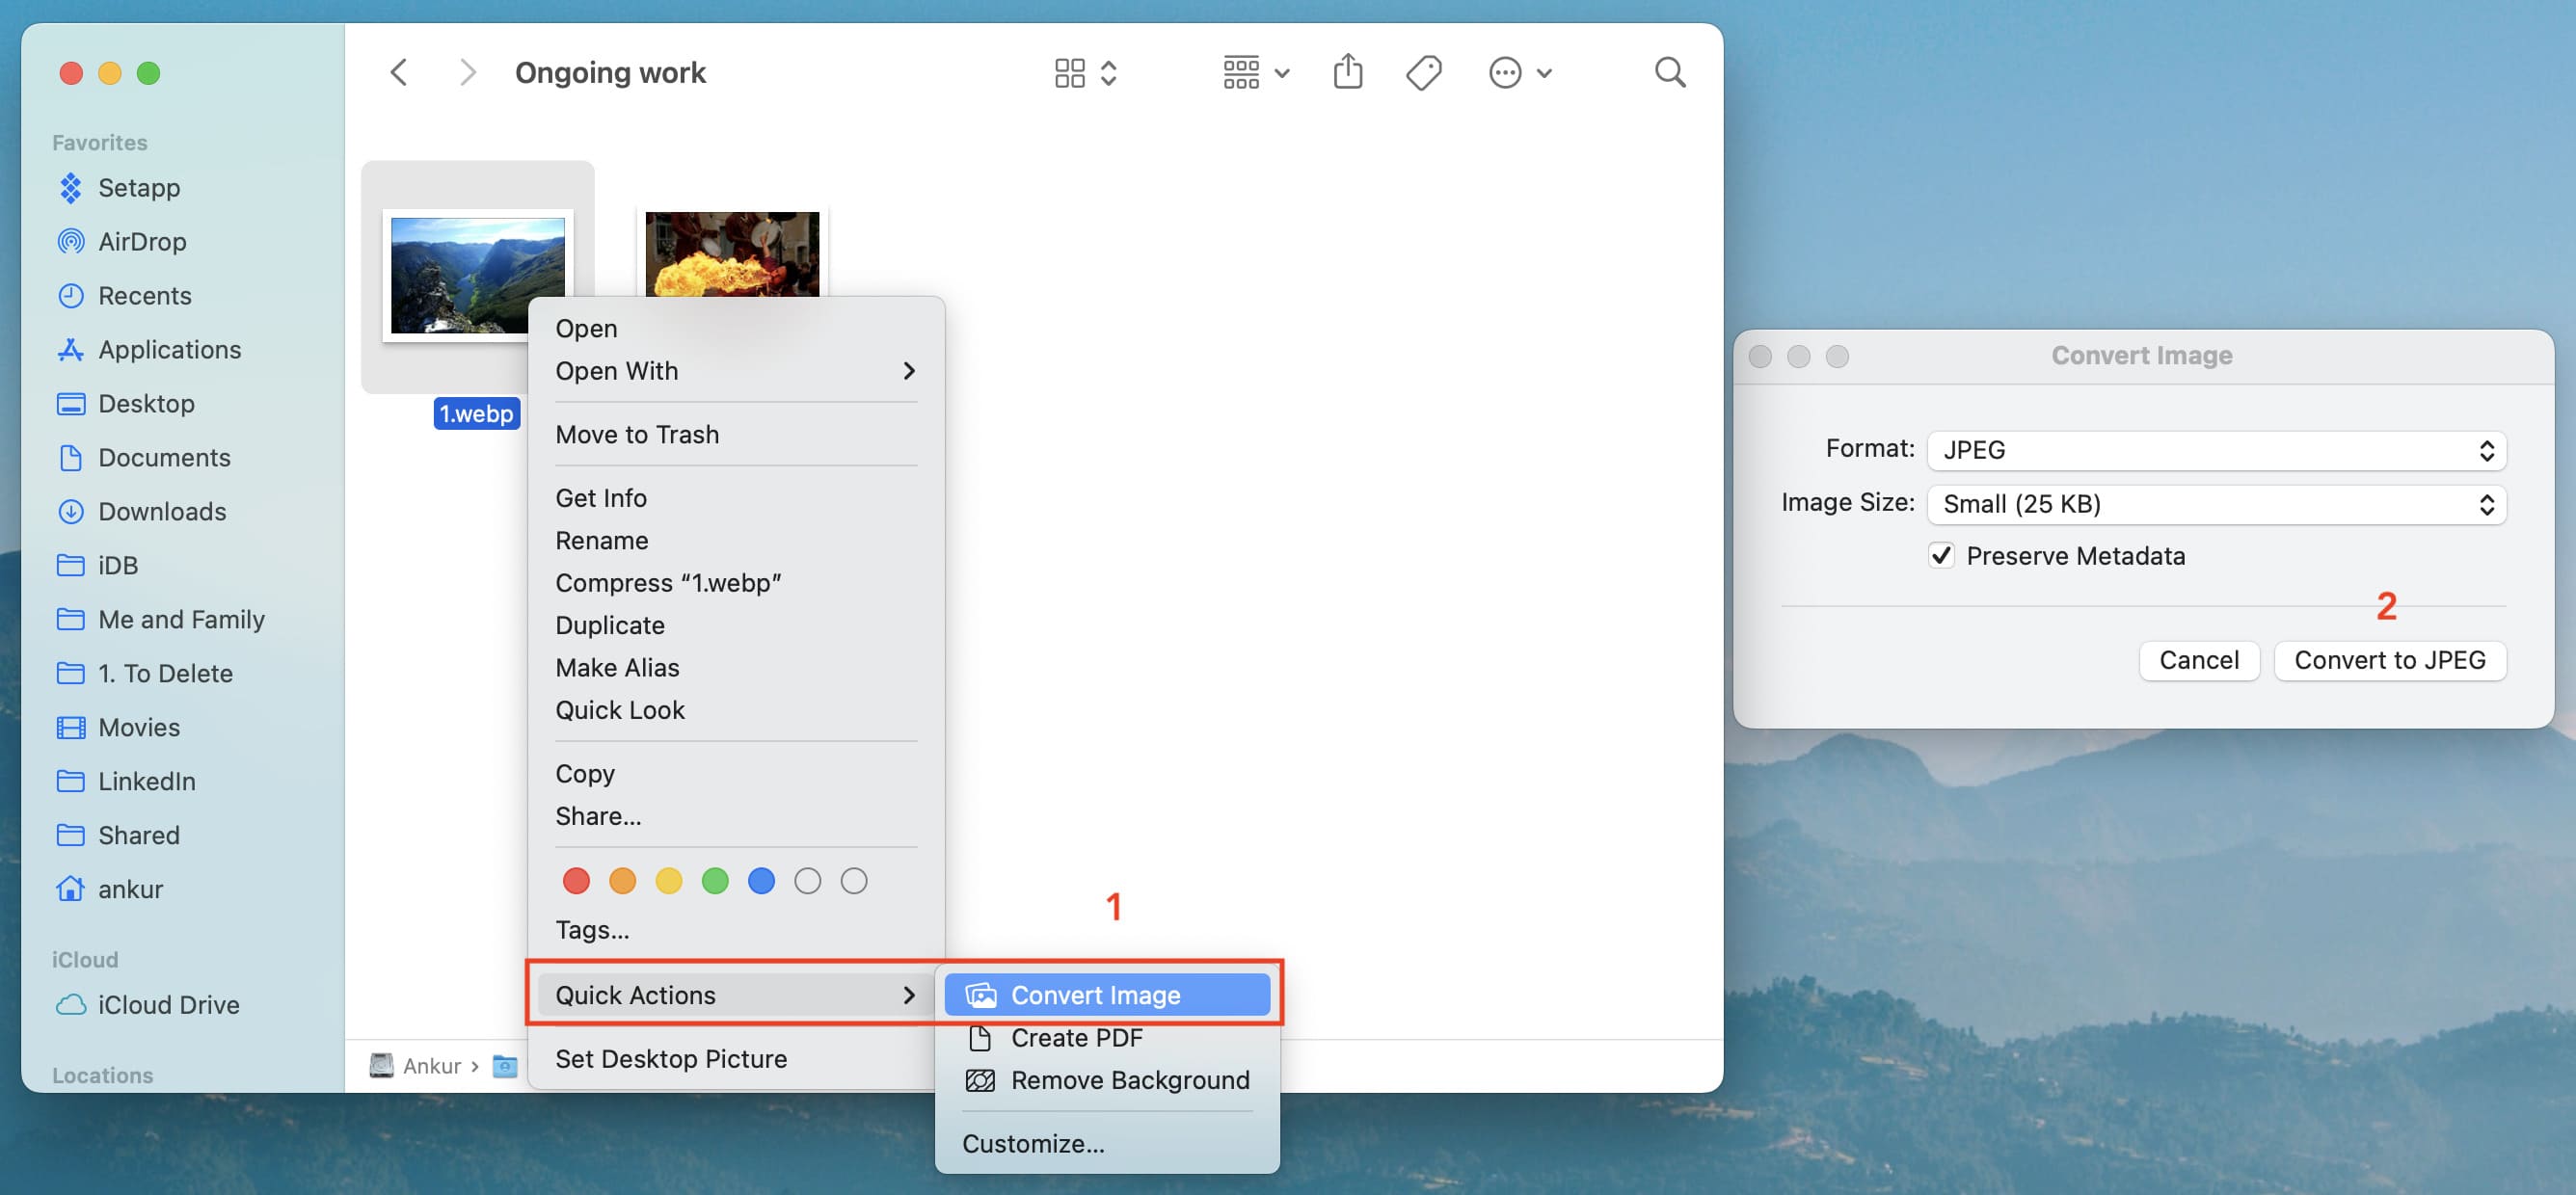
- Right-click or Control-click a WebP image in the Finder or your desktop and select Quick Actions > Convert Image.
- Select the format: JPEG, PNG, or HEIF.
- Click the Image Size menu and choose between Small, Medium, Large, or Actual Size.
- You can optionally delete all image metadata by unticking the Preserve Metadata checkbox. This includes location data embedded into images taken with your iPhone.
- Finally, click Convert to JPEG (or PNG/HEIF).
Finder will convert the WebP image to JPG, PNG, or whatever format you’ve selected, and save it in the same folder as the original file.
Use the built-in Photos app
If you’ve imported WebP images into the Apple Photos app, follow these steps to convert them to JPG or PNG.
- Select one or more WebP images in the built-in Photos app on your Mac, then click File > Export > Export n Photo.
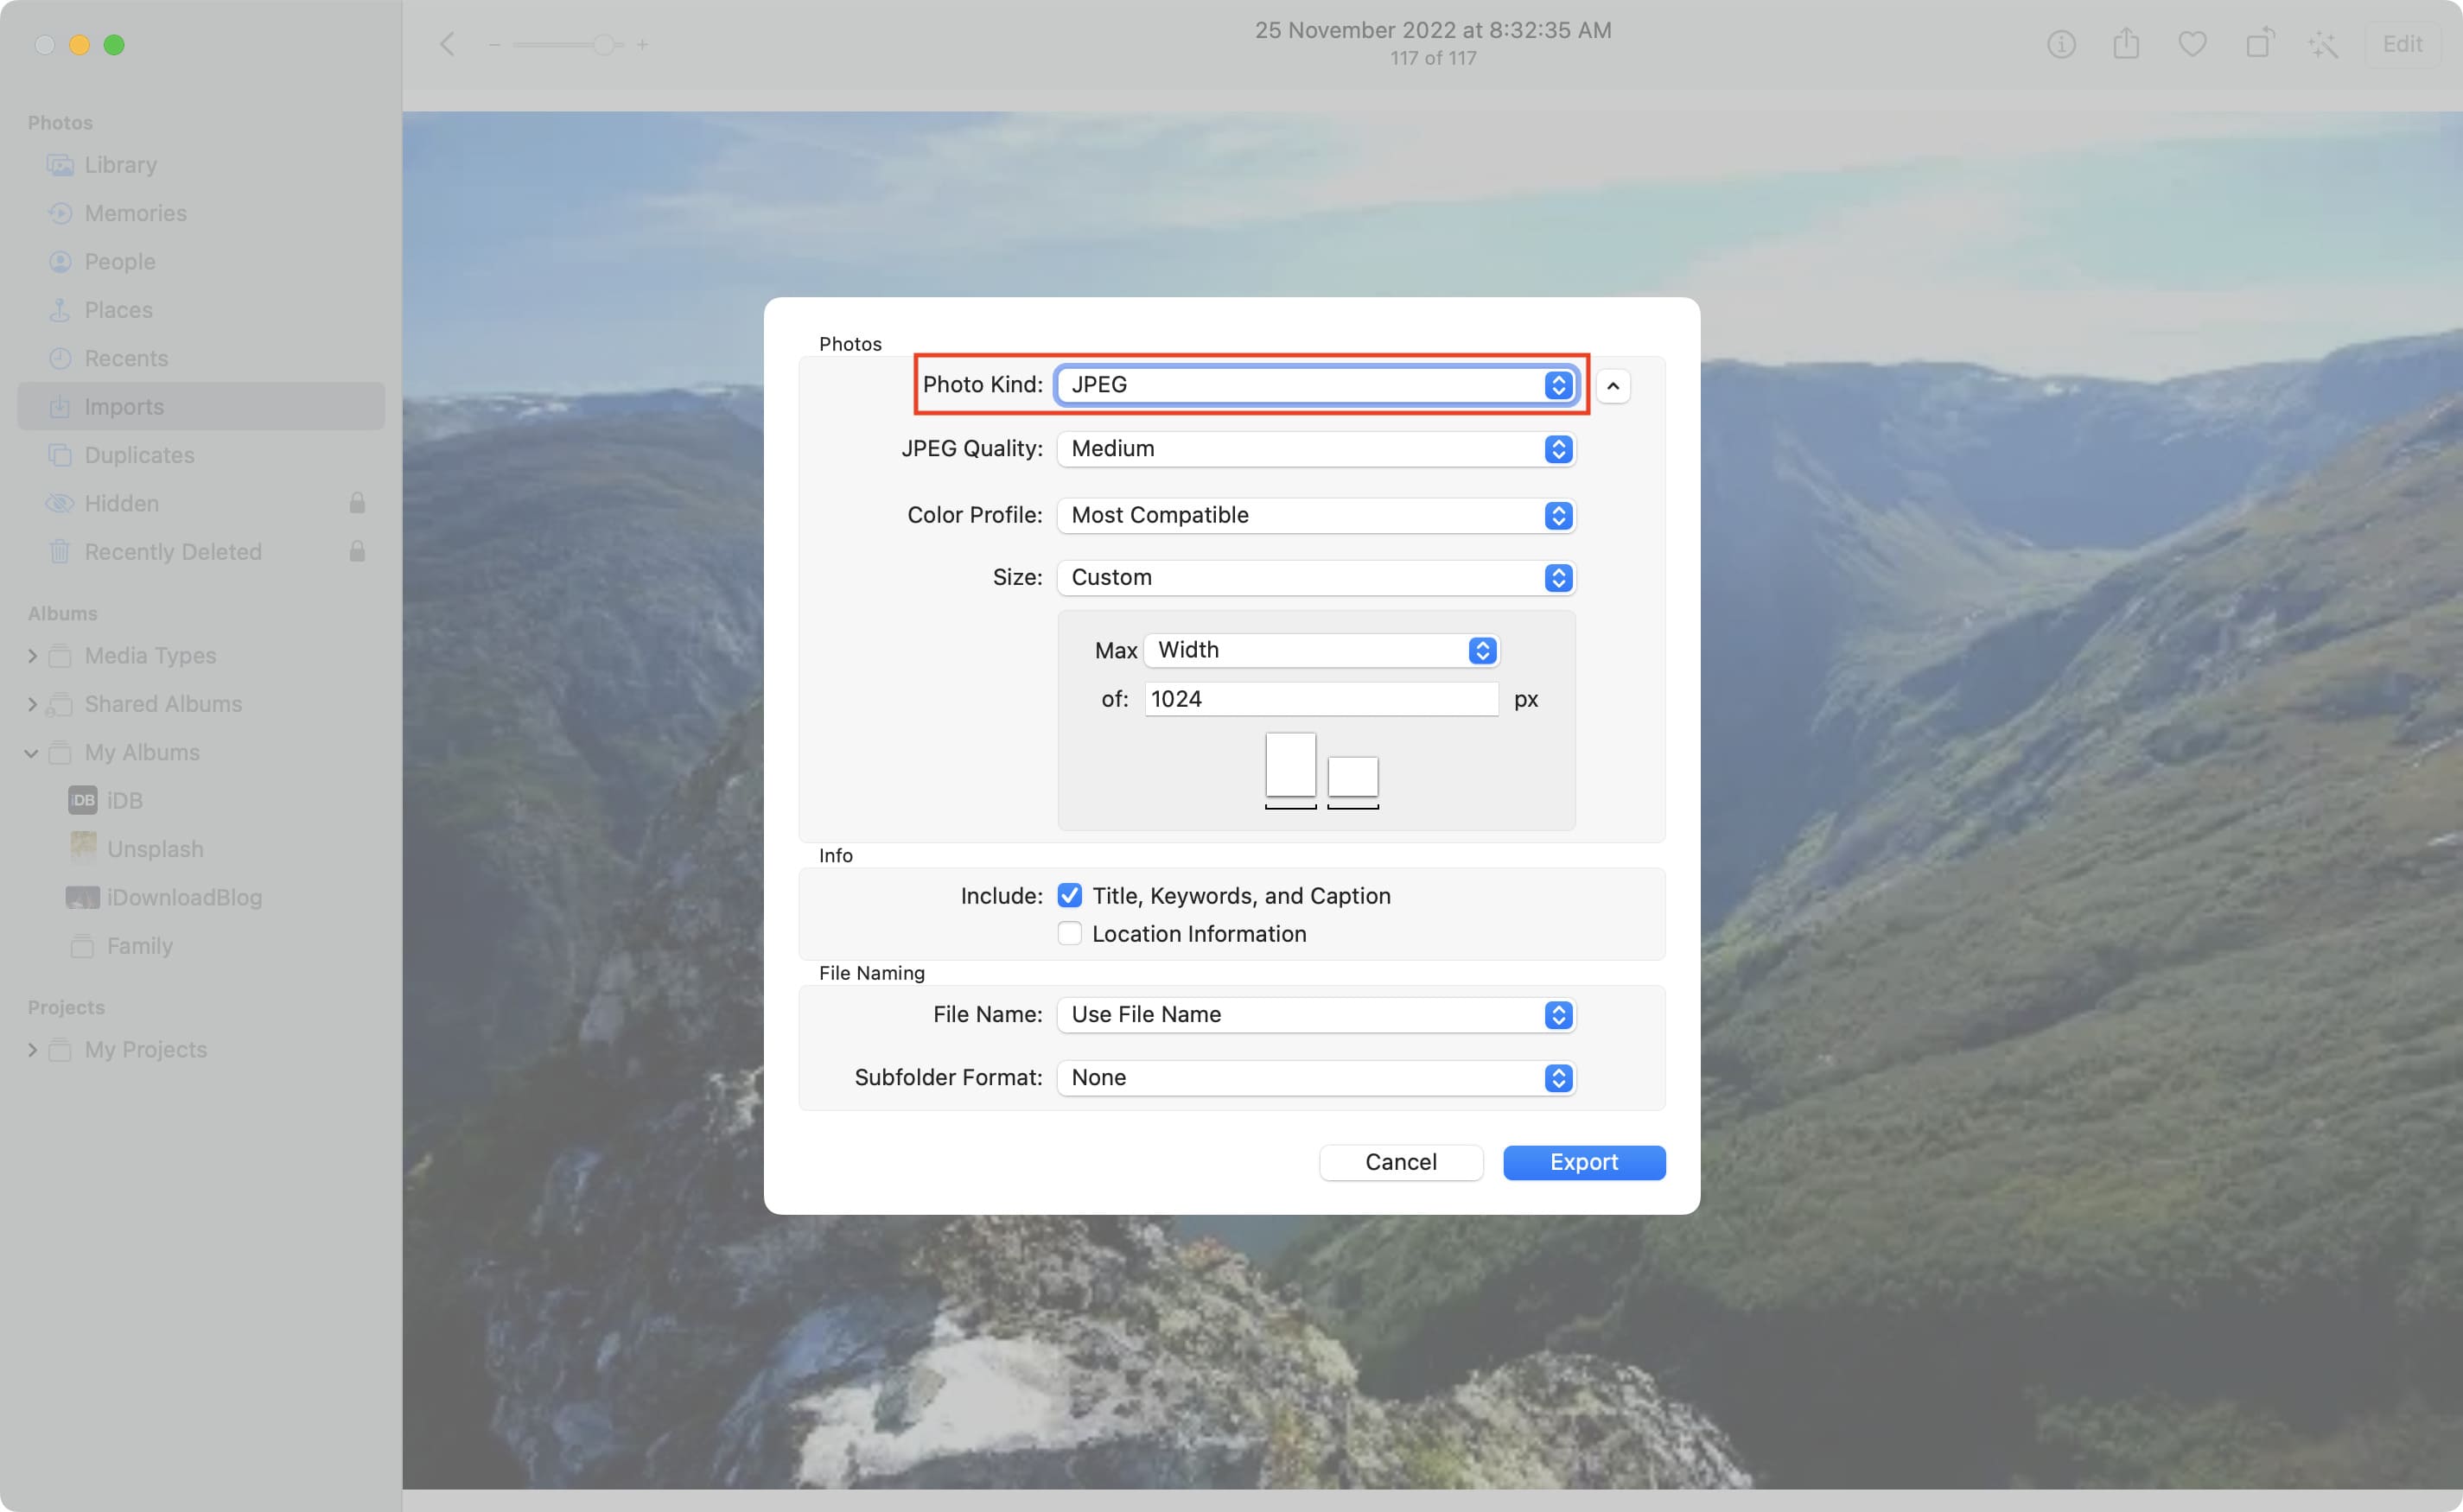
- Click the Photo Kind menu and choose the JPEG, PNG, or TIFF format.
- Set a desired image quality in the JPEG Quality menu between Low (smaller files, lower quality), Medium, High, or Maximum (bigger files, better quality)
- Click the tiny arrow next to Photo Kind to reveal hidden options and tweak them to your liking. For example, you can use the Size menu to resize the final image.
- With all done, click Export, then pick a location to save the converted images, and hit Export again.
Use online sites
Use any of these free online sites on a web browser on your Mac, Windows PC, iPhone, iPad, or Android phone to change WebP images to other formats in batch, without installing any apps.
- iLoveIMG.com: Drop the WebP image, and click Convert to JPG.
- cloudconvert.com: Drop the WebP image or use the Select file button, then click the Convert to menu and pick a desired format. Now hit the wrench icon to set the quality, size, fit, and whether to keep metadata. Once satisfied, hit the Convert button.
- Ezgif.com: Choose the WebP file and hit Upload, set image quality and other options you see here, then click Convert to JPG! Once the conversion completes, hit Save.
Convert JPG and PNG to WebP via WordPress
If you have your own WordPress website or blog, you can use plugins to convert JPG and PNG images to WebP for use on your blog.
WordPress plugins for converting WebP images
These WordPress plugins can convert images saved in JPG, PNG, and other formats into WebP:
- Performance Lab: The PageSpeed Insights tool by Google recommends this WP plugin.
- Imagify – Optimize Images & Convert WebP
- ShortPixel Image Optimizer
- Converter for Media – Optimize images | Convert WebP & AVIF
- WebP Express
- EWWW Image Optimizer
- Plus WebP
- Smush
- Images to WebP
- Other WordPress plugins for WebP conversion
Free websites to convert WebP images
If you don’t use WordPress, you can convert PNG or JPG images into the WebP format with these free websites:
- Convertio.co
- FreeConvert.com
- cloudconvert.com
- Ezgif.com
- TinyIMG.com
- WebP-Converter.com
- AnyWebP.com
- Online-Convert.com
Check out next: