Learn how you can stop AirDrop on iPhone from converting photos to another format, such as PNG to JPG, while sending them to a Mac.
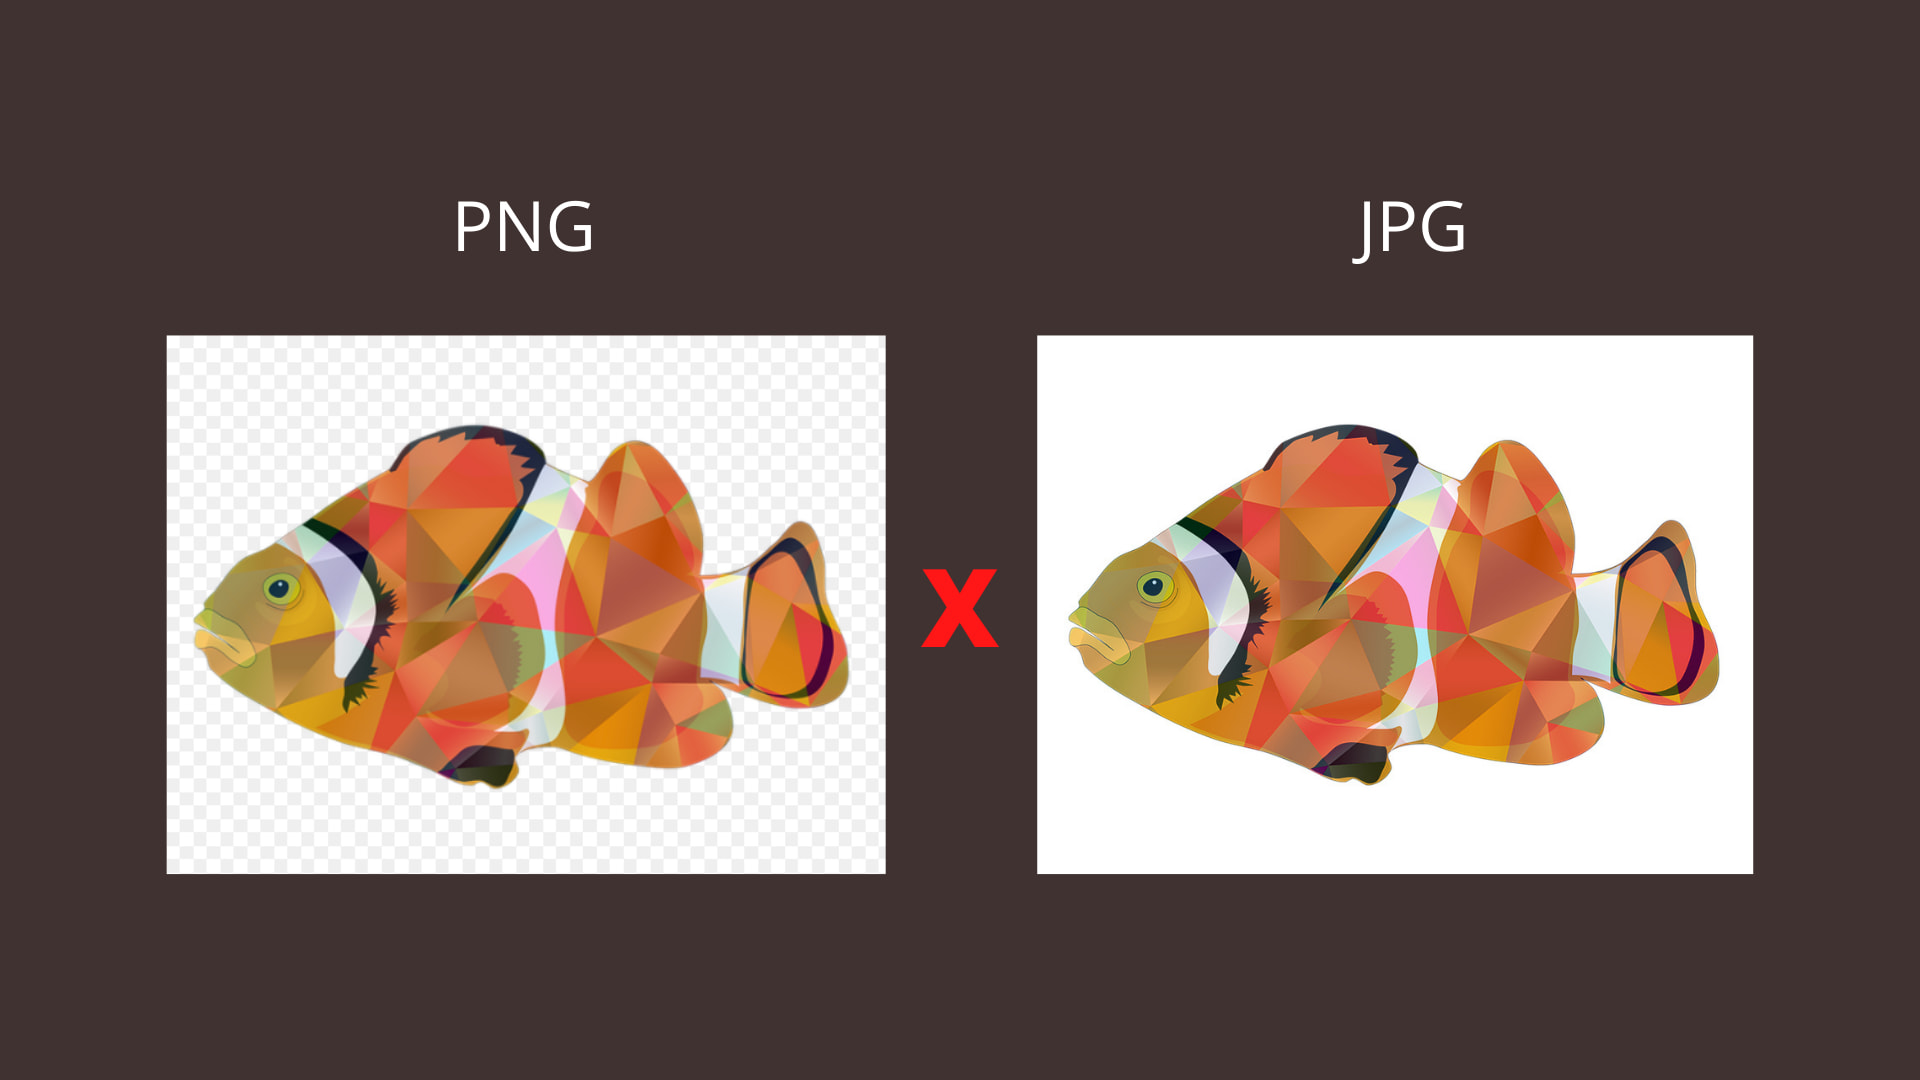
When you send a PNG image from your iPhone to your Mac via AirDrop, the file format may change to a JPG file after transfer. This can be an issue if you need the file to specifically be a PNG.
To prevent this, you can use a hidden trick that will transfer images from iPhone to Mac in their original file format, at full quality, with all their Exif data included.
Enable “All Data” before transferring images via AirDrop
I add frames to my screenshots on my iPhone and AirDrop them to my Mac for use in iDB tutorials. The PNG images used to transfer perfectly. But a while back, I updated my iPhone and then noticed that the PNG images I send from my iPhone appear as JPGs on my MacBook. This reduces the quality of the screenshots and also adds a white background to transparent images. I restarted my iPhone and tried some basic fixes, but none worked for me except for the steps below.
- Open the Photos app, select one or more photos, and tap the share icon.
- Tap Options from the top.
- Enable All Photos Data. After that, tap the checkmark icon or Done, and then select AirDrop to transfer the pictures with all the data. If you’re on a newer version of iOS, you can just select Current under the Format heading and then AirDrop the file.

I agree that following these steps every time you use AirDrop to send images can be unpleasant. So, I also recommend keeping an eye out for a new update from Apple and installing it when it becomes available.
Turn on “Keep Original” from iPhone Settings
iPhone takes images in High-Efficiency Image File (HEIF) format. HEIF takes substantially less space than JPG. But this format isn’t supported on all devices, operating systems, apps, and websites.
So, you can set your iPhone to shoot in JPG instead of HEIF. Or, you can choose to shoot in the high-efficiency format (HEIF), thus saving space, but have your iPhone convert them to JPG when transferring. You can learn more about all this here and also see the steps to proceed.
Bonus Tip: Use Image Capture to get images from iPhone to Mac in the original format
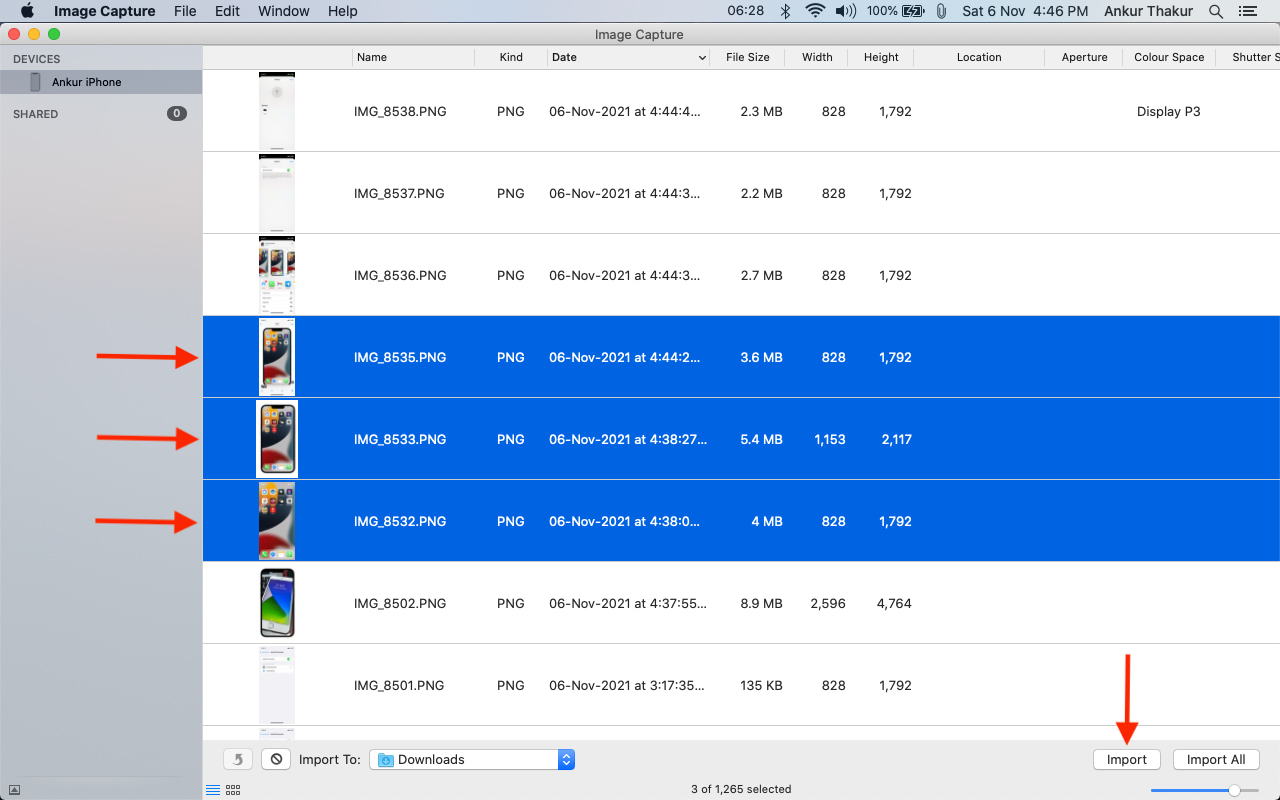
Image Capture is a simple yet excellent macOS app by Apple that is preinstalled on all Macs. I often use this to transfer images between my iPhone and MacBook when AirDrop doesn’t work, or I have tons of images to copy, or I face issues like this one where the format is changed.
Go through these steps to use Image Capture to transfer images from iPhone to Mac in original quality and format.
- Connect your iPhone to your Mac using an appropriate cable.
- Open Image Capture.
- Unlock your iPhone using Face ID, Touch ID, or its passcode.
- Within a few seconds, you should see your iPhone pictures inside Image Capture. Select one image or press the Command key and select multiple.
- Finally, click Import. You can see these images in Mac’s Downloads folder.
This is how you can transfer pictures from your iPhone to Mac without a reduction in quality or change in format. Remember that these methods also include the Exif data, which can disclose things like where you shot the picture and more. So, take caution if you would like to hide them before sending the image to someone.
On a related note: