It’s always a good idea to blur or pixelate parts of an image or screenshot if it contains sensitive information that you wouldn’t want others to see. You can easily take a screenshot on Mac using the built-in tool, but there’s no way to pixelate an image with that tool. Luckily, there are a couple of ways to pixelate and image or screenshot to hide information.
In this tutorial, you’ll learn how to blur or pixelate images or screenshots on Mac using third-party apps. There’s also a quick way to hide parts of an image using the Retouch tool in the Photos app.
Also see: How to take a screenshot of your Mac using Touch Bar
How to blur or pixelate an image or screenshot on Mac
As mentioned in the beginning, there are a few ways to blur or pixelate an image on Mac. Unfortunately, there’s no built-in tool that offers this on macOS. You can use the keyboard shortcuts in macOS to grab a screenshot, and then add the blur or pixelation using a third-party app.
Skitch
While there are a couple of other photo tools that offer the blur option, we found that Skitch is an excellent choice. Skitch is owned by Evernote, so you can also sign-in and sync with your Evernote account. It’s a free app that’s available for download on the Mac App Store. Here’s how you can use it to pixelate a screenshot or image.
1) Launch Skitch on your Mac.
2) Drag and drop the image or screenshot you want to edit. You can also click on File > Open and select the image.
3) Select the Pixelate tool from the left toolbar.
4) Use it to select the area on the image that you want to pixelate.
You can now save the image or share it without any worry. The selected region will now be pixelated and everything underneath it will be hidden.
Retouch tool in Photos app
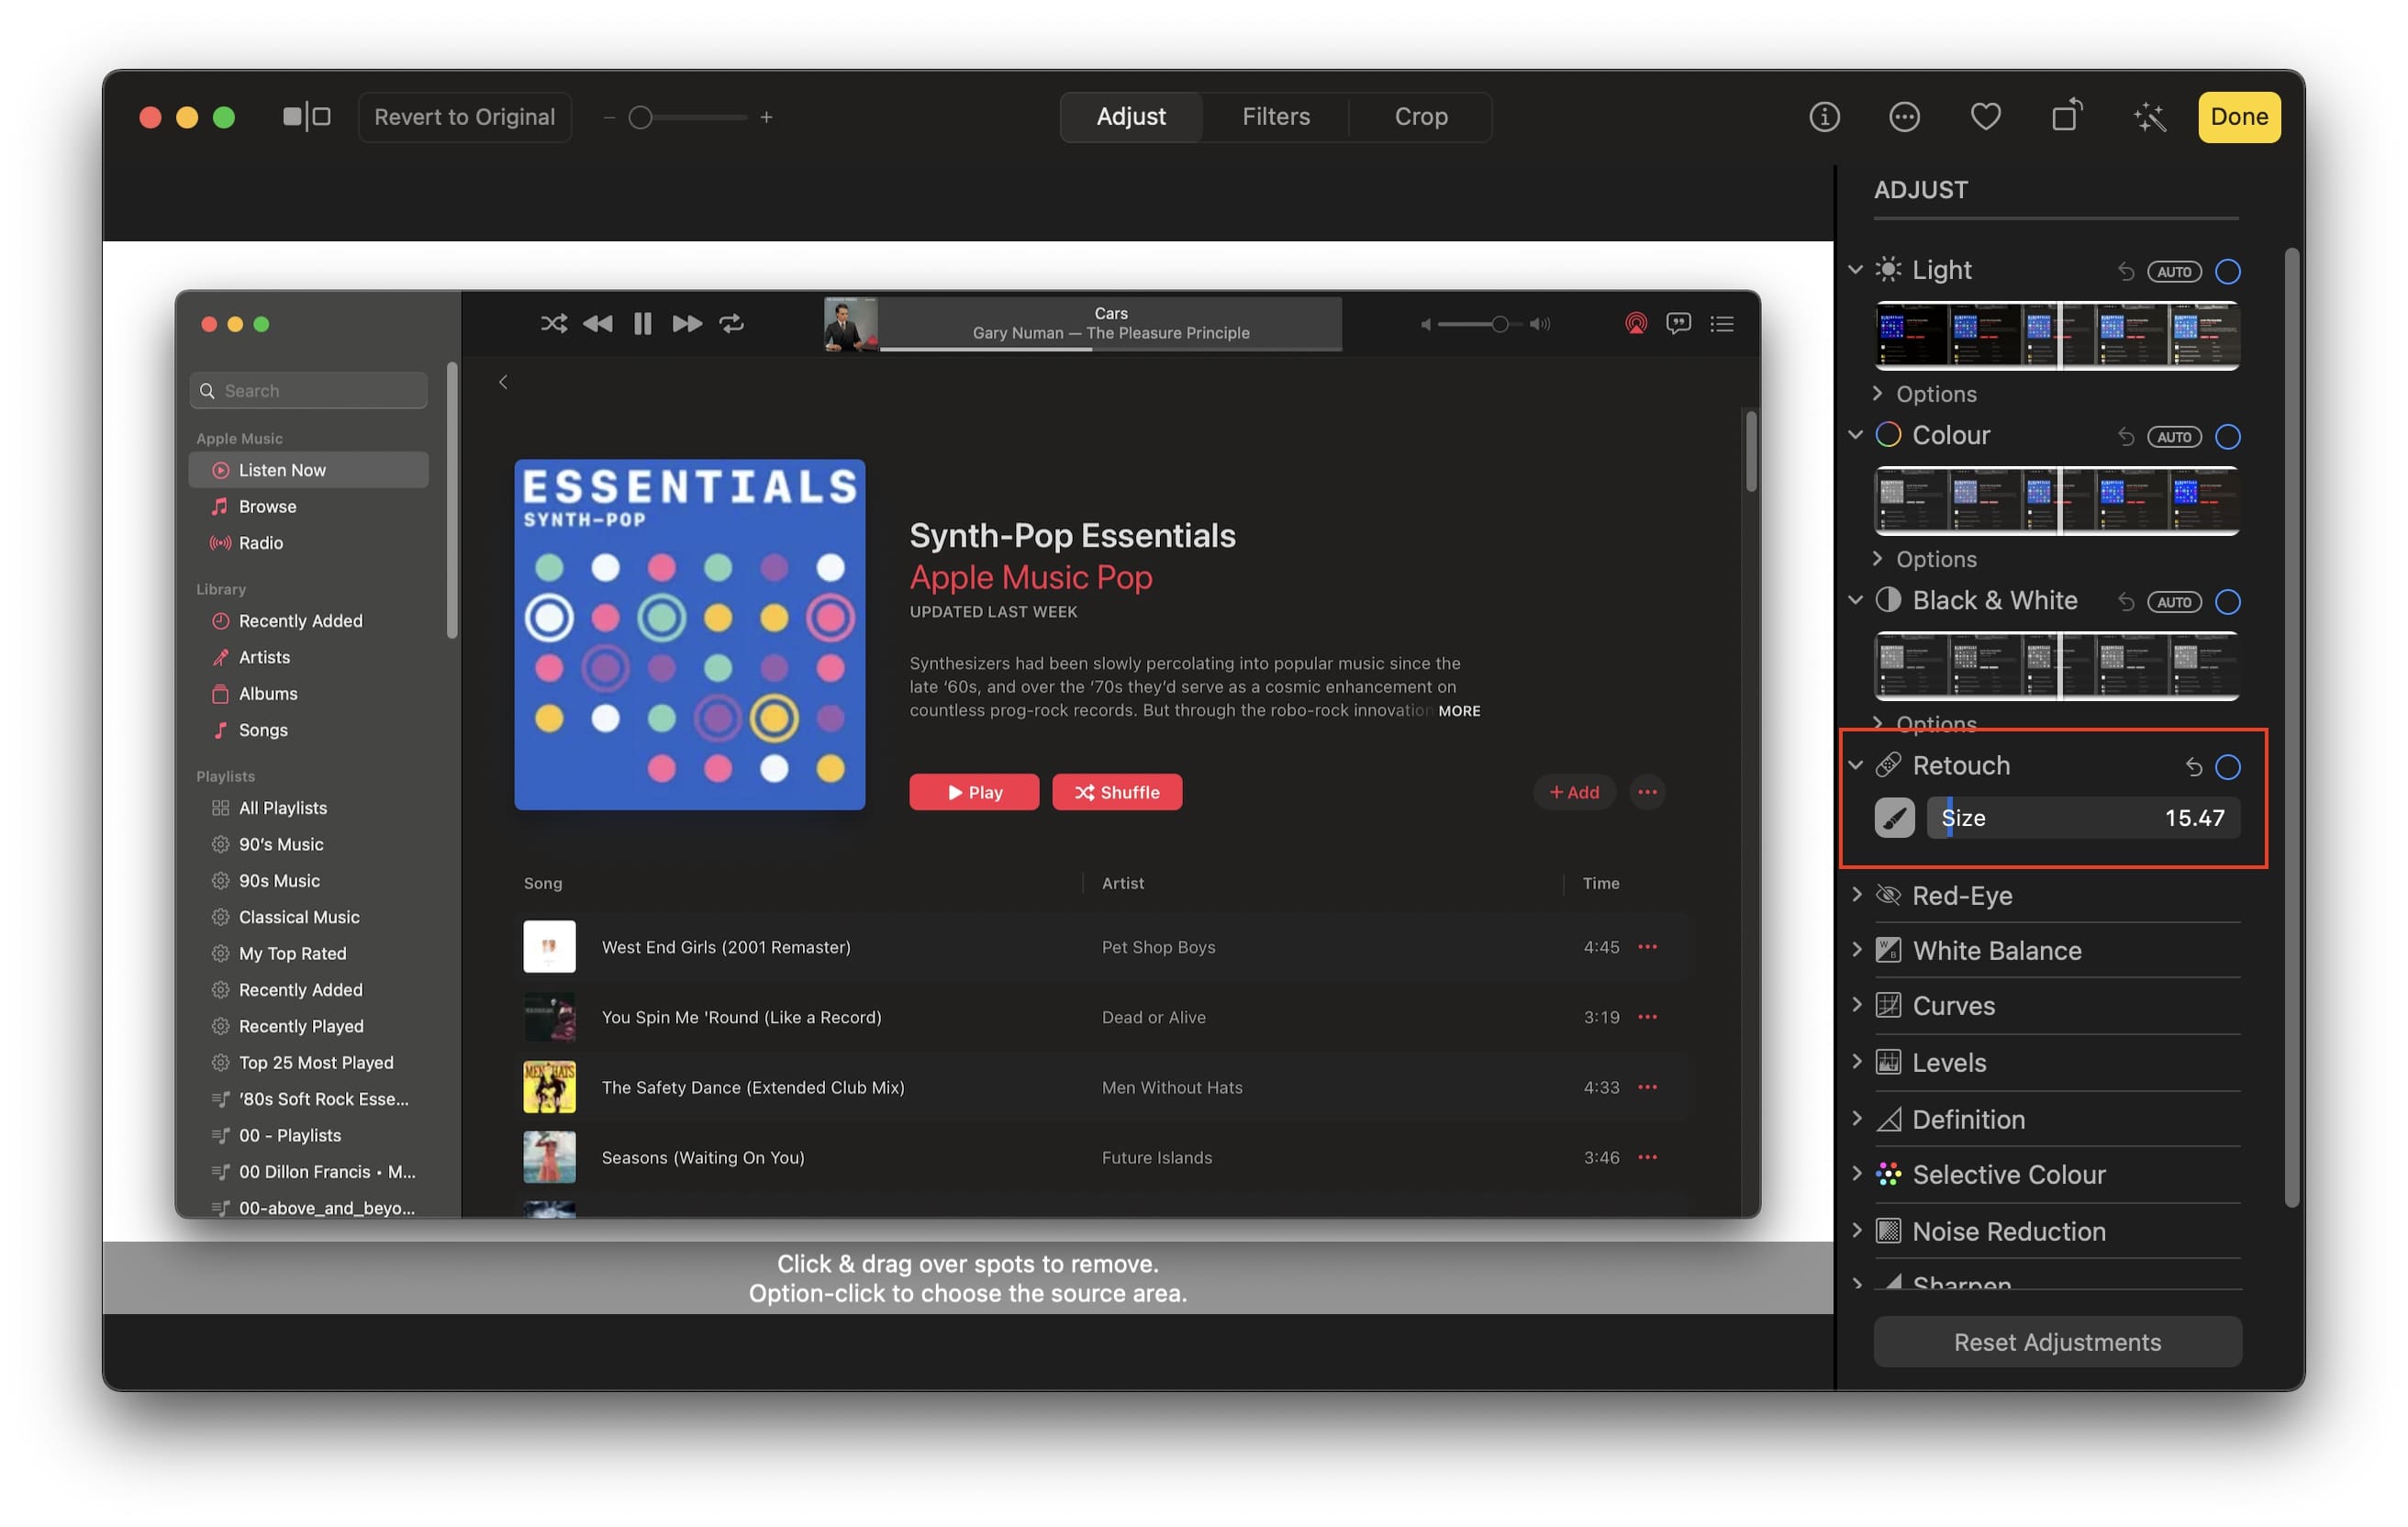
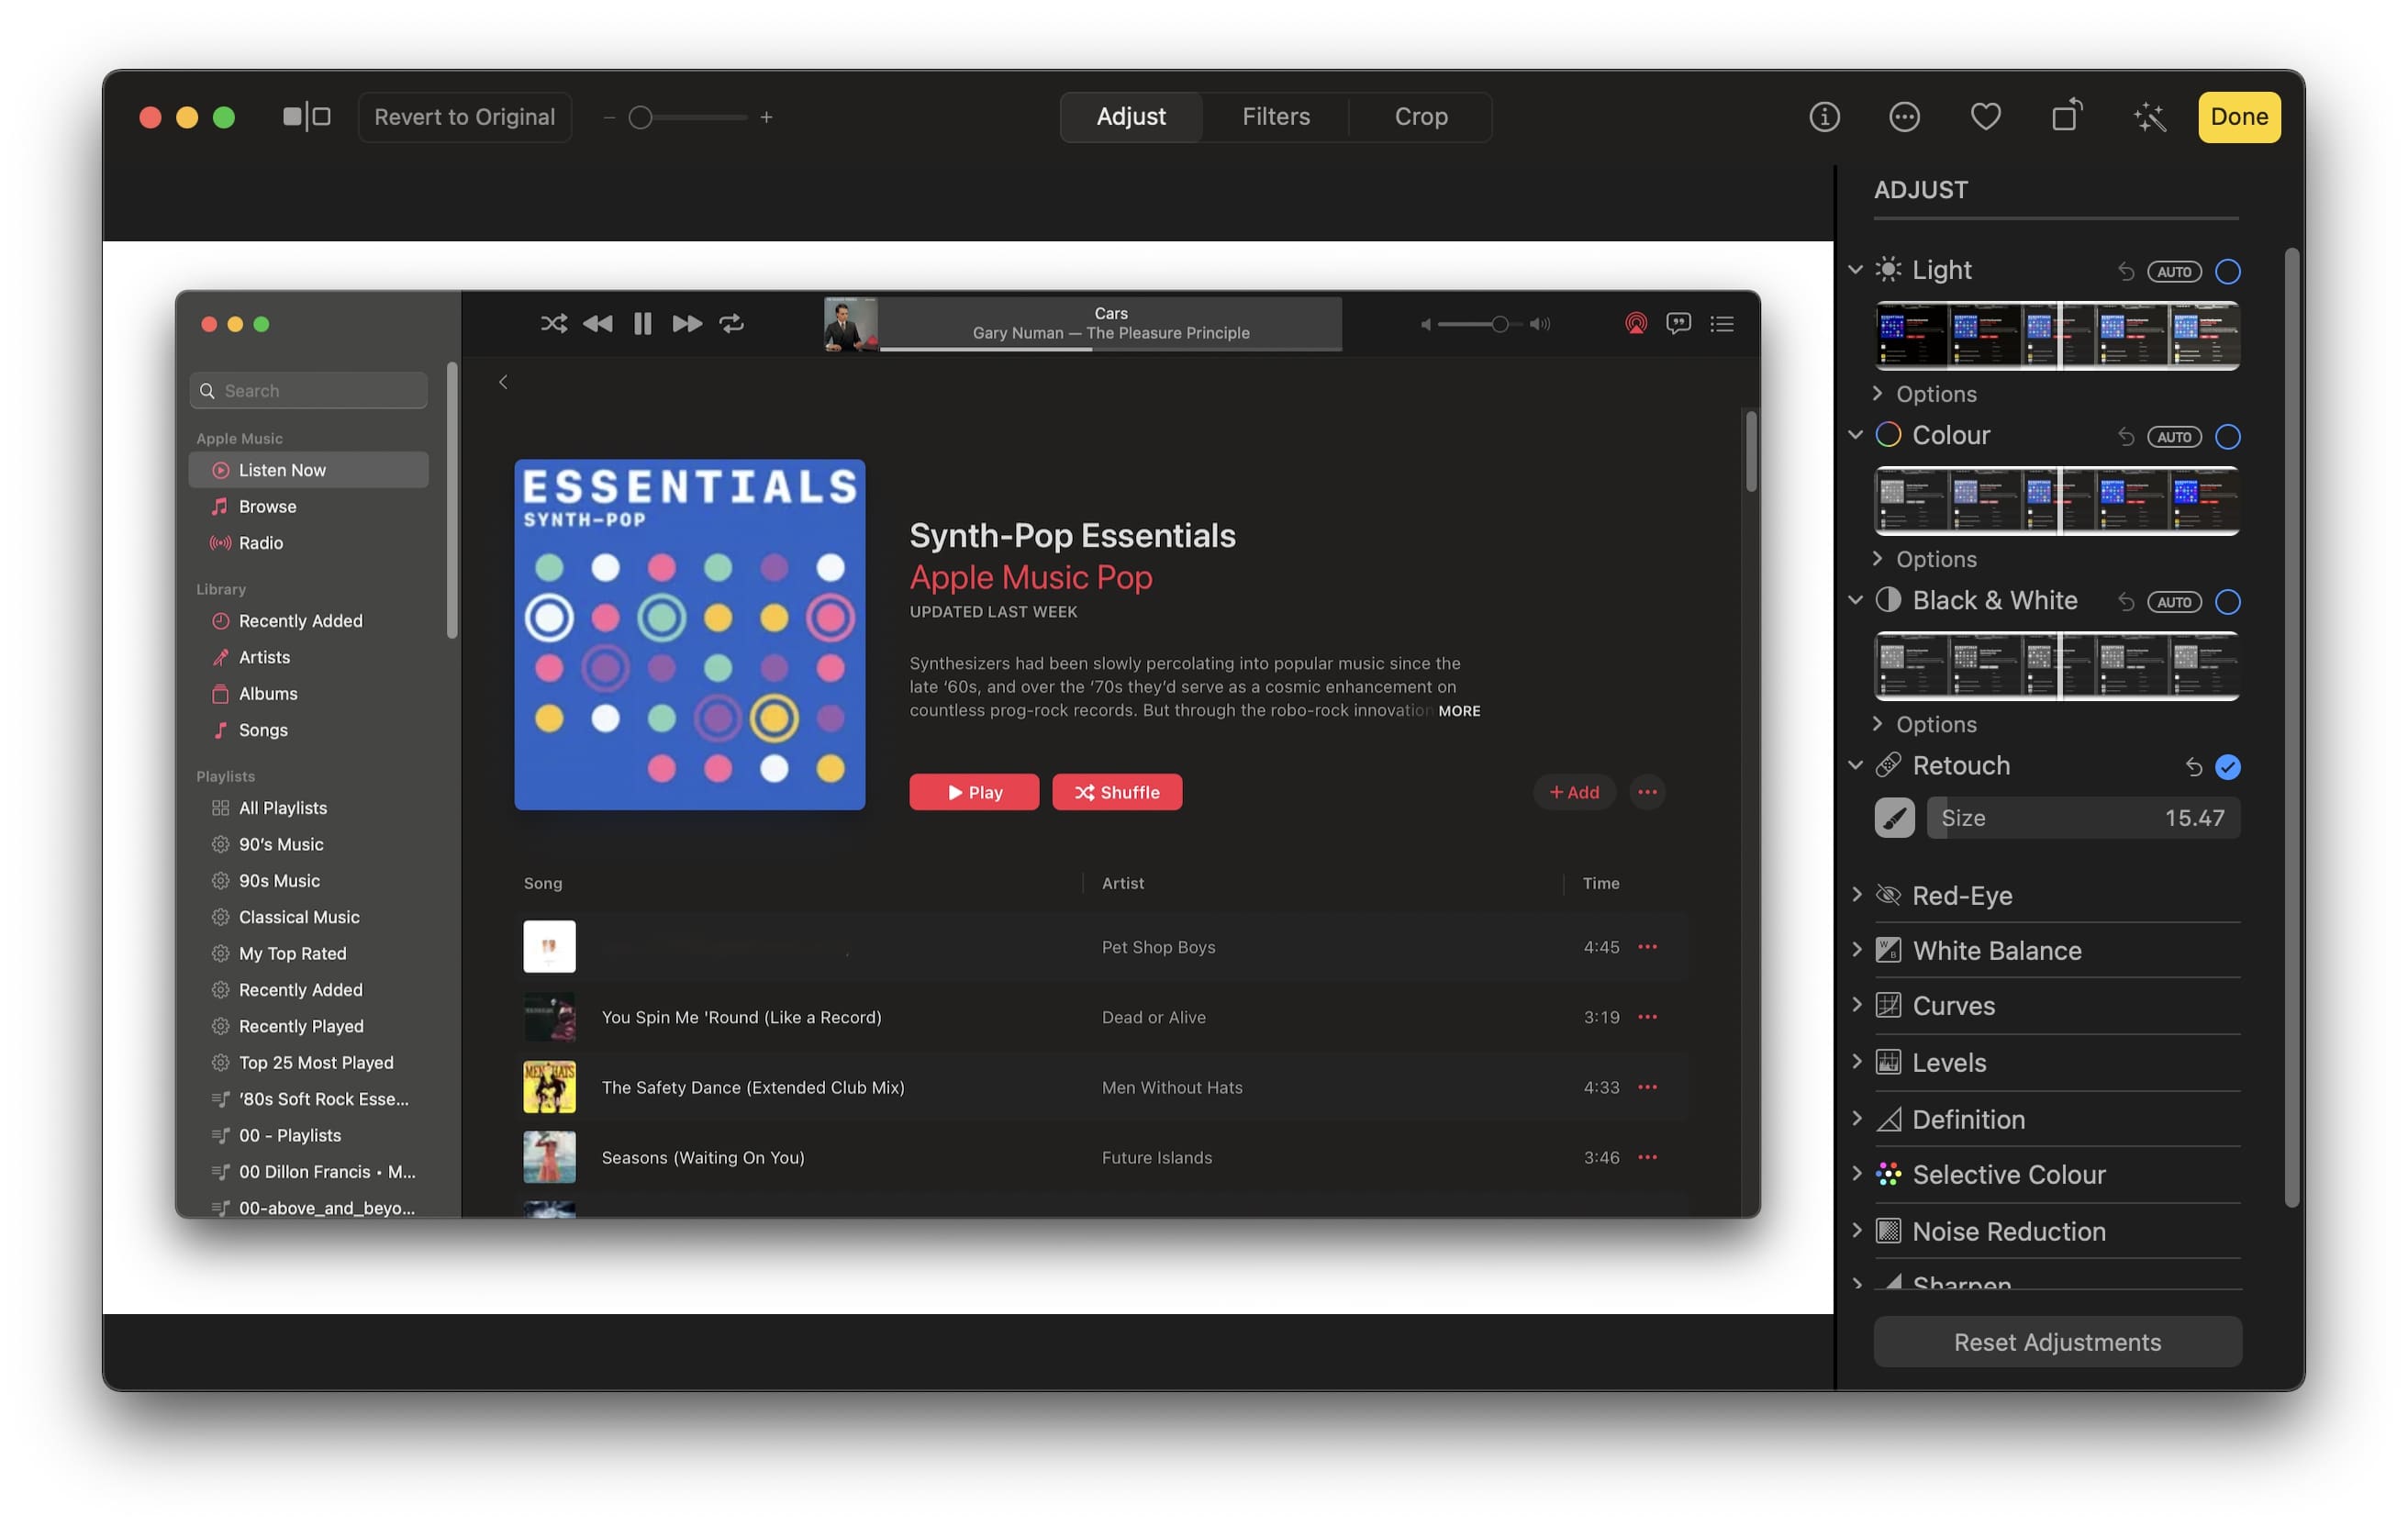
This method doesn’t add a blur, but it will hide any sensitive information. The Photos app on your Mac has a built-in Retouch tool that can be used to remove anything you don’t want from an image or screenshot. Here’s how to do it.
1) Launch the Photos app on your Mac.
2) Open an image by clicking File > Import or you can also drag-and-drop one directly into the Photos app.
3) Double click on the image and click on the Edit button located on the top right corner of the app.
4) Select the Retouch tool from the right toolbar. Choose the size that you want.

5) Use the tool on the part of the image that you want hidden.

The tool will basically try to remove whatever you use it on. Therefore, that part of the image will appear to be smudged or erased. This is another easy way to hide information on an image or screenshot.
Wrapping up
Pixelating or blurring images or screenshots is an excellent and easy way to protect your information. While there’s no built-in tool on Mac that can do this, you can use Skitch or the Photos app to get a quick desired result. Of course, if you’re a professional image editor and deal with plenty of images, then you can use other apps such as Photoshop. We hope this tutorial helped you learn how to blur or pixelate images on a Mac.