Learn how to add, edit, and use tab stops in the Apple Pages app to set up your document layout right from the start and make your document creation process quicker and easier.
You may not think much about tab stops when composing a document in Pages, but these handy tools can save you time if you set them up from the start. Depending on the type of document you’re creating, you can use the stops for each press of the tab key on Mac. Your text is then perfectly aligned where it needs to be each time, letting you concentrate on your words instead of the layout.
You can also use tab stops in Pages on iPhone and iPad. Then, with the shortcut menu, move the text to the stop you want.
On Mac
You can set up and edit tab stops in Pages on your Mac in a couple of different ways. One is using the ruler, and the other is using the Format sidebar.
Use the ruler for tab stops
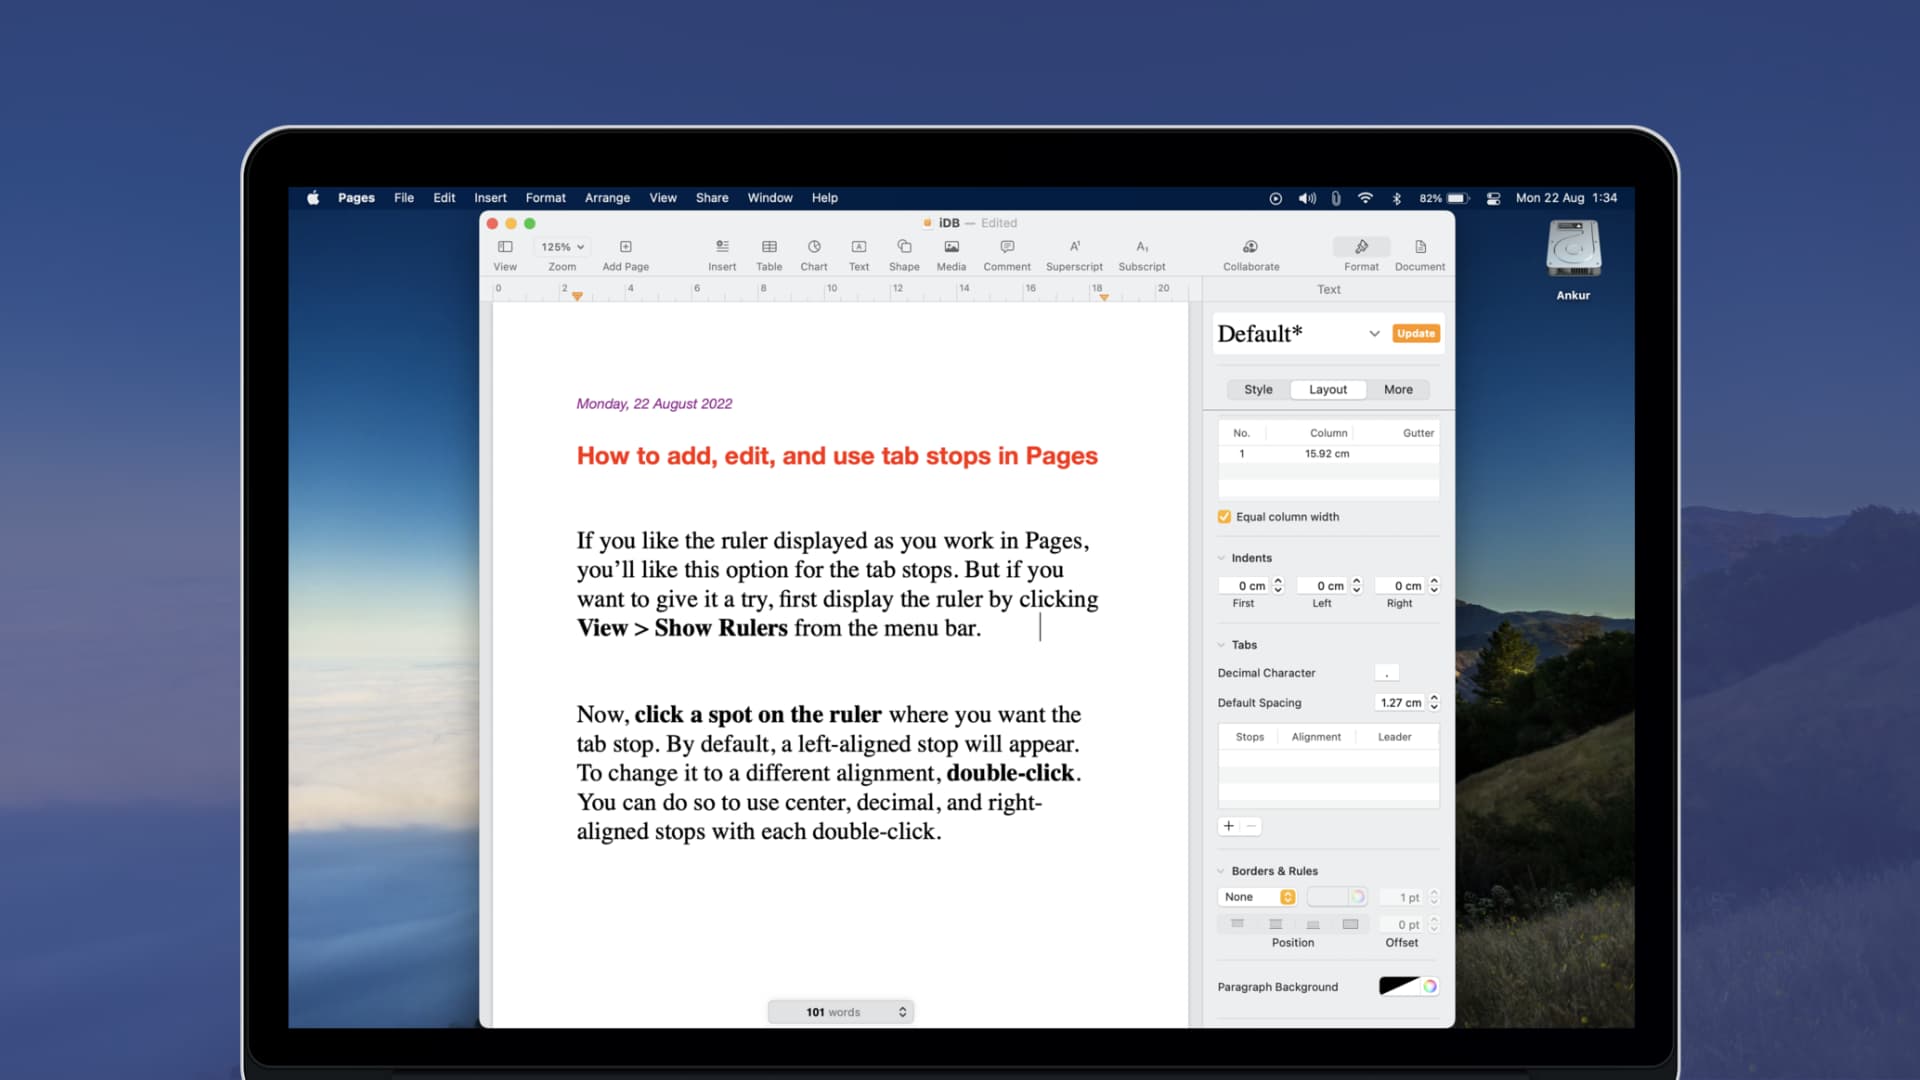
If you like the ruler displayed as you work in Pages, you’ll like this option for the tab stops. But if you want to give it a try, first display the ruler by clicking View > Show Ruler from the menu bar.
Now, click a spot on the ruler where you want the tab stop. By default, a left-aligned stop will appear. To change it to a different alignment, double-click. You can do so to use center, decimal, and right-aligned stops with each double-click.

To remove a tab stop, click and drag it downward off the ruler.
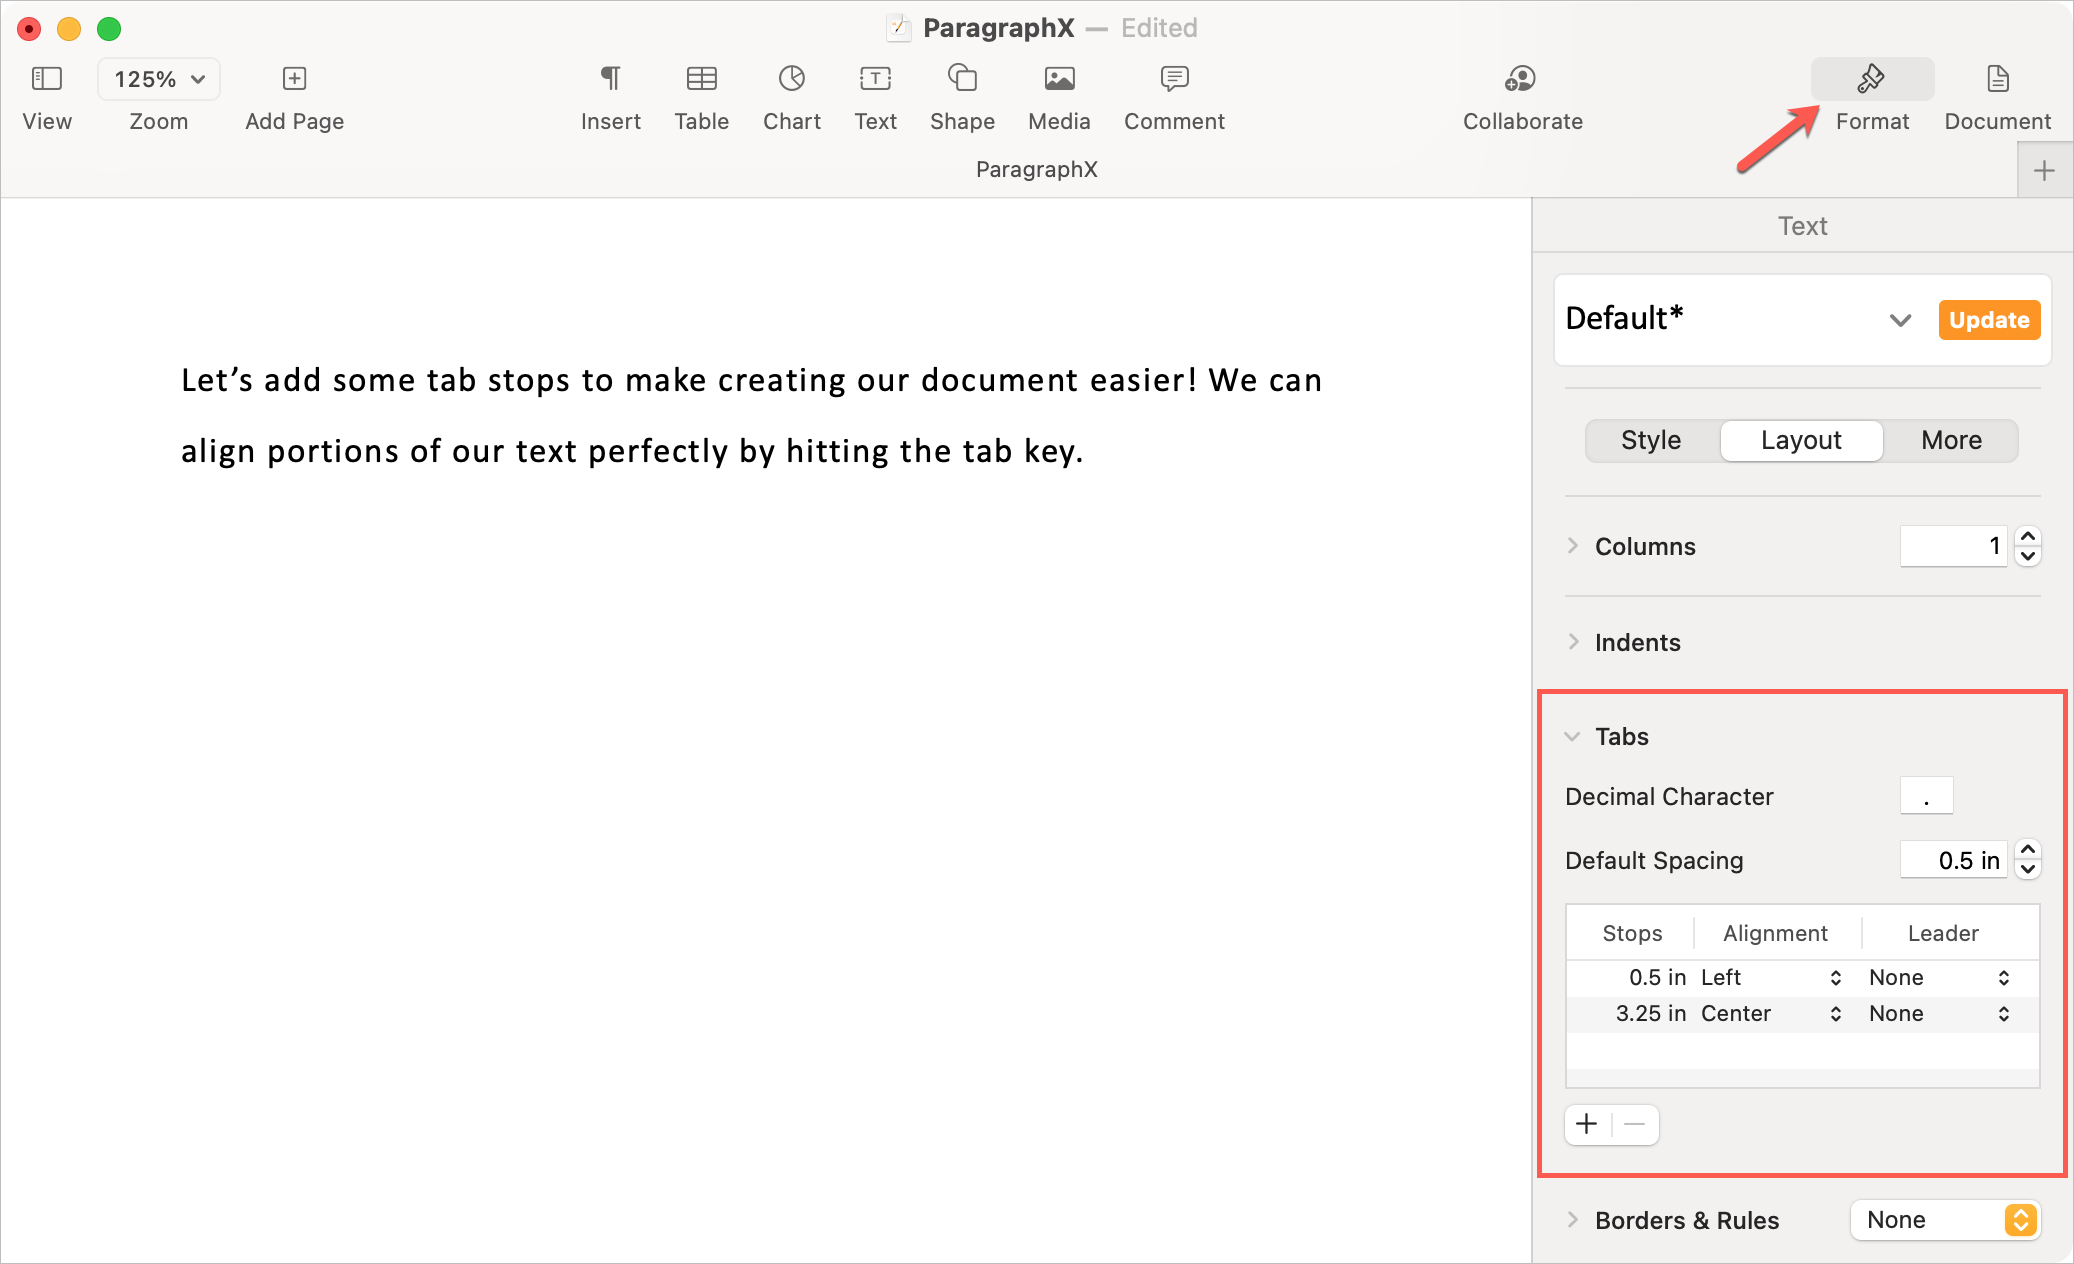
If you’re not fond of the ruler showing in Pages, you can add, edit, and remove tab stops in the Format sidebar. Click the Format button on the top right and select the Layout tab in the sidebar. Go down to the Tabs section and expand it if it isn’t already.
Click the plus sign button to add a tab stop. Then, use each column to set it up.
- Stops to adjust the position
- Alignment for left, center, decimal, or right
- Optionally, a Leader like dots or dashes
To remove a tab stop, select it and click the minus sign button.
Tip: You can also use the ruler along with the Format sidebar for your tab stops. By viewing both, you can see those you add with the ruler display in the sidebar and vice versa. This gives you a good way to enter an exact position or apply a leader when using the ruler.
Hit your tab key
Once you have your stops set up, just press the tab key. If you have more than one tab stop, you’ll move to each one from left to right with every key press.
On iPhone and iPad
Formatting your layout in Pages is often easier on Mac, but you can set up tab stops in the app on iPhone and iPad as well.
- Open a document and select the paragraphs you want to format.
- Tap the three dots button on the top right, and select View Options > Ruler.
- Tap a spot on the ruler to insert a tab stop. Like on Mac, you’ll see a left-aligned stop first by default. Double-tap the stop to change its alignment to center, decimal, or right.
- You can also touch and hold the marker and drag the stop to position it where you want it on the ruler. Finally, tap Done.

Insert a tab
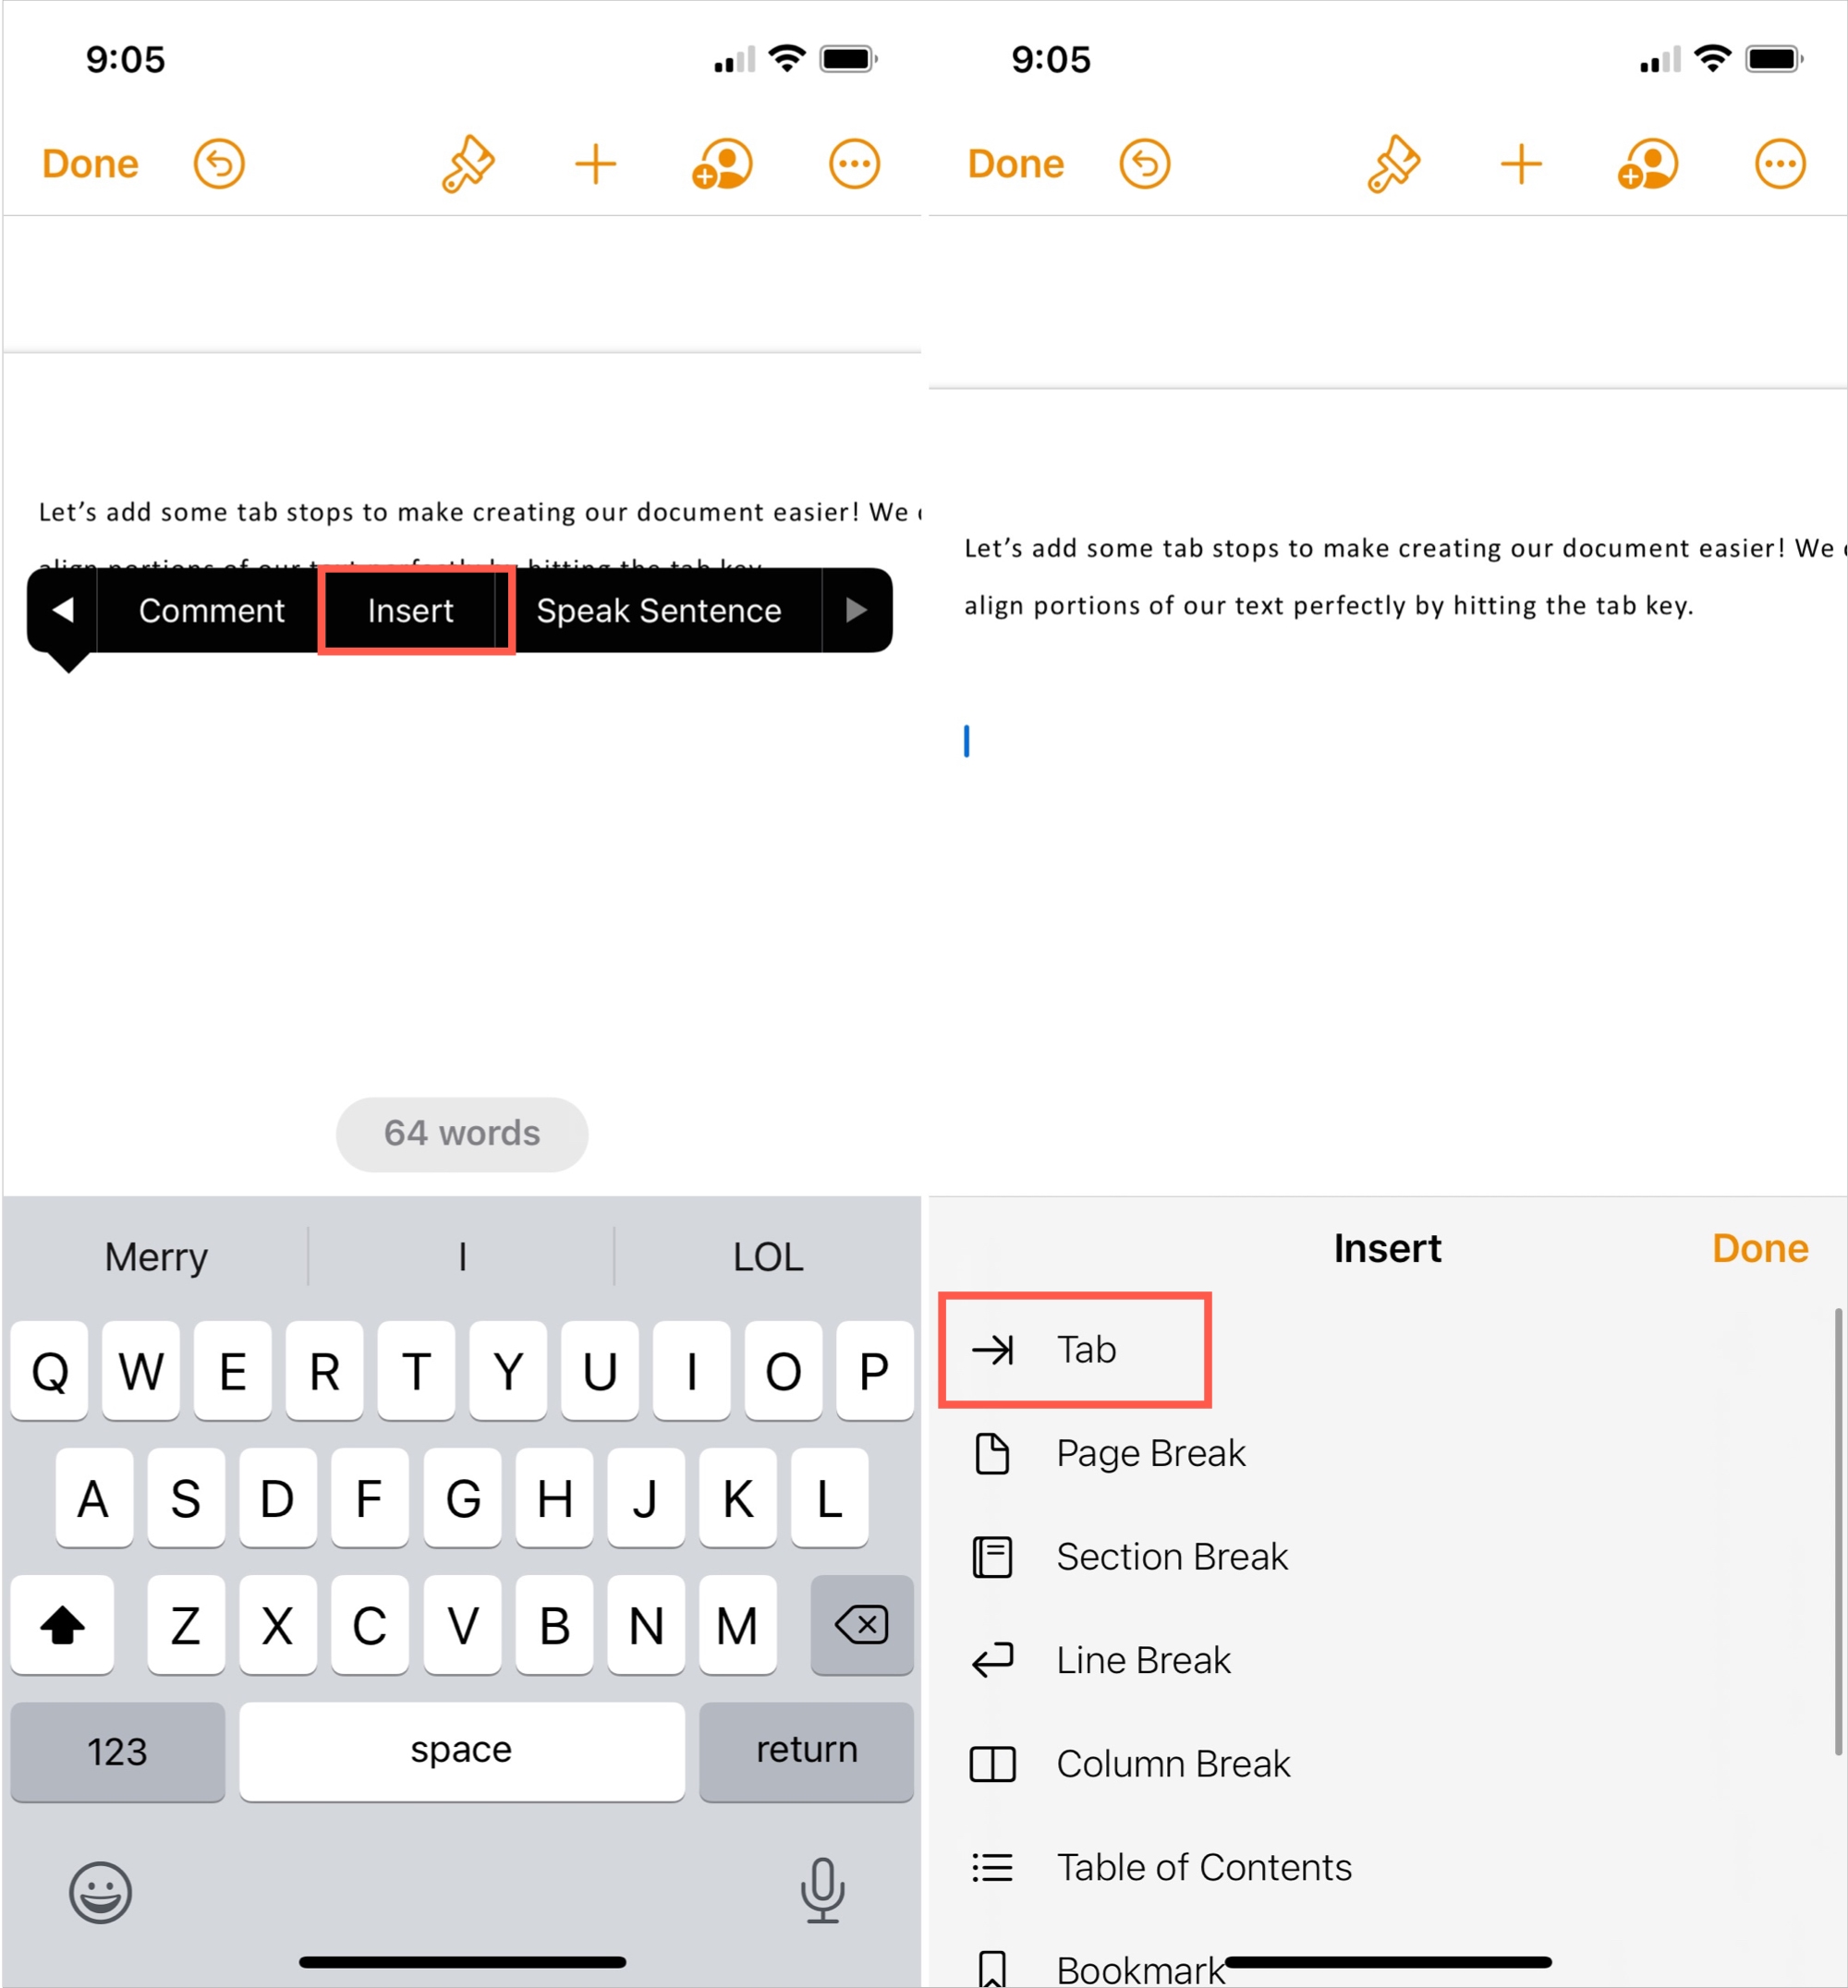
When you’re ready to use the tab stop, do the following:
- Tap the page and tap again to display the shortcut menu.
- Use the arrow on the right side to move over to Insert.
- Select Tab in the pop-up.
Follow these same steps to move to the next tab stop if you set up more than one.
To edit your tab stops, display the ruler as when you set them up. Reposition one by dragging it, or remove one by dragging it downward off the ruler.
Many times, we don’t think about setting up our layout before we begin creating our Pages document. But by getting your tab stops ready ahead of time, you’ll save more time later as you progress through your document.
On a related note: