Learn how to add slide transitions in Keynote on Mac, iPhone, and iPad to give your slideshow a professional appearance.

We’ve already shown you how to use the Keynote Magic Move transition, but what about the standard Keynote transition feature? If you don’t care to add “magic” to your slideshows, you can still use a simple transition between your slides.
Slide transitions don’t have to be over-the-top or even noticeable. You can use a basic fade effect to move from one slide to the next. And if you do want something fancier, pick one that uses a swoosh for your slides to swoop in and out.
Let’s show you how to add slide transitions to your Keynote presentation on a computer or phone.
On Mac
1) Select the first slide you want to add the transition to. You’ll need to do this for each and every slide where you want to use a transition.
2) Click the Animate button on the top right.
3) Hit the Add an Effect button, and you’ll see a drop-down list of options. Those near the top in the Appear & Move and Flip, Spin & Scale sections apply to slides. The others near the bottom are for objects and text, which you can also experiment with.
4) Move your cursor over an effect and click Preview when it displays to see how it’ll look. If you like it, select it.

5) After you pick a transition, you have options to adjust it depending on which one you use. So you can change things like direction, duration, and timing.
6) At the top of the sidebar, you have buttons for Change and Preview. To pick a different effect or remove the current one, use the Change button. And for a preview as you make adjustments, use the Preview button.
7) Also, in the sidebar, choose the Start Transition option from On Click or Automatically, per your preference.

Once you add a transition, select the next slides in your presentation and follow the same steps. This gives you the flexibility to use different transitions for your slides if you really want to spruce up the show.
On iPhone or iPad
Although applying slide transitions on a Mac gives you a better view, you can still add them in Keynote on iPhone and iPad. This is handy if you’re on the go.
1) Open your slideshow and tap the Edit button on the top right to use editing mode.
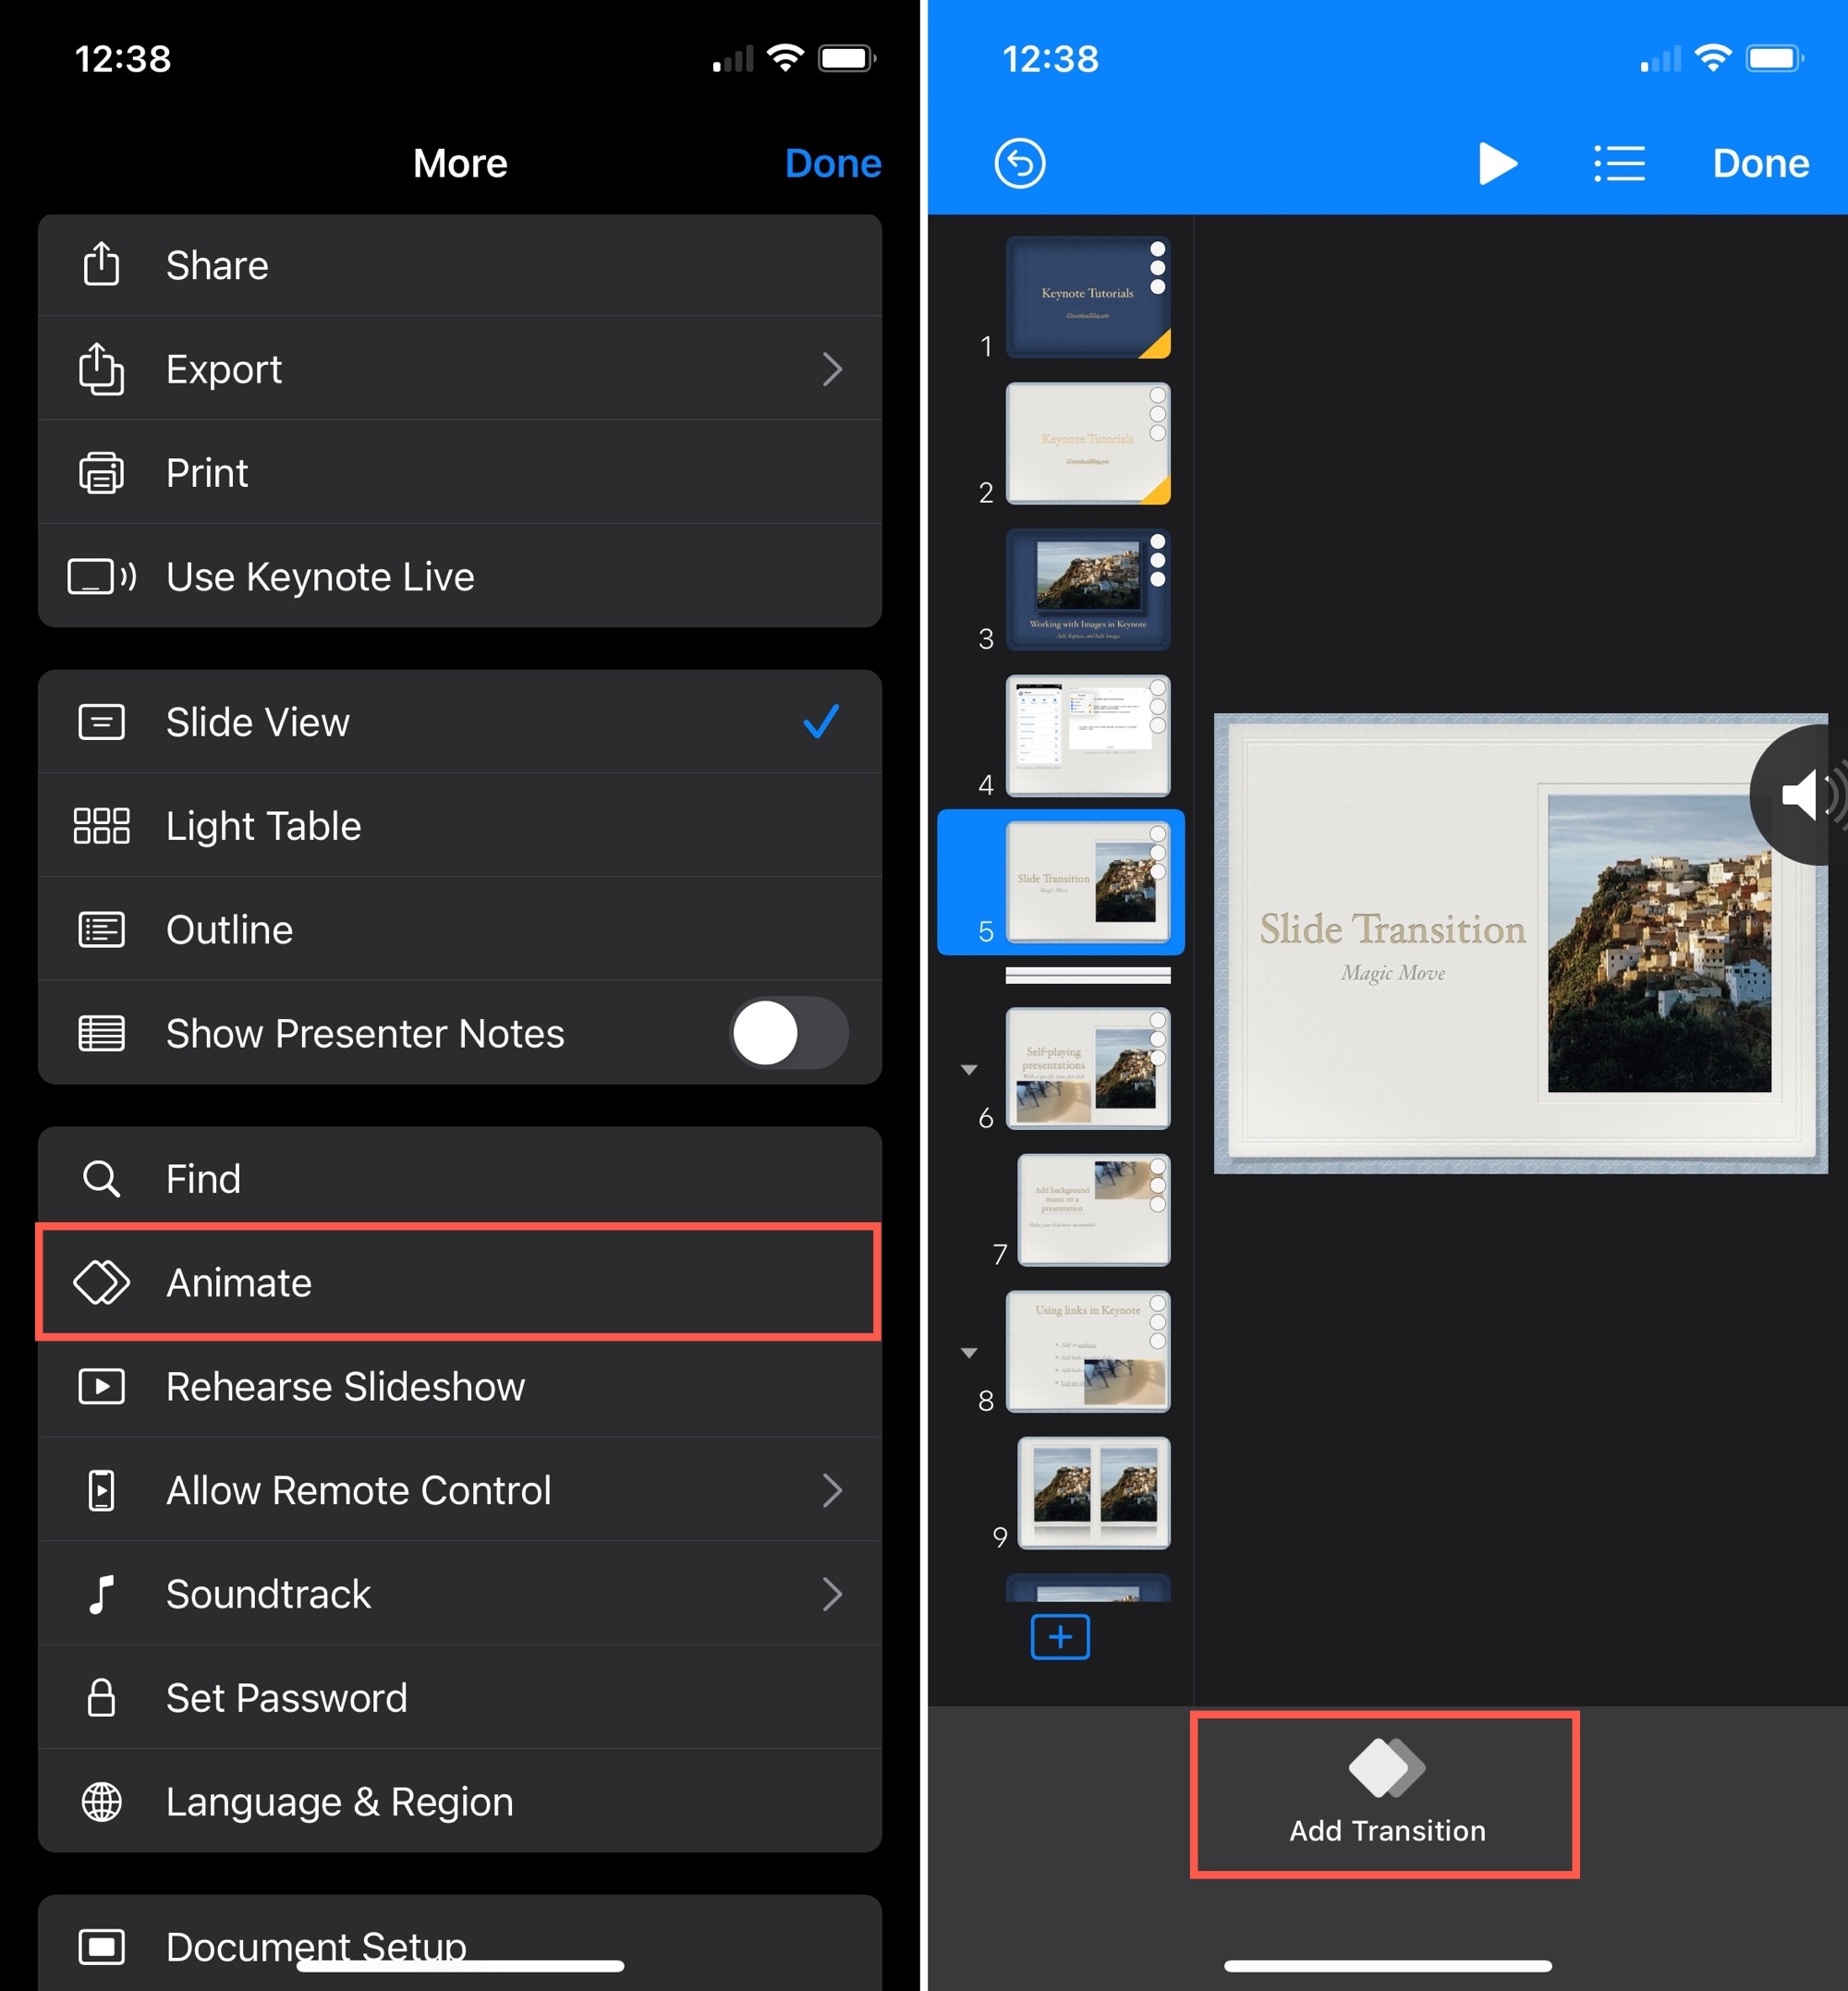
2) Tap the three dots at the top and select Animate > Add Transition.
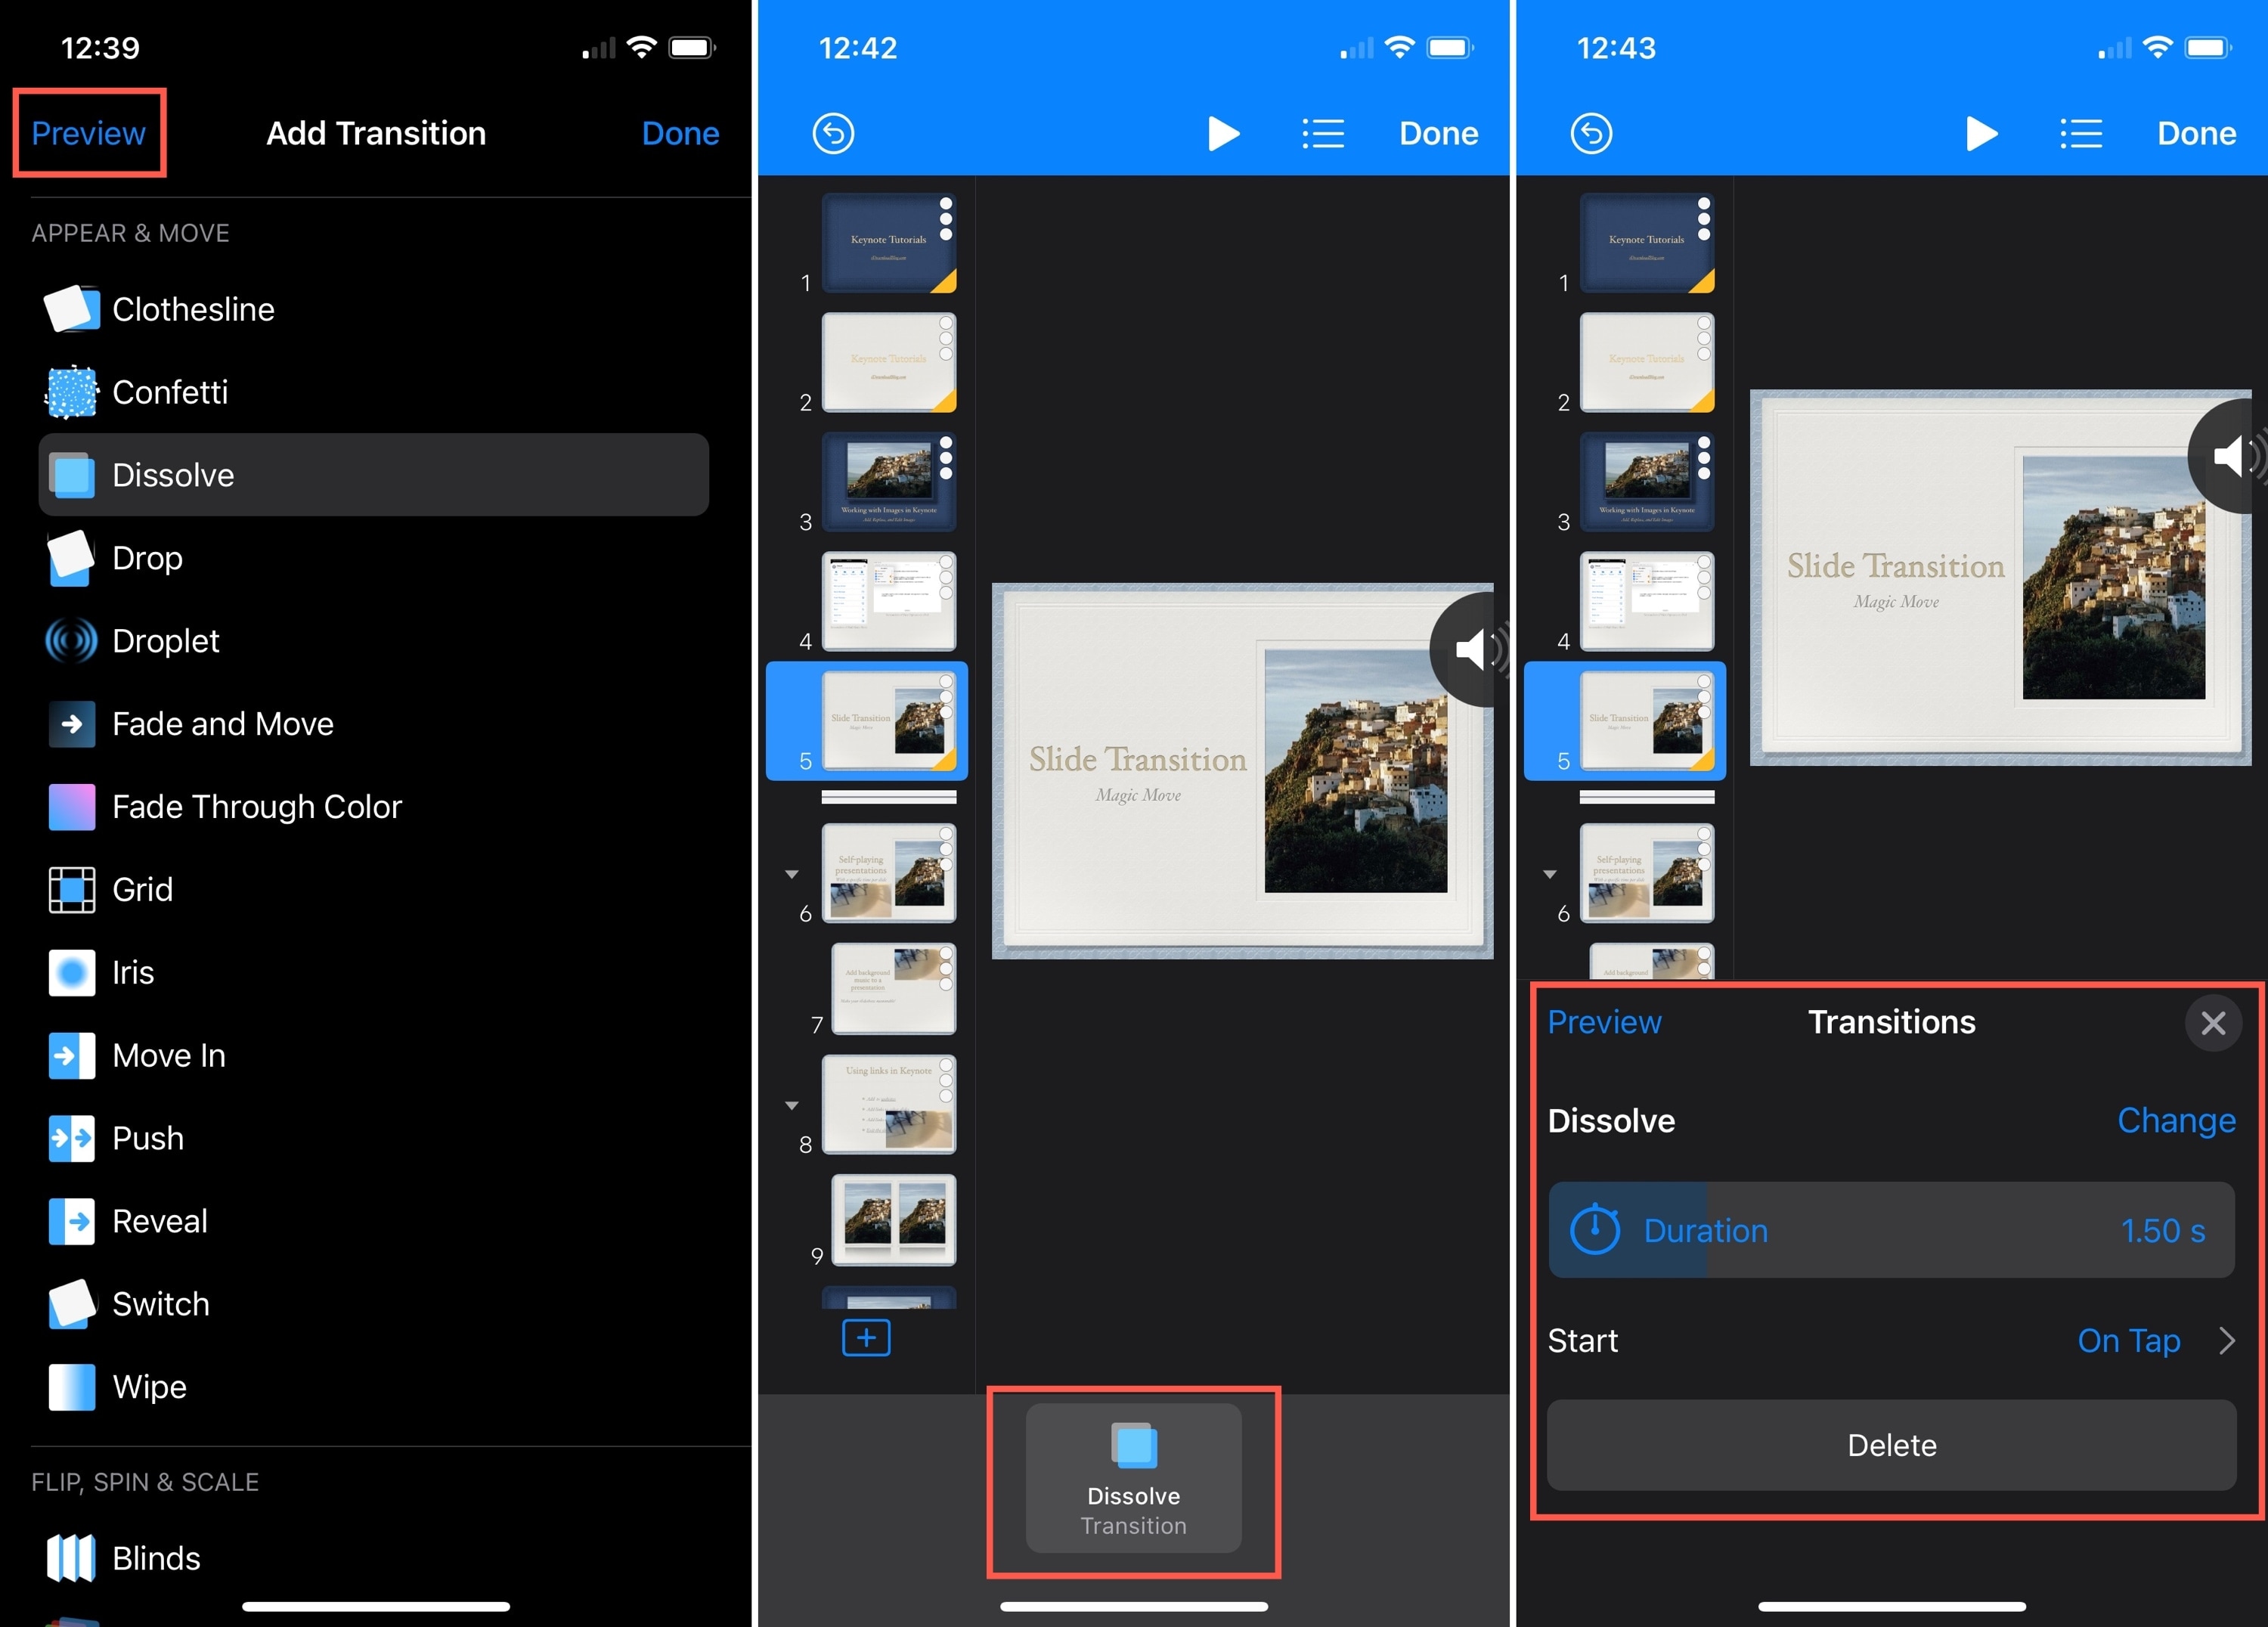
3) Like on Mac, the sections at the top of the list on iPhone are for slides, with others for objects and text beneath. On iPad, these sections begin on the left side of the bottom toolbar. Pick an effect and then tap the Preview option on the top left of the iPhone to see it. On iPad, you’ll see the preview when you select the effect.
4) If you like the transition, keep it selected and tap Done on your iPhone. On iPad, just keep it selected.
5) You’ll then see the name of the slide translation at the bottom of the screen. So if you want to adjust the settings like direction or duration, change or remove it, or set the Start for the transition, just tap the effect name. You also have the option to preview it here once again and can tap the X to close the window.
6) You can then choose the next slide you want to add a transition to or tap Done if you’re finished.
Rather than each slide just showing up on the screen, you can add subtle or even energized transitions between the slides. This gives the presentation an attractive and professional appearance.
What do you think about using slide transitions in Keynote? Let us know!
On a related note: